编译部署LAMP+xcache (php-fpm模式)
通过编译安装方式部署分离式LAMP+xcache (php-fpm模式)
要求:
(1)采用源码编译部署分离式的LAMP,其中php基于php-fpm模式
(2)基于LAMP平台一个虚拟主机提供WordPress,另一个虚拟主机提供phpMyadmin
(3)利用xcache来为php提供缓存加速页面的访问速度
(4)对其中一个站点缓分别做压力测试,并且比对缓存加速前和加速后的数据。
环境:
192.168.1.103------>提供httpd服务
192.168.1.104------>提供mariadb服务
192.168.1.110------>提供PHP xcache服务
软件包:
httpd-2.4.6.tar apr-1.5.0.tar apr-util-1.5.2.tar ###httpd2.4版本需要apr和apr-util包的1.4以上版本支持
mariadb-5.5.46-linux-x86_64.tar (二进制包)
php-5.4.26.tar
xcache-3.1.0.tar
wordpress-4.3.1-zh_CN
phpMyAdmin-4.4.14.1-all-languages
---------------------------------------------------分割线------------------------------------------------------------
编译安装服务:
一、编译安装httpd服务(192.168.1.103)
1、首先确认系统是否已经安装了httpd服务,如果存在我们需要卸载,为了避免与后面有冲突。
2、安装开发包组
[root@pxe132 ~]# yum -y groupinstall Desktop Platform Development Development Tools
3、编译安装apr和apr-util
centos7中rpm包安装apr和apr-util就是1.4版本支持httpd,此处我就使用编译的方式来进行
###编译安装apr:
[root@pxe132 ~]# tar xf apr-1.5.0.tar.bz2
[root@pxe132 ~]# cd apr-1.5.0/
[root@pxe132 apr-1.5.0]# ./configure --prefix=/usr/local/apr
[root@pxe132 apr-1.5.0]# make -j 4 && make install


###编译安装apr-util:
[root@pxe132 ~]# tar xf apr-util-1.5.2.tar.bz2
[root@pxe132 ~]# cd apr-util-1.5.2/
[root@pxe132 apr-util-1.5.2]# ./configure --prefix=/usr/local/apr-util
                                          --with-apr=/usr/local/apr
[root@pxe132 apr-util-1.5.2]# make -j 4 && make install

###查看编译安装后的结果:
[root@pxe132 ~]# rpm -q apr
apr-1.4.8-3.el7.x86_64
[root@pxe132 ~]# rpm -q apr-util
apr-util-1.5.2-6.el7.x86_64
4、编译安装httpd
[root@pxe132 ~]# yum -y install pcre-devel  openssl-devel  libevent-devel

[root@pxe132 ~]# tar xf httpd-2.4.6.tar.bz2
[root@pxe132 ~]# cd httpd-2.4.6/
[root@pxe132 httpd-2.4.6]# ./configure
--prefix=/usr/local/apache  ##安装路径
--sysconfdir=/etc/httpd24  ##配置文件路径
--enable-so  ##支持动态装卸载DSO机制,DSO是动态共享对象,可实现模块动态生效
--enable-ssl ##支持SSL/TLS 可实现https功能,需要安装openssl-devel开发工具
--enable-cgi  ##支持CGI脚本 默认对非线程的MPM(多路处理)模块开启
--enable-rewrite  ##支持URL重写
--enable-defalte  ##支持压缩功能
--enable-modules=most ##支持动态启用的模块 {all|most}
--enable-mpms-shared=all ##支持动态加载的MPM模块 {most|all}
--with-mpm=prefork  ##设置默认启用的mpm模式 {prefork|worker|event}
--with-pcre ##使用指定的pcre库,需要安装pcre-devel工具
--with-zlib ##使用指定的zlib库
--with-apr=/usr/local/apr  ##指定apr安装路径
--with-apr-util=/usr/local/apr-util  ##指定apr-util安装路径


此时我们就可以启动服务:
[root@pxe132 ~]# /usr/local/apache/bin/apachectl start
但是这样操作不是太方便,所有我们后面还需要做些操作:
5、添加PATH环境变量
[root@pxe132 ~]# vim /etc/profile.d/httpd24.sh
                export PATH=/usr/local/apache/bin:$PATH

[root@pxe132 ~]# source /etc/profile.d/httpd24.sh ###重读下文件路径,使其立马生效
[root@pxe132 ~]# echo $PATH
/usr/local/apache/bin:/usr/lib64/qt-3.3/bin:/usr/local/sbin:/usr/local/bin:/usr/sbin:/usr/bin:/root/bin
6、导出头文件:
[root@pxe132 ~]# ln -sv /usr/local/apache/include/ /usr/include/httpd24
7、启动服务
[root@pxe132 ~]# apachectl start
[root@pxe132 ~]# ss -tnl
State      Recv-Q Send-Q          Local Address:Port                         Peer Address:Port
LISTEN     0      128                         *:22                                      *:*
LISTEN     0      128                 127.0.0.1:631                                     *:*
LISTEN     0      100                 127.0.0.1:25                                      *:*
LISTEN     0      128                 127.0.0.1:6012                                    *:*
LISTEN     0      128                        :::80                                     :::*
9、测试下httpd服务是否正常:
[root@pxe132 ~]# curl 192.168.1.103
<html><body><h1>It works!</h1></body></html>
二、编译安装mariadb服务(192.168.1.104)
1、为了安全我们我mysql建立专门的用户和组,让其以普通用户的身份运行
[root@bogon ~]# groupadd -r mysql
[root@bogon ~]# useradd -r mysql -g mysql
[root@bogon ~]# id mysql
uid=988(mysql) gid=983(mysql) groups=983(mysql)
2、建立数据可数据存放的目录,此处需要注意权限的问题
[root@bogon ~]# mkdir -p /data/mydata
[root@bogon ~]# chown -R mysql:mysql /data/mydata/  ###此文件在后面我们安装包的时候会用到
3、解压mariadb安装包到/usr/local目录下
[root@bogon ~]# tar xf mariadb-5.5.46-linux-x86_64.tar.gz -C /usr/local
4、创建一个软链接方便使用
[root@bogon ~]# ln -sv /usr/local/mariadb-5.5.46-linux-x86_64/ mysql
‘mysql’ -> ‘/usr/local/mariadb-5.5.46-linux-x86_64/’
5、此时我们可以进入mysql的目录去看下,发现里面的属组合属主都是root,所有需要改下权限
[root@bogon ~]# cd /usr/local/mysql/
[root@bogon mysql]# ll
total 204
drwxr-xr-x.  2 root root   4096 Jul 21 14:39 bin
-rw-r--r--.  1  500  500  17987 Oct 10  2015 COPYING
-rw-r--r--.  1  500  500  26545 Oct 10  2015 COPYING.LESSER
drwxr-xr-x.  3 root root     17 Jul 21 14:39 data
-rw-r--r--.  1  500  500   8245 Oct 10  2015 EXCEPTIONS-CLIENT
drwxr-xr-x.  3 root root     18 Jul 21 14:39 include
-rw-r--r--.  1  500  500   8694 Oct 10  2015 INSTALL-BINARY
drwxr-xr-x.  3 root root   4096 Jul 21 14:39 lib
drwxr-xr-x.  4 root root     28 Jul 21 14:39 man
lrwxrwxrwx.  1 root root     39 Jul 21 14:42 mariadb-5.5.46-linux-x86_64 -> /usr/local/mariadb-5.5.46-linux-x86_64/
drwxr-xr-x. 11 root root   4096 Jul 21 14:39 mysql-test
-rw-r--r--.  1  500  500 108813 Oct 10  2015 README

[root@bogon mysql]# chown -R root.mysql ./*  ###更改文件的权限
6、使用mysql自己提供的scripts脚本文件mysql_install_db文件来安装数据库,其中指明用户和数据可存放目录(就是 我们在上边刚开始的时候进行创建的用户和数据存放路径)
[root@bogon mysql]# scripts/mysql_install_db --user=mysql --datadir=/data/mydata
                    ###此处需要注意必须在mysql目录下进行,切换到里面去就不行了
7、为mariadb提供配置文件,在support-files中有模板(my-large.conf)
[root@bogon mysql]# cp support-files/my-large.cnf /etc/my.cnf
8、编辑配置文件添加数据库存放的目录信息
datadir=/data/mydata     ###指明mysql的数据存放路径
innodb_file_per_table = ON     ##成为独立表空间
skip_name_resolve = ON   ##跳过名称解析
9、提供mysql服务启动脚本,这个脚本在我们的support-file有模板(mysql.server)
[root@bogon support-files]# cp mysql.server /etc/rc.d/init.d/mysqld
[root@bogon support-files]# chkconfig --add mysqld  ###添加到服务启动
10、添加环境变量
[root@bogon ~]# vim /etc/profile.d/mysql.sh
                export PATH=/usr/local/mysql/bin:$PATH
[root@bogon ~]# source /etc/profile.d/mysql.sh
11、导出头文件
[root@bogon local]# ls
bin  etc  games  include  lib  lib64  libexec  mariadb-5.5.46-linux-x86_64  mysql  sbin  share  src
[root@bogon local]#
[root@bogon local]# ln -sv include/ /usr/include/mysql
‘/usr/include/mysql’ -> ‘include/’
12、导出库文件
[root@bogon local]# vim /etc/ld.so.conf.d/mysql.conf
添加:/usr/local/mysql/lib
13、启动服务,测试是否正常
[root@bogon local]# systemctl start mysqld
[root@bogon local]# ss -tnl
State      Recv-Q Send-Q     Local Address:Port    Peer Address:Port
LISTEN     0      50           *:3306     *:*

[root@bogon local]# mysql
Welcome to the MariaDB monitor.  Commands end with ; or \g.
Your MariaDB connection id is 2
Server version: 5.5.46-MariaDB-log MariaDB Server

Copyright (c) 2000, 2015, Oracle, MariaDB Corporation Ab and others.

Type 'help;' or '\h' for help. Type '\c' to clear the current input statement.

MariaDB [(none)]>
三、编译安装php(192.168.1.110)
1、安装开发包组及依赖关系的包
[root@pxe130 ~]# yum groupinstall Development tools Server Platform Development
[root@pxe130 ~]# yum -y install bzip2-devel libmcrypt-devel libxml2-devel openssl-devel
2、编译安装php
[root@pxe130 ~]# tar xf php-5.4.26.tar.bz2
[root@pxe130 ~]# cd php-5.4.26/
./configure --prefix=/usr/local/php --with-openssl --with-mysql=mysqlnd
 --with-pdo-mysql=mysqlnd --with-mysql=mysqlnd --enable-mbstring
--with-freetype-dir --with-jpeg-dir --with-png-dir --with-zlib
--with-libxml-dir=/usr --enable-xml --enable-sockets --enable-fpm --with-mcrypt
--with-config-file-path=/etc --with-config-file-scan-dir=/etc/php.d --with-bz2

[root@pxe130 php-5.4.26]# make -j 4 && make install
注意:支持fpm是需要把--with-apxs给去掉,添加--enable-fpm,此两项是不可以同时使用
3、提供php提供配置文件
[root@pxe130 php-5.4.26]# cp php.ini-production /etc/php.ini
4、提供php-fpm脚本,并添加到服务启动列表
[root@pxe130 php-5.4.26]# cp sapi/fpm/init.d.php-fpm /etc/rc.d/init.d/php-fpm
[root@pxe130 php-5.4.26]# chmod +x /etc/rc.d/init.d/php-fpm
[root@pxe130 php-5.4.26]# chkconfig --add php-fpm
5、提供php-fpm配置文件
[root@pxe130 php]# cd /usr/local/php
[root@pxe130 php]# cp etc/php-fpm.conf.default etc/php-fpm.conf
6、启动服务
[root@pxe130 php]# systemctl start php-fpm
[root@pxe130 php]# ss -tnl
State       Recv-Q Send-Q Local Address:Port               Peer Address:Port
LISTEN      0      128       127.0.0.1:9000                          *:*
到此时我们的httpd mariadb php服务都已经全部编译安装好,下面我们需要来部署LAMP环境了!
---------------------------------------------------分割线------------------------------------------------------------
部署LAMP环境配置:
一、配置httpd:(192.168.1.103)
1、启用支持fastFCGI的模块
LoadModule proxy_module modules/mod_proxy.so
LoadModule proxy_fcgi_module modules/mod_proxy_fcgi.so
2、启用虚拟主机
Include /etc/httpd24/extra/httpd-vhosts.conf
3、添加两行使支持php
AddType application/x-httpd-php .php
AddType application/x-httpd-php-source .phps
4、配置虚拟主机
[root@pxe132 ~]# vim /etc/httpd24/extra/httpd-vhosts.conf
Directory Index index.php
<VirtualHost 192.168.1.103:80>
    DocumentRoot "/data/vhost1/www1"
    ServerName  wp.magedu.com
    ProxyRequests off
    ProxyPassMatch ^/(.*\.php)$ fcgi://192.168.1.110:9000/data/vhost1/www1/$1
   <Directory "/data/vhost1/www1">
        Options None
        AllowOverride None
        Require all granted
   </Directory>

</VirtualHost>


<VirtualHost 192.168.1.103:80>
    DocumentRoot "/data/vhost2/www2"
    ServerName pam.magedu.com
    ProxyRequests off
    ProxyPassMatch ^/(.*\.php)$ fcgi://192.168.1.110:9000/data/vhost2/www2/$1
     <Directory "/data/vhost2/www2">
         Options None
         AllowOverride None
         Require all granted
     </Directory>
</VirtualHost>
5、创建网页路径
[root@pxe132 ~]# mkdir -p /data/vhost1/www1
[root@pxe132 ~]# mkdir -p /data/vhost2/www2

[root@pxe132 ~]# echo "vhost1" >/data/vhost1/www1/index.html
[root@pxe132 ~]# echo "vhost2" >/data/vhost2/www2/index.html
6、重启服务测试是否正常
[root@pxe132 ~]# apachectl -t
Syntax OK
[root@pxe132 ~]# apachectl restart
[root@pxe132 ~]# curl http://wp.magedu.com
vhost1
[root@pxe132 ~]# curl http://pam.magedu.com
vhost2    ###ok我们httpd服务是没问题
二、配置php-fpm(192.168.1.110)
1、配置php监听地址信息
[root@pxe130 ~]# vim /usr/local/php/etc/php-fpm.conf
pid = run/php-fpm.pid  #启用
listen.allowed_clients = 192.168.1.103 ##监听允许htpd的IP地址
listen = 192.168.1.110:9000 ##监听php可以与外部通信的IP地址

[root@pxe130 ~]# systemctl restart php-fpm.service
[root@pxe130 ~]# ss -tnl
State       Recv-Q Send-Q Local Address:Port               Peer Address:Port
LISTEN      0      128    192.168.1.110:9000                          *:*
2、创建与http网页相同的路径。然后测试php和http之间是否正常
[root@pxe130 ~]# mkdir -p /data/vhost1/www1
[root@pxe130 ~]# mkdir -p /data/vhost2/www2

[root@pxe130 ~]# vim /data/vhost1/www1/index.php
<?php
phpinfo();
?>

[root@pxe130 ~]# vim /data/vhost2/www2/index.php

<?php
phpinfo();
?>
3、测试:


ok说明我们的php和httpd连接时正常的
三、配置mariadb(192.168.1.104)
1、创建表和授权用户权限
MariaDB [(none)]> create database wpdb;###用于WordPress准备
Query OK, 1 row affected (0.00 sec)

MariaDB [(none)]> grant all on wpdb.* to 'wpuser'@'192.168.%.%' identified by 'wppass';
Query OK, 0 rows affected (0.03 sec)


MariaDB [(none)]> create database pma;  ###用于phpmyadmin准备
Query OK, 1 row affected (0.01 sec)

MariaDB [(none)]> grant all on pma.* to 'pmauser'@'192.168.%.%' identified by 'pmapass';
Query OK, 0 rows affected (0.00 sec)
2、在php服务中编写下测试页,测试php和mariadb是否连接正常
[root@pxe130 ~]# vim /data/vhost1/www1/index.php

<?php
$conn = mysql_connect('192.168.1.104','wpuser','wppass');
        if ($conn)
                echo "ok";
        else
                echo "no";
phpinfo();
?>


[root@pxe130 ~]# vim /data/vhost2/www2/index.php

<?php
$conn = mysql_connect('192.168.1.104','pmauser','pmapass');
        if ($conn)
                echo "ok";
        else
                echo "no";
phpinfo();
?>
3、测试


ok到现在我们的LAMP平台环境是搞好了!!
---------------------------------------------------分割线-----------------------------------------------------------
基于LAMP部署应用WordPress和phpmyadmin
此处以下的操作在php服务器中进行:
一、部署WordPress
1、解压、配置连接密码和用户及数据库地址
[root@pxe130 ~]# unzip wordpress-4.3.1-zh_CN.zip
[root@pxe130 ~]# mv wordpress /data/vhost1/www1/
[root@pxe130 ~]# cd /data/vhost1/www1/wordpress/
[root@pxe130 wordpress]# mv wp-config-sample.php wp-config.php
[root@pxe130 wordpress]# vim wp-config.php

/** WordPress数据库的名称 */
define('DB_NAME', 'wpdb');

/** MySQL数据库用户名 */
define('DB_USER', 'wpuser');

/** MySQL数据库密码 */
define('DB_PASSWORD', 'wppass');

/** MySQL主机 */
define('DB_HOST', '192.168.1.104');
2、此时我们需要把WordPress这个目录个传到http服务器主页访问的路径下
root@pxe130 www1]# scp -r wordpress/ root@192.168.1.103:/data/vhost1/www1/
二、部署phpmyadmin
1、解压,配置
[root@pxe130 ~]# unzip phpMyAdmin-4.4.14.1-all-languages.zip
[root@pxe130 ~]# mv phpMyAdmin-4.4.14.1-all-languages /data/vhost2/www2/
[root@pxe130 www2]# ln -sv phpMyAdmin-4.4.14.1-all-languages/ phpmyadmin
[root@pxe130 www2]# vim phpmyadmin/libraries/config.default.php

$cfg['blowfish_secret'] = 'tSQRO02T+grA6rvJHCXr';
$cfg['Servers'][$i]['host'] = '192.168.1.104'; ###数据库服务地址
$cfg['Servers'][$i]['user'] = 'pmauser';
$cfg['Servers'][$i]['password'] = 'pmapass';
2、将phpmyadmin传一份给http服务器的相对应路径下
[root@pxe130 www2]# scp -r phpmyadmin/ root@192.168.1.103:/data/vhost2/www2/
测试:


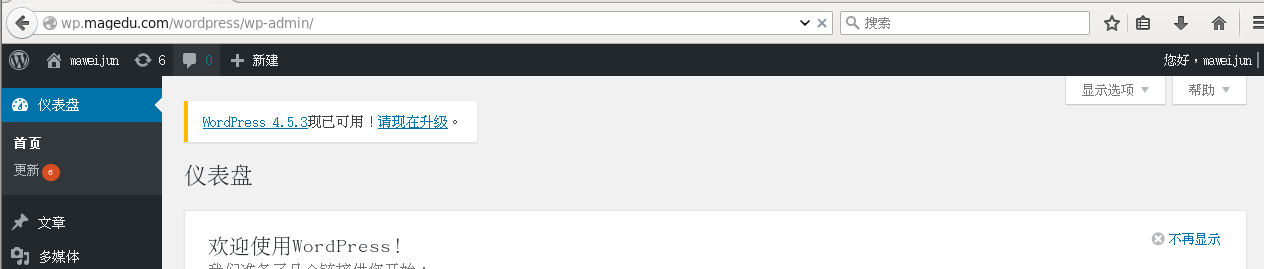
4、压力测试:
Server Software:        Apache/2.4.6
Server Hostname:        wp.magedu.com
Server Port:            80

Document Path:          /wordpress
Document Length:        239 bytes

Concurrency Level:      1000
Time taken for tests:   3.096 seconds
Complete requests:      10000
Failed requests:        0
Write errors:           0
Non-2xx responses:      10006
Total transferred:      4672802 bytes
HTML transferred:       2391434 bytes
Requests per second:    3229.61 [#/sec] (mean)
Time per request:       309.635 [ms] (mean)
Time per request:       0.310 [ms] (mean, across all concurrent requests)
Transfer rate:          1473.76 [Kbytes/sec] received

Connection Times (ms)
              min  mean[+/-sd] median   max
Connect:        1   64 319.1      3    3030
Processing:     1   55 186.0     21    1454
Waiting:        1   54 185.9     20    1454
Total:         12  120 426.7     24    3042

Percentage of the requests served within a certain time (ms)
  50%     24
  66%     25
  75%     26
  80%     27
  90%     30
  95%    691
  98%   1649
  99%   2462
 100%   3042 (longest request)
编译安装xcache缓存加速
1、解包生成配置
[root@pxe130 /]# tar xf xcache-3.2.0.tar.bz2
[root@pxe130 /]# cd xcache-3.2.0/
[root@pxe130 xcache-3.2.0]# /usr/local/php/bin/phpize
Configuring for:
PHP Api Version:         20100412
Zend Module Api No:      20100525
Zend Extension Api No:   220100525

[root@pxe130 xcache-3.2.0]# ./configure --enable-xcache
--with-php-config=/usr/local/php/bin/php-config


[root@pxe130 xcache-3.2.0]# make && make install
2、配置xcache
[root@pxe130 ~]# cp /xcache-3.2.0/xcache.ini  /etc/php.d/
[root@pxe130 ~]# vim /etc/php.d/xcache.ini

添加:
[xcache-common]
extension = /usr/local/php/lib/php/extensions/no-debug-non-zts-20100525/xcache.so
修改下缓存大小:
xcache.size  =               200M
3、重启php-fpm服务,此时index.php页面应该就会有xcache支持了
[root@pxe130 ~]# systemctl restart php-fpm.service

在进行压力测试::
[root@bogon ~]# ab -n 10000 -c1000 http://wp.magedu.com/wordpress
Server Software:        Apache/2.4.6
Server Hostname:        wp.magedu.com
Server Port:            80

Document Path:          /wordpress
Document Length:        239 bytes

Concurrency Level:      1000
Time taken for tests:   2.128 seconds
Complete requests:      10000
Failed requests:        0
Write errors:           0
Non-2xx responses:      10000
Total transferred:      4670000 bytes
HTML transferred:       2390000 bytes
Requests per second:    4700.07 [#/sec] (mean)
Time per request:       212.763 [ms] (mean)
Time per request:       0.213 [ms] (mean, across all concurrent requests)
Transfer rate:          2143.49 [Kbytes/sec] received

Connection Times (ms)
              min  mean[+/-sd] median   max
Connect:        1   37 116.1     23    1028
Processing:     1   46 129.4     26    1480
Waiting:        1   40 129.8     20    1474
Total:         24   83 189.7     49    1646

Percentage of the requests served within a certain time (ms)
  50%     49
  66%     52
  75%     53
  80%     55
  90%     59
  95%     78
  98%    726
  99%   1458
 100%   1646 (longest request)
转载于:https://blog.51cto.com/maweijun/1828621