【CircuitPython】RaspberryPi Pico RP2040 自定义机械键盘实例
【CircuitPython】RaspberryPi Pico RP2040 Mechanical Keyboard实例
- 本示例基于
Thonny开发,所使用的固件是:CircuitPython,区别于MicroPython固件。
最近B站某君的瀚文键盘很火热,这里介绍利用
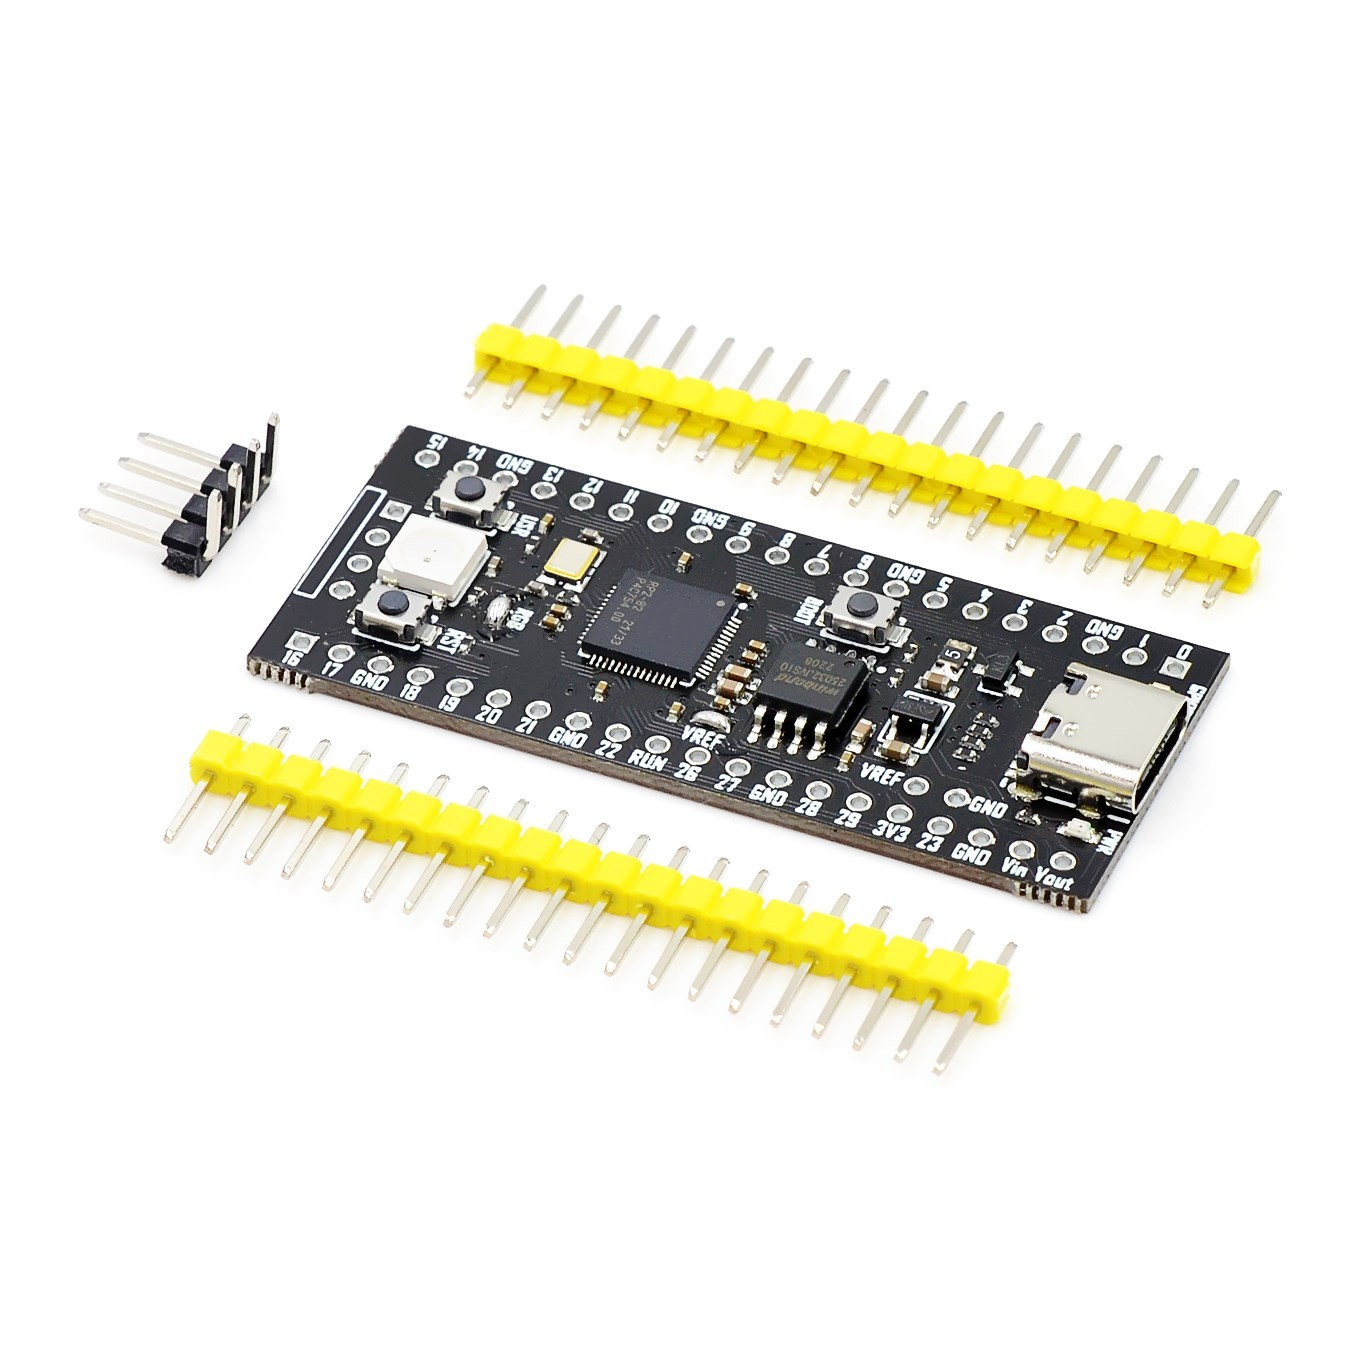
RaspberryPi Pico RP2040实现键盘按键定制功能。由于RP2040引脚限制,最多支持20个自定义按键或组合键的输入。
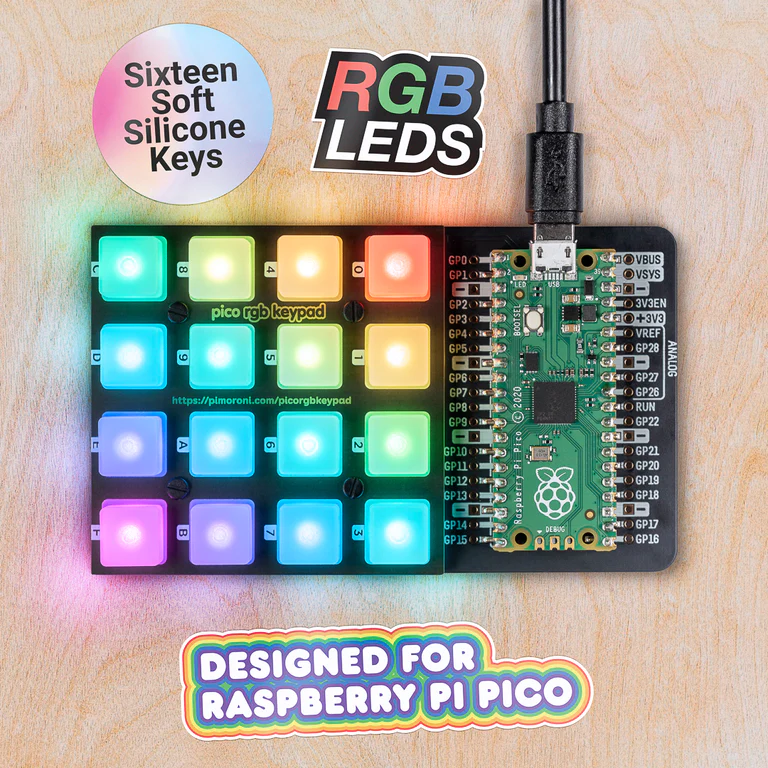
- 现有售卖模块有16按键的,如果自己打板可以设计最多20的按键,
- 介绍链接:
https://shop.pimoroni.com/products/pico-rgb-keypad-base?variant=32369517166675
测试方法
- 在线
键盘按键测试 - 找一个测试按键的专门网站:
https://keyboard.bmcx.com/进行按键测试和验证。
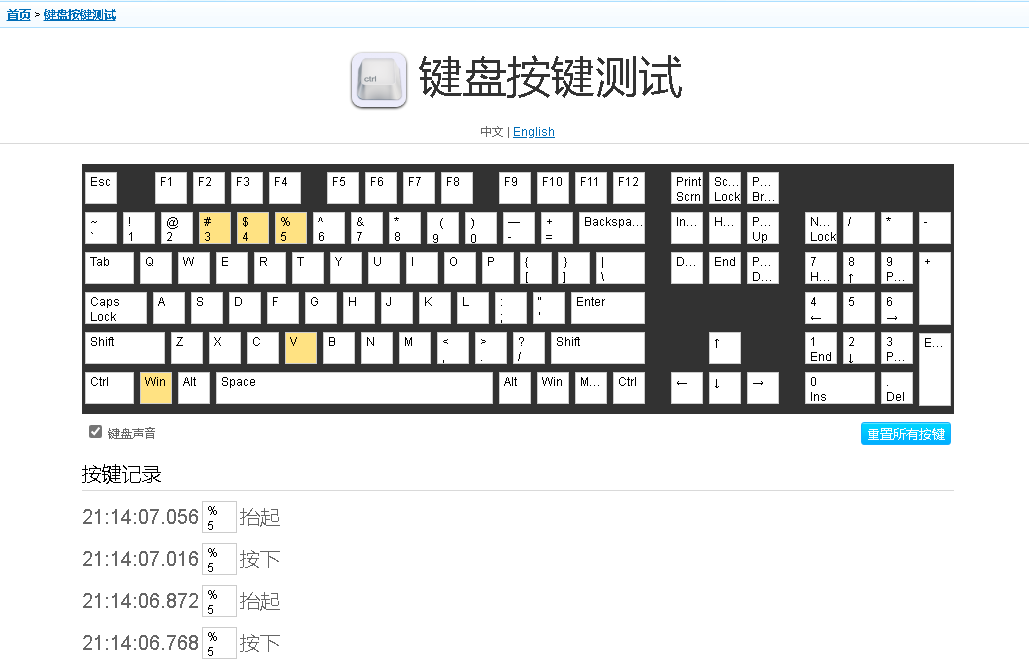
- 测试方法:
调试时可以使用一根导线串联一个1K的电阻用于限流作用,一头接到
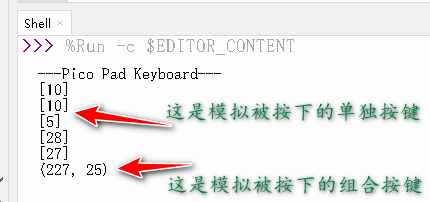
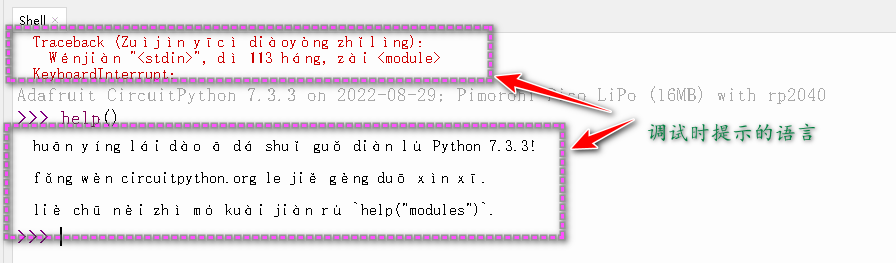
GND,另一端去触碰引脚,处理GP16引脚外,其他数字引脚都可以去碰一碰,你可以在按键测试网站上看到,按键有被模拟按下。同时如果你打开了Thonny,在Shell调试窗口有对应的按键码值打印信息。
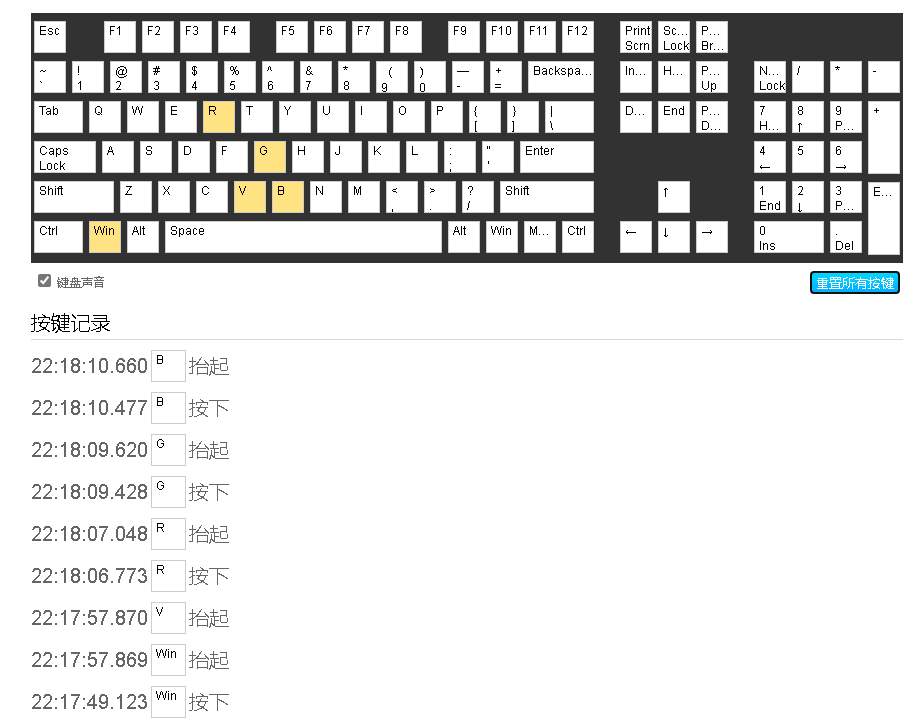
- 按键映射可以自己在代码中修改成自己想要的指定按键或组合按键。
keymap = {
    (0): (KEY, (Keycode.GUI, Keycode.C)),# win + C
    (1): (KEY, (Keycode.GUI, Keycode.V)),# win +V
    (2): (KEY, [Keycode.THREE]),
    (3): (KEY, [Keycode.FOUR]),
    (4): (KEY, [Keycode.FIVE]),
    (5): (MEDIA, ConsumerControlCode.VOLUME_DECREMENT),
    (6): (MEDIA, ConsumerControlCode.VOLUME_INCREMENT),

    (7): (KEY, [Keycode.R]),
    (8): (KEY, [Keycode.G]),
    (9): (KEY, [Keycode.B]),
    (10): (KEY, [Keycode.UP_ARROW]),
    (11): (KEY, [Keycode.X]),  # plus key
    (12): (KEY, [Keycode.Y]),
    (13): (KEY, [Keycode.Z]),

    (14): (KEY, [Keycode.I]),
    (15): (KEY, [Keycode.O]),
    (16): (KEY, [Keycode.LEFT_ARROW]),
    (17): (KEY, [Keycode.DOWN_ARROW]),
    (18): (KEY, [Keycode.RIGHT_ARROW]),
    (19): (KEY, [Keycode.ALT]),
    (20): (KEY, [Keycode.U]),

}
环境搭建说明
- 下载和烧录
CircuitPython固件 - 官方RP2040固件下载地址:
https://circuitpython.org/downloads

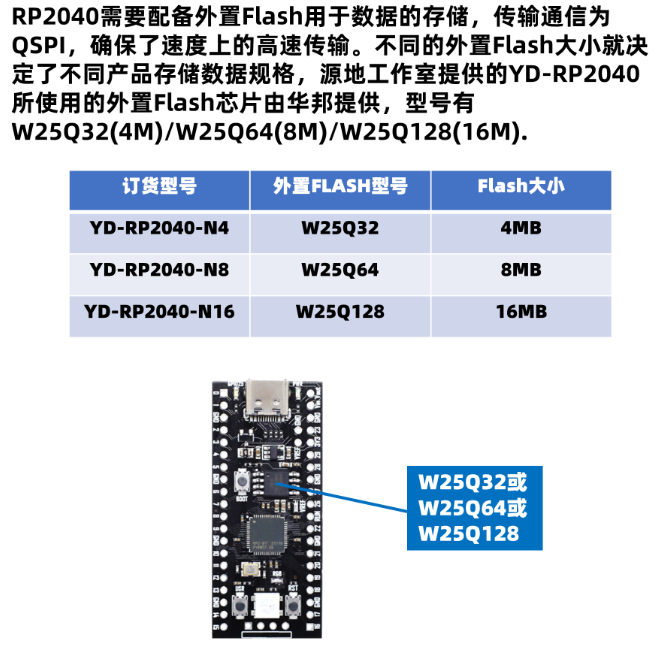
- 如果使用的是YD2040的板子可以选择:
pimoroni型号flash容量分:4MB、8MB、16MB
- 固件选择说明
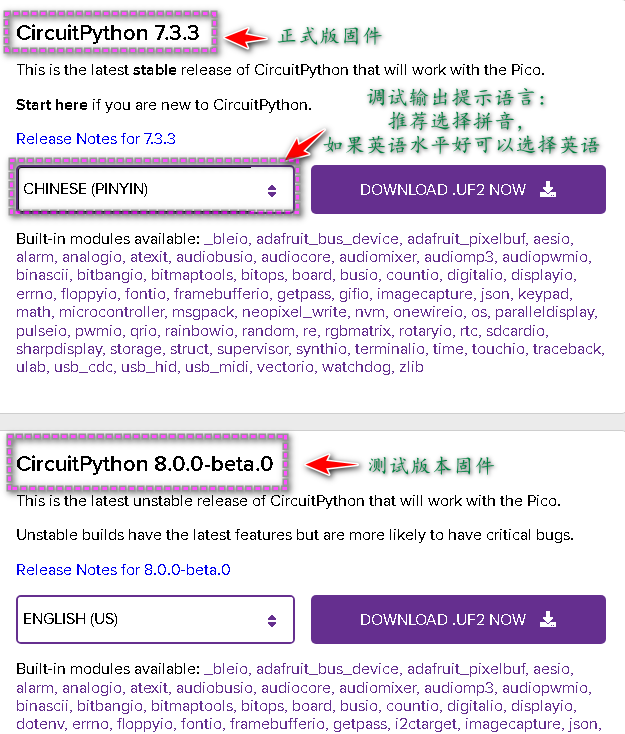
- 由于没有中文提示的,只有拼音
- 烧录方法
在插入usb到电脑前先按住boot按键,在连接到电脑上,电脑上会显示一个虚拟出来的120MB容量的U盘,然后将下载下来的.uf2文件拷贝到虚拟的U盘当中即可实现固件的烧录。
库下载和导入
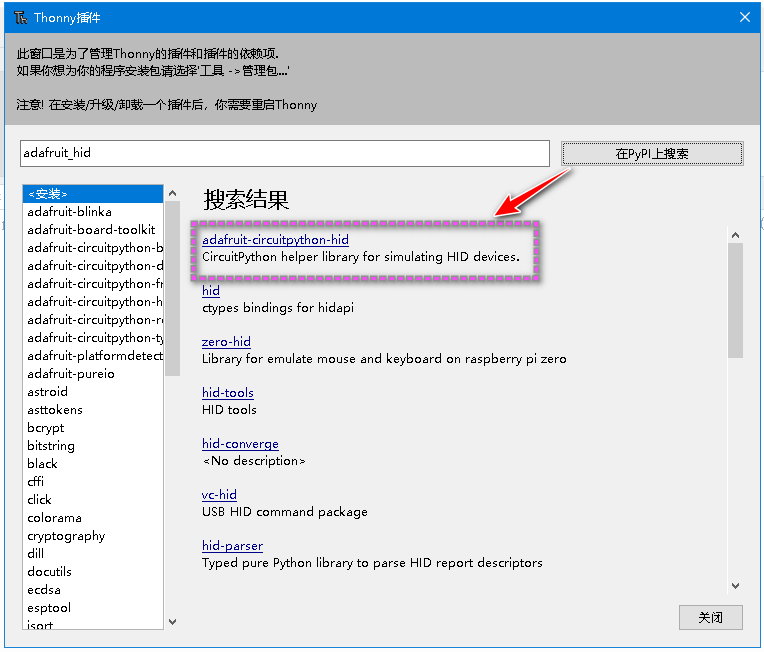
- 在
Thonny工具栏上当中-工具-管理插件,搜索adafruit_hid
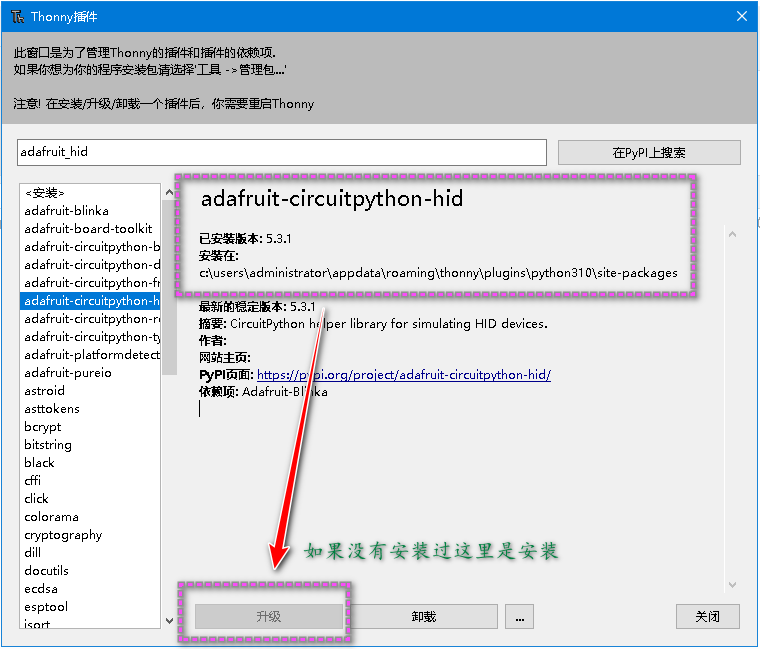
- 找到下载路径:
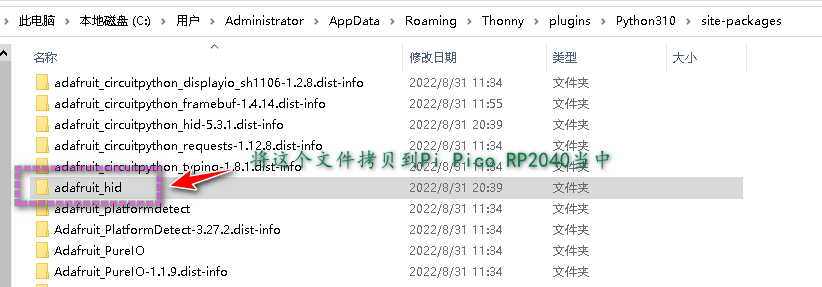
C:\Users\Administrator\AppData\Roaming\Thonny\plugins\Python310\site-packages
将
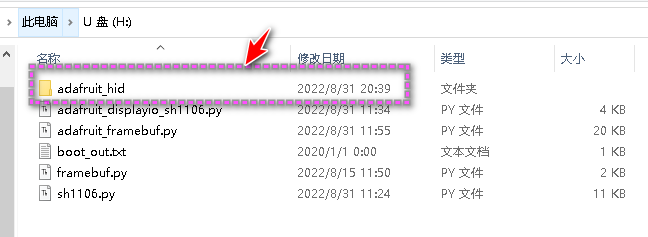
adafruit_hid文件夹拷贝到Pi Pico RP2040设备当中。
-
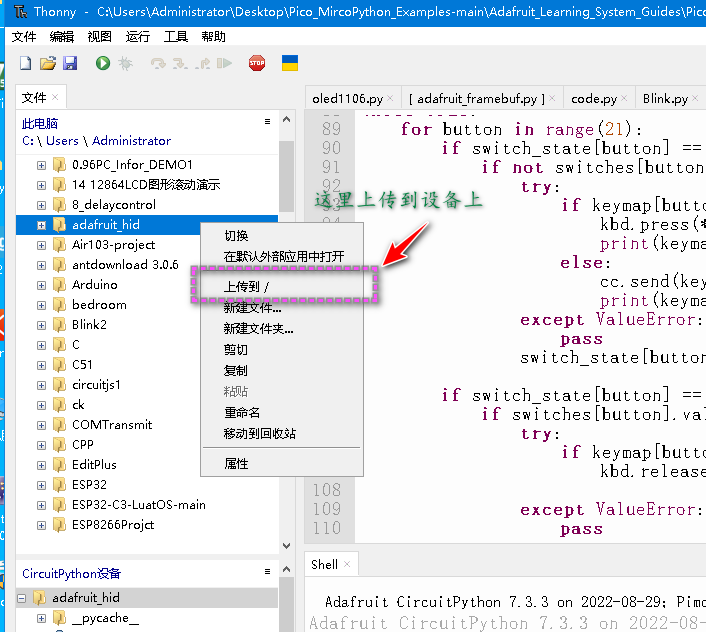
先将此文件夹拷贝到桌面或其他自己能找到的地方,通过
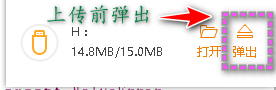
Thonny定位到文件夹,选中,右键上传到/(注意需要将设备退出U盘模式,不然上传会出错)
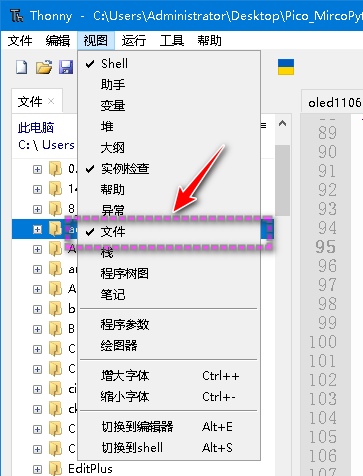
-
如果没有将文件菜单勾选的:
-
直接拷贝方法:当
RP2040插入到电脑上默认是有一个盘符的,不想Micropython ESP32
-
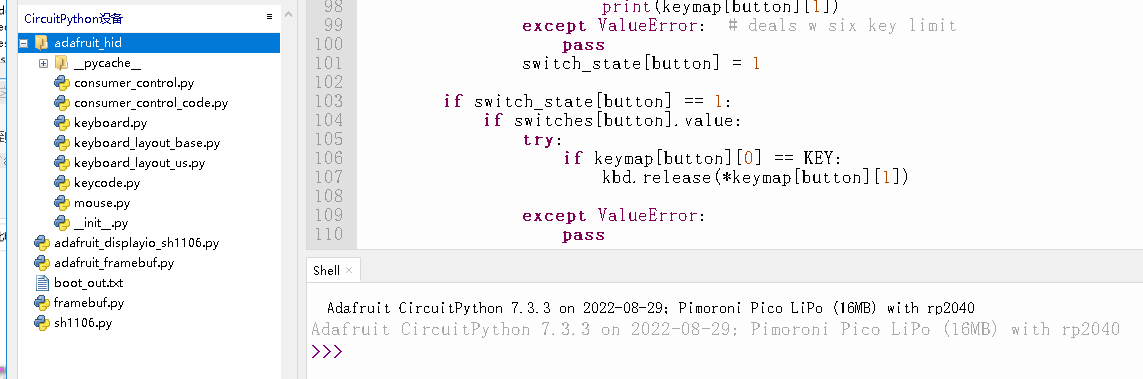
文件结构
Pico_RP2040 Mech Keyboard 示例代码
- 示例地址:
https://github.com/adafruit/Adafruit_Learning_System_Guides/tree/main/Pico_RP2040_Mech_Keyboard
在源代码上添加了按键调试串口输出,方便查阅。
# SPDX-FileCopyrightText: 2021 John Park for Adafruit Industries
# SPDX-License-Identifier: MIT
# RaspberryPi Pico RP2040 Mechanical Keyboard

import time
import board
from digitalio import DigitalInOut, Direction, Pull
import usb_hid
from adafruit_hid.keyboard import Keyboard
from adafruit_hid.keycode import Keycode
from adafruit_hid.consumer_control import ConsumerControl
from adafruit_hid.consumer_control_code import ConsumerControlCode

print("---Pico Pad Keyboard---")

led = DigitalInOut(board.LED)
led.direction = Direction.OUTPUT
led.value = True

kbd = Keyboard(usb_hid.devices)
cc = ConsumerControl(usb_hid.devices)

# list of pins to use (skipping GP15 on Pico because it's funky)
pins = (
    board.GP0,
    board.GP1,
    board.GP2,
    board.GP3,
    board.GP4,
    board.GP5,
    board.GP6,
    board.GP7,
    board.GP8,
    board.GP9,
    board.GP10,
    board.GP11,
    board.GP12,
    board.GP13,
    board.GP14,
    board.GP16,
    board.GP17,
    board.GP18,
    board.GP19,
    board.GP20,
    board.GP21,
)

MEDIA = 1
KEY = 2

keymap = {
    (0): (KEY, (Keycode.GUI, Keycode.C)),# win + C
    (1): (KEY, (Keycode.GUI, Keycode.V)),# win +V
    (2): (KEY, [Keycode.THREE]),
    (3): (KEY, [Keycode.FOUR]),
    (4): (KEY, [Keycode.FIVE]),
    (5): (MEDIA, ConsumerControlCode.VOLUME_DECREMENT),
    (6): (MEDIA, ConsumerControlCode.VOLUME_INCREMENT),

    (7): (KEY, [Keycode.R]),
    (8): (KEY, [Keycode.G]),
    (9): (KEY, [Keycode.B]),
    (10): (KEY, [Keycode.UP_ARROW]),
    (11): (KEY, [Keycode.X]),  # plus key
    (12): (KEY, [Keycode.Y]),
    (13): (KEY, [Keycode.Z]),

    (14): (KEY, [Keycode.I]),
    (15): (KEY, [Keycode.O]),
    (16): (KEY, [Keycode.LEFT_ARROW]),
    (17): (KEY, [Keycode.DOWN_ARROW]),
    (18): (KEY, [Keycode.RIGHT_ARROW]),
    (19): (KEY, [Keycode.ALT]),
    (20): (KEY, [Keycode.U]),

}

switches = []
for i in range(len(pins)):
    switch = DigitalInOut(pins[i])
    switch.direction = Direction.INPUT
    switch.pull = Pull.UP
    switches.append(switch)


switch_state = [0, 0, 0, 0, 0, 0, 0, 0, 0, 0, 0, 0, 0, 0, 0, 0, 0, 0, 0, 0, 0]

while True:
    for button in range(21):
        if switch_state[button] == 0:
            if not switches[button].value:
                try:
                    if keymap[button][0] == KEY:
                        kbd.press(*keymap[button][1])
                        print(keymap[button][1])
                    else:
                        cc.send(keymap[button][1])
                        print(keymap[button][1])
                except ValueError:  # deals w six key limit
                    pass
                switch_state[button] = 1

        if switch_state[button] == 1:
            if switches[button].value:
                try:
                    if keymap[button][0] == KEY:
                        kbd.release(*keymap[button][1])

                except ValueError:
                    pass
                switch_state[button] = 0

    time.sleep(0.01)  # debounce