iptables之SNAT,DNAT原理与DNS分离解析实验
1.SNAT 策略
局域网主机共享单个公网IP地址接入Internet(私网不能在Internet(公网)中正常路由因为公网有 个机制叫黑洞路由(吸收私网数据包并丢弃))

2.SNAT原理 (source network address translation)
修改数据包源地址
3.SNAT转换前提条件在nat表中做
1. 局域网各主机已正确设置ip地址,子网掩码,默认网关地址
2. linux网关开启路由转发
4.网关服务器要打开ip路由转发功能
1.0打开方式(1.临时打开)
sysctl -w net.ipv4.ip_forword=1
sysctl -p 加载
2.0.永久打开
vim /etc/sysctl.conf
sycctl -p
5.网关服务器配置
方式一:
iptables -t nat -A POSTROUTING -s 192.168.159.0/24 -o ens33-j SNET --to 12.0.0.254
主要代码配置指定地址
方式二:
iptables -t nat -A POSTROUTING -s 192.168.159.0/24 -o ens33 -j MASQUERADE
指定动态地址
实验步骤:
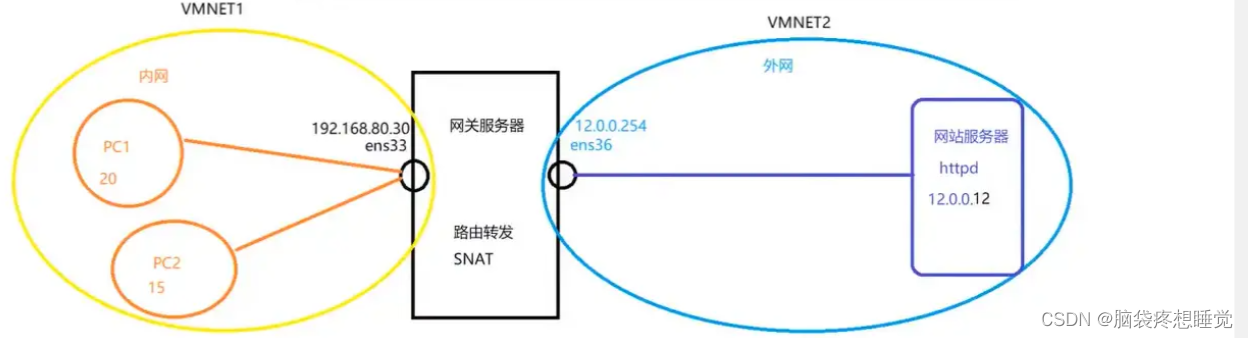
1.需要准备三台主机 1台内网服务器 1台网关服务器 1台 外网服务器
2.实验目的:实现内外网服务器的访问
内网服务器配置: ip地址192.168.61.10 网关 192.168.61.20要想外网访问内网必须安装htppd服务。
 1  ifconfig
    2  systemcel status iptables
    3  systemcel status iptables.server
    4  systemcel start iptables.server
    5  iptables -nvL
    6  iptables -nvL INPUT
    7  iptables -t filter -A INPUT -p tcp --dport 20:21 -j REJECT
    8  iptables -nvL INPUT
    9  iptables -nvL --line-numbers
   10  iptables -nvL -t filter --line-numbers
   11  iptables -nvL input --line-numbers
   12  iptables -nvL input
   13  iptables -P INPUT DROP
   14  iptables -nvL input
   15  iptables -nvL
   16  iptables -F
   17  iptables -P INPUT DROP
   18  iptables -A INPUT --dport 22 -j REJECT
   19  iptables -A INPUT --dport22 -j REJECT
   20  iptables -A INPUT -p tcp --dport 22 -j REJECT
   21  ping 192.168.61.20
   22  iptables -A FORWORD -p udp -m iprange --src-range 192.168.61.20-192.168.61.50 -j REJECT
   23  iptables -A FORWARD -p udp -m iprange --src-range 192.168.61.20-192.168.61.50 -j REJECT
   24  ping 192.168.61.20
   25  iptables -A INPUT -p tcp -m state--state ESTABLISHED,RELATED -j ACCEPT
   26  iptables -A INPUT -p tcp -m state--state ESTABLISHED ,RELATED -j ACCEPT
   27  iptables -A INPUT -p tcp -m state --state ESTABLISHED ,RELATED -j ACCEPT
   28  iptables -A INPUT -p tcp -m state --state ESTABLISHED,RELATED -j ACCEPT
   29  cd /etc/sysconfig
   30  ls
   31  cd /etc/sysconfig
   32  ls
   33  vim iptables
   34  iptables-save>/opt/1.txt
   35  cd opt
   36  cd /opt
   37  ls
   38  ls 1.txt
   39  cat 1.txt
   40  cd sysconfig
   41  cd /etc/sysconfig
   42  ls
   43  ls iptables
   44  cat iptables
   45  iptables-restore </opt/1.txt
   46  cat iptables
   47  ifconfig
   48  iptables
   49  iptables -nL
   50  iptables -F
   51  iptables -nL
   52  ifconfig
   53  vim /etc/sysconfig/network-scripts/ifcfg-ens33
   54  systemctl restart network
   55  ping 192.168.61.20
   56  ping 192.168.61.10
   57  systemctl stop firewalld
   58  setenforce 0
   59  ifconfig
   60  cd /etc/sysconfig/network-scripts/
   61  ls
   62  vim ifcfg-ens33
   63  yum install -y httpd
   64  cd yum.repos.d
   65  cd /etc/yum.repos.d
   66  ls
   67  mkdir bak
   68  mv *.repo bak
   69  vim local.repo
   70  df
   71  mount /dev/sr0 /mnt
   72  yum install -y httpd
   73
   74  systemctl status httpd
   75  systemctl start httpd
网关服务器配置:(需要添加一块网卡,一个做内网网关,一个作外网网关,网关服务器需要设置一个 转发功能 编辑 vim /etc/sysctl.conf 添加配置 nat.ipv4.ip_forward=1 1是开启的意思。
网关服务器不需要网关和dns直接在配置文件注释即可,只需保存ip地址即是内网网关。)
  1  cd ~
    2  vim /etc/sysconfig/network-scripts/ifcfg-ens33
    3  systemctl restart network
    4  ping www.baidu.com
    5  ifconfig
    6  cd /etc/sysconfig/network-scripts/
    7  ls
    8  vim ifcfg-ens33
    9  cp ifcfg-ens33 ifcfg-ens36
   10  vim ifcfg-ens36
   11  systemctl restart network
   12  ifconfig
   13  vim ifcfg-ens36
   14  ping 12.0.0.12
   15  vim /etc/sysctl.conf
   16  sysctl -p
   17  ping 192.168.61.20
   18  ifconfig
   19  vim ifcfg-ens33
   20  systemctl status iptables
   21  yum install -y iptables iptables-services
   22  df
   23  mount /dev/sr0 /mnt
   24  yum install -y iptables iptables-services
   25  df
   26  cd /etc/yum.repos.d
   27  ls
   28  mkdir bak
   29  mv *.repo bak
   30  vim local.repo
   31  yum install -y iptables iptables-services
   32  systemctl start iptables
   33  systemctl status iptables
   37  systemctl stop firewalld
   38  setenforce 0
   39  vim /etc/sysctl.conf      #在这个文件里面添加net.ipv4.ip_forward=1
   40  sysctl -p                 #加载一下网关服务器的转发功能
   41  ifconfig
   42  iptables -nvL -t nat
   43  iptables -F
   45  iptables -F
   46  iptables -t nat -A POSTROUTING -s 192.168.61.0/24 -o ens33 -j SNAT --to 12.0.0.12
       ######### -o ens33为出站口   -s指定源地址
   47  iptables -nvL -t nat
   48  iptables -D 1 -t nat
   49  iptables -D 1 -t nat
   50  iptables -F -t nat
   51  iptables -nvL -t nat
   55  iptables -t nat -A PREROUTING -i ens36 -d 12.0.0.12 -p tcp --dport 80 -j DNAT --to
       192.168.61.20
       ########## -i 指定ens36入站口  -d指定目的地址  -p 指定协议  --dport  指定端口号
       ####192.168.61.20为源地址
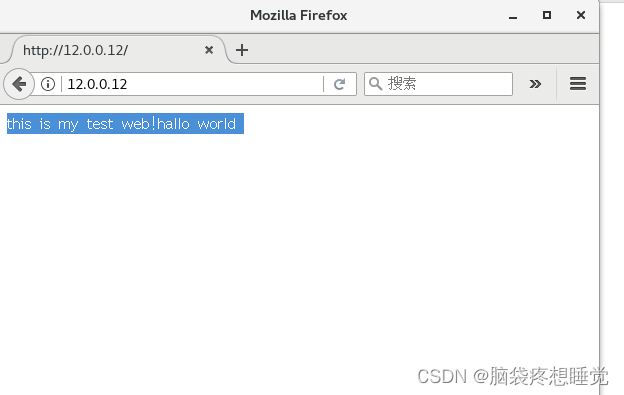
外网服务器: (ip地址 12.0.0.12 )要想内网通过网关服务器访问外网必须安装httpd服务
    2  cd /etc/sysconfig/network-scripts/
    4  vim ifcfg-ens33
    5  ifconfig
    6  systemctl restart network
    7  ifconfig
    8  vim ifcfg-ens33
    9  systemctl restart network
   10  ifconfig
   11  systemctl restart network
   12  yum install -y httpd
   13  systemctl stop firewalld
   14  setenforce 0
   15  vim ifcfg-ens33
   16  rpm -qc httpd
   17  rpm -q httpd
   18  yum install -y httpd
   19  systemctl stop firewalld
   20  setenforce 0
   27  systemctl restart network
   28  ping 12.0.0.12
   29  ping 12.0.0.254
   30  vim ifcfg-ens33
   31  systemctl stop firewalld
   32  setenforce 0
   36  yum install -y httpd
   38  systemctl status httpd
   39  systemctl start httpd
   41  cd /var/log/httpd
   43  taif -f access_log
   44  taif access_log
   45  tail -f access_log
   46  cd /var/log/httpd/
   48  tail -f access_log
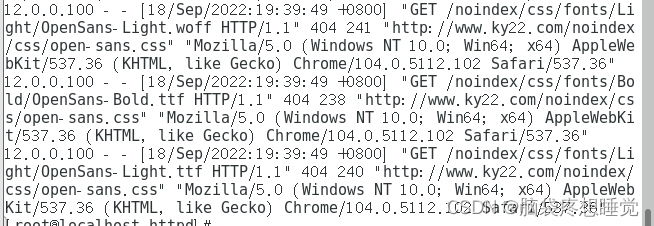
查看httpd程序日志文件在/var/log/httpd/access_log中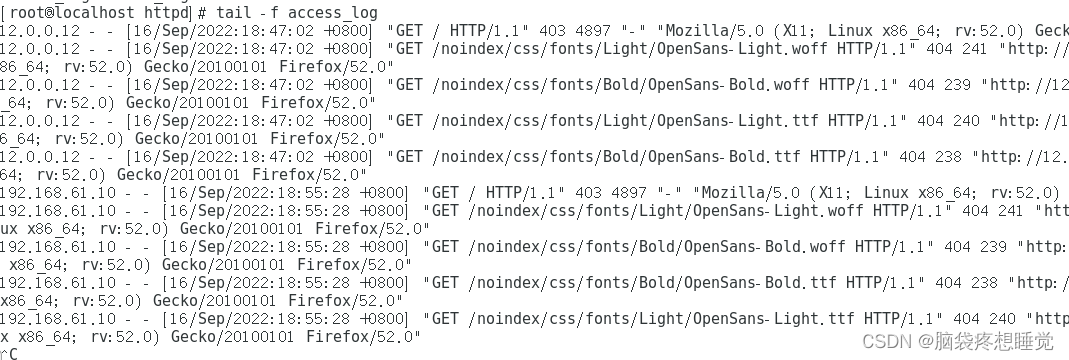
防火墙规则的备份和还原
iptables -save > /opt/1.txt (备份)

iptables -restore < /opt/1.txt (还原)

DNAT策略(目的地址转换)
目的:修改数据包的目的地址
网关服务器主要配置:
1.打开路由转发
2.做SNAT和DNAT转换
iptables -t nat -A POSTROUTING -s 192.168.61.0/24 -o ens36 -j SNET --to 12.0.0.254
iptables -t nat -A PREROUTING -i ens36 -d 12.0.0.254 -p tcp --dport 80 -j DNAT --to 192.168.80.20:80
windows访问12.0.0.254网关
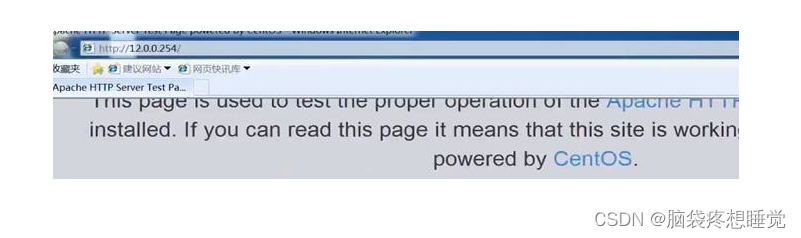
在内网日志中显示的ip记录是12.0.0.100windows主机地址
因为访问时DNAT会把目标地址转换为公网地址,而公网地址通过路由转发给源地址
抓包
tcpdump tcp -i ens33 -t -s 0 -c 100 and dst port ! 22 and src net 192.168.1.0/24 -w ./target.cap
-tcp -udp -icmp协议抓包时必须写在前面
-i ens33 抓取经过ens33的网卡的包
-t 不显示时间戳
-s 0 抓取数据包默认68字节 -s 0代表可以抓取完整包
-c 100 指抓取100个包
src net 192.168.1.0/24 数据包源网络地址
-w 指定保存路径文件为 ./target.cap
要在ens33抓取http协议相关的包
tcpdump http -i ens33 -s 0 -w
dns网关服务器域名解析

这边注意编写的文件一定要是index.html文件才可以访问 html文件位于/var/www/html下
dns分离解析实现用域名访问主机
在网关服务器中配置分离解析
1.安装bind包
yum install -y bind
2.修改主配置文件
3.修改区域配置文件
4.在区域数据配置文件中配置以bsj.com.lan和bsj.com.wan结尾文件
5.关闭防火墙,关闭系统防护,开启named服务
6.在客户机中设置vim /etc/resolv.conf 文件
nameserver=dns域名服务器地址
实验过程
vim /etc/named.conf
options {
        listen-on port 53 { any; };
#       listen-on-v6 port 53 { ::1; };
        directory       "/var/named";
        dump-file       "/var/named/data/cache_dump.db";
        statistics-file "/var/named/data/named_stats.txt";
        memstatistics-file "/var/named/data/named_mem_stats.txt";
        allow-query     { any; };
vim /etc/named.rfc1912.zones
view "lan" {
        match-clients { 192.168.61.0/24; };    #内网解析到的网段
        zone "ky22.com" IN {
                type master;
                file "bsj.com.lan";           #位于/var/named/ky22.com.lan下
        };
         zone "." IN {                          #根域配置文件
                type hint;
                file "named.ca";
        };
};


view "wan" {
    match-clients { any; };                    #外网解析到的除192.168.61.0网段所有地址
    zone "ky22.com" IN {
        type master;
        file "bsj.com.wan";                   #位于/var/named/bsj.com.wan下
    };
};
~
~
cp -p /var/named/named.localhost bsj.com.lan bsj.com.wan 文件模板复制到两个文件下面
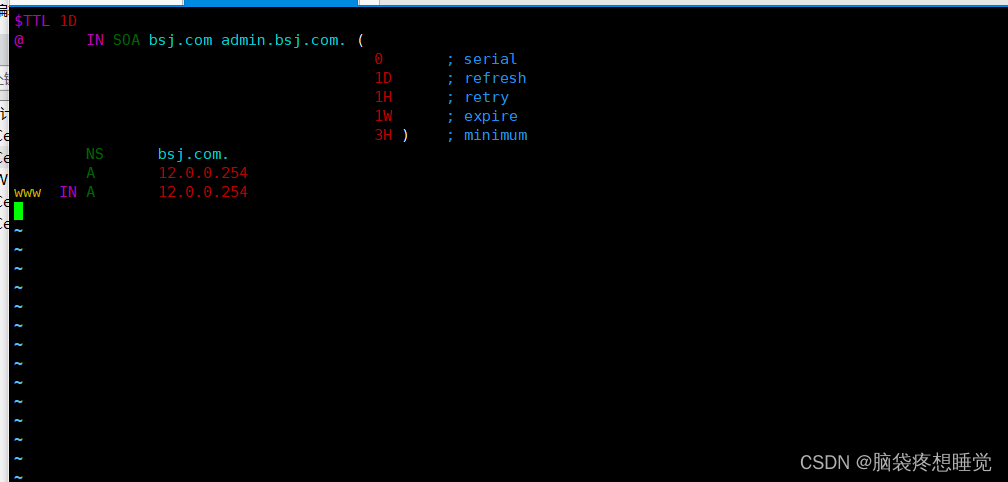
vim /var/named/bsj.com.lan
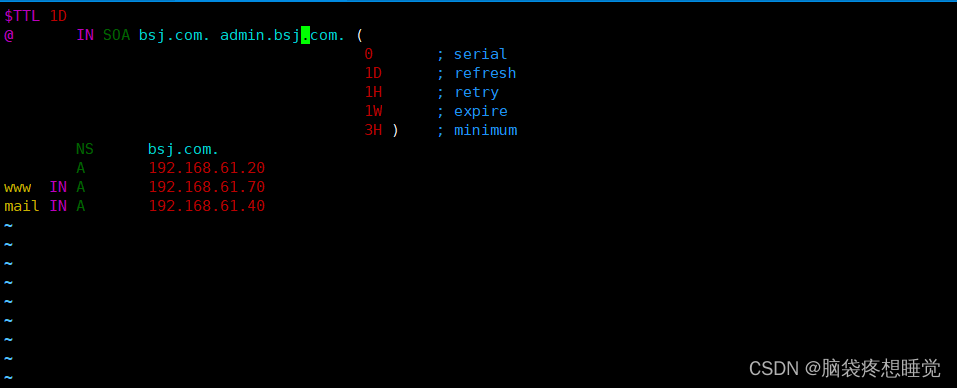
vim /var/named/bsj.com.wan
在客户端加一个服务器解析地址
vim /etc/resolv.conf

[root@localhost ~]# nslookup mail.bsj.com
Server:		192.168.61.20
Address:	192.168.61.20#53

Name:	mail.bsj.com
Address: 192.168.61.40
打开windows主机:设置和外网一个网段vmnet2仅主机模式
