如何通过自定义模块DIY出专属个性化的CSDN主页?一招教你搞定!

个人主页:学习前端的小z
个人专栏:HTML5和CSS3悦读
本专栏旨在分享记录每日学习的前端知识和学习笔记的归纳总结,欢迎大家在评论区交流讨论!

文章目录
- 💯如何通过HTML+CSS自定义模板diy出自己的个性化csdn主页?
- 🎲1 最终效果展示
- 🎲2 自定义模板介绍
- 🎁2.1 自定义模块入口
- 🎁2.2 自定义模块使用前置条件
- 🎁2.3 自定义模块使用限制
- 🎲3 实现效果所需的前置知识
- 🎲4 实现效果原理
- 🎲5 DIV系统自带CSS样式-应用CSS三大特性之特殊性
- 🎁5.1 如何DIV主页背景
- 🎁5.2 如何DIV主页头部背景,或者设置为透明
- 🎁5.3 如何DIV主题区域颜色
- 🎁5.4 如何DIY主页ID个性化样式
- 🎁5.5 如何DIV左部栏颜色
- 🎁5.6 如何DIV头部栏背景透明颜色
- 🎁5.7 如何DIV个人简介样式
- 🎁5.8 如何DIV主页文章展示字体
- 🎁5.9 如何DIV个人信息和文章数据展示效果
- 🎁5.10 如何DIV主页扩展信息
- 🎲6 如何制作背景透明的免抠图标
- 🎲7 如何DIV系统自带的认证图标
- 🎲8 在系统原有基础上DIV新标签增加页面内容-应用CSS定位
- 🎁8.1 如何给头像加上头像框(静态贴图)
- 🎁8.2 如何在主页最上方加段醒目的欢迎语
- 🎲5.10 如何DIV头部导航栏颜色?(补到第5点)
- 🎲9 注意事项
- 🎲10 小结

注意:该文章中出现的代码块都是可以复制粘贴进自定义模块直接使用的,样式是随着文章深入逐步累加的,本人亲测可以使用(●⁰౪⁰●)
💯如何通过HTML+CSS自定义模板diy出自己的个性化csdn主页?
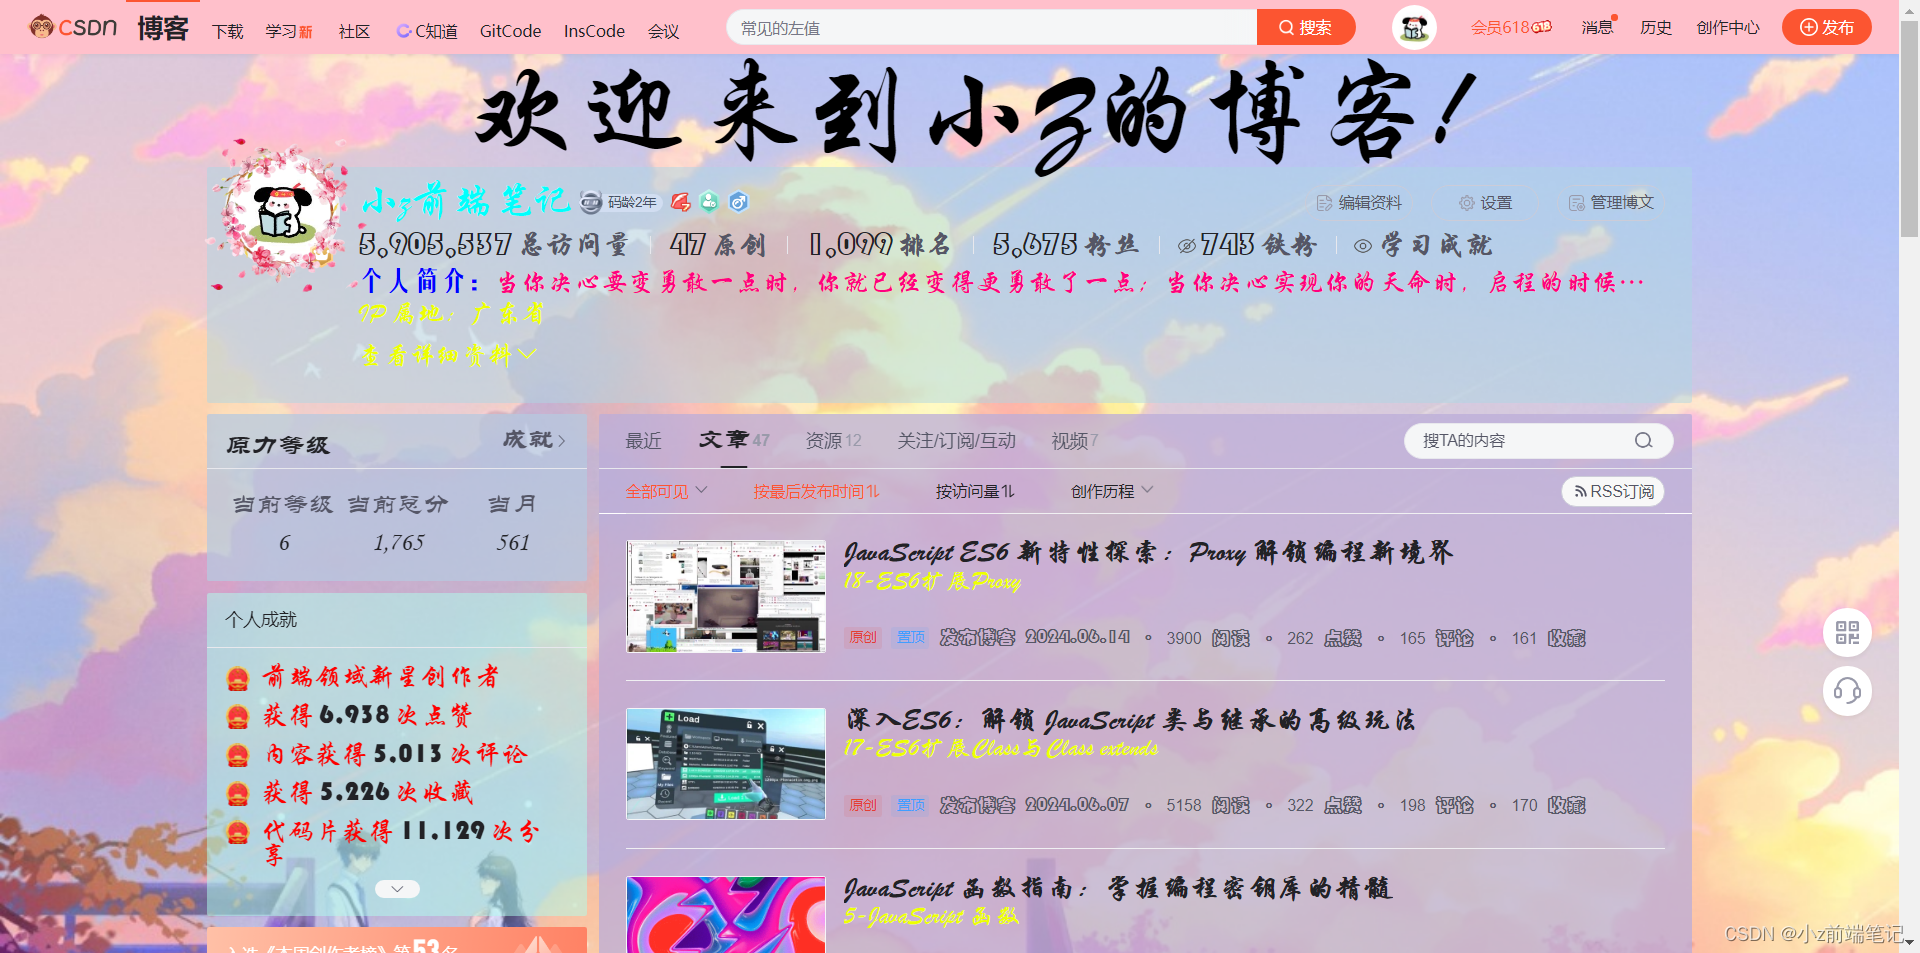
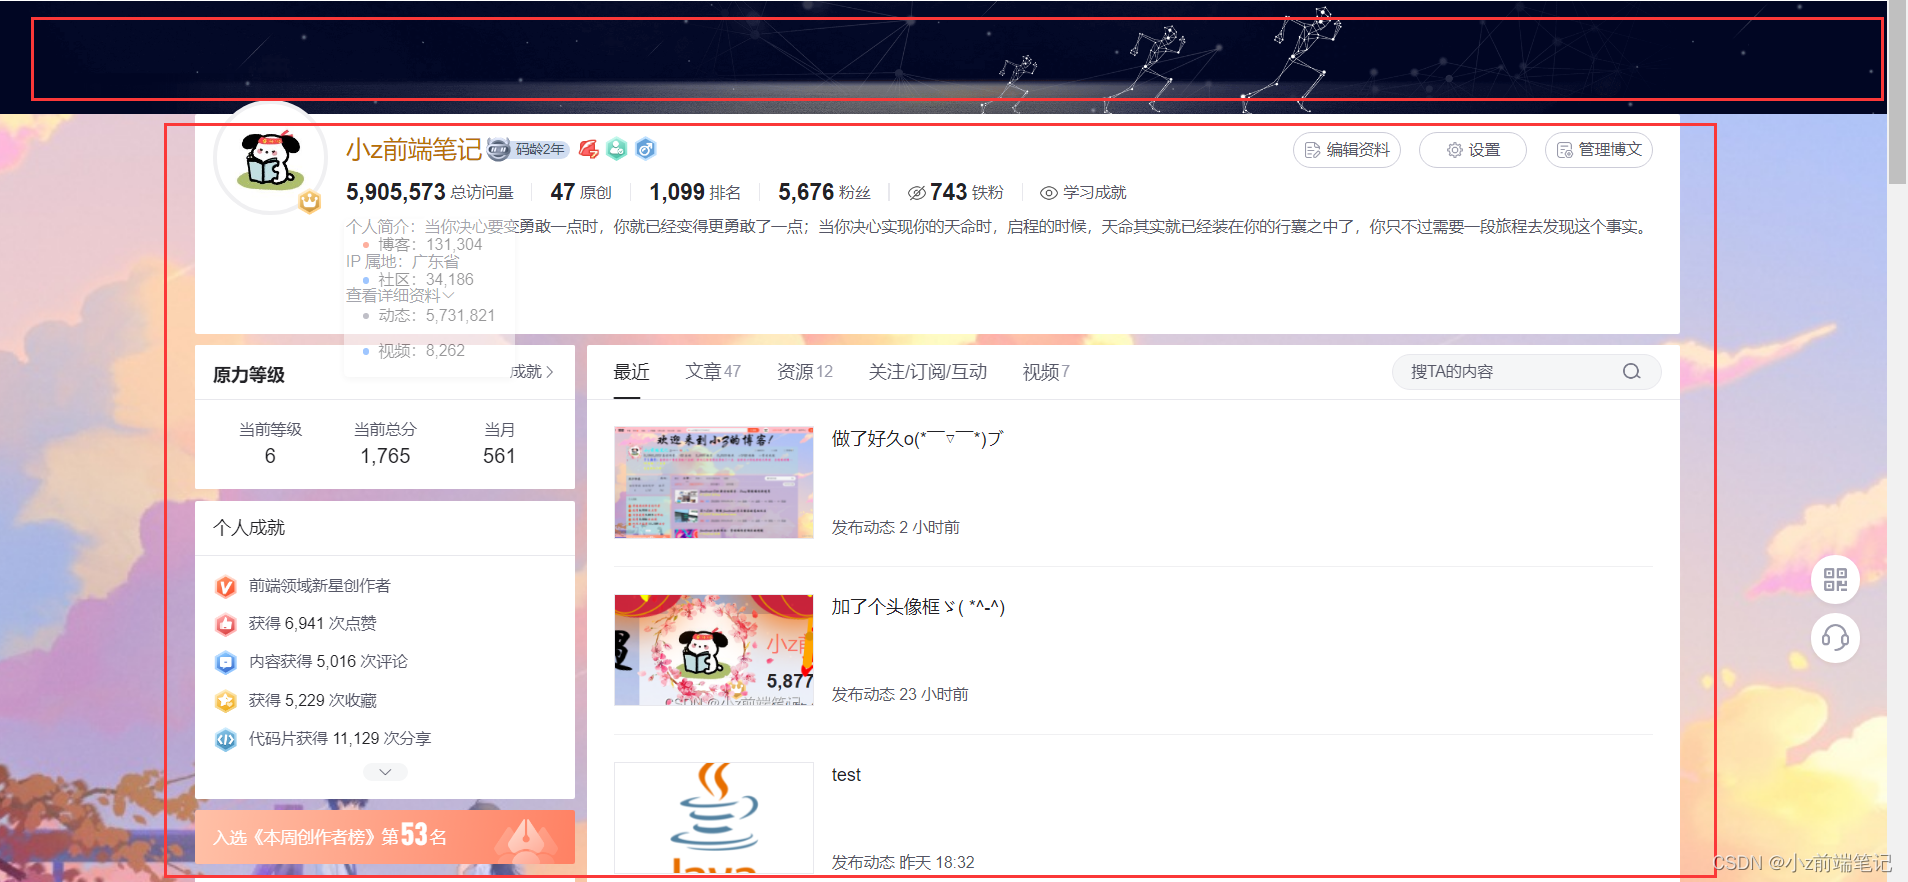
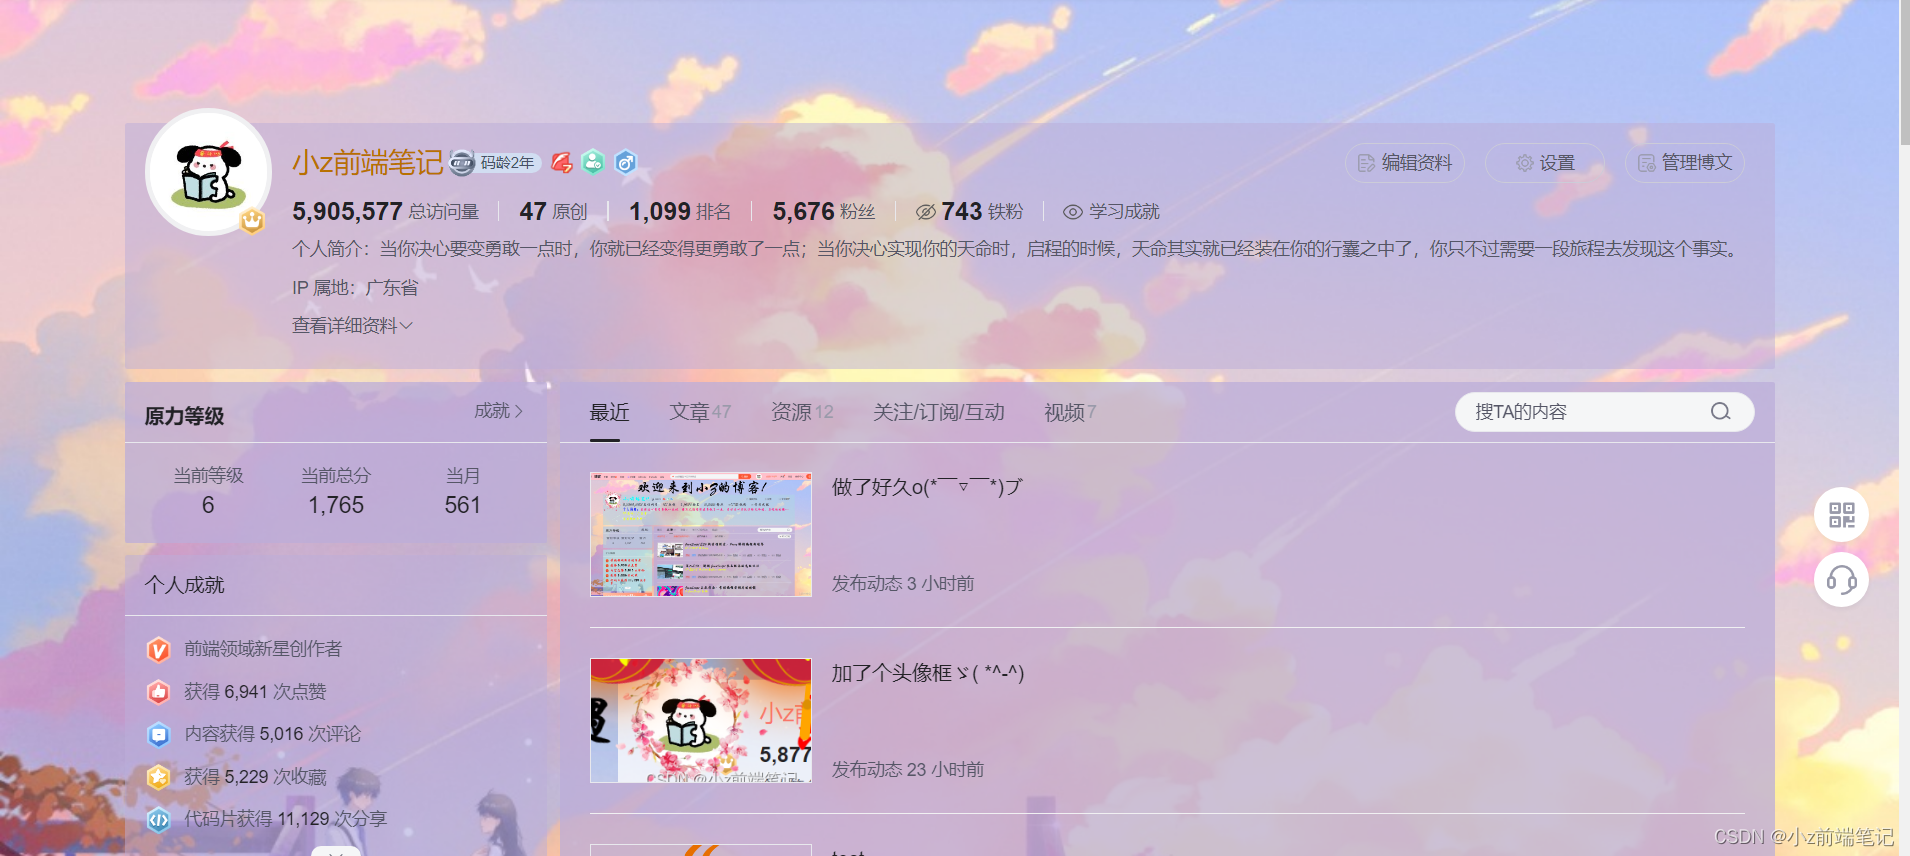
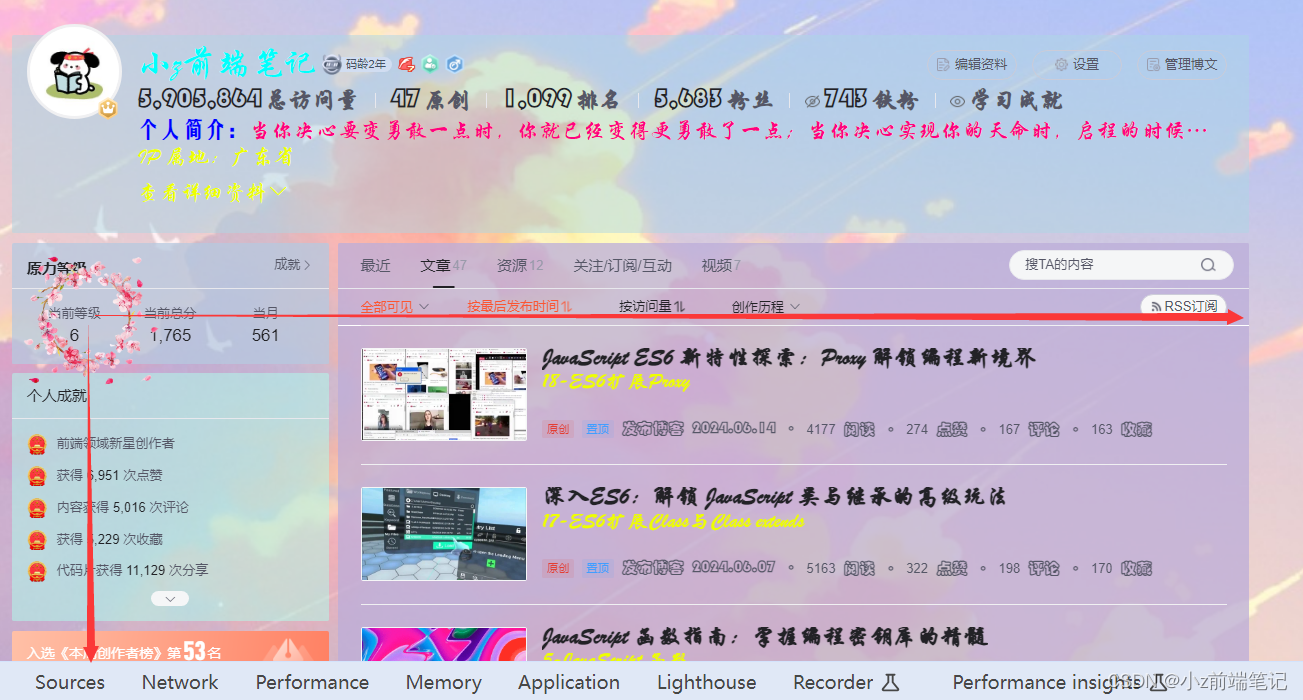
🎲1 最终效果展示
前提:必须是VIP、博客专家、企业博客才可在个人详情页显示!!!
发这个是为了分享好玩的功能(●⁰౪⁰●)(//●⁰౪⁰●)//
🎲2 自定义模板介绍
🎁2.1 自定义模块入口
1.首先从右上角个人头像找到内容管理进入。
>2.从左侧栏下滑找到自定义模块

🎁2.2 自定义模块使用前置条件
必须是VIP、博客专家、企业博客才可在个人详情页显示
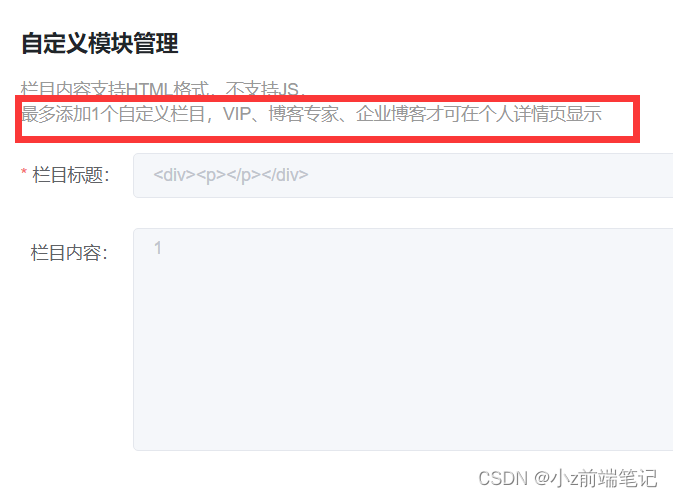
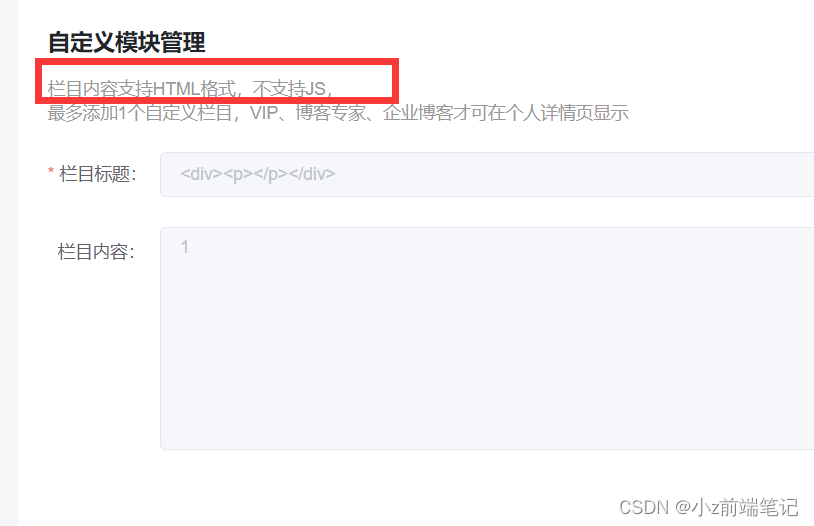
🎁2.3 自定义模块使用限制
只能使用基本的HTML格式,包括css样式,不能设置js,此外栏目内容长度也有限制。
🎲3 实现效果所需的前置知识
1.CSS选择器
2.CSS定位(绝对定位)
3.CSS三大特性(特殊性)
4.Chrom调试技巧(提高效率)
可以参考之前我发过的文章:
CSS3 选择器
CSS3 复合选择器
CSS3 定位
CSS3 三大特性+Chrome 调试代码技巧
🎲4 实现效果原理
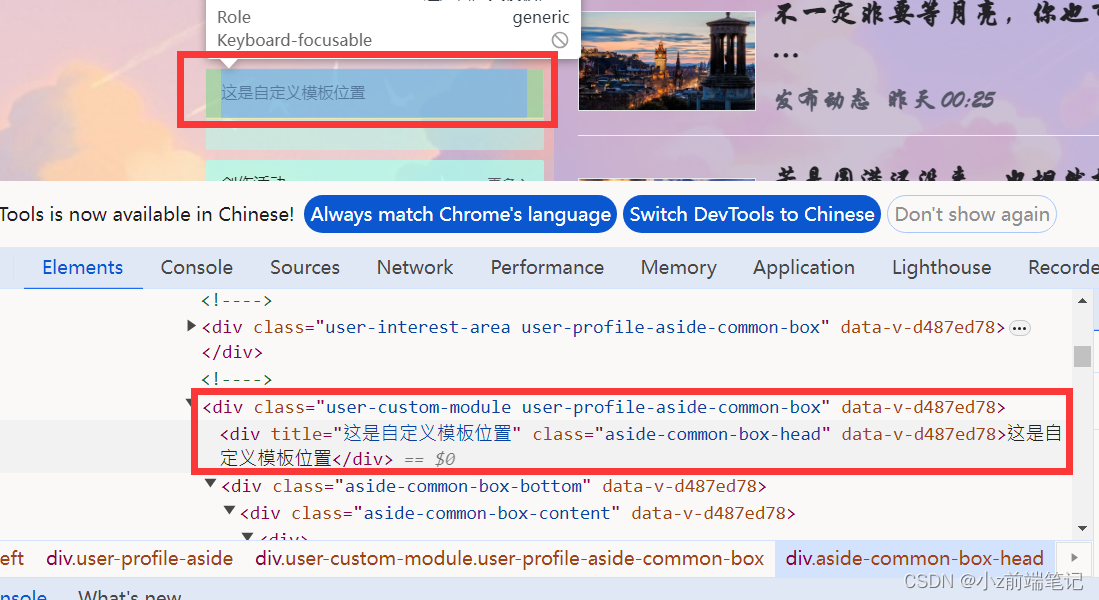
首先我们按F12打开调试工具到自定义模块的位置,可以看到自定义模块的内容实际是在一个
<div>盒子。我们可以在<div>中放入一些新的HTML标签写我们想要的样式,以及一个<style>标签存放我们所要用到的CSS样式。
但是最奇妙的点在于,这个通过自定义模块中插入csdn主页的<div>标签是在CSDN个人主页<body>标签中!!这就意味着我们或许可以在这个<div>盒子中设置的<style>标签中的同样可以影响到整个CSDN主页的CSS样式!
那我们来试试看!
1.找到系统自己设置的class类
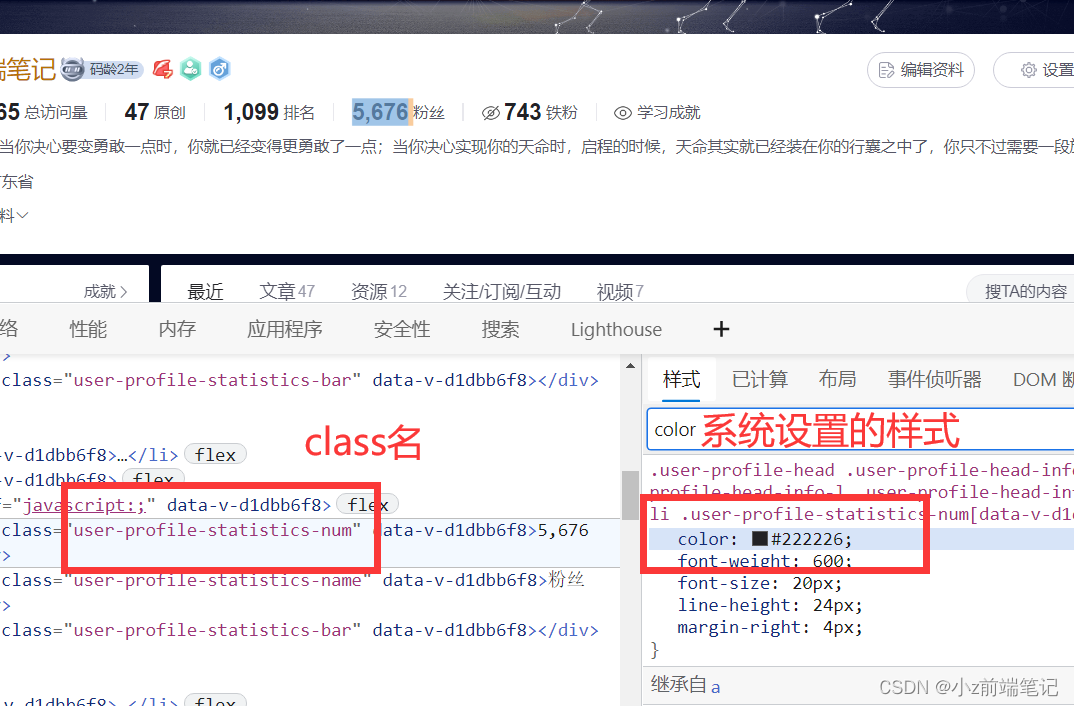
<div><style>.user-profile-statistics-num{color:red;}</style>
</div>
2.在自定义模块中写入
<style>标签并写和系统相同的类名,进行修改

不出意外的话,肯定没有实现成功≥Ö‿Ö≤,难道真的要放弃了吗?
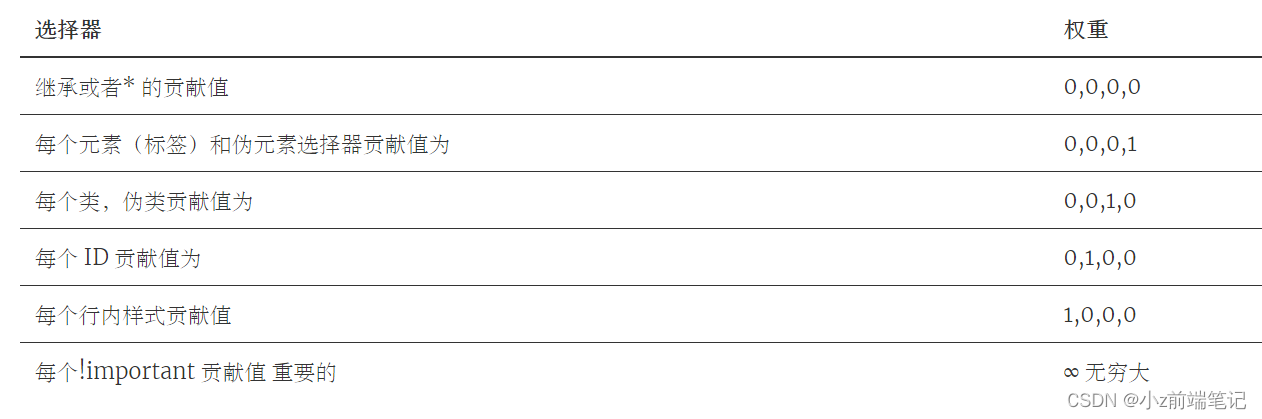
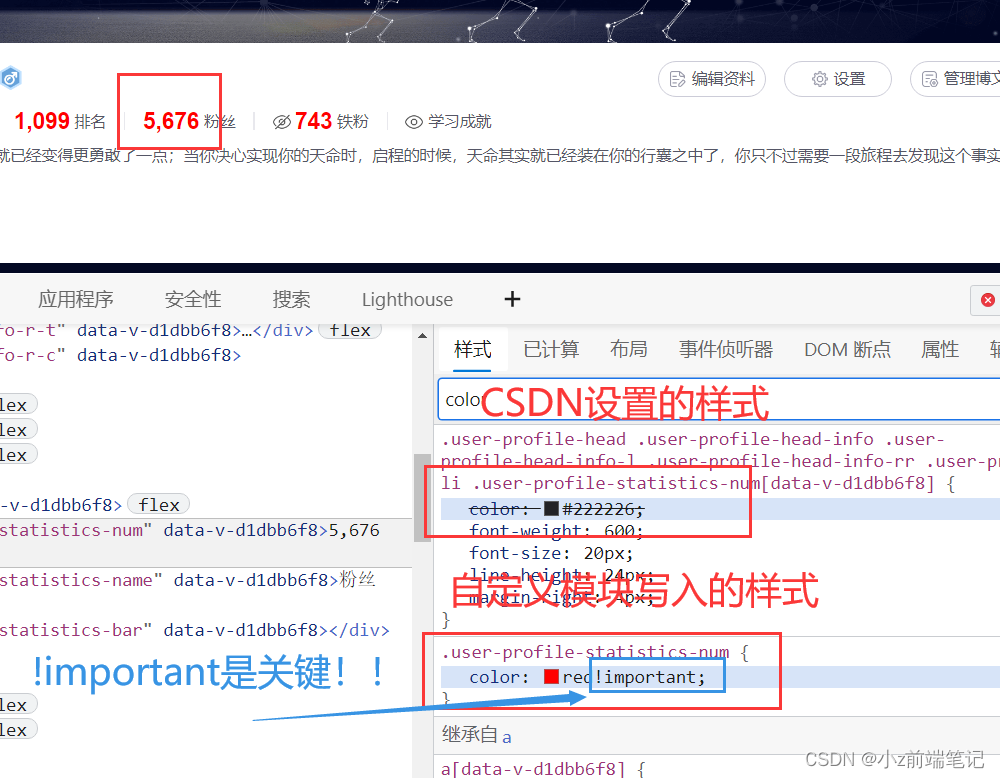
但是我们发现!在我们自定义模块中写入的<style>标签中的CSS属性确实在系统主页中出现了,只是因为选择器权重的问题被系统原有的样式覆盖了!等等,选择器权重?你肯定也想到了!
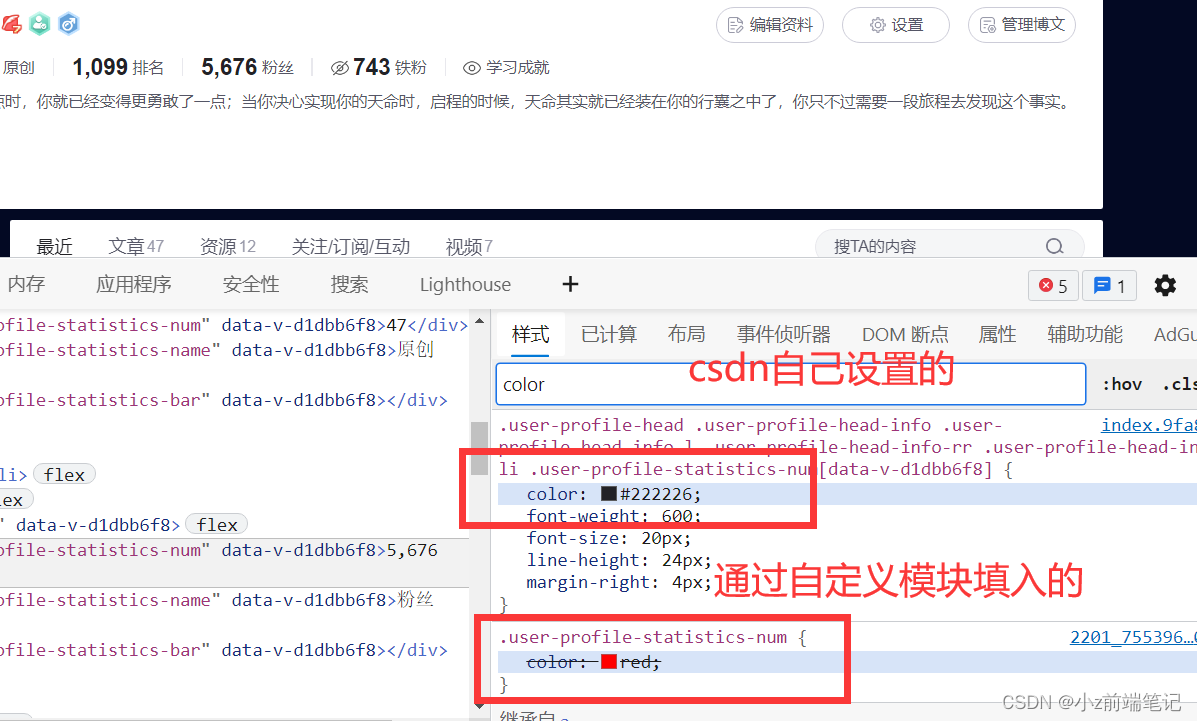
没错!!!只需再加一步我们的样式就可以在CSDN主页中显示!!(这是CSS3 三大特性中特殊性的内容)就是
!important这个属性,可以让选择器的权重无限大,从而强制生效其中的CSS样式!那么,我们需要在设置样式的末尾加上!important就可以让他强制生效!
那我们来试试看!在自定义模块中样式末尾加入!important
<div><style>.user-profile-statistics-num{color:red!important;}</style>
</div>

真的生效了!!,字体变成我们所设置的红色!我们设置的样式成功通过
!important覆盖了csdn原先设置的样式!
那么好玩的来了,我们只要可以知道CSDN中主页样式的选择器名,我们就可以通过自定义模块中设置<style>标签中定义与其同名的选择器,将CSDN同类名中原有样式进行覆盖,遇到权重低而不能生效的问题我们就可以通过!important使其强制覆盖CSDN原有类中的样式。
那么就意味着理论上我们可以通过自定义模板来修改CSDN主页中存在任何样式!!DIV一个专属于自己的独特的CSDN个人主页(‐^▽^‐)>。这也是CSDN设置这个模块的初衷吧!这就是程序员的浪漫吗☆*・゜゚・(O)/・゜゚・*☆゚・✿ヾ╲(。◕‿◕。)╱✿・゚\( ● ⌒ ∇ ⌒ ● )/
🎲5 DIV系统自带CSS样式-应用CSS三大特性之特殊性
接下来我将这两天所做主页样式经验和总结分享给大家!
开始前要先掌握以下三个我们将用到的知识点:
CSS3 选择器
CSS3 复合选择器
CSS3 定位
CSS3 三大特性+Chrome 调试代码技巧
注意:由于个人定义模板有字数限制,所以我打在代码块上都是紧凑的没有格式化的代码,防止超出字数!
🎁5.1 如何DIV主页背景
首先我们打开F12调试找到了主页背景图所在的位置,选择器名为#userSkin.skin-ai
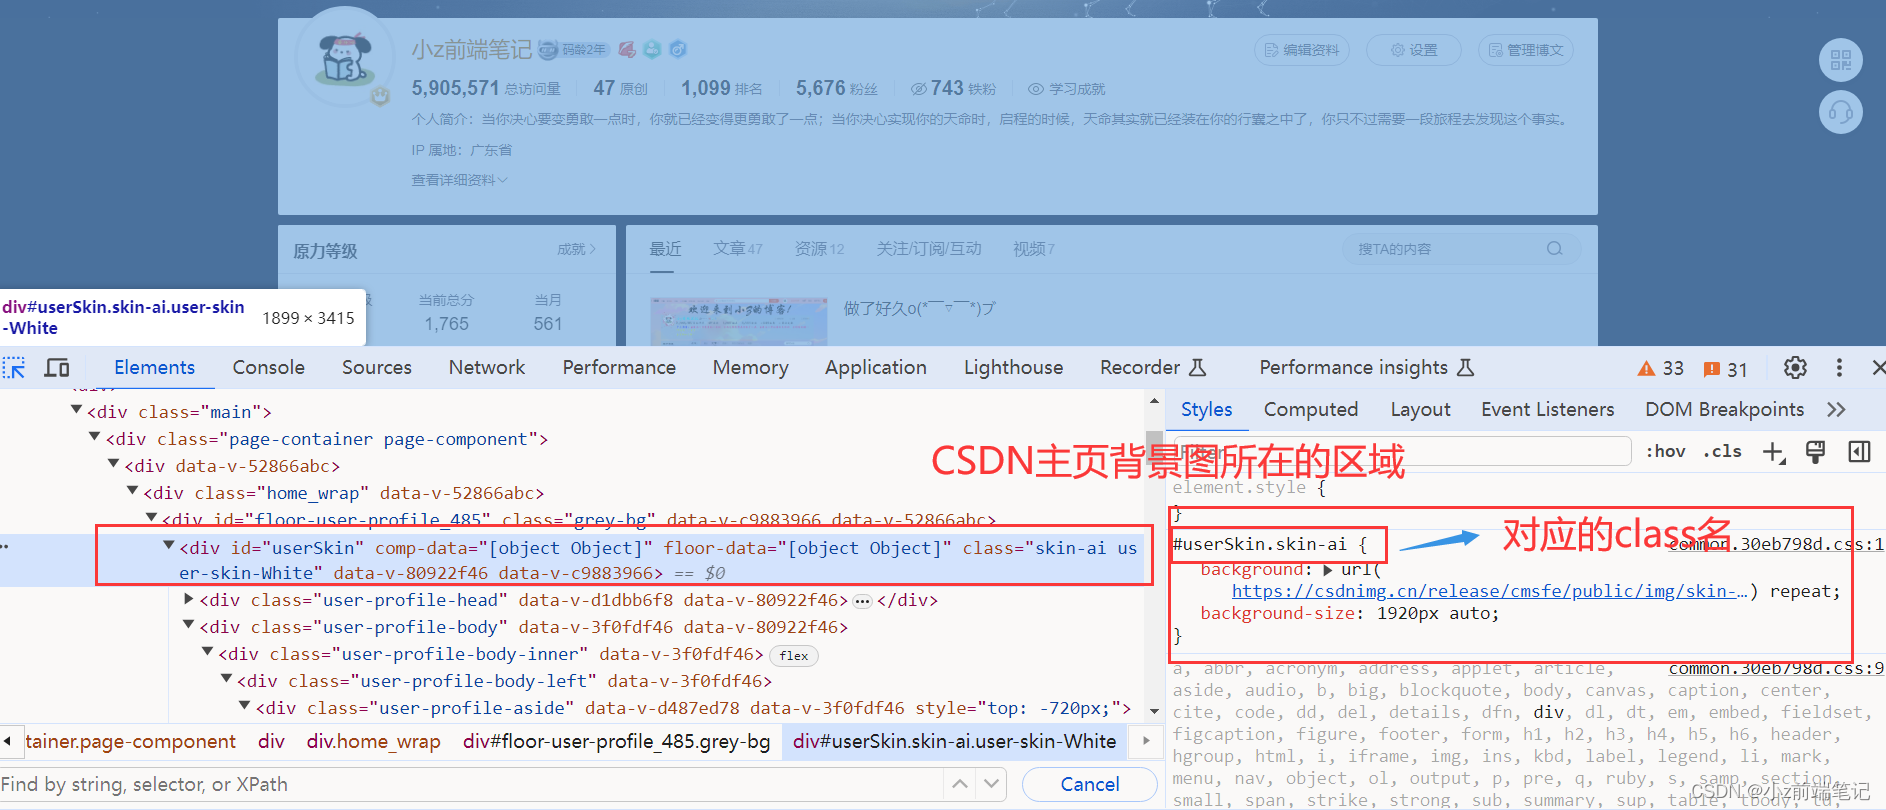
这时候我们可以在自定义模板中设置
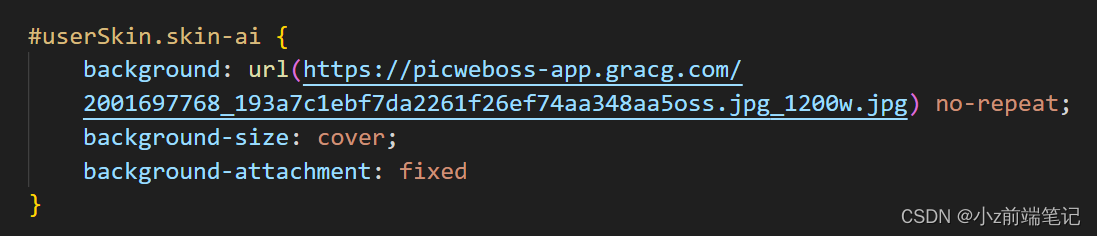
<div><style>#userSkin.skin-ai{background:url(https://picweboss-app.gracg.com/2001697768_193a7c1ebf7da2261f26ef74aa348aa5oss.jpg_1200w.jpg) no-repeat;background-size: cover;background-attachment: fixed}</style></div>
来解释一下代码
1.background: url(“https://picweboss-app.gracg.com/2001697768_193a7c1ebf7da2261f26ef74aa348aa5oss.jpg_1200w.jpg”) no-repeat;
这个是设置背景图片,no-repeat表示背景图片不会重复,即只显示一次。
2.background-size: cover;
表示完全覆盖内容区域,但背景图像的长宽比会保持不变。
3.background-attachment: fixed
表示背景图像是固定的,不会随着页面的滚动而移动。
这里权重足够,所以不用!important
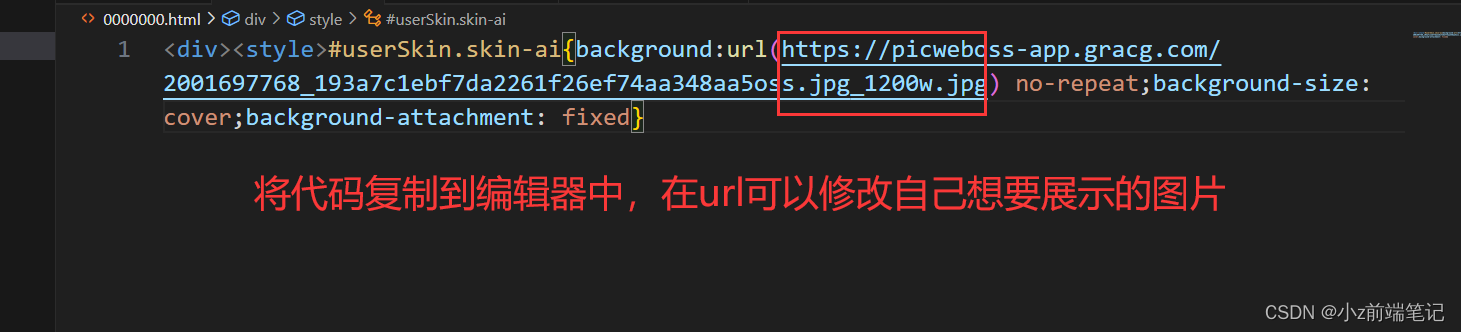
注意:选图尽量选择宽图。
url中可以填入自己所需要设置的背景图片
我们发现头部区域仍有图片,已经要如何将中心区域换成透明和自己喜欢的颜色呢?
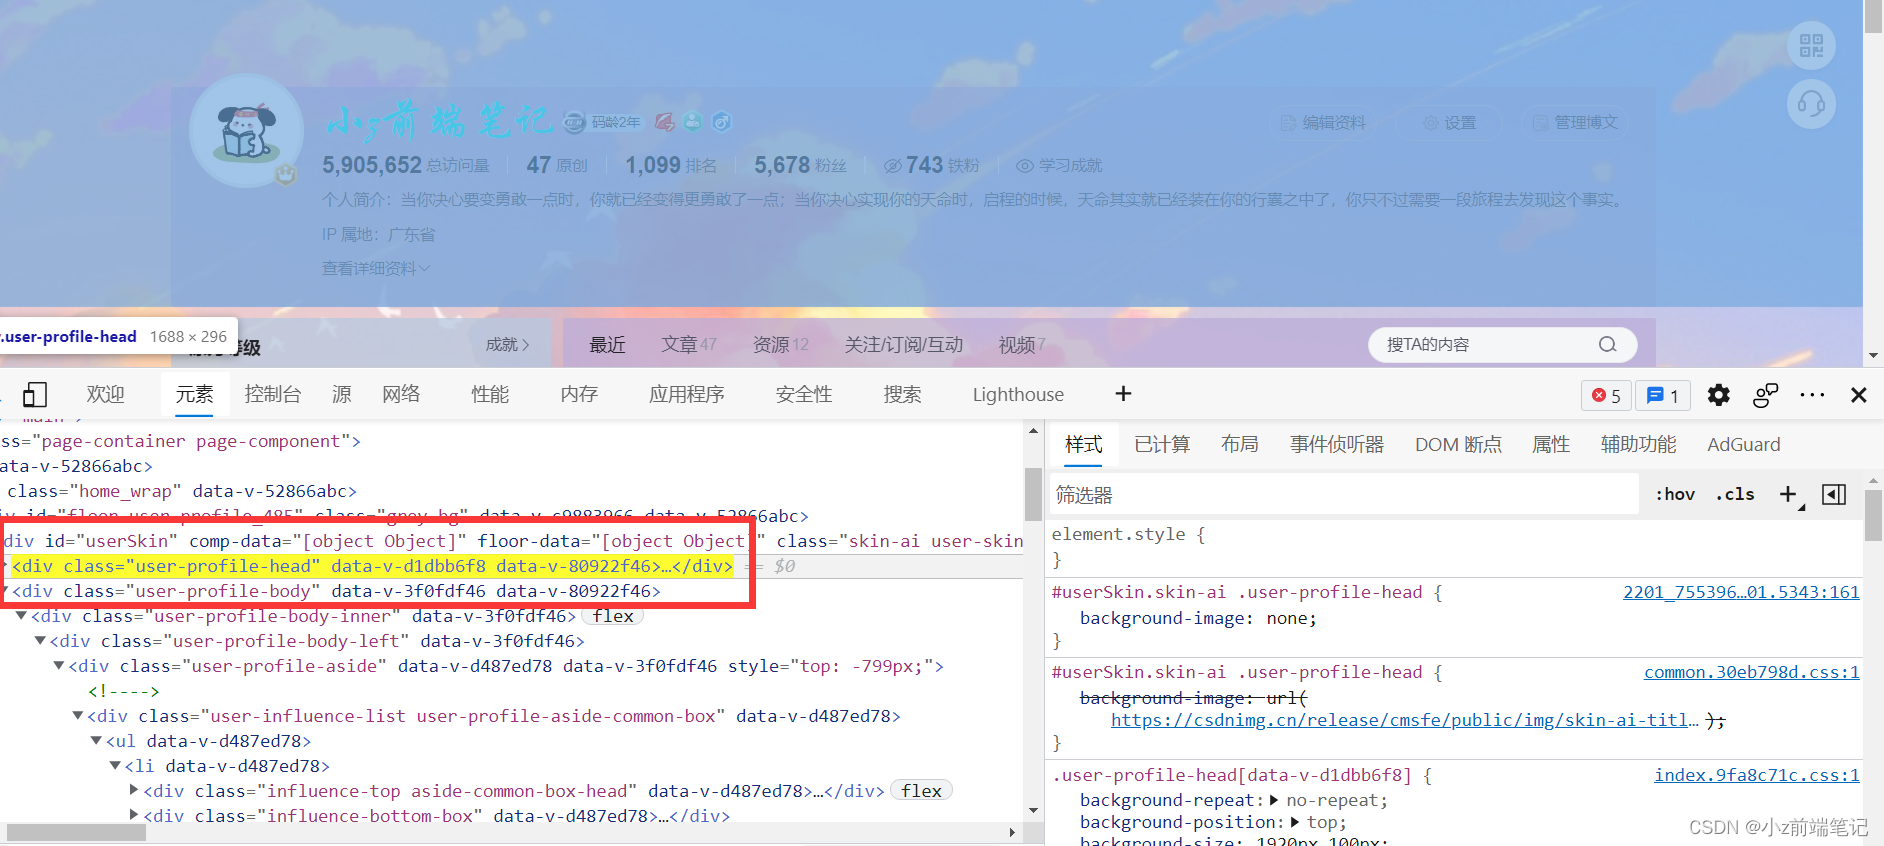
🎁5.2 如何DIV主页头部背景,或者设置为透明
首先我们打开F12调试找到了主页头部背景图所在的位置,选择器名为##userSkin.skin-ai .user-profile-headi
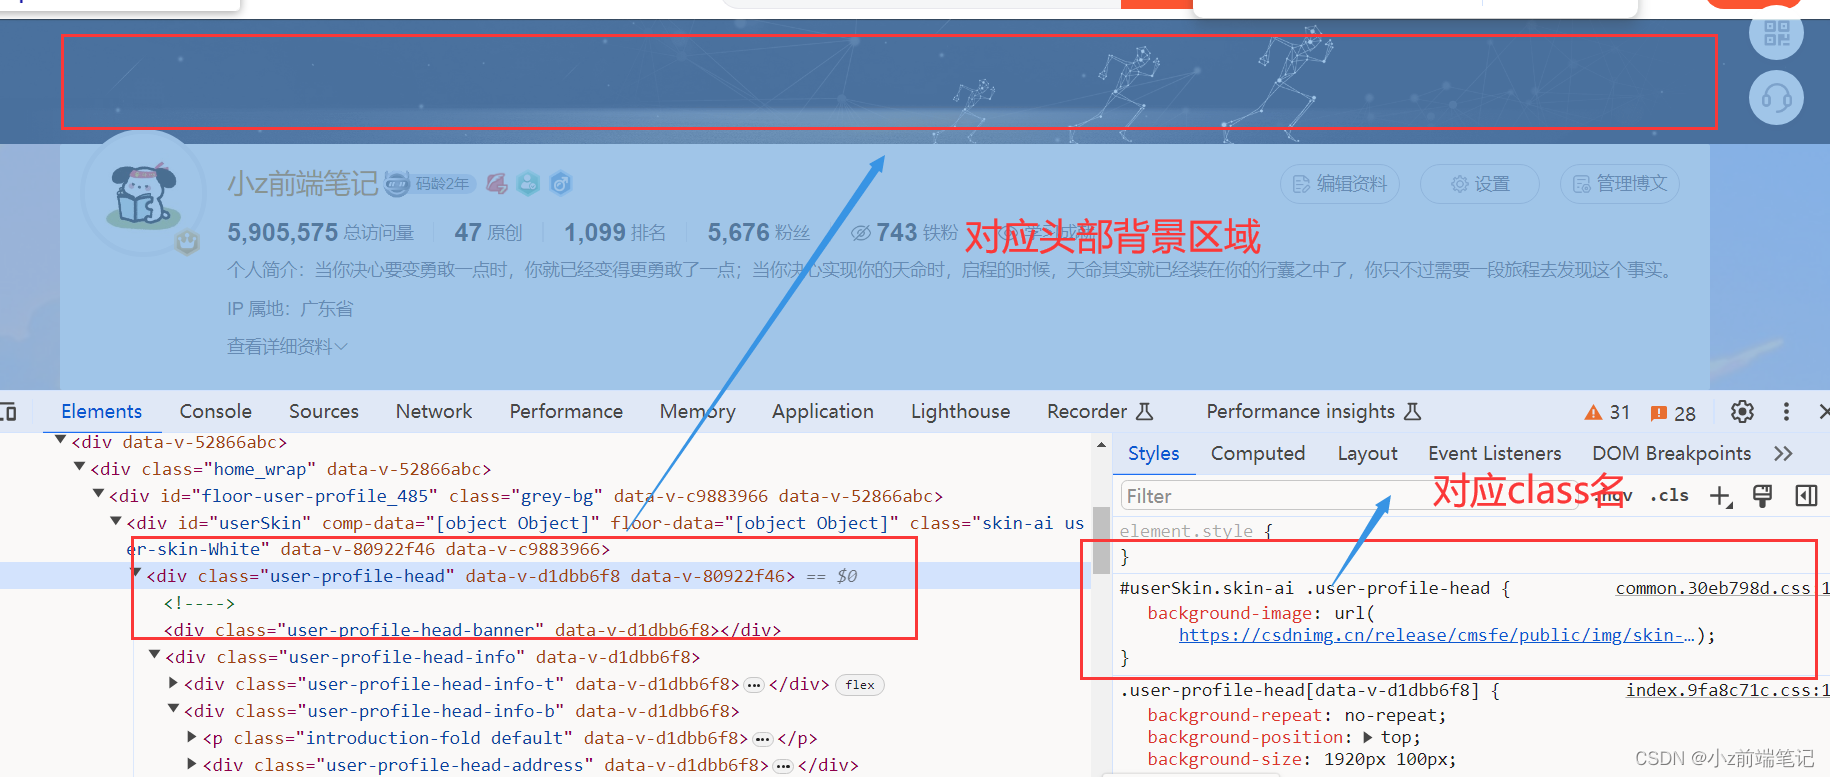
这时候我们可以在自定义模板中设置
<div><style>#userSkin.skin-ai{background:url(https://picweboss-app.gracg.com/2001697768_193a7c1ebf7da2261f26ef74aa348aa5oss.jpg_1200w.jpg) no-repeat;background-size: cover;background-attachment: fixed}#userSkin.skin-ai .user-profile-head{background-image:none;}</style></div>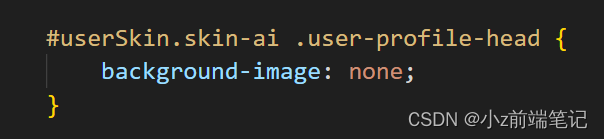
来解释一下代码
background-image: none;
这里background-image设置是none,意思是不要背景图片,这里权重足够,所以不用!important
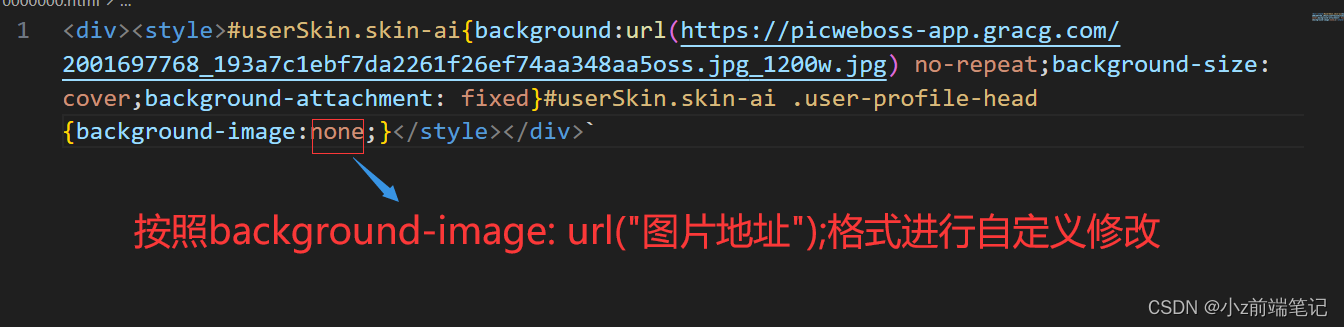
当然你也可以设置
background-image: url(“图片地址”);
在url中填入自己需要设置成头部背景的图片
可以看到我们的头部区域以及清除啦!
🎁5.3 如何DIV主题区域颜色
\( ● ⌒ ∇ ⌒ ● )/
找到背景图所在选择器
#userSkin.skin-ai .user-profile-head{background-image:none;}.user-profile-aside .user-profile-aside-common-box,.blog_extension,.user-profile-aside .user-influence-list ul li,.user-profile-head .user-profile-head-info,.navList-box .navList,.navList-box .blog-second-list,.blog-list-box,.el-input__inner,.blink-list-box,.sub-people-list-box,.live-list-box,.resources-list-box,.answer-list-box,.navList-box .ask-second-list,.answer-list-box,.navList-box ,.sub-second-list
<div><style>#userSkin.skin-ai{background:url(https://picweboss-app.gracg.com/2001697768_193a7c1ebf7da2261f26ef74aa348aa5oss.jpg_1200w.jpg) no-repeat;background-size: cover;background-attachment: fixed}#userSkin.skin-ai .user-profile-head{background-image:none;}.user-profile-aside .user-profile-aside-common-box,.blog_extension,.user-profile-aside .user-influence-list ul li,.user-profile-head .user-profile-head-info,.navList-box .navList,.navList-box .blog-second-list,.blog-list-box,.el-input__inner,.blink-list-box,.sub-people-list-box,.live-list-box,.resources-list-box,.answer-list-box,.navList-box .ask-second-list,.answer-list-box,.navList-box ,.sub-second-list{background:rgba(187, 173, 217, 0.5) !important}</style></div>
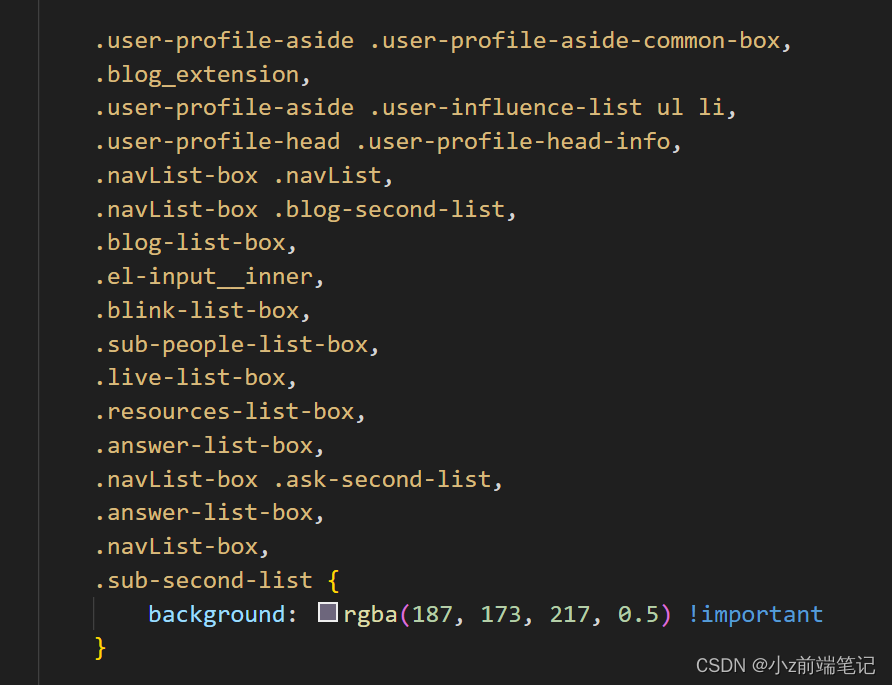
解释代码:background设置背景颜色,这里可以选择自己喜欢的颜色,这里权重不够,
!important是为了强制覆盖csdn原有的样式。
放入模板效果如下:
🎁5.4 如何DIY主页ID个性化样式
找到个人id所在选择器
.user-profile-head-name-vip
<div><style>#userSkin.skin-ai{background:url(https://picweboss-app.gracg.com/2001697768_193a7c1ebf7da2261f26ef74aa348aa5oss.jpg_1200w.jpg) no-repeat;background-size: cover;background-attachment: fixed}#userSkin.skin-ai .user-profile-head{background-image:none;}.user-profile-aside .user-profile-aside-common-box,.blog_extension,.user-profile-aside .user-influence-list ul li,.user-profile-head .user-profile-head-info,.navList-box .navList,.navList-box .blog-second-list,.blog-list-box,.el-input__inner,.blink-list-box,.sub-people-list-box,.live-list-box,.resources-list-box,.answer-list-box,.navList-box .ask-second-list,.answer-list-box,.navList-box ,.sub-second-list{background:rgba(187, 173, 217, 0.5) !important}.user-profile-head-name-vip[data-v-d1dbb6f8]{color:#00FFFD!important;font-family:华文行楷;font-size:1.8em}</style></div>
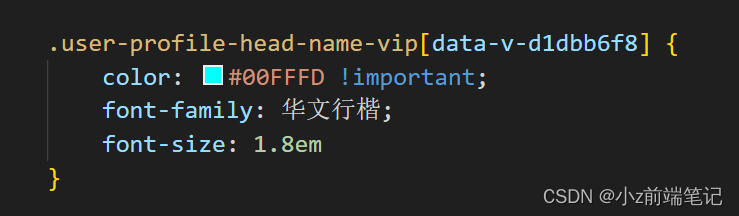
解释代码:
color是颜色;
font-family是字体;
font-size是字体大小;
这些都是可以自己变换的哦~
名字就有颜色啦

🎁5.5 如何DIV左部栏颜色
找到左部栏所在选择器
.navList-box .blog-second-list>ul>li .blog-time-filter .el-select .el-input .el-input__inner, .user-profile-aside .user-profile-aside-common-box
<div><style>#userSkin.skin-ai{background:url(https://picweboss-app.gracg.com/2001697768_193a7c1ebf7da2261f26ef74aa348aa5oss.jpg_1200w.jpg) no-repeat;background-size: cover;background-attachment: fixed}#userSkin.skin-ai .user-profile-head{background-image:none;}.user-profile-aside .user-profile-aside-common-box,.blog_extension,.user-profile-aside .user-influence-list ul li,.user-profile-head .user-profile-head-info,.navList-box .navList,.navList-box .blog-second-list,.blog-list-box,.el-input__inner,.blink-list-box,.sub-people-list-box,.live-list-box,.resources-list-box,.answer-list-box,.navList-box .ask-second-list,.answer-list-box,.navList-box ,.sub-second-list{background:rgba(187, 173, 217, 0.5) !important}.user-profile-head-name-vip[data-v-d1dbb6f8]{color:#00FFFD!important;font-family:华文行楷;font-size:1.8em}.navList-box .blog-second-list>ul>li .blog-time-filter .el-select .el-input .el-input__inner,.user-profile-aside .user-profile-aside-common-box{background: rgb(173, 255, 238, 0.5) !important}</style></div>

这里也是设置背景颜色,可以自己替换自己喜欢的
可以看到效果:
但是我们发现了不兼容的部分
找到对应的选择器:
#blogExtensionBox .blog_extension .navList-box .blog-second-list>ul>li .blog-time-filter .el-select .el-input .el-input__inner

更改代码:
<div><style>#userSkin.skin-ai{background:url(https://picweboss-app.gracg.com/2001697768_193a7c1ebf7da2261f26ef74aa348aa5oss.jpg_1200w.jpg) no-repeat;background-size: cover;background-attachment: fixed}#userSkin.skin-ai .user-profile-head{background-image:none;}.user-profile-aside .user-profile-aside-common-box,.blog_extension,.user-profile-aside .user-influence-list ul li,.user-profile-head .user-profile-head-info,.navList-box .navList,.navList-box .blog-second-list,.blog-list-box,.el-input__inner,.blink-list-box,.sub-people-list-box,.live-list-box,.resources-list-box,.answer-list-box,.navList-box .ask-second-list,.answer-list-box,.navList-box ,.sub-second-list{background:rgba(187, 173, 217, 0.5) !important}.user-profile-head-name-vip[data-v-d1dbb6f8]{color:#00FFFD!important;font-family:华文行楷;font-size:1.8em}.navList-box .blog-second-list>ul>li .blog-time-filter .el-select .el-input .el-input__inner,.user-profile-aside .user-profile-aside-common-box{background: rgb(173, 255, 238, 0.5) !important}#blogExtensionBox .blog_extension{background: #ffffff3b !important}.navList-box .blog-second-list>ul>li .blog-time-filter .el-select .el-input .el-input__inner{ background: #f9020200 !important}</style></div>
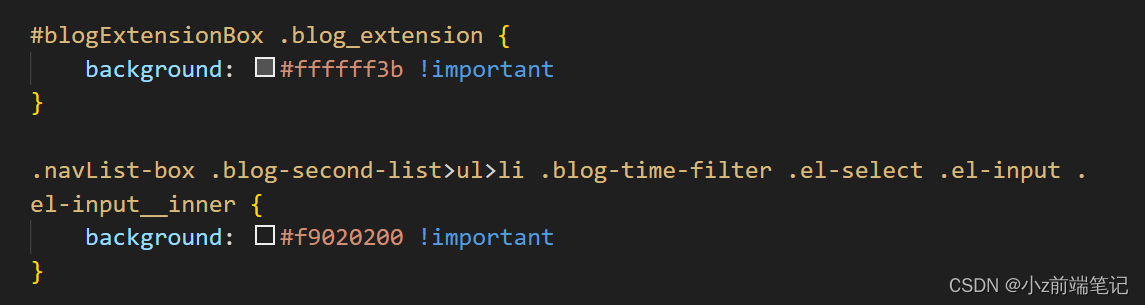
恢复正常啦

🎁5.6 如何DIV头部栏背景透明颜色
首先清空背景,确保设置颜色不会被影响
找到对应选择器:
#userSkin.skin-cookblue .user-profile-head
<div><style>#userSkin.skin-ai{background:url(https://picweboss-app.gracg.com/2001697768_193a7c1ebf7da2261f26ef74aa348aa5oss.jpg_1200w.jpg) no-repeat;background-size: cover;background-attachment: fixed}#userSkin.skin-ai .user-profile-head{background-image:none;}.user-profile-aside .user-profile-aside-common-box,.blog_extension,.user-profile-aside .user-influence-list ul li,.user-profile-head .user-profile-head-info,.navList-box .navList,.navList-box .blog-second-list,.blog-list-box,.el-input__inner,.blink-list-box,.sub-people-list-box,.live-list-box,.resources-list-box,.answer-list-box,.navList-box .ask-second-list,.answer-list-box,.navList-box ,.sub-second-list{background:rgba(187, 173, 217, 0.5) !important}.user-profile-head-name-vip[data-v-d1dbb6f8]{color:#00FFFD!important;font-family:华文行楷;font-size:1.8em}.navList-box .blog-second-list>ul>li .blog-time-filter .el-select .el-input .el-input__inner,.user-profile-aside .user-profile-aside-common-box{background: rgb(173, 255, 238, 0.5) !important}#blogExtensionBox .blog_extension{background: #ffffff3b !important}.navList-box .blog-second-list>ul>li .blog-time-filter .el-select .el-input .el-input__inner{ background: #f9020200 !important}#userSkin.skin-cookblue .user-profile-head{background:none;}</style></div>

将背景清空后,加入想要的背景色:
<div><style>#userSkin.skin-ai{background:url(https://picweboss-app.gracg.com/2001697768_193a7c1ebf7da2261f26ef74aa348aa5oss.jpg_1200w.jpg) no-repeat;background-size: cover;background-attachment: fixed}#userSkin.skin-ai .user-profile-head{background-image:none;}.user-profile-aside .user-profile-aside-common-box,.blog_extension,.user-profile-aside .user-influence-list ul li,.user-profile-head .user-profile-head-info,.navList-box .navList,.navList-box .blog-second-list,.blog-list-box,.el-input__inner,.blink-list-box,.sub-people-list-box,.live-list-box,.resources-list-box,.answer-list-box,.navList-box .ask-second-list,.answer-list-box,.navList-box ,.sub-second-list{background:rgba(187, 173, 217, 0.5) !important}.user-profile-head-name-vip[data-v-d1dbb6f8]{color:#00FFFD!important;font-family:华文行楷;font-size:1.8em}.navList-box .blog-second-list>ul>li .blog-time-filter .el-select .el-input .el-input__inner,.user-profile-aside .user-profile-aside-common-box{background: rgb(173, 255, 238, 0.5) !important}#blogExtensionBox .blog_extension{background: #ffffff3b !important}.navList-box .blog-second-list>ul>li .blog-time-filter .el-select .el-input .el-input__inner{ background: #f9020200 !important}#userSkin.skin-cookblue .user-profile-head{background:none;}#userSkin .user-profile-head .user-profile-head-info{ background: rgba(173, 216, 230, 0.5)!important}</style></div>

头部栏透明颜色设置好啦,也可以根据自己喜好更改颜色~
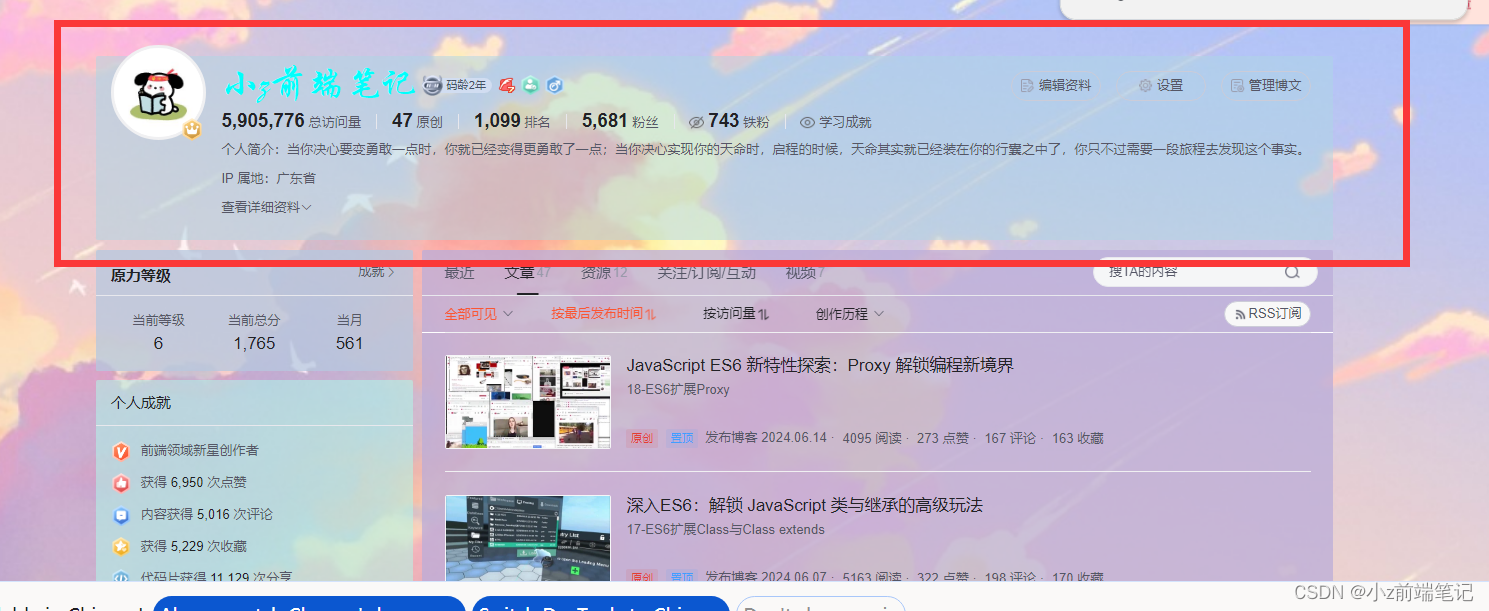
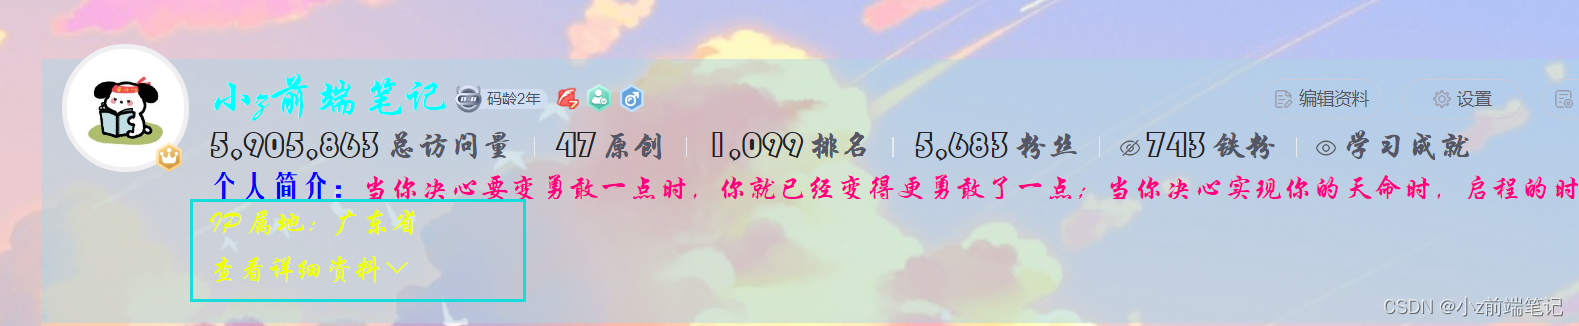
🎁5.7 如何DIV个人简介样式
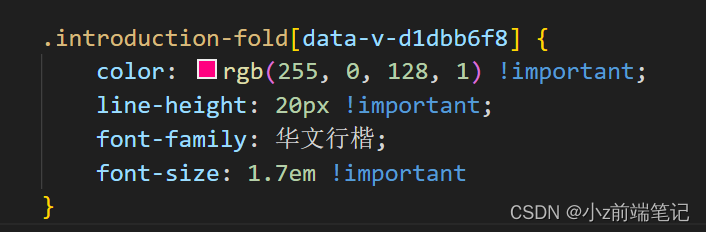
找到对应的选择器:.introduction-fold[data-v-d1dbb6f8]
<div><style>#userSkin.skin-ai{background:url(https://picweboss-app.gracg.com/2001697768_193a7c1ebf7da2261f26ef74aa348aa5oss.jpg_1200w.jpg) no-repeat;background-size: cover;background-attachment: fixed}#userSkin.skin-ai .user-profile-head{background-image:none;}.user-profile-aside .user-profile-aside-common-box,.blog_extension,.user-profile-aside .user-influence-list ul li,.user-profile-head .user-profile-head-info,.navList-box .navList,.navList-box .blog-second-list,.blog-list-box,.el-input__inner,.blink-list-box,.sub-people-list-box,.live-list-box,.resources-list-box,.answer-list-box,.navList-box .ask-second-list,.answer-list-box,.navList-box ,.sub-second-list{background:rgba(187, 173, 217, 0.5) !important}.user-profile-head-name-vip[data-v-d1dbb6f8]{color:#00FFFD!important;font-family:华文行楷;font-size:1.8em}.navList-box .blog-second-list>ul>li .blog-time-filter .el-select .el-input .el-input__inner,.user-profile-aside .user-profile-aside-common-box{background: rgb(173, 255, 238, 0.5) !important}#blogExtensionBox .blog_extension{background: #ffffff3b !important}.navList-box .blog-second-list>ul>li .blog-time-filter .el-select .el-input .el-input__inner{ background: #f9020200 !important}#userSkin.skin-cookblue .user-profile-head{background:none;}#userSkin .user-profile-head .user-profile-head-info{ background: rgba(173, 216, 230, 0.5)!important}.introduction-fold[data-v-d1dbb6f8]{color:rgb(255, 0, 128, 1)!important;line-height: 20px!important;font-family:华文行楷;font-size:1.7em!important}</style></div>
uu可以根据自己的喜好更改样式~
效果如下:

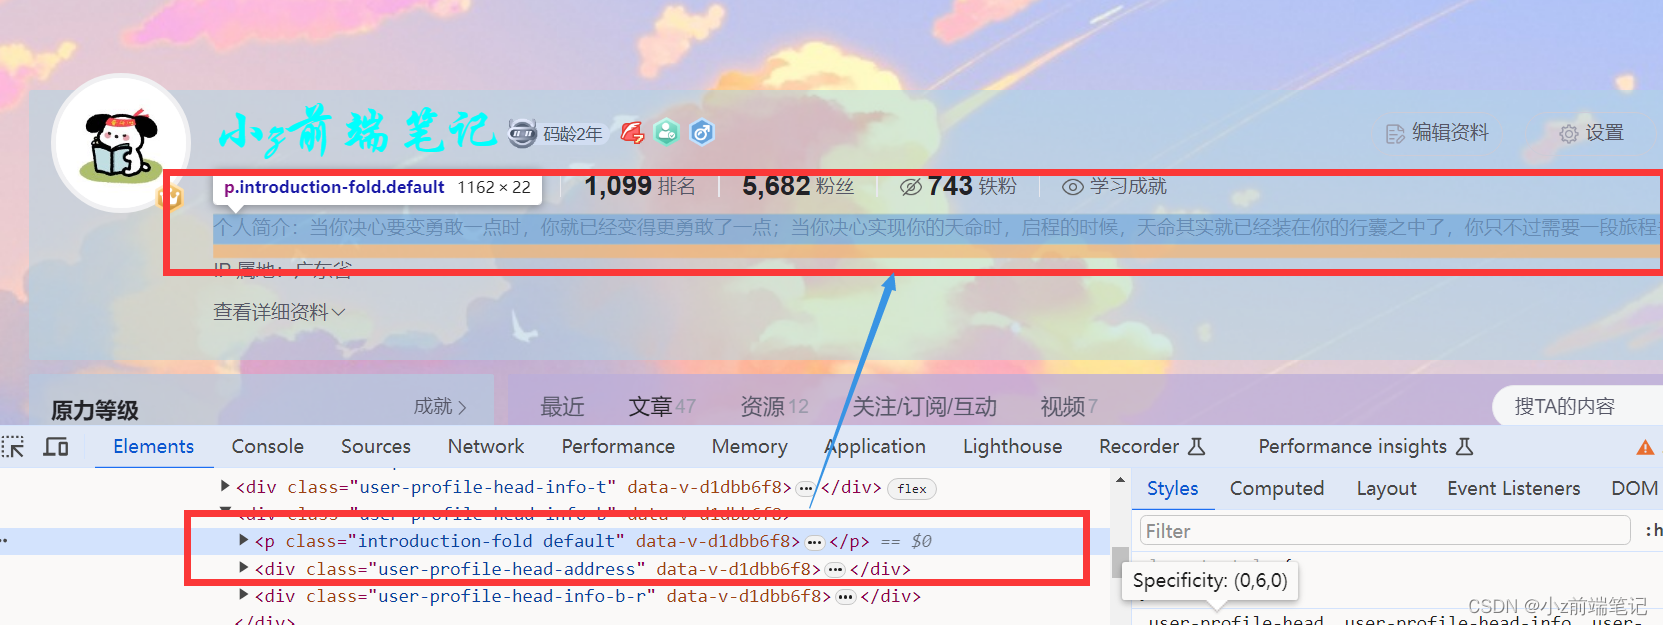
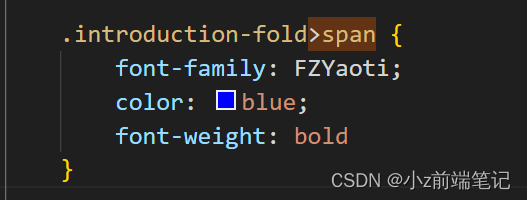
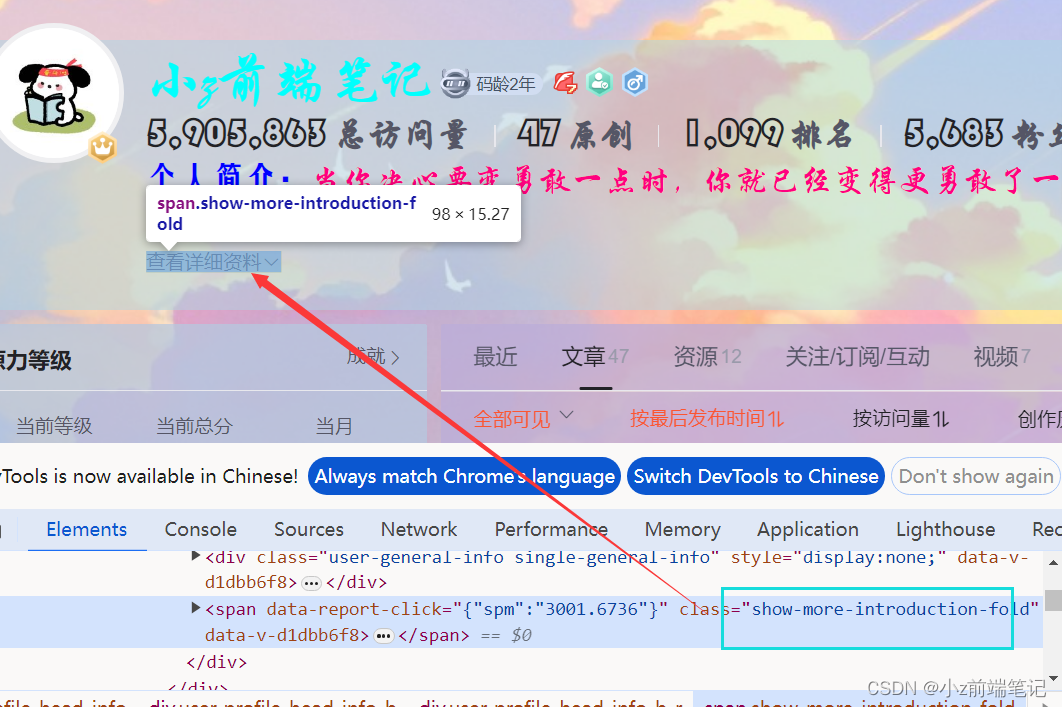
我们发现个人简介这四个字样式没变,我们继续找对应的选择器
但是这个好像没有选择器,只是一个<span>标签,那我们在浏览器里修改一下看看!important可不可以,
什么?!important也不行,我想应该是继承的关系,不知道有没有大佬可以解释一下
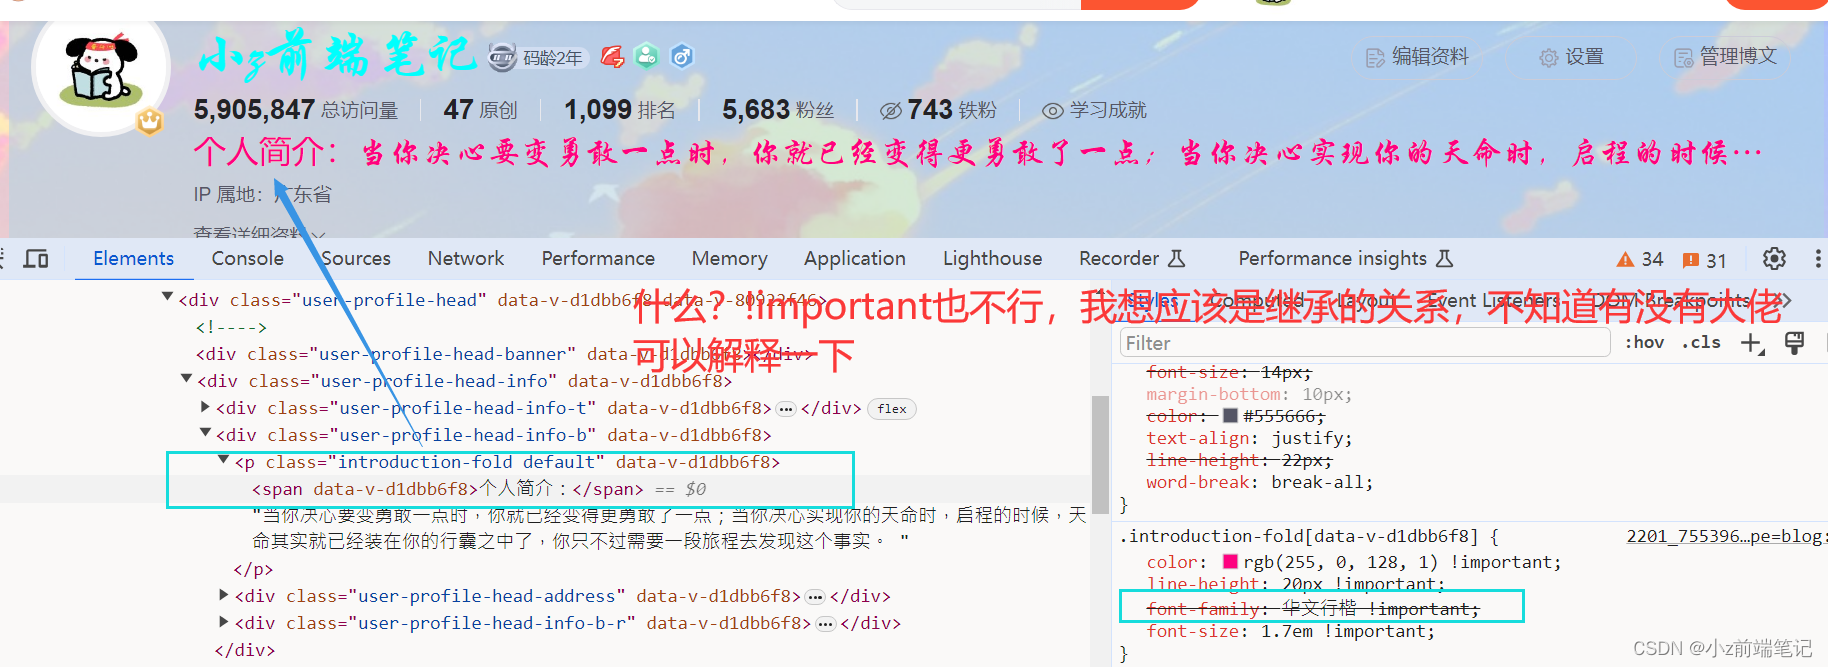
那我们就用后代选择器试试可不可以
<div><style>#userSkin.skin-ai{background:url(https://picweboss-app.gracg.com/2001697768_193a7c1ebf7da2261f26ef74aa348aa5oss.jpg_1200w.jpg) no-repeat;background-size: cover;background-attachment: fixed}#userSkin.skin-ai .user-profile-head{background-image:none;}.user-profile-aside .user-profile-aside-common-box,.blog_extension,.user-profile-aside .user-influence-list ul li,.user-profile-head .user-profile-head-info,.navList-box .navList,.navList-box .blog-second-list,.blog-list-box,.el-input__inner,.blink-list-box,.sub-people-list-box,.live-list-box,.resources-list-box,.answer-list-box,.navList-box .ask-second-list,.answer-list-box,.navList-box ,.sub-second-list{background:rgba(187, 173, 217, 0.5) !important}.user-profile-head-name-vip[data-v-d1dbb6f8]{color:#00FFFD!important;font-family:华文行楷;font-size:1.8em}.navList-box .blog-second-list>ul>li .blog-time-filter .el-select .el-input .el-input__inner,.user-profile-aside .user-profile-aside-common-box{background: rgb(173, 255, 238, 0.5) !important}#blogExtensionBox .blog_extension{background: #ffffff3b !important}.navList-box .blog-second-list>ul>li .blog-time-filter .el-select .el-input .el-input__inner{ background: #f9020200 !important}#userSkin.skin-cookblue .user-profile-head{background:none;}#userSkin .user-profile-head .user-profile-head-info{ background: rgba(173, 216, 230, 0.5)!important}.introduction-fold[data-v-d1dbb6f8]{color:rgb(255, 0, 128, 1)!important;line-height: 20px!important;font-family:华文行楷;font-size:1.7em!important}.introduction-fold>span{font-family:FZYaoti;color:blue;font-weight: bold}</style></div>
成功啦o͡͡͡͡͡͡͡͡͡͡͡͡͡͡╮(^ ਊ ^)╭o͡͡͡͡͡͡͡͡͡͡͡͡͡͡

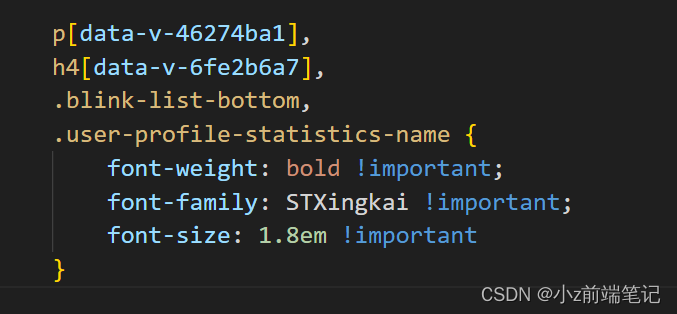
🎁5.8 如何DIV主页文章展示字体
找到对应选择器:
p[data-v-46274ba1],h4[data-v-6fe2b6a7], .blink-list-bottom, .user-profile-statistics-name

<div><style>#userSkin.skin-ai{background:url(https://picweboss-app.gracg.com/2001697768_193a7c1ebf7da2261f26ef74aa348aa5oss.jpg_1200w.jpg) no-repeat;background-size: cover;background-attachment: fixed}#userSkin.skin-ai .user-profile-head{background-image:none;}.user-profile-aside .user-profile-aside-common-box,.blog_extension,.user-profile-aside .user-influence-list ul li,.user-profile-head .user-profile-head-info,.navList-box .navList,.navList-box .blog-second-list,.blog-list-box,.el-input__inner,.blink-list-box,.sub-people-list-box,.live-list-box,.resources-list-box,.answer-list-box,.navList-box .ask-second-list,.answer-list-box,.navList-box ,.sub-second-list{background:rgba(187, 173, 217, 0.5) !important}.user-profile-head-name-vip[data-v-d1dbb6f8]{color:#00FFFD!important;font-family:华文行楷;font-size:1.8em}.navList-box .blog-second-list>ul>li .blog-time-filter .el-select .el-input .el-input__inner,.user-profile-aside .user-profile-aside-common-box{background: rgb(173, 255, 238, 0.5) !important}#blogExtensionBox .blog_extension{background: #ffffff3b !important}.navList-box .blog-second-list>ul>li .blog-time-filter .el-select .el-input .el-input__inner{ background: #f9020200 !important}#userSkin.skin-cookblue .user-profile-head{background:none;}#userSkin .user-profile-head .user-profile-head-info{ background: rgba(173, 216, 230, 0.5)!important}.introduction-fold[data-v-d1dbb6f8]{color:rgb(255, 0, 128, 1)!important;line-height: 20px!important;font-family:华文行楷;font-size:1.7em!important}.introduction-fold>span{font-family:FZYaoti;color:blue;font-weight: bold}p[data-v-46274ba1],h4[data-v-6fe2b6a7],.blink-list-bottom, .user-profile-statistics-name{ font-weight: bold!important; font-family:STXingkai!important;font-size:1.8em!important}</style></div>
成功啦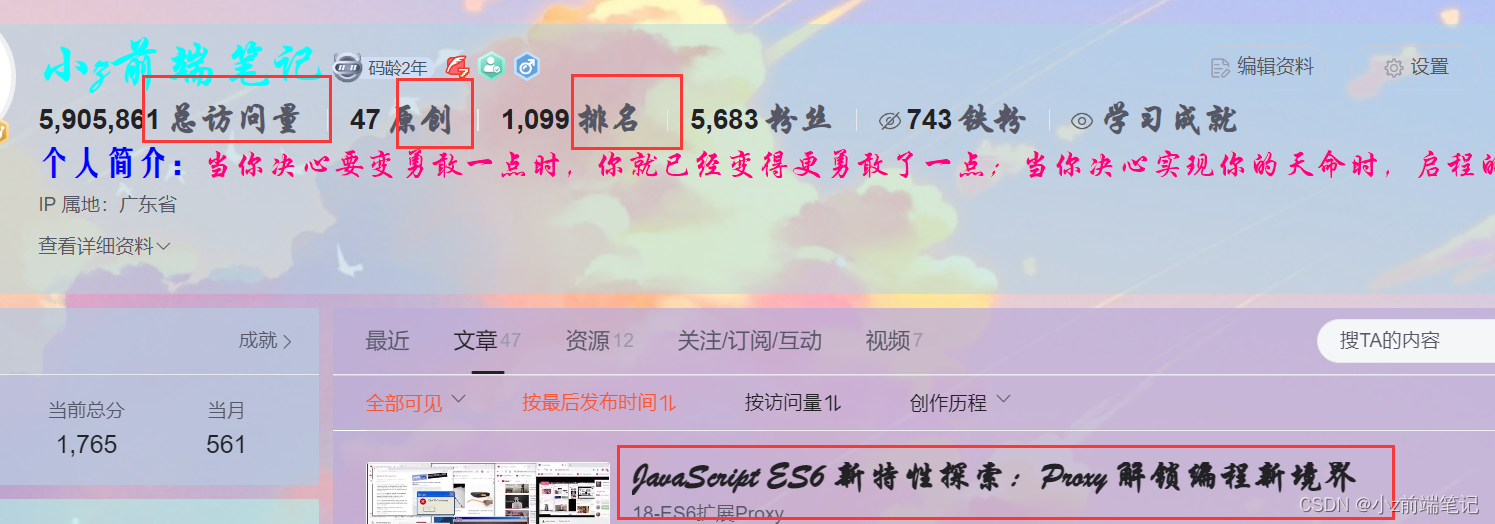
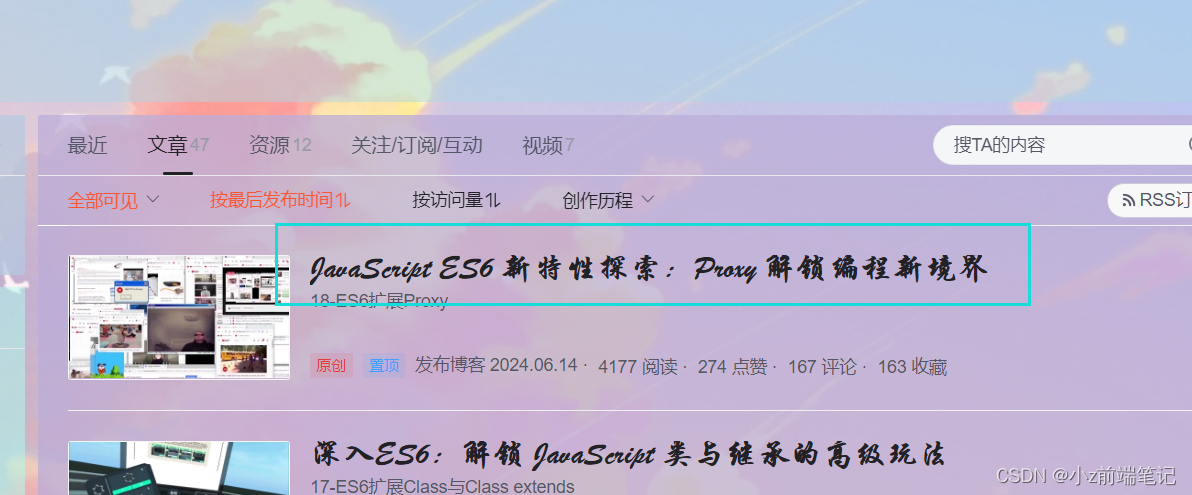
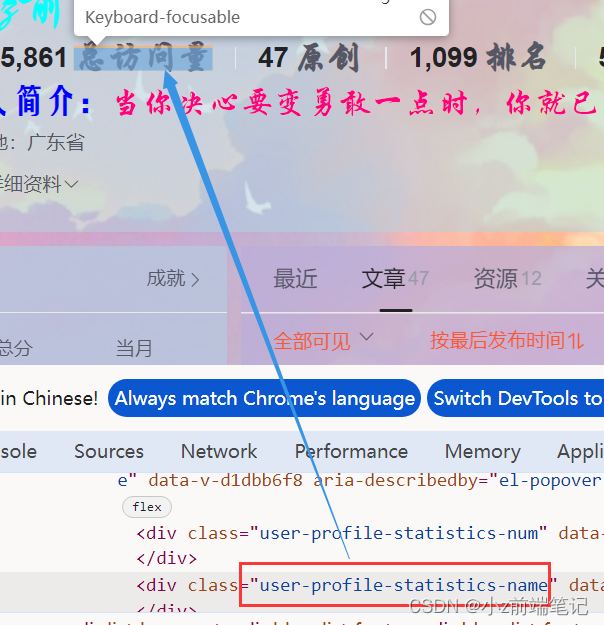
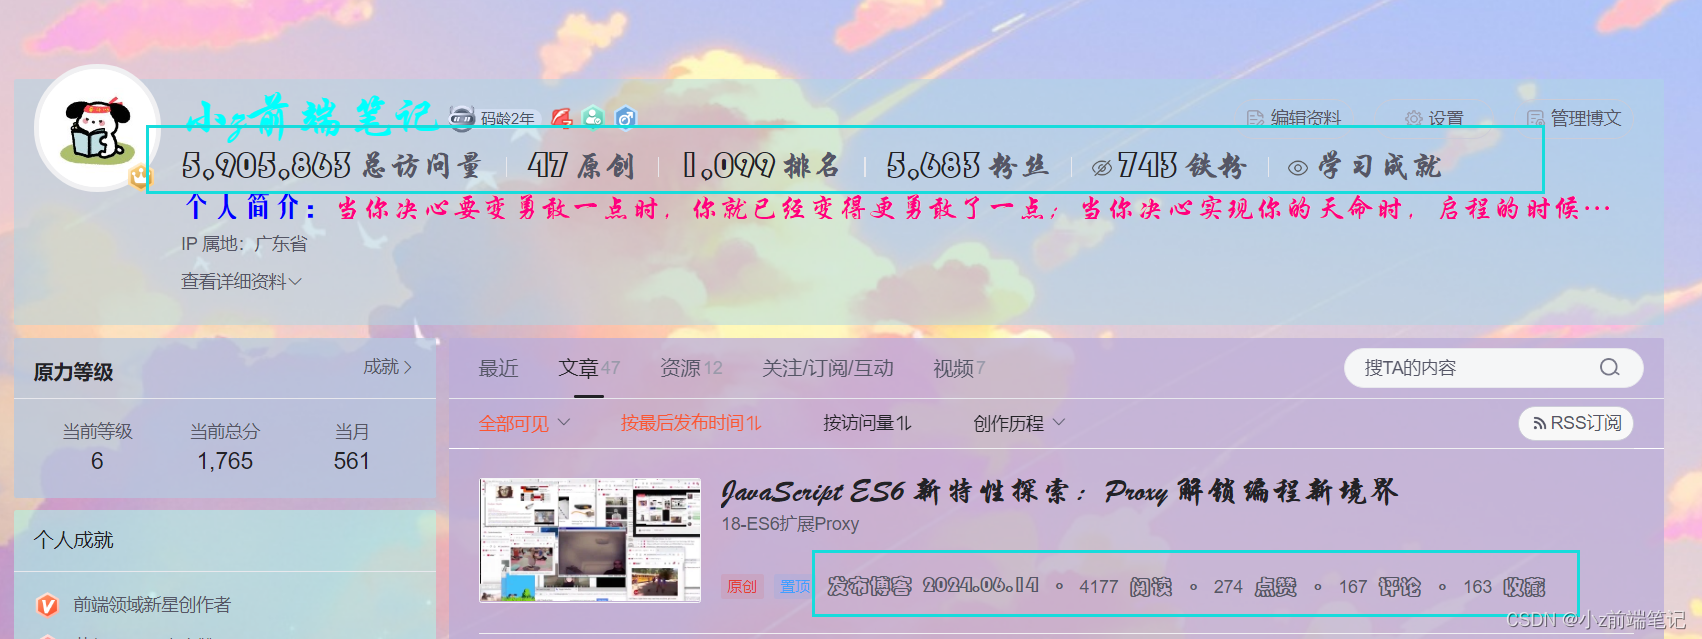
🎁5.9 如何DIV个人信息和文章数据展示效果
找到个人信息的数字对应的选择器
.user-profile-statistics-num
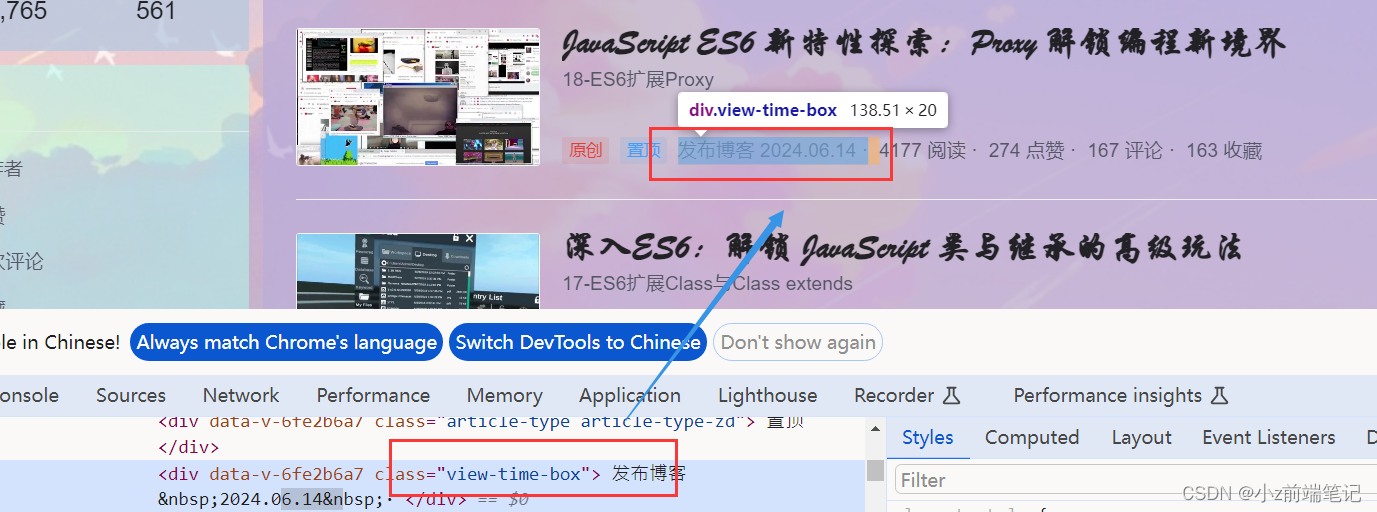
找到文章数据数字对应的选择器:
.blog-list-box .view-time-box, .two-px

<div><style>#userSkin.skin-ai{background:url(https://picweboss-app.gracg.com/2001697768_193a7c1ebf7da2261f26ef74aa348aa5oss.jpg_1200w.jpg) no-repeat;background-size: cover;background-attachment: fixed}#userSkin.skin-ai .user-profile-head{background-image:none;}.user-profile-aside .user-profile-aside-common-box,.blog_extension,.user-profile-aside .user-influence-list ul li,.user-profile-head .user-profile-head-info,.navList-box .navList,.navList-box .blog-second-list,.blog-list-box,.el-input__inner,.blink-list-box,.sub-people-list-box,.live-list-box,.resources-list-box,.answer-list-box,.navList-box .ask-second-list,.answer-list-box,.navList-box ,.sub-second-list{background:rgba(187, 173, 217, 0.5) !important}.user-profile-head-name-vip[data-v-d1dbb6f8]{color:#00FFFD!important;font-family:华文行楷;font-size:1.8em}.navList-box .blog-second-list>ul>li .blog-time-filter .el-select .el-input .el-input__inner,.user-profile-aside .user-profile-aside-common-box{background: rgb(173, 255, 238, 0.5) !important}#blogExtensionBox .blog_extension{background: #ffffff3b !important}.navList-box .blog-second-list>ul>li .blog-time-filter .el-select .el-input .el-input__inner{ background: #f9020200 !important}#userSkin.skin-cookblue .user-profile-head{background:none;}#userSkin .user-profile-head .user-profile-head-info{ background: rgba(173, 216, 230, 0.5)!important}.introduction-fold[data-v-d1dbb6f8]{color:rgb(255, 0, 128, 1)!important;line-height: 20px!important;font-family:华文行楷;font-size:1.7em!important}.introduction-fold>span{font-family:FZYaoti;color:blue;font-weight: bold}p[data-v-46274ba1],h4[data-v-6fe2b6a7],.blink-list-bottom, .user-profile-statistics-name{ font-weight: bold!important; font-family:STXingkai!important;font-size:1.8em!important}.blog-list-box .view-time-box,.user-profile-statistics-num,.two-px{font-weight: bold;font-family:STCaiyun!important;font-size:1.2em!important}</style></div>
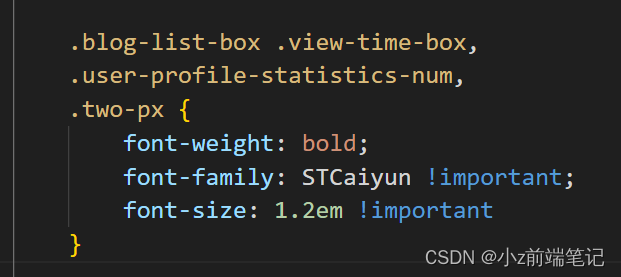
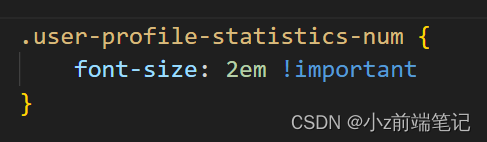
效果展示发现个人信息的字体太小了,我们调大一点
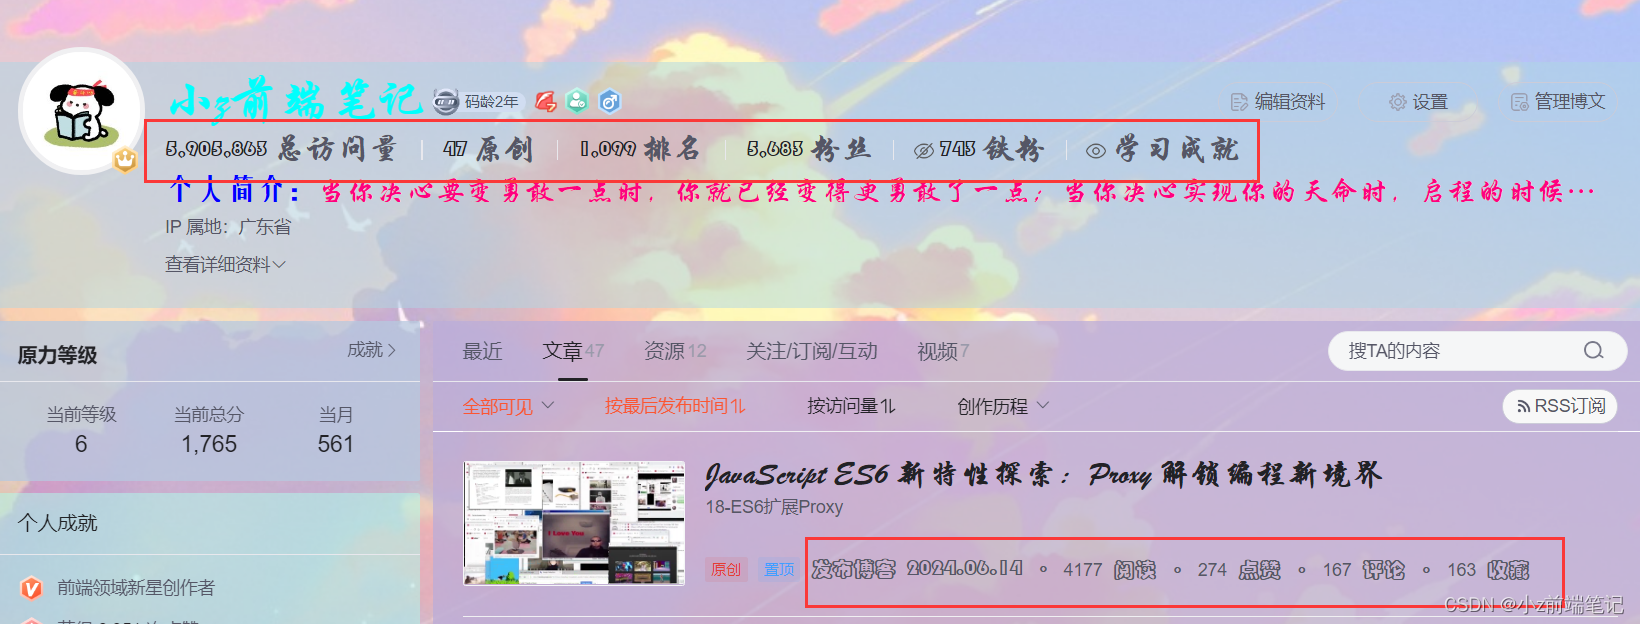
<div><style>#userSkin.skin-ai{background:url(https://picweboss-app.gracg.com/2001697768_193a7c1ebf7da2261f26ef74aa348aa5oss.jpg_1200w.jpg) no-repeat;background-size: cover;background-attachment: fixed}#userSkin.skin-ai .user-profile-head{background-image:none;}.user-profile-aside .user-profile-aside-common-box,.blog_extension,.user-profile-aside .user-influence-list ul li,.user-profile-head .user-profile-head-info,.navList-box .navList,.navList-box .blog-second-list,.blog-list-box,.el-input__inner,.blink-list-box,.sub-people-list-box,.live-list-box,.resources-list-box,.answer-list-box,.navList-box .ask-second-list,.answer-list-box,.navList-box ,.sub-second-list{background:rgba(187, 173, 217, 0.5) !important}.user-profile-head-name-vip[data-v-d1dbb6f8]{color:#00FFFD!important;font-family:华文行楷;font-size:1.8em}.navList-box .blog-second-list>ul>li .blog-time-filter .el-select .el-input .el-input__inner,.user-profile-aside .user-profile-aside-common-box{background: rgb(173, 255, 238, 0.5) !important}#blogExtensionBox .blog_extension{background: #ffffff3b !important}.navList-box .blog-second-list>ul>li .blog-time-filter .el-select .el-input .el-input__inner{ background: #f9020200 !important}#userSkin.skin-cookblue .user-profile-head{background:none;}#userSkin .user-profile-head .user-profile-head-info{ background: rgba(173, 216, 230, 0.5)!important}.introduction-fold[data-v-d1dbb6f8]{color:rgb(255, 0, 128, 1)!important;line-height: 20px!important;font-family:华文行楷;font-size:1.7em!important}.introduction-fold>span{font-family:FZYaoti;color:blue;font-weight: bold}p[data-v-46274ba1],h4[data-v-6fe2b6a7],.blink-list-bottom, .user-profile-statistics-name{ font-weight: bold!important; font-family:STXingkai!important;font-size:1.8em!important}.blog-list-box .view-time-box,.user-profile-statistics-num,.two-px{font-weight: bold;font-family:STCaiyun!important;font-size:1.2em!important}.user-profile-statistics-num{font-size:2em!important}</style></div>
可以可以,刚刚好☆ミヾ(∇≦((ヾ(≧∇≦)〃))≧∇)ノ彡☆
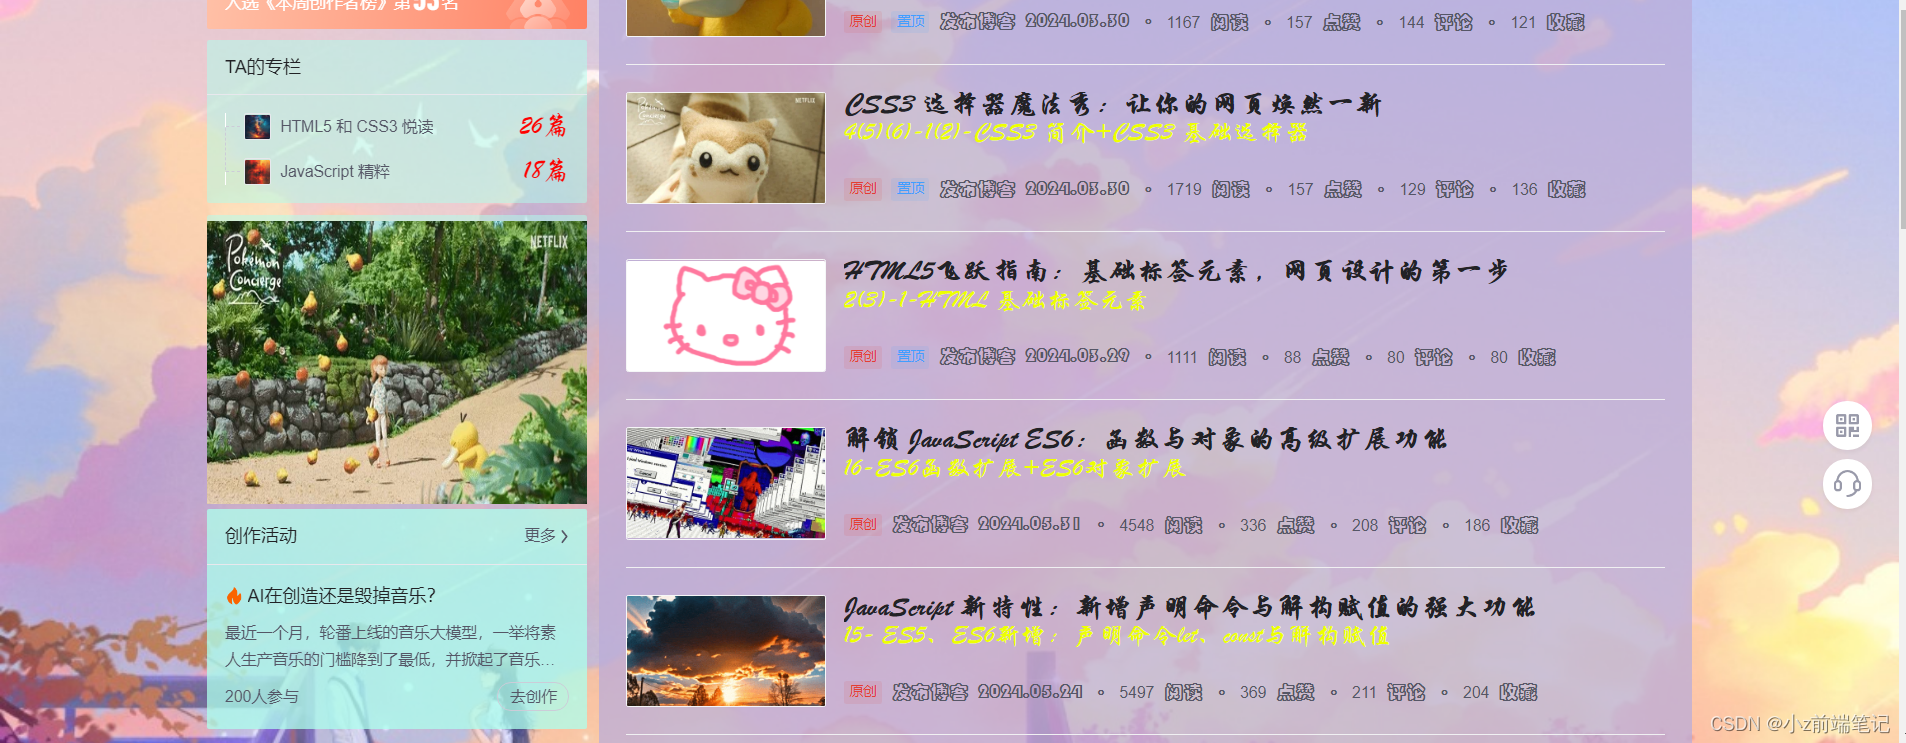
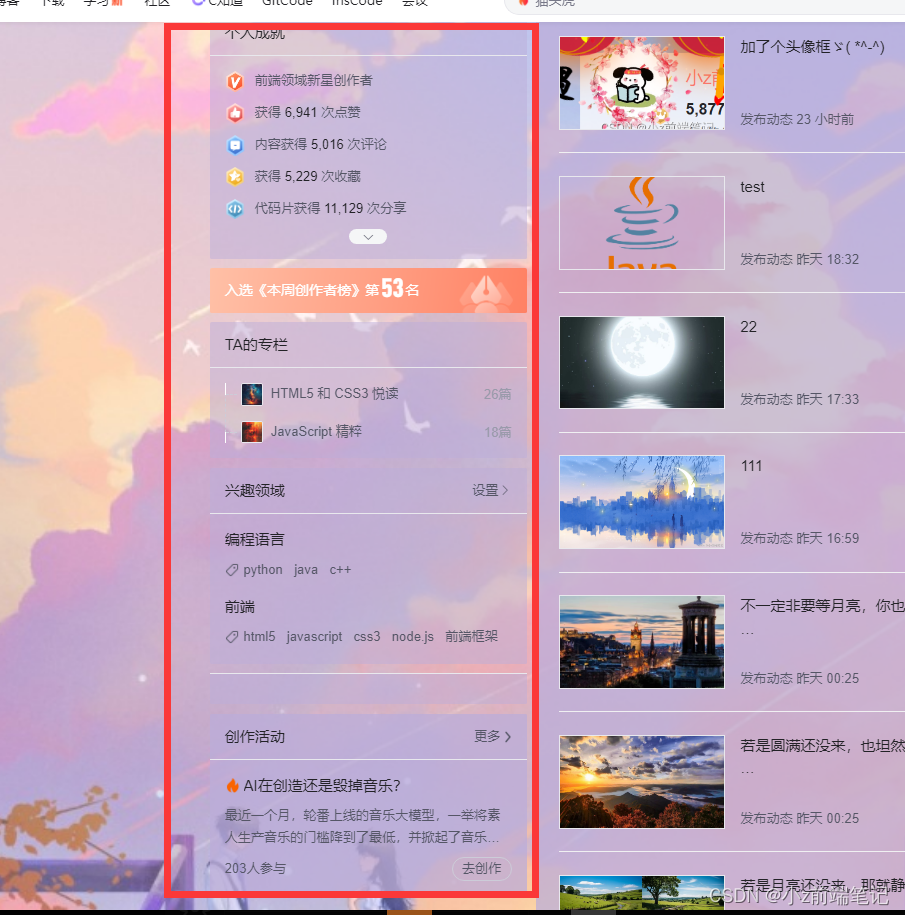
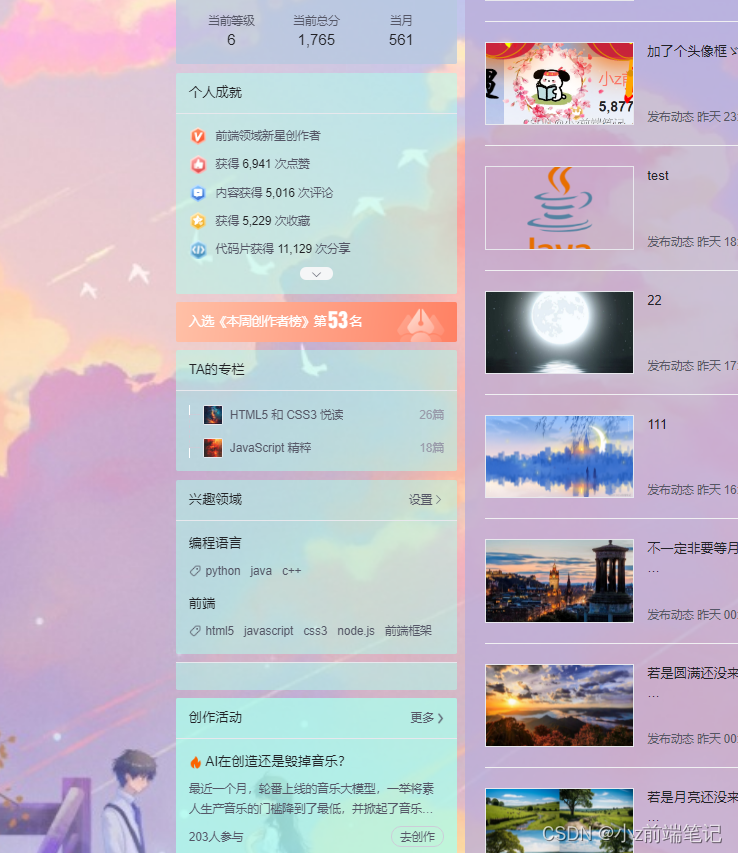
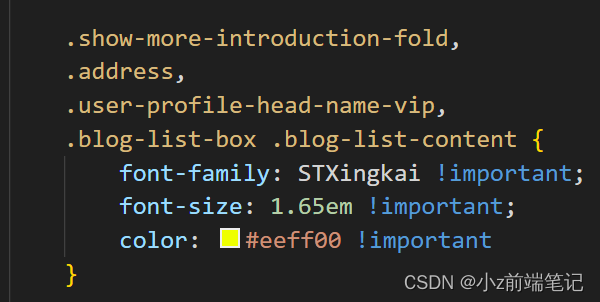
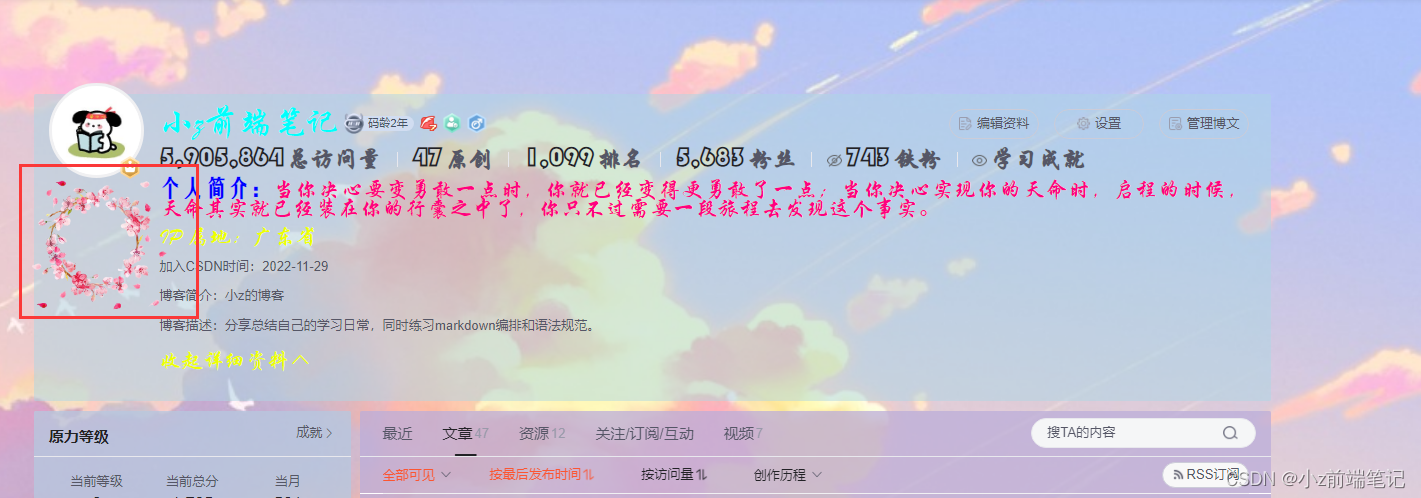
🎁5.10 如何DIV主页扩展信息
找到对应选择器
.show-more-introduction-fold,.address, .user-profile-head-name-vip,.blog-list-box .blog-list-content

<div><style>#userSkin.skin-ai{background:url(https://picweboss-app.gracg.com/2001697768_193a7c1ebf7da2261f26ef74aa348aa5oss.jpg_1200w.jpg) no-repeat;background-size: cover;background-attachment: fixed}#userSkin.skin-ai .user-profile-head{background-image:none;}.user-profile-aside .user-profile-aside-common-box,.blog_extension,.user-profile-aside .user-influence-list ul li,.user-profile-head .user-profile-head-info,.navList-box .navList,.navList-box .blog-second-list,.blog-list-box,.el-input__inner,.blink-list-box,.sub-people-list-box,.live-list-box,.resources-list-box,.answer-list-box,.navList-box .ask-second-list,.answer-list-box,.navList-box ,.sub-second-list{background:rgba(187, 173, 217, 0.5) !important}.user-profile-head-name-vip[data-v-d1dbb6f8]{color:#00FFFD!important;font-family:华文行楷;font-size:1.8em}.navList-box .blog-second-list>ul>li .blog-time-filter .el-select .el-input .el-input__inner,.user-profile-aside .user-profile-aside-common-box{background: rgb(173, 255, 238, 0.5) !important}#blogExtensionBox .blog_extension{background: #ffffff3b !important}.navList-box .blog-second-list>ul>li .blog-time-filter .el-select .el-input .el-input__inner{ background: #f9020200 !important}#userSkin.skin-cookblue .user-profile-head{background:none;}#userSkin .user-profile-head .user-profile-head-info{ background: rgba(173, 216, 230, 0.5)!important}.introduction-fold[data-v-d1dbb6f8]{color:rgb(255, 0, 128, 1)!important;line-height: 20px!important;font-family:华文行楷;font-size:1.7em!important}.introduction-fold>span{font-family:FZYaoti;color:blue;font-weight: bold}p[data-v-46274ba1],h4[data-v-6fe2b6a7],.blink-list-bottom, .user-profile-statistics-name{ font-weight: bold!important; font-family:STXingkai!important;font-size:1.8em!important}.blog-list-box .view-time-box,.user-profile-statistics-num,.two-px{font-weight: bold;font-family:STCaiyun!important;font-size:1.2em!important}.user-profile-statistics-num{font-size:2em!important}.show-more-introduction-fold,.address ,.user-profile-head-name-vip,.blog-list-box .blog-list-content{font-family:STXingkai!important;font-size:1.65em!important;color:#eeff00!important}</style></div>
效果展示:
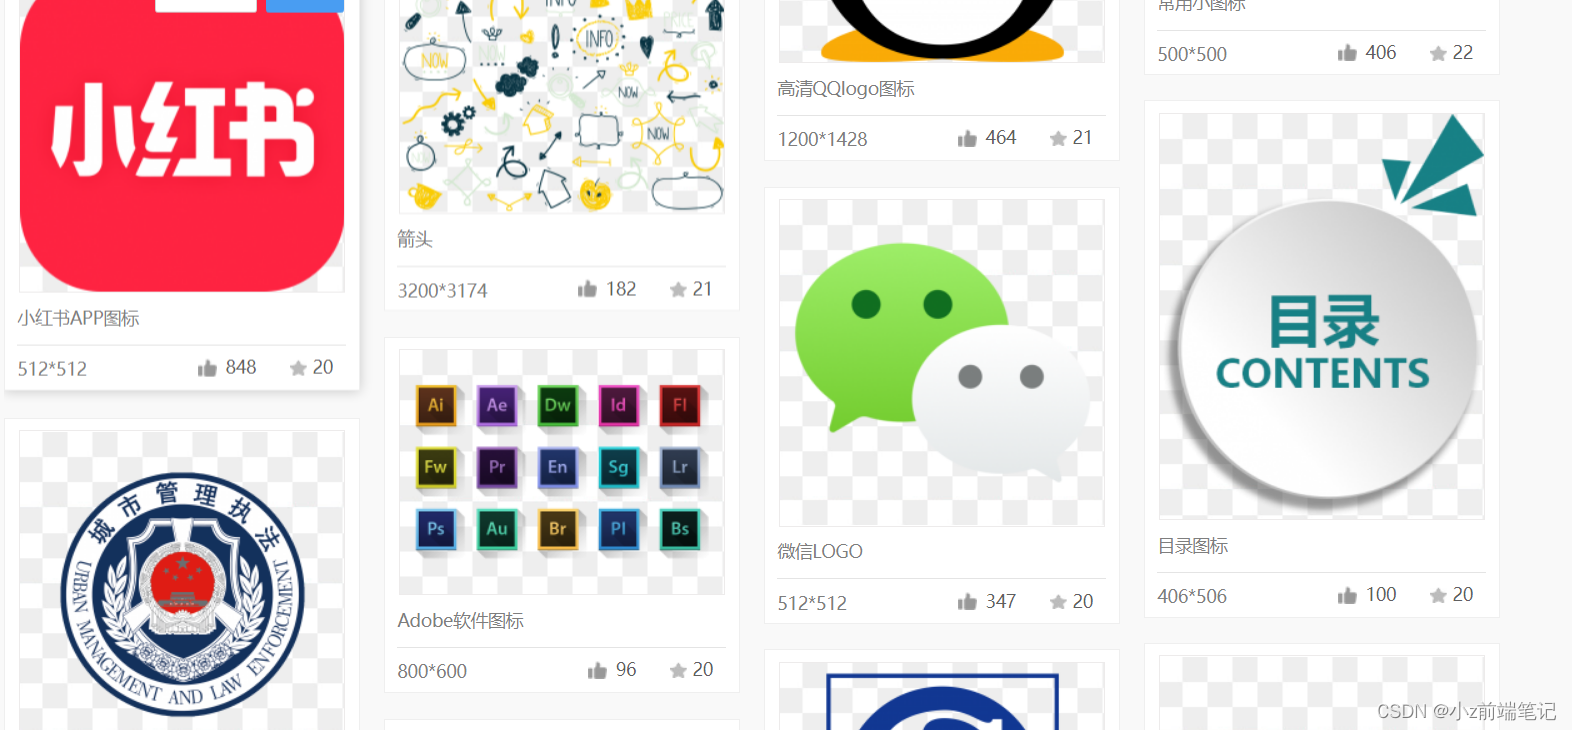
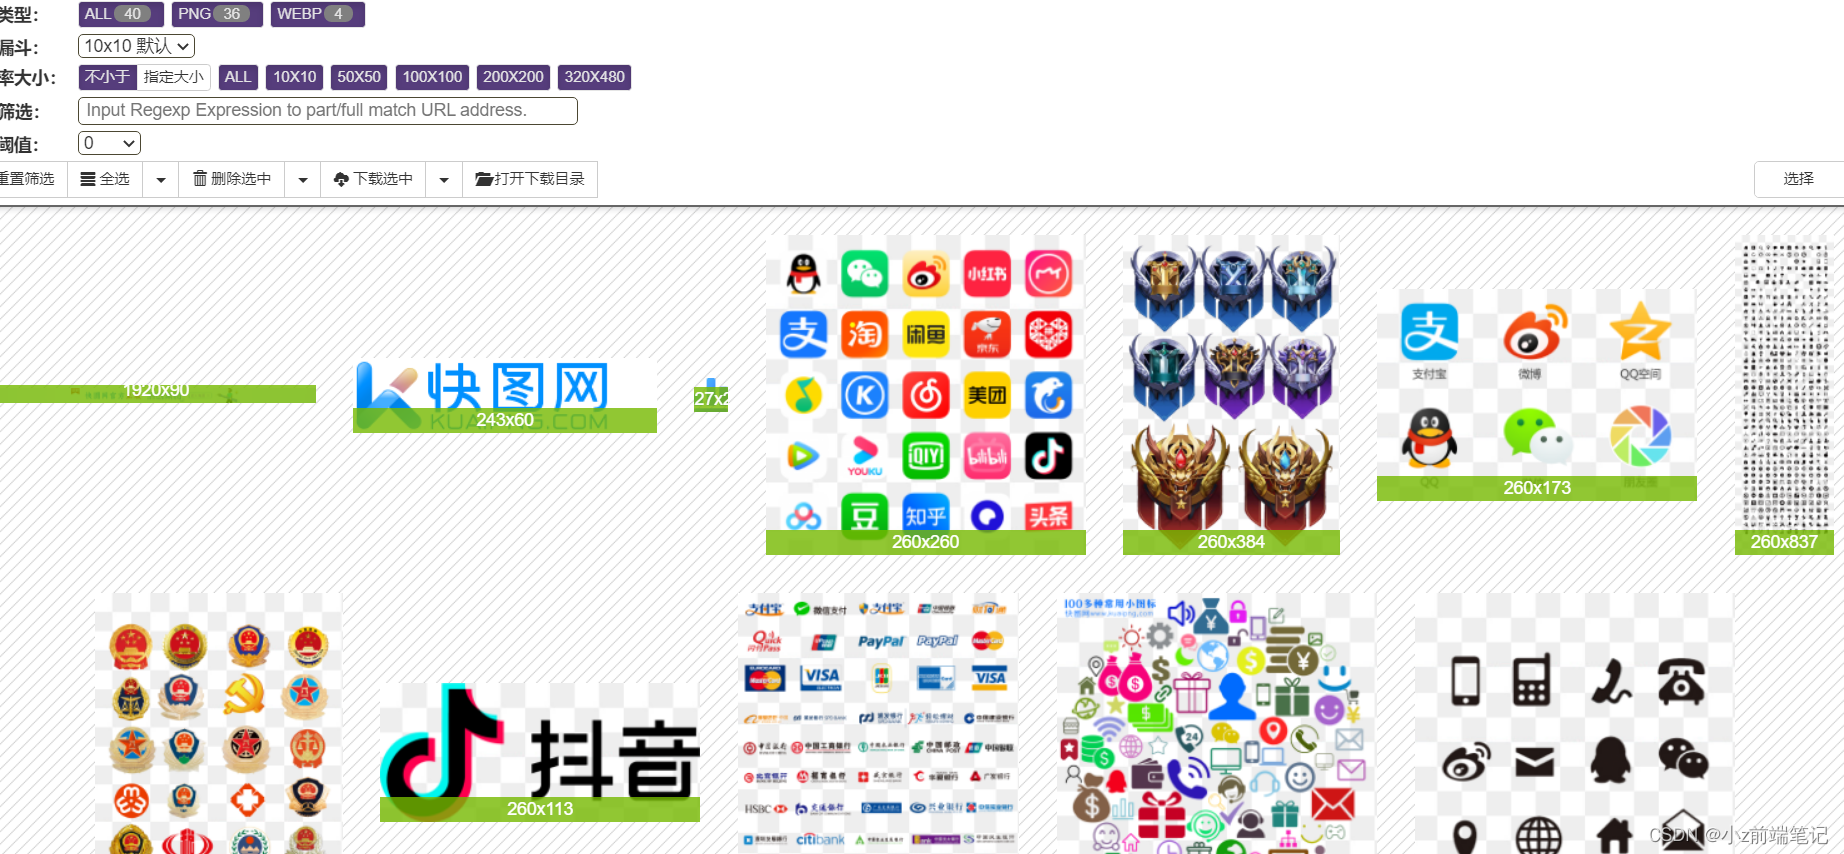
🎲6 如何制作背景透明的免抠图标
我找的是
快图网http://www.kuaipng.com/sucai/95734.html
搜索图标后有各种已经扣好的图片
但是好像只能下载一次,后面要开vip
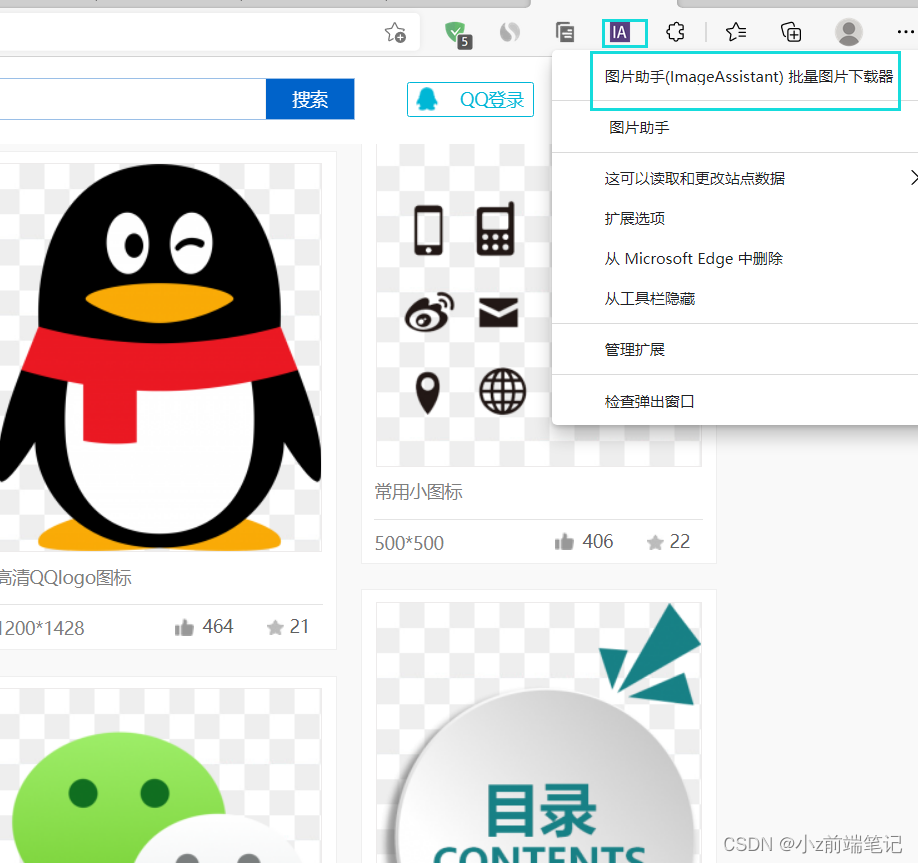
没事,还有办法!
在浏览器扩展商店找到图片助手点击下载后
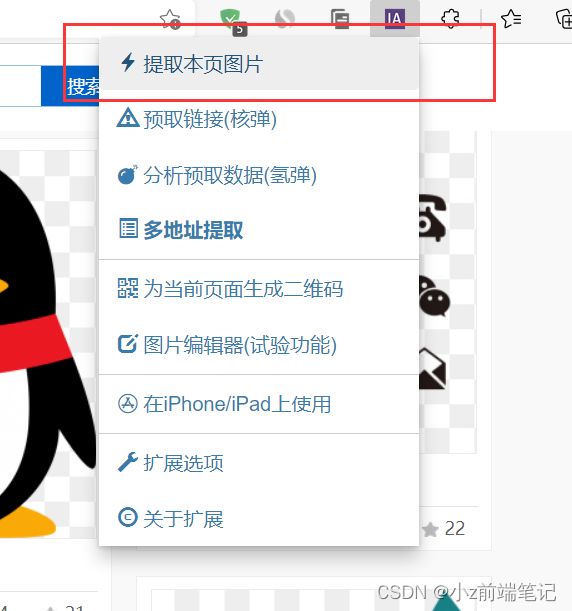
在页面找到图标点击提取本页图片
我们可以在这里下载以后截取的图片,但是这个是没有抠好的
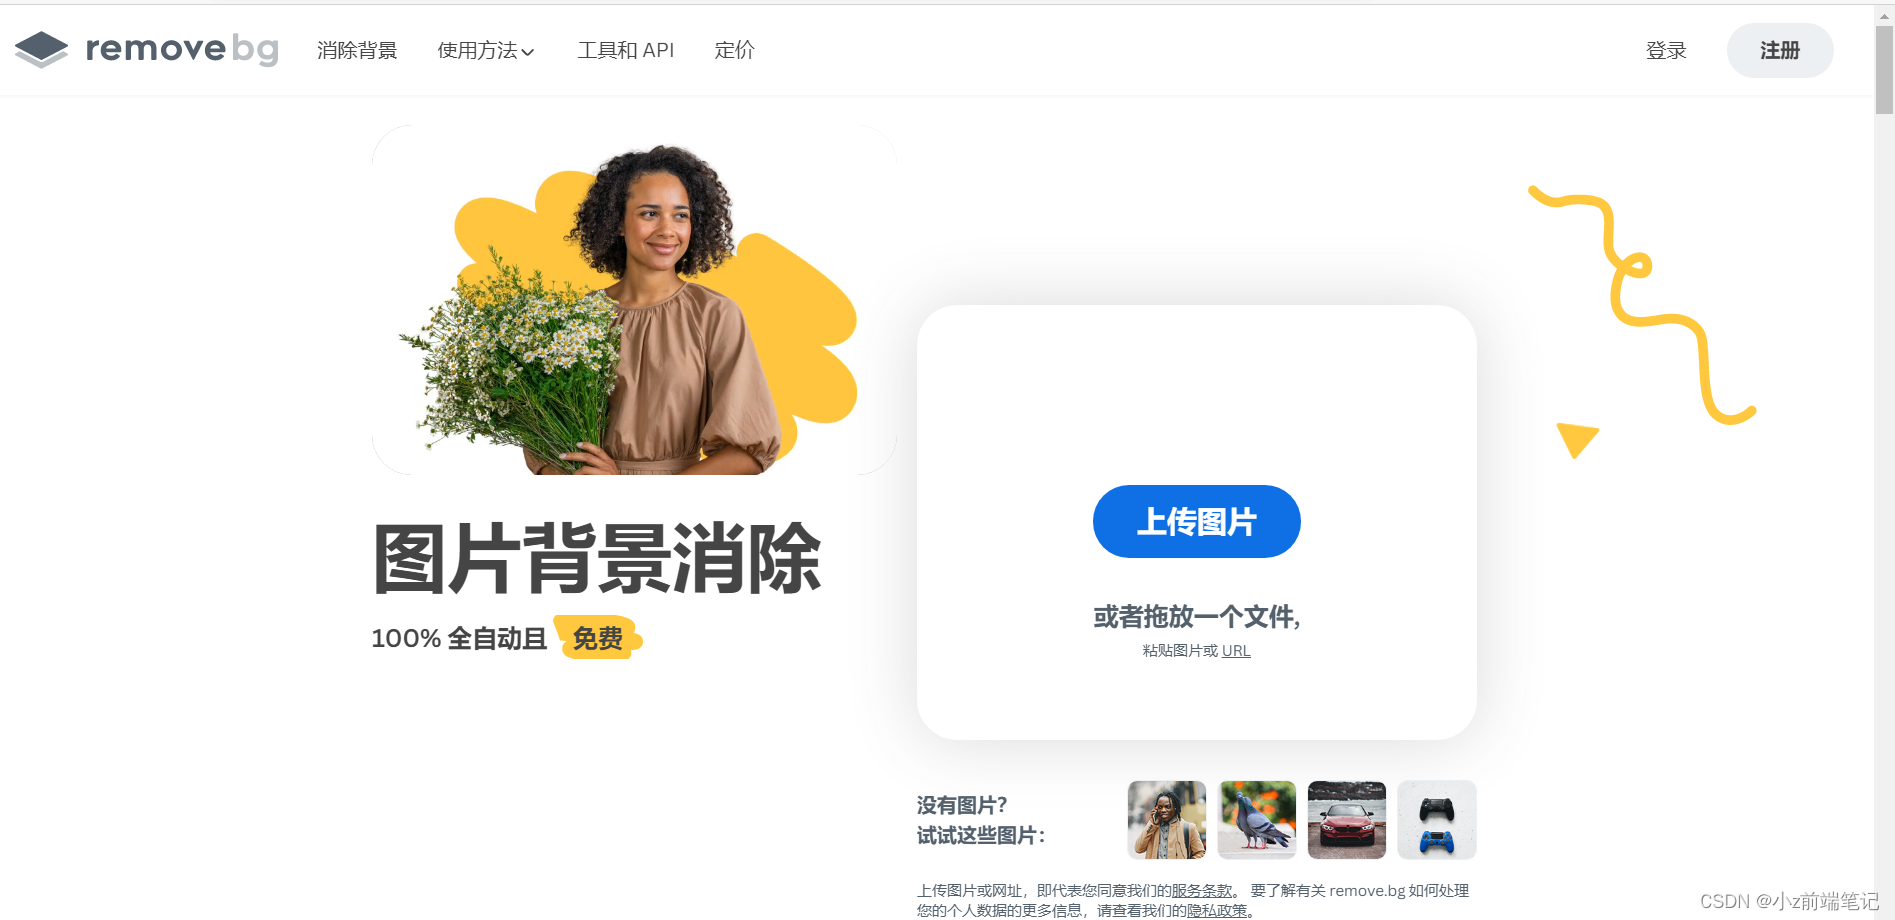
我们去抠图网https://www.remove.bg/zh把图片抠出来
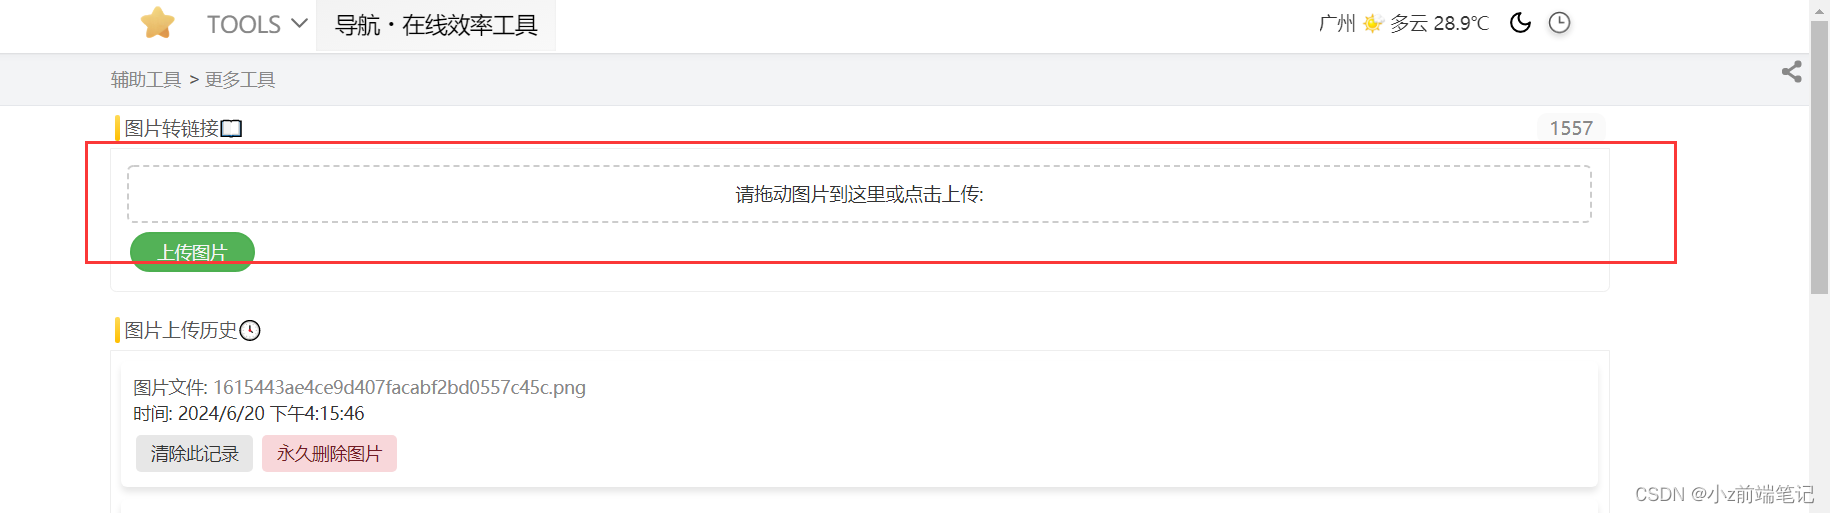
最后去生成一个图片在线链接
在线生成图片链接https://www.gptkong.com/tools/image_to_link
拿着这个链接就可以去做我们的图标啦

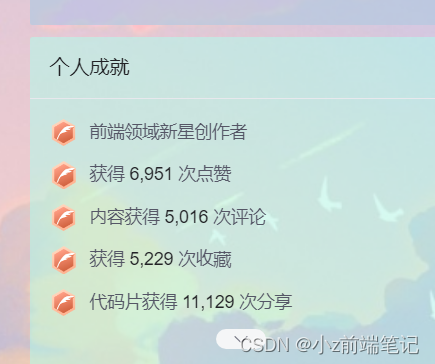
🎲7 如何DIV系统自带的认证图标
没错,系统自带的黄v也可以修改!
我们发现图标是内联样式,我们不能直接用li,因为主页中不止这一个li,那我们就使用后代选择器,使用一个有设置class的父级元素去绑定它的位置,这里我们选择了离i最近的<ul>,因此我们找到的选择器是.aside-common-box-achievement li
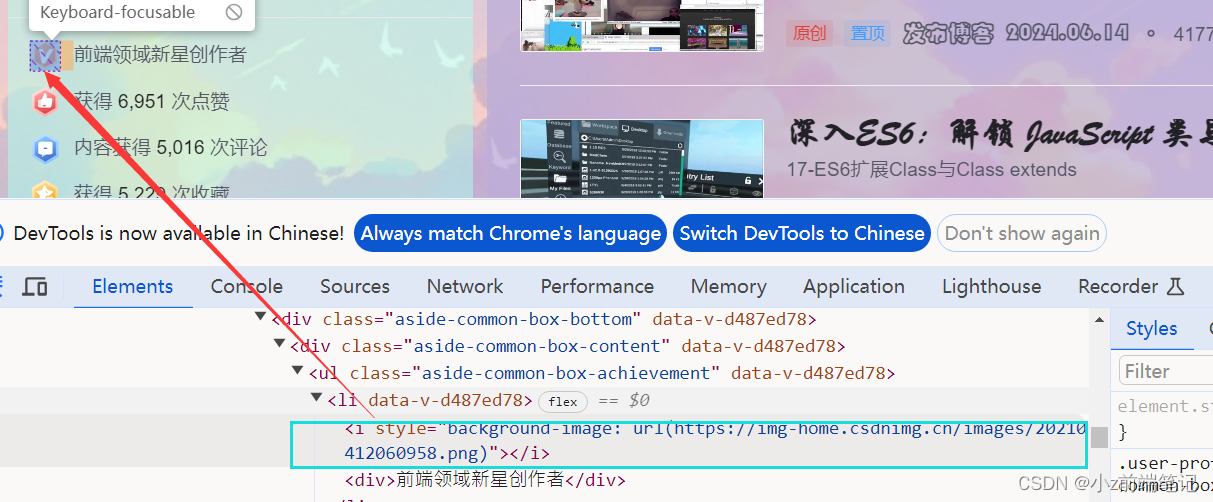
<div><style>#userSkin.skin-ai{background:url(https://picweboss-app.gracg.com/2001697768_193a7c1ebf7da2261f26ef74aa348aa5oss.jpg_1200w.jpg) no-repeat;background-size: cover;background-attachment: fixed}#userSkin.skin-ai .user-profile-head{background-image:none;}.user-profile-aside .user-profile-aside-common-box,.blog_extension,.user-profile-aside .user-influence-list ul li,.user-profile-head .user-profile-head-info,.navList-box .navList,.navList-box .blog-second-list,.blog-list-box,.el-input__inner,.blink-list-box,.sub-people-list-box,.live-list-box,.resources-list-box,.answer-list-box,.navList-box .ask-second-list,.answer-list-box,.navList-box ,.sub-second-list{background:rgba(187, 173, 217, 0.5) !important}.user-profile-head-name-vip[data-v-d1dbb6f8]{color:#00FFFD!important;font-family:华文行楷;font-size:1.8em}.navList-box .blog-second-list>ul>li .blog-time-filter .el-select .el-input .el-input__inner,.user-profile-aside .user-profile-aside-common-box{background: rgb(173, 255, 238, 0.5) !important}#blogExtensionBox .blog_extension{background: #ffffff3b !important}.navList-box .blog-second-list>ul>li .blog-time-filter .el-select .el-input .el-input__inner{ background: #f9020200 !important}#userSkin.skin-cookblue .user-profile-head{background:none;}#userSkin .user-profile-head .user-profile-head-info{ background: rgba(173, 216, 230, 0.5)!important}.introduction-fold[data-v-d1dbb6f8]{color:rgb(255, 0, 128, 1)!important;line-height: 20px!important;font-family:华文行楷;font-size:1.7em!important}.introduction-fold>span{font-family:FZYaoti;color:blue;font-weight: bold}p[data-v-46274ba1],h4[data-v-6fe2b6a7],.blink-list-bottom, .user-profile-statistics-name{ font-weight: bold!important; font-family:STXingkai!important;font-size:1.8em!important}.blog-list-box .view-time-box,.user-profile-statistics-num,.two-px{font-weight: bold;font-family:STCaiyun!important;font-size:1.2em!important}.user-profile-statistics-num{font-size:2em!important}.show-more-introduction-fold,.address ,.user-profile-head-name-vip,.blog-list-box .blog-list-content{font-family:STXingkai!important;font-size:1.65em!important;color:#eeff00!important} .aside-common-box-content i {background-image: url(https://img-home.csdnimg.cn/images/20210114022826.png) !important}</style></div>

这里我使用的是一个博客专家的图标,选择的图片最好是抠图抠出来的底部是透明的比较适合,抠图方法在上面,以下是效果展示:
🎲8 在系统原有基础上DIV新标签增加页面内容-应用CSS定位
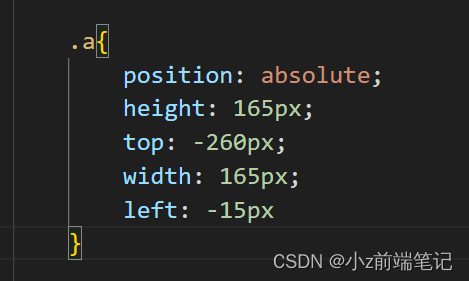
🎁8.1 如何给头像加上头像框(静态贴图)
CSDN页面绝对定位的x,y轴是这样子的:
<div><img class="a" src="https://picture.gptkong.com/20240619/23170053c526f04519aae1ebdb8538628e.png"><style>#userSkin.skin-ai{background:url(https://picweboss-app.gracg.com/2001697768_193a7c1ebf7da2261f26ef74aa348aa5oss.jpg_1200w.jpg) no-repeat;background-size: cover;background-attachment: fixed}#userSkin.skin-ai .user-profile-head{background-image:none;}.user-profile-aside .user-profile-aside-common-box,.blog_extension,.user-profile-aside .user-influence-list ul li,.user-profile-head .user-profile-head-info,.navList-box .navList,.navList-box .blog-second-list,.blog-list-box,.el-input__inner,.blink-list-box,.sub-people-list-box,.live-list-box,.resources-list-box,.answer-list-box,.navList-box .ask-second-list,.answer-list-box,.navList-box ,.sub-second-list{background:rgba(187, 173, 217, 0.5) !important}.user-profile-head-name-vip[data-v-d1dbb6f8]{color:#00FFFD!important;font-family:华文行楷;font-size:1.8em}.navList-box .blog-second-list>ul>li .blog-time-filter .el-select .el-input .el-input__inner,.user-profile-aside .user-profile-aside-common-box{background: rgb(173, 255, 238, 0.5) !important}#blogExtensionBox .blog_extension{background: #ffffff3b !important}.navList-box .blog-second-list>ul>li .blog-time-filter .el-select .el-input .el-input__inner{ background: #f9020200 !important}#userSkin.skin-cookblue .user-profile-head{background:none;}#userSkin .user-profile-head .user-profile-head-info{ background: rgba(173, 216, 230, 0.5)!important}.introduction-fold[data-v-d1dbb6f8]{color:rgb(255, 0, 128, 1)!important;line-height: 20px!important;font-family:华文行楷;font-size:1.7em!important}.introduction-fold>span{font-family:FZYaoti;color:blue;font-weight: bold}p[data-v-46274ba1],h4[data-v-6fe2b6a7],.blink-list-bottom, .user-profile-statistics-name{ font-weight: bold!important; font-family:STXingkai!important;font-size:1.8em!important}.blog-list-box .view-time-box,.user-profile-statistics-num,.two-px{font-weight: bold;font-family:STCaiyun!important;font-size:1.2em!important}.user-profile-statistics-num{font-size:2em!important}.show-more-introduction-fold,.address ,.user-profile-head-name-vip,.blog-list-box .blog-list-content{font-family:STXingkai!important;font-size:1.65em!important;color:#eeff00!important} .aside-common-box-content i {background-image: url(https://picture.gptkong.com/20240620/1615443ae4ce9d407facabf2bd0557c45c.png) !important} .a,.b{position: absolute;height:165px;top: -260px; width:165px;left:-15px}</style></div>
这里只放了一个<img>标签,之所以class设置这么简短,是因为自定义模块有字数限制,代码能省则省呀

这里我用了一个绝对定位,对准了头像位置,参数直接用就好了
最终效果:
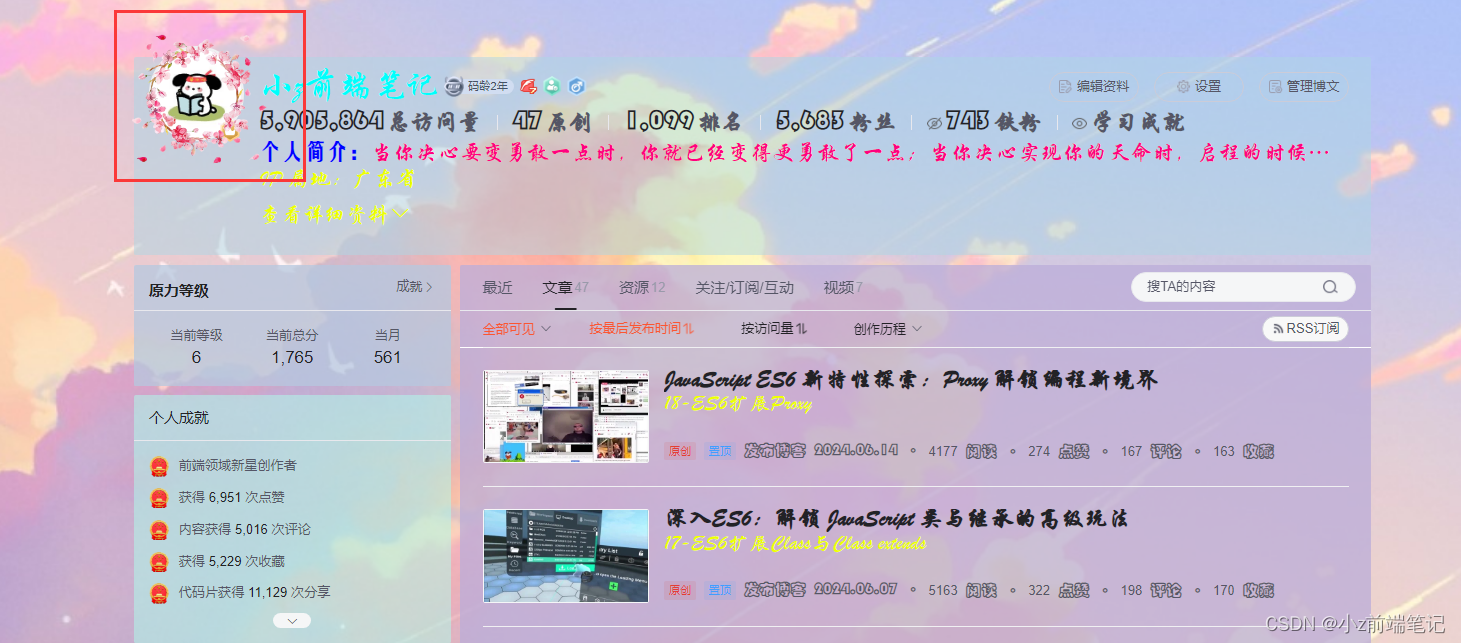
缺点:点开详情资料的时候页面被拉下来,这个位置也会被拉下来,不知道有没有大佬有更好的解决方法
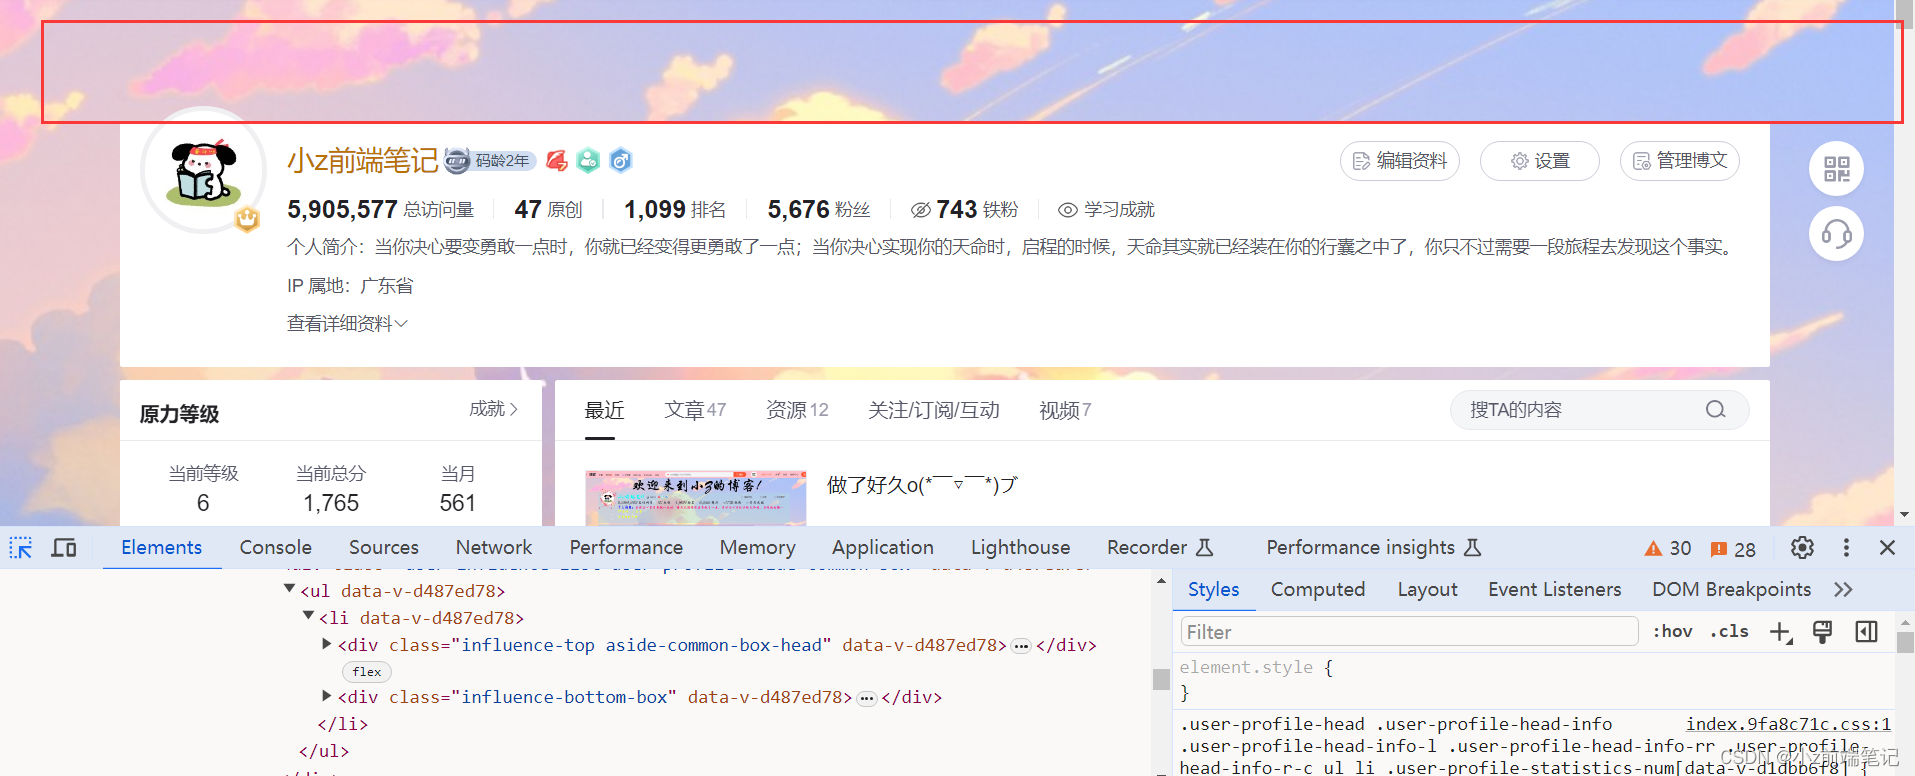
🎁8.2 如何在主页最上方加段醒目的欢迎语
<div><p class="b">欢迎来到小Z的博客!</p><img class="a" src="https://picture.gptkong.com/20240619/23170053c526f04519aae1ebdb8538628e.png"><style>#userSkin.skin-ai{background:url(https://picweboss-app.gracg.com/2001697768_193a7c1ebf7da2261f26ef74aa348aa5oss.jpg_1200w.jpg) no-repeat;background-size: cover;background-attachment: fixed}#userSkin.skin-ai .user-profile-head{background-image:none;}.user-profile-aside .user-profile-aside-common-box,.blog_extension,.user-profile-aside .user-influence-list ul li,.user-profile-head .user-profile-head-info,.navList-box .navList,.navList-box .blog-second-list,.blog-list-box,.el-input__inner,.blink-list-box,.sub-people-list-box,.live-list-box,.resources-list-box,.answer-list-box,.navList-box .ask-second-list,.answer-list-box,.navList-box ,.sub-second-list{background:rgba(187, 173, 217, 0.5) !important}.user-profile-head-name-vip[data-v-d1dbb6f8]{color:#00FFFD!important;font-family:华文行楷;font-size:1.8em}.navList-box .blog-second-list>ul>li .blog-time-filter .el-select .el-input .el-input__inner,.user-profile-aside .user-profile-aside-common-box{background: rgb(173, 255, 238, 0.5) !important}#blogExtensionBox .blog_extension{background: #ffffff3b !important}.navList-box .blog-second-list>ul>li .blog-time-filter .el-select .el-input .el-input__inner{ background: #f9020200 !important}#userSkin.skin-cookblue .user-profile-head{background:none;}#userSkin .user-profile-head .user-profile-head-info{ background: rgba(173, 216, 230, 0.5)!important}.introduction-fold[data-v-d1dbb6f8]{color:rgb(255, 0, 128, 1)!important;line-height: 20px!important;font-family:华文行楷;font-size:1.7em!important}.introduction-fold>span{font-family:FZYaoti;color:blue;font-weight: bold}p[data-v-46274ba1],h4[data-v-6fe2b6a7],.blink-list-bottom, .user-profile-statistics-name{ font-weight: bold!important; font-family:STXingkai!important;font-size:1.8em!important}.blog-list-box .view-time-box,.user-profile-statistics-num,.two-px{font-weight: bold;font-family:STCaiyun!important;font-size:1.2em!important}.user-profile-statistics-num{font-size:2em!important}.show-more-introduction-fold,.address ,.user-profile-head-name-vip,.blog-list-box .blog-list-content{font-family:STXingkai!important;font-size:1.65em!important;color:#eeff00!important} .aside-common-box-content i {background-image: url(https://picture.gptkong.com/20240620/1615443ae4ce9d407facabf2bd0557c45c.png) !important} .a,.b{position: absolute;height:165px;top: -260px; width:165px;left:-15px}.b{height:70px;width:900px;top: -276px;left: 231px;;font-family:华文行楷;font-size:100px;color:black}</style></div>

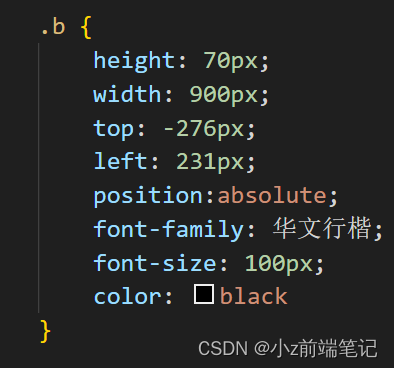
这里也是用到一个<p>标签,加上定位,定位的参数都找好了,可以直接用上去就好啦,注意行高不能设置太高,要不然会挡住一些按键从而按不了。

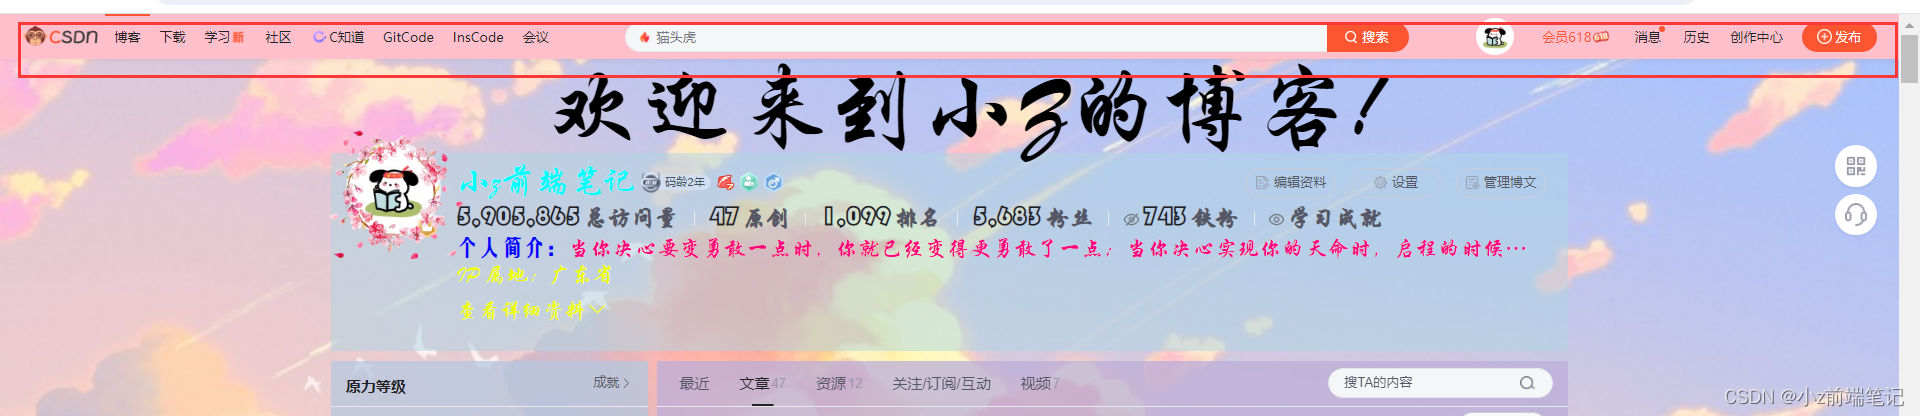
🎲5.10 如何DIV头部导航栏颜色?(补到第5点)
本来该在上面加的,现在刚想起来,一个一个加太麻烦了,就在这里加吧。
找到导航栏的选择器.toolbar-container
<div><p class="b">欢迎来到小Z的博客!</p><img class="a" src="https://picture.gptkong.com/20240619/23170053c526f04519aae1ebdb8538628e.png"><style>#userSkin.skin-ai{background:url(https://picweboss-app.gracg.com/2001697768_193a7c1ebf7da2261f26ef74aa348aa5oss.jpg_1200w.jpg) no-repeat;background-size: cover;background-attachment: fixed}#userSkin.skin-ai .user-profile-head{background-image:none;}.user-profile-aside .user-profile-aside-common-box,.blog_extension,.user-profile-aside .user-influence-list ul li,.user-profile-head .user-profile-head-info,.navList-box .navList,.navList-box .blog-second-list,.blog-list-box,.el-input__inner,.blink-list-box,.sub-people-list-box,.live-list-box,.resources-list-box,.answer-list-box,.navList-box .ask-second-list,.answer-list-box,.navList-box ,.sub-second-list{background:rgba(187, 173, 217, 0.5) !important}.user-profile-head-name-vip[data-v-d1dbb6f8]{color:#00FFFD!important;font-family:华文行楷;font-size:1.8em}.navList-box .blog-second-list>ul>li .blog-time-filter .el-select .el-input .el-input__inner,.user-profile-aside .user-profile-aside-common-box{background: rgb(173, 255, 238, 0.5) !important}#blogExtensionBox .blog_extension{background: #ffffff3b !important}.navList-box .blog-second-list>ul>li .blog-time-filter .el-select .el-input .el-input__inner{    background: #f9020200 !important}#userSkin.skin-cookblue .user-profile-head{background:none;}#userSkin .user-profile-head .user-profile-head-info{ background: rgba(173, 216, 230, 0.5)!important}.introduction-fold[data-v-d1dbb6f8]{color:rgb(255, 0, 128, 1)!important;line-height: 20px!important;font-family:华文行楷;font-size:1.7em!important}.introduction-fold>span{font-family:FZYaoti;color:blue;font-weight: bold}p[data-v-46274ba1],h4[data-v-6fe2b6a7],.blink-list-bottom, .user-profile-statistics-name{ font-weight: bold!important; font-family:STXingkai!important;font-size:1.8em!important}.blog-list-box .view-time-box,.user-profile-statistics-num,.two-px{font-weight: bold;font-family:STCaiyun!important;font-size:1.2em!important}.user-profile-statistics-num{font-size:2em!important}.show-more-introduction-fold,.address ,.user-profile-head-name-vip,.blog-list-box .blog-list-content{font-family:STXingkai!important;font-size:1.65em!important;color:#eeff00!important}  .aside-common-box-content i {background-image: url(https://picture.gptkong.com/20240620/1615443ae4ce9d407facabf2bd0557c45c.png) !important} .a,.b{position: absolute;height:165px;top: -260px; width:165px;left:-15px}.b{height:70px;width:900px;top: -276px;left: 231px;;font-family:华文行楷;font-size:100px;color:black}.toolbar-container {
background: pink;}</style></div>
最终效果:
🎲9 注意事项
1.如果只在自定义模块设置<style>,必须在<style>标签外加上 <div>,否则<style> 不能生效!
2.当!important不能生效的时候,大多数是因为继承的因素,因为继承无论权重多大,相对于其他的都是0,这时候我们需要找更近的class,如果我们想要的样式标签没有设置class或者是内联样式,我们可以通过后代选择器或者子代选择器进行间接选中。可参考: CSS3 复合选择器。
3.自己设置css定位以及调整属性的时候,可以直接在主页打开F12利用调试进行测试,找到自己想要设定的值,提高效率。可参考:CSS3 三大特性+Chrome 调试代码技巧
4.由于自定义模块有字数限制,所以我们设定的class名要尽可能简短,已经有相同属性的我们可以进行合并,多余的空格也可以删除。
🎲10 小结
阅读好这篇文章你一定了解了div个人主页的原理了吧!修改个人主页主要用到就是css选择器和css定位,要多加使用chrome调试简化修改过程,加强效率。同时自定义模块有字数限制,我们要尽可能简化我们的代码。自定义模块还有更多可以被挖掘出来的功能,现有的也还在被挖掘,uu们可以自己div专属自己的页面。昨天还想着怎么串灯笼,后面受到空白诗大佬的启发,知道了可以改系统的样式\( ● ⌒ ∇ ⌒ ● )/非常感谢。本来期末打算好好复习了,一下子又过去了五个小时ෆු(˃ர்˂)ෆු
