Maven私服Nexus安装及使用
前言
周末在家闲着无聊,不知道做点啥,就想着自己搭建一个Maven私服来玩玩。刚好使用自己之前在电脑上搭建的虚拟机服务器来操作体验了一把。搭建好私服后,以后自己写的一些小模块啊,工具包啥的就可以发布到自己的私服上了,方便在工程中直接引入了,不用在通过一些本地引入的方式来添加了。配置需求
在搭建私服之前,首先得准备一些相关资源:- 一台服务器:我用的虚拟机搭建的操作系统:Ubuntu 22.04.1 LTS (配置:4核4G 40G磁盘)
- JDK 8+:Nexus启动需要JDK环境
- Nexus安装包
安装Nexus
下载Nexus
访问Nexus[官网下载地址](https://help.sonatype.com/en/download-archives---repository-manager-3.html),找到自己对应的环境版本下载。我下载的是Java8版本的Unix操作系统的 3.70.2-01版本。下载下来是一个.tar.gz压缩包,将压缩包上传到我们需要安装的目录路径。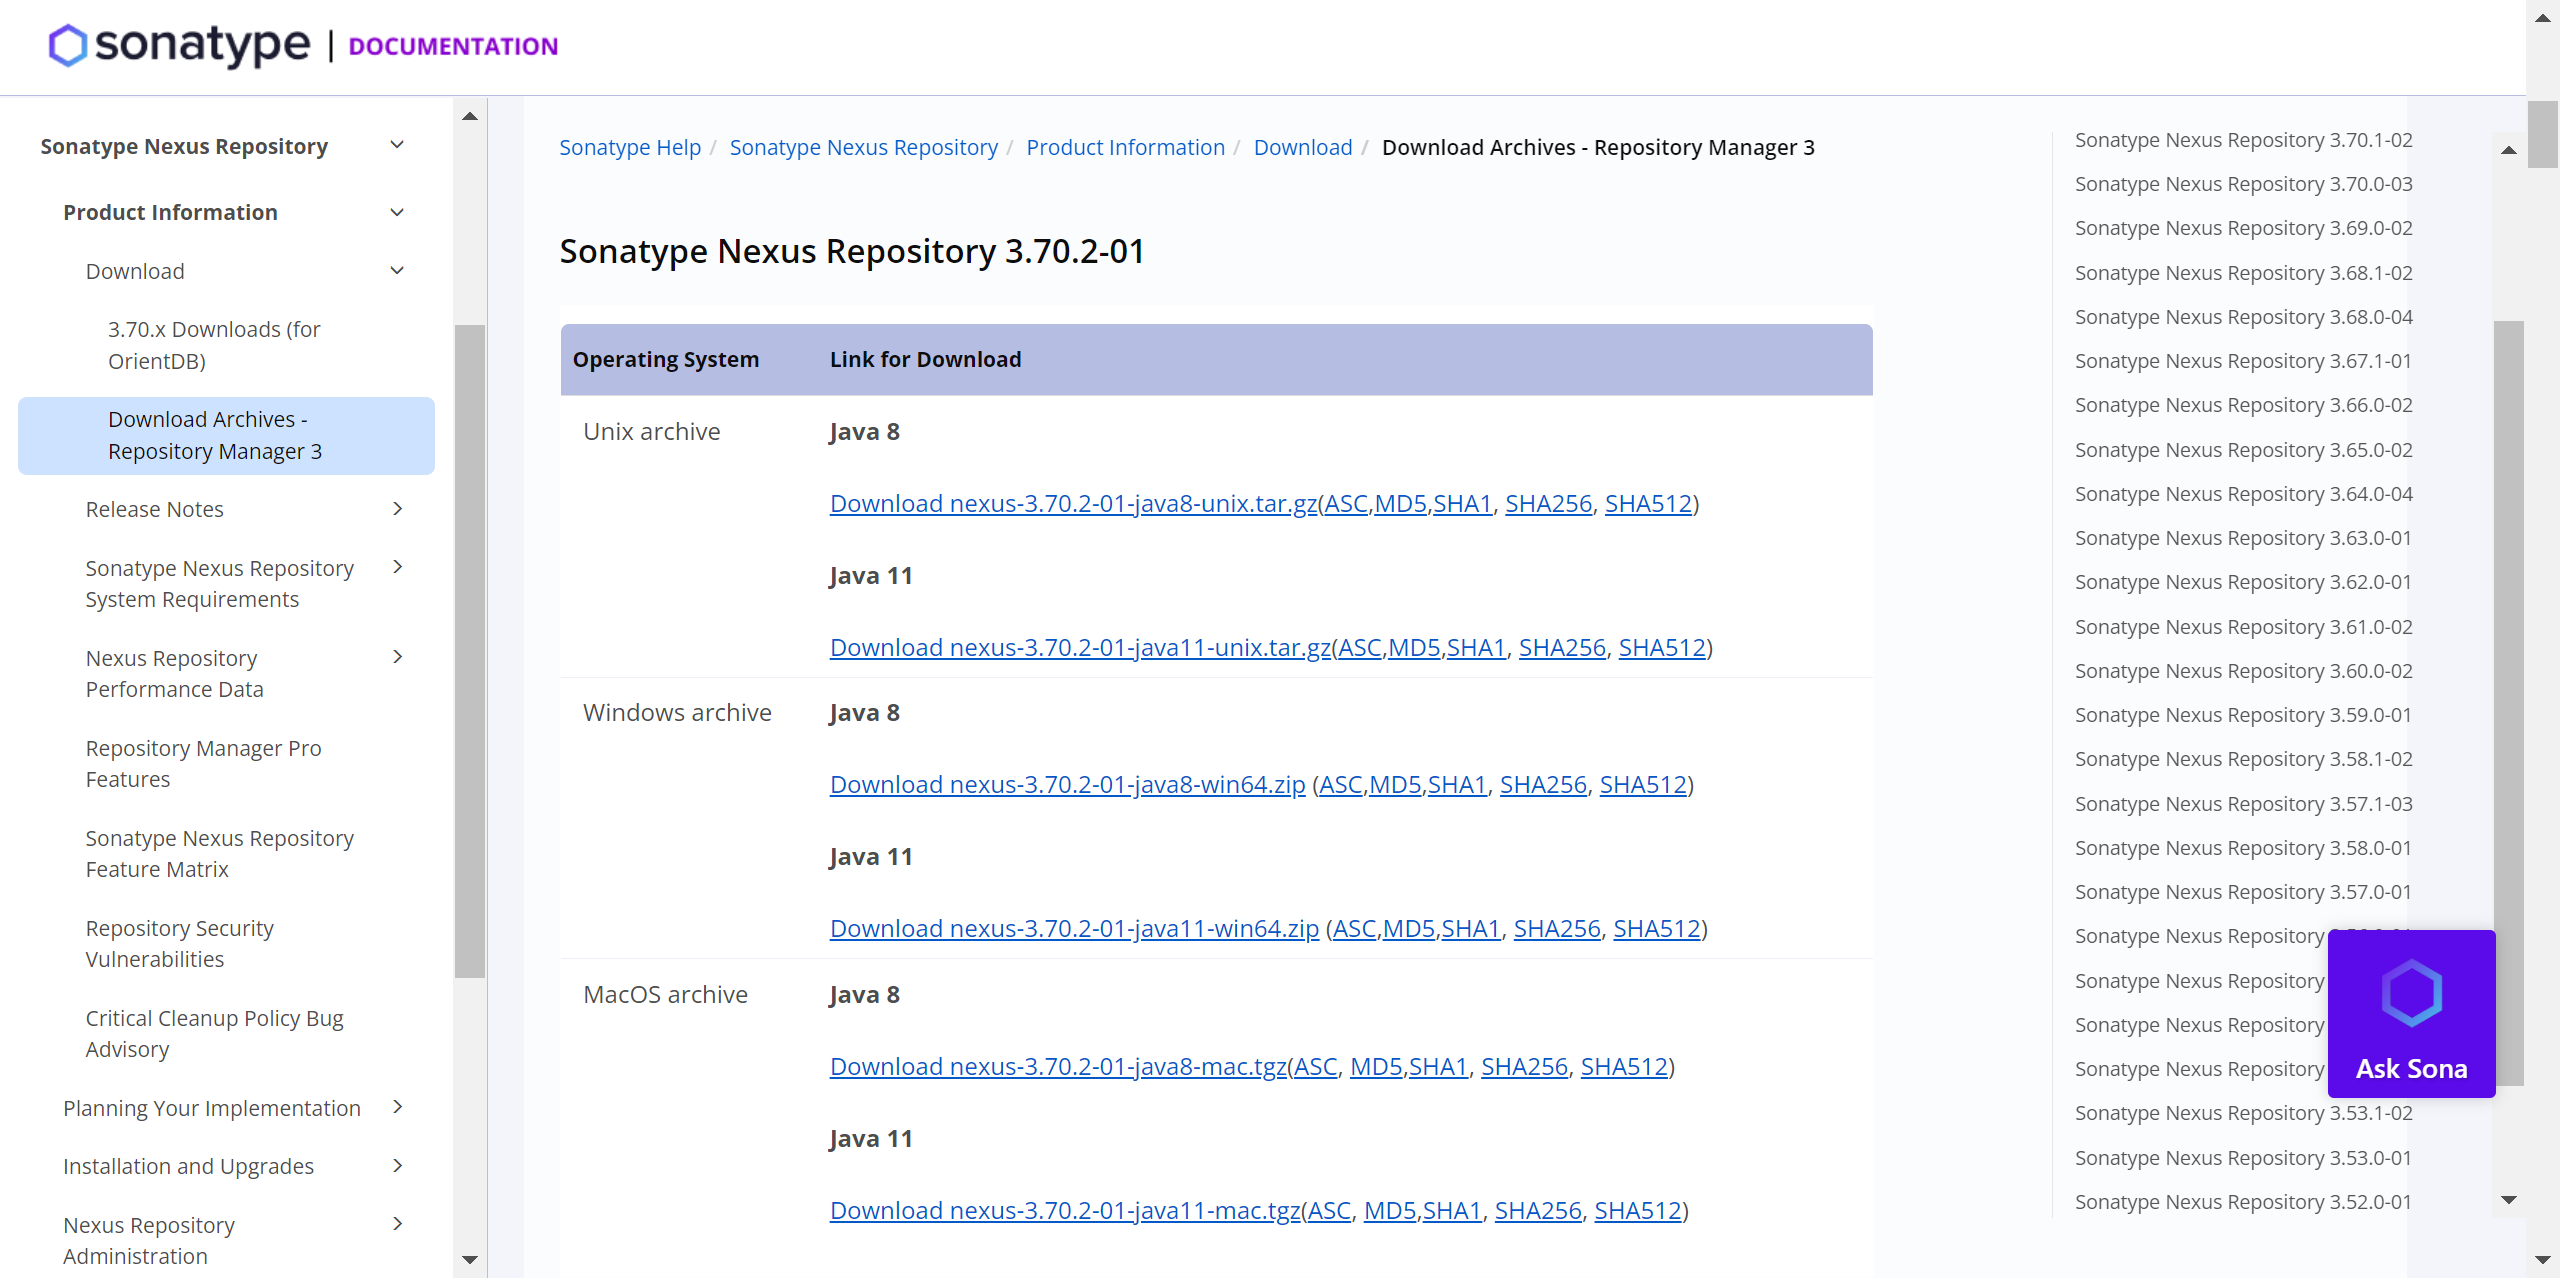
解压Nexus
将安装包上传到安装目录后,我们将压缩包进行解压缩,会看到解压出来两个文件夹,分别是**nexus-3.70.2-01**和**sonatype-work。**drwxrwxr-x 10 layne layne 4096 9月 8 12:52 nexus-3.70.2-01/
-rw-r--r-- 1 layne layne 256210120 9月 8 12:18 nexus-3.70.2-01-java8-unix.tar.gz
drwxrwxr-x 3 layne layne 4096 9月 8 12:52 sonatype-work/
配置Nexus
在启动之前,我们可以对Nexus进行一些参数配置。Nexus的参数配置是在nexus.vmoptions这个文件中保存的,文件地址是在nexus-3.70.2-01/bin这个目录下。我这里就是简单修改了一下启动的堆内存大小。layne@layne-ubuntu-22-3:~/app/nexus$ ll
total 250228
drwxrwxr-x 4 layne layne 4096 9月 8 12:52 ./
drwxrwxr-x 3 layne layne 4096 9月 8 12:51 ../
drwxrwxr-x 10 layne layne      4096  9月  8 12:52 nexus-3.70.2-01/
-rw-r--r--  1 layne layne 256210120  9月  8 12:18 nexus-3.70.2-01-java8-unix.tar.gz
drwxrwxr-x 3 layne layne 4096 9月 8 12:52 sonatype-work/# 进入nexus-3.70.2-01/bin/目录
layne@layne-ubuntu-22-3:~/app/nexus$ cd nexus-3.70.2-01/bin/# 查看参数配置
layne@layne-ubuntu-22-3:~/app/nexus/nexus-3.70.2-01/bin$ cat nexus.vmoptions -Xms1703m
-Xmx1703m
-XX:MaxDirectMemorySize=1703m
-XX:+UnlockDiagnosticVMOptions
-XX:+LogVMOutput
-XX:LogFile=../sonatype-work/nexus3/log/jvm.log
-XX:-OmitStackTraceInFastThrow
-Djava.net.preferIPv4Stack=true
-Dkaraf.home=.
-Dkaraf.base=.
-Dkaraf.etc=etc/karaf
-Djava.util.logging.config.file=etc/karaf/java.util.logging.properties
-Dkaraf.data=../sonatype-work/nexus3
-Dkaraf.log=../sonatype-work/nexus3/log
-Djava.io.tmpdir=../sonatype-work/nexus3/tmp
-Dkaraf.startLocalConsole=false
-Djdk.tls.ephemeralDHKeySize=2048
#
# additional vmoptions needed for Java9+
#
# --add-reads=java.xml=java.logging
# --add-exports=java.base/org.apache.karaf.specs.locator=java.xml,ALL-UNNAMED
# --patch-module java.base=${KARAF_HOME}/lib/endorsed/org.apache.karaf.specs.locator-4.3.9.jar
# --patch-module java.xml=${KARAF_HOME}/lib/endorsed/org.apache.karaf.specs.java.xml-4.3.9.jar
# --add-opens java.base/java.security=ALL-UNNAMED
# --add-opens java.base/java.net=ALL-UNNAMED
# --add-opens java.base/java.lang=ALL-UNNAMED
# --add-opens java.base/java.util=ALL-UNNAMED
# --add-opens java.naming/javax.naming.spi=ALL-UNNAMED
# --add-opens java.rmi/sun.rmi.transport.tcp=ALL-UNNAMED
# --add-exports=java.base/sun.net.www.protocol.http=ALL-UNNAMED
# --add-exports=java.base/sun.net.www.protocol.https=ALL-UNNAMED
# --add-exports=java.base/sun.net.www.protocol.jar=ALL-UNNAMED
# --add-exports=jdk.xml.dom/org.w3c.dom.html=ALL-UNNAMED
# --add-exports=jdk.naming.rmi/com.sun.jndi.url.rmi=ALL-UNNAMED
# --add-exports java.security.sasl/com.sun.security.sasl=ALL-UNNAMED
#
# comment out this vmoption when using Java9+
#
-Djava.endorsed.dirs=lib/endorsed
layne@layne-ubuntu-22-3:~/app/nexus/nexus-3.70.2-01/bin$
Nexus的控制台相关配置参数是在nexus-default.properties中,文件地址是在nexus-3.70.2-01/etc这个目录下。
# 查看nexus-default.properties配置信息layne@layne-ubuntu-22-3:~/app/nexus/nexus-3.70.2-01/etc$ cat nexus-default.properties
## DO NOT EDIT - CUSTOMIZATIONS BELONG IN $data-dir/etc/nexus.properties
##
# Jetty section
application-port=8081
application-host=0.0.0.0
nexus-args=${jetty.etc}/jetty.xml,${jetty.etc}/jetty-http.xml,${jetty.etc}/jetty-requestlog.xml
nexus-context-path=/# Nexus section
nexus-edition=nexus-pro-edition
nexus-features=\nexus-pro-featurenexus.hazelcast.discovery.isEnabled=true
启动Nexus
配置完参数后,我们就可以来执行启动命令来运行Nexus了。启动脚本也是在nexus-3.70.2-01/bin这个目录下。进入到目录下。执行./nexus run命令,通过前台方式启动。看看启动过程中有没有问题,会不会报错啥的。看到Started Sonatype Nexus OSS 3.70.2-01字样的信息说明就是启动成功了。
layne@layne-ubuntu-22-3:~/app/nexus/nexus-3.70.2-01/bin$ ll
total 40
drwxrwxr-x  3 layne layne  4096  9月  8 12:52 ./
drwxrwxr-x 10 layne layne  4096  9月  8 12:52 ../
drwxrwxr-x  2 layne layne  4096  9月  8 12:52 contrib/
-rwxr-xr-x  1 layne layne 18546  8月 27 04:49 nexus*
-rw-r--r--  1 layne layne    15  8月 27 04:49 nexus.rc
-rw-r--r--  1 layne layne  1635  9月  8 12:52 nexus.vmoptions
layne@layne-ubuntu-22-3:~/app/nexus/nexus-3.70.2-01/bin$ ./nexus run# 省略启动日志信息
---
---
---
2024-09-08 17:01:30,324+0800 INFO  [jetty-main-1] *SYSTEM org.sonatype.nexus.siesta.SiestaServlet - JAX-RS RuntimeDelegate: org.sonatype.nexus.siesta.internal.resteasy.SisuResteasyProviderFactory@16e0d984
2024-09-08 17:01:30,374+0800 INFO  [jetty-main-1] *SYSTEM org.jboss.resteasy.plugins.validation.i18n - RESTEASY008550: Unable to find CDI supporting ValidatorFactory. Using default ValidatorFactory
2024-09-08 17:01:31,890+0800 INFO  [jetty-main-1] *SYSTEM org.sonatype.nexus.siesta.SiestaServlet - Initialized
2024-09-08 17:01:31,897+0800 INFO  [jetty-main-1] *SYSTEM org.sonatype.nexus.repository.httpbridge.internal.ViewServlet - Initialized
2024-09-08 17:01:31,917+0800 INFO  [FelixStartLevel] *SYSTEM org.sonatype.nexus.extender.NexusLifecycleManager - Start TASKS
2024-09-08 17:01:31,960+0800 INFO  [jetty-main-1] *SYSTEM org.eclipse.jetty.server.handler.ContextHandler - Started o.e.j.w.WebAppContext@16f670b7{Sonatype Nexus,/,null,AVAILABLE}
2024-09-08 17:01:32,047+0800 INFO  [jetty-main-1] *SYSTEM org.eclipse.jetty.server.AbstractConnector - Started ServerConnector@7648a1ce{HTTP/1.1, (http/1.1)}{0.0.0.0:8081}
2024-09-08 17:01:32,048+0800 INFO  [jetty-main-1] *SYSTEM org.eclipse.jetty.server.Server - Started @46930ms
2024-09-08 17:01:32,048+0800 INFO  [jetty-main-1] *SYSTEM org.sonatype.nexus.bootstrap.jetty.JettyServer -
-------------------------------------------------Started Sonatype Nexus OSS 3.70.2-01
通过执行`./nexus run`命令启动成功后,我们可以进行退出,按照后台方式去启动nexus。执行后台启动指令`./nexus start`。这样nexus就会以后台方式在运行了。启动完后,我们通过指令`./nexus status`来查看nexus的运行状态。
# 查看nexus运行状态
layne@layne-ubuntu-22-3:~/app/nexus/nexus-3.70.2-01/bin$ ./nexus status
nexus is stopped.# 启动nexus
layne@layne-ubuntu-22-3:~/app/nexus/nexus-3.70.2-01/bin$ ./nexus start
Starting nexus# 查看nexus运行状态
layne@layne-ubuntu-22-3:~/app/nexus/nexus-3.70.2-01/bin$ ./nexus status
nexus is running.
layne@layne-ubuntu-22-3:~/app/nexus/nexus-3.70.2-01/bin$
访问Nexus
启动成功后,我们就可以访问Nexus控制台了,我这里虚拟机的IP地址是[192.168.56.103](http://192.168.56.103/),nexus默认启动端口是8081,所以访问地址就是:[http://192.168.56.103:8081/](http://192.168.56.103:8081/)。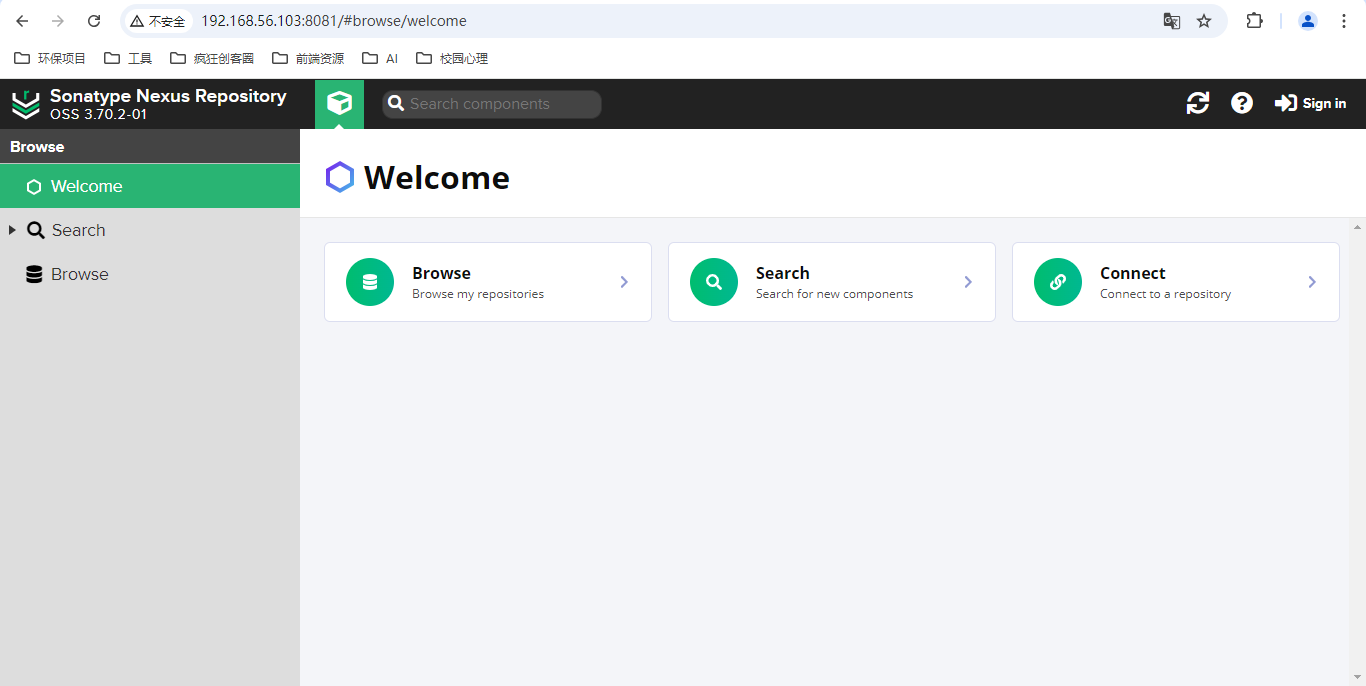
首次访问Nexus控制台,默认登录账号是admin,登录密码是在admin.password这个文件中的。文件地址是在另一个文件夹里,路径是在sonatype-work/nexus3/文件夹下面。
使用Nexus
配置Maven使用Nexus
我们找到自己安装的Maven的目录,然后找到Maven配置文件settings.xml。配置一下内容:<servers><server><id>maven-releases</id><username>admin</username><password>admin@123</password></server> <server><id>maven-snapshots</id><username>admin</username><password>admin@123</password></server><server><id>maven-public</id><username>admin</username><password>admin@123</password></server>
</servers><mirrors><mirror> <id>maven-public</id> <url>http://192.168.56.103:8081/repository/maven-public/</url> <mirrorOf>*</mirrorOf> </mirror><mirror><id>alimaven</id><name>aliyun maven</name><url>http://maven.aliyun.com/nexus/content/groups/public/</url><mirrorOf>central</mirrorOf> </mirror>
</mirrors><profiles><profile> <id>myprofile</id><repositories><repository><id>maven-releases</id> <url>http://192.168.56.103:8081/repository/maven-releases/</url> <releases><enabled>true</enabled></releases><snapshots><enabled>true</enabled></snapshots></repository><repository><id>maven-snapshots</id><url>http://192.168.56.103:8081/repository/maven-snapshots/</url> <releases><enabled>true</enabled></releases><snapshots><enabled>true</enabled></snapshots></repository></repositories><pluginRepositories><pluginRepository><id>central</id><url>http://central</url><releases><enabled>true</enabled></releases><snapshots><enabled>false</enabled></snapshots></pluginRepository></pluginRepositories>
</profile><profile><id>jdk-1.8</id><activation><activeByDefault>true</activeByDefault><jdk>1.8</jdk></activation><properties><maven.compiler.source>1.8</maven.compiler.source><maven.compiler.target>1.8</maven.compiler.target><maven.compiler.compilerVersion>1.8</maven.compiler.compilerVersion></properties></profile>
</profiles>
<activeProfiles><activeProfile>myprofile</activeProfile>
</activeProfiles>
配置项目pom文件
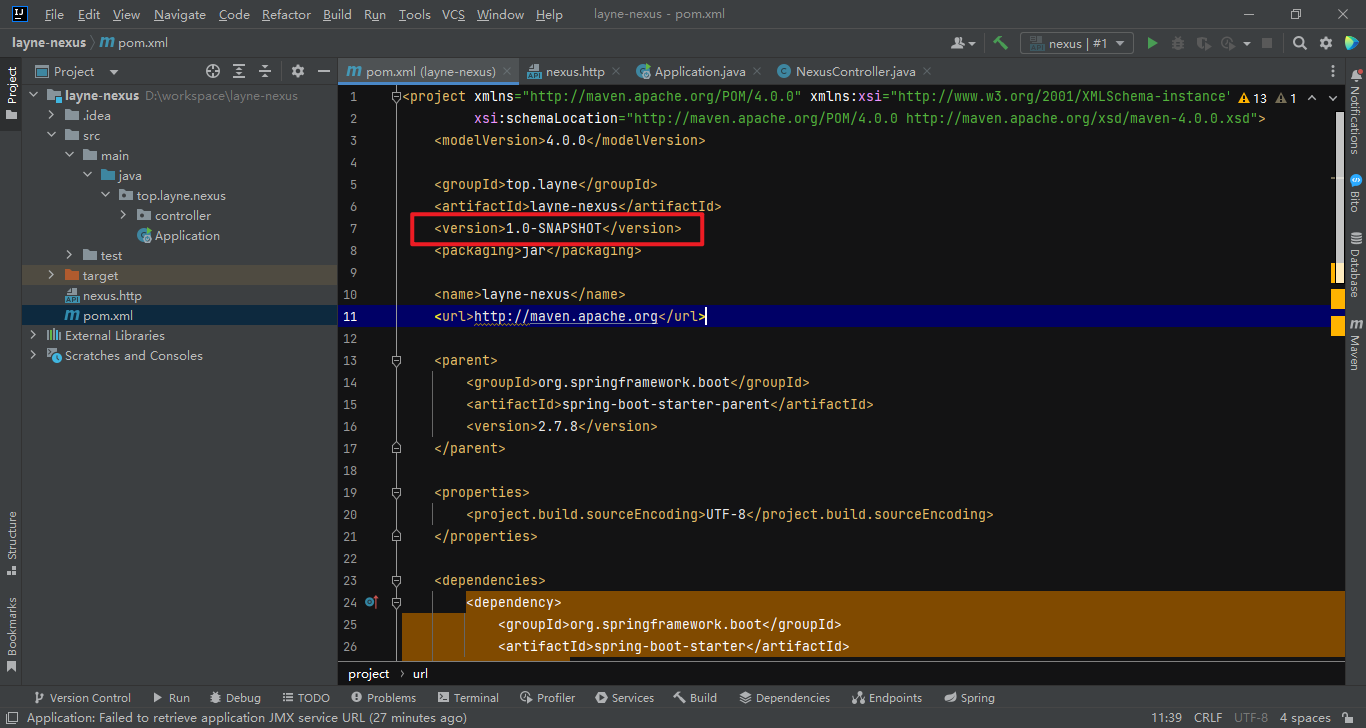
找到我们的Maven项目工程中的pom文件,添加私服配置。<project xmlns="http://maven.apache.org/POM/4.0.0" xmlns:xsi="http://www.w3.org/2001/XMLSchema-instance"xsi:schemaLocation="http://maven.apache.org/POM/4.0.0 http://maven.apache.org/xsd/maven-4.0.0.xsd"><modelVersion>4.0.0</modelVersion><groupId>top.layne</groupId><artifactId>layne-nexus</artifactId><version>1.0-SNAPSHOT</version><packaging>jar</packaging><name>layne-nexus</name><url>http://maven.apache.org</url><parent><groupId>org.springframework.boot</groupId><artifactId>spring-boot-starter-parent</artifactId><version>2.7.8</version></parent><properties><project.build.sourceEncoding>UTF-8</project.build.sourceEncoding></properties><dependencies><dependency><groupId>org.springframework.boot</groupId><artifactId>spring-boot-starter</artifactId></dependency><dependency><groupId>org.springframework.boot</groupId><artifactId>spring-boot-starter-web</artifactId></dependency><dependency><groupId>org.springframework.boot</groupId><artifactId>spring-boot-starter-test</artifactId></dependency></dependencies><!-- 添加私服配置 --><distributionManagement><repository><id>maven-releases</id><url>http://192.168.56.103:8081/repository/maven-releases/</url></repository><snapshotRepository><id>maven-snapshots</id><url>http://192.168.56.103:8081/repository/maven-snapshots/</url></snapshotRepository></distributionManagement><build><plugins><plugin><groupId>org.springframework.boot</groupId><artifactId>spring-boot-maven-plugin</artifactId></plugin><plugin><groupId>org.apache.maven.plugins</groupId><artifactId>maven-source-plugin</artifactId><configuration><attach>true</attach></configuration><executions><execution><phase>compile</phase><goals><goal>jar</goal></goals></execution></executions></plugin></plugins></build>
</project>项目打包发布
在idea开发工具中执行clean和deploy执行打包发布操作,或者直接在项目下执行mvn clean deploy命令。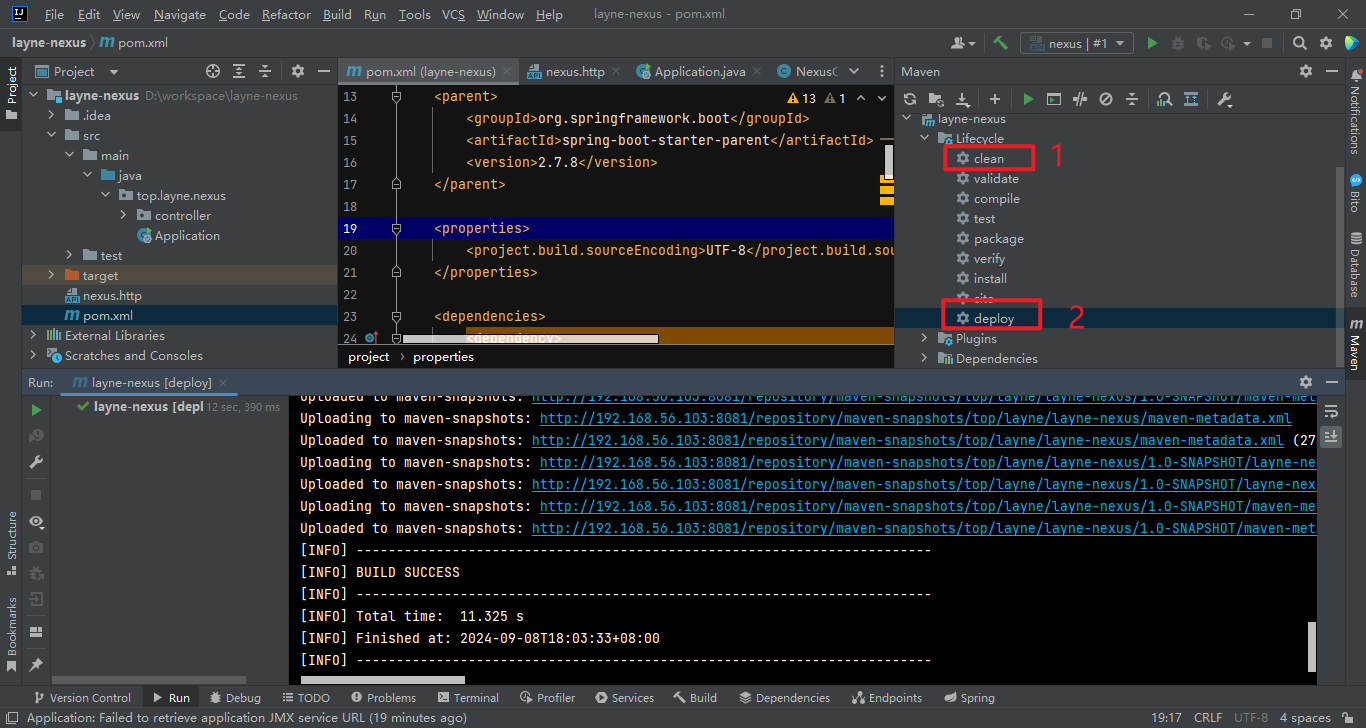
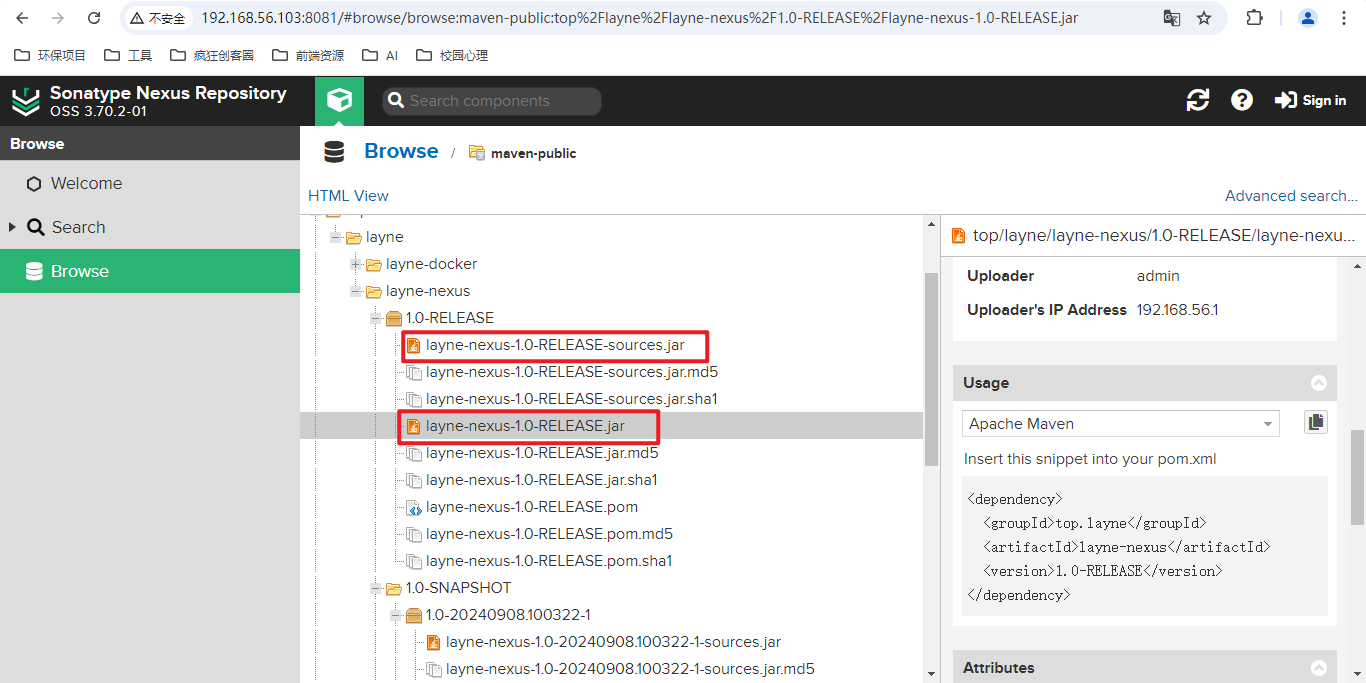
执行完打包发布命令,我们在来登录Nexus控制台,就可以看到我们发布的项目包了。
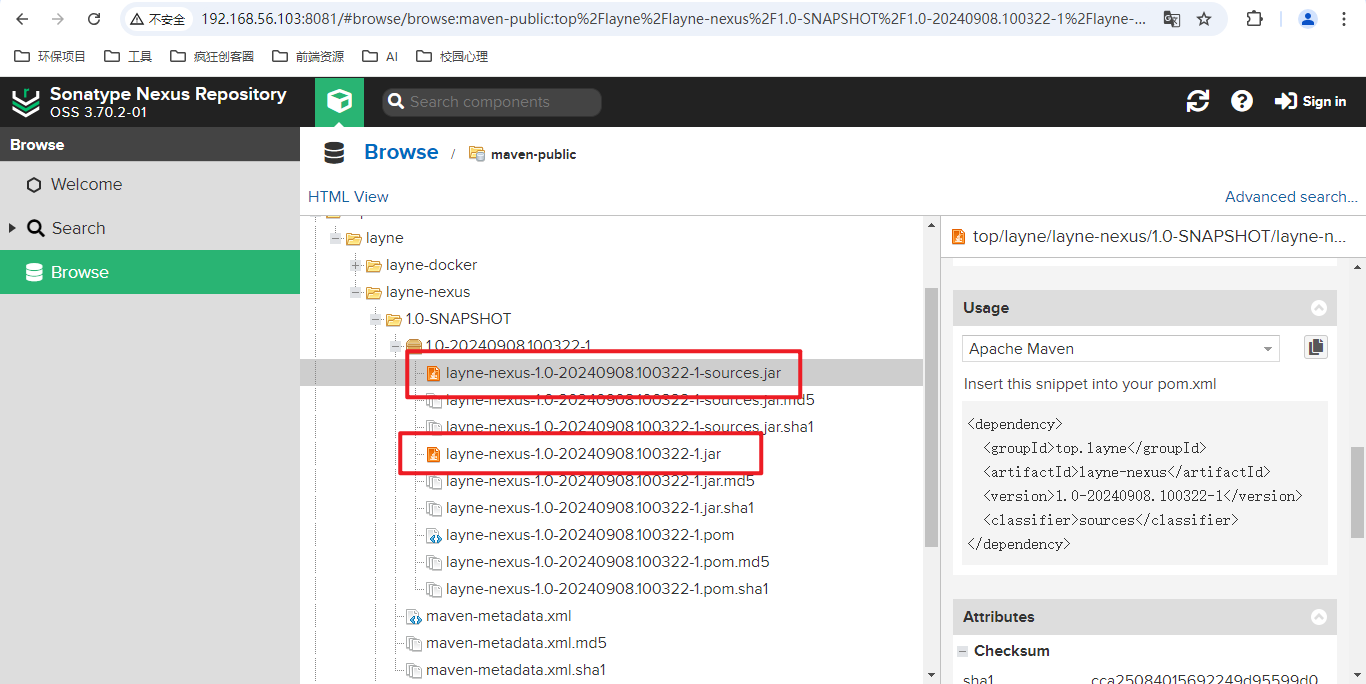
通过上面的图中我们可以看到发布的包都是一些快照版本的包,包名后面都带了一个时间戳信息。我们需要打正式包的话,只需要去修改我们项目中pom文件中的版本信息就行了,版本名称信息不带SNAPSHOT就行啦。
snapshot包配置:
release包配置:
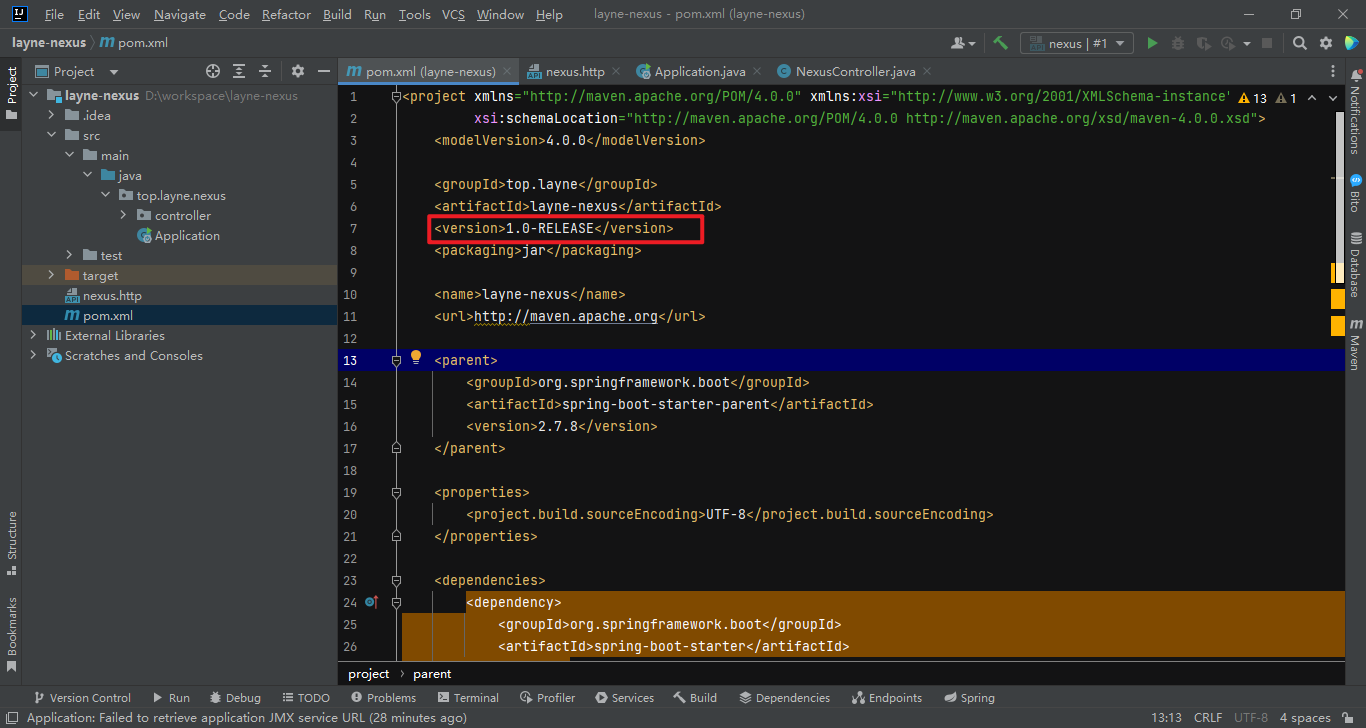
重新执行打包发布命令。我们刷新以下Nexus页面就会看到正式包信息了,包名是没有带时间戳信息后缀了。
后语
总而言之,Maven私服环境我们就搭建好了。后面我们在自己的项目中就可以使用自己的私服来拉取上传发布项目包了。当然了,Nexus在仓库的配置中还有很多东西可以去学习,其中像代理仓库啊,本地仓库啊各种不同的方式可以去进行私有化的配置。整体流程看下来,安装流程还是很简单的,而且官方文档中也提供了一些相关的安装示例,还有一些相关的系统配置要求可以去参考。