Tex2DArray的使用举例
这里主要讲解的是,如何申请一个RT的时候,指定是一个2DArray的类型,然后怎样采样这个2DArray。
本文实现的目标有两个:
1、申请2DArray的rt,两个我的深度图,渲染到0号和1号的rt上
2、完成阴影的计算

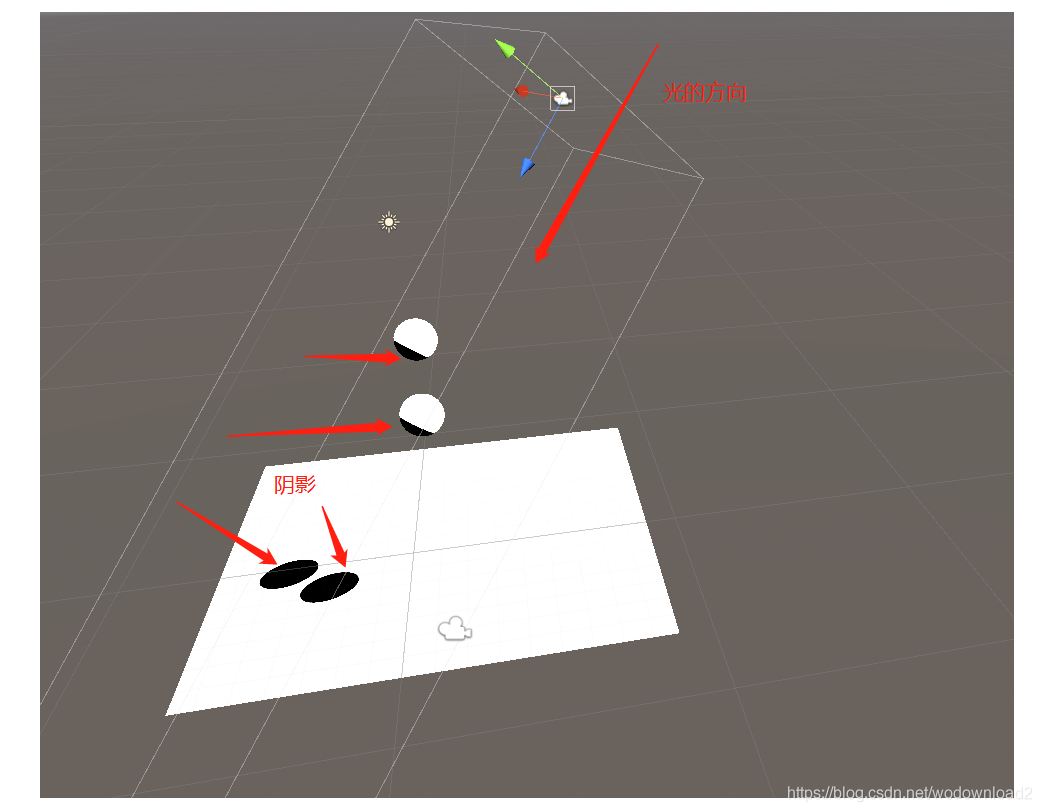
如上图,绿色球的深度,画到rt的0号索引上;红色球的深度,画到rt的1号索引上。
using UnityEngine;
using UnityEngine.Rendering;

public class Tex2DArray : MonoBehaviour
{
    public RenderTexture depthRT;
    public Transform mainLight;

    private CommandBuffer workingCB;
    private int width = 0;
    private int height = 0;

    public GameObject sphere1;
    public GameObject sphere2;
    public GameObject plane;

    private Mesh mesh1;
    private Mesh mesh2;
    private Mesh planeMesh;

    private Material depthMat;
    private Material drawShadowMat;
    private Camera lightCamera;
    private Matrix4x4 m1 = Matrix4x4.identity;
    private Matrix4x4 m2 = Matrix4x4.identity;
    private Matrix4x4 m3 = Matrix4x4.identity;

    private void Start()
    {
        width = Camera.main.pixelWidth;
        height = Camera.main.pixelHeight;
        depthRT = new RenderTexture(width, height, 16, RenderTextureFormat.Shadowmap);
        depthRT.name = "depthRT";
        depthRT.volumeDepth = 2;
        depthRT.dimension = TextureDimension.Tex2DArray;

        workingCB = new CommandBuffer();
        workingCB.name = "working cb";

        mesh1 = sphere1.GetComponent<MeshFilter>().mesh;
        mesh2 = sphere2.GetComponent<MeshFilter>().mesh;
        planeMesh = plane.GetComponent<MeshFilter>().mesh;


        depthMat = new Material(Shader.Find("My/ShadowCaster"));
        drawShadowMat = new Material(Shader.Find("My/ShadowReceiver"));

        GameObject tmpGo = new GameObject();
        tmpGo.name = "lightCamera";
        lightCamera = tmpGo.AddComponent<Camera>();
        lightCamera.enabled = false;
        lightCamera.transform.position = new Vector3(5.28f, 20, -12);
        lightCamera.nearClipPlane = 0.1f;
        lightCamera.farClipPlane = 100;
        lightCamera.orthographicSize = 5;
        lightCamera.orthographic = true;
        lightCamera.aspect = 1;
        lightCamera.transform.forward = mainLight.transform.forward;
    }

    private void Update()
    {
        workingCB.Clear();
        //workingCB.SetRenderTarget(depthRT);
        workingCB.SetRenderTarget(depthRT, 0, CubemapFace.Unknown, 0);
        workingCB.ClearRenderTarget(true, true, Color.clear);

        m1.SetTRS(sphere1.transform.position, sphere1.transform.rotation, sphere1.transform.lossyScale);
        m2.SetTRS(sphere2.transform.position, sphere2.transform.rotation, sphere2.transform.lossyScale);
        m3.SetTRS(plane.transform.position, plane.transform.rotation, plane.transform.lossyScale);
        //这里unity自动,为我们进行了z反转,不用手动反转了
        workingCB.SetViewProjectionMatrices(lightCamera.worldToCameraMatrix, lightCamera.projectionMatrix);
        workingCB.DrawMesh(mesh1, m1, depthMat);
        workingCB.SetRenderTarget(depthRT, 0, CubemapFace.Unknown, 1);
        workingCB.DrawMesh(mesh2, m2, depthMat);
        Graphics.ExecuteCommandBuffer(workingCB);

        Matrix4x4 view = lightCamera.worldToCameraMatrix;
        Matrix4x4 proj = lightCamera.projectionMatrix;
        //这里需要我们手动反转,传递到shader中去
        proj = GL.GetGPUProjectionMatrix(proj, true);
        Shader.SetGlobalTexture("_ShadowMapTex", depthRT);
        Shader.SetGlobalMatrix("ligthVP", proj * view);

        Graphics.DrawMesh(mesh1, m1, drawShadowMat, 0);
        Graphics.DrawMesh(mesh2, m2, drawShadowMat, 0);
        Graphics.DrawMesh(planeMesh, m3, drawShadowMat, 0);
    }
}
画深度的shader:
Shader "My/ShadowCaster"
{
    SubShader
    {
        Tags { "RenderType"="Opaque" }
        Pass
        {
            CGPROGRAM
            #pragma vertex vert
            #pragma fragment frag

            #include "UnityCG.cginc"

            struct appdata
            {
                float4 vertex : POSITION;
            };

            struct v2f
            {
                float4 vertex : SV_POSITION;
            };

            sampler2D _MainTex;
            float4 _MainTex_ST;

			float4x4 _view;
			float4x4 _proj;


            v2f vert (appdata v)
            {
                v2f o;
                o.vertex = UnityObjectToClipPos(v.vertex);
				//float4 worldPos = mul(unity_ObjectToWorld, v.vertex);
				//o.vertex = mul(_proj*_view, worldPos);
				return o;
            }

            fixed4 frag (v2f i) : SV_Target
            {
                return 0;
            }
            ENDCG
        }
    }
}
绘制阴影的shader:
Shader "My/ShadowReceiver"
{

    SubShader
    {
        Tags { "RenderType"="Opaque" }

        Pass
        {
            CGPROGRAM
            #pragma vertex vert
            #pragma fragment frag
			#pragma target 5.0

            #include "UnityCG.cginc"
			#define TEX2DARR_SHADOWMAP(tex) Texture2DArray tex; SamplerComparisonState sampler##tex
			#define SAMPLE_SHADOW2DARR_CMP(tex, coord) tex.SampleCmpLevelZero(sampler##tex, (coord).xyz, (coord).w)

			#define TEXTURE2D_SHADOWMAP(tex) Texture2D tex; SamplerComparisonState sampler##tex
			#define SAMPLE_SHADOW_CMP(tex,coord) tex.SampleCmpLevelZero (sampler##tex,(coord).xy,(coord).z)


			#if defined(SHADER_API_D3D11)||defined(SHADER_API_D3D12)||defined(SHADER_API_VULKAN)||defined(SHADER_API_METAL)
				#define _SUPPORT_TEXARR_CMP
			#endif
			TEX2DARR_SHADOWMAP(_ShadowMapTex);
			//TEXTURE2D_SHADOWMAP(_ShadowMapTex);

			float4x4 ligthVP;
            struct appdata
            {
                float4 vertex : POSITION;
            };

            struct v2f
            {
                float4 vertex : SV_POSITION;
				float4 worldPos: TEXCOORD0;
            };

            v2f vert (appdata v)
            {
                v2f o;
				o.worldPos = mul(unity_ObjectToWorld, v.vertex);
                o.vertex = UnityObjectToClipPos(v.vertex);
                return o;
            }

            fixed4 frag (v2f i) : SV_Target
            {
				fixed4 col = fixed4(1,1,1,1);
				float4 pos = mul(ligthVP, i.worldPos);
				float2 uv = pos.xy;
				uv = uv * 0.5f + 0.5f;
				uv.y = 1 - uv.y;
				float shadow = 1;
				float depthInLS = pos.z + 0.01f; //+_Bias;
				float4 coord = float4(uv, 0, depthInLS);
				shadow = SAMPLE_SHADOW2DARR_CMP(_ShadowMapTex, coord);
				coord = float4(uv, 1, depthInLS);
				float shadow2 = SAMPLE_SHADOW2DARR_CMP(_ShadowMapTex, coord);
				return col * shadow * shadow2;
            }
            ENDCG
        }
    }
}
注意点:
1、格式要设置正确:
depthRT = new RenderTexture(width, height, 16, RenderTextureFormat.Shadowmap);
depthRT.name = "depthRT";
depthRT.volumeDepth = 2;
depthRT.dimension = TextureDimension.Tex2DArray;
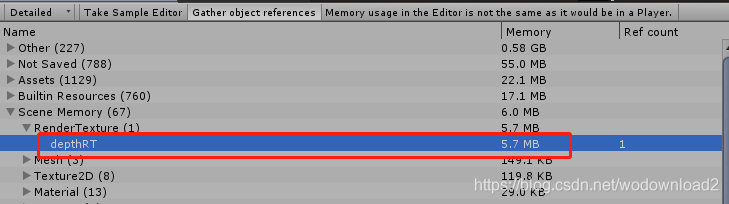
这里是申请了维度为2的rt,索引还是占用内存多点的。
2、采样的地方:
fixed4 col = fixed4(1,1,1,1);
float4 pos = mul(ligthVP, i.worldPos);
float2 uv = pos.xy;
uv = uv * 0.5f + 0.5f;
uv.y = 1 - uv.y;
float shadow = 1;
float depthInLS = pos.z + 0.01f; //+_Bias;
float4 coord = float4(uv, 0, depthInLS);
shadow = SAMPLE_SHADOW2DARR_CMP(_ShadowMapTex, coord);
coord = float4(uv, 1, depthInLS);
float shadow2 = SAMPLE_SHADOW2DARR_CMP(_ShadowMapTex, coord);
return col * shadow * shadow2;
3、其次是y反转、z反转的问题,传递矩阵的时候要注意。