Linux环境安装docker
第一次接触docker,完全不知道怎么安装,又不想用物理机来实验(主要是怕出什么问题= =),所以就在虚拟机的Ubuntu系统中尝试安装。
各种百度,Google寻找Docker的安装教程,最终找到了正常的安装步骤如下:
1.执行下面的命令来安装可选内核模块包
$ sudo apt-get update
$ sudo apt-get install\linux-p_w_picpath-extra-$(uname -r)\linux-p_w_picpath-extra-virtual
2.使用APT镜像源安装
$ sudo apt-get update
$ sudo apt-get install \apt-transport-https \ca-certificates \curl \software-properties-common
3.使用国内源(速度更快)
①添加软件源的GPG密钥
$ curl -fsSL https://mirrors.aliyun.com/docker-ce/linux/ubuntu/gpg | sudo apt-key add -②添加Docker软件源
$ sudo add-apt-repository \    "deb [arch=amd64] https://mirrors.aliyun.com/docker-ce/linux/ubuntu \    $(lsb_release -cs) \
    stable"
4.安装Docker
$ sudo apt-get update

$ sudo apt-get install docker-ce
5.使用脚本自动安装
$ curl -fsSL get.docker.com -o get-docker.sh
$ sudo sh get-docker.sh --mirror Aliyun
6.启动Docker
$ sudo systemctl enable docker
$ sudo systemctl start docker
Ubuntu14.04的启动命令为
$ sudo service docker start到这里理论上就已经可以愉快的体验Docker了,但我本着搭建环境总能遇见网上能查到的一切问题的精神,果然在第一步的时候就已经出问题了,在执行第二条命令时,出现下图提示:

很绝望啊,然后就开始找解决这个问题的办法,然鹅一无所获,然后就开始乱搞模式,直接在终端输入 docker,回车,居然神奇的出现下图

看着这句话,我内牛满面,感觉自己跟个傻子一样,不过还是很激动的,果断输入命令:
sudo apt install docker.io然后就会出现一个提示是否继续的信息,输入yes,回车,静等命令执行完就OK了
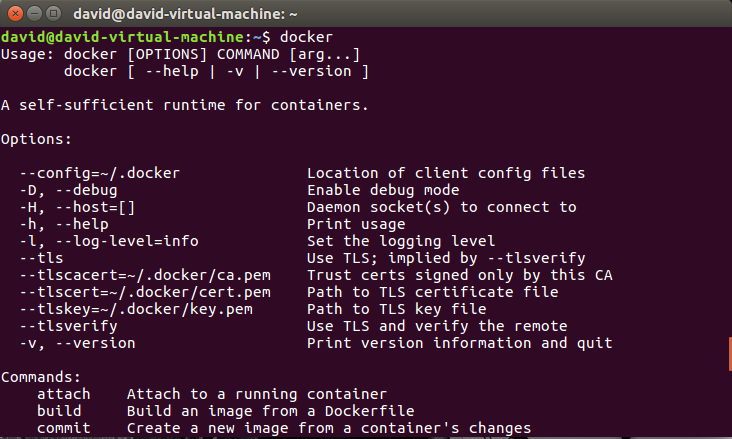
安装结束之后,在终端重新输入:docker,此时出现的信息已经是各种提示信息:

真不容易^_^ 不过结果还是好的。可能是因为Ubuntu版本的不断升级吧,所以才可以有这种操作
转载于:https://blog.51cto.com/acevi/1977916
