Unity UI Toolkit学习笔记-Runtime UI 案例实践
Unity UI Toolkit学习笔记-Runtime UI
- 🥞环境搭建
- 💡新建RuntimeTheme
- 💡新建UXML
- 💡设置Theme
- 💡设置自动匹配GameView
- 🍤添加UI 元素
- 🍥设置场景
- 💡创建PanelSettings
- 💡创建UI Document物体
- 🎭添加测试数据
- 🍰创建人物信息列表项UI 模板
- 🌭 创建列表项控制脚本
- 🍣创建CharacterList控制脚本
- 🍨创建全局UI控制脚本
- 🥠 获取UI 元素引用
- 🥩填充人物列表
- 💡创建makeItem回调方法
- 💡创建bindItem回调方法
- 💡设置Item高度
- 💡设置ItemList 数据源
- 🥛添加选中项处理
- 🍼小技巧
- 💡背景图保持正确的比例
- 💡多个UIDocument使用同一个Panel
- 💡UI 交互初始化
- 💡代码设置背景图片
- 参考
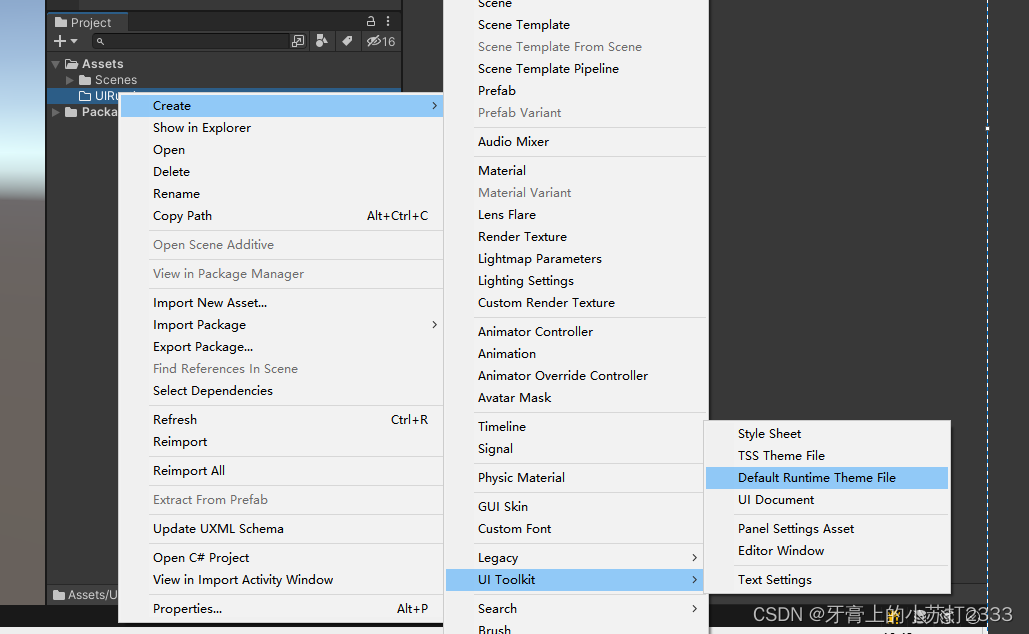
🥞环境搭建
💡新建RuntimeTheme
Editor和Runtime两个不同的Theme 默认的字体大小 尺寸等配置不同,会影响到ui的布局。
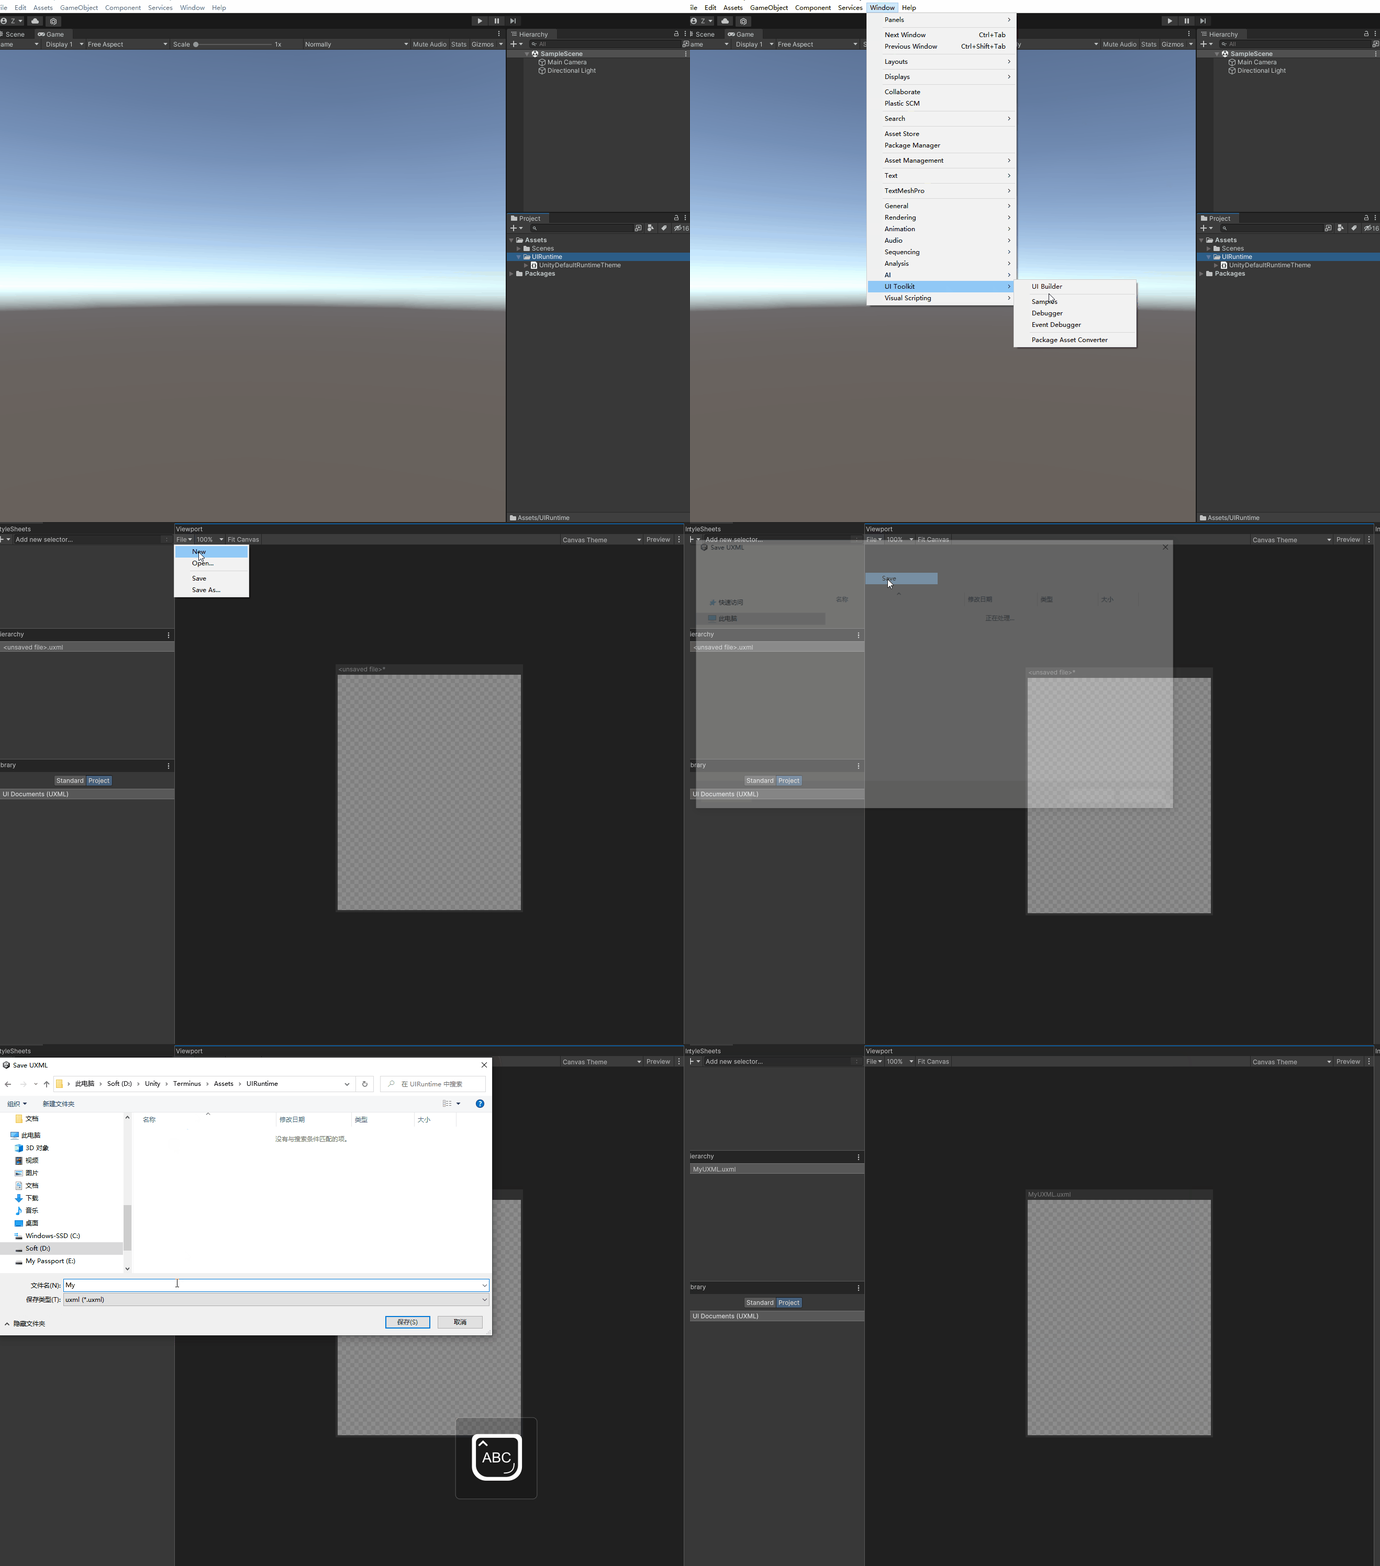
💡新建UXML
打开UI Builder创建新的UXML文件并保存到本地。
💡设置Theme
选择前面创建的Unity Defualt Runtime Theme初始化 画布;

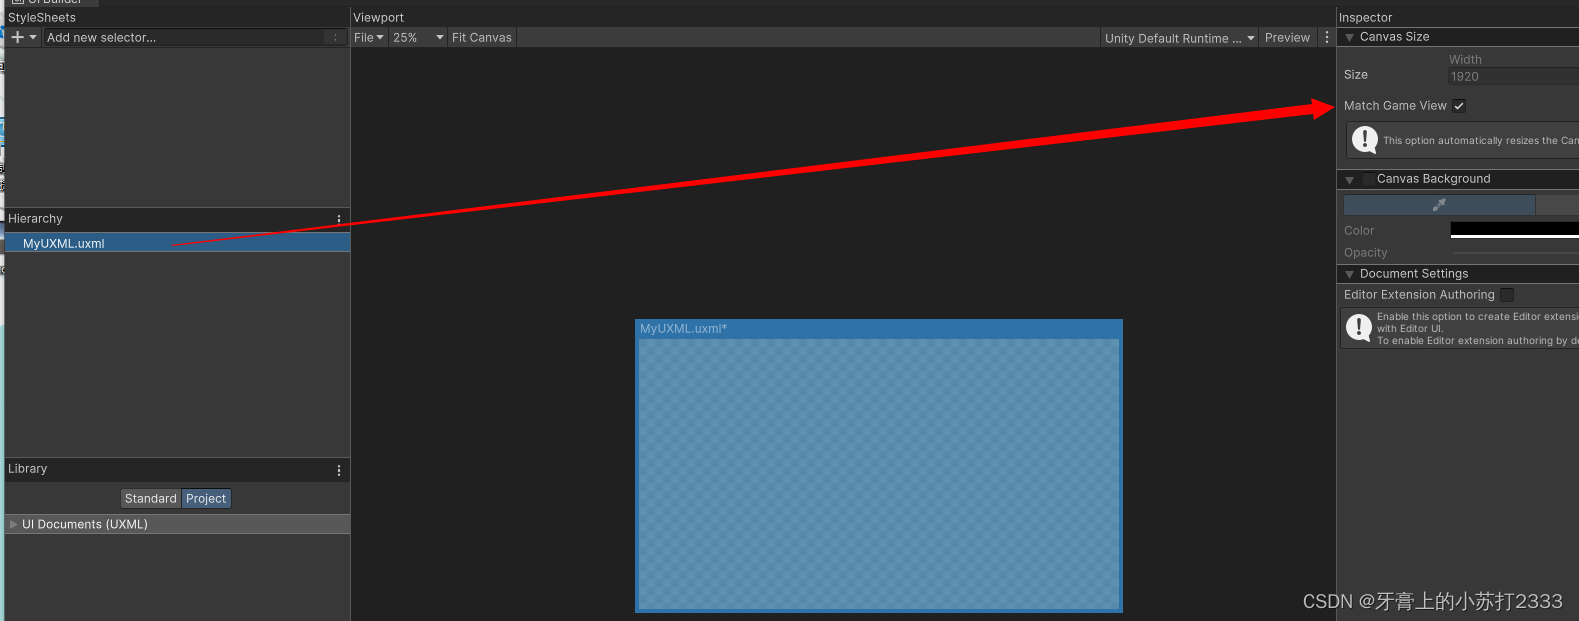
💡设置自动匹配GameView
让画布始终与GameView保持一致
🍤添加UI 元素
💡.从Library中拖拽一个VisualElement 到Hierarchy中。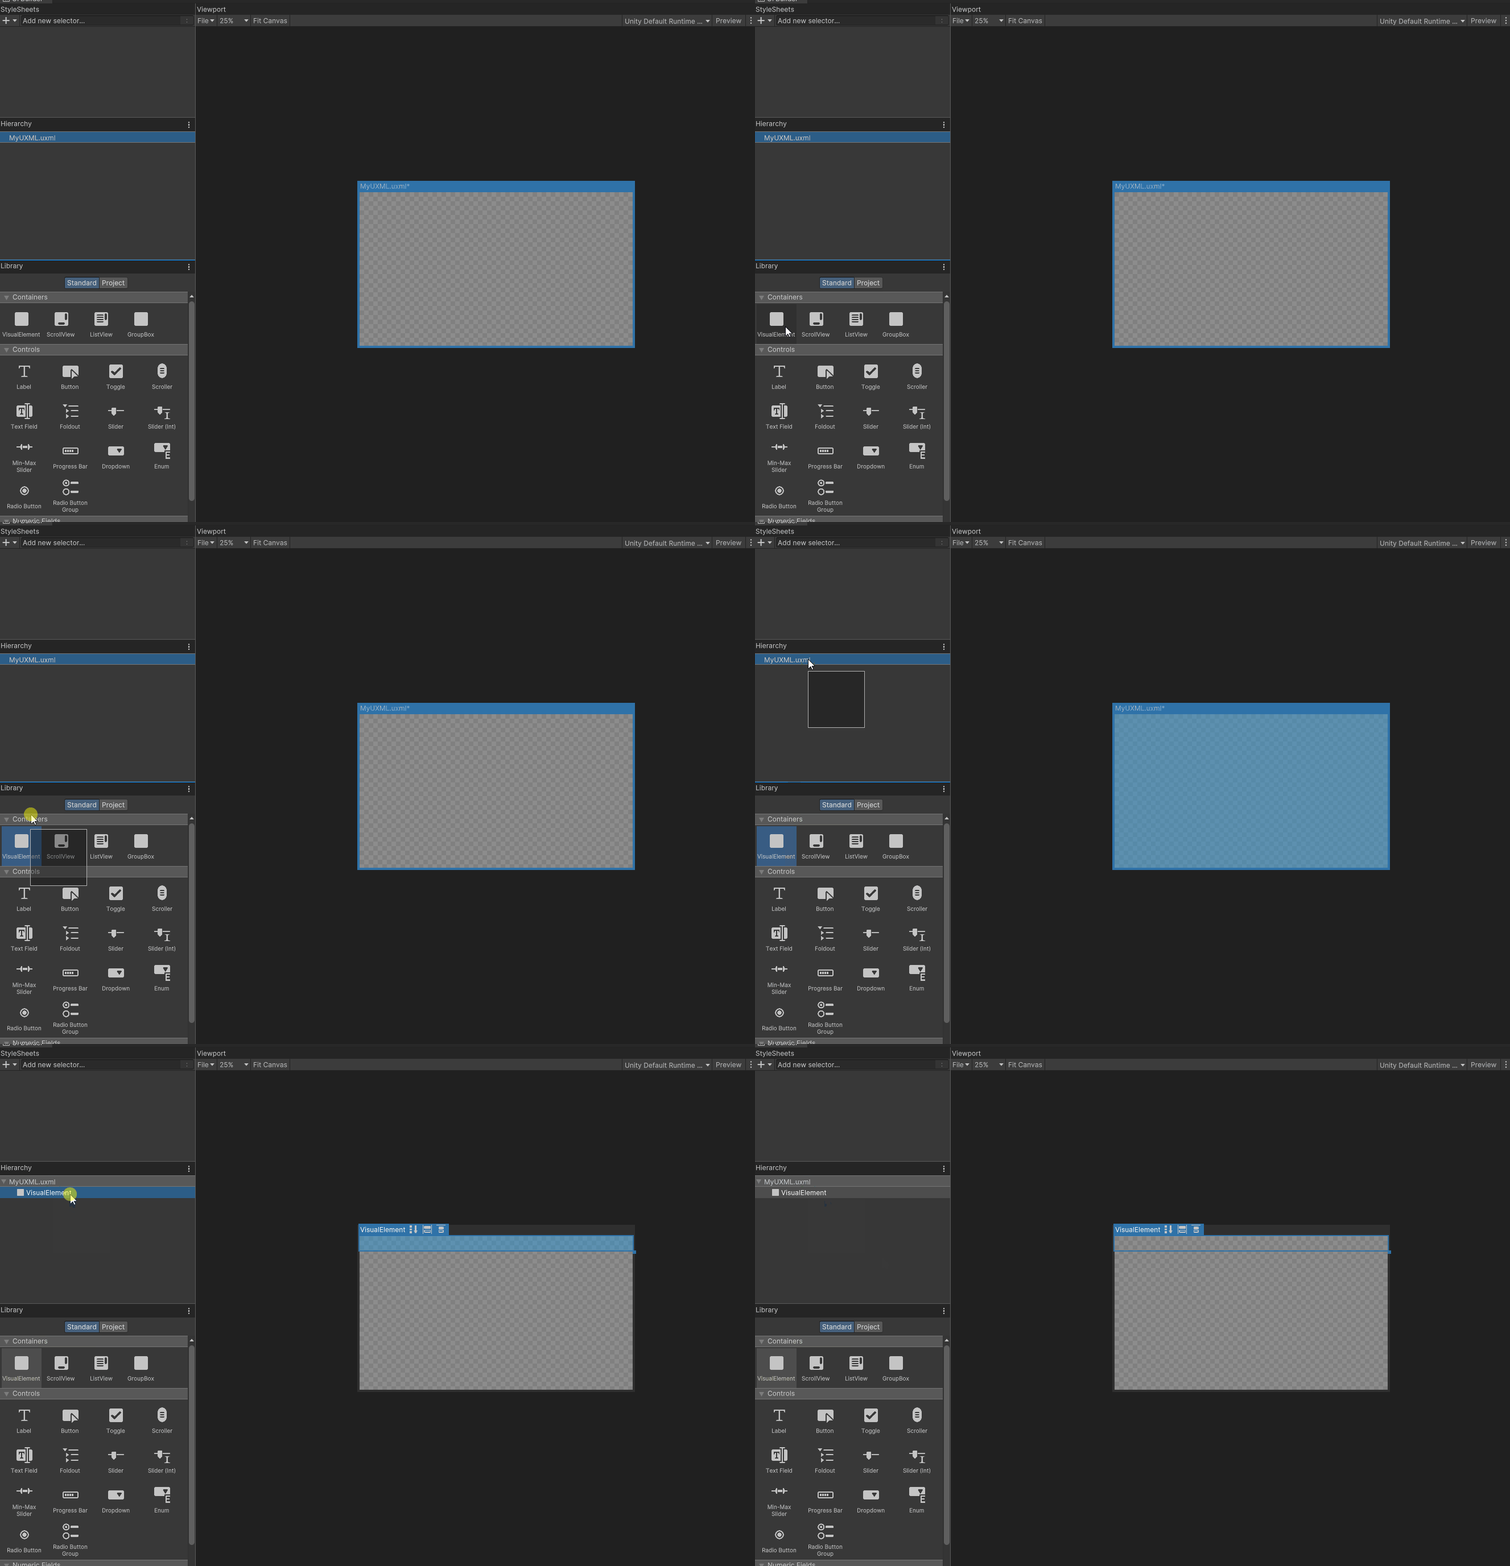
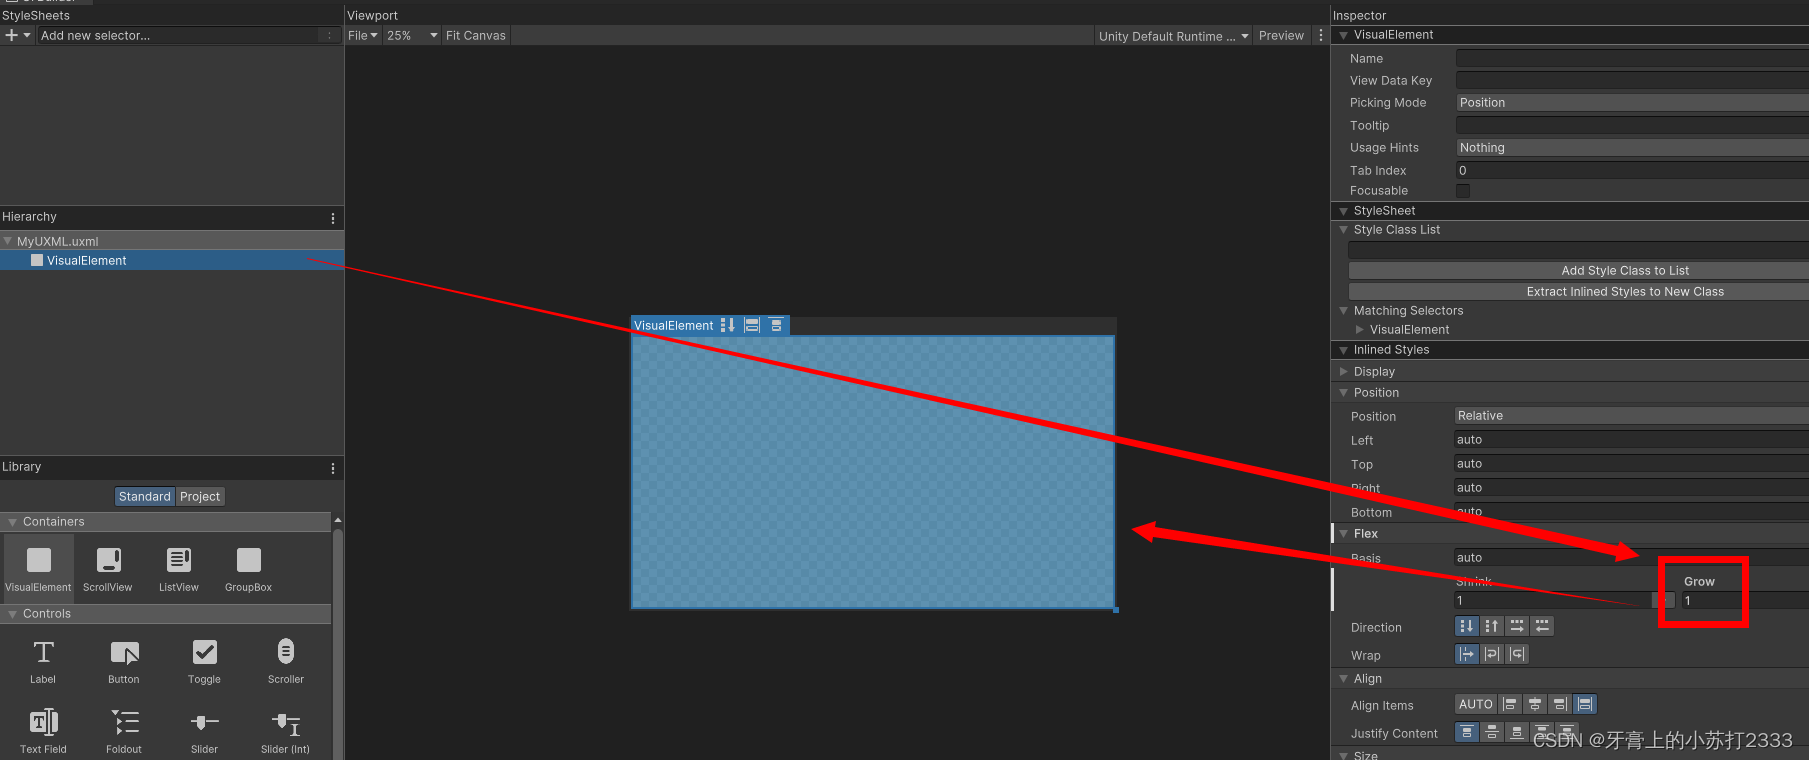
💡.选中添加的元素找到Flex并把里面的Grow值设置为1,这样它就会填充整个画布。
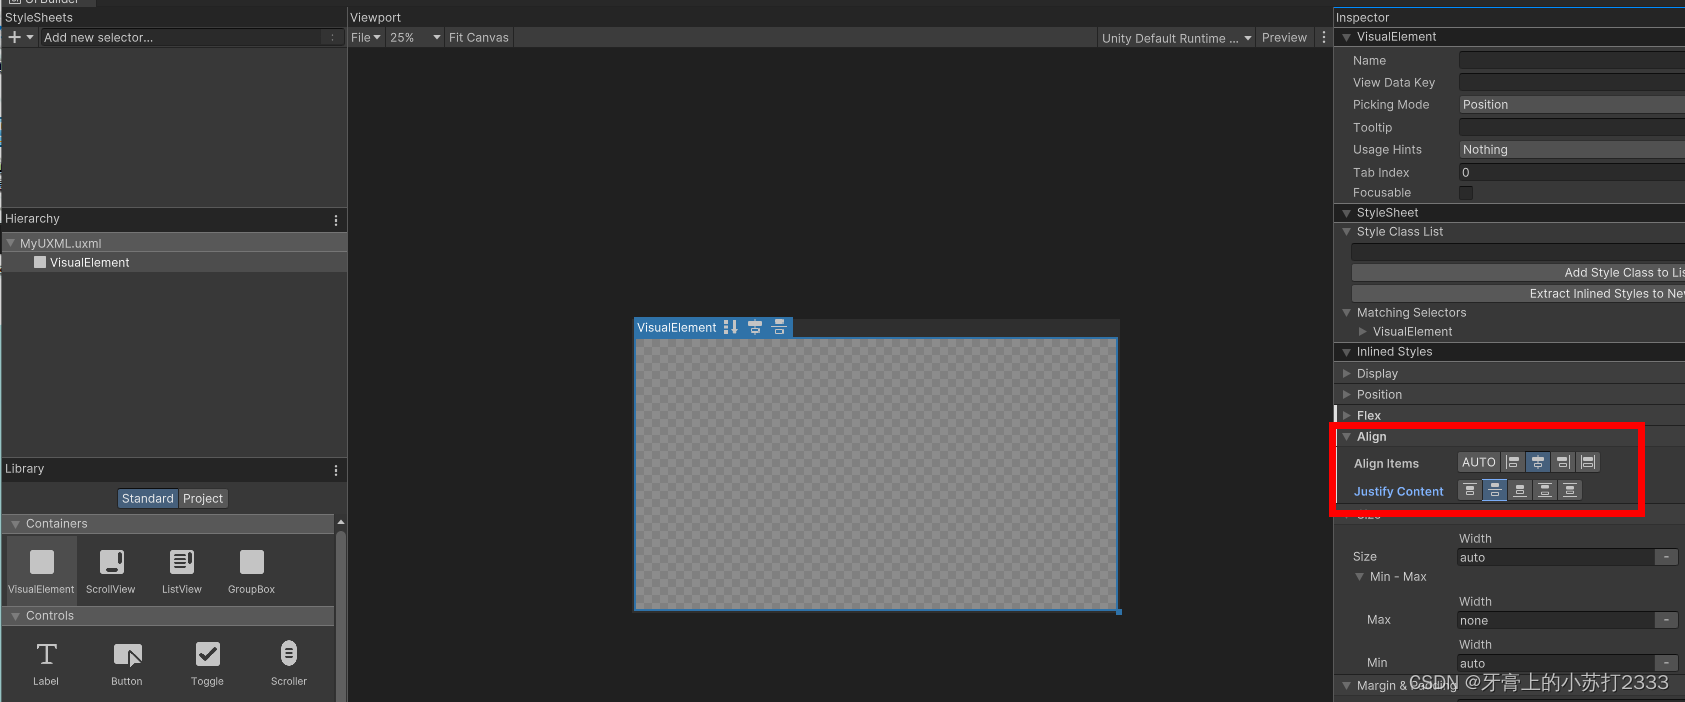
💡.为了让这个元素内的子元素在屏幕中间排列,需要设置 Align Items和Justify Content为Center。
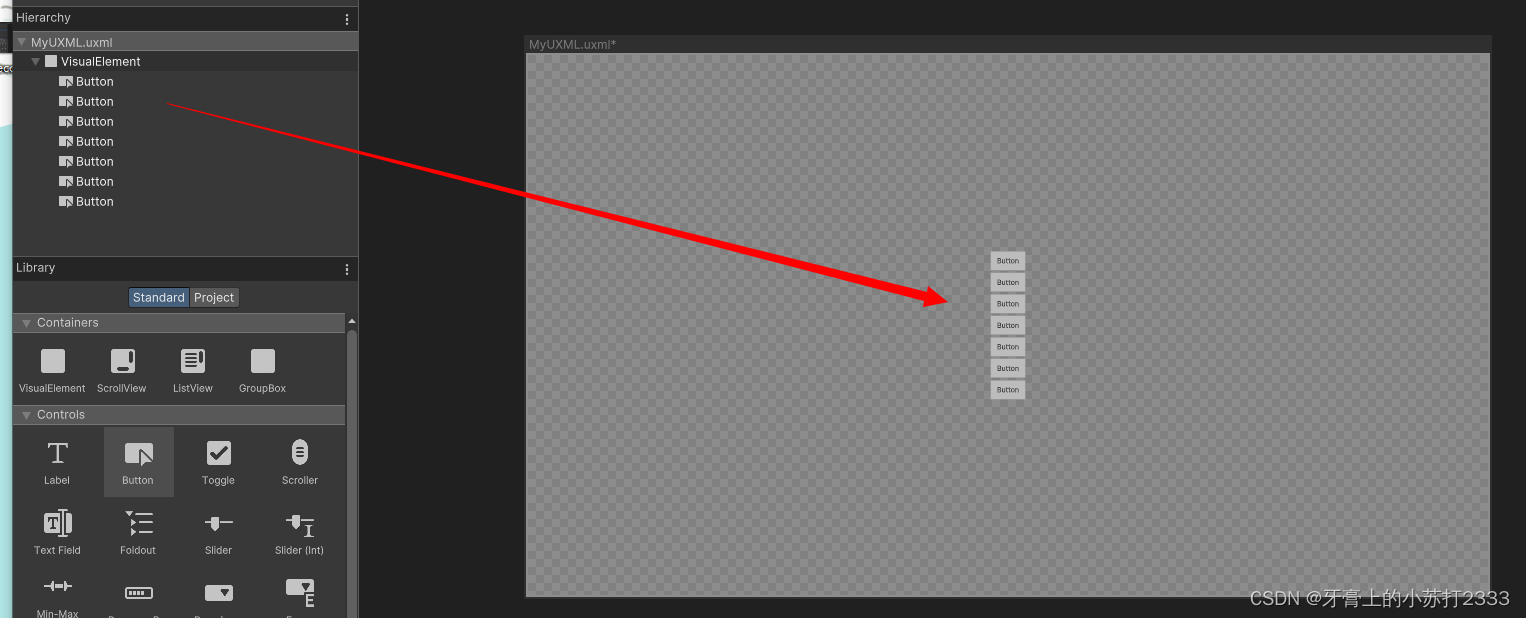
可以试着添加其它ui元素到这个VisualElement下就可以看到居中排列的效果。
💡.可以在Background > Color中设置背景色
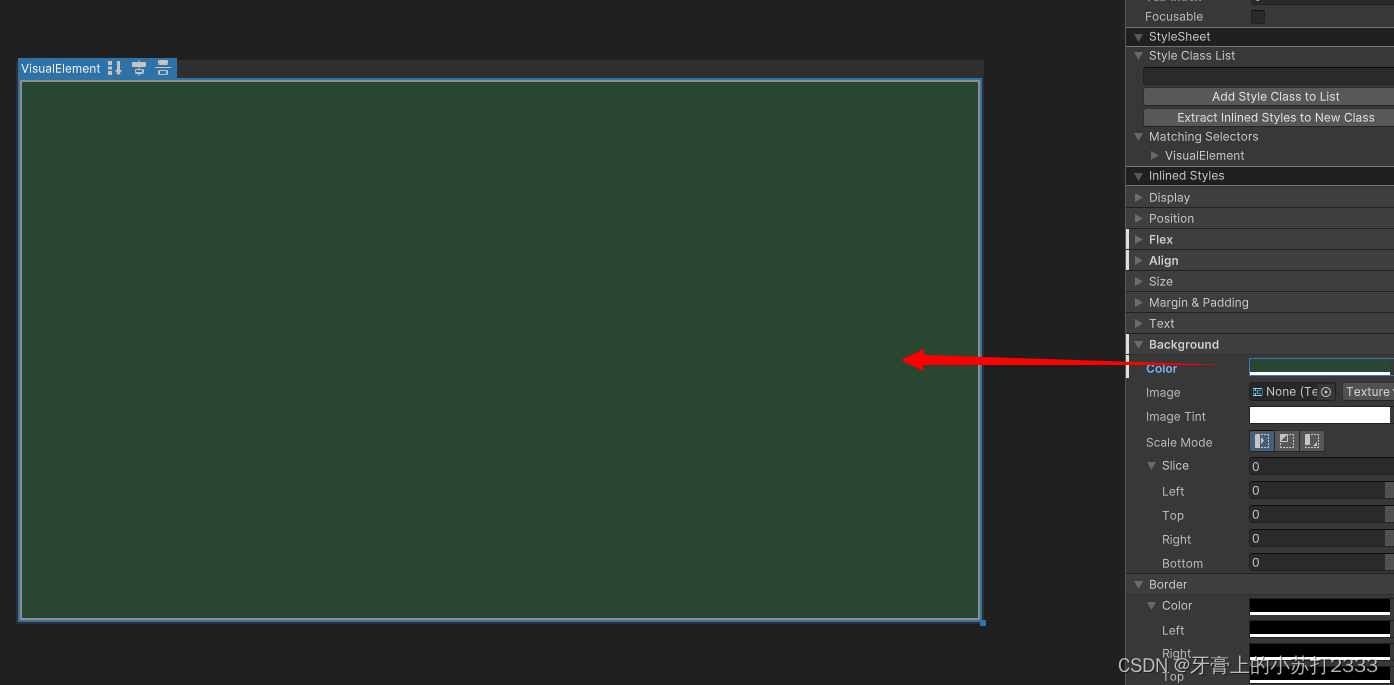
💡.在前面创建的VisualElement下新增一个VisualElement,作为后面左右排列的UI 的父节点。

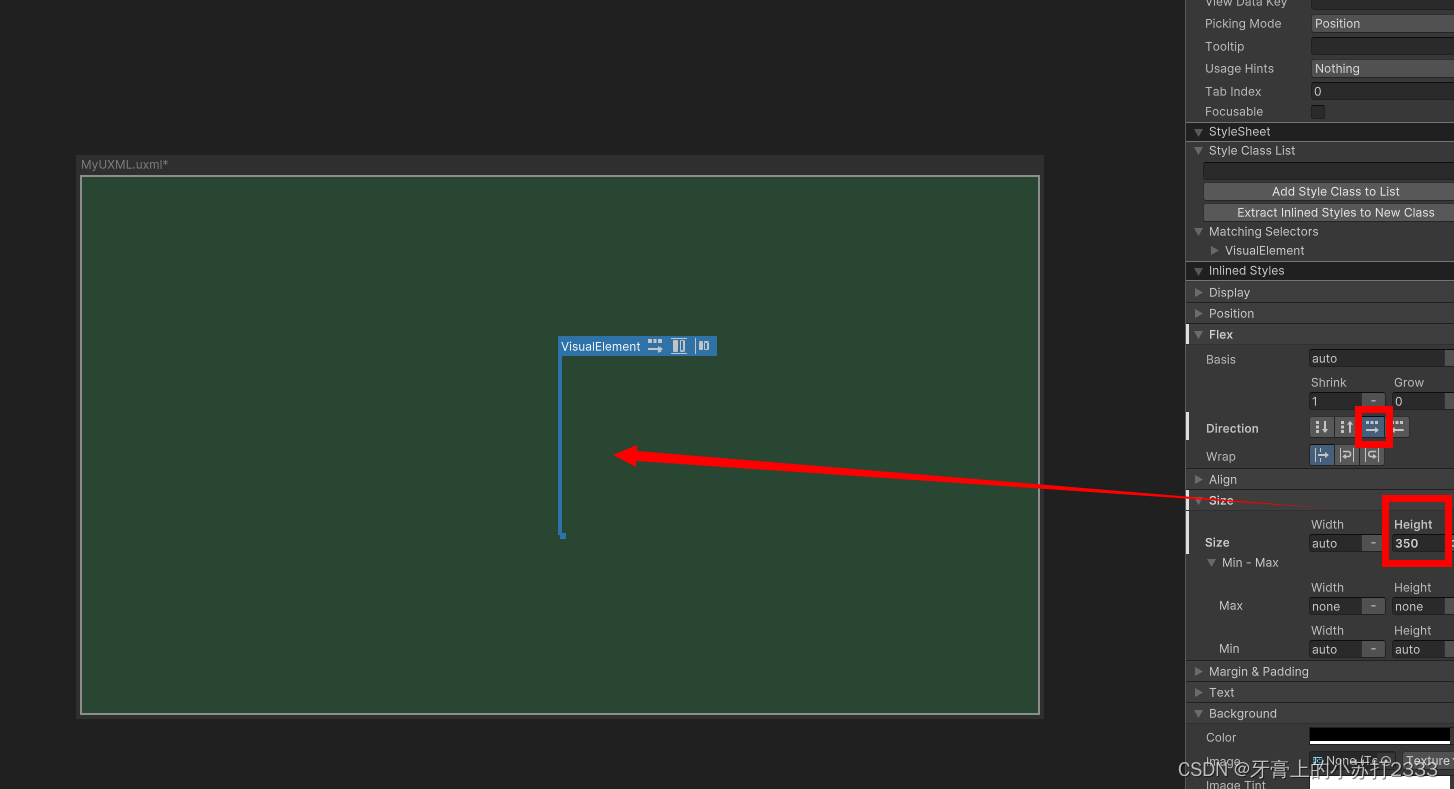
💡.设置该节点Flex-Direction为 从左到右排列(row),再设置固定高度为350像素。
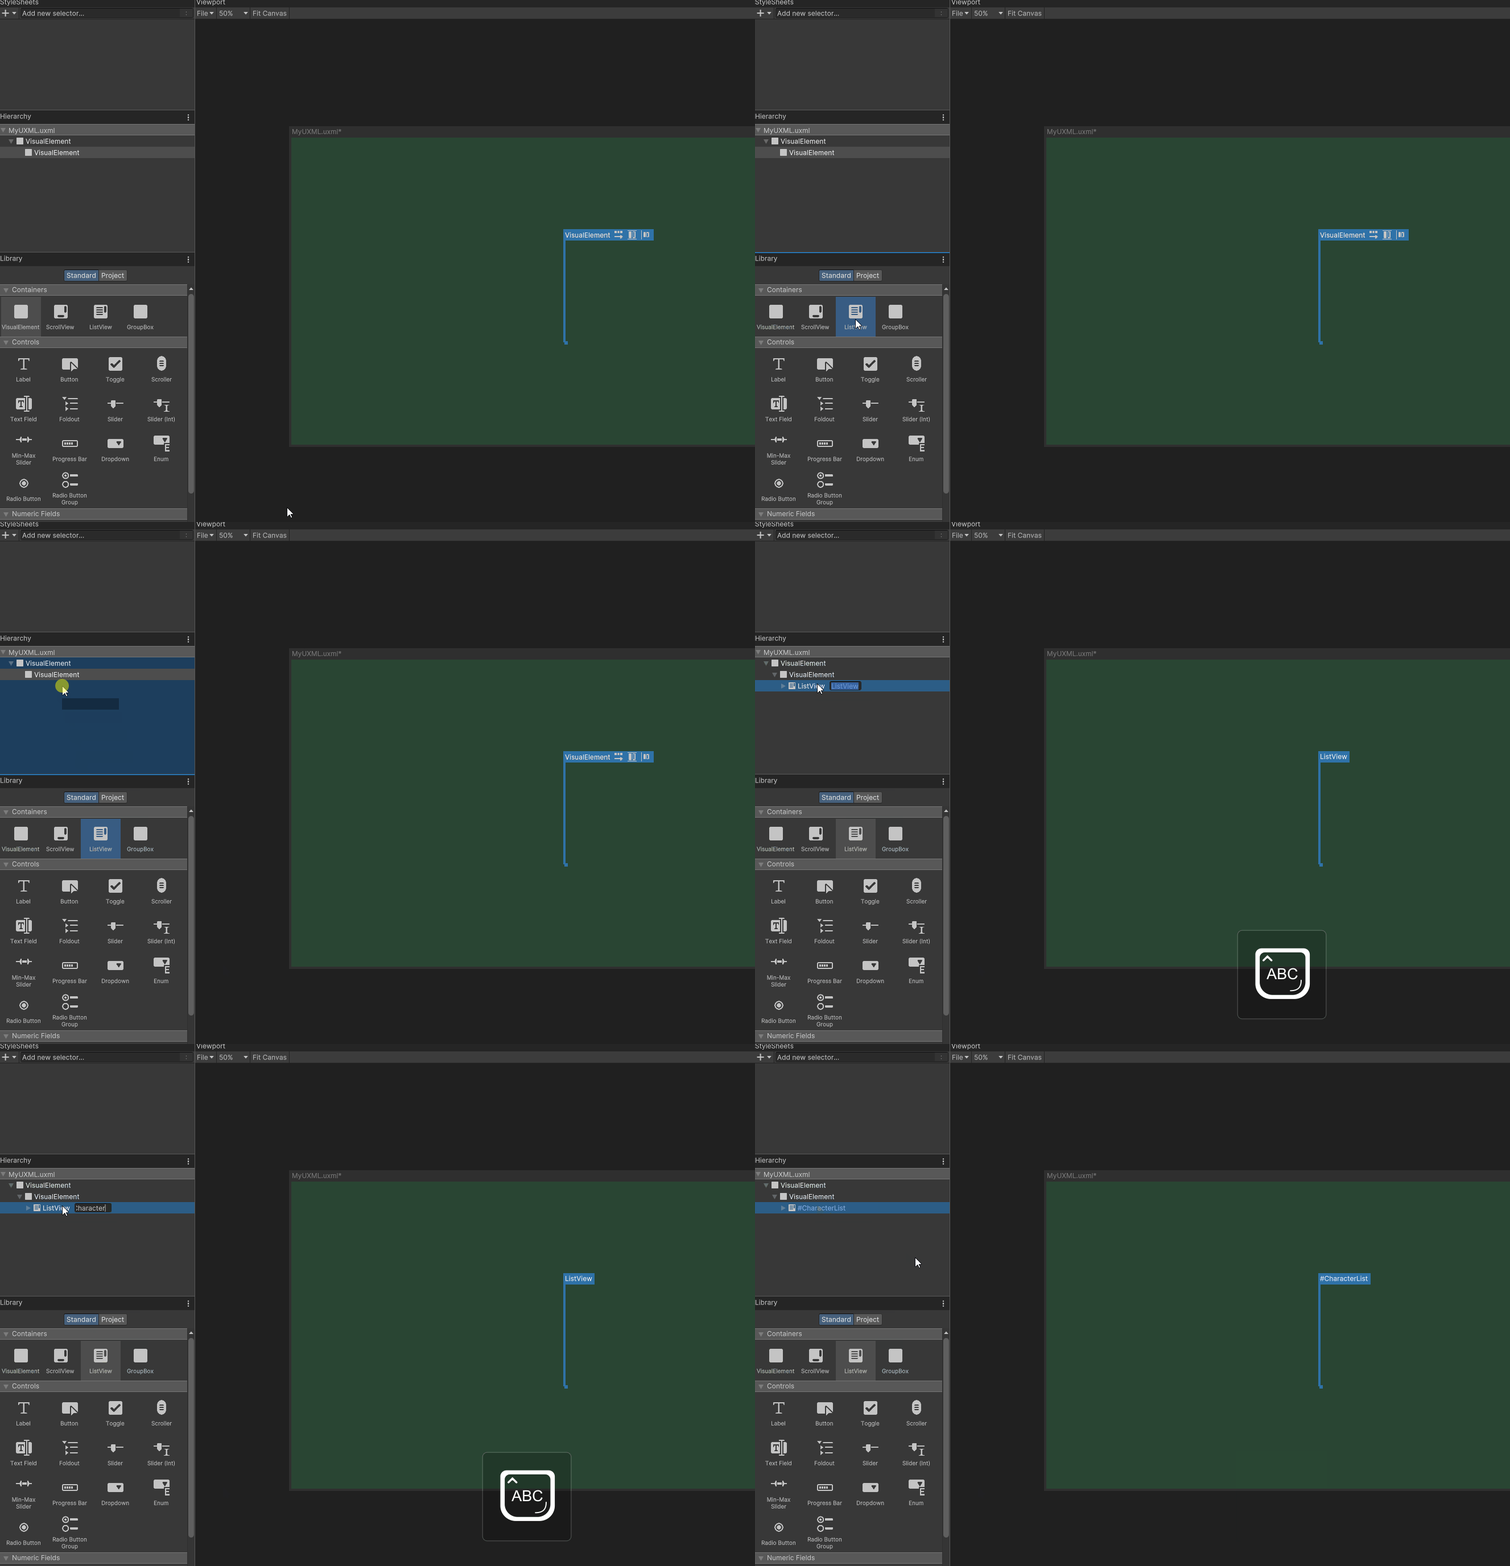
💡.拖拽一个ListView到刚刚添加的VisualElement下,并双击它重命名为CharacterList,重命名后可以通过脚本进行访问。
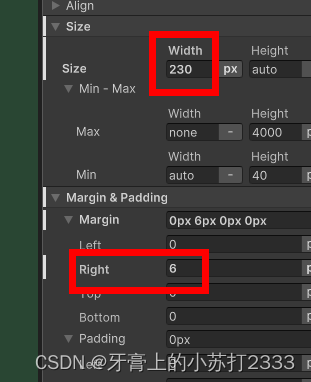
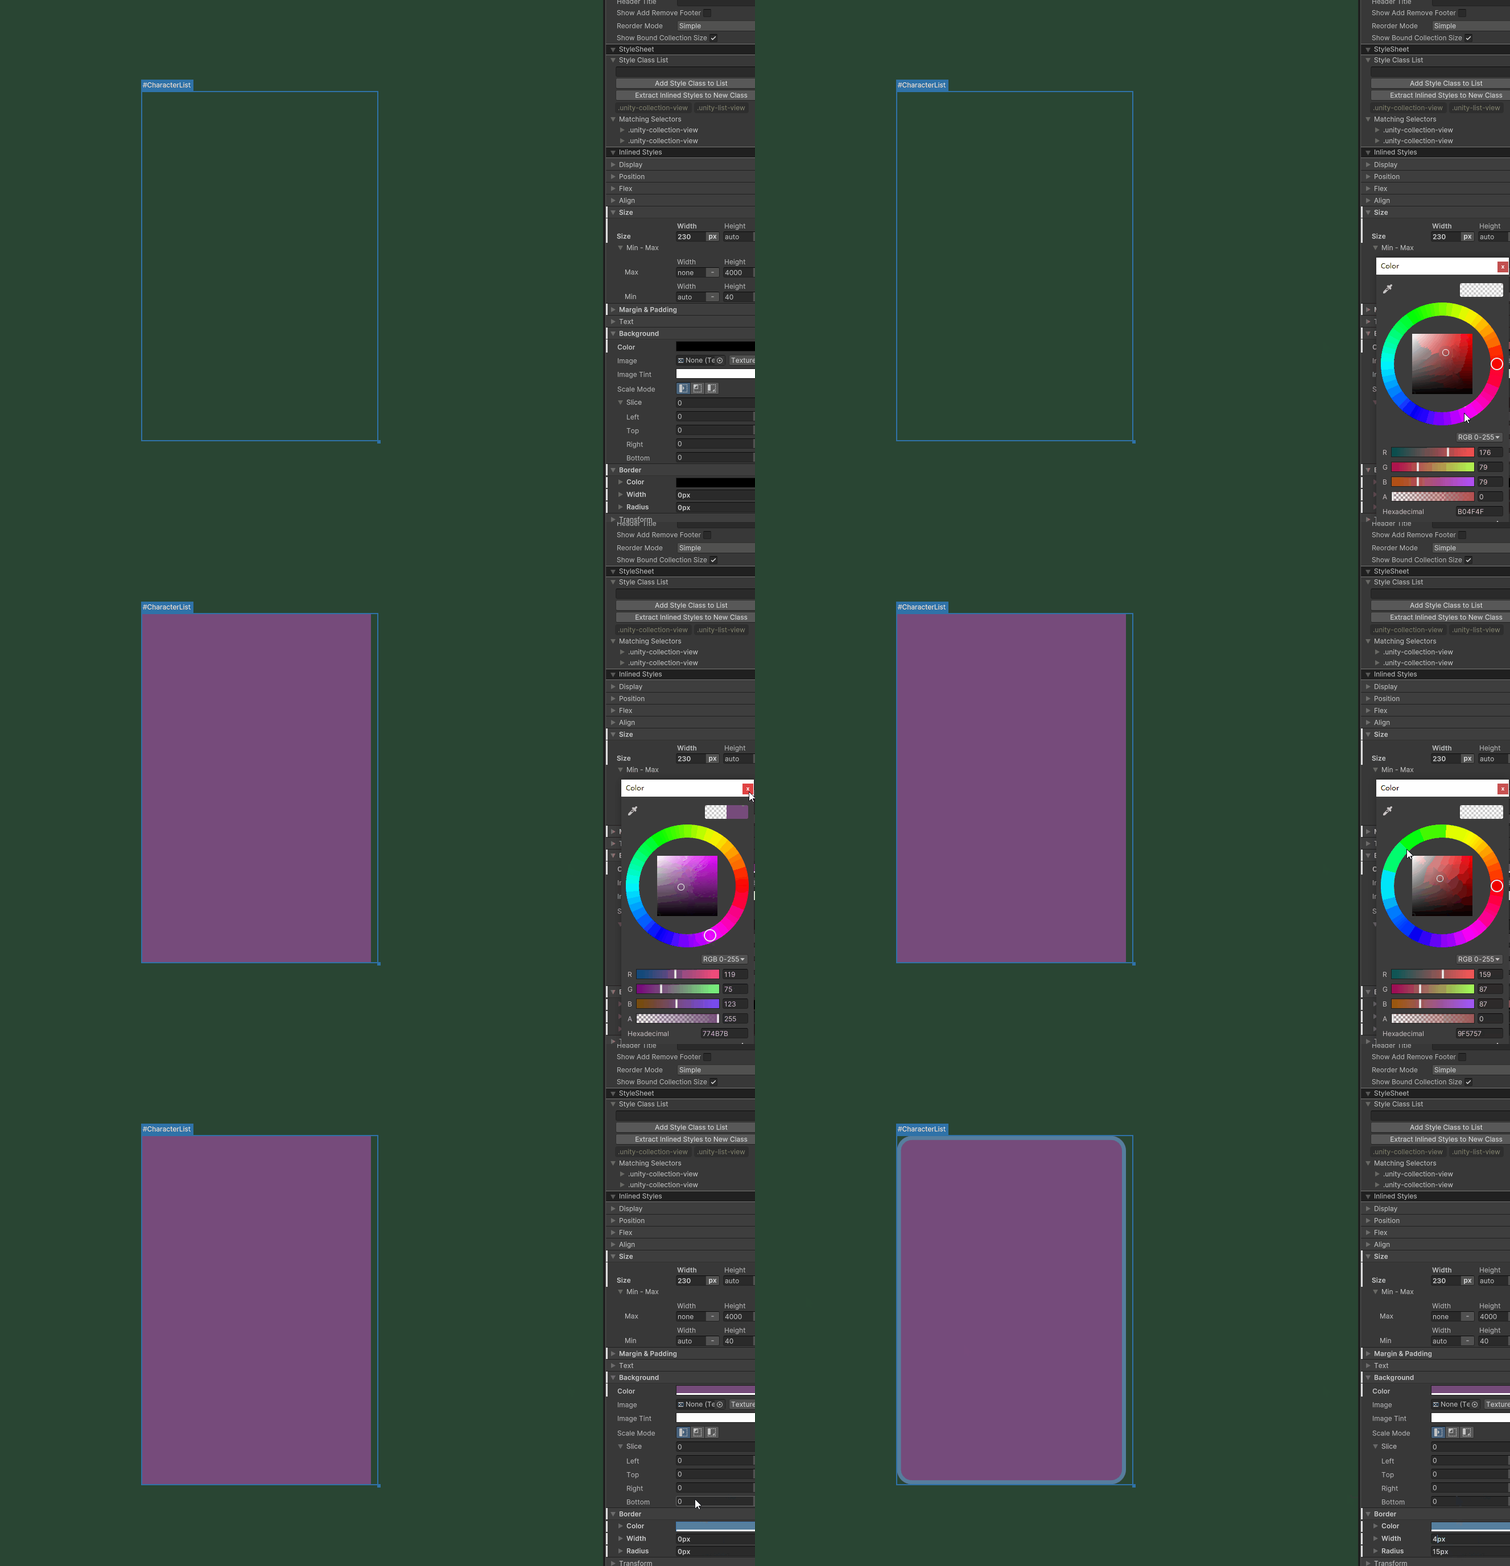
💡.设置CharacterList固定宽度为230px,Margin > Right 为6px
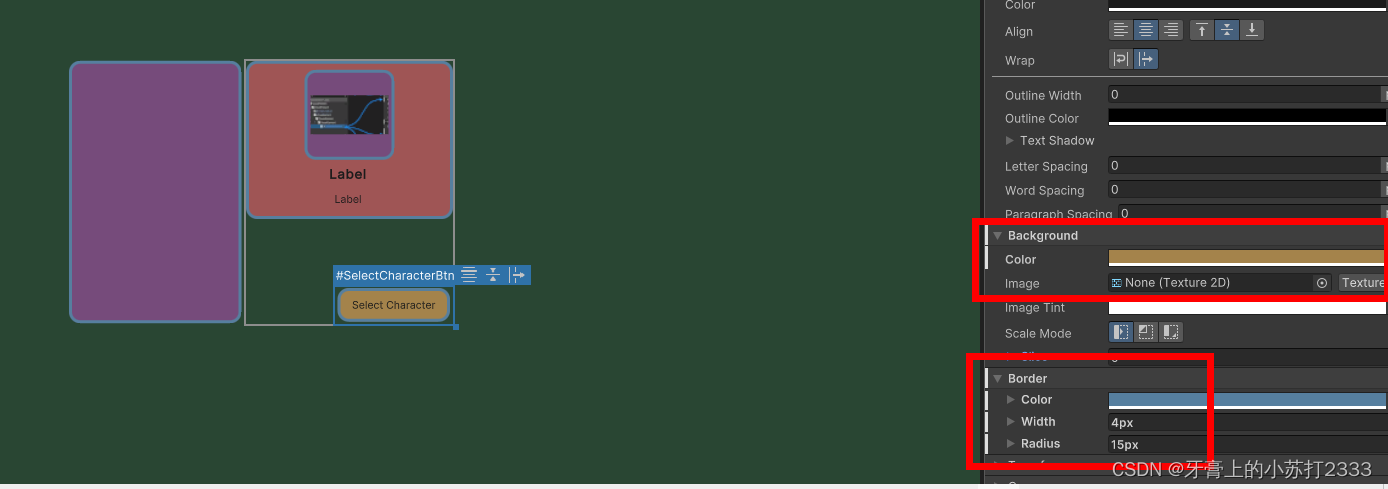
设置Background > Color、Border > Color,Width,Radius
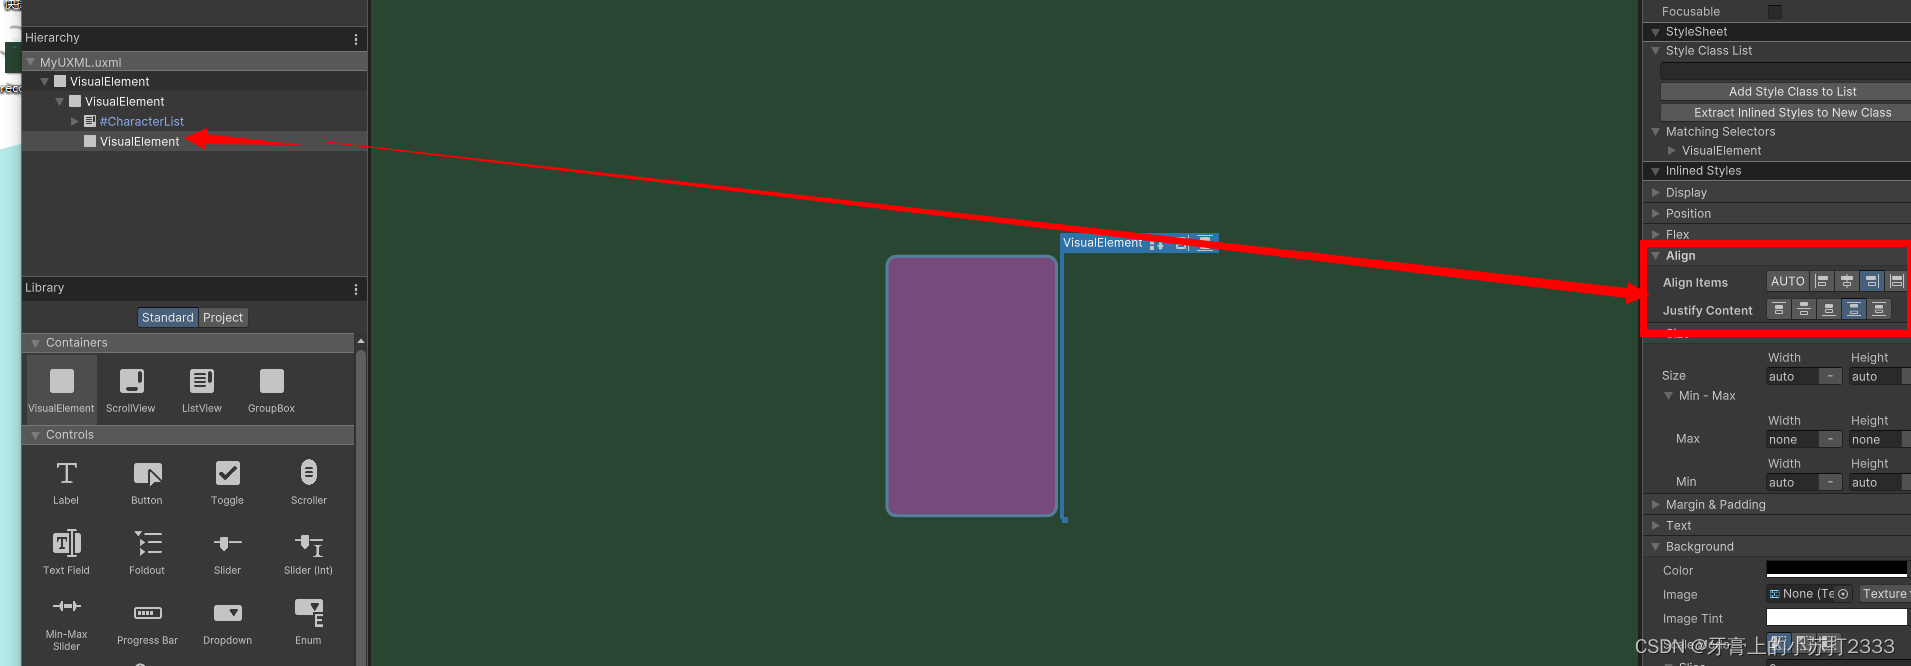
💡.添加一个VisualElement到CharacterList同级下,设置Align Item为Flex-End,Justify Content为Space-Between,这个节点作为人物详情显示和按钮的父节点。
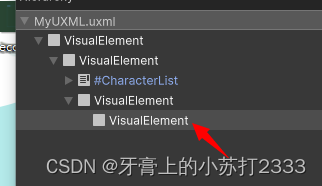
💡.再新建一个VisualElement到前面的节点中作为任务详情面板。当用户点击CharacterList中的item时它会显示人物的头像、名称、班级。
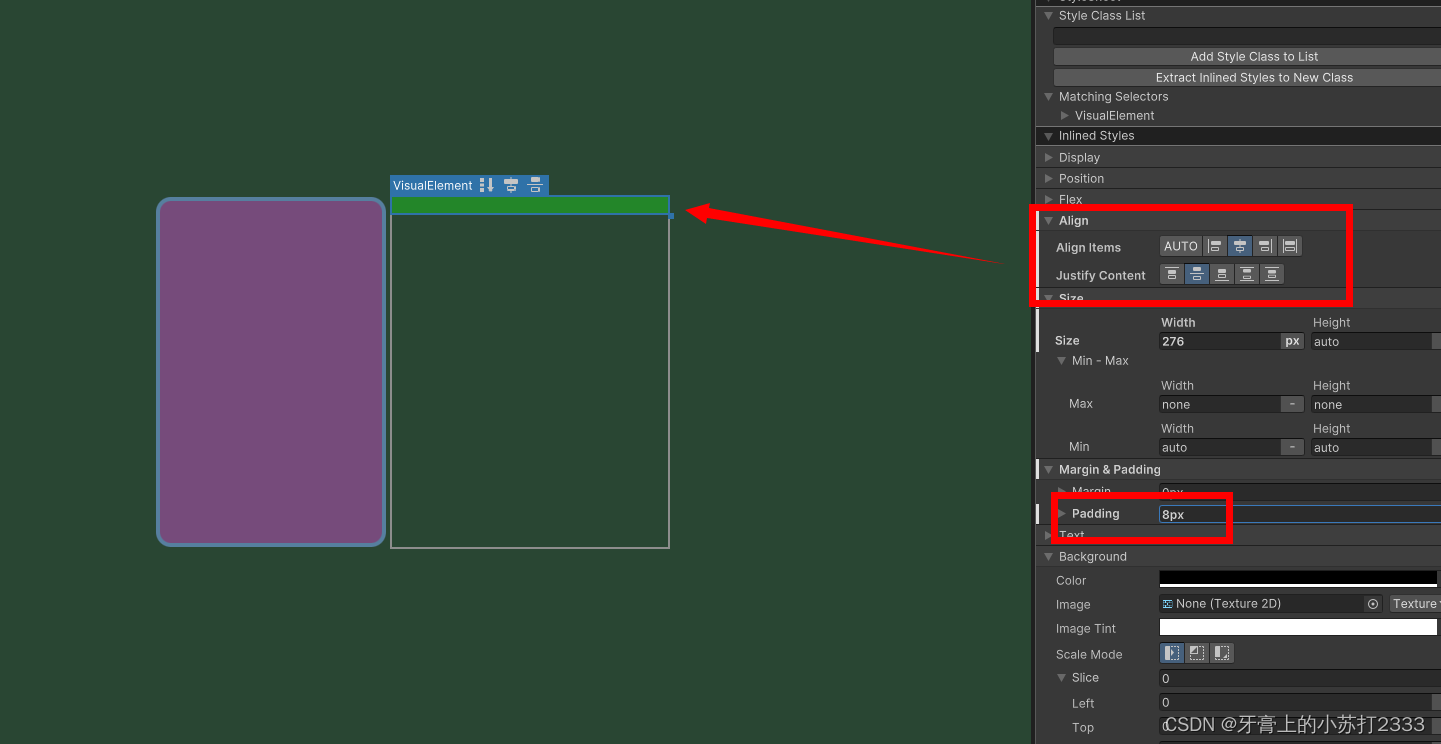
设置固定宽度为276px,Align Item 和 Justify Content 为Center,再设置Padding为8px让它的子元素与边缘保持距离。
还可以设置背景色和边框
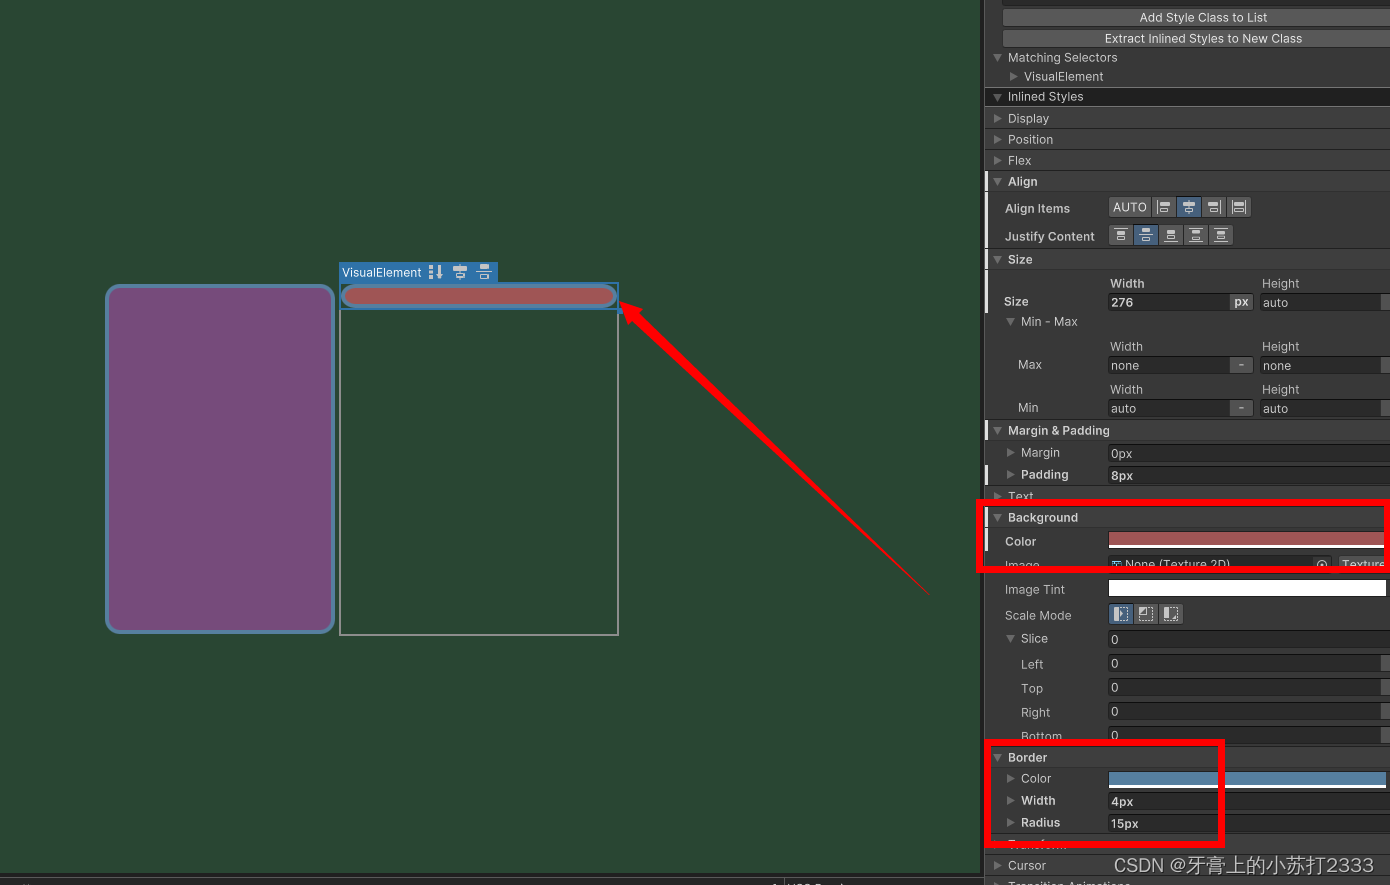
💡.接下来要添加人物详情中的每个子元素。首先是人物头像,它由背景框和前景图像组成,添加一个VisualElement到人物详情层中,设置固定尺寸为120x120px,Padding为4px,这样头像就不会接触到边框。
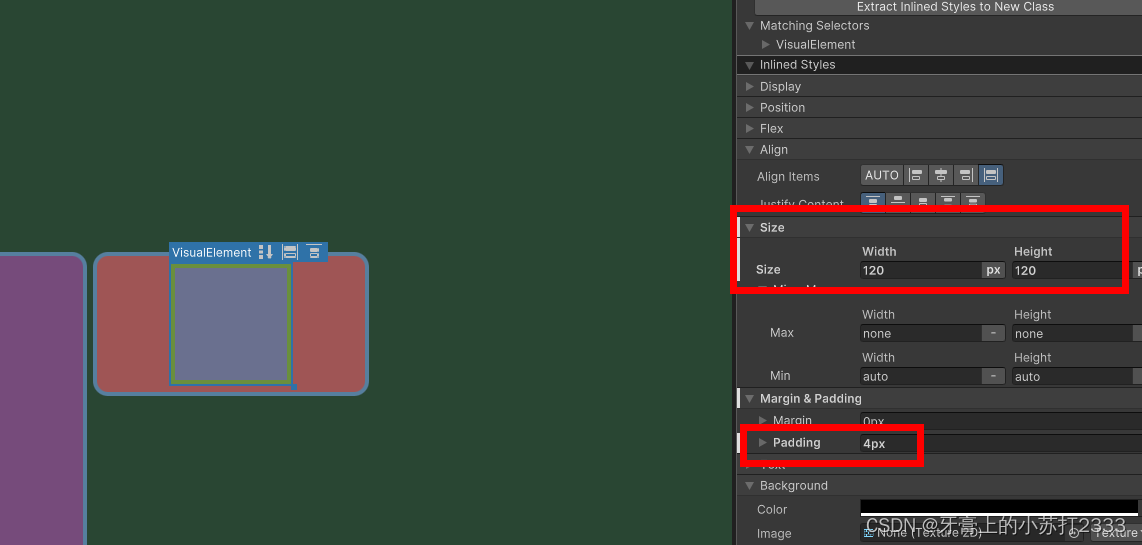
也可以设置边框样式和背景颜色。
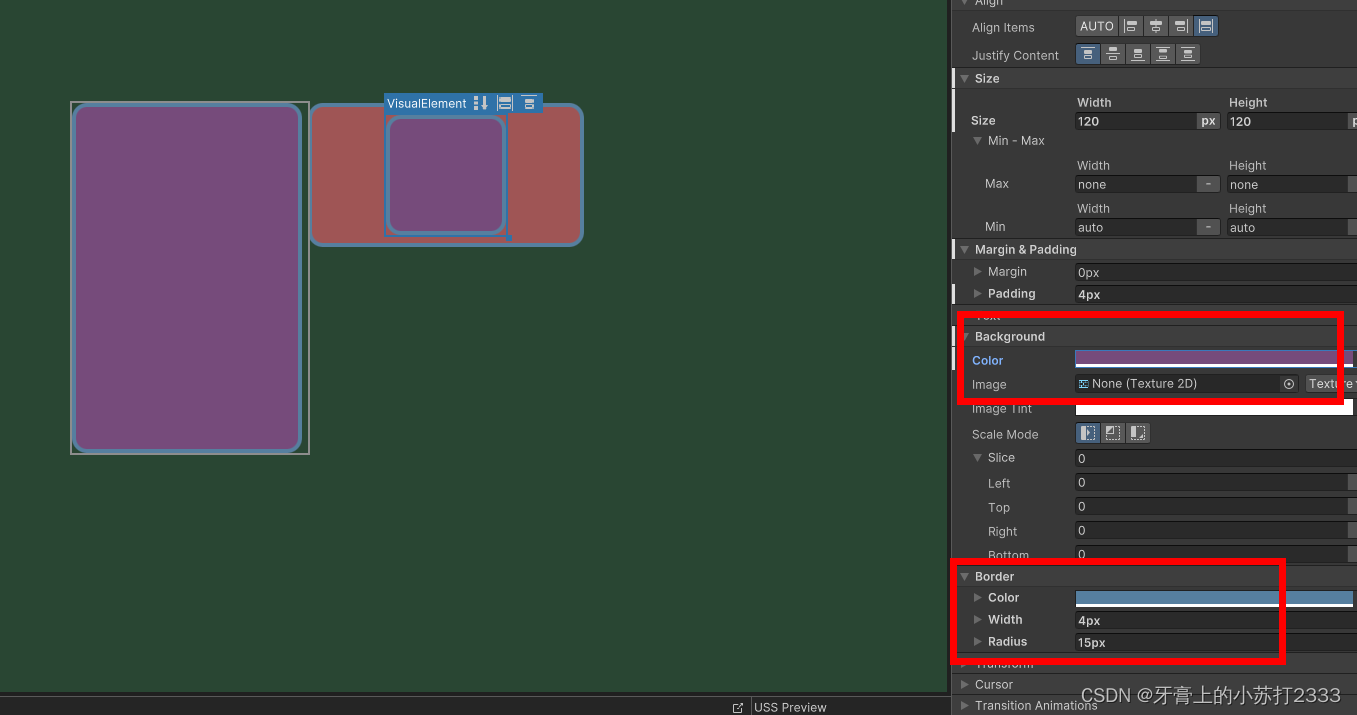
💡.这时再添加一个VisualElement放到刚刚的头像框中显示头像图片,重命名为CharacterPortrait这样后面可以通过脚本访问,设置Flex > Grow为1 保证撑满空间
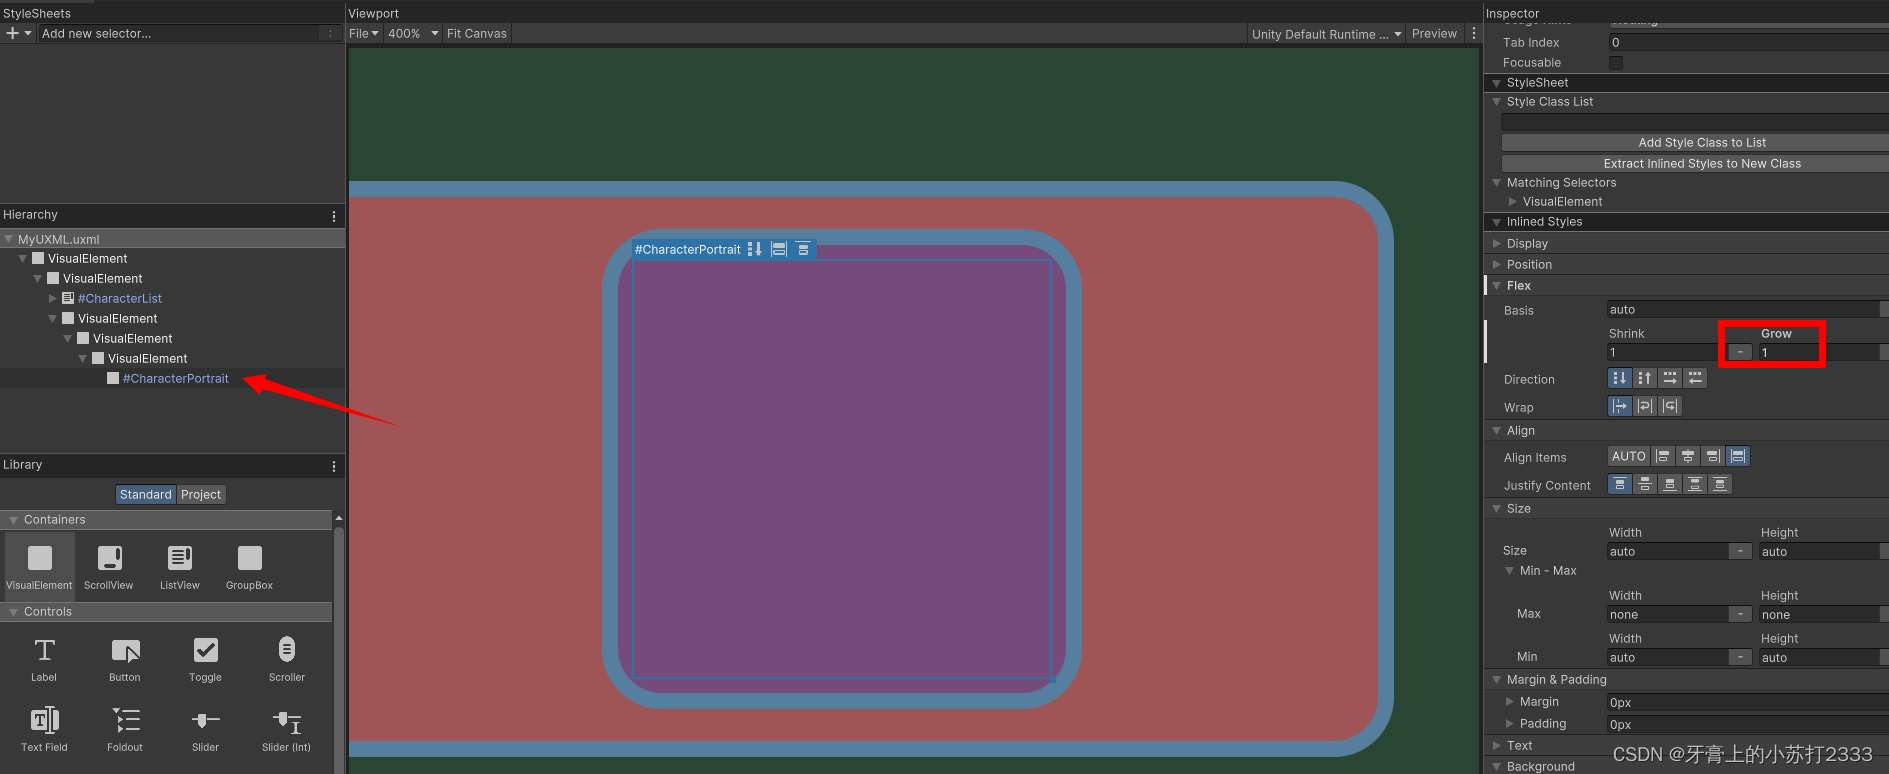
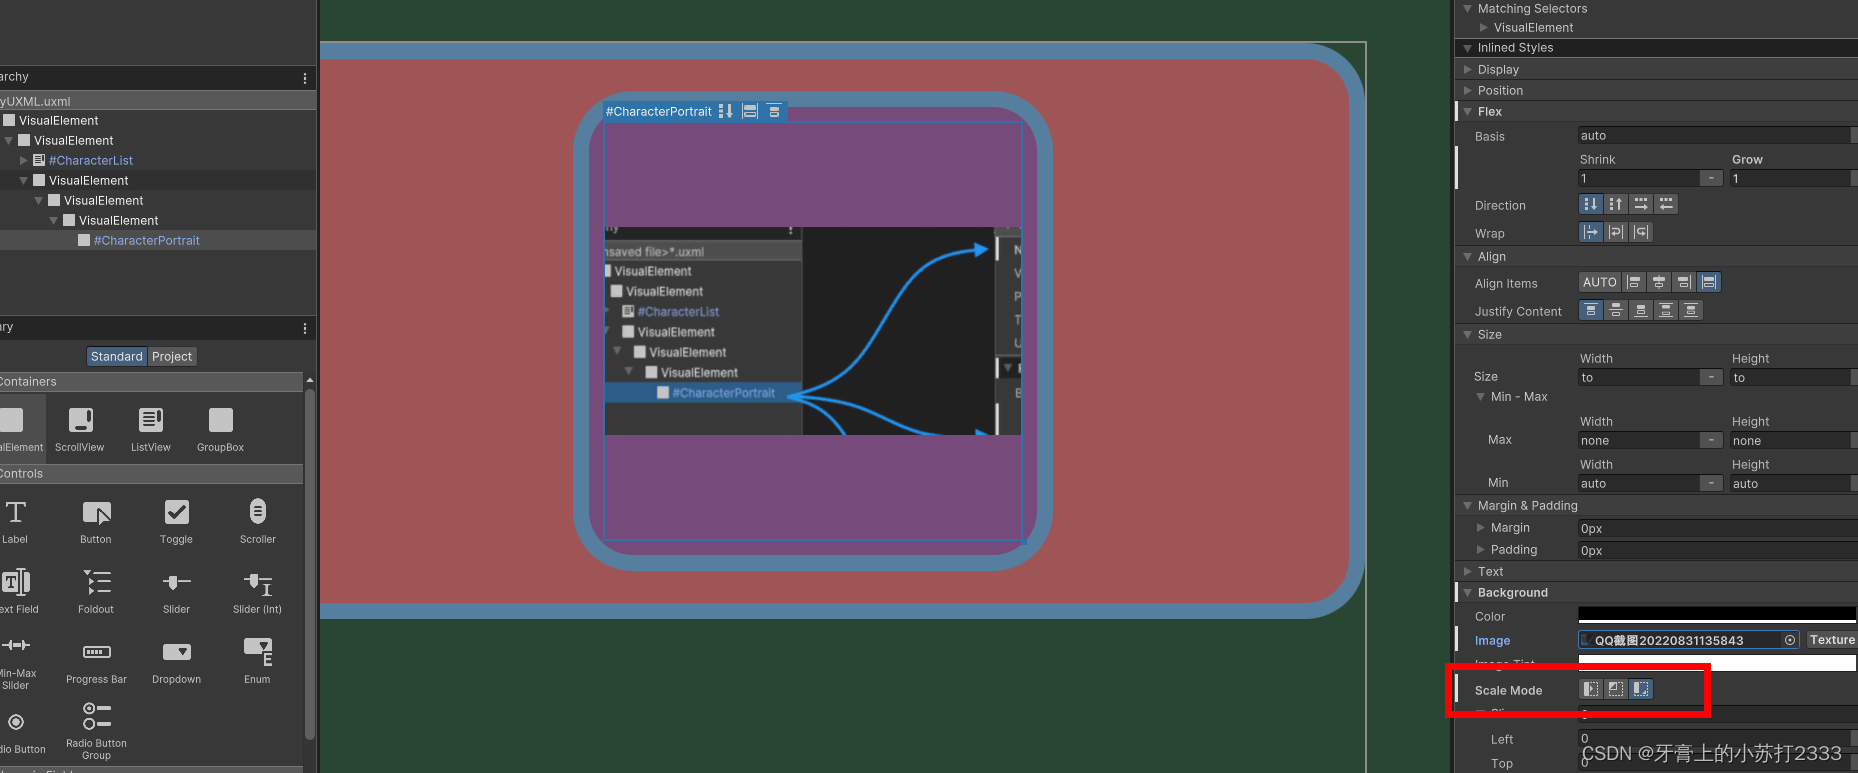
设置 Background > Scale Mode 为 Scale to Fit,这样图片会按正确的比例充满画布。
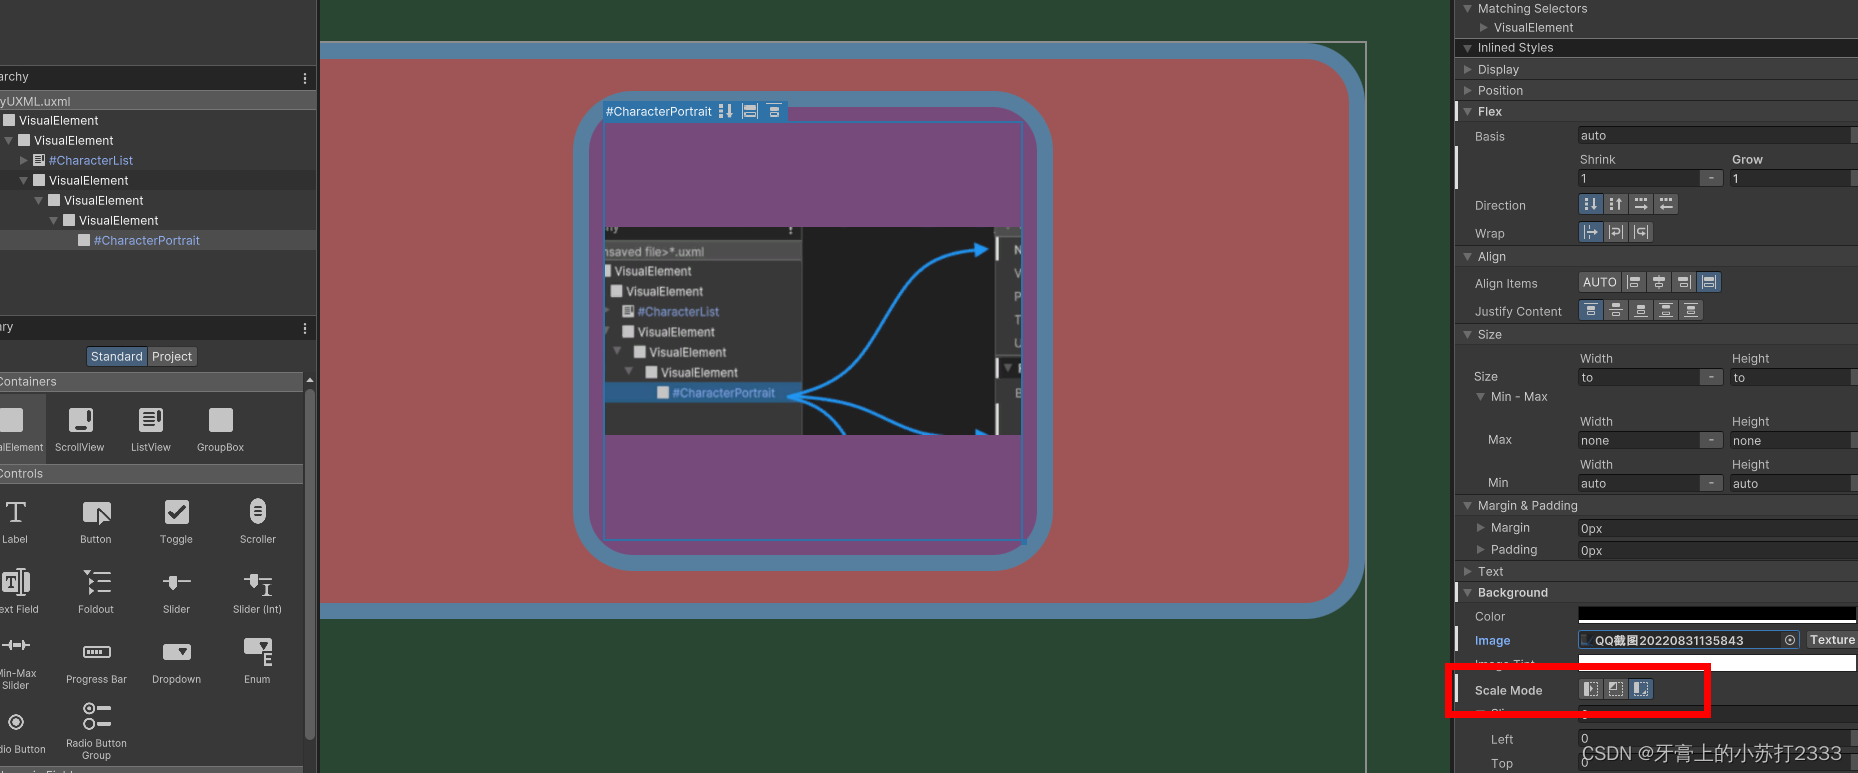
💡.添加两个Label到人物详情根节点中,分别重命名为CharacterName和CharacterClass,显示人物名称和班级信息。
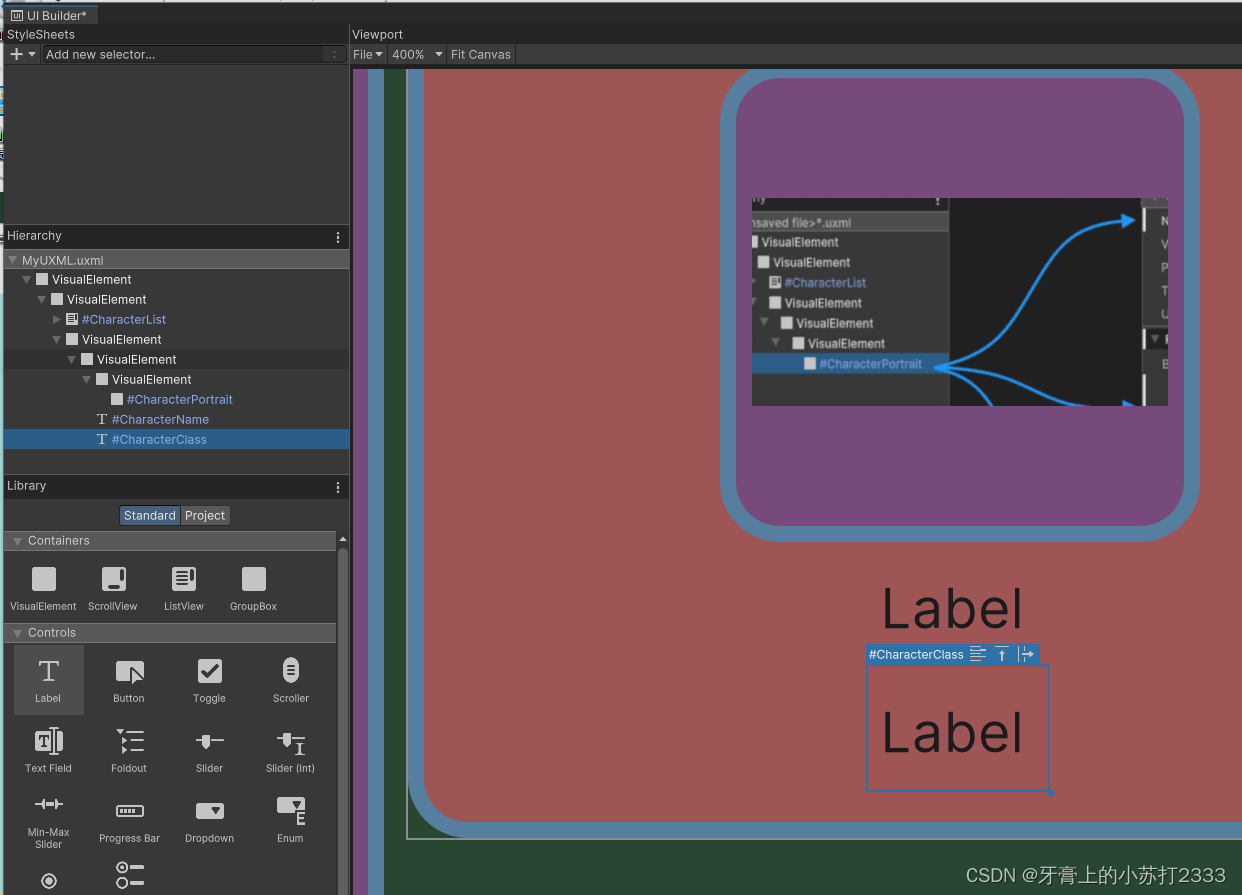
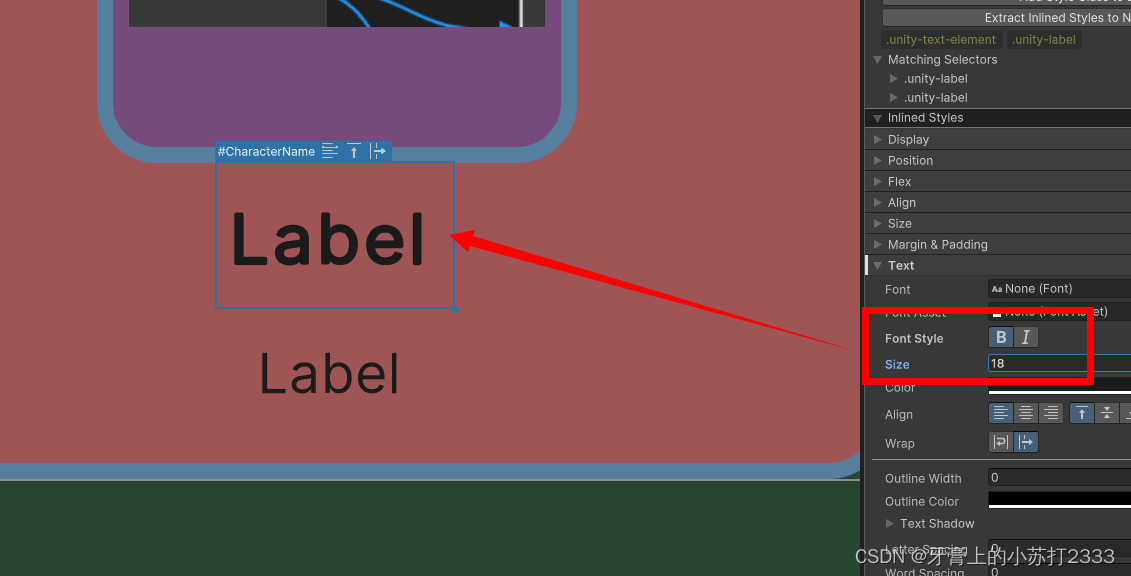
为了突出人物名称,可以设置它的字体大小为18,再设置加粗
💡.添加一个Buttion到右边的UI 容器中,重命名为SelectCharacterBtn,后面通过脚本根据CharacterList中item的选中或取消来控制激活或禁用它,设置固定宽度为150px,并修改Label为Select Character
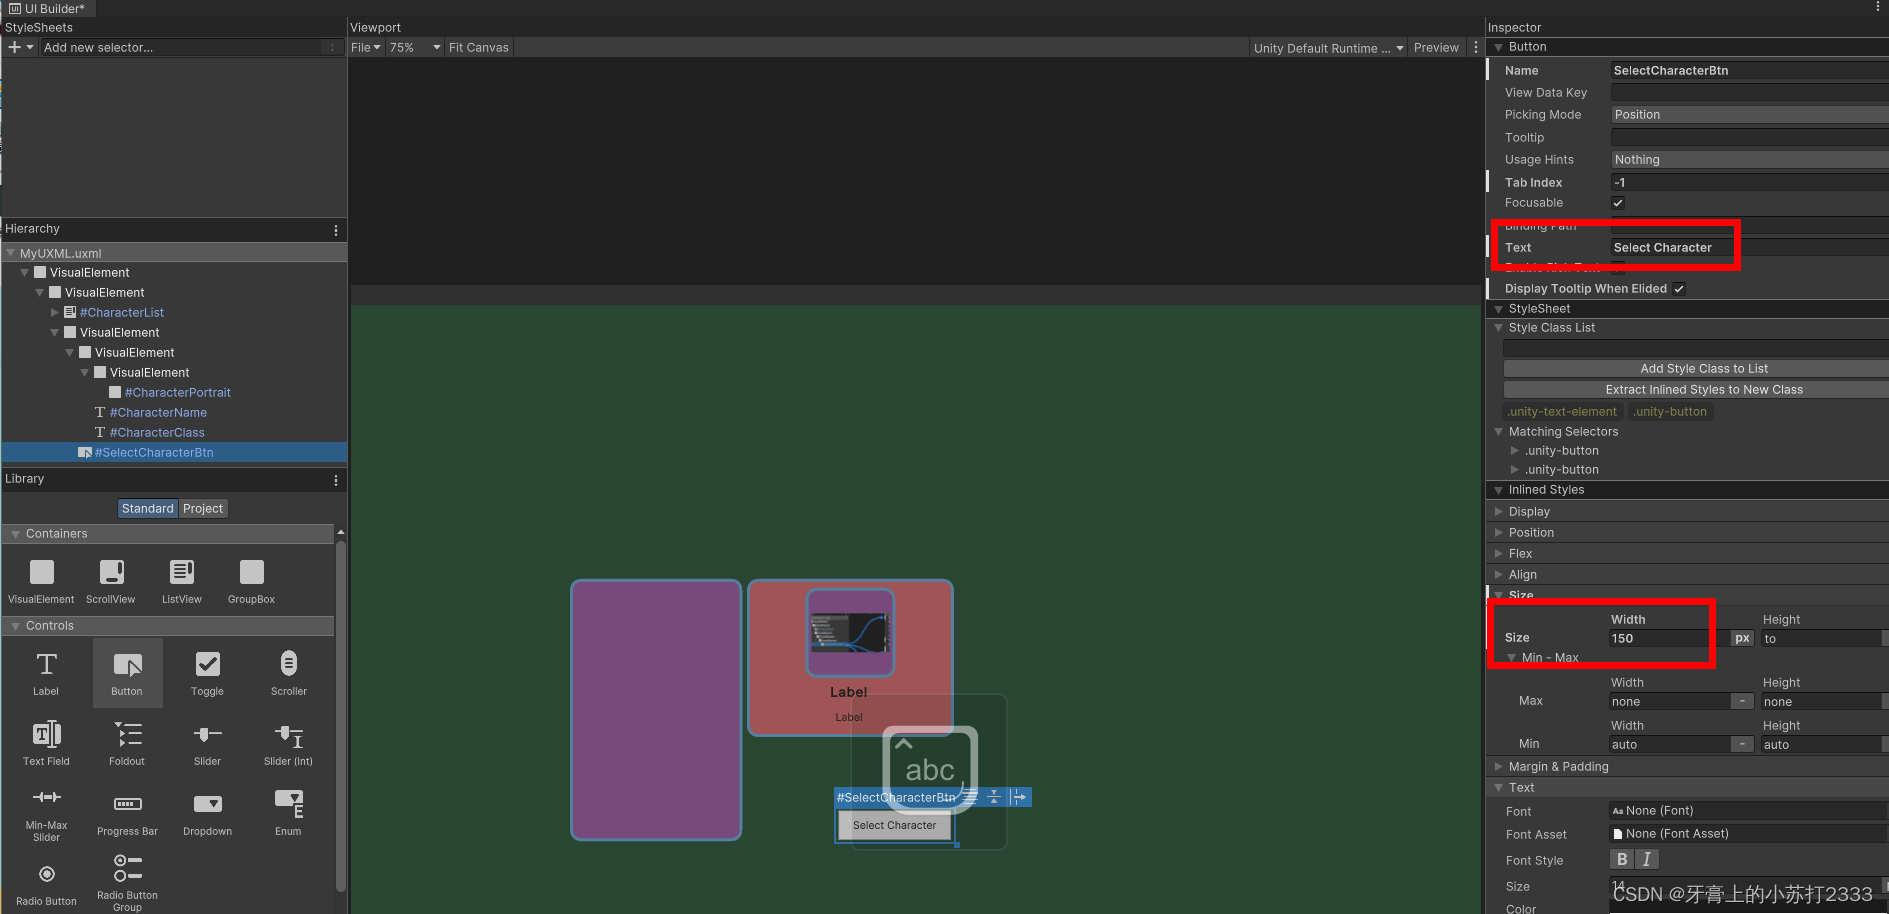
可以修改按钮的颜色、边框样式
💡.最后Ctrl+s保存
🍥设置场景
我们将在本节学会在运行时加载显示前面编辑好的ui 模板。
💡创建PanelSettings
这个是用来配置屏幕相关的设置,比如缩放模式、渲染顺序,还定义了你的UI在UI Toolkit Debugger中显示的名字。
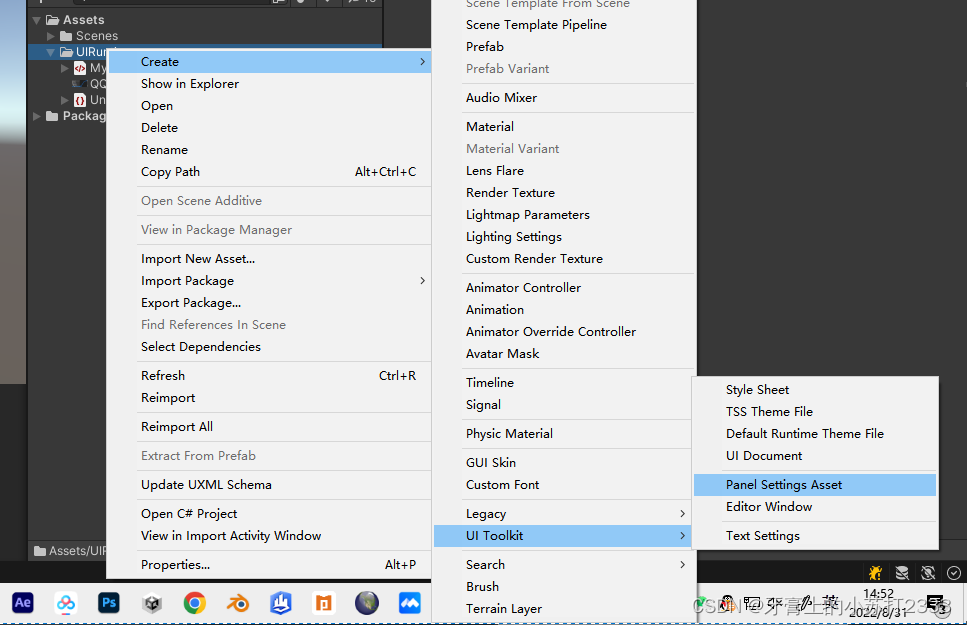
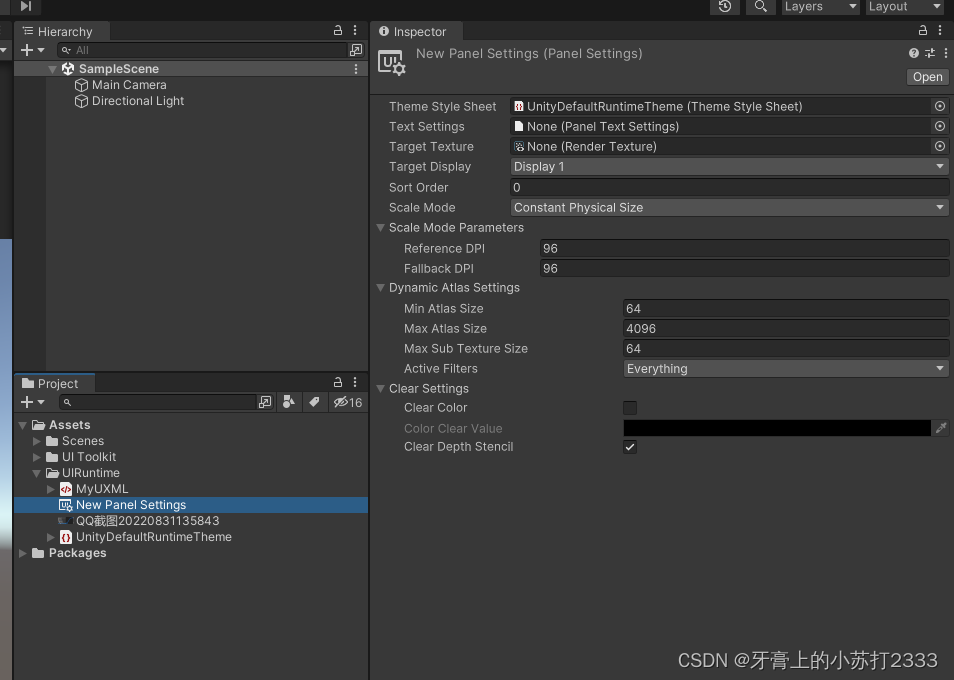
💡创建UI Document物体
新建一个空物体并挂上UIDocument组件。
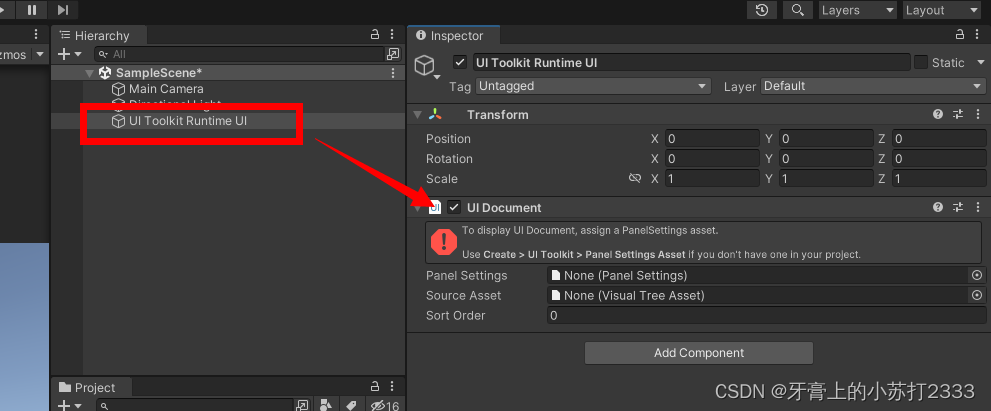
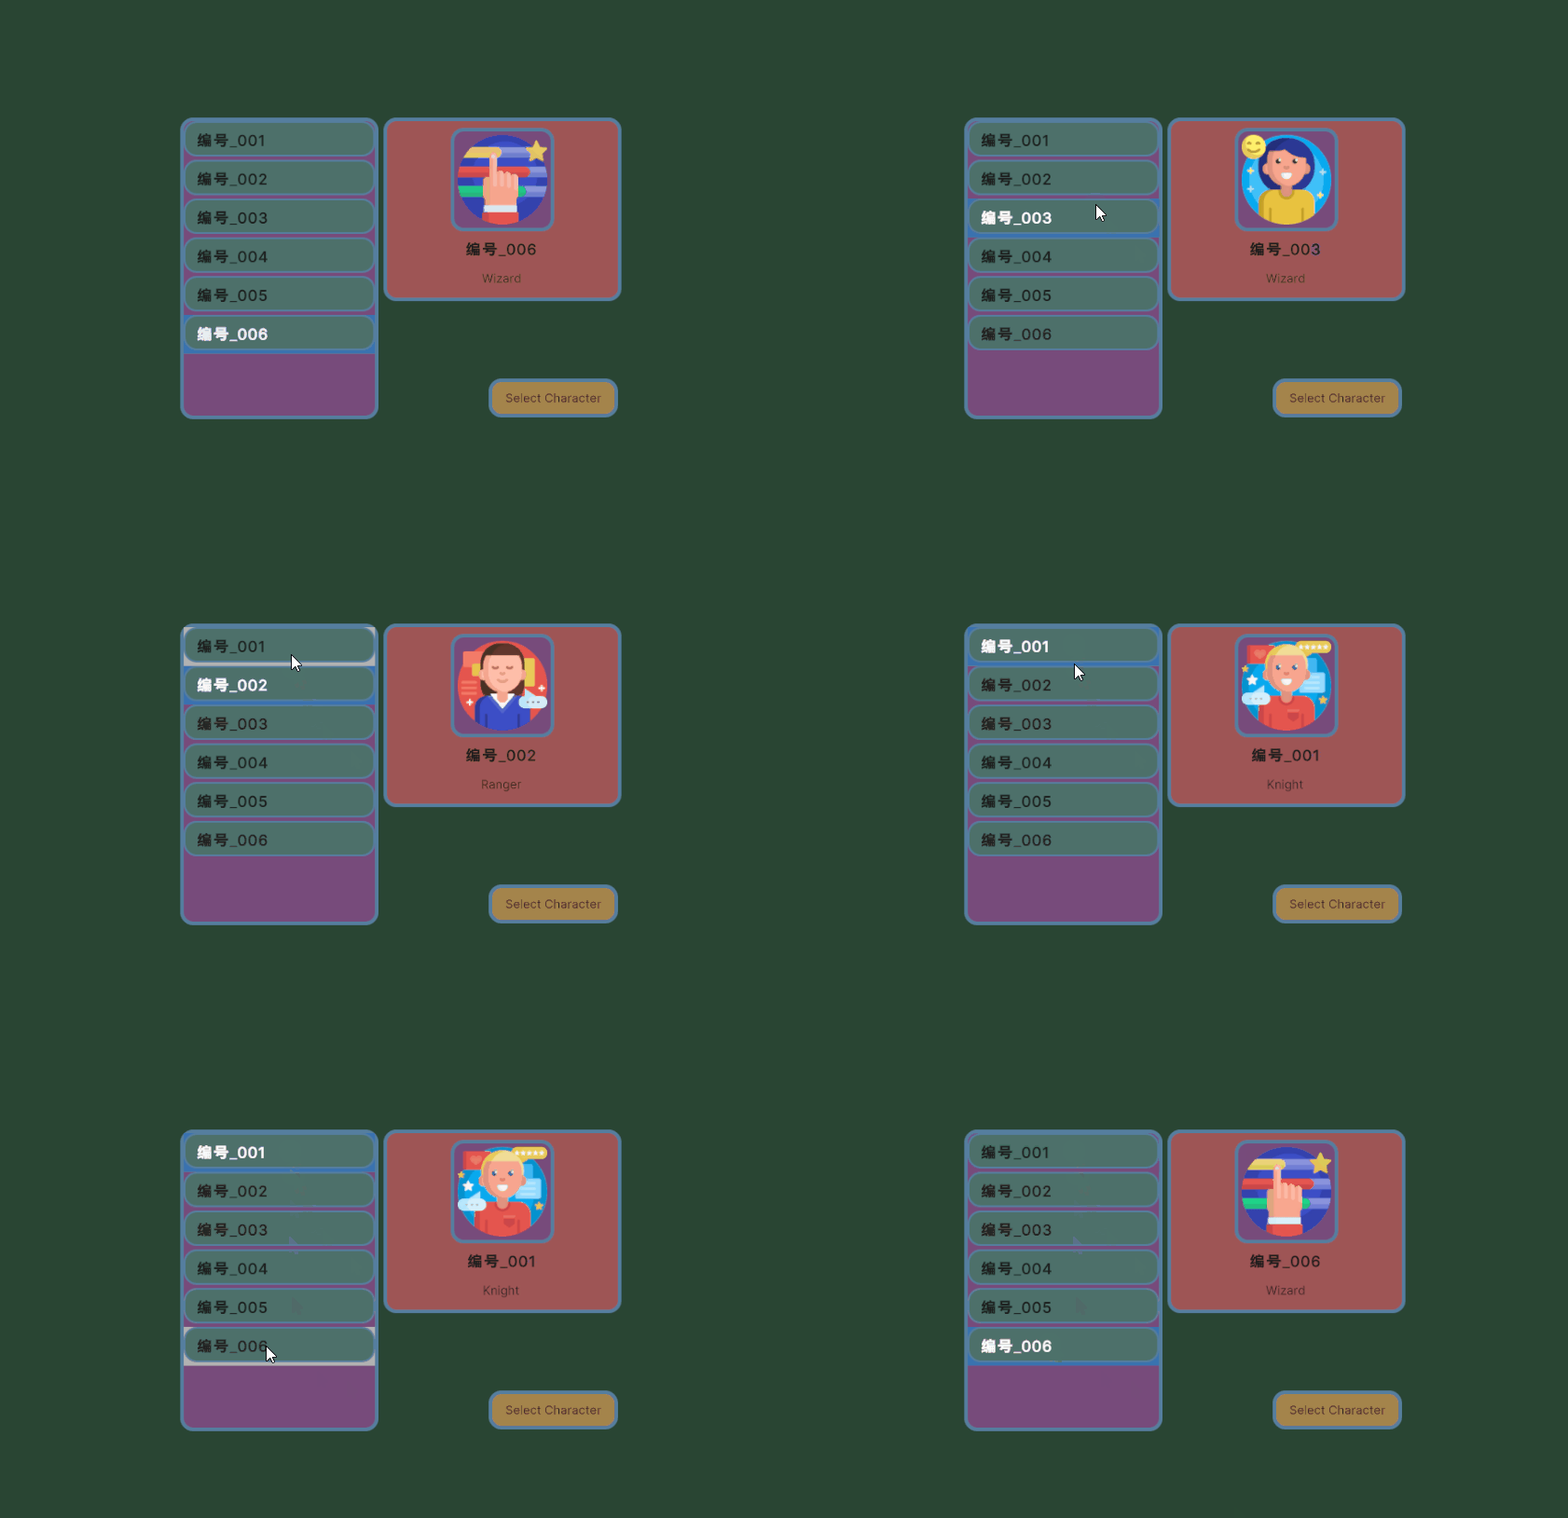
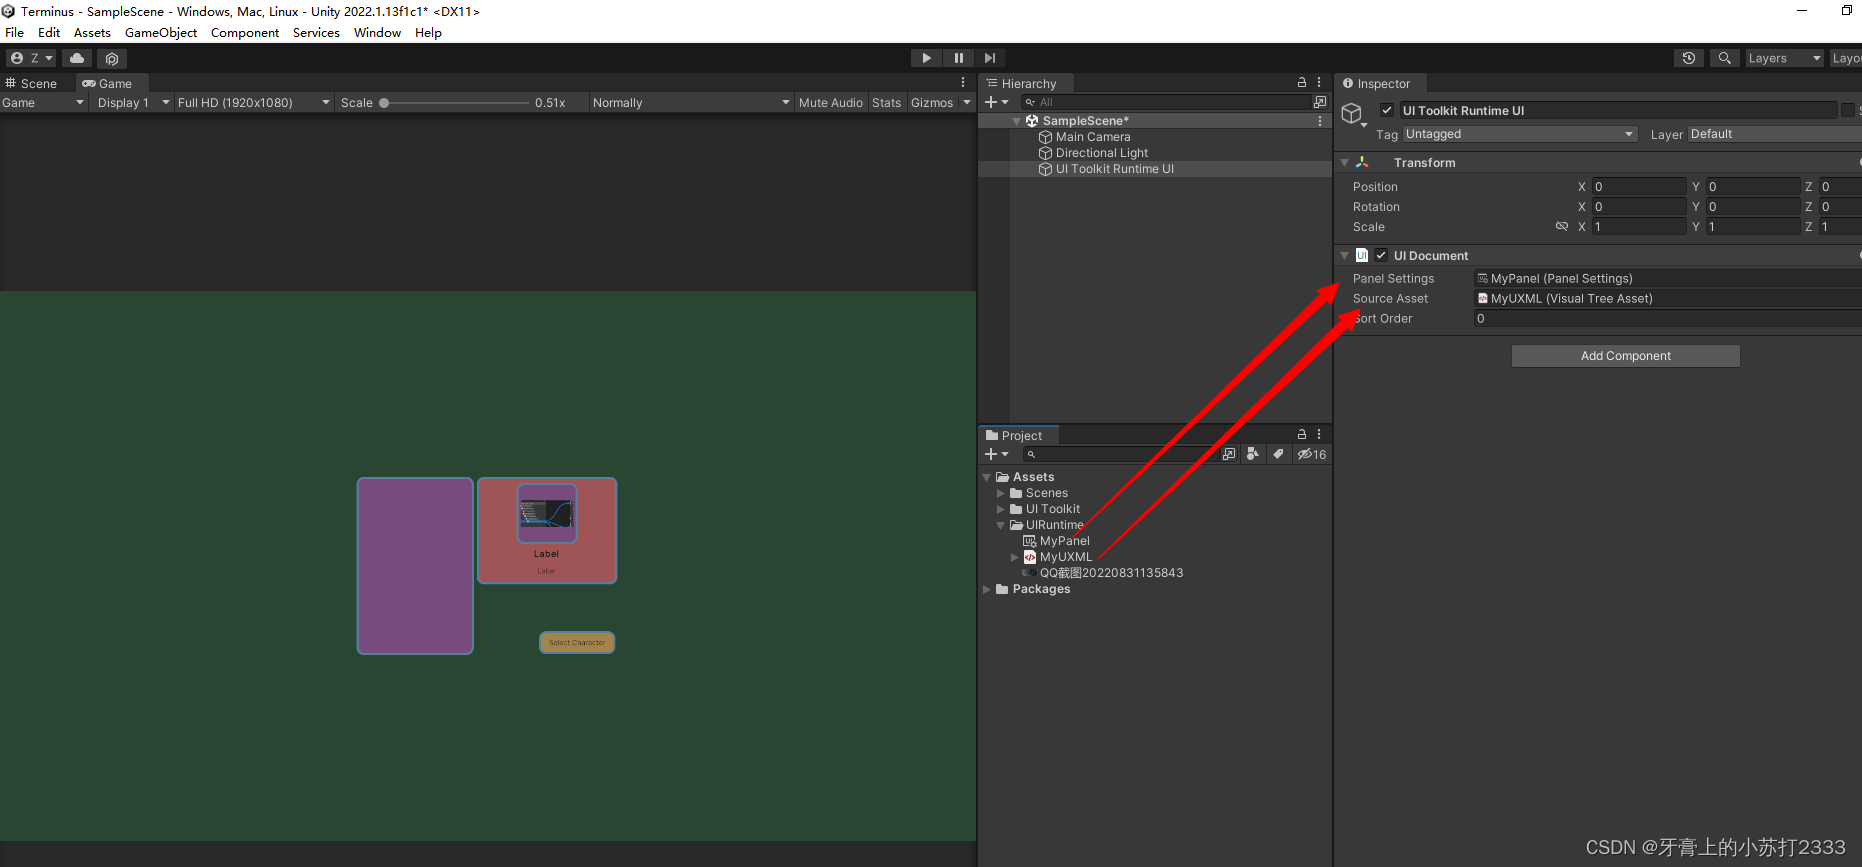
把之前创建的MyPanel、MyUXML赋值到对应的槽内,即可看到Game窗口显示出了之前做的UI*★,°*:.☆( ̄▽ ̄)/$:*.°★* 。
🎭添加测试数据
新建CharacterData.cs定义人物信息
using System.Collections.Generic;
using UnityEngine;
public enum ECharacterClass
{
    Knight,Ranger,Wizard
}
[System.Serializable]
public class CharacterDataInfo
{
    public string m_CharacterName;
    public ECharacterClass m_Class;
    public Texture m_PortraitImg;
}
[CreateAssetMenu]
public class CharacterDatas : ScriptableObject
{
    public List<CharacterDataInfo> m_AllCharacters;
}
[CreateAssetMenu]特性可以在创建菜单中新增一个入口快速实例化CharacterData
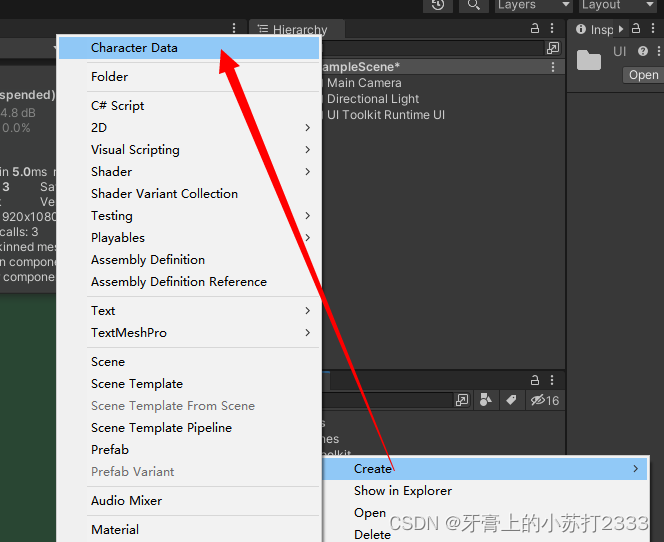
配置人物信息

🍰创建人物信息列表项UI 模板
添加到ListView的item由一个背景框和人物名称构成

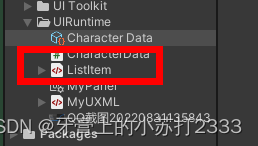
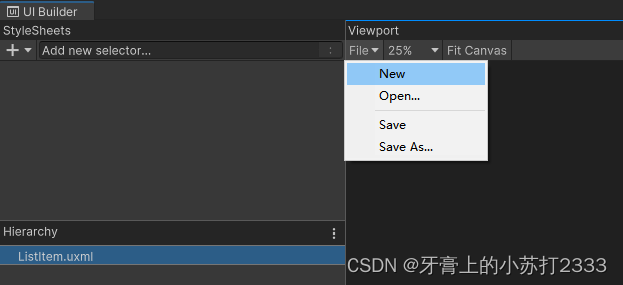
打开UI Builder (Window > UI Toolkit > UI Builder)新建一个UXML 并保存为ListItem.uxml.
💡.添加一个VisualElement作为背景
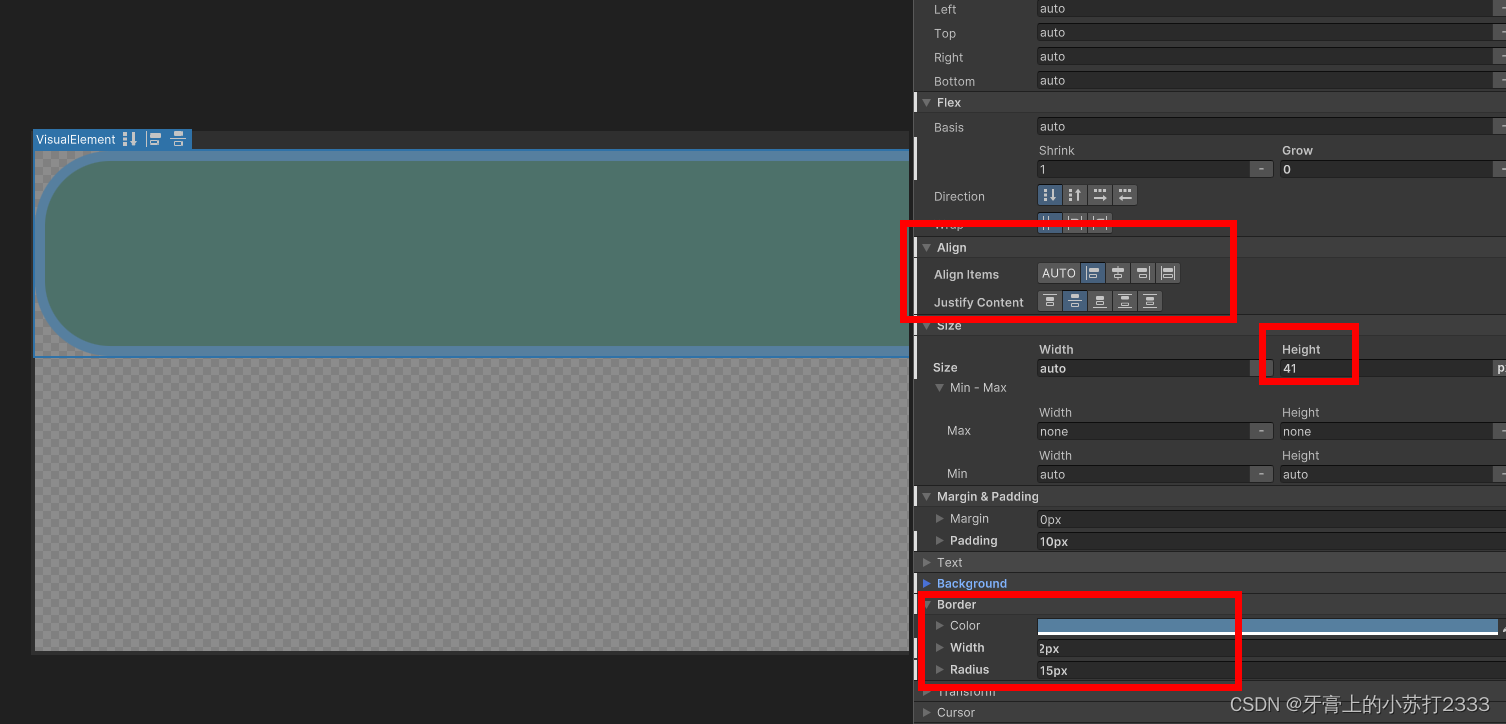
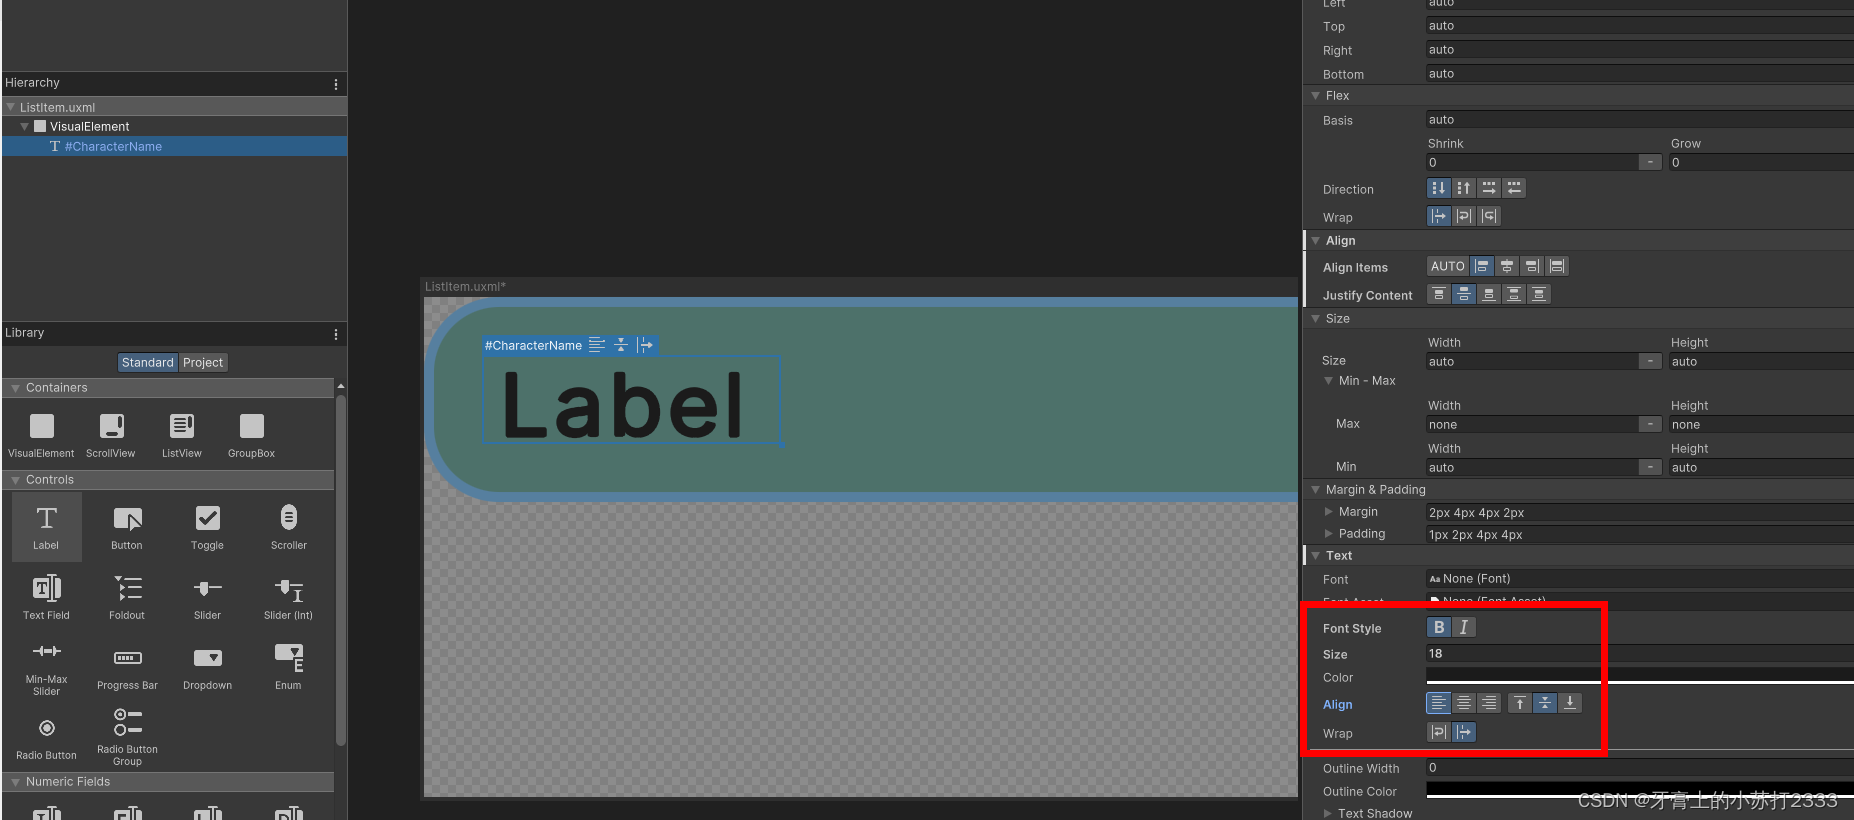
💡.添加一个Label到背景下并重命名为CharacterName,以便后续通过脚本访问,设置字体大小为18并加粗居中
🌭 创建列表项控制脚本
新建CharacterListItemCtrl.cs脚本,用于处理信息显示。
using UnityEngine.UIElements;

public class CharacterListItemCtrl
{
    Label m_NameLabel;
    public void SetVisualElement(VisualElement visualEle) {
        m_NameLabel = visualEle.Q<Label>("CharacterName");
    }
    public void SetCharacterData(CharacterDataInfo characterData) {
        m_NameLabel.text = characterData.m_CharacterName;
    }
}
🍣创建CharacterList控制脚本
新建CharacterListCtrl.cs用来实例化列表
using System.Collections;
using System.Collections.Generic;
using UnityEngine;
using UnityEngine.UIElements;

public class CharacterListCtrl
{
    public void InitializeCharacterList(VisualElement root,VisualTreeAsset  listElementTemplate,List<CharacterDataInfo> datas) {

    }
}
🍨创建全局UI控制脚本
像前面创建的CharacterListItemCtrl.ce、CharacterListCtrl.cs不是MonoBehaviour,需要创建MainView.cs实例化它们并把VisualTree传给它们;
using System.Collections;
using System.Collections.Generic;
using UnityEngine;
using UnityEngine.UIElements;

public class MainView : MonoBehaviour
{
    [SerializeField,Header("item 模板")]
    VisualTreeAsset m_ListItemTemplate;
    [SerializeField,Header("人物 信息")]
    public CharacterDatas characterInfos;
    private void OnEnable()
    {
        //UIDocument会实例化 UXML
        var uiDoc = GetComponent<UIDocument>();

        //初始化人物信息列表控制器,把ui根节点和item模板传给它
        var characterListCtrl = new CharacterListCtrl();
        characterListCtrl.InitializeCharacterList(root:uiDoc.rootVisualElement,listElementTemplate:m_ListItemTemplate,datas:characterInfos.m_AllCharacters);
    }
}
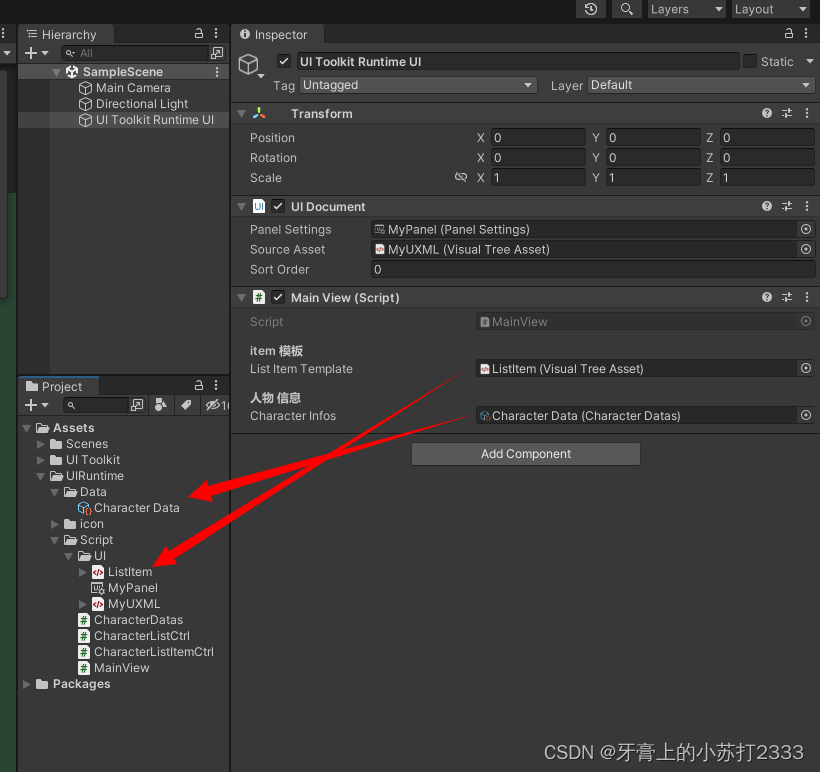
把MainView.cs挂到UI物体上,并把ListItem.uxml赋值到ListItemTemplate上和实例化的CharcterData赋值到CharacterInfos上。
🥠 获取UI 元素引用
在CharacterListCtrl.cs中使用UQuery查找UI元素。
using System.Collections;
using System.Collections.Generic;
using UnityEngine;
using UnityEngine.UIElements;

public class CharacterListCtrl
{
    private List<CharacterDataInfo> datas; //人物数据
    VisualTreeAsset itemTemplate; //列表item 模板

    ListView ui_characterListView; //人物信息列表ui
    [SerializeField]
    private string name_characterListView;

    Label ui_characterClassLabel;  //人物类别ui
    [SerializeField]
    private string name_characterClassLabel;

    Label ui_characterNameLabel;    //人物名称ui
    [SerializeField]
    private string name_characterNameLabel;

    VisualElement ui_characterPortrait; //人物头像ui
    [SerializeField]
    private string name_characterPortrait;

    Button ui_SelectCharacterBtn; //选择人物按钮ui
    [SerializeField]
    private string name_SelectCharacterBtn;

    public void InitializeCharacterList(VisualElement root,VisualTreeAsset  listElementTemplate,List<CharacterDataInfo> datas) {
        this.datas = datas;

        itemTemplate = listElementTemplate;

        ui_characterListView    = root.Q<ListView>(name_characterListView);
        ui_characterClassLabel  = root.Query<Label>(name:name_characterClassLabel);
        ui_characterNameLabel   = root.Query<Label>(name: name_characterNameLabel);
        ui_characterPortrait    = root.Query<VisualElement>(name: name_characterPortrait);
        ui_SelectCharacterBtn   = root.Query<Button>(name: name_SelectCharacterBtn);


    }
}
🥩填充人物列表
把传入的人物信息填入ListView以生成列表item
1.创建makeItem回调方法
2.创建bindItem回调方法
3.设置ListView高度
4.设置ListView ItemSource
💡创建makeItem回调方法
using System;
using System.Collections;
using System.Collections.Generic;
using UnityEngine;
using UnityEngine.UIElements;

public class CharacterListCtrl
{
	...
    public void InitializeCharacterList(VisualElement root,VisualTreeAsset  listElementTemplate,List<CharacterDataInfo> datas) {
        ...
        FillCharacterViewList();
    }

    /// <summary>
    /// 填充item到ListView
    /// </summary>
    /// <exception cref="NotImplementedException"></exception>
    private void FillCharacterViewList()
    {
        ui_characterListView.makeItem = () =>
        {
            //实例化item 模板
            var item = itemTemplate.Instantiate();

            //绑定item处理脚本,后续绑定数据时使用该脚本进行处理
            var itemCtrl = new CharacterListItemCtrl();
            item.userData = itemCtrl;

            //初始化item处理脚本
            itemCtrl.SetVisualElement(item);

            return item;
        };
    }
}
💡创建bindItem回调方法
因为ListView做了优化,它的item ui 是回收重复使用的,所以需要进行数据绑定
using System;
using System.Collections;
using System.Collections.Generic;
using UnityEngine;
using UnityEngine.UIElements;

public class CharacterListCtrl
{
    ...

    /// <summary>
    /// 填充item到ListView
    /// </summary>
    /// <exception cref="NotImplementedException"></exception>
    private void FillCharacterViewList()
    {
        ....

        //绑定item 数据
        ui_characterListView.bindItem = (item,index) => {
            var itemCtrl = item.userData as CharacterListItemCtrl;
            var data = datas[index];
            itemCtrl.SetCharacterData(characterData:data);
        };

        //设置item固定高度
        ui_characterListView.fixedItemHeight = 45;

        //设置ListView数据源
        ui_characterListView.itemsSource = datas;
    }
}
💡设置Item高度
设置每个Item的高度使得它们不会挨到
using System;
using System.Collections;
using System.Collections.Generic;
using UnityEngine;
using UnityEngine.UIElements;

public class CharacterListCtrl
{
    ...

    /// <summary>
    /// 填充item到ListView
    /// </summary>
    /// <exception cref="NotImplementedException"></exception>
    private void FillCharacterViewList()
    {
        ....

        //设置item固定高度
        ui_characterListView.fixedItemHeight = 45;

        //设置ListView数据源
        ui_characterListView.itemsSource = datas;
    }
}
💡设置ItemList 数据源
最后设置ItemList的数据源,告诉它从这里拿数据
using System;
using System.Collections;
using System.Collections.Generic;
using UnityEngine;
using UnityEngine.UIElements;

public class CharacterListCtrl
{
    ...

    /// <summary>
    /// 填充item到ListView
    /// </summary>
    /// <exception cref="NotImplementedException"></exception>
    private void FillCharacterViewList()
    {
        ....
        //设置ListView数据源
        ui_characterListView.itemsSource = datas;
    }
}
🥛添加选中项处理
使用ListView.onSelectionChange 回调可以在用户点击item时触发
using System;
using System.Collections;
using System.Collections.Generic;
using UnityEngine;
using UnityEngine.UIElements;

public class CharacterListCtrl
{
    ...

    public void InitializeCharacterList(VisualElement root,VisualTreeAsset  listElementTemplate,List<CharacterDataInfo> datas) {
       ...
        ui_characterListView.onSelectionChange += OnCharacterSelected;
    }

    private void OnCharacterSelected(IEnumerable<object> obj)
    {
        var selectedItem = ui_characterListView.selectedItem as CharacterDataInfo;
        //注意有可能返回空值
        if (selectedItem == null)
        {
            ui_characterClassLabel.text = "";
            ui_characterNameLabel.text = "";
            ui_characterPortrait.style.backgroundImage = null;

            //禁用按钮
            ui_SelectCharacterBtn.SetEnabled(false);
        }
        else {
            ui_characterClassLabel.text = selectedItem.m_Class.ToString();
            ui_characterNameLabel.text = selectedItem.m_CharacterName;
            ui_characterPortrait.style.backgroundImage = new StyleBackground(selectedItem.m_PortraitImg);

            //激活按钮
            ui_SelectCharacterBtn.SetEnabled(true);

        }
    }

    ...
}
🍼小技巧
💡背景图保持正确的比例
Background > Scale Mode 设置为 Scale to Fit,这样图片能够以正确的比例充满整个可用空间。
💡多个UIDocument使用同一个Panel
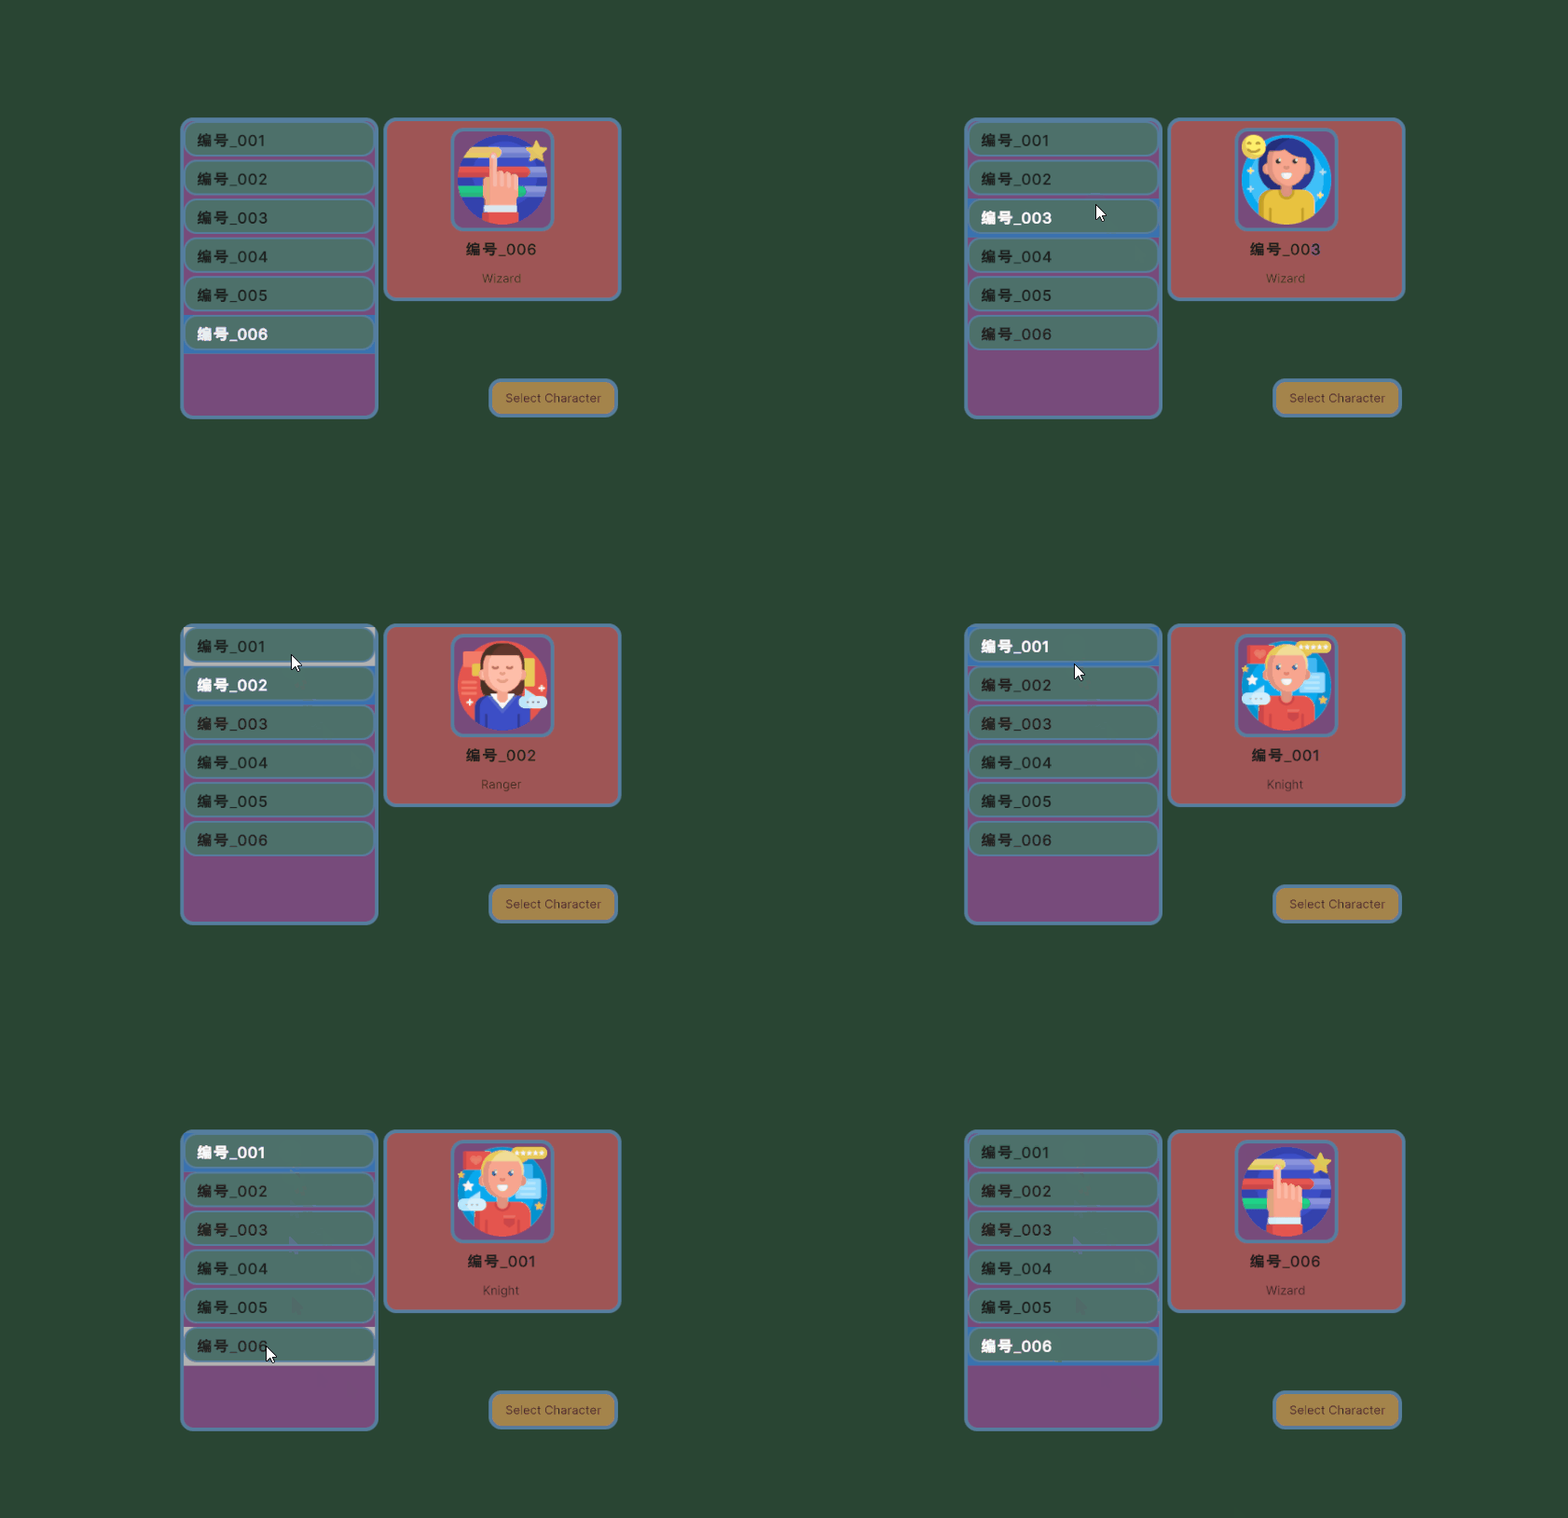
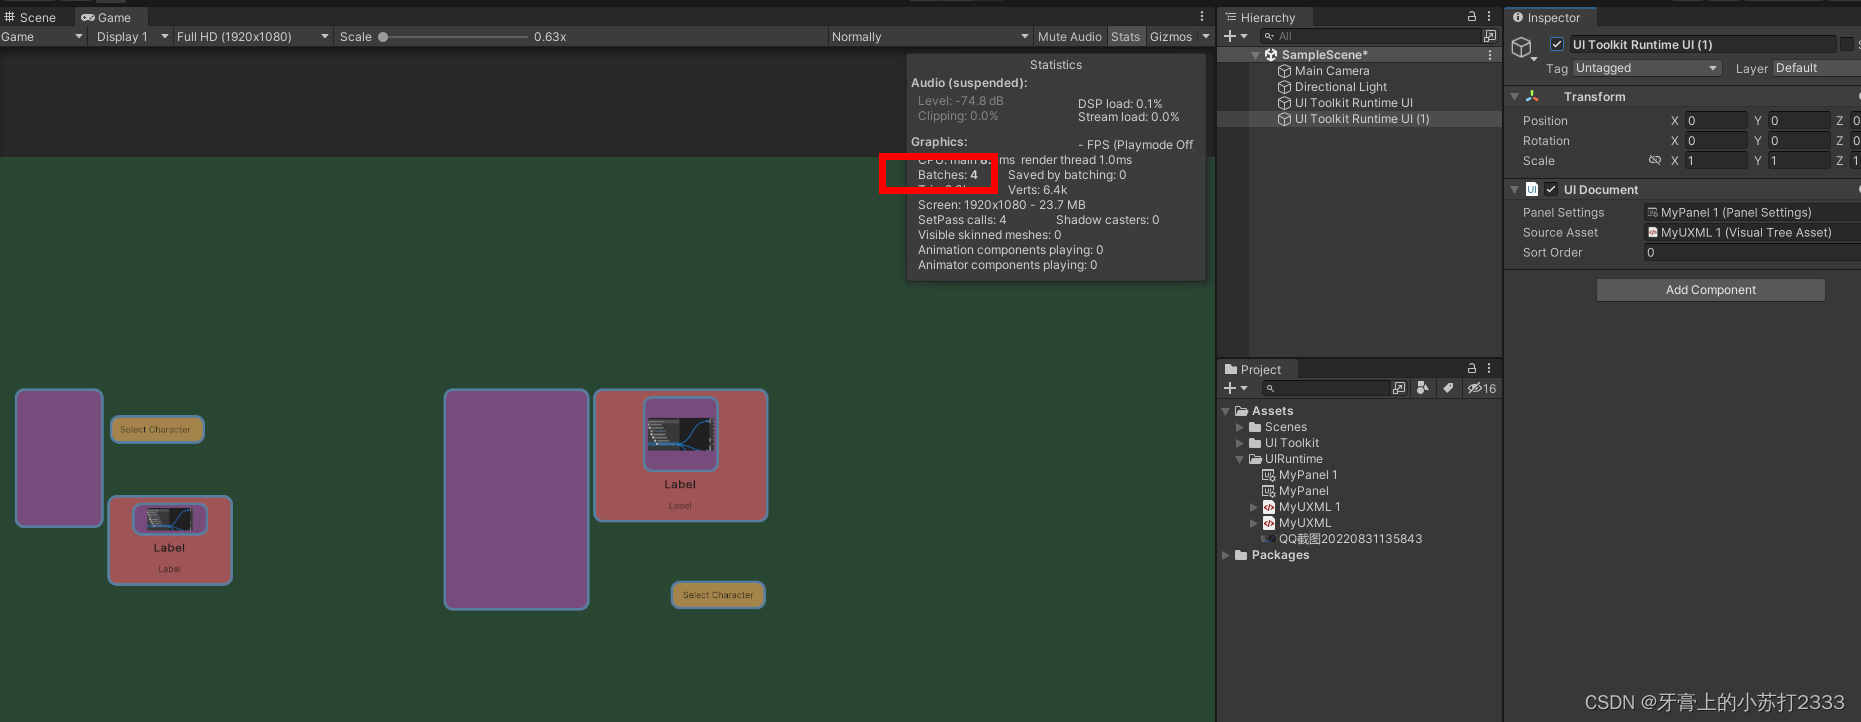
这种会让所有的UI 在一个panel里面渲染,这样可以提高性能。
如图所示下面两个 UI 使用的相同的Panel Settings Batches为3

当使用不同的Panel Setting时会增加一个Batches:
💡UI 交互初始化
在OnEnable和OnDisable中进行 ui 交互是比较靠谱的。
💡代码设置背景图片
ui_characterPortrait.style.backgroundImage = new StyleBackground(selectedItem.m_PortraitImg);
参考
官网
