鉴于有些小伙伴在寻找博客园迁移到个人博客的方案,本人针对博客园实现了一个自动备份脚本,可以快速将博客园中自己的文章备份成Markdown格式的独立文件,备份后的md文件可以直接放入到hexo博客中,快速生成自己的站点,而不需要自己逐篇文章迁移,提高了备份文章的效率。
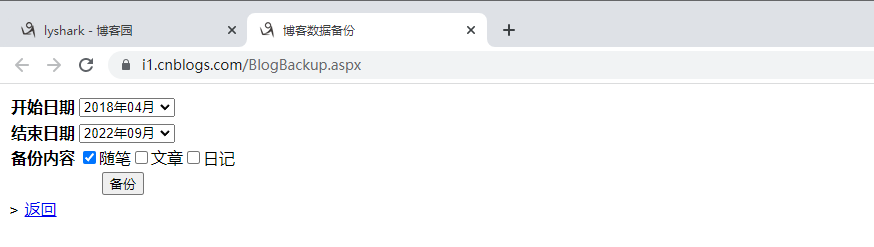
首先第一步将博客园主题替换为codinglife默认主题,第二步登录到自己的博客园后台,然后选择博客备份,备份所有的随笔文章,如下所示:
备份出来以后将其命名为backup.xml,然后新建一个main.py脚本,以及一个blog目录,代码实现的原理是,解析xml格式并依次提取出文档内容,然后分别保存为markdown文件。
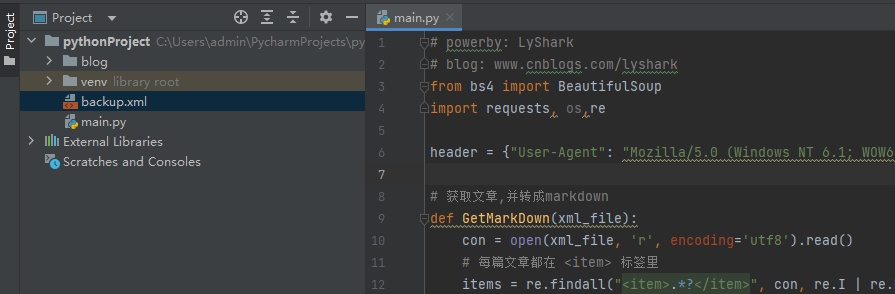
转存文章到MD: 写入备份脚本,代码如下所示,运行后即可自动转存文件到blog目录下,当运行结束后备份也就结束了。
# powerby: LyShark
# blog: www.cnblogs.com/lyshark
from bs4 import BeautifulSoup
import requests, os,re

header = {"User-Agent": "Mozilla/5.0 (Windows NT 6.1; WOW64) AppleWebKit/537.36 (KHTML, like Gecko) By LyShark CnblogsBlog Backup Script"}

# 获取文章,并转成markdown
# blog: www.lyshark.com
def GetMarkDown(xml_file):
    con = open(xml_file, 'r', encoding='utf8').read()
    # 每篇文章都在 <item> 标签里
    items = re.findall("<item>.*?</item>", con, re.I | re.M | re.S)
    ele2 = ['<title>(.+?)</title>', '<link>(.+?)</link>', '<description>(.+?)</description>']
    # md_name = xml_file.split('.xml')[0] + '.md'
    for item in items:
        try:
            title = re.findall(ele2[0], item, re.I | re.S | re.M)[0]
            link = re.findall(ele2[1], item, re.I | re.S | re.M)[0]
            des = re.findall(ele2[2], item, re.I | re.S | re.M)[0]
            des = re.findall('<!\[CDATA\[(.+?)\]\]>', des, re.I | re.S | re.M)[0]  # CDATA 里面放的是文章的内容
            des = des.replace('~~~', "```")
            lines = des.split('\n')
            with open("./blog/" + title.replace("/","") + ".md", mode='w+', encoding='utf8') as f:
                f.write("---\n")
                f.write("title: '{}'\n".format(title.replace("##","").replace("###","").replace("-","").replace("*","").replace("<br>","").replace(":","").replace(":","").replace(" ","").replace(" ","").replace("`","")))
                f.write("copyright: true\n")

                setdate = "2018-12-27 00:00:00"
                try:
                    # 读取时间
                    response = requests.get(url=link, headers=header)
                    print("读取状态: {}".format(response.status_code))

                    if response.status_code == 200:
                        bs = BeautifulSoup(response.text, "html.parser")
                        ret = bs.select('span[id="post-date"]')[0]
                        setdate = str(ret.text)
                        pass
                    else:
                        f.write("date: '2018-12-27 00:00:00'\n")
                except Exception:
                    f.write("date: '2018-12-27 00:00:00'\n")
                    pass

                f.write("date: '{}'\n".format(setdate))

                # description检测
                description_check = lines[0].replace("##","").replace("###","").replace("-","").replace("*","").replace("<br>","").replace(":","").replace(":","").replace(" ","").replace(" ","")
                if description_check == "":
                    f.write("description: '{}'\n".format("该文章暂无概述"))
                elif description_check == "```C":
                    f.write("description: '{}'\n".format("该文章暂无概述"))
                elif description_check == "```Python":
                    f.write("description: '{}'\n".format("该文章暂无概述"))
                else:
                    f.write("description: '{}'\n".format(description_check))

                print("[*] 时间: {} --> 标题: {}".format(setdate, title))
                f.write("tags: '{}'\n".format("tags10245"))
                f.write("categories: '{}'\n".format("categories10245"))
                f.write("---\n\n")
                f.write('%s' %des)
                f.close()
        except Exception:
            pass

if __name__ == "__main__":
    GetMarkDown("backup.xml")
备份后的效果如下所示:

打开Markdown格式看一下,此处的标签和分类使用了一个别名,在备份下来以后,你可以逐个区域进行替换,将其替换成自己需要的分类类型即可。

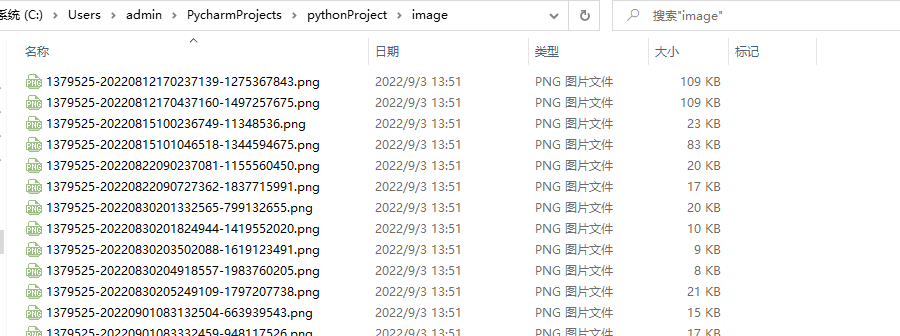
转存图片到本地: 接着就是继续循环将博客中所有图片备份下来,同样新建一个image文件夹,并运行如下代码实现备份。
# powerby: LyShark
# blog: www.cnblogs.com/lyshark
from bs4 import BeautifulSoup
import requests, os,re

header = {"User-Agent": "Mozilla/5.0 (Windows NT 6.1; WOW64) AppleWebKit/537.36 (KHTML, like Gecko) By LyShark CnblogsBlog Backup Script"}

# 从备份XML中找到URL
# blog: www.cnblogs.com/lyshark
def GetURL(xml_file):
    blog_url = []
    con = open(xml_file, 'r', encoding='utf8').read()
    items = re.findall("<item>.*?</item>", con, re.I | re.M | re.S)
    ele2 = ['<title>(.+?)</title>', '<link>(.+?)</link>', '<description>(.+?)</description>']
    for item in items:
        title = re.findall(ele2[0], item, re.I | re.S | re.M)[0]
        link = re.findall(ele2[1], item, re.I | re.S | re.M)[0]
        print("标题: {} --> URL: {} ".format(title,link))
        blog_url.append(link)
    return blog_url

# 下载所有图片
# blog: www.lyshark.com
def DownloadURLPicture(url):
    params = {"encode": "utf-8"}
    response = requests.get(url=url, params=params, headers=header)
    # print("网页编码方式: {} -> {}".format(response.encoding,response.apparent_encoding))
    context = response.text.encode(response.encoding).decode(response.apparent_encoding, "ignore")
    try:
        bs = BeautifulSoup(context, "html.parser")
        ret = bs.select('div[id="cnblogs_post_body"] p img')
        for item in ret:
            try:
                img_src_path = item.get("src")
                img_src_name = img_src_path.split("/")[-1]
                print("[+] 下载图片: {} ".format(img_src_name))
                img_download = requests.get(url=img_src_path, headers=header, stream=True)
                with open("./image/" + img_src_name, "wb") as fp:
                    for chunk in img_download.iter_content(chunk_size=1024):
                        fp.write(chunk)
            except Exception:
                print("下载图片失败: {}".format(img_src_name))
                pass
    except Exception:
        pass

if __name__ == "__main__":
    url = GetURL("backup.xml")
    for u in url:
        DownloadURLPicture(u)
备份后的效果如下:
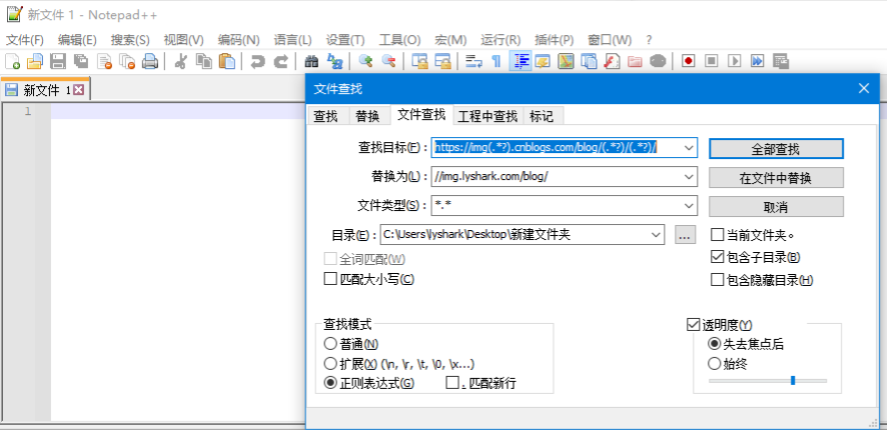
替换文章内的图片链接地址,可以使用编辑器,启用正则批量替换。
当把博客备份下来以后你就可以把这些文章拷贝到hexo博客_post目录下面,然后hexo命令快速渲染生成博客园的镜像站点,这样也算是增加双保险了。
