计算机视觉 Project 1:Image Filtering and Hybrid Images
计算机视觉 Project 1:Image Filtering and Hybrid Images
- 计算机视觉 Project 1:Image Filtering and Hybrid Images
- 实验原理
- 图像的频率、低频与高频
- 图像过滤
- 滤波器
- Guassian滤波
- 图像融合
- 实验目的
- 实验内容
- 实验步骤
- 实验数据及结果分析
- 实验结论
- 总结及心得体会
计算机视觉 Project 1:Image Filtering and Hybrid Images
实验原理
图像的频率、低频与高频
图像可以视为一个定义为二维平面上的信号,该信号的幅值对应于像素的灰度值(对于彩色图像则是 RGB 三个分量)。图像的频率是灰度值变化剧烈程度的指标,是灰度在平面空间上的梯度,它反映了图像的像素灰度在空间中变化的情况。
对图像而言,低频分量代表着图像中亮度或者灰度值变化缓慢的区域, 也就是图像中大片平坦的区域,描述了图像的主要部分,是对整幅图像强度的综合度量。高频分量对应着图像变化剧烈的部分,也就是图像的边缘(轮廓)或者噪声以及细节部分。
图像过滤
图像过滤,即在尽量保留图像细节特征的条件下对目标图像的噪声进行抑制,是图像预处理中不可缺少的操作,其处理效果的好坏将直接影响到后续图像处理和分析的有效性和可靠性。
滤波器
滤波器可分为高通滤波器与低通滤波器。高通滤波器可以检测图像中尖锐、变化明显的地方;低通滤波器可以让图像变得光滑,滤除图像中的噪声。常见的滤波器有:非线性滤波器、中值滤波、形态学滤波器和双边滤波。
理想的低通滤波器模板为:

其中,D_0表示通带半径,D(u,v)是到频谱中心的距离(欧式距离),计算公式如下:

M和N表示频谱图像的大小,(M/2,N/2)即为频谱中心。
理想的高通滤波器与此相反,1减去低通滤波模板即可。
Guassian滤波
Guassian滤波是一种线性平滑滤波,适用于消除高斯噪声,广泛应用于图像处理的减噪过程。通俗的讲,Guassian滤波就是对整幅图像进行加权平均的过程,每一个像素点的值,都由其本身和邻域内的其他像素值经过加权平均后得到。Guassian滤波的具体操作是:用一个模板(或称卷积、掩模)扫描图像中的每一个像素,用模板确定的邻域内像素的加权平均灰度值去替代模板中心像素点的值。Guassian低通滤波器函数为:

1减去低通滤波模板即可得到高通滤波模板。
图像融合
图像融合是指将多源信道所采集到的关于同一目标的图像数据经过图像处理和计算机技术等,最大限度的提取各自信道中的有利信息,最后综合成高质量的图像,以提高图像信息的利用率、改善计算机解译精度和可靠性、提升原始图像的空间分辨率和光谱分辨率,利于监测。
实验目的
对所给图像分别进行高通和低通滤波,并通过图像融合得到混合图像。
实验内容
- 了解并学习图像过滤与图像融合的相关知识与操作。
- 图像过滤:完善相关代码,对所给图像进行滤波处理,分别得到图像的高频信号与低频信号。
- 图像融合:融合图像的高频信号与低频信号,输出融合后的图像。
实验步骤
Part 1:图像滤波
对于此部分,只需要修改完善student.py文件中的my_imfilter函数即可。该函数接收图像输入与filter,主要实现图像的padding操作与卷积操作,但是要注意保持图像尺寸的一致。经过修改完善后的代码如下:
def my_imfilter(image, kernel):
    """
    Your function should meet the requirements laid out on the project webpage.
    Apply a filter (using kernel) to an image. Return the filtered image. To
    achieve acceptable runtimes, you MUST use numpy multiplication and summation
    when applying the kernel.
    Inputs
    - image: numpy nd-array of dim (m,n) or (m, n, c)
    - kernel: numpy nd-array of dim (k, l)
    Returns
    - filtered_image: numpy nd-array of dim of equal 2D size (m,n) or 3D size (m, n, c)
    Errors if:
    - filter/kernel has any even dimension -> raise an Exception with a suitable error message.
    """
    filtered_image = np.zeros(image.shape)

    ##################
    # Your code here #
    # print('my_imfilter function in student.py needs to be implemented')

    # 限制kernel的shape
    if len(kernel.shape) != 2:
        raise TypeError("kernel must be 2D!")
    if (kernel.shape[0] % 2 == 0) or (kernel.shape[1] % 2 == 0):
        raise ValueError("Only support odd-dimension filters!")

    filter_width = int(kernel.shape[0] / 2)
    filter_height = int(kernel.shape[1] / 2)

    image_width = image.shape[0]
    image_height = image.shape[1]

    width_padding = np.zeros([image_width, filter_height], dtype=np.uint8) * 255
    height_padding = np.zeros([filter_width, image_height + filter_height * 2], dtype=np.uint8) * 255

    filtered_image = np.zeros_like(image)

    if len(image.shape) == 2:
        # 这部分是库函数返回的结果
        # temp = cv2.filter2D(image, -1, kernel)
        # filtered_image = temp

        time_start = time.time()
        print("Filtering...")

        input_image = image
        # 上下的padding
        input_image = np.concatenate([width_padding, input_image], axis=1)
        input_image = np.concatenate([input_image, width_padding], axis=1)
        # 左右的padding
        input_image = np.concatenate([height_padding, input_image], axis=0)
        input_image = np.concatenate([input_image, height_padding], axis=0)

        # 让filter划过整个图片的长宽
        for column in range(filter_width, input_image.shape[0] - filter_width):
            for row in range(filter_height, input_image.shape[1] - filter_height):
                ret = np.multiply(kernel, input_image[column - filter_width:column + filter_width + 1,
                                          row - filter_height:row + filter_height + 1])
                # 保存对应位
                filtered_image[column - filter_width, row - filter_height] = min(max(int(np.sum(ret)), 0), 255)

        time_end = time.time()
        print("End, total time:{}".format(time_end - time_start))

    elif len(image.shape) == 3:
        # 这部分是库函数返回的结果
        # temp = cv2.filter2D(image, -1, kernel)
        # filtered_image = temp

        time_start = time.time()
        print("Filtering...")
        for channel in range(0, 3):
            # 对每个通道进行计算
            input_image = image[:, :, channel]
            # 上下的padding
            input_image = np.concatenate([width_padding, input_image], axis=1)
            input_image = np.concatenate([input_image, width_padding], axis=1)
            # 左右的padding
            input_image = np.concatenate([height_padding, input_image], axis=0)
            input_image = np.concatenate([input_image, height_padding], axis=0)

            # 让filter划过整个通道的长宽
            for column in range(filter_width, input_image.shape[0] - filter_width):
                for row in range(filter_height, input_image.shape[1] - filter_height):
                    ret = np.multiply(kernel, input_image[column - filter_width:column + filter_width + 1,
                                              row - filter_height:row + filter_height + 1])
                    # 保存对应位
                    # filtered_image[column - filter_width, row - filter_height, channel] = min(max(int(np.sum(ret)), 0), 255)
                    filtered_image[column - filter_width, row - filter_height, channel] = min(max(np.sum(ret), 0), 1)

        time_end = time.time()
        print("End, total time:{}".format(time_end - time_start))

    else:
        # 非images
        raise ValueError("unsupported image scale!")
    ##################

    return filtered_image
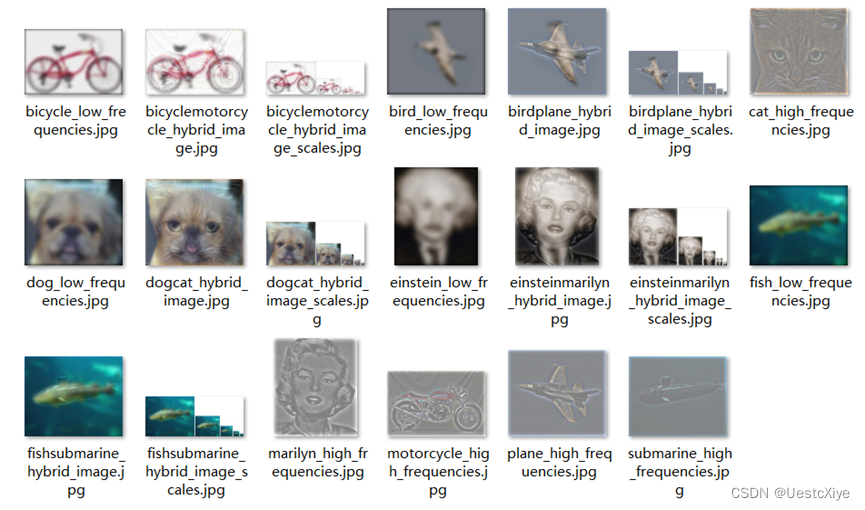
运行proj1_part1.py程序,则会生成results文件夹,并输出经过不同滤波操作处理后的若干图片,如图所示:

Part 2:图像融合
对于此部分,需要修改完善student.py文件中的gen_hybrid_image函数。该函数中已实现了高斯滤波核函数,函数接收两个图像输入,对输入的图像1进行滤波处理得到低频信息,对输入的图像2进行滤波处理得到高频信息,最终,将得到的低频信息与高频信息相加,即组合成融合图像。经过修改完善后的代码如下:
def gen_hybrid_image(image1, image2, cutoff_frequency):
    """
     Inputs:
     - image1 -> The image from which to take the low frequencies.
     - image2 -> The image from which to take the high frequencies.
     - cutoff_frequency -> The standard deviation, in pixels, of the Gaussian
                           blur that will remove high frequencies.

     Task:
     - Use my_imfilter to create 'low_frequencies' and 'high_frequencies'.
     - Combine them to create 'hybrid_image'.
    """

    assert image1.shape[0] == image2.shape[0]
    assert image1.shape[1] == image2.shape[1]
    assert image1.shape[2] == image2.shape[2]

    # Steps:
    # (1) Remove the high frequencies from image1 by blurring it. The amount of
    #     blur that works best will vary with different image pairs
    # generate a 1x(2k+1) gaussian kernel with mean=0 and sigma = s,
    # see https://stackoverflow.com/questions/17190649/how-to-obtain-a-gaussian-filter-in-python
    s, k = cutoff_frequency, cutoff_frequency * 2
    probs = np.asarray([exp(-z * z / (2 * s * s)) / sqrt(2 * pi * s * s) for z in range(-k, k + 1)], dtype=np.float32)
    kernel = np.outer(probs, probs)

    # Your code here:
    # low_frequencies = np.zeros(image1.shape)  # Replace with your implementation
    low_frequencies = my_imfilter(image1, kernel)

    # (2) Remove the low frequencies from image2. The easiest way to do this is to
    #     subtract a blurred version of image2 from the original version of image2.
    #     This will give you an image centered at zero with negative values.
    # Your code here #
    # high_frequencies = np.zeros(image1.shape)  # Replace with your implementation
    high_frequencies = image2 - my_imfilter(image2, kernel)
    # 归一化到[0, 1]
    high_frequencies = np.clip(high_frequencies, 0, 1)
    # high_frequencies = high_frequencies / high_frequencies.max(axis=0)

    # (3) Combine the high frequencies and low frequencies
    # Your code here #
    # hybrid_image = np.zeros(image1.shape)  # Replace with your implementation
    hybrid_image = np.add(low_frequencies, high_frequencies, )

    # (4) At this point, you need to be aware that values larger than 1.0
    # or less than 0.0 may cause issues in the functions in Python for saving
    # images to disk. These are called in proj1_part2 after the call to
    # gen_hybrid_image().
    # One option is to clip (also called clamp) all values below 0.0 to 0.0,
    # and all values larger than 1.0 to 1.0.

    # hybrid_image = hybrid_image / hybrid_image.max(axis=0)

    hybrid_image = np.clip(hybrid_image, 0, 1)

    return low_frequencies, high_frequencies, hybrid_image
运行修改后的proj1_part2.py文件,在results文件夹,对data文件夹的每一对图片都分别输出了图像1的低频信息、图像2的高频信息、融合后的图像、以及对融合图像的缩放对比图,如图所示:
实验数据及结果分析
Part 1:图像滤波
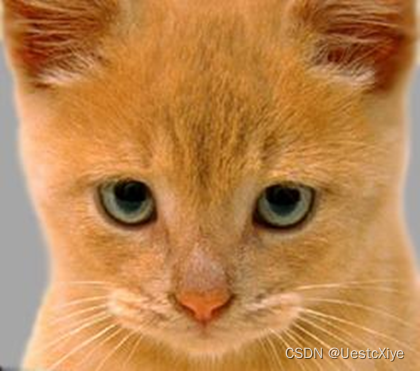
图3:Identity filter滤波后的图像

图4:Small blur with a box filter滤波后的图像
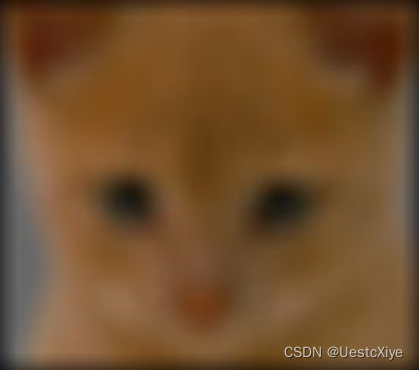
图5:Gaussian blur滤波后的图像
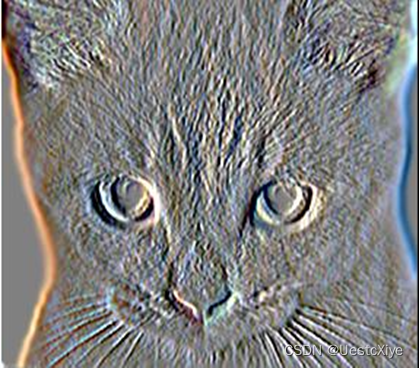
图6:Oriented filter (Sobel operator)滤波后的图像

图7:Laplacian filter滤波后的图像
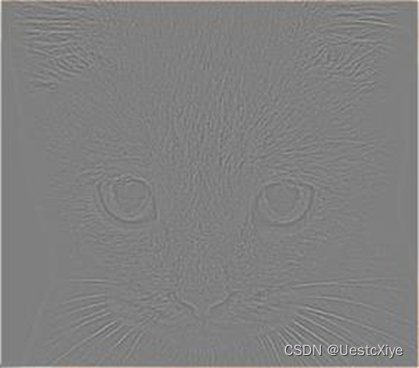
图8:High pass filter滤波后的图像
从以上不同输出结果可以看出,不同的滤波器有着各自的特点,即使是对于同一张图片,采用不同的滤波器对其进行滤波处理,得到的结果也是各自不相同的,有些甚至差别非常大。在实际应用时,要根据不同滤波器的特点,选择使用合适的滤波器进行操作。
其中,Identity filter什么也不做,得到的结果与原图保持一致;Small blur with a box filter去除了一部分的高频信息,使得结果会比原图稍微模糊;Gaussian blur(高斯模糊)让图像与正态分布做卷积,减少图像噪声以及降低细节层次,模糊效果更好更平滑;Oriented filter (Sobel operator)能很好的保留图像的边界信息;Laplacian filter可以用于图像增强和空间锐化;High pass filter可以过滤低频信息保留高频信息,可用于图像锐化。
Part 2:图像融合
以data文件夹中猫和狗的图像——cat.bmp和dog.bmp为例,两张原始图像如图9所示。
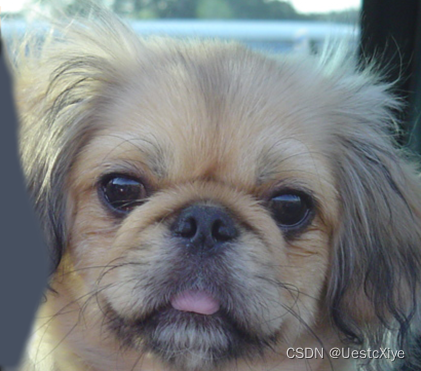
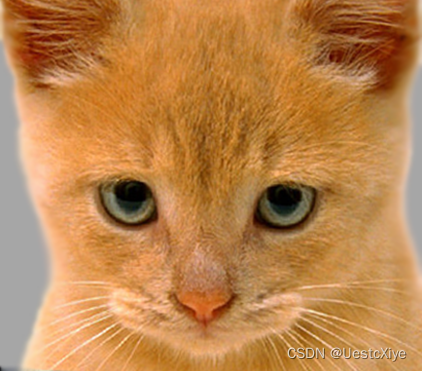
图9 猫和狗的原始图像
上述图像经过高通和低通滤波处理后的图像如下所示:

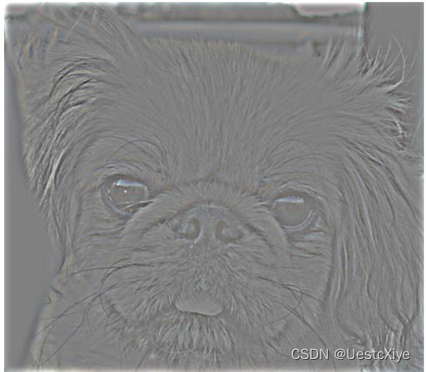
图 10 高通滤波图像


图 11 低通滤波图像
提取猫图像的高频信号,再提取狗图像的低频信号,进行图像融合,混合图像如图12所示:
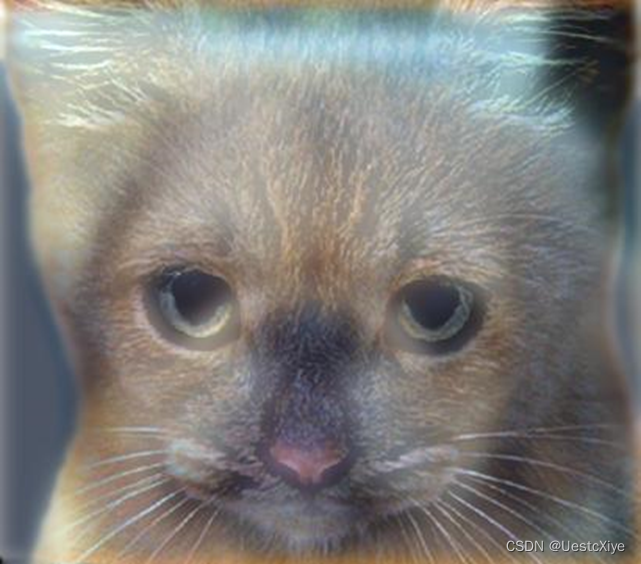
图 12 混合图像
对融合图像进行缩放处理的对比图如图13所示:
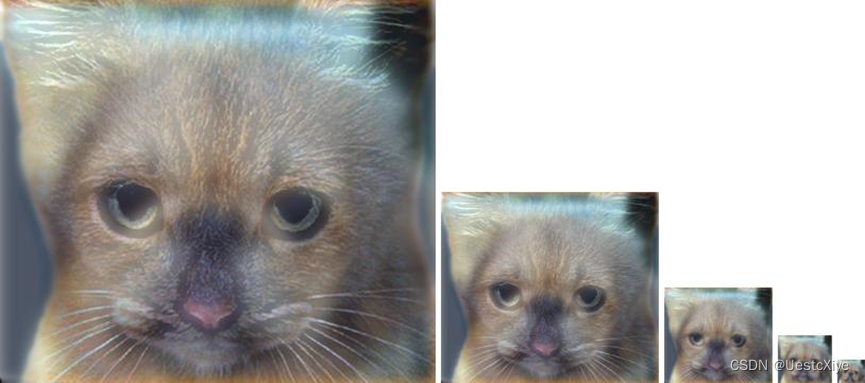
图 13 不同大小的混合图像
可以看出,融合了不同图片高低频信息后的图像,在图像尺寸大小不同时,在视觉上会呈现出不同的感受。在上图就可以很明显直观的看出,当图像尺寸较大,或是观察距离很近时,图像看上去更像是一只猫。而当图像尺寸较小,或是观察距离很远时,图像看上去更像是一只狗。
实验结论
高通滤波可以检测图像中尖锐、变化明显的地方;低通滤波可以让图像变得光滑,滤除图像中的噪声,使图像变得模糊。
对图像应用不同的滤波器可以实现各种不一样的效果。例如应用Identity filter得到原图;应用Small blur with a box filter去除部分高频信息,使结果比原图稍模糊;应用Gaussian blur(高斯模糊)减少图像噪声,降低细节层次,得到更平滑的模糊图像;应用Oriented filter (Sobel operator)可以保留图像边缘信息;应用Laplacian filter进行图像增强和空间锐化;应用High pass filter过滤低频信息保留高频信息进行图像锐化等等。
融合不同图像高低频信息得到的融合图像,在图像尺寸不一致或观察距离变化时产生不一样的视觉效果。在图像尺寸较大或观察距离很近时,图像更倾向于呈现出高频信息,而在图像尺寸较小或观察距离较远时,图像更倾向于呈现出低频信息。
总结及心得体会
通过完善相关代码实现了对所给图像分别进行高通和低通滤波,并通过图像融合得到混合图像,得到了低频信息代表远看时的信息,高频信息代表近看时的信息这一结论。