从0到一开发微信小程序(6)—小程序常用API
文章目录
- 其他相关文章
- 1、小程序API
- 1.1、路由
- 1.1.1、navigateTo(保留当前页面,跳转到应用内的某个页面,可以带参数)
- 1.1.2、redirectTo(关闭当前页面,跳转到应用内的某个页面,可以带参数)
- 1.1.3、reLaunch(关闭所有页面,打开到应用内的某个页面)
- 1.1.4、switchTab(跳转到 tabBar 页面,并关闭其他所有非 tabBar 页面)
- 1.2、交互
- 1.2.1、消息提示框
- 参数
- 注意
- 测试代码
- 1.2.2、loading提示框
- 参数
- 注意
- 测试代码
- 1.2.3、模态对话框
- 常用属性
- 存在输入框
- 1.2.4、操作菜单
- 常用属性
- 获取数据
- 1.3、动态设置导航栏
- 常用设置
- 1.4、网络请求(前后端分离常用)
- 基本使用
- 生产(prod)上(由于我本人的小程序只有个人资质,看不了域名,企业版的可看)
- 开发(dev)上
- 升级版使用:
- 带参数版
- 高阶版:封装网络请求(可直接用)
- 1.5、下拉刷新与上拉加载
- 1.5.1、下拉刷新(更新数据)
- 1.5.1.1、demo
- 1.5.1.2、实际工作
- 1.5.2、上拉加载(增加数据)
- 1.5.2.1、demo
- 1.5.2.2、实际工作中
- 1.6、模块化
- 1.7、文件上传
- 1.8、数据缓存
- 1.8.1、异步
- 1.8.1.1、wx.setStorage()
- 1.8.1.2、wx.getStorage()
- 1.8.1.3、wx.removeStorage()
- 1.8.1.4、wx.clearStorage()
- 1.8.2、同步
- 1.9、微信分享
- 1.9.1、分享好友
- 1.9.2、分享朋友圈
- 1.10、获取用户信息
- 1.10.1、小程序登录流程
- 1.10.2、用户登录_服务器端
- 1.10.3、用户登录
- 1.11、自定义组件
- 1.11.1、创建组件
- 1.11.2、常用属性和方法
- 1.11.3、插槽
- 1.11.3.1、实现组件
- 1.11.3.2、引用组件
- 1.11.4、Dialog(弹出框)
- 1.12、简易音乐播放器(实战,前后端调用)
- 1.12.1、app.json中添加
- 1.12.2、新建页面searchmusic
- 1.12.3、新建页面musiclist
- 1.12.4、新建页面musicplay
其他相关文章
从0到一开发微信小程序(1)——申请账号并安装开发环境
从0到一开发微信小程序(2)——开发第一个小程序
从0到一开发微信小程序(3)—小程序框架配置
从0到一开发微信小程序(4)—小程序组件
从0到一开发微信小程序(5)—小程序WXML
从0到一开发微信小程序(6)—小程序常用API
从0到一开发微信小程序(7)—小程序组件库(提高开发效率)
从0到一开发微信小程序(8)—实战一个商城项目——正在书写中
1、小程序API
1.1、路由
什么是路由?
- 相信大家都耳熟目染了,我们平常在一个页面中是不是可以点击之后跳转到其他页面,这就是路由,简单可以理解为一个页面跳转到另一个页面。
1.1.1、navigateTo(保留当前页面,跳转到应用内的某个页面,可以带参数)
- 不同页面之间的跳转(可以传参数),可回退
- 保留当前页面,跳转到应用内的某个页面。但是不能跳到 tabbar 页面。
- 程序中页面栈最多十层
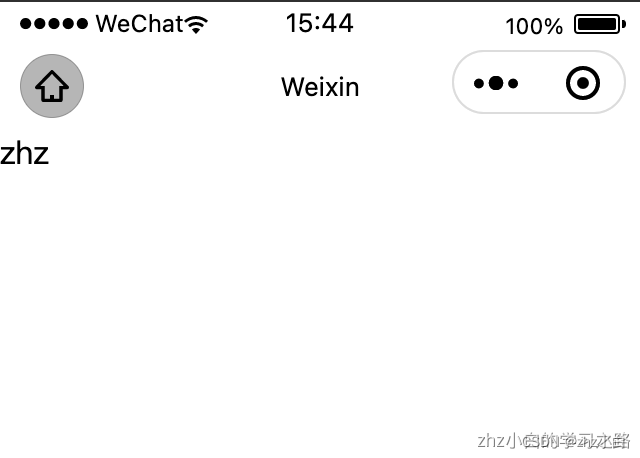
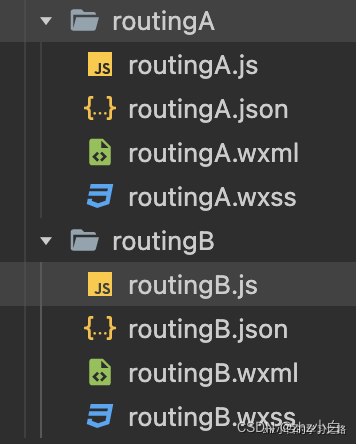
文件目录:本次主要演示routing跳routingA的流程
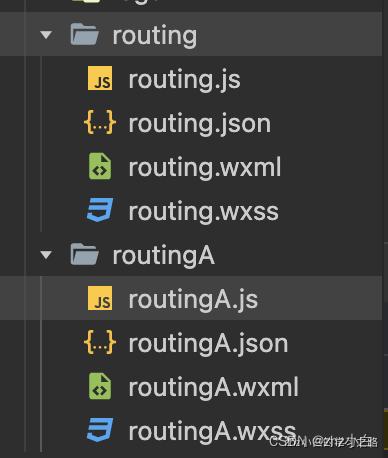
routing.wxml
<view>Routing</view>
<button
type="primary"
bindtap="clickTapButton">
跳转到RoutingA
</button>
routing.js
Page({
  clickTapButton(e){
    wx.navigateTo({
      url: '/pages/routingA/routingA?name=zhz',
    })
  }
})
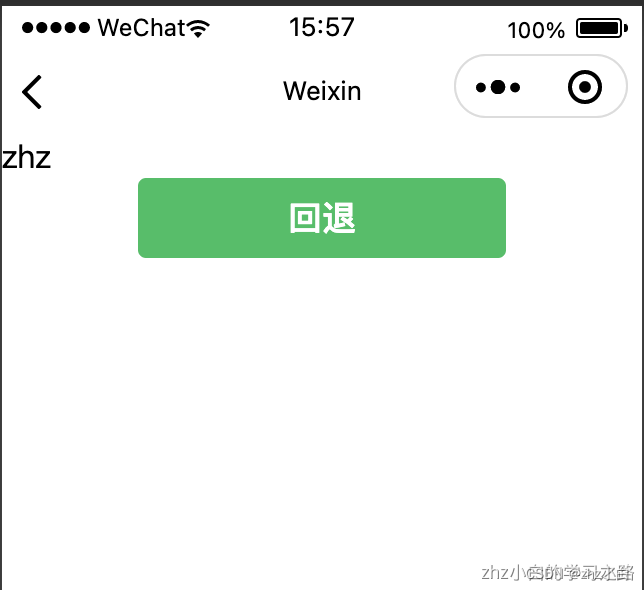
routingA.wxml
<view>
{{name}}
</view>
<button
type="primary"
bindtap="backHandle">
回退
</button>
routingA.js
Page({
  data:{
    name:''
  },
  onLoad(e){
    console.log(e.name);
    this.setData({
      name:e.name
    });
  },
  // 关闭当前页面,返回上一页面
  backHandle(){
    wx.navigateBack({
      delta: '/pages/routing/routing',
    })
  }
})
展示效果,从routing开始看:
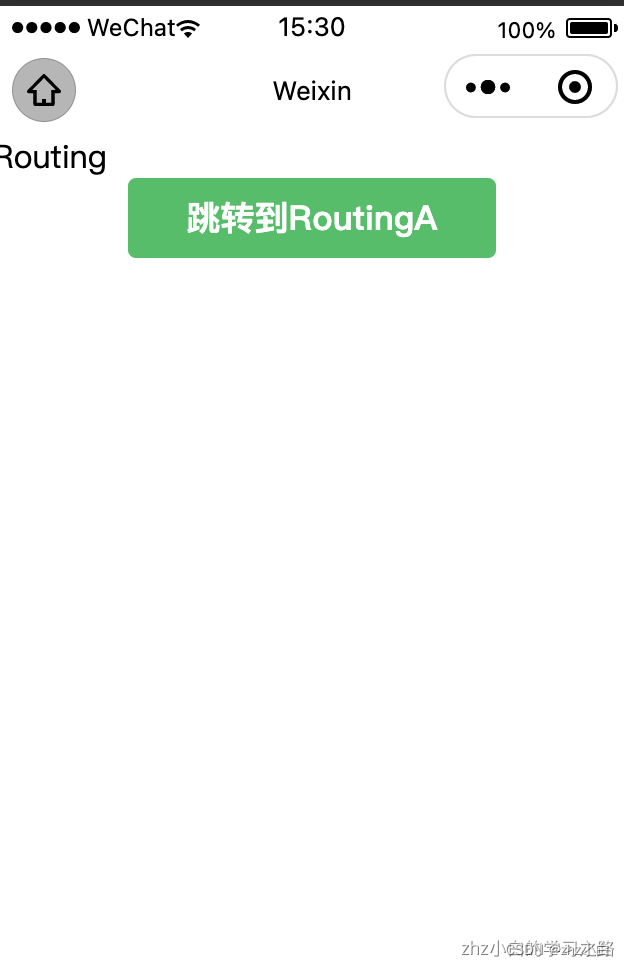
点击跳转到routingA,就会出现
点击重定向RoutingA,就会跳回Routing。
1.1.2、redirectTo(关闭当前页面,跳转到应用内的某个页面,可以带参数)
- 关闭当前页面,跳转到应用内的某个页面。但是不允许跳转到 tabbar 页面
- redirectTo和navigateTo 最大的区别就是前者无法在返回之前的页面,也就是在页面栈中不存在之前的页面了
项目目录:

测试代码:
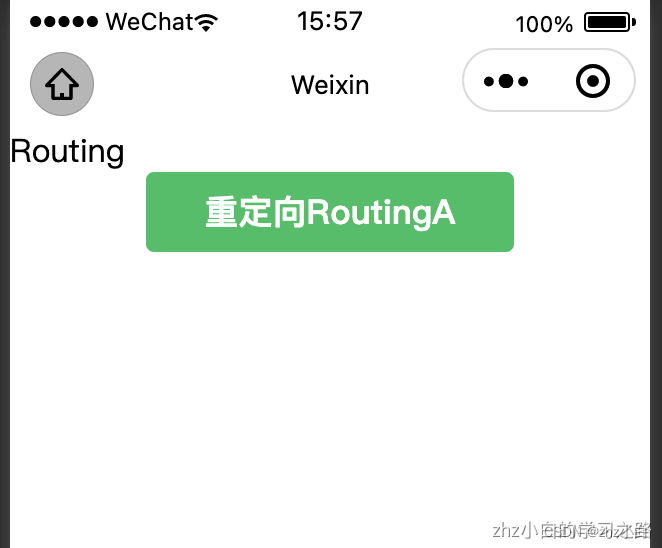
routing.wxml
<view>Routing</view>
<button
type="primary"
bindtap="clickTapButton">
重定向到RoutingA
</button>
routing.js
Page({
  clickTapButton(e){
    wx.redirectTo({
      url: '/pages/routingA/routingA?name=zhz',
    })
  }
})
routingA.wxml
<view>
{{name}}
</view>
routingA.js
Page({
  data:{
    name:''
  },
  onLoad(e){
    console.log(e.name);
    this.setData({
      name:e.name
    });
  }
})
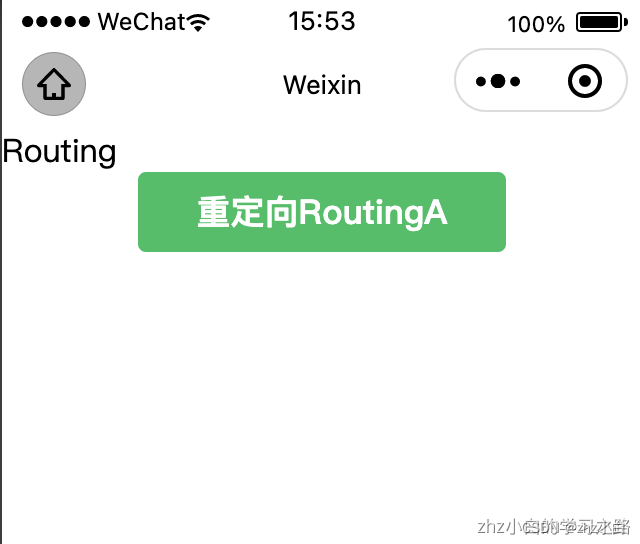
演示效果:
1.1.3、reLaunch(关闭所有页面,打开到应用内的某个页面)
- 关闭所有页面,打开到应用内的某个页面
项目目录:

测试代码:
routing.wxml
<view>Routing</view>
<button
type="primary"
bindtap="clickTapButton">
重定向到RoutingA
</button>
routing.js
Page({
  clickTapButton(e){
    wx.redirectTo({
      url: '/pages/routingA/routingA?name=zhz',
    })
  }
})
routingA.wxml
<view>
{{name}}
</view>
<button
type="primary"
bindtap="backHandle">
回退
</button>
routingA.js
Page({
  data:{
    name:''
  },
  onLoad(e){
    console.log(e.name);
    this.setData({
      name:e.name
    });
  },
  // 关闭当前页面,返回上一页面
  backHandle(){
    wx.reLaunch({
      url: '/pages/routing/routing',
    })
  }
})
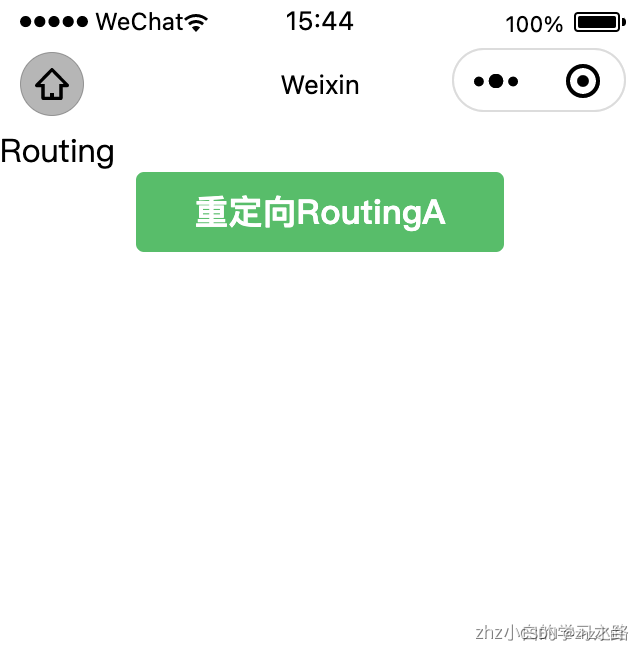
演示效果:

点击重定向RoutingA
再点击**回退,**就会出现
1.1.4、switchTab(跳转到 tabBar 页面,并关闭其他所有非 tabBar 页面)
- 跳转到 tabBar 页面,并关闭其他所有非 tabBar 页面
测试代码:我们此次用routingB,routingA来测;
项目目录:
测试代码:
第一步我们先在app.json中添加tabBar,如下
"tabBar": {
  "color": "#bfbfbf",
  "selectedColor": "#d81e06",
  "backgroundColor": "#fff",
  "borderStyle": "black",
  "position": "bottom",
  "list": [{
    "pagePath": "pages/routing/routing",
    "text": "首页",
    "iconPath": "./images/home.png",
    "selectedIconPath": "./images/home_select.png"
  },
    {
      "pagePath": "pages/routingA/routingA",
      "text": "路由A",
      "iconPath": "./images/news.png",
      "selectedIconPath": "./images/news_select.png"
    },
    {
      "pagePath": "pages/routingB/routingB",
      "text": "路由B",
      "iconPath": "./images/news.png",
      "selectedIconPath": "./images/news_select.png"
    }
  ]

}
routingB.wxml
<button type="primary" bindtap="switchTabButton">切换tabBar</button>
routingB.js
// pages/routingB/routingB.js
Page({
  switchTabButton(e){
    wx.switchTab({
      url: '/pages/routingA/routingA',
    })
  }
})
routingA.wxml
<view>
routingA页
</view>
演示效果:
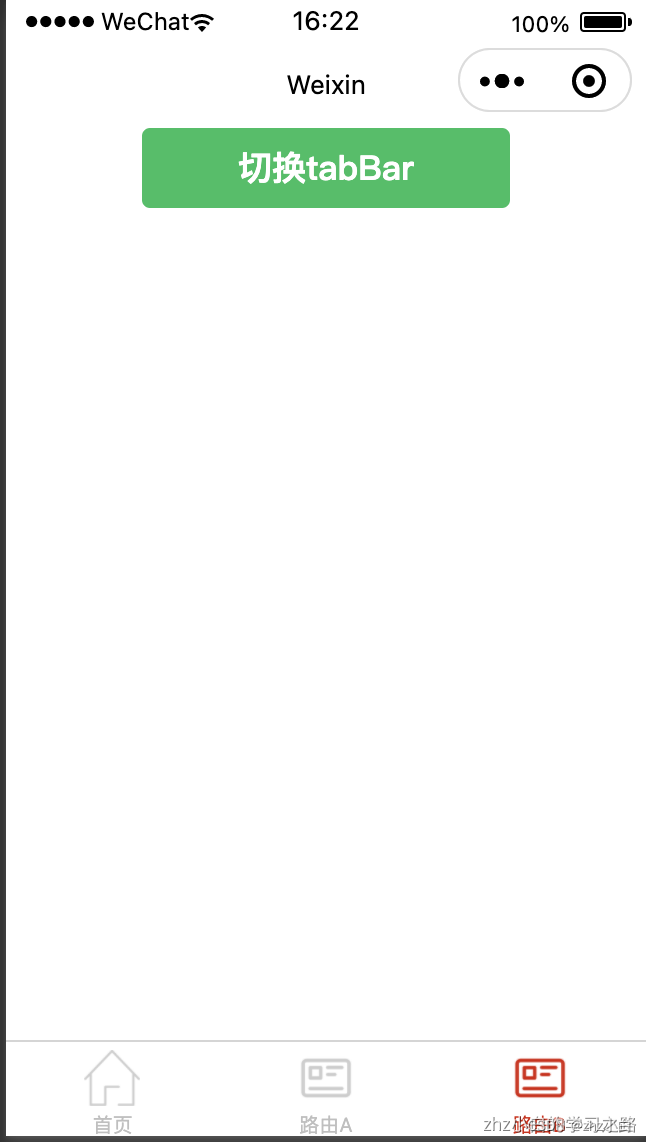
点击切换tabBar,就会调到路由A

1.2、交互
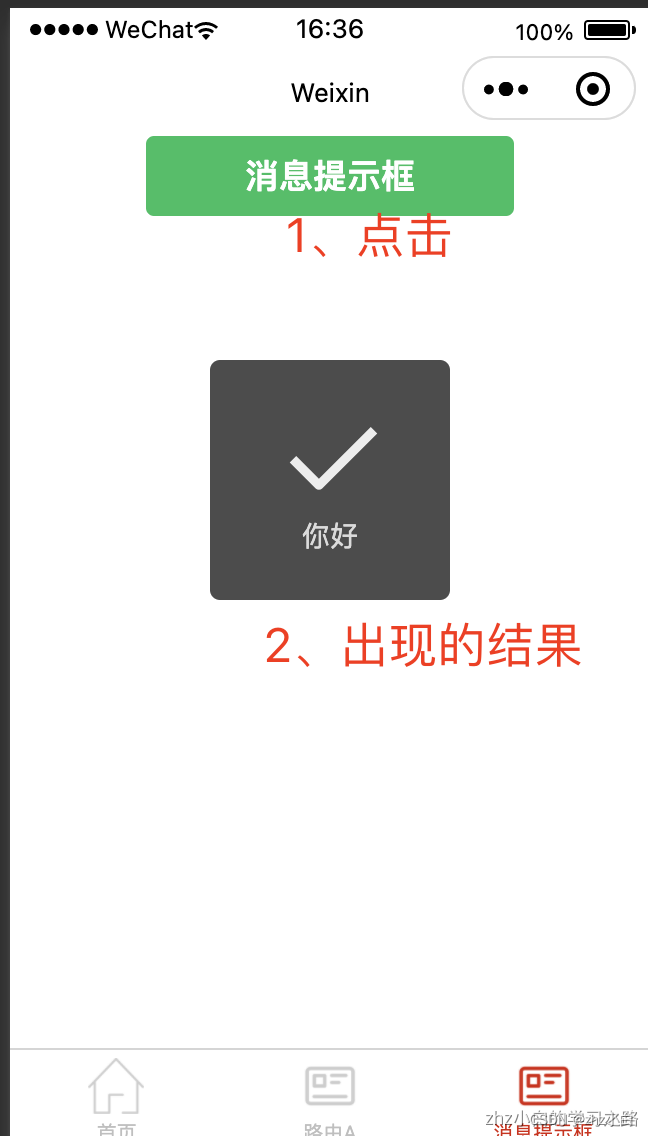
1.2.1、消息提示框
- 显示消息提示框,给出用户提示,注意该提示框是无焦点的
参数
| 属性 | 类型 | 默认值 | 必填 | 说明 |
|---|---|---|---|---|
| title | string | 是 | 提示的内容 | |
| icon | string | success | 否 | 图标 |
| image | string | 否 | 自定义图标的本地路径,image 的优先级高于 icon | |
| duration | number | 1500 | 否 | 提示的延迟时间 |
| mask | boolean | false | 否 | 是否显示透明蒙层,防止触摸穿透 |
| success | function | 否 | 接口调用成功的回调函数 | |
| fail | function | 否 | 接口调用失败的回调函数 | |
| complete | function | 否 | 接口调用结束的回调函数(调用成功、失败都会执行) |
其中icon的属性配置详情为:
| 合法值 | 说明 |
|---|---|
| success | 显示成功图标,此时 title 文本最多显示 7 个汉字长度 |
| error | 显示失败图标,此时 title 文本最多显示 7 个汉字长度 |
| loading | 显示加载图标,此时 title 文本最多显示 7 个汉字长度 |
| none | 不显示图标,此时 title 文本最多可显示两行,1.9.0 |
| 及以上版本支持 |
注意
- wx.showLoading 和 wx.showToast 同时只能显示一个
- wx.showToast 应与 wx.hideToast 配对使用
测试代码
<button type="primary" bindtap="clickShowTotal">消息提示框</button>
// pages/showToast/showToast.js
Page({
  clickShowTotal(e){
    wx.showToast({
      title: '你好',
    })
  }
})
展示效果:
1.2.2、loading提示框
- 显示 loading 提示框。需主动调用 wx.hideLoading 才能关闭提示框
参数
| 属性 | 类型 | 默认值 | 必填 | 说明 |
|---|---|---|---|---|
| title | string | 是 | 提示的内容 | |
| mask | boolean | false | 否 | 是否显示透明蒙层,防止触摸穿透 |
| success | function | 否 | 接口调用成功的回调函数 | |
| fail | function | 否 | 接口调用失败的回调函数 | |
| complete | function | 否 | 接口调用结束的回调函数(调用成功、失败都会执行) |
注意
- wx.showLoading 和 wx.showToast 同时只能显示一个
- wx.showLoading 应与 wx.hideLoading 配对使用
测试代码
<button type="primary" bindtap="clickLoading">loading提示框</button>
// pages/showToast/showToast.js
Page({
  clickLoading(e){
    wx.showLoading({
      title: '加载中',
    }),
    setTimeout(function(){
        wx.hideLoading()
    },2000)
  }
})
展示效果:
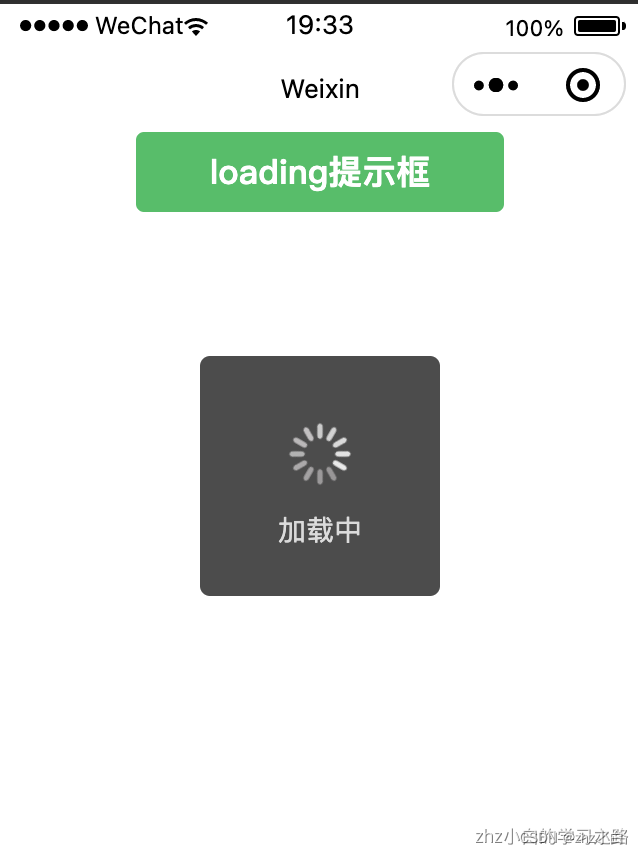
加载两秒后,加载中消失。
1.2.3、模态对话框
- 显示模态对话框,其实就是可以进行交互了
常用属性
| 属性 | 类型 | 默认值 | 必填 | 说明 |
|---|---|---|---|---|
| title | string | 否 | 提示的标题 | |
| content | string | 否 | 提示的内容 | |
| showCancel | boolean | true | 否 | 是否显示取消按钮 |
| cancelText | string | 取消 | 否 | 取消按钮的文字,最多 4 个字符 |
| cancelColor | string | #000000 | 否 | 取消按钮的文字颜色,必须是 16 进制格式的颜色字符串 |
| confirmText | string | 确定 | 否 | 确认按钮的文字,最多 4 个字符 |
| confirmColor | string | #576B95 | 否 | 确认按钮的文字颜色,必须是 16 进制格式的颜色字符串 |
| editable | boolean | false | 否 | 是否显示输入框 |
| placeholderText | string | 否 | 显示输入框时的提示文本 |
存在输入框
object.success 回调函数
| 属性 | 类型 | 说明 |
|---|---|---|
| content | string | editable 为 true 时,用户输入的文本 |
| confirm | boolean | 为 true 时,表示用户点击了确定按钮 |
| cancel | boolean | 为 true 时,表示用户点击了取消 |
测试代码:
<button type="primary" bindtap="clickModalHandle">显示对话框</button>
// pages/showToast/showToast.js
Page({
clickModalHandle(e) {
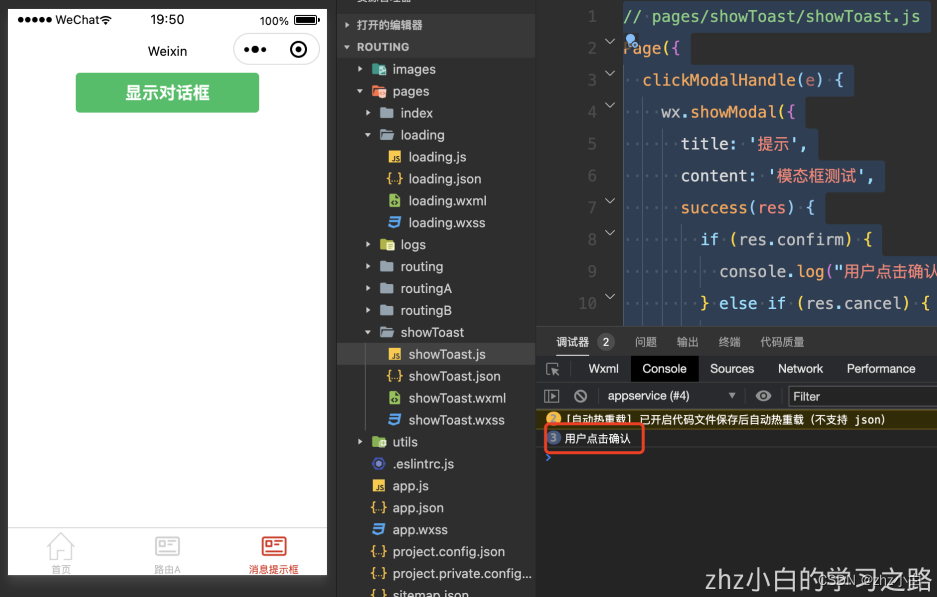
wx.showModal({
title: '提示',
content: '模态框测试',
success(res) {
if (res.confirm) {
console.log("用户点击确认")
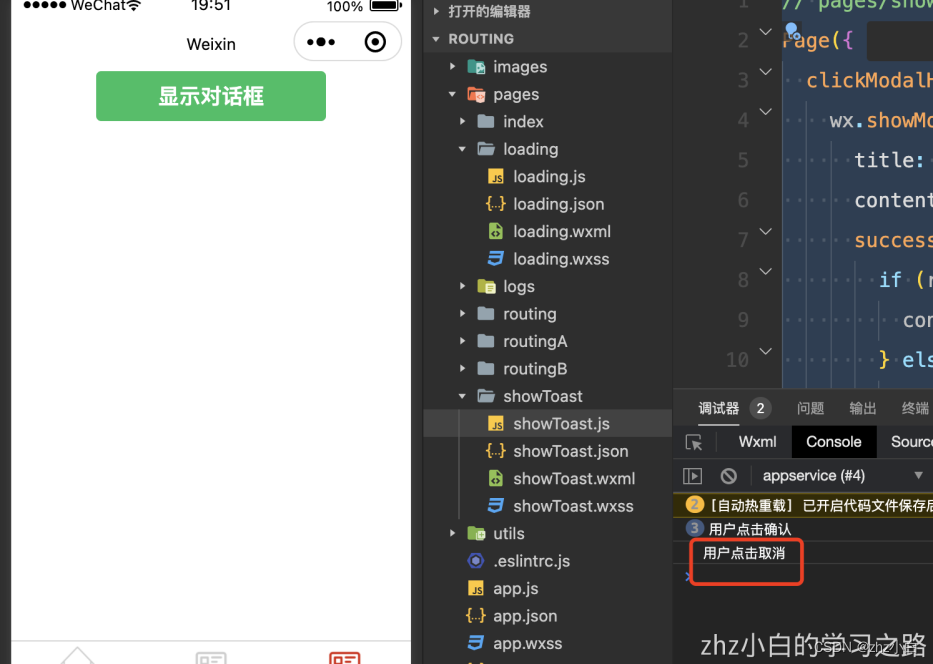
} else if (res.cancel) {
console.log("用户点击取消");
}
}
})
}
})
展示效果:
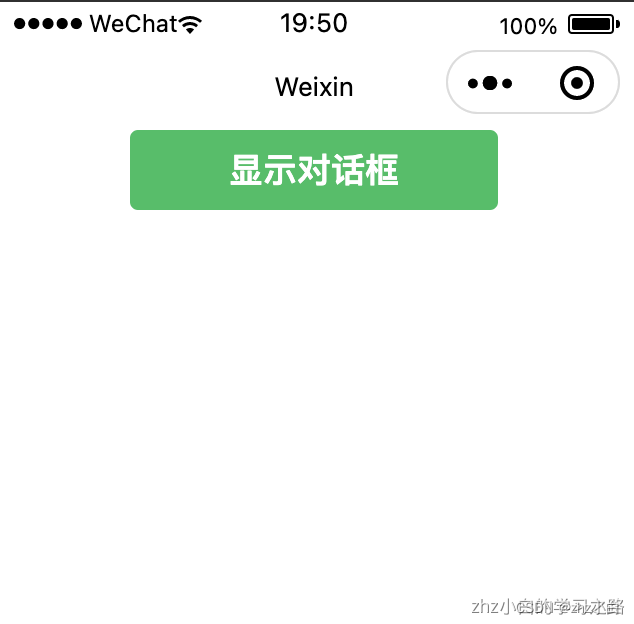
点击:
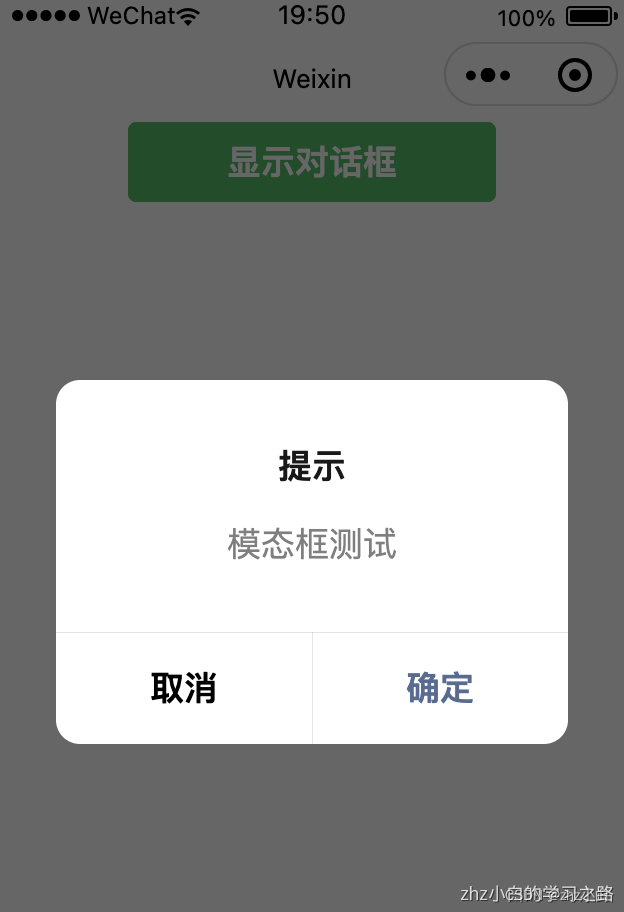
当我点击了确认,取消也同理
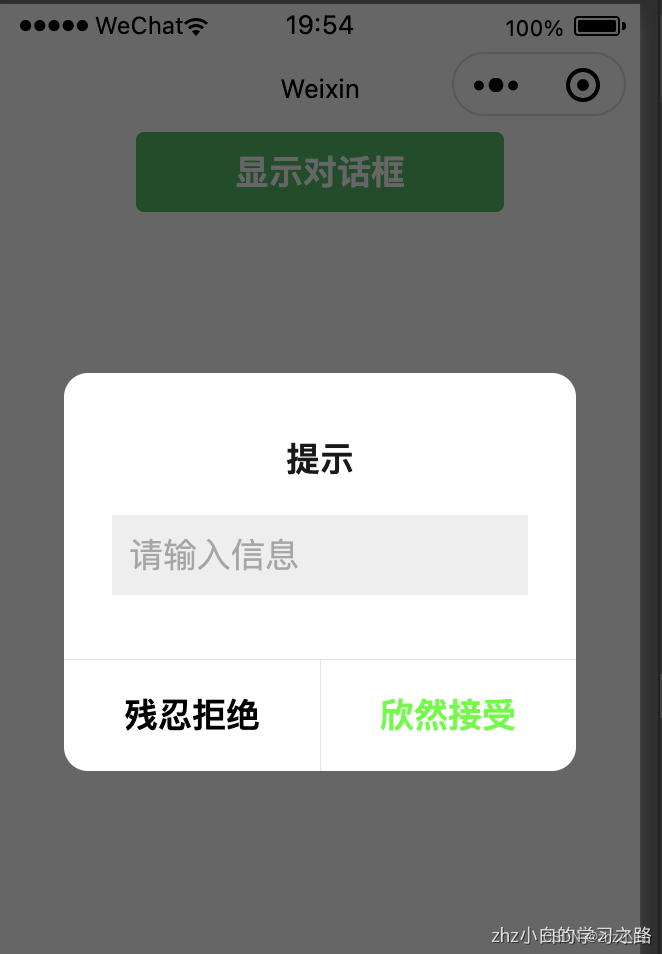
升级版交互,只需要改js文件即可:
// pages/showToast/showToast.js
Page({
  clickModalHandle(e) {
    wx.showModal({
      title: '提示',
      showCancel:true,
      cancelText:"残忍拒绝",
      confirmText:"欣然接受",
      confirmColor:"#00ff00",
      editable:true,
      placeholderText:"请输入信息",
      success(res) {
        if (res.confirm) {
            // res.content获取用户输入信息
            console.log('用户点击确定',res.content)
        } else if (res.cancel) {
          console.log("用户点击取消");
        }
      }
    })
  }
})
展示效果
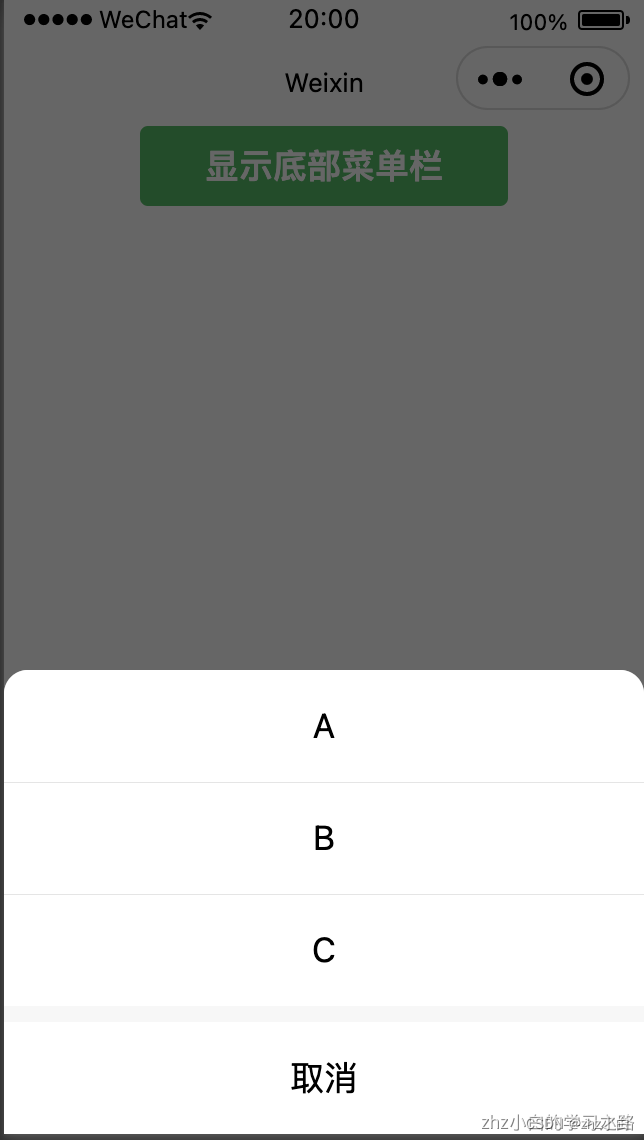
1.2.4、操作菜单
- 显示操作菜单,菜单会从底部弹出
常用属性
| 属性 | 类型 | 默认值 | 必填 | 说明 |
|---|---|---|---|---|
| itemList | Array. | 是 | 按钮的文字数组,数组长度最大为 6 | |
| itemColor | string | #000000 | 否 | 按钮的文字颜色 |
| success | function | 否 | 接口调用成功的回调函数 | |
| fail | function | 否 | 接口调用失败的回调函数 |
获取数据
object.success 回调函数
| 属性 | 类型 | 说明 |
|---|---|---|
| tapIndex | number | 用户点击的按钮序号,从上到下的顺序,从0开始 |
测试代码:
<button type="primary" bindtap="clickActionSheetHandle">显示底部菜单栏</button>
// pages/showToast/showToast.js
Page({
  clickActionSheetHandle() {
    wx.showActionSheet({
      itemList: ['A', 'B', 'C'],
      success(res) {
        console.log(res.tapIndex)
       },
      fail(res) {
        console.log(res.errMsg)
       }
     })
   }
})
展示效果:
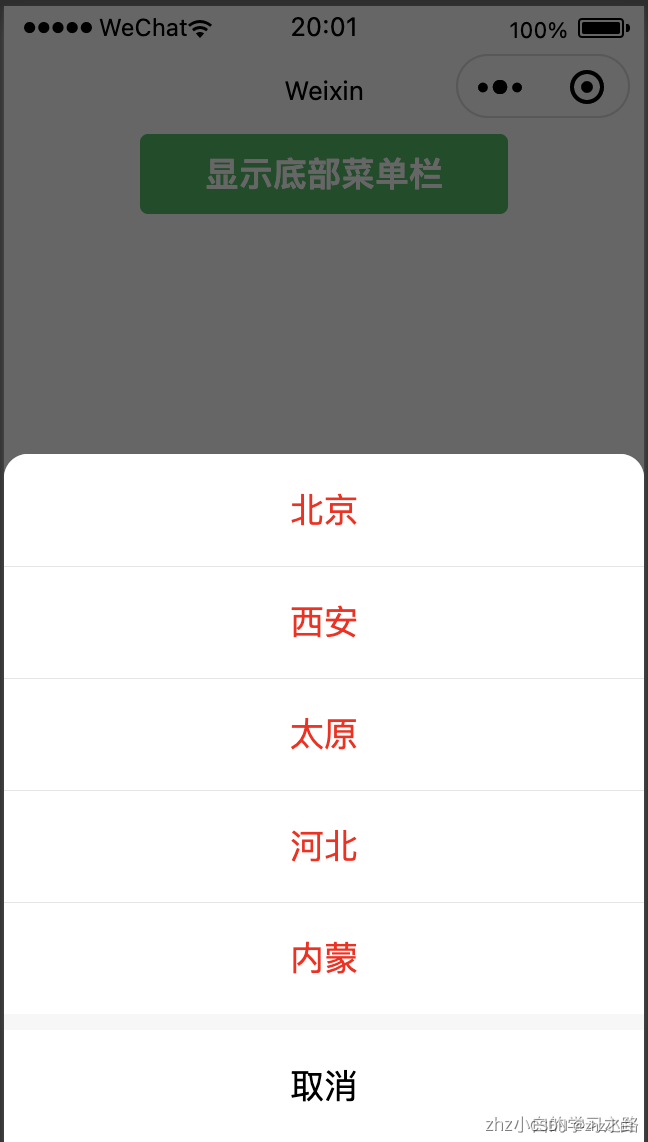
升级版,只需要改造js文件:
// pages/showToast/showToast.js
Page({
  data:{
    citys:["北京","西安","太原","河北","内蒙"]
   },
  clickActionSheetHandle() {
    var that = this;
    wx.showActionSheet({
      itemList: this.data.citys,
      itemColor:"#f00",
      success(res) {
        console.log(that.data.citys[res.tapIndex])
       },
      fail(res) {
        console.log(res.errMsg)
       }
     })
   }
})
展示效果:
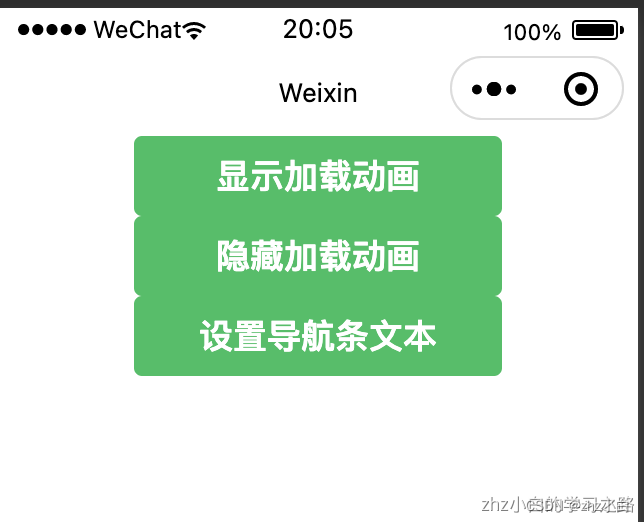
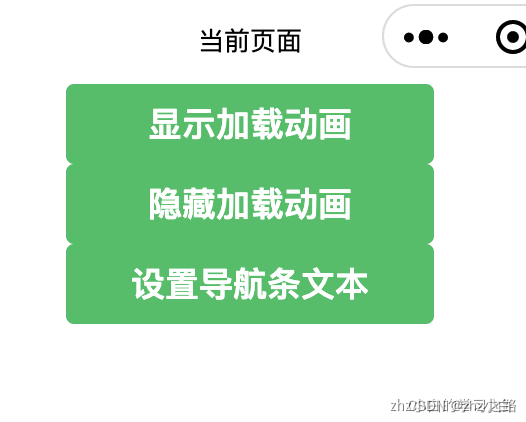
1.3、动态设置导航栏
- 在微信小程序中,我们可以通过逻辑动态设置导航栏
常用设置
| 方法 | 描述 |
|---|---|
| showNavigationBarLoading | 在当前页面显示导航条加载动画 |
| hideNavigationBarLoading | 在当前页面隐藏导航条加载动画 |
| setNavigationBarTitle | 动态设置当前页面的标题 |
| hideHomeButton | 隐藏返回首页按钮。当用户打开的小程序最底层页面是非首页时,默认展示“返回首页”按钮,开发者可在页面 onShow 中调用 hideHomeButton 进行隐藏 |
测试代码
<button type="primary" bindtap="bindShowBarHandle">显示加载动画</button>
<button type="primary" bindtap="bindHideBarHandle">隐藏加载动画</button>
<button type="primary" bindtap="bindSetBarTitle">设置导航条文本</button>
// pages/showToast/showToast.js
Page({
  bindShowBarHandle(){
    wx.showNavigationBarLoading();
   },
  bindHideBarHandle(){
    wx.hideNavigationBarLoading();
   },
  bindSetBarTitle(){
    wx.setNavigationBarTitle({
      title: '当前页面'
     })
   },
  onShow(){
    wx.hideHomeButton()
   }
})
演示效果:
当点击显示加载动画
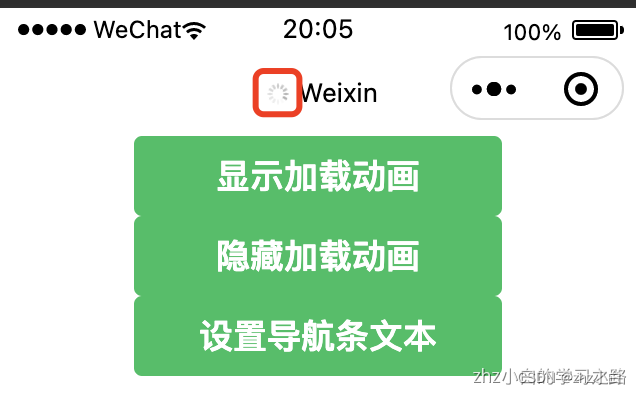
当点击隐藏加载动画

当点击设置导航条文本:
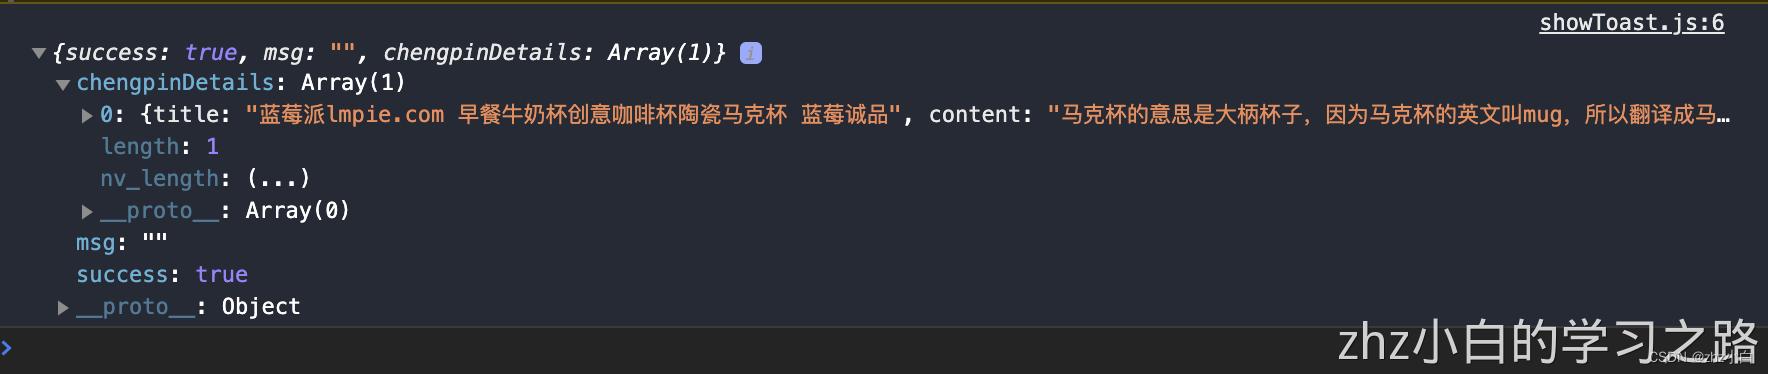
1.4、网络请求(前后端分离常用)
- 发起 HTTPS 网络请求,从后端获取数据,显示在页面之上
基本使用
Page({
  onLoad(options) {
    wx.request({
      url: 'https://iwenwiki.com/api/blueberrypai/getChengpinDetails.php',
      success(res) {
        console.log(res.data)
       }
     })
   }
})
展示效果:
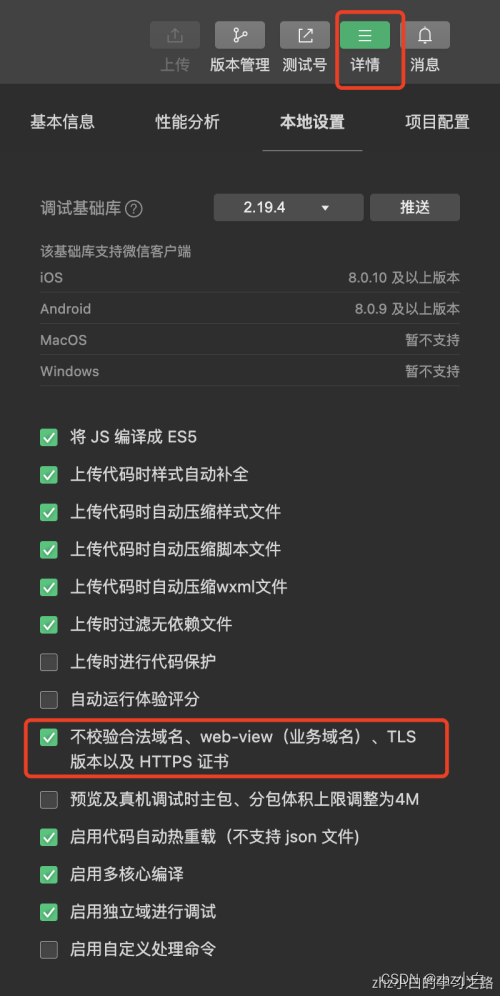
特殊的需要开启域名校验方面的东西
生产(prod)上(由于我本人的小程序只有个人资质,看不了域名,企业版的可看)
需要登录微信小程序配置域名,具体位置:
- 小程序后台 - 开发 - 开发设置 - 服务器域名
- 参考:https://www.yw-jz.com/h-nd-1341.html
开发(dev)上
按照下面勾上即可
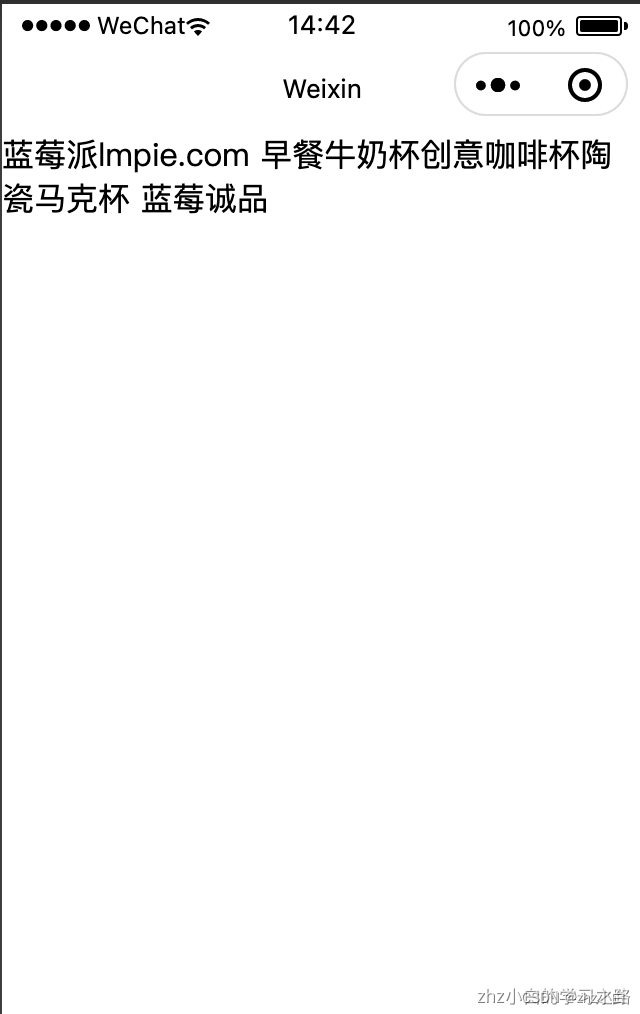
升级版使用:
<view>
  <block wx:for="{{ chengpinDetails }}" wx:key="index">
    <text>{{ item.title }}</text>
  </block>
</view>
Page({
  data:{
    chengpinDetails:[]
  },
  onLoad(options) {
    var that=this;
    wx.request({
      url: 'https://iwenwiki.com/api/blueberrypai/getChengpinDetails.php',
      success(res) {
        that.setData({
          chengpinDetails:res.data.chengpinDetails
        })
       }
     })
   }
})
展示效果:
带参数版
| 属性 | 类型 | 默认值 | 必填 | 说明 |
|---|---|---|---|---|
| url | string | 是 | 开发者服务器接口地址 | |
| data | string/object/ArrayBuffer | 否 | 请求的参数 | |
| header | Object | 否 | 设置请求的 header,header 中不能设置 Referer。 content-type 默认为 application/json | |
| timeout | number | 否 | 超时时间,单位为毫秒。默认值为 60000 | |
| method | string | GET | 否 | HTTP 请求方法 常用的方式 GET和POST |
| success | function | 否 | 接口调用成功的回调函数 | |
| fail | function | 否 | 接口调用失败的回调函数 | |
| complete | function | 否 | 接口调用结束的回调函数(调用成功、失败都会执行) |
Page({
  data: {
    chengpinDetails: []
   },
  onLoad(options) {
    wx.request({
      url: 'http://iwenwiki.com:3002/api/foods/list',
      method: "GET",
      data: {
        city: "北京"
       },
      header: {
        'content-type': 'application/json'
       },
      timeout:5000,
      success(res) {
        console.log(res.data);
       },
      fail(error){
        console.log(error);
       },
      complete(){
        console.log("网络请求完成");
       }
     })
   }
})
高阶版:封装网络请求(可直接用)
在utils目录下新建一个js文件:request.js,内容为:
function request(url,params,method){
  wx.showLoading({
    title: '加载中',
    mask:true
  })
  let promise=new Promise((resolve,reject)=>{
    wx.request({
      url: url,
      data: params,
      header:{
        'content-type':'application/json'
      },
      method:method,
      success:res=>{
        resolve(res.data)
      },
      fail:err=>{
        reject(err)
      },
      complete:()=>{
        wx.hideLoading();
      }
    })
  })
  return promise;
}

module.exports={
  request
}
测试代码:
const {request}  = require("../../utils/request.js")
Page({
    data: {
    result: []
   },
  onLoad(options) {
    request("http://iwenwiki.com:3002/api/foods/list",{
      city:"北京"
    },"GET")
    .then(res=>{
      console.log(res.data);
      this.setData({
        result:res.data.result
      })
    })
   }
})
视图层:
<view>
  <block wx:for="{{result}}" wx:key="index">
    <view>{{item.name}}</view>
  </block>
</view>
1.5、下拉刷新与上拉加载
1.5.1、下拉刷新(更新数据)
1.5.1.1、demo
- 常见效果:微信的朋友圈
测试代码:
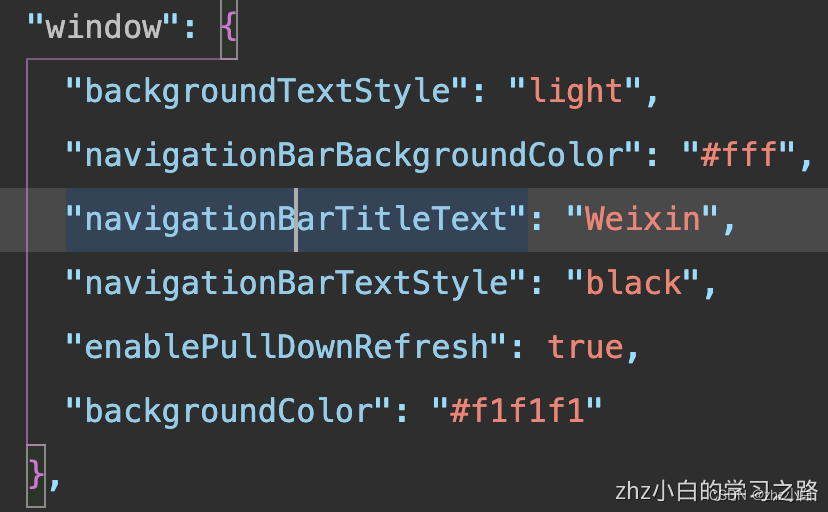
app.json中需要配置如下
"window": {
    "backgroundTextStyle": "light",
    "enablePullDownRefresh": true,
    "backgroundColor": "#f1f1f1"
  },
对应的文件中的js文件添加逻辑
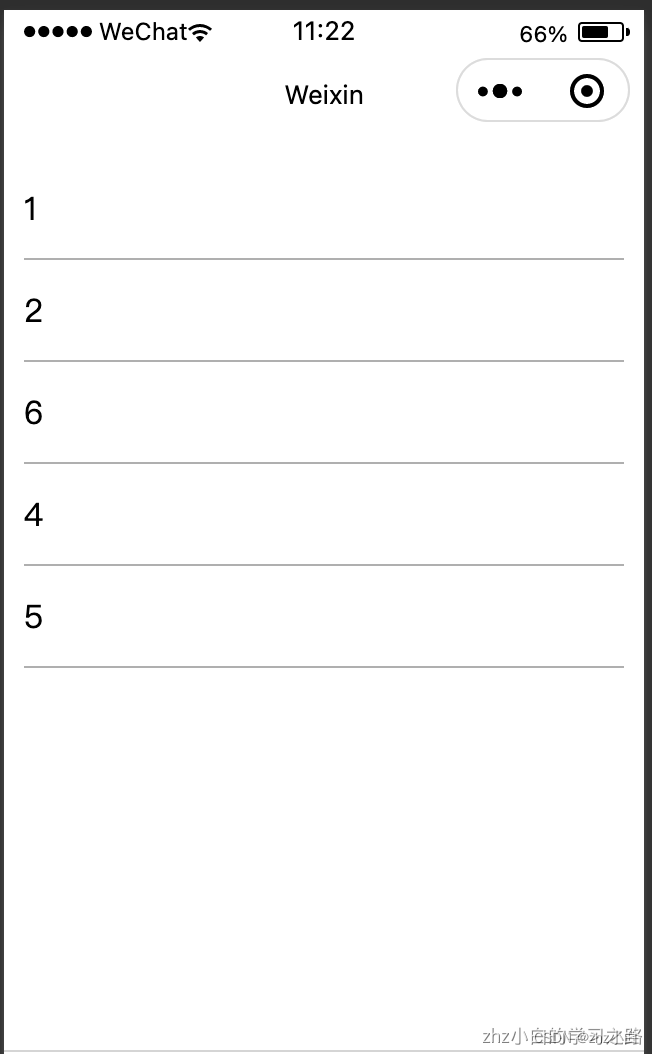
Page({
data: {
list:[1,2,6,4,5]
},
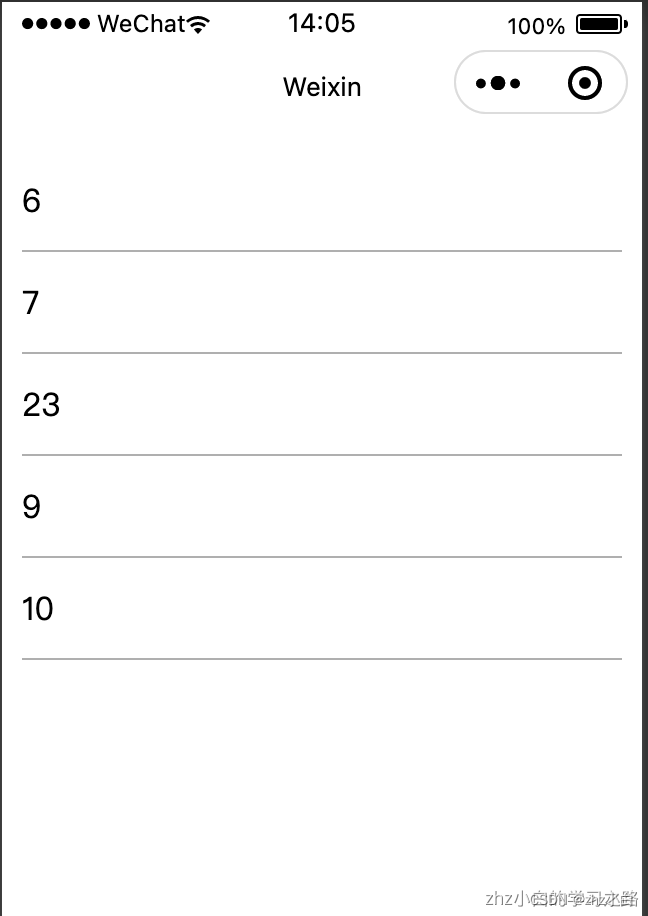
onPullDownRefresh() {
setTimeout(() =>{
this.setData({
list:[6,7,23,9,10]
})
wx.stopPullDownRefresh();
},1000)
}
})
wxml中添加:
<view class="root">
  <view wx:for="{{ list }}" wx:key="index">
    <view class="item">{{ item }}</view>
  </view>
</view>
wxss中添加:
page{
  background: #fff;
}
.root{
  padding: 10px;
}
.item{
  width: 100%;
  height: 50px;
  border-bottom: 1px solid #afafaf;
  line-height: 50px;
}
演示效果如下:
进去时->
下拉刷新时->
1.5.1.2、实际工作
老规矩,还是先在app.json中配置
"window": {
    "backgroundTextStyle": "light",
    "enablePullDownRefresh": true,
    "backgroundColor": "#f1f1f1"
  },
对应的页面的js文件中添加
const { request } = require("../../utils/request.js")
Page({
  data: {
    list:[],
    page:1
   },
  onLoad(options){
    this.http(this.data.page)
   },
  onPullDownRefresh() {
    this.setData({
      page:this.data.page+=1
     })
    this.http(this.data.page)
   },
  http(page){
    request("http://iwenwiki.com:3002/api/foods/list","GET",{
      city:"北京",
      page:page
     }).then(res =>{
      if(!res.msg){
        this.setData({
          list:res.data.result
         })
       }else{
        wx.showToast({
         title: res.msg,
         })
       }
      wx.stopPullDownRefresh()
     })
   }
})
wxml中添加
<view class="root">
  <view class="item" wx:for="{{ list }}" wx:key="index">
    <image src="{{ item.pic }}"></image>
    <text>{{ item.name }}</text>
  </view>
</view>
wxss文件中添加:
page{
  background: #f1f1f1;
}

.root{
  padding: 10px;
}

.item{
  height: 80px;
  margin: 5px 0;
  background: #fff;
  line-height: 100px;
  padding: 10px;
}

image{
  width: 80px;
  height: 80px;
}

text{
  height: 80px;
  padding-left: 10px;
  position: absolute;
  line-height: 80px;
}
1.5.2、上拉加载(增加数据)
1.5.2.1、demo
常用场景:微信朋友圈,淘宝搜索之后,京东搜索之后等
测试代码:
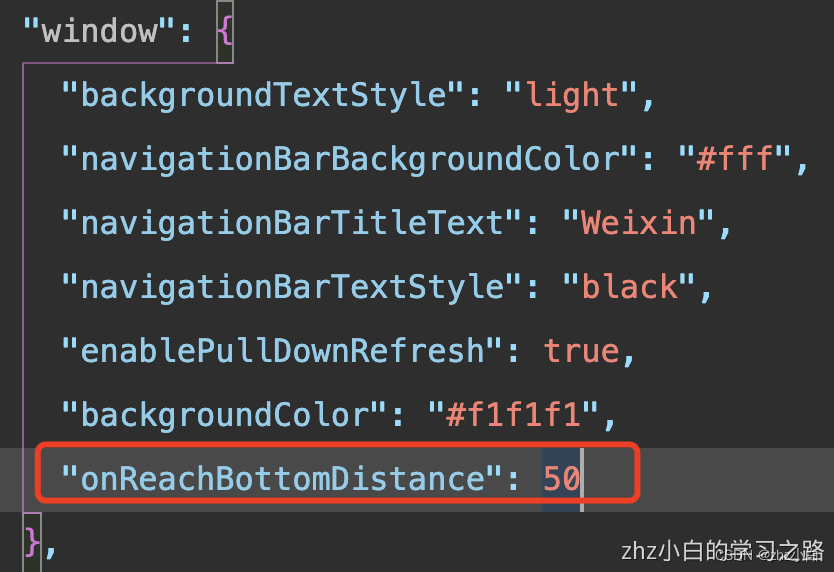
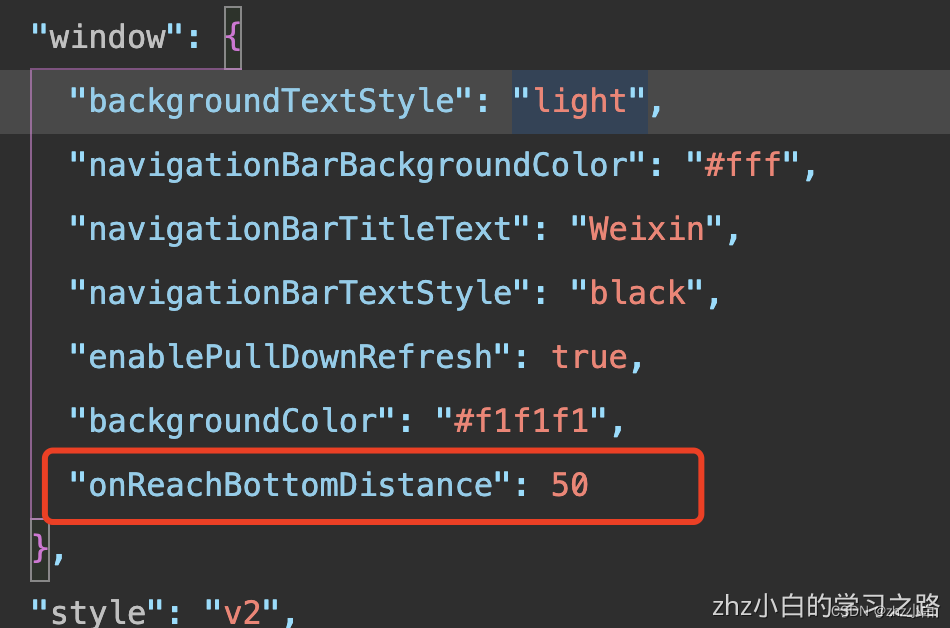
在app.json中添加以下内容
"window":{
  "onReachBottomDistance":50
}
实现上拉加载逻辑:对应页面的js文件中书写
Page({
  data: {
    list:[1,2,3,4,5]
   },
  onReachBottom() {
    this.setData({
      list:this.data.list.concat([6,7,8,9,10])
     })
   }
})
渲染页面,在wxml中添加:
<view class="container">
  <view class="item" wx:for="{{ list }}" wx:key="index">
    <text>{{ item }}</text>
  </view>
</view>
样式加载,wxss中添加:
.item{
  height: 200px;
}
text{
  font-size: 30px;
}
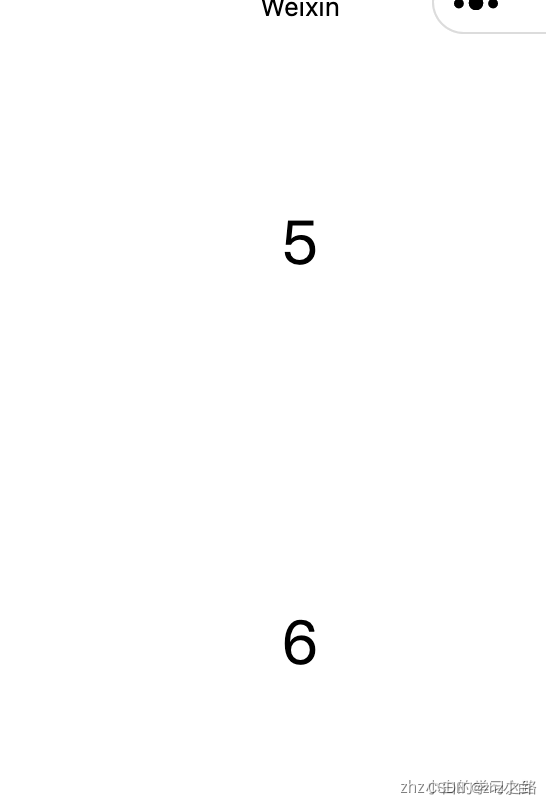
展示效果:我截了个中间数,东西太多了
1.5.2.2、实际工作中
app.json中添加:
"window": {
    "onReachBottomDistance": 50
  },
页面的js文件
const { request } = require("../../utils/request.js")

Page({
  data: {
    list:[],
    page:1
   },
  onLoad(options) {
    this.http(this.data.page);
   },
  onReachBottom() {
    this.setData({
      page:this.data.page+=1
     })
    this.http(this.data.page)
   },
  http(page){
    request("http://iwenwiki.com:3002/api/foods/list","GET",{
      city:"北京",
      page:page
     }).then(res =>{
      if(!res.msg){
        this.setData({
          list:this.data.list.concat(res.data.result)
         })
       }else{
        wx.showToast({
         title: res.msg,
         })
       }
     })
   }
})
页面的wxml文件
<view class="root">
  <view class="item" wx:for="{{ list }}" wx:key="index">
    <image src="{{ item.pic }}"></image>
    <text>{{ item.name }}</text>
  </view>
</view>
页面的wxss文件
page{
  background: #f1f1f1;
}


.root{
  padding: 10px;
}


.item{
  height: 80px;
  margin: 5px 0;
  background: #fff;
  line-height: 100px;
  padding: 10px;
}


image{
  width: 80px;
  height: 80px;
}


text{
  height: 80px;
  padding-left: 10px;
  position: absolute;
  line-height: 80px;
}
1.6、模块化
在小程序中,文件与文件之间是如何管理的呢?小程序提供了"模块化"解决方案
- 导出:module.exports
- 导入:require
我们可以使用module.exports导出,并且使用require导入
//hello.js

const num = 10;
function hello(){
  return "hello"
}

module.exports = {
  hello,
  num
}
//module.js

const { num,hello } = require("../../utils/hello.js")
Page({
  onLoad(options) {
    console.log(num);
    console.log(hello());
   }
})
1.7、文件上传
| 属性 | 类型 | 默认值 | 必填 | 说明 |
|---|---|---|---|---|
| url | string | 是 | 开发者服务器地址 | |
| filePath | string | 是 | 要上传文件资源的路径 (本地路径) | |
| name | string | 是 | 文件对应的 key,开发者在服务端可以通过这个 key 获取文件的二进制内容 | |
| formData | Object | 否 | HTTP 请求中其他额外的 form data | |
| timeout | number | 否 | 超时时间,单位为毫秒 | |
| success | function | 否 | 接口调用成功的回调函数 | |
| fail | function | 否 | 接口调用失败的回调函数 | |
| complete | function | 否 | 接口调用结束的回调函数(调用成功、失败都会执行) |
Page({
  bindUploadHandle(){
    wx.chooseImage({
      success(res) {
        const tempFilePaths = res.tempFilePaths
        wx.uploadFile({
          // xiu
          url: 'http://localhost:3000/api/upload',
          filePath: tempFilePaths[0],
          name: 'file',
          formData: {
            'user': 'test'
           },
          timeout:50000,
          success(res) {
            const data = res.data
            console.log(data);
           },
          fail(err){
            console.log(err);
           },
          complete(){
            console.log("完成");
           }
         })
       }
     })
   }
})
1.8、数据缓存
1.8.1、异步
在开发过程中,有些需求是数据需要持久保存在程序中的,不随程序关闭而删除
例如:用户基本信息、主题颜色等
在微信小程序中,提供了对数据的存储操作:
- 存储:wx.setStorage()
- 读取:wx.getStorage()
- 删除:wx.removeStorage()
- 清空:wx.clearStorage()
1.8.1.1、wx.setStorage()
- 将数据存储在本地缓存中指定的 key 中。会覆盖掉原来该 key 对应的内容。除非用户主动删除或因存储空间原因被系统清理,否则数据都一直可用。单个 key 允许存储的最大数据长度为 1MB,所有数据存储上限为 10MB
Page({
  onLoad(options) {
    wx.setStorage({
      key: "name",
      data: "你好帅"
     })
   }
})
属性表
| 属性 | 类型 | 默认值 | 必填 | 说明 |
|---|---|---|---|---|
| key | string | 是 | 本地缓存中指定的 key | |
| data | any | 是 | 需要存储的内容。只支持原生类型、Date、及能够通过JSON.stringify序列化的对象。 | |
| encrypt | Boolean | false | 否 | 是否开启加密存储。只有异步的 setStorage 接口支持开启加密存储。开启后,将会对 data 使用 AES128 加密,接口回调耗时将会增加。若开启加密存储,setStorage 和 getStorage 需要同时声明 encrypt 的值为 true。此外,由于加密后的数据会比原始数据膨胀1.4倍,因此开启 encrypt 的情况下,单个 key 允许存储的最大数据长度为 0.7MB,所有数据存储上限为 7.1MB |
温馨提示
AES加密:高级加密标准(英语:Advanced Encryption Standard,缩写:AES) 是一种区块加密标准。AES可以使用128、192和256位mi钥,从安全性来看,AES256安全性最高。从性能来看,AES128性能最高
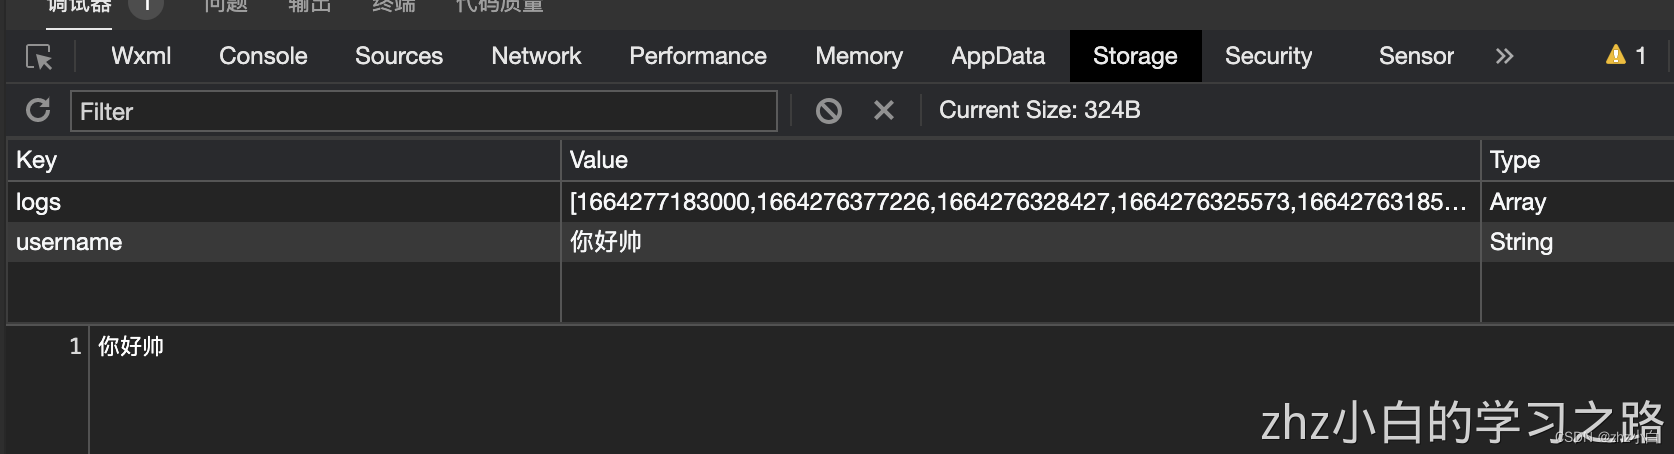
Page({
  onLoad(options) {
    wx.setStorage({
      key: "username",
      data: "你好帅",
      encrypt: true
     })
   }
})
1.8.1.2、wx.getStorage()
- 从本地缓存中异步获取指定 key 的内容
Page({
  onLoad(options) {
    wx.setStorage({
      key: "name",
      data: "你好帅呀"
     })
    wx.getStorage({
      key:"name",
      success(res){
        console.log(res.data);
       }
     })
    wx.setStorage({
      key: "username",
      data: "你好帅",
      encrypt: true
     })
    wx.getStorage({
      key:"username",
      encrypt: true,
      success(res){
        console.log(res.data);
       }
     })
   }
})
1.8.1.3、wx.removeStorage()
- 从本地缓存中移除指定 key
Page({
  onLoad(options) {
    wx.setStorage({
      key: "name",
      data: "你好帅呀"
     })
    wx.removeStorage({
      key: 'name',
      success(res) {
        console.log(res)
       }
     })
   }
})
- 为了避免意外,我们最好用try…catch进行捕获
Page({
  onLoad(options) {
    wx.setStorage({
      key: "name",
      data: "itbaizhan"
    })
    try {
      wx.removeStorage({
        key: 'name',
        success(res) {
          console.log(res)
        }
      })
    } catch (e) {
      // 发生意外
      console.log(e);
    }
  }
})
1.8.1.4、wx.clearStorage()
- 清理本地数据缓存
Page({
  onLoad(options) {
    wx.setStorage({
      key: "name",
      data: "itbaizhan"
     })
    wx.clearStorage()
   }
})
1.8.2、同步
数据缓存有两套操作方案,一套是异步操作,一套是同步操作
我们之前讲解的就是异步操作,而同步操作如下(只是在后面多了Sync):
- 存储:wx.setStorageSync()
- 读取:wx.getStorageSync()
- 删除:wx.removeStorageSync()
- 清空:wx.clearStorageSync()
温馨提示
异步不会阻塞当前任务,同步缓存直到同步方法处理完才能继续往下执行
通俗的说:异步就是不管保没保存成功,程序都会继续往下执行.同步是等保存成功了,才会执行下面的代码
使用异步,性能会更好;而使用同步,数据会更安全
Page({
  onLoad(options) {
    wx.setStorageSync("color","red")
    var value = wx.getStorageSync('color')
    console.log(value);
    wx.removeStorageSync('color')
    wx.clearStorageSync()
   }
})
1.9、微信分享
监听用户点击页面内转发按钮,可以发送给你的好友或者分享到你的朋友圈哦
分享给好友和分享到朋友圈是需要分别添加不同函数的
- 分享好友:onShareAppMessage()
- 分享朋友圈:onShareTimeline()
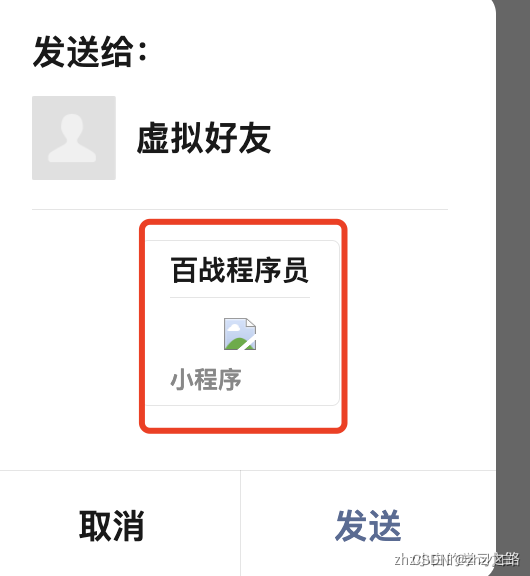
1.9.1、分享好友
| 字段 | 说明 | 默认值 |
|---|---|---|
| title | 转发标题 | 当前小程序名称 |
| path | 转发路径 | 当前页面 path ,必须是以 / 开头的完整路径 |
| imageUrl | 自定义图片路径,可以是本地文件路径、代码包文件路径或者网络图片路径。支持 PNG 及JPG。显示图片长宽比是 5:4。 | 使用默认截图 |
随便新建个页面,在js文件中添加
  /**
   * 用户点击右上角分享
   */
  onShareAppMessage() {
    return {
      title: '百战程序员',
      path: '/pages/upload/upload',
      imageUrl:"../../images/1.jpg",
      //这里要写上你对应的用户点击右上角分享,用户点击右上角分享的名称。
      menus: ['shareAppMessage','shareTimeline']
     }
  },
    /**
   * 用户点击右上角分享
   */
  onShareTimeline(){
    return {
      title: '分享到朋友圈',
      query: '/pages/upload/upload',
      imageUrl:"../../images/2.jpeg"
     }
   }
展示效果:
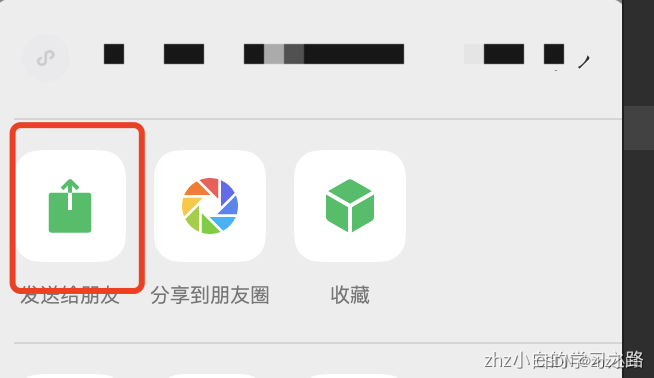
因为图片太大了,所以看不了,自己剪辑剪辑:
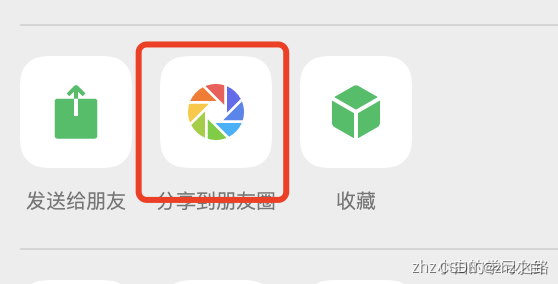
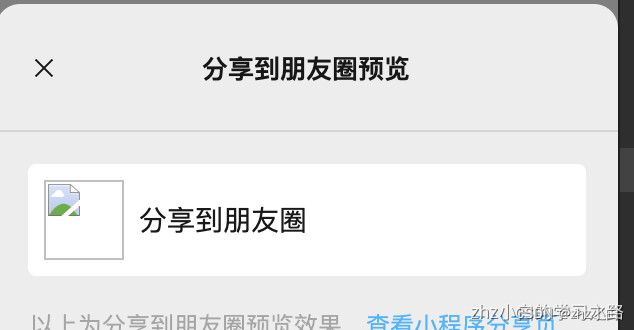
1.9.2、分享朋友圈
| 字段 | 说明 | 默认值 |
|---|---|---|
| title | 自定义标题,即朋友圈列表页上显示的标题 | 当前小程序名称 |
| query | 自定义页面路径中携带的参数,如 path?a=1&b=2 的 “?” 后面部分 | 当前页面路径携带的参数 |
| imageUrl | 自定义图片路径,可以是本地文件或者网络图片。支持 PNG 及 JPG,显示图片长宽比是 1:1 | 默认使用小程序 Logo |
  /**
   * 用户点击右上角分享
   */
  onShareAppMessage() {
    return {
      title: '百战程序员',
      path: '/pages/upload/upload',
      imageUrl:"../../images/1.jpg",
      //这里要写上你对应的用户点击右上角分享,用户点击右上角分享的名称。
      menus: ['shareAppMessage','shareTimeline']
     }
  },
    /**
   * 用户点击右上角分享
   */
  onShareTimeline(){
    return {
      title: '分享到朋友圈',
      query: '/pages/upload/upload',
      imageUrl:"../../images/2.jpeg"
     }
   }
展示效果:
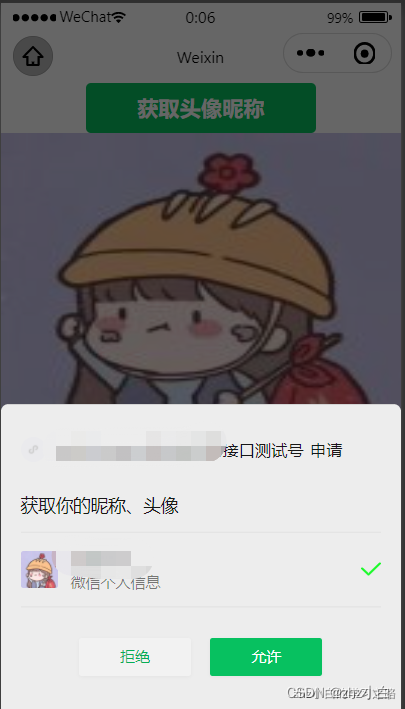
1.10、获取用户信息
获取用户信息。页面产生点击事件后才可调用,每次请求都会弹出授权窗口,用户同意后返回 userInfo
通过wx.getUserProfile()方法进行获取。
常用参数
| 属性 | 类型 | 默认值 | 必填 | 说明 |
|---|---|---|---|---|
| desc | string | 是 | 声明获取用户个人信息后的用途,不超过30个字符 | |
| success | function | 否 | 接口调用成功的回调函数 | |
| fail | function | 否 | 接口调用失败的回调函数 | |
| complete | function | 否 | 接口调用结束的回调函数(调用成功、失败都会执行) |
测试代码:
<button type="primary" bindtap="getUserProfile"> 获取头像昵称 </button>
<view>
  <image src="{{userInfo.avatarUrl}}"></image>
  <text>{{userInfo.nickName}}</text>
</view>
Page({
  data: {
    userInfo: {},
   },
  getUserProfile(e) {
    wx.getUserProfile({
      desc: '展示用户信息',
      success: (res) => {
        console.log(res)
        this.setData({
          userInfo: res.userInfo
         })
       },
      fail(err){
        console.log(err);
       },
      complete(){
        console.log("获取完成");
       }
     })
   }
})
展示效果:
1.10.1、小程序登录流程
流程图:
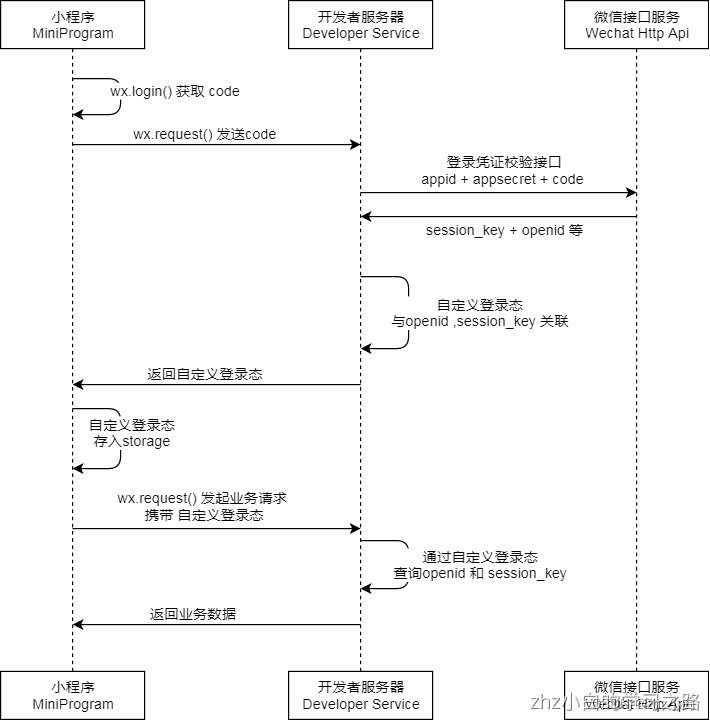
- 会话secret key session_key 是对用户数据进行 **加密签名 **的mi钥。
- 临时登录凭证 code 只能使用一次
- 调用 wx.login() 获取 临时登录凭证code ,并回传到开发者服务器。
- 调用 auth.code2Session 接口,换取 用户唯一标识 OpenID 、 用户在微信开放平台帐号下的唯一标识UnionID(若当前小程序已绑定到微信开放平台帐号) 和 会话mi钥 session_key
1.10.2、用户登录_服务器端
模拟服务器端:(具体可以百度下node)
const express = require("express");
const app = express();
const router = require("./router");
const bodyParser = require("body-parser");
const cors = require("cors");

// 解决跨域
app.use(cors());
app.use(bodyParser.urlencoded({
  extended:true
}))
app.use("/api",router);

app.listen(3000,()=>{
  console.log("服务器运行在3000端口上");
})
登录请求:
const express = require("express");
const router = express.Router();
const request = require("request");
const authorization_code = "zhz"
const appid = "wxe4135ba234344b52522f4"
const secret = "3d197129a2efc0c5ee4d93c10248072412"


router.post("/login", (req, res) => {
  // 获取到登录后的code
  const { code} = req.body;
  // 向微信服务器发送信息获取到 openid 和 session_key
  request(`https://api.weixin.qq.com/sns/jscode2session?appid=${appid}&secret=${secret}&js_code=${code}&grant_type=${authorization_code}`, (err, response, body) => {
    if (err) console.log(err);
    const data = JSON.parse(body);
    /*
     签名校验以及数据加解密涉及用户的会话mi钥session_key。 需要保存在服务器
     openid 判断是否是同一个用户
     session_key 判断用户是否失效
     data: {
      openid: '**********',
      session_key: '********'
     }
     */
    res.send(data)
   })
})


module.exports = router;
1.10.3、用户登录
- 服务器端实现之后,我们来写小程序端的代码
- 调用接口获取登录凭证(code)。通过凭证进而换取用户登录态信息,包括用户在当前小程序的唯一标识(openid)、微信开放平台帐号下的唯一标识(unionid,若当前小程序已绑定到微信开放平台帐号)及本次登录的会话mi钥(session_key)等。用户数据的加解密通讯需要依赖会话mi钥完成
Page({
  bindLoginHandle() {
    wx.login({
      success(response) {
        console.log(response.code);
        wx.request({
          url: 'http://localhost:3000/api/login',
          method: "POST",
          data: {
            code: response.code
           },
          header: {
            'Content-Type': 'application/x-www-form-urlencoded'
           },
          success(result) {
            console.log(result.data)
           },
          fail(err) {
            console.log('失败返回的信息', err);
           }
         })
       },
      fail(err) {
        console.log('login error', err);
       }
     })
   }
})
1.11、自定义组件
- 可以理解为就是Java的模板设计模式。
- 抽象出公有的页面功能定义为组件,重复使用,减少重复代码。
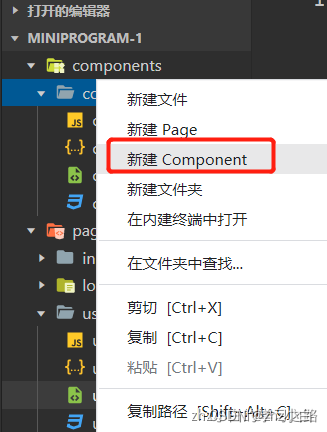
1.11.1、创建组件
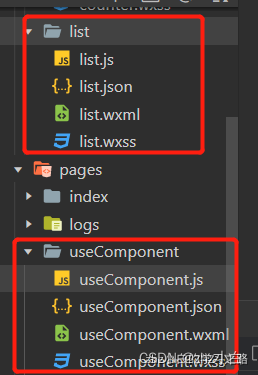
文件目录(counter是一个组件)
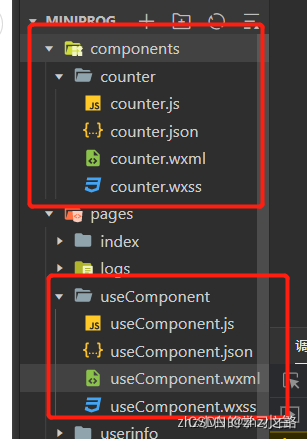
counter的创建方式
counter.wxml中的内容为:
<text>自定义组件</text>
useComponent.json文件中内容为:
{
  "usingComponents": {
    "counter":"../../components/counter/counter"
  }
}
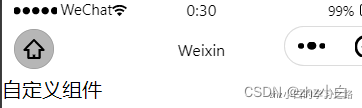
useComponent.wxml中的内容为->引用组件
<counter></counter>
展示效果为:
1.11.2、常用属性和方法
- 外部属性:properties
- 内部属性:data
- 定义方法:methods
测试代码:—>在1.11.1的基础上改的
counter.wxml中内容为:
<!-- 自定义组件 -->
<view>我是自定义组件</view>
<view>{{ title }}</view>
<view>{{ text }}</view>
<button type="primary" bindtap="clickHandle">按钮</button>
counter.js中内容为:
Component({
  properties: {
    title: {
      type: String,
      value: 'default value',
     }
   },
  data: {
    text:"测试数据"
   },
  methods: {
    clickHandle(){
      console.log("点击了");
     }
   }
})
useComponent.json的内容为:
{
  "usingComponents": {
    "counter":"../../components/counter/counter"
  }
}
useComponet.wxml的内容为
<view class="counter">
  <counter title="自定义组件"></counter>
</view>
1.11.3、插槽
在组件模板中可以提供一个 节点,用于承载页面引用时提供的子节点
这种方式与直接传递数据是有区别的,他是可以传递视图的!
1.11.3.1、实现组件
<!-- components/list/list.wxml -->
<view>
  <view class="title">
    <slot></slot>
  </view>
  <view wx:for="{{ listData }}" wx:key="index">
    <view>{{ item }}</view>
  </view>
</view>
// components/list/list.js
Component({
  properties: {
    listData:{
      type:Array,
      value:[]
     }
   }
})
// components/list/list.wxss
.title{
  margin: 5px;
}
温馨提示
在组件中,样式只允许使用class定义
1.11.3.2、引用组件
//pages/useComponent/useComponent.json
{
  "usingComponents": {
    "list":"../../components/list/list"
   }
}
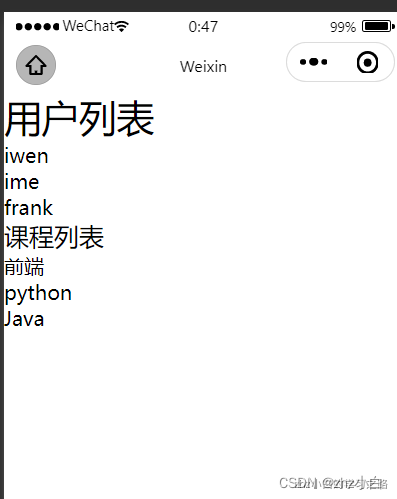
//pages/useComponent/useComponent.wxml
<view>
  <list listData="{{ userList }}">
    <view style="font-size:30px;">{{ userTitle }}</view>
  </list>
  <list listData="{{ dataList }}">
    <view style="font-size:20px;">{{ dataTitle }}</view>
  </list>
</view>
//pages/useComponent/useComponent.js
Page({
  data: {
    userList:["iwen","ime","frank"],
    userTitle:"用户列表",
    dataList:["前端","python","Java"],
    dataTitle:"课程列表"
   }
})
展示效果:
1.11.4、Dialog(弹出框)
测试用例,本次只写component的内容,page页的参考上面的样例
<view hidden="{{!isShow}}">
  <view class='wx-mask'></view>
  <view class='wx-dialog'>
    <view class='wx-dialog-title'>{{ title }}</view>
    <view class='wx-dialog-content'>{{ content }}</view>
    <view class='wx-dialog-footer'>
     <view class='wx-dialog-btn' catchtap='_cancelEvent'>{{ cancelText }}</view>
     <view class='wx-dialog-btn' catchtap='_confirmEvent'>{{ confirmText }}</view>
    </view>
  </view>
</view>
.wx-mask {
  position: fixed;
  z-index: 1000;
  top: 0;
  right: 0;
  left: 0;
  bottom: 0;
  background: rgba(0, 0, 0, 0.3);
}
Component({
  /**
   * 组件的属性列表
   */
  properties: {
    // 弹窗标题
    title: { // 属性名
      type: String, // 类型(必填),目前接受的类型包括:String, Number, Boolean, Object, Array, null(表示任意类型)
      value: '标题' // 属性初始值(可选),如果未指定则会根据类型选择一个
     },
    // 弹窗内容
    content: {
      type: String,
      value: '弹窗内容'
     },
    // 弹窗取消按钮文字
    cancelText: {
      type: String,
      value: '取消'
     },
    // 弹窗确认按钮文字
    confirmText: {
      type: String,
      value: '确定'
     }
   }
})
1.12、简易音乐播放器(实战,前后端调用)
1.12.1、app.json中添加
{
  "pages":[
    "pages/searchmusic/searchmusic",
    "pages/musiclist/musiclist",
    "pages/musicplay/musicplay"
  ],
  "entryPagePath": "pages/searchmusic/searchmusic",
}
1.12.2、新建页面searchmusic
<view class="container">
  <input bindinput="bindKeyInput" class="search" placeholder="输入您喜欢的歌曲名"/>
  <button class="btn" bindtap="bindgotoList" type="primary">搜索</button>
</view>
.container{
  margin: 5px;
  margin-top: 100px;
}

.container .search{
  height: 40px;
  border: 2px solid #C20C0C;
  padding-left: 10px;
}

.container .btn{
  margin-top: 5px;
}
Page({

  data: {
    search:""
  },
  bindgotoList(){
    wx.navigateTo({
      url: '/pages/musiclist/musiclist?search='+this.data.search,
    })
  },
  bindKeyInput(e){
    this.setData({
      search:e.detail.value
     })
  }
})
1.12.3、新建页面musiclist
<view class="container">
  <view
    data-id="{{ item.id }}"
    data-name="{{ item.name }}"
    data-poster="{{ item.artists[0].img1v1Url }}"
    data-author="{{ item.artists[0].name }}"
    class="item"
    wx:for="{{ songs }}"
    wx:key="index"
    bindtap="bindgotoPlay"
    >
    <text class="name">{{ item.name }}</text>
    <text class="author">{{ item.artists[0].name }}</text>
  </view>
</view>
page{
  background: #f1f1f1;
}

.container{
  margin: 5px;
}

.item{
  height: 50px;
  background: #fff;
  margin: 5px;
  line-height: 50px;
  padding-left: 10px;
}

.author{
  font-size: 12px;
  margin-left: 20px;
  color: #999;
}
const { request } = require("../../utils/request.js")
Page({
  data: {
    songs: [],
    search: "",
    limit: 20,
    offset: 1
   },
  onLoad(options) {
    this.setData({
      search: options.search
     })
    this.http(options.search, this.data.limit, this.data.offset)
   },
  http(keywords, limit, offset) {
    request("http://iwenwiki.com:3000/search", {
      keywords,
      limit,
      offset
     },"GET").then(res => {
      console.log(res)
      if (res.result.songs) {
        this.setData({
          songs: this.data.songs.concat(res.result.songs)
         })
       } else {
        wx.showToast({
          title: "暂无数据",
         })
       }
     })
   },
  onReachBottom() {
    this.setData({
      offset: this.data.offset += 20
     })
    this.http(this.data.search, this.data.limit, this.data.offset)
   },
   bindgotoPlay(e){
    let { id,name,author,poster } = e.currentTarget.dataset
    wx.navigateTo({
     url: '/pages/musicplay/musicplay?id=' + id +"&name=" + name + "&author=" + author +"&poster=" + poster
     })
   }
})
1.12.4、新建页面musicplay
<audio
  poster="{{poster}}"
  name="{{name}}"
  author="{{author}}"
  src="{{src}}"
  id="myAudio"
  controls>
</audio>
Page({
  data: {
    src:"",
    name:"",
    poster:"",
    author:""
   },
  onLoad(options) {
    console.log(options);
    this.setData({
      src:"https://music.163.com/song/media/outer/url?id=" + options.id,
      name:options.name,
      poster:"https://p2.music.126.net/6y-UleORITEDbvrOLV0Q8A==/5639395138885805.jpg",
      author:options.author
     })
   }
})
我是zhz小白,一个在互联网行业的小白,立志成为一名架构师
https://blog.csdn.net/zhouhengzhe?t=1