Opencv项目实战:11 使用Opencv高亮显示文本检测
1、项目展示
检测结果对比图

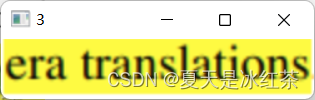
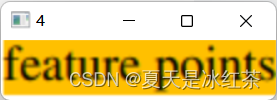
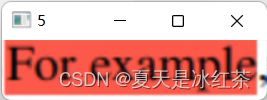
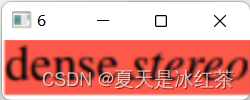
截取所框选的区域。
![]()


打开我们生成的.csv文件

2、项目介绍
假如我们已经有了一个经过文字高亮的图片,我们想提取其中的文字,让我们可以快速的找到重点,并将其中的内容存入.csv文件当中。
3、项目搭建
由于未知的原因,我的tesseract出现了问题,后面我又重新下载了下来,你可以通过这里
Home · UB-Mannheim/tesseract Wiki (github.com)
进行下载,在之前的项目中,我也用到了这个,你可以查看我的项目1:(4条消息) Opencv项目实战:01 文字检测OCR(1)_夏天是冰红茶的博客-CSDN博客
以及
(4条消息) Opencv项目实战:01 文字检测OCR(2)_夏天是冰红茶的博客-CSDN博客
OK!今天的项目很简单,完全是调用了之前已经所写的一些函数。
4、项目代码的展示与讲解
这段代码,我以前讲过,有所遗忘的可以在我之前的实战中查找。
utlis.py
import cv2
import numpy as np


def detectColor(img, hsv):
    imgHSV = cv2.cvtColor(img, cv2.COLOR_BGR2HSV)
    # cv2.imshow("hsv",imgHSV)
    lower = np.array([hsv[0], hsv[2], hsv[4]])
    upper = np.array([hsv[1], hsv[3], hsv[5]])
    mask = cv2.inRange(imgHSV, lower, upper)
    # cv2.imshow("mask", mask)
    imgResult = cv2.bitwise_and(img, img, mask=mask)
    # cv2.imshow("imgResult", imgResult)
    return imgResult


def getContours(img, imgDraw, cThr=[100, 100], showCanny=False, minArea=1000, filter=0, draw=False):
    imgDraw = imgDraw.copy()
    imgGray = cv2.cvtColor(img, cv2.COLOR_BGR2GRAY)
    imgBlur = cv2.GaussianBlur(imgGray, (5, 5), 1)
    imgCanny = cv2.Canny(imgBlur, cThr[0], cThr[1])
    kernel = np.array((10, 10))
    imgDial = cv2.dilate(imgCanny, kernel, iterations=1)
    imgClose = cv2.morphologyEx(imgDial, cv2.MORPH_CLOSE, kernel)

    if showCanny: cv2.imshow('Canny', imgClose)
    contours, hiearchy = cv2.findContours(imgClose, cv2.RETR_EXTERNAL, cv2.CHAIN_APPROX_SIMPLE)
    finalCountours = []
    for i in contours:
        area = cv2.contourArea(i)
        if area > minArea:
            peri = cv2.arcLength(i, True)
            approx = cv2.approxPolyDP(i, 0.02 * peri, True)
            bbox = cv2.boundingRect(approx)
            if filter > 0:
                if len(approx) == filter:
                    finalCountours.append([len(approx), area, approx, bbox, i])
            else:
                finalCountours.append([len(approx), area, approx, bbox, i])
    finalCountours = sorted(finalCountours, key=lambda x: x[1], reverse=True)
    if draw:
        for con in finalCountours:
            x, y, w, h = con[3]
            cv2.rectangle(imgDraw, (x, y), (x + w, y + h), (255, 0, 255), 3)
            # cv2.drawContours(imgDraw,con[4],-1,(0,0,255),2)
    return imgDraw, finalCountours


def getRoi(img, contours):
    roiList = []
    for con in contours:
        x, y, w, h = con[3]
        roiList.append(img[y:y + h, x:x + w])
    return roiList


def roiDisplay(roiList):
    for x, roi in enumerate(roiList):
        roi = cv2.resize(roi, (0, 0), None, 2, 2)
        cv2.imshow(str(x),roi)


def saveText(highlightedText):
    with open('HighlightedText.csv', 'w') as f:
        for text in highlightedText:
            f.writelines(f'\n{text}')


def stackImages(scale, imgArray):
    rows = len(imgArray)
    cols = len(imgArray[0])
    rowsAvailable = isinstance(imgArray[0], list)
    width = imgArray[0][0].shape[1]
    height = imgArray[0][0].shape[0]
    if rowsAvailable:
        for x in range(0, rows):
            for y in range(0, cols):
                if imgArray[x][y].shape[:2] == imgArray[0][0].shape[:2]:
                    imgArray[x][y] = cv2.resize(imgArray[x][y], (0, 0), None, scale, scale)
                else:
                    imgArray[x][y] = cv2.resize(imgArray[x][y], (imgArray[0][0].shape[1], imgArray[0][0].shape[0]),
                                                None, scale, scale)
                if len(imgArray[x][y].shape) == 2: imgArray[x][y] = cv2.cvtColor(imgArray[x][y], cv2.COLOR_GRAY2BGR)
        imageBlank = np.zeros((height, width, 3), np.uint8)
        hor = [imageBlank] * rows
        hor_con = [imageBlank] * rows
        for x in range(0, rows):
            hor[x] = np.hstack(imgArray[x])
        ver = np.vstack(hor)
    else:
        for x in range(0, rows):
            if imgArray[x].shape[:2] == imgArray[0].shape[:2]:
                imgArray[x] = cv2.resize(imgArray[x], (0, 0), None, scale, scale)
            else:
                imgArray[x] = cv2.resize(imgArray[x], (imgArray[0].shape[1], imgArray[0].shape[0]), None, scale, scale)
            if len(imgArray[x].shape) == 2: imgArray[x] = cv2.cvtColor(imgArray[x], cv2.COLOR_GRAY2BGR)
        hor = np.hstack(imgArray)
        ver = hor
    return ver
在上一个实战项目中,我也用到了这个轨迹栏,也不多做叙述
color.py
import cv2
import numpy as np

def empty(a):
    pass

def stackImages(scale,imgArray):
    rows = len(imgArray)
    cols = len(imgArray[0])
    rowsAvailable = isinstance(imgArray[0], list)
    width = imgArray[0][0].shape[1]
    height = imgArray[0][0].shape[0]
    if rowsAvailable:
        for x in range ( 0, rows):
            for y in range(0, cols):
                if imgArray[x][y].shape[:2] == imgArray[0][0].shape [:2]:
                    imgArray[x][y] = cv2.resize(imgArray[x][y], (0, 0), None, scale, scale)
                else:
                    imgArray[x][y] = cv2.resize(imgArray[x][y], (imgArray[0][0].shape[1], imgArray[0][0].shape[0]), None, scale, scale)
                if len(imgArray[x][y].shape) == 2: imgArray[x][y]= cv2.cvtColor( imgArray[x][y], cv2.COLOR_GRAY2BGR)
        imageBlank = np.zeros((height, width, 3), np.uint8)
        hor = [imageBlank]*rows
        hor_con = [imageBlank]*rows
        for x in range(0, rows):
            hor[x] = np.hstack(imgArray[x])
        ver = np.vstack(hor)
    else:
        for x in range(0, rows):
            if imgArray[x].shape[:2] == imgArray[0].shape[:2]:
                imgArray[x] = cv2.resize(imgArray[x], (0, 0), None, scale, scale)
            else:
                imgArray[x] = cv2.resize(imgArray[x], (imgArray[0].shape[1], imgArray[0].shape[0]), None,scale, scale)
            if len(imgArray[x].shape) == 2: imgArray[x] = cv2.cvtColor(imgArray[x], cv2.COLOR_GRAY2BGR)
        hor= np.hstack(imgArray)
        ver = hor
    return ver


path = 'test.png'
cv2.namedWindow("TrackBars")
cv2.resizeWindow("TrackBars",640,240)
cv2.createTrackbar("Hue Min","TrackBars",0,179,empty)
cv2.createTrackbar("Hue Max","TrackBars",19,179,empty)
cv2.createTrackbar("Sat Min","TrackBars",110,255,empty)
cv2.createTrackbar("Sat Max","TrackBars",240,255,empty)
cv2.createTrackbar("Val Min","TrackBars",153,255,empty)
cv2.createTrackbar("Val Max","TrackBars",255,255,empty)

while True:
    img = cv2.imread(path)
    imgHSV = cv2.cvtColor(img,cv2.COLOR_BGR2HSV)
    h_min = cv2.getTrackbarPos("Hue Min","TrackBars")
    h_max = cv2.getTrackbarPos("Hue Max", "TrackBars")
    s_min = cv2.getTrackbarPos("Sat Min", "TrackBars")
    s_max = cv2.getTrackbarPos("Sat Max", "TrackBars")
    v_min = cv2.getTrackbarPos("Val Min", "TrackBars")
    v_max = cv2.getTrackbarPos("Val Max", "TrackBars")
    print(h_min,h_max,s_min,s_max,v_min,v_max)
    lower = np.array([h_min,s_min,v_min])
    upper = np.array([h_max,s_max,v_max])
    mask = cv2.inRange(imgHSV,lower,upper)
    imgResult = cv2.bitwise_and(img,img,mask=mask)


    # cv2.imshow("Original",img)
    # cv2.imshow("HSV",imgHSV)
    # cv2.imshow("Mask", mask)
    # cv2.imshow("Result", imgResult)

    imgStack = stackImages(0.3,([img,imgHSV],[mask,imgResult]))
    cv2.imshow("Stacked Images", imgStack)

    if cv2.waitKey(1) & 0XFF == 27:
        break
我们的主函数
main.py
from utlis import *
import pytesseract

path = 'test.png'
hsv = [0, 65, 59, 255, 0, 255]
pytesseract.pytesseract.tesseract_cmd = 'E:\pythonProject\Github/tesseract-ocr//tesseract.exe'

#### Step 1 ####
img = cv2.imread(path)
# cv2.imshow("Original",img)
#### Step 2 ####
imgResult = detectColor(img, hsv)
#### Step 3 & 4 ####
imgContours, contours = getContours(imgResult, img, showCanny=True,
                                    minArea=1000, filter=4,
                                    cThr=[100, 150], draw=True)
cv2.imshow("imgContours",imgContours)
print(len(contours))

#### Step 5 ####
roiList = getRoi(img, contours)
# cv2.imshow("TestCrop",roiList[2])
roiDisplay(roiList)

#### Step 6 ####
highlightedText = []
for x, roi in enumerate(roiList):
    # print(pytesseract.image_to_string(roi))
    print(pytesseract.image_to_string(roi))
    highlightedText.append(pytesseract.image_to_string(roi))
    if cv2.waitKey(1) & 0xFF == 27:
        break

saveText(highlightedText)

imgStack = stackImages(0.6, ([img, imgResult, imgContours]))
cv2.imshow("Stacked Images", imgStack)
嗯,我感觉这次的项目真没有什么难度,就这样吧。
5、项目资源
项目资源:Opencv-project-training/Opencv project training/11 Highlighted Text Detection at main · Auorui/Opencv-project-training · GitHub
6、项目总结
大家看到了,在我们生成的.csv文件当中,其中的内容并不全,我怀疑还是tesseract的问题,在之前的项目中,我就曾经吐槽过它。我们将内容打印一下。
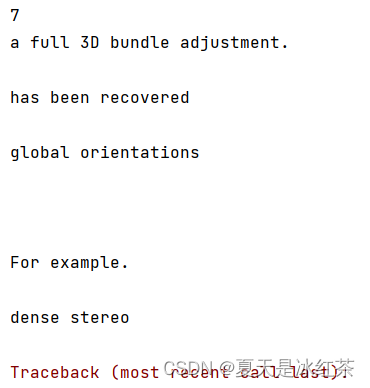
共有七个高亮文本,是正确的,应该还是它自己无法识别的问题。
PS:还有一件事情,为了更好的宣传我的专栏,我将会做一个快速入门级别的opencv系列,请大家敬请期待!
好了,希望你能在这个项目中玩得开心,否则我会在下一个项目中看到你!!
