一文带你入门,领略angular风采(上)!!!
话不多说,上代码!!!
一、脚手架创建项目
1.安装脚手架指令
npm install -g @angular/cli
2.创建项目
ng new my-app(ng new 项目名)
3.功能选择

4.切换到创建好的项目上
cd my-app
5.安装依赖
npm install
6.运行项目
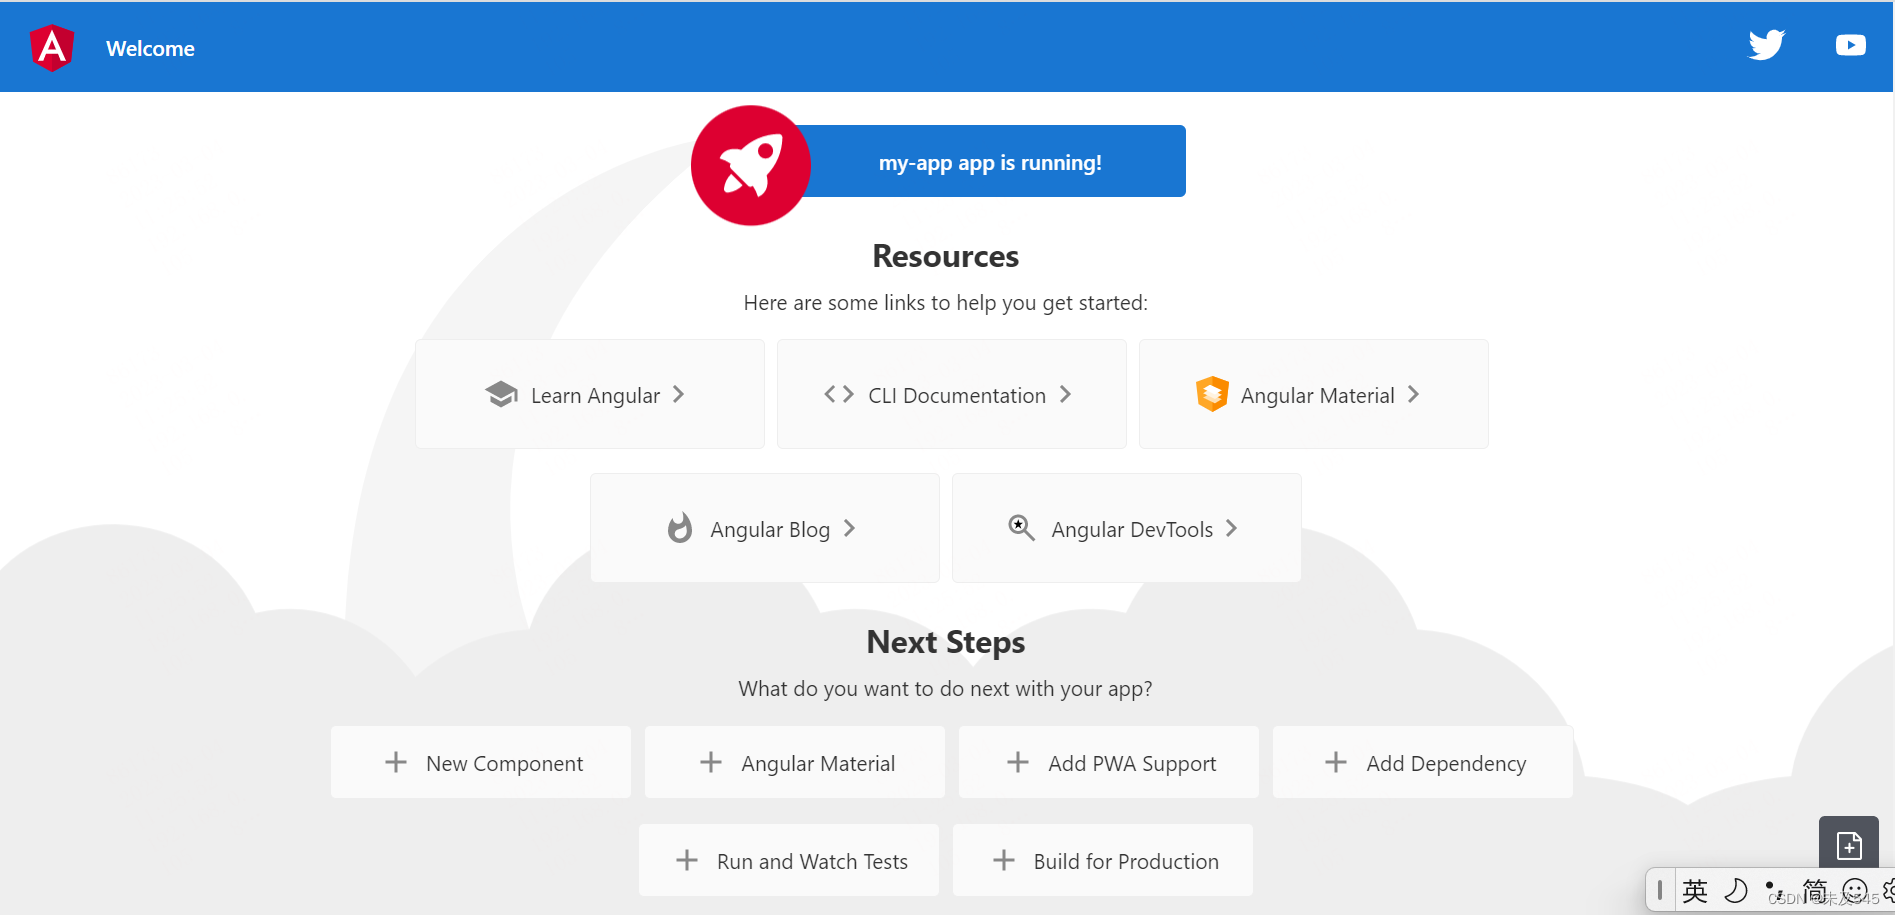
npm start或者ng serve --open
跑起来的效果如下:
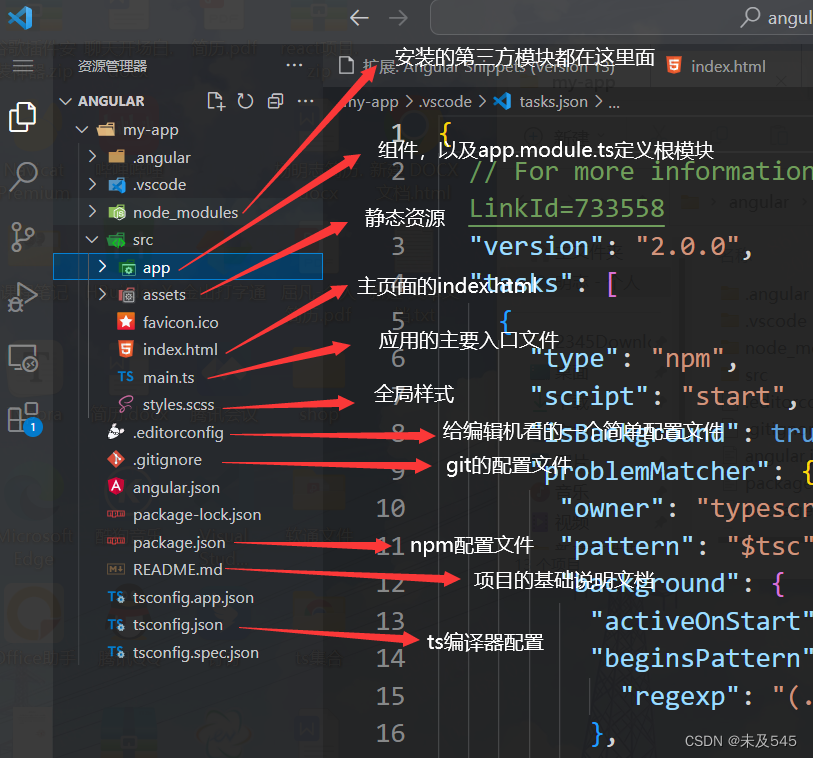
7.目录结构分析
8.app.moudles.ts文件功能概述

9.app.component.ts功能概述
 二、创建组件以及使用
1.创建组件指令
这句话的意思是创建一个header组件在components文件夹下,注意,components文件夹不用自己手动创建,输入以下命令,所有自动创建好。
ng g component components/header
2.组件使用
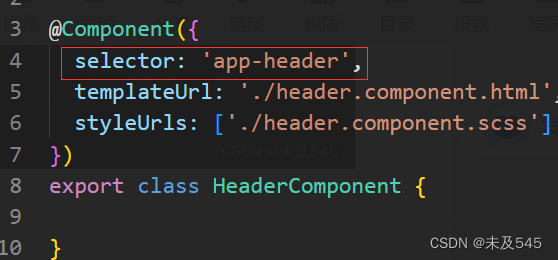
首先在生成好的header.components.ts找到selector后面跟的就是组件名
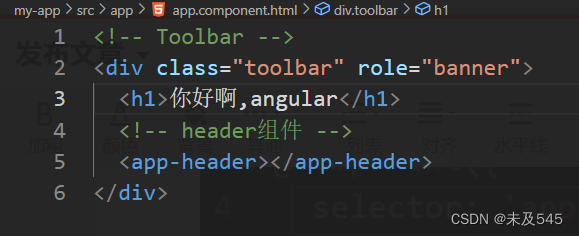
其次在app.component.html进行使用,注意命令安装组件的时候会在app.moudle.ts 自动帮你引入和注册!
效果如下:

3.定义数据,绑定并使用数据
在header.component.ts文件定义

在header.component.html使用

效果如下:
![]()
4.ts定义使用以及定义属性的几种方法
header.component.ts:
import { Component } from '@angular/core';

@Component({
  selector: 'app-header',
  templateUrl: './header.component.html',
  styleUrls: ['./header.component.scss']
})
export class HeaderComponent {

  public title = "我是头部区域"
  //ts语法指定类型
  fonts: string = "我是字符串"
  // 声明属性的几种方式
  // public 共有属性    可以在这个类里面使用,也可以在类外面使用(属性前不加,默认public)
  //protected 保护类型 只有在当前类和他的子类里面可以访问
  //private 私有类型  只有在当前类才可以访问这个属性
  protected userinfo = {
    username: "zs",
    age: "18"
  }
  // 定义不赋值
  public message: any
  //构造器
  constructor() {
    this.message = "给属性赋值"
    this.title = "我是改变头部区域的"
  }

  //方法
  ngOnInit() {
    // this.message = "给属性赋值"
  }
}
header.component.html:
<h2>789</h2>
<p>{{title}}</p>
<p>{{fonts}}</p>
<h6>{{userinfo.username}}</h6>
<h6>{{userinfo.age}}{{message}}</h6>
5.*ngFor 数据循环
import { Component } from '@angular/core';

@Component({
  selector: 'app-header',
  templateUrl: './header.component.html',
  styleUrls: ['./header.component.scss']
})
export class HeaderComponent {
  msg = "提示消息"
  content = "<h1>我是标签元素</h1>"
  arr = [111, 222, 333]
  cars: Array<any> = [
    {
      cate: "奔驰",
      list: [
        { title: "奔驰1", price: "30w" },
        { title: "奔驰2", price: "30w" },
        { title: "奔驰3", price: "30w" }
      ]
    },

  ]
  constructor() {

  }
  ngOnInit() {

  }
}
<h2>789</h2>
<!-- []用来绑定属性,不加就是字符串 -->
<div [title]="msg" class="color">
div盒子
</div>
<!-- 标签渲染 -->
<div [innerHTML]="content">
</div>
<!-- 注意此处只能使用let -->
<H2 *ngFor="let item of arr">{{item}}</H2>
<ul>
<li *ngFor="let item1 of cars">{{item1.cate}}
<h2>{{item1.cate}}</h2>
<ol>
<li *ngFor="let item2 of item1.list">{{item2.title}}</li>
</ol>
</li>
</ul>6.img,*ngIf,ngSwitch,ngClass,ngStyle的使用
header.component.ts:
import { Component } from '@angular/core';

@Component({
  selector: 'app-header',
  templateUrl: './header.component.html',
  styleUrls: ['./header.component.scss']
})
export class HeaderComponent {
  //列如后台请求的图片地址如何渲染
  picUrl = "https://ts2.cn.mm.bing.net/th?id=OIP-C.xJt38dVPSj9s_WyNDvE08QHaJQ&w=223&h=279&c=8&rs=1&qlt=90&o=6&pid=3.1&rm=2"
  arr = [111, 222, 333]
  flag: boolean = false
  num: number = 3
 attr: string = "red"
  constructor() {

  }
  ngOnInit() {

  }
}
header.component.html:
<!-- 图片引入 ,注意angular图片引入不需要../,只需要文件名逐级选择即可-->
<img src="assets/imgs/favicon.ico" alt="">
<!-- []动态绑定 -->
<img [src]="picUrl" alt="" />
<!-- 获取下标方法 -->
<p *ngFor="let item of arr;let key=index" [ngClass]="{'color1':key==0,'color2':key==1,'color3':key==2}">
  {{key}}--{{item}}
</p>
<!-- *ngIf判断使用 -->
<p *ngIf="flag">显示与隐藏</p>
<!--ngSwitch使用  -->
<span [ngSwitch]="num">
  <p *ngSwitchCase="1">
    苹果
  </p>
  <p *ngSwitchCase="2">
    橘子
  </p>
  <p *ngSwitchDefault>
    桃子
  </p>
</span>

<div class="color1">
  ngClass演示1(尽量不要用dom来改变class)
</div>
<!-- ngClass的多种用法,可以绑定变量,布尔 -->
<div [ngClass]="{'color2':true,'color3':!flag}">
  ngClass演示2
</div>
<div [ngClass]="{'color2':true,'color3':!flag}">
  ngClass演示2
</div>
<!--ngStyle使用  -->
<h1 [ngStyle]="{'color': 'red','fontSize':'12px'}">style</h1>
<p [ngStyle]="{'color': attr}">style另外的用法</p>
header.component.scss:
.color1 {
  color: red
}

.color2 {
  color: blue
}

.color3 {
  color: orange
}
7.管道符使用
import { Component } from '@angular/core';

@Component({
  selector: 'app-header',
  templateUrl: './header.component.html',
  styleUrls: ['./header.component.scss']
})
export class HeaderComponent {
  today: any = new Date()
  constructor() {
    console.log(this.today);

  }
  ngOnInit() {

  }
}
<p>{{today|date:"yyyy-MM-dd HH:mm:ss"}}</p>
三、点击及键盘事件以及双向数据绑定的使用
首先app.moudle.ts引入数据双向绑定方法并声明
import { NgModule } from '@angular/core';

import { BrowserModule } from '@angular/platform-browser';

import { AppRoutingModule } from './app-routing.module';

import { AppComponent } from './app.component';
import { HeaderComponent } from './components/header/header.component';
// 1.用于数据双向绑定,双向数据绑定只针对form表单
import { FormsModule } from '@angular/forms';

@NgModule({
  declarations: [
    AppComponent, HeaderComponent
  ],
  imports: [
    BrowserModule,
    AppRoutingModule,
    //2.声明双向绑定
    FormsModule
  ],
  providers: [],
  bootstrap: [AppComponent]
})

export class AppModule { }
import { Component } from '@angular/core';
@Component({
selector: 'app-header',
templateUrl: './header.component.html',
styleUrls: ['./header.component.scss']
})
export class HeaderComponent {
num = 1
keywords: any = ''
constructor() {
}
ngOnInit() {
}
change() {
alert("触发了")
}
changeTitle() {
this.num++
}
keydown(e: any) {
console.log("键盘按下了", e);
}
}
<button (click)="change()">按钮</button>
<button (click)="changeTitle()">点击+1</button>
<h1>{{num}}</h1>
<!-- 键盘按下事件 -->
<input type="text" (keydown)="keydown($event)">
<input type="text" [(ngModel)]="keywords">
<p>{{keywords}}</p>
四、angular中的service服务
1.angular中的服务
①组件中的方法无法彼此调用
②公共的方法存在服务(service)中,可被其他组件共享调用
③服务与服务之间可以相互调用
2.创建服务的指令
ng g service services/common(ng g service 文件名/服务名)
3.在app.moudle.ts文件引入并声明服务
import { NgModule } from '@angular/core';

import { BrowserModule } from '@angular/platform-browser';

import { AppRoutingModule } from './app-routing.module';

import { AppComponent } from './app.component';
import { HeaderComponent } from './components/header/header.component';
import { FormsModule } from '@angular/forms';
//1.引入服务
import { ComoonService } from './services/comoon.service';
import { FooterComponent } from './components/footer/footer.component';
@NgModule({
  declarations: [
    AppComponent, HeaderComponent, FooterComponent
  ],
  imports: [
    BrowserModule,
    AppRoutingModule,
    //2.声明双向绑定
    FormsModule
  ],
  //2.声明服务
  providers: [ComoonService],
  bootstrap: [AppComponent]
})

export class AppModule { }
4.任何组件使用服务时,引入并使用
import { Component } from '@angular/core';
//1.引入服务
import { ComoonService } from '../../services/comoon.service';
//2.导入的是一个类,此方法可以使用,不推荐
var storage = new ComoonService()
@Component({
  selector: 'app-footer',
  templateUrl: './footer.component.html',
  styleUrls: ['./footer.component.scss']
})
export class FooterComponent {
  //推荐写法,这个语法可以理解为和上面不推荐方法的语法一样,只是推荐这样使用
  constructor(public word: ComoonService) {
    console.log(this.word.out());
  }
  // constructor() {
  //   console.log(storage.out());
  // }
}
5.commoon.service.ts文件定义的方法
import { Injectable } from '@angular/core';

@Injectable({
  providedIn: 'root'
})
export class ComoonService {

  constructor() {

  }
  out() {
    return "service"
  }
}