【SpringBoot3+Vue3】四【实战篇】-前端(vue基础)
目录
一、项目前置知识
二、使用vscode创建
三、vue介绍
四、局部使用vue
1、快速入门
1.1 需求
1.2 准备工作
1.3 操作
1.3.1 创建html
1.3.2 创建初始html代码
1.3.3 参照官网import vue
1.3.4 创建vue应用实例
1.3.5 准备div
1.3.6 准备用户数据
1.3.7 通过插值表达式渲染页面
1.3.8 保存(ctrl+s)运行
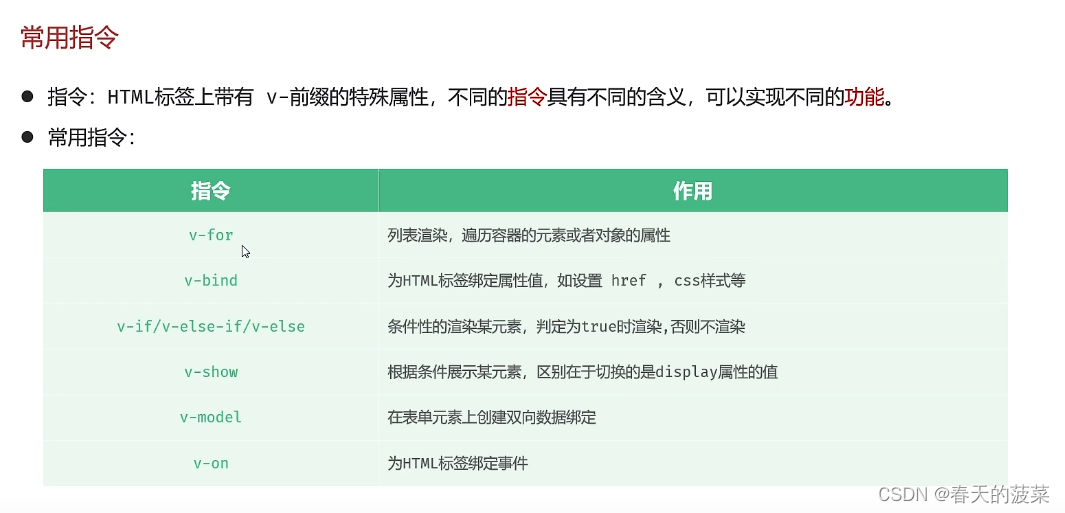
2、常用指令
2.1 v-for 遍历
编辑 2.2 v-bind动态为html标签绑定属性值
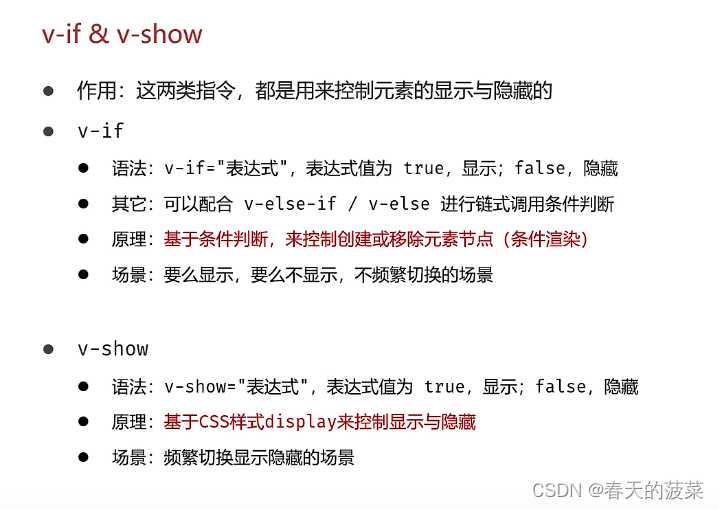
2.3 v-if & v-show 用来控制元素的显示与隐藏
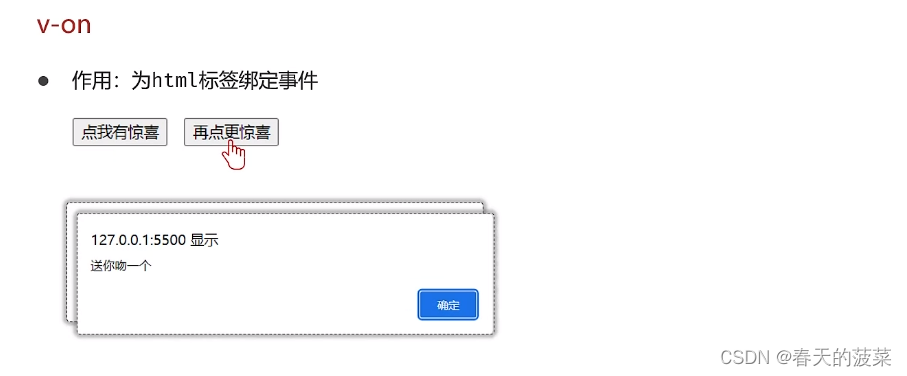
2.4 v-on为html标签绑定事件
2.5 v-model双向数据绑定
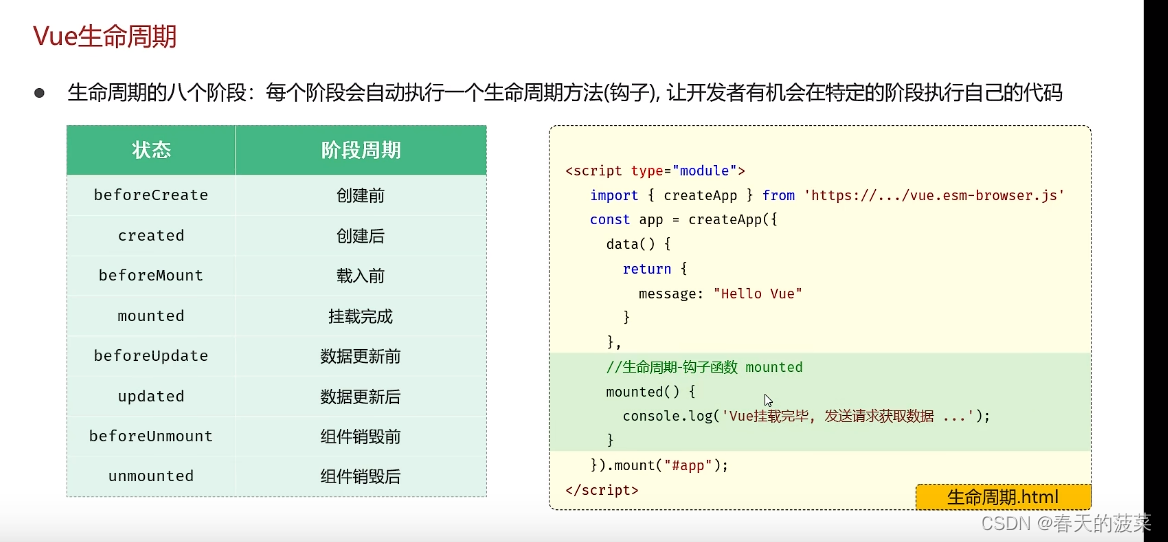
3、生命周期
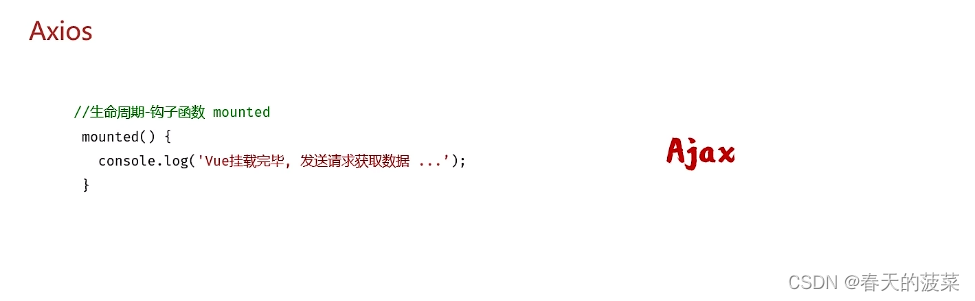
4、Axios
4.1 介绍
4.2 使用步骤
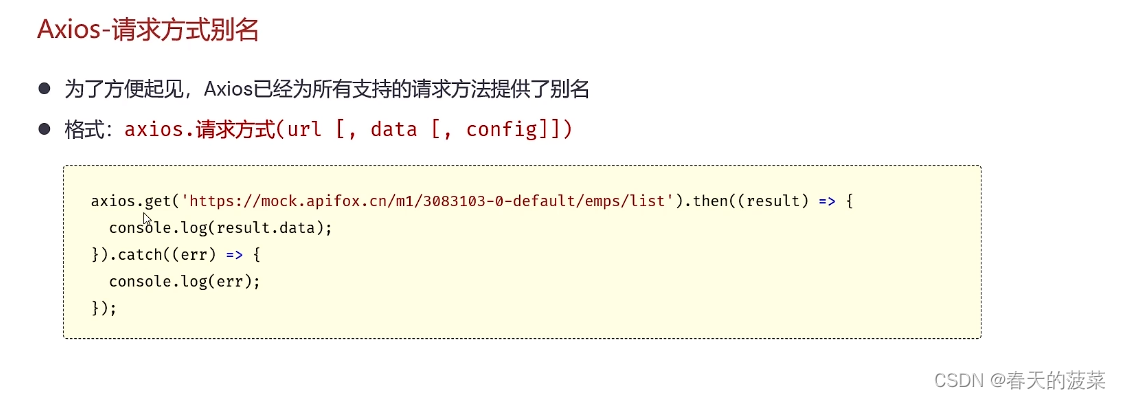
4.3 别名方式
4.4 实践
4.4.1 导入后端
4.4.2 前端
5、综合案例
五、整站使用vue(工程化)
1、环境准备
2、VUE项目创建和启动
2.1 创建vue3项目
2.2 使用vscode 打开vue项目
2.3 vue项目目录结构
2.4 vue项目启动
3、vue项目开发流程
4、API风格
4.1 组合式API
5、案例
5.1 启动后台程序
5.2 安装axios
5.3 App.vue代码
5.4 Article.vue代码
5.5 代码优化1
5.5.1 新增api文件夹
5.5.2 新增article.js文件
5.5.3 修改Article.vue代码
5.6 代码优化2(拦截器使用)
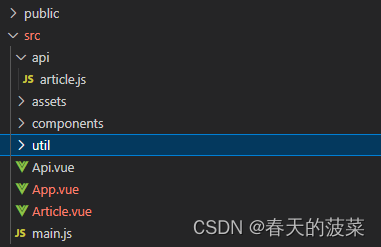
5.6.1 新建文件夹util
5.6.2 新建request.js文件
5.6.3 优化article.js
六、Element-plus
1、快速入门
1.1 步骤
1.2 实操
1.2.1 创建vue3项目
1.2.2 进入项目目录安装vue依赖
1.2.3 使用vs studio打开项目
1.2.4 安装Element Plus
1.2.5 项目引用Element Plus
1.2.6 src下新建Button.vue文件
1.2.7 修改 App.vue
2、常用组件
2.1 表格组件
2.1.1 src新增Article.vue文件
2.1.2 修改App.vue
2.2 分页组件
2.2.1 main.js修改
2.2.2 Article.vue文件导入分页组件
2.3 表单组件
2.3.1 Article.vue文件导入表单组件
2.4 卡片组件
2.4.1 Article.vue文件导入卡片组件
前言:学习vue基础知识,为项目实战铺垫
一、项目前置知识

二、使用vscode创建
创建目录spring3boot3,在文件目录里cmd,输入
# 输入
code .
打开vscode

三、vue介绍


四、局部使用vue
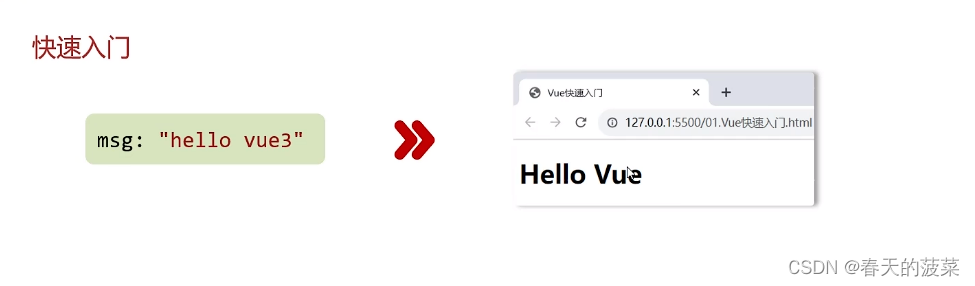
1、快速入门
1.1 需求
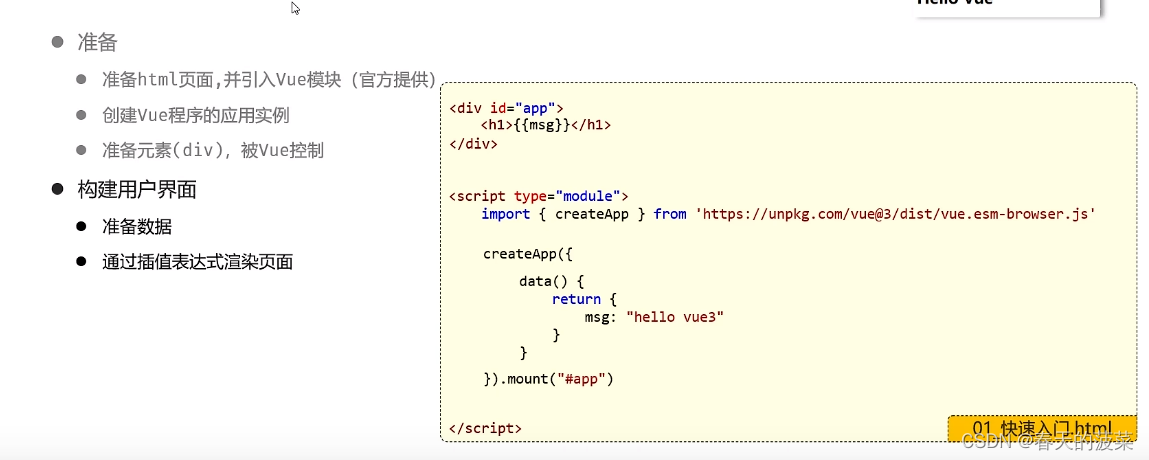
1.2 准备工作
1.3 操作
1.3.1 创建html
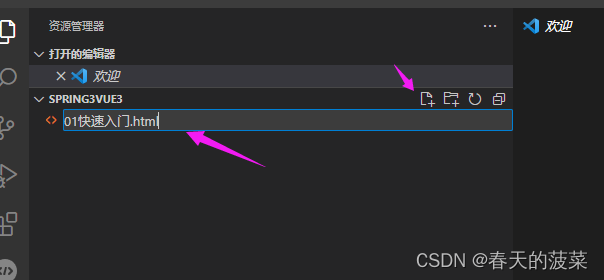
1.3.2 创建初始html代码
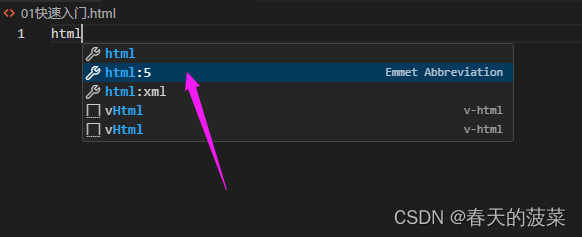
<!DOCTYPE html>
<html lang="en">
<head><meta charset="UTF-8"><meta name="viewport" content="width=device-width, initial-scale=1.0"><title>Document</title>
</head>
<body></body>
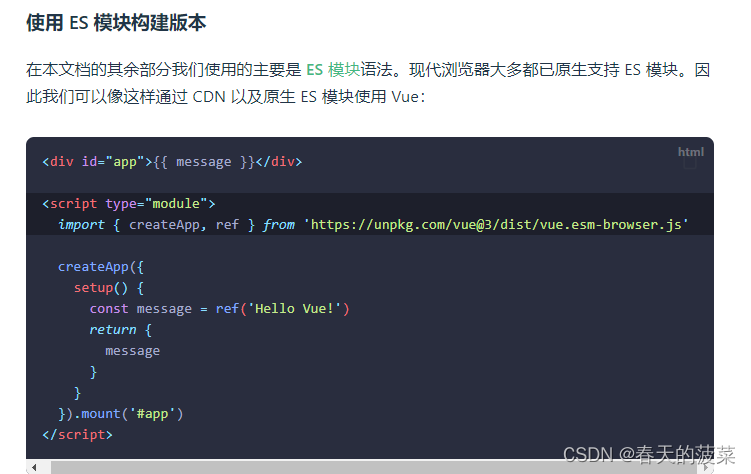
</html>1.3.3 参照官网import vue
快速上手 | Vue.js
<!DOCTYPE html>
<html lang="en">
<head><meta charset="UTF-8"><meta name="viewport" content="width=device-width, initial-scale=1.0"><title>Document</title>
</head>
<body><!-- 引入vue模块--><script type="module">import { createApp } from 'https://unpkg.com/vue@3/dist/vue.esm-browser.js';</script></body>
</html>
1.3.4 创建vue应用实例
<!DOCTYPE html>
<html lang="en">
<head><meta charset="UTF-8"><meta name="viewport" content="width=device-width, initial-scale=1.0"><title>Document</title>
</head>
<body><!-- 引入vue模块--><script type="module">import { createApp } from 'https://unpkg.com/vue@3/dist/vue.esm-browser.js';/* 创建vue应用实例 */createApp({})</script></body>
</html>
1.3.5 准备div
<!DOCTYPE html>
<html lang="en">
<head><meta charset="UTF-8"><meta name="viewport" content="width=device-width, initial-scale=1.0"><title>Document</title>
</head>
<body><div id="app"></div><!-- 引入vue模块--><script type="module">import { createApp } from 'https://unpkg.com/vue@3/dist/vue.esm-browser.js';/* 创建vue应用实例 */createApp({}).mount("#app");</script></body>
</html>
1.3.6 准备用户数据
<!DOCTYPE html>
<html lang="en">
<head><meta charset="UTF-8"><meta name="viewport" content="width=device-width, initial-scale=1.0"><title>Document</title>
</head>
<body><div id="app"></div><!-- 引入vue模块--><script type="module">import { createApp } from 'https://unpkg.com/vue@3/dist/vue.esm-browser.js';/* 创建vue应用实例 */createApp({data(){return{//定义数据msg: 'hello bocai'}}}).mount("#app");</script></body>
</html>
1.3.7 通过插值表达式渲染页面
<!DOCTYPE html>
<html lang="en">
<head><meta charset="UTF-8"><meta name="viewport" content="width=device-width, initial-scale=1.0"><title>Document</title>
</head>
<body><div id="app"><h1>{{msg}}</h1></div><!-- 引入vue模块--><script type="module">import { createApp } from 'https://unpkg.com/vue@3/dist/vue.esm-browser.js';/* 创建vue应用实例 */createApp({data(){return{//定义数据msg:'hello bocai'}}}).mount("#app");</script></body>
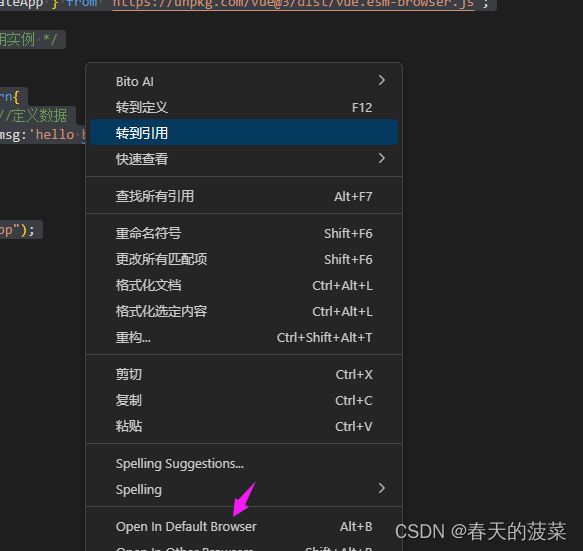
</html>1.3.8 保存(ctrl+s)运行
保存 保存 保存
2、常用指令
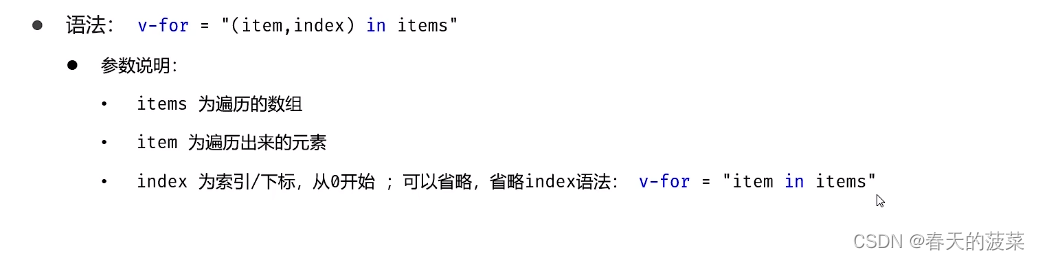
2.1 v-for 遍历

语法:
02指令v-for.html
<!DOCTYPE html>
<html lang="en">
<head><meta charset="UTF-8"><meta name="viewport" content="width=device-width, initial-scale=1.0"><title>Document</title>
</head>
<body><div id="app"><table border="1 solid" colspa="0" cellspacing="0"><tr><th>文章标题</th><th>分类</th><th>发表时间</th><th>状态</th><th>操作</th></tr><!-- 哪个元素要出现多次,v-for指令就添加到哪个元素上 --><tr v-for="(article,index) in articleList"><td>{{article.title}}</td><td>{{article.category}}</td><td>{{article.time}}</td><td>{{article.state}}</td><td><button>编辑</button><button>删除</button></td></tr><!-- <tr><td>标题2</td><td>分类2</td><td>2000-01-01</td><td>已发布</td><td><button>编辑</button><button>删除</button></td></tr><tr><td>标题3</td><td>分类3</td><td>2000-01-01</td><td>已发布</td><td><button>编辑</button><button>删除</button></td></tr> --></table></div><script type="module">//导入vue模块import { createApp} from 'https://unpkg.com/vue@3/dist/vue.esm-browser.js'//创建应用实例createApp({data() {return {//定义数据articleList:[{title:"医疗反腐绝非砍医护收入",category:"时事",time:"2023-09-5",state:"已发布"},{title:"中国男篮缘何一败涂地?",category:"篮球",time:"2023-09-5",state:"草稿"},{title:"华山景区已受大风影响阵风达7-8级,未来24小时将持续",category:"旅游",time:"2023-09-5",state:"已发布"}] }}}).mount("#app")//控制页面元素</script>
</body>
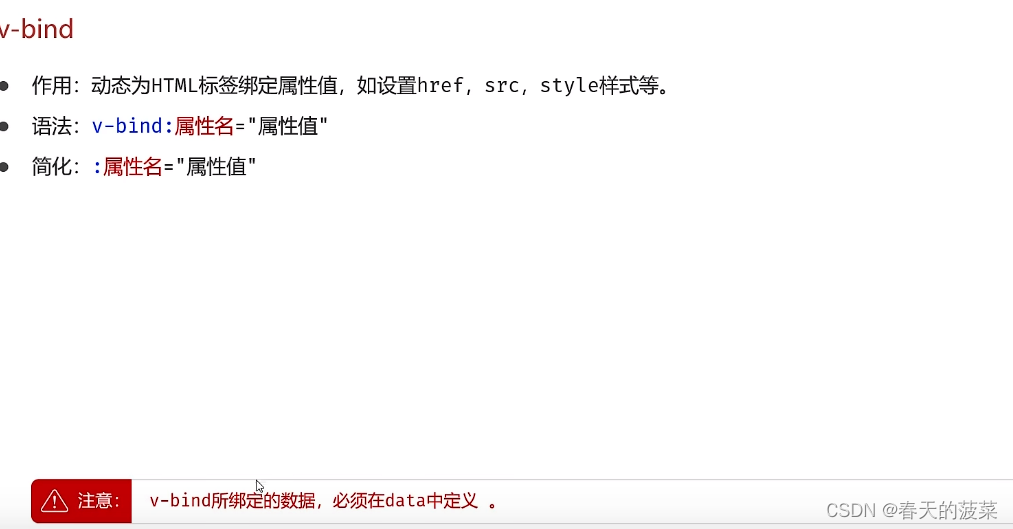
</html> 2.2 v-bind动态为html标签绑定属性值
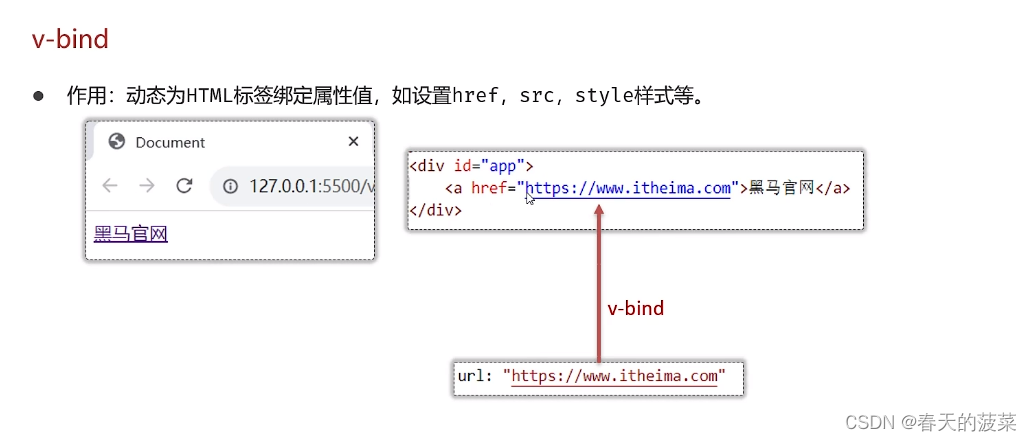
语法:
<!DOCTYPE html>
<html lang="en">
<head><meta charset="UTF-8"><meta name="viewport" content="width=device-width, initial-scale=1.0"><title>Document</title>
</head>
<body><div id="app"><!-- <a v-bind:href="url">百度一下</a> --><a :href="url">百度一下</a></div><script type="module">//引入vue模块import { createApp} from 'https://unpkg.com/vue@3/dist/vue.esm-browser.js'//创建vue应用实例createApp({data() {return {url: 'https://www.baidu.com'}}}).mount("#app")//控制html元素</script>
</body>
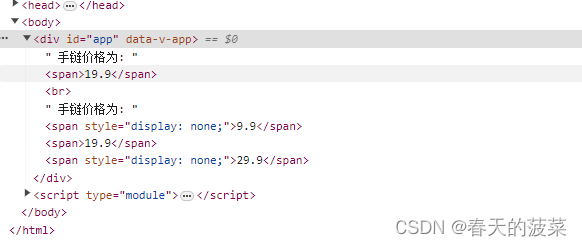
</html>2.3 v-if & v-show 用来控制元素的显示与隐藏
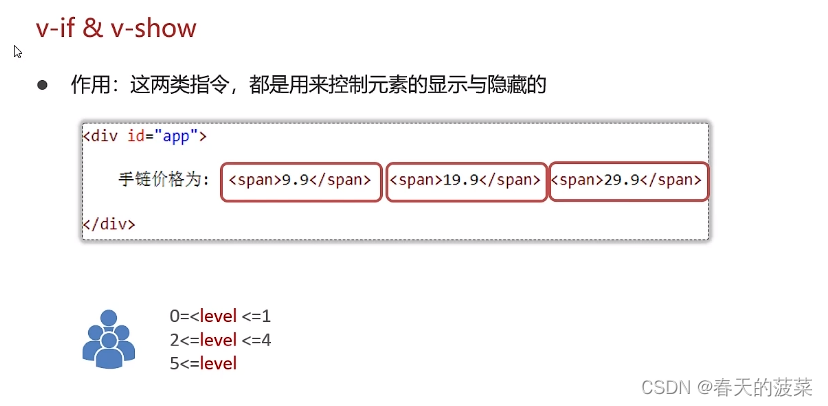
语法:
<!DOCTYPE html>
<html lang="en"><head><meta charset="UTF-8"><meta name="viewport" content="width=device-width, initial-scale=1.0"><title>Document</title>
</head><body><div id="app">手链价格为:  <span v-if="customer.level>=0 && customer.level<=1">9.9</span>  <span v-else-if="customer.level>=2 && customer.level<=4">19.9</span> <span v-else>29.9</span><br/>手链价格为:  <span v-show="customer.level>=0 && customer.level<=1">9.9</span>  <span v-show="customer.level>=2 && customer.level<=4">19.9</span> <span v-show="customer.level>=5">29.9</span></div><script type="module">//导入vue模块import { createApp} from 'https://unpkg.com/vue@3/dist/vue.esm-browser.js'//创建vue应用实例createApp({data() {return {customer:{name:'张三',level:2}}}}).mount("#app")//控制html元素</script>
</body></html>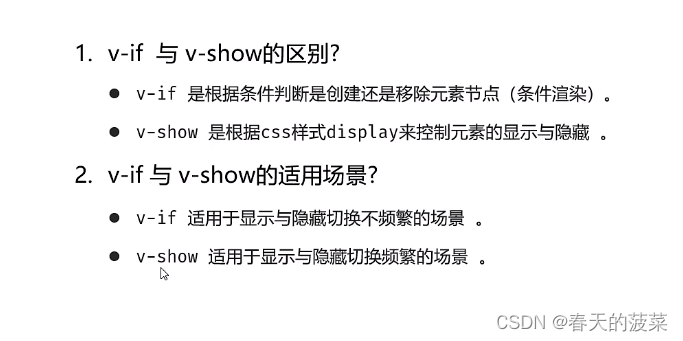
2.4 v-on为html标签绑定事件
语法:

<!DOCTYPE html>
<html lang="en">
<head><meta charset="UTF-8"><meta name="viewport" content="width=device-width, initial-scale=1.0"><title>Document</title>
</head>
<body><div id="app"><button v-on:click="money">点我有惊喜</button> <button @click="love">再点更惊喜</button></div><script type="module">//导入vue模块import { createApp} from 'https://unpkg.com/vue@3/dist/vue.esm-browser.js'//创建vue应用实例createApp({data() {return {//定义数据}},methods:{money: function(){alert('送你钱100')},love: function(){alert('爱你一万年')}}}).mount("#app");//控制html元素</script>
</body>
</html>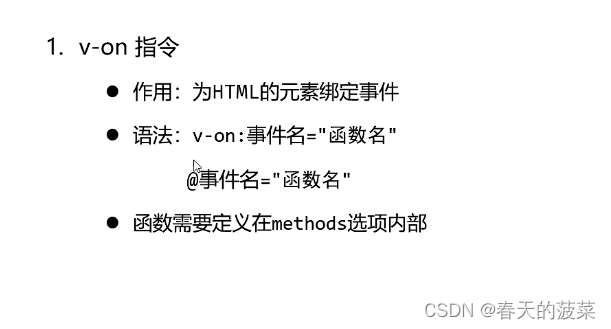
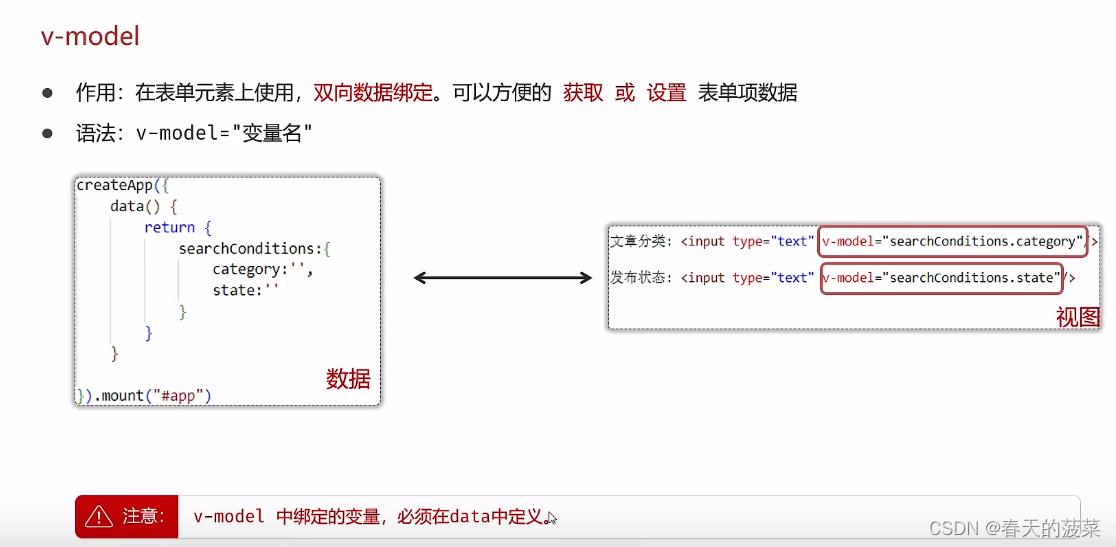
2.5 v-model双向数据绑定
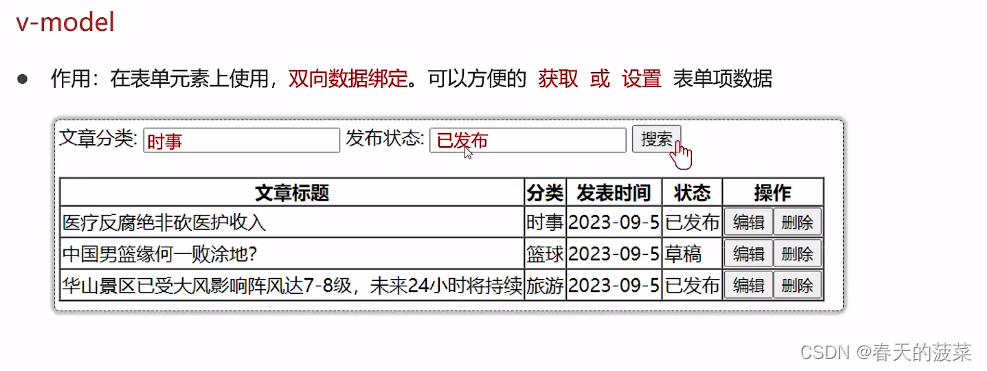
语法:
<!DOCTYPE html>
<html lang="en"><head><meta charset="UTF-8"><meta name="viewport" content="width=device-width, initial-scale=1.0"><title>Document</title>
</head><body><div id="app">文章分类: <input type="text" v-model="searchConditions.category"/> <span>{{searchConditions.category}}</span>发布状态: <input type="text" v-model="searchConditions.state"/> <span>{{searchConditions.state}}</span><button>搜索</button><button v-on:click="clear">重置</button><br /><br /><table border="1 solid" colspa="0" cellspacing="0"><tr><th>文章标题</th><th>分类</th><th>发表时间</th><th>状态</th><th>操作</th></tr><tr v-for="(article,index) in articleList"><td>{{article.title}}</td><td>{{article.category}}</td><td>{{article.time}}</td><td>{{article.state}}</td><td><button>编辑</button><button>删除</button></td></tr></table></div><script type="module">//导入vue模块import { createApp } from 'https://unpkg.com/vue@3/dist/vue.esm-browser.js'//创建vue应用实例createApp({data() {return {//定义数据searchConditions:{category:'',state:''},articleList: [{title: "医疗反腐绝非砍医护收入",category: "时事",time: "2023-09-5",state: "已发布"},{title: "中国男篮缘何一败涂地?",category: "篮球",time: "2023-09-5",state: "草稿"},{title: "华山景区已受大风影响阵风达7-8级,未来24小时将持续",category: "旅游",time: "2023-09-5",state: "已发布"}]}},methods:{clear:function(){//清空category以及state的数据//在methods对应的方法里面,使用this就代表的是vue实例,可以使用this获取到vue实例中准备的数据this.searchConditions.category='';this.searchConditions.state='';}}}).mount("#app")//控制html元素</script>
</body></html>
3、生命周期
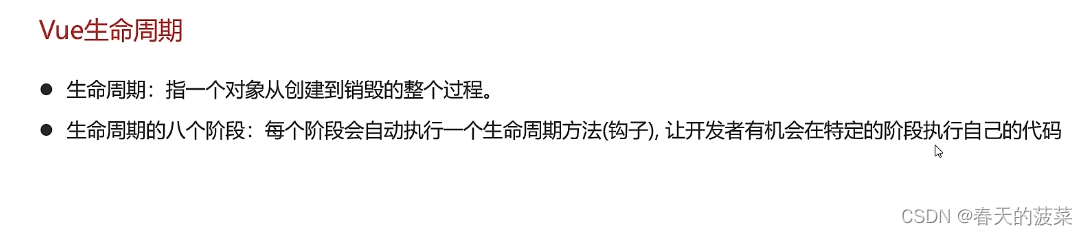

mounted 最频繁
<!DOCTYPE html>
<html lang="en"><head><meta charset="UTF-8"><meta name="viewport" content="width=device-width, initial-scale=1.0"><title>Document</title>
</head><body><div id="app">文章分类: <input type="text" v-model="searchConditions.category"/> <span>{{searchConditions.category}}</span>发布状态: <input type="text" v-model="searchConditions.state"/> <span>{{searchConditions.state}}</span><button>搜索</button><button v-on:click="clear">重置</button><br /><br /><table border="1 solid" colspa="0" cellspacing="0"><tr><th>文章标题</th><th>分类</th><th>发表时间</th><th>状态</th><th>操作</th></tr><tr v-for="(article,index) in articleList"><td>{{article.title}}</td><td>{{article.category}}</td><td>{{article.time}}</td><td>{{article.state}}</td><td><button>编辑</button><button>删除</button></td></tr></table></div><script type="module">//导入vue模块import { createApp } from 'https://unpkg.com/vue@3/dist/vue.esm-browser.js'//创建vue应用实例createApp({data() {return {//定义数据searchConditions:{category:'',state:''},articleList: [{title: "医疗反腐绝非砍医护收入",category: "时事",time: "2023-09-5",state: "已发布"},{title: "中国男篮缘何一败涂地?",category: "篮球",time: "2023-09-5",state: "草稿"},{title: "华山景区已受大风影响阵风达7-8级,未来24小时将持续",category: "旅游",time: "2023-09-5",state: "已发布"}]}},methods:{clear:function(){//清空category以及state的数据//在methods对应的方法里面,使用this就代表的是vue实例,可以使用this获取到vue实例中准备的数据this.searchConditions.category='';this.searchConditions.state='';}},mounted:function(){console.log('Vue挂载完毕,发送请求获取数据')}}).mount("#app")//控制html元素</script>
</body></html>
4、Axios
4.1 介绍

4.2 使用步骤

4.3 别名方式
4.4 实践
4.4.1 导入后端
前面课程的存在token,不好处理
后端代码:
链接:https://pan.baidu.com/s/1H2kd77Brg8zblMj7fnMuoQ
提取码:关注联系我,私信我,发本文链接
我下载下来pom做了一些改变,主要是springboot版本等与前面后端的课程保存一致性
<?xml version="1.0" encoding="UTF-8"?>
<project xmlns="http://maven.apache.org/POM/4.0.0" xmlns:xsi="http://www.w3.org/2001/XMLSchema-instance"xsi:schemaLocation="http://maven.apache.org/POM/4.0.0 https://maven.apache.org/xsd/maven-4.0.0.xsd"><modelVersion>4.0.0</modelVersion><parent><groupId>org.springframework.boot</groupId><artifactId>spring-boot-starter-parent</artifactId><version>3.1.5</version><relativePath/> <!-- lookup parent from repository --></parent><groupId>com.itheima</groupId><artifactId>axios_demo</artifactId><version>0.0.1-SNAPSHOT</version><name>axios_demo</name><description>axios_demo</description><properties><java.version>17</java.version></properties><dependencies><dependency><groupId>org.springframework.boot</groupId><artifactId>spring-boot-starter-web</artifactId></dependency><dependency><groupId>org.springframework.boot</groupId><artifactId>spring-boot-starter-test</artifactId><scope>test</scope></dependency><dependency><groupId>org.projectlombok</groupId><artifactId>lombok</artifactId></dependency></dependencies><build><plugins><plugin><groupId>org.springframework.boot</groupId><artifactId>spring-boot-maven-plugin</artifactId></plugin></plugins></build></project>
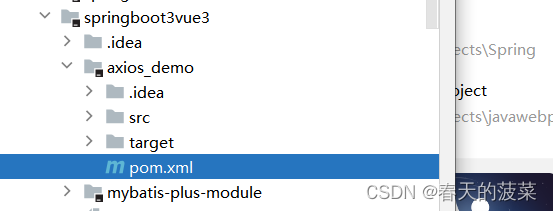
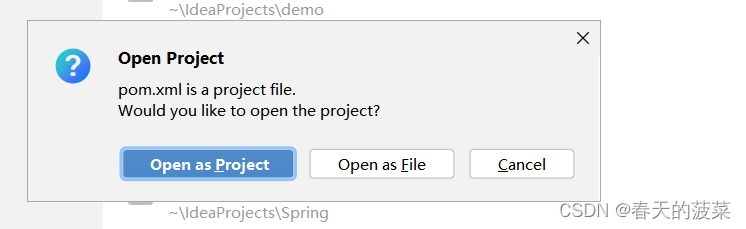
 导入的时候卡主,注意自己的maven配置
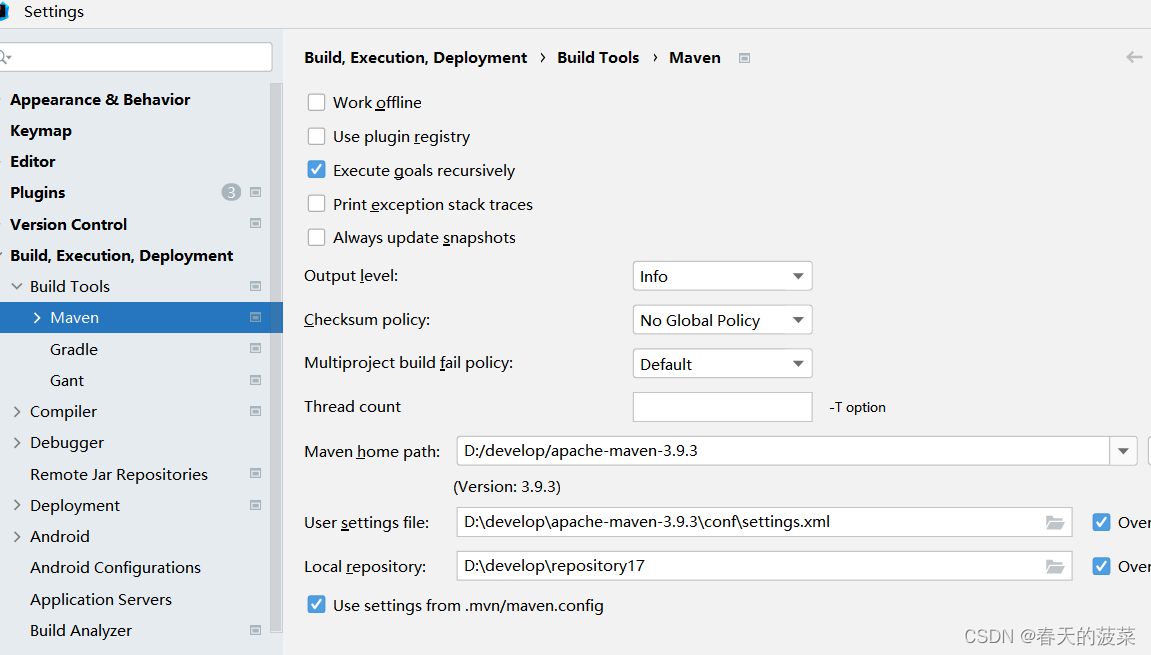
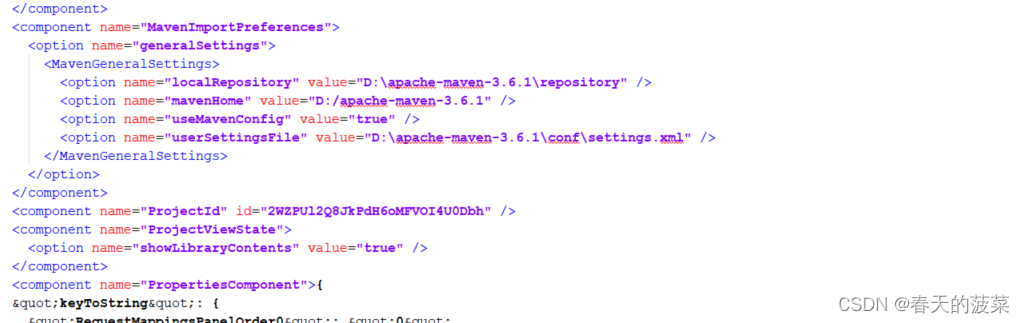
不知道跟.idea里面这个是否有关 workspace.xml,导致卡主。修改这个maven估计就好了
4.4.2 前端
默认方式与别名方式
<!DOCTYPE html>
<html lang="en"><head><meta charset="UTF-8"><meta name="viewport" content="width=device-width, initial-scale=1.0"><title>Document</title>
</head><body><!-- 引入axios的js文件 --><script src="https://unpkg.com/axios/dist/axios.min.js"></script><script>/* 发送请求 *//* axios({method:'get',url:'http://localhost:8080/article/getAll'}).then(result=>{//成功的回调//result代表服务器响应的所有的数据,包含了响应头,响应体. result.data 代表的是接口响应的核心数据console.log(result.data);}).catch(err=>{//失败的回调console.log(err);}); */let article = {title: '明天会更好',category: '生活',time: '2000-01-01',state: '草稿'}/*  axios({method:'post',url:'http://localhost:8080/article/add',data:article}).then(result=>{//成功的回调//result代表服务器响应的所有的数据,包含了响应头,响应体. result.data 代表的是接口响应的核心数据console.log(result.data);}).catch(err=>{//失败的回调console.log(err);}); *///别名的方式发送请求/* axios.get('http://localhost:8080/article/getAll').then(result => {//成功的回调//result代表服务器响应的所有的数据,包含了响应头,响应体. result.data 代表的是接口响应的核心数据console.log(result.data);}).catch(err => {//失败的回调console.log(err);}); */axios.post('http://localhost:8080/article/add', article).then(result => {//成功的回调//result代表服务器响应的所有的数据,包含了响应头,响应体. result.data 代表的是接口响应的核心数据console.log(result.data);}).catch(err => {//失败的回调console.log(err);});</script>
</body></html>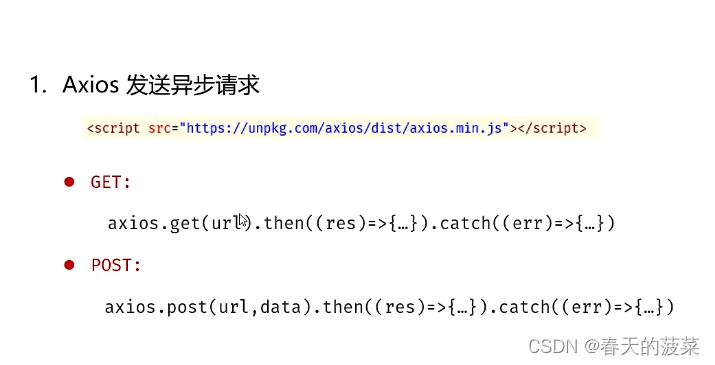
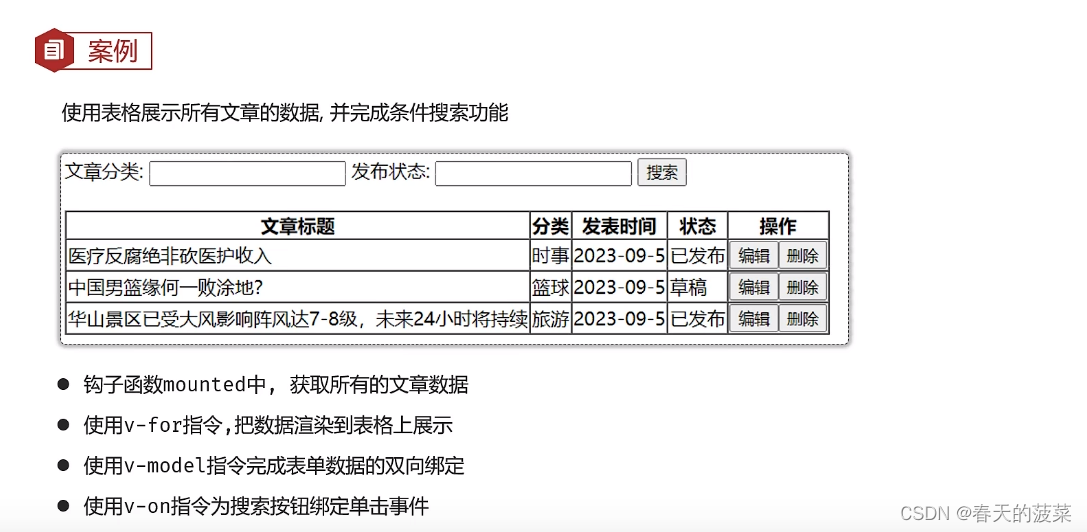
5、综合案例

<!DOCTYPE html>
<html lang="en"><head><meta charset="UTF-8"><meta name="viewport" content="width=device-width, initial-scale=1.0"><title>Document</title>
</head><body><div id="app">文章分类: <input type="text" v-model="searchConditions.category">发布状态: <input type="text"  v-model="searchConditions.state"><button v-on:click="search">搜索</button><button v-on:click="clear">重置</button><br /><br /><table border="1 solid" colspa="0" cellspacing="0"><tr><th>文章标题</th><th>分类</th><th>发表时间</th><th>状态</th><th>操作</th></tr><tr v-for="(article,index) in articleList"><td>{{article.title}}</td><td>{{article.category}}</td><td>{{article.time}}</td><td>{{article.state}}</td><td><button>编辑</button><button>删除</button></td></tr><!-- <tr><td>标题2</td><td>分类2</td><td>2000-01-01</td><td>已发布</td><td><button>编辑</button><button>删除</button></td></tr><tr><td>标题3</td><td>分类3</td><td>2000-01-01</td><td>已发布</td><td> --><button>编辑</button><button>删除</button></td></tr></table></div><!-- 引入axios的js文件 --><script src="https://unpkg.com/axios/dist/axios.min.js"></script><script type="module">//导入vue模块import {createApp} from  'https://unpkg.com/vue@3/dist/vue.esm-browser.js'// 创建vue应用实例createApp({data(){return{articleList:[],searchConditions:{category:'',state:''}}},methods:{//声明方法search:function(){//发送请求,完成搜索,携带搜索条件axios.get('http://localhost:8080/article/search?category='+this.searchConditions.category+'&state='+this.searchConditions.state).then(result=>{//成功回调 result.data//把得到的数据赋值给articleListthis.articleList=result.data}).catch(err=>{console.log(err);});},clear:function(){//清空category以及state的数据//在methods对应的方法里面,使用this就代表的是vue实例,可以使用this获取到vue实例中准备的数据this.searchConditions.category='';this.searchConditions.state='';}},mounted:function(){//发送异步请求 axiosaxios.get('http://localhost:8080/article/getAll').then(result =>{//成功回调// console.log(result.data);this.articleList = result.data}).catch(err =>{//失败回调console.log(err);})}}).mount('#app'); // 控制html元素</script></body></html>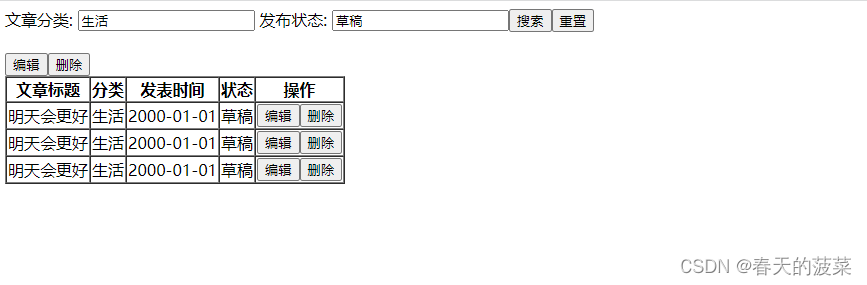
五、整站使用vue(工程化)
1、环境准备

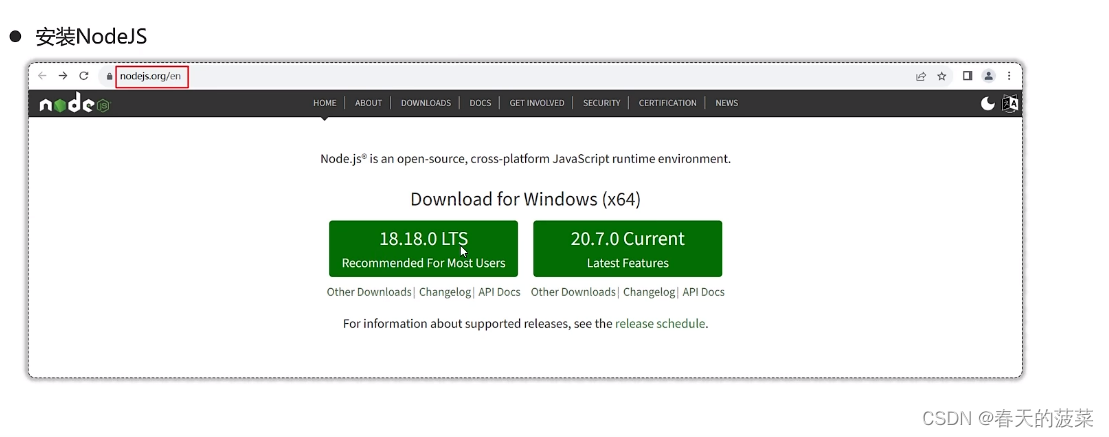
看这个也行《nodejs》
2、VUE项目创建和启动
2.1 创建vue3项目
npm init vue@latest
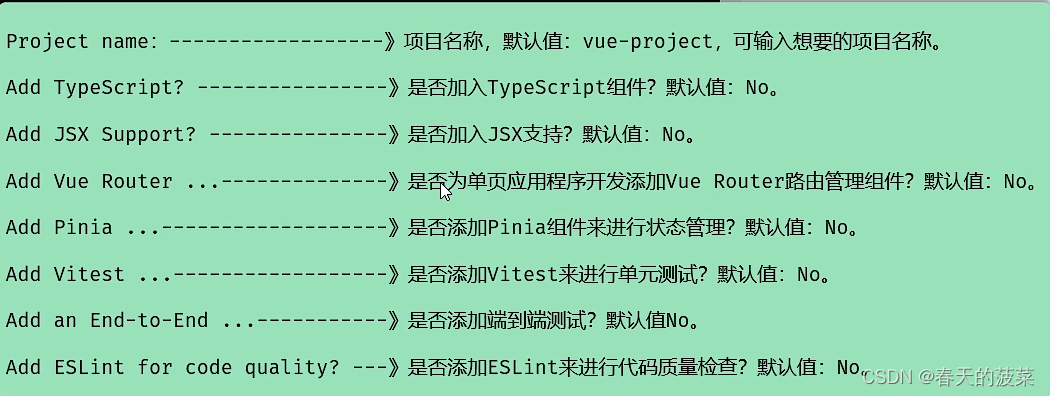
实际操作
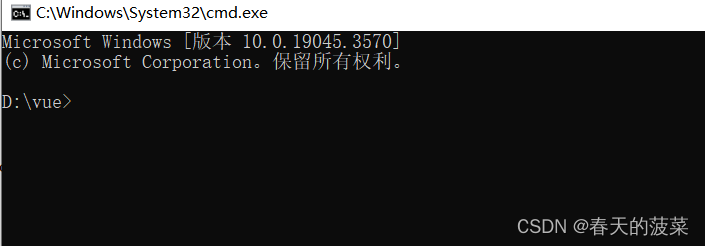
npm init vue@latest
# 输入项目名称,然后全部默认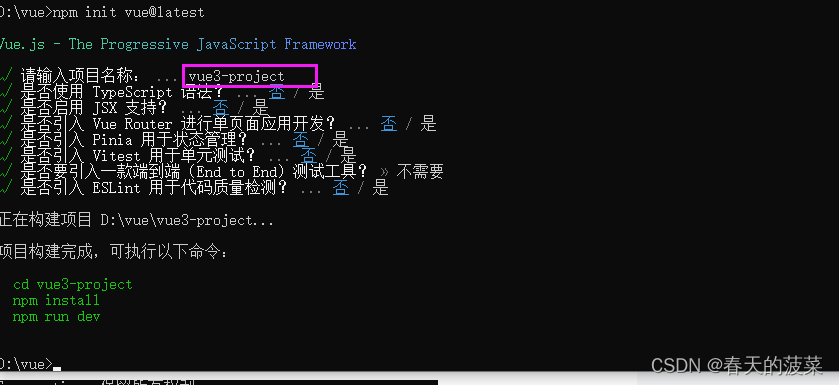
# 进到项目目录
cd vue3-project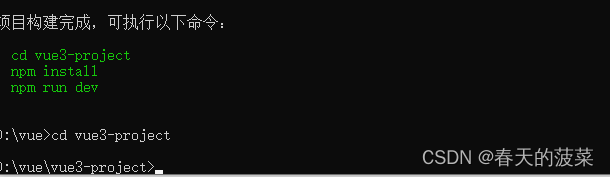
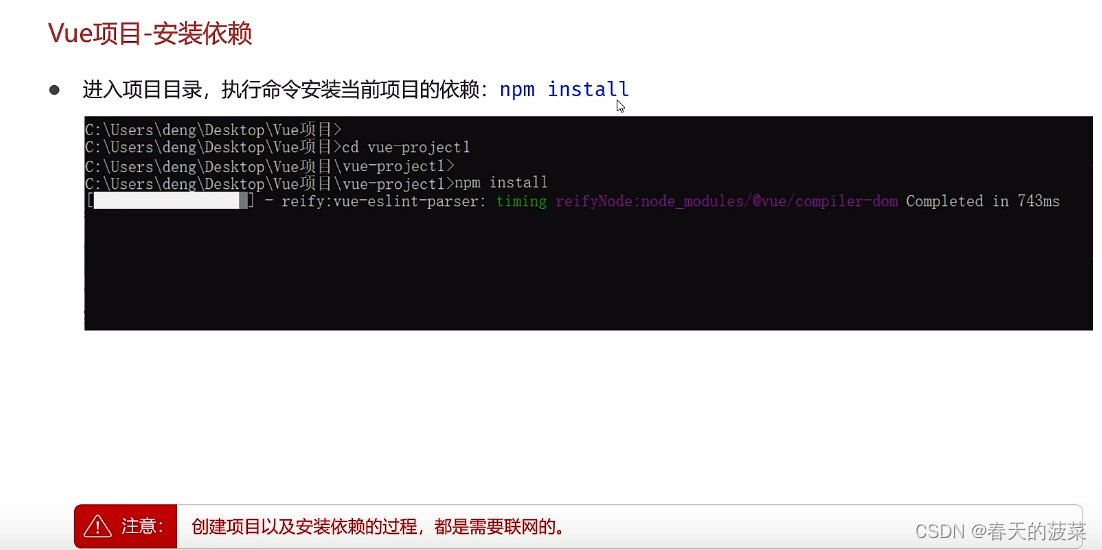
# 输入命令   安装项目vue依赖
npm install
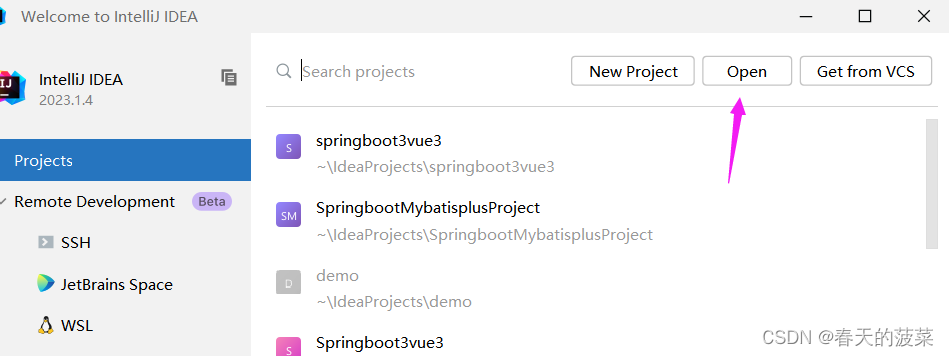
2.2 使用vscode 打开vue项目
在项目目录输入命令code .
code . 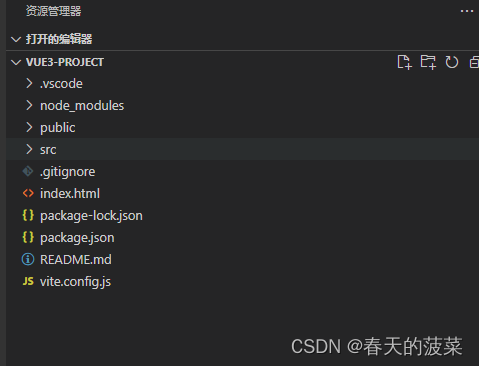
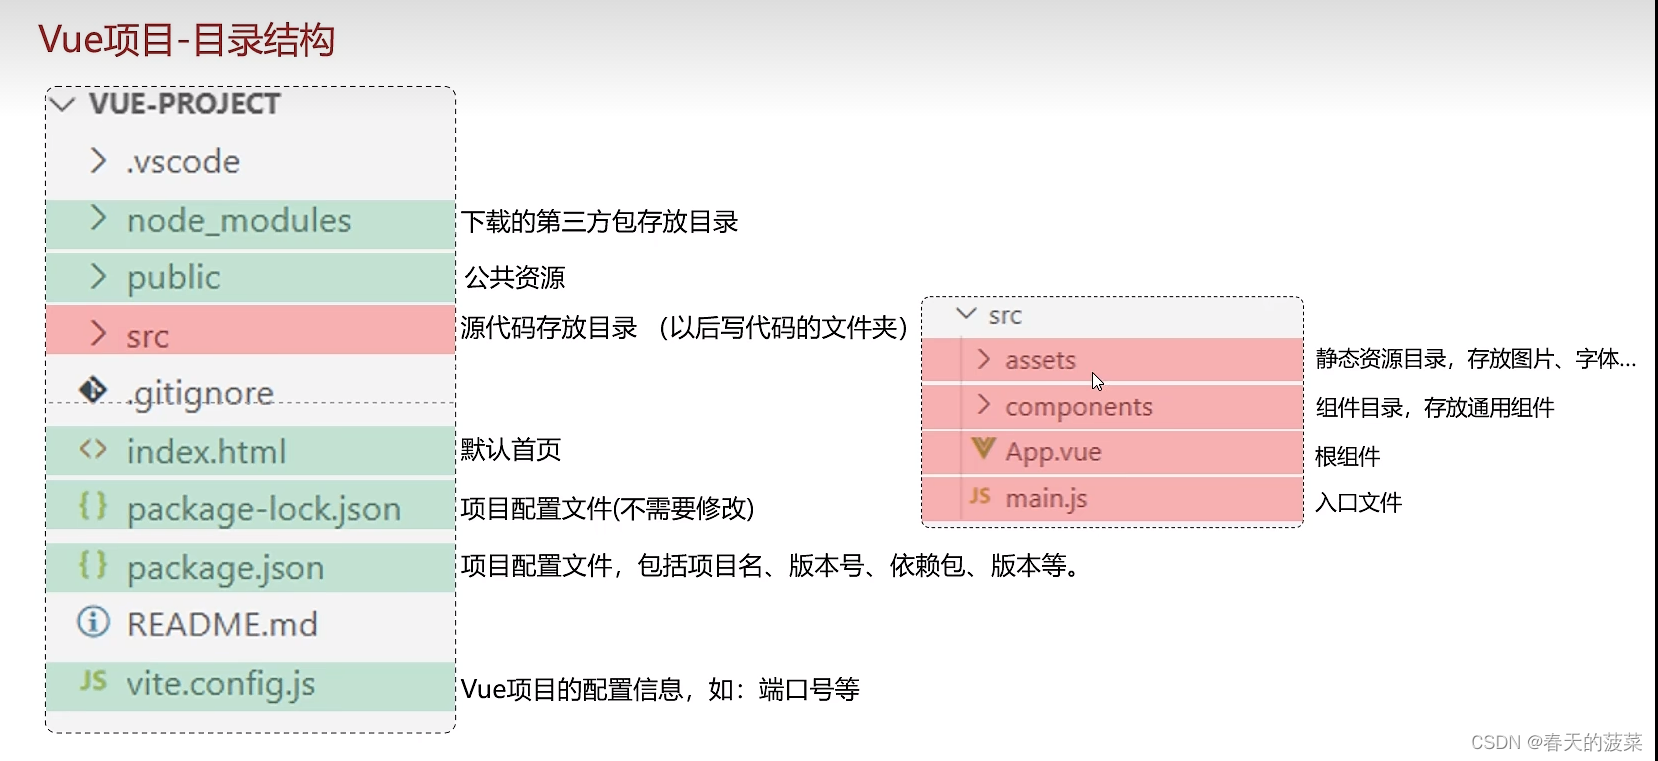
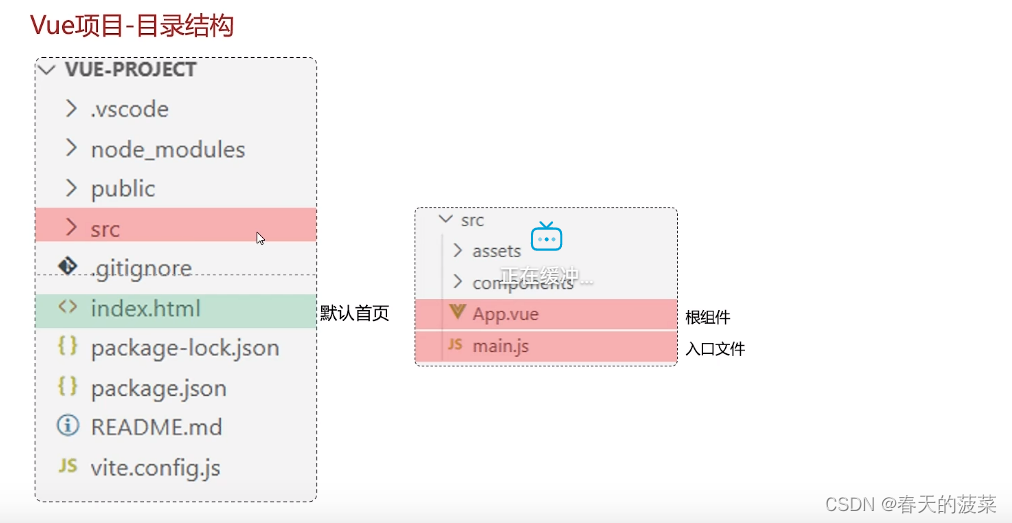
2.3 vue项目目录结构
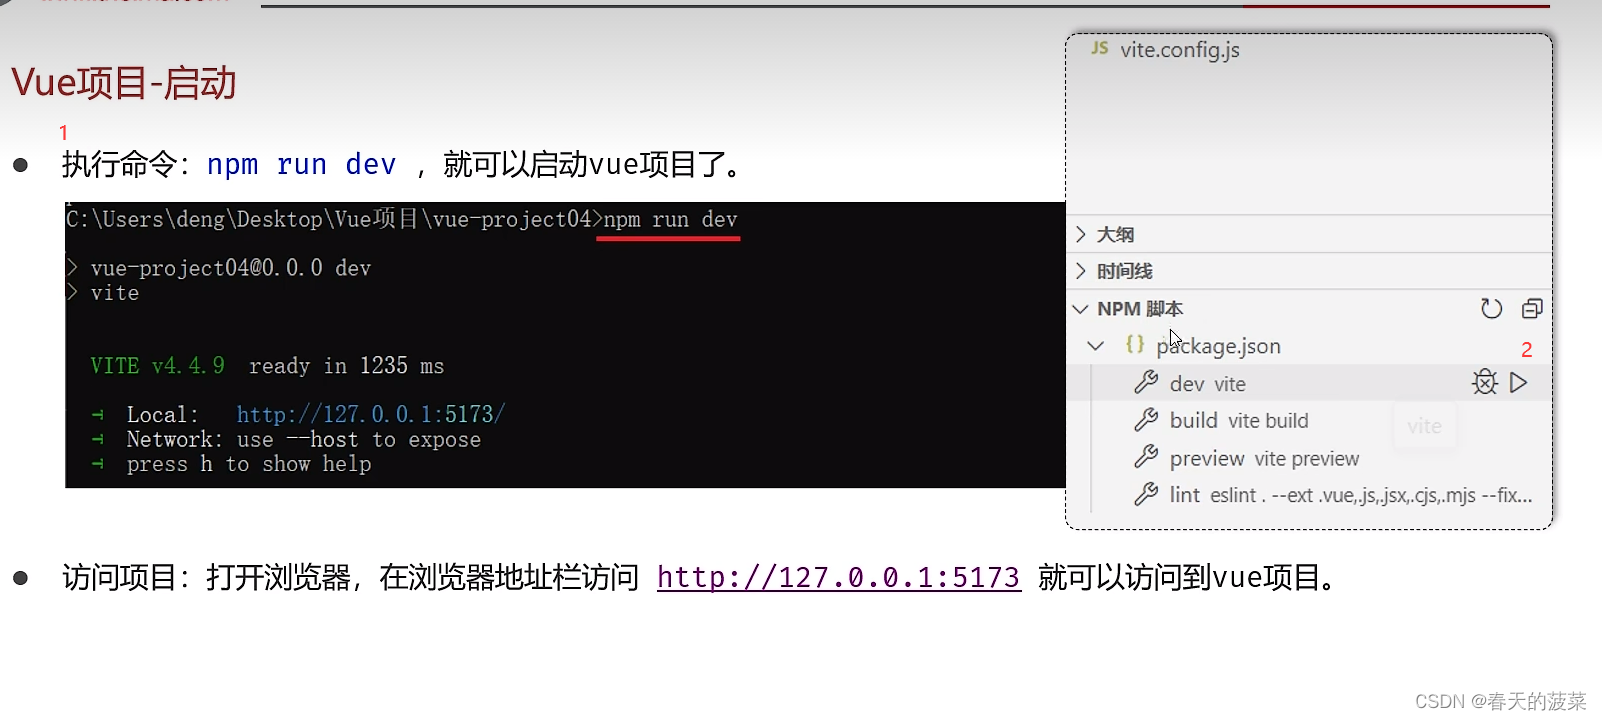
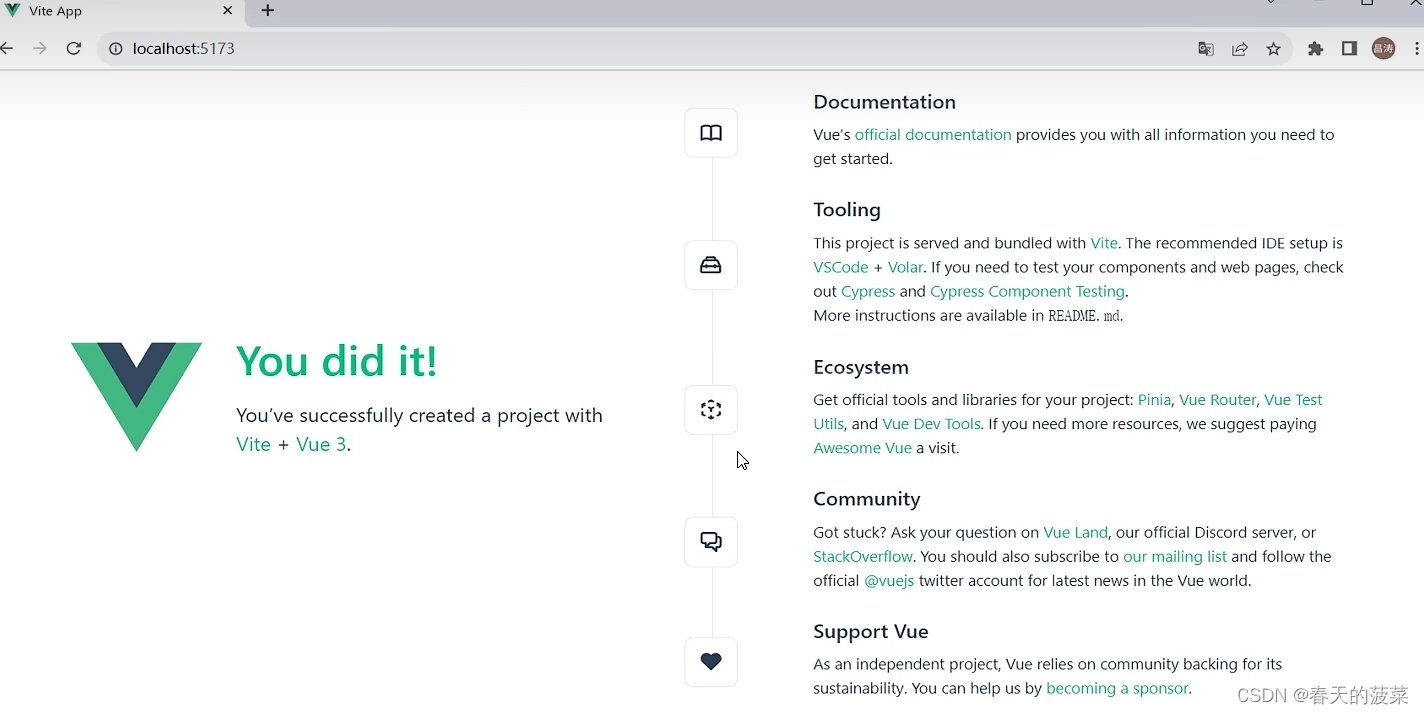
2.4 vue项目启动
下图有两种方式启动 1与2
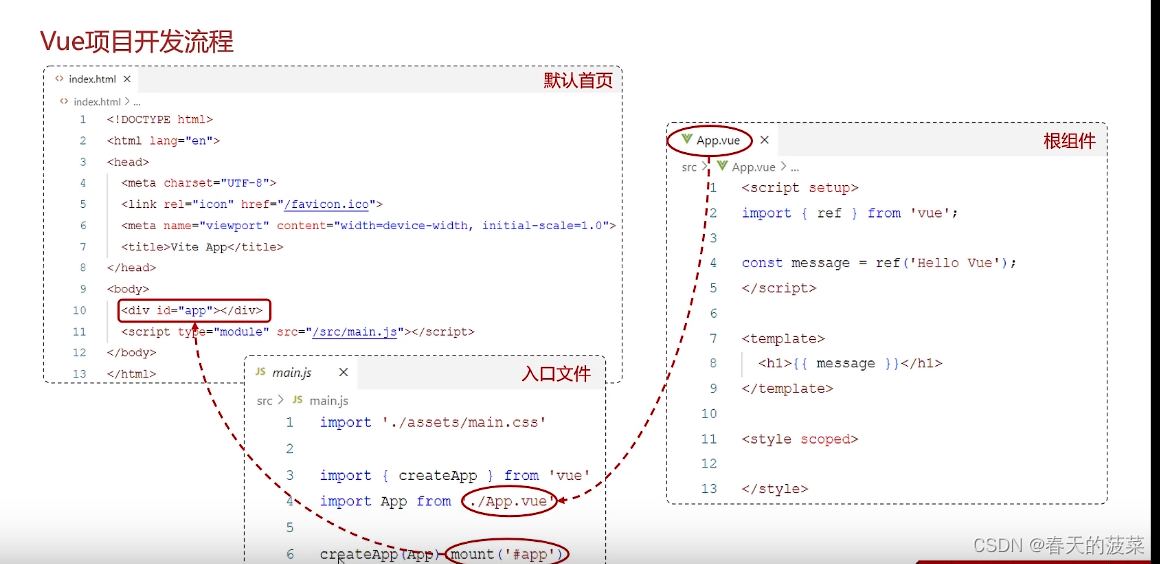
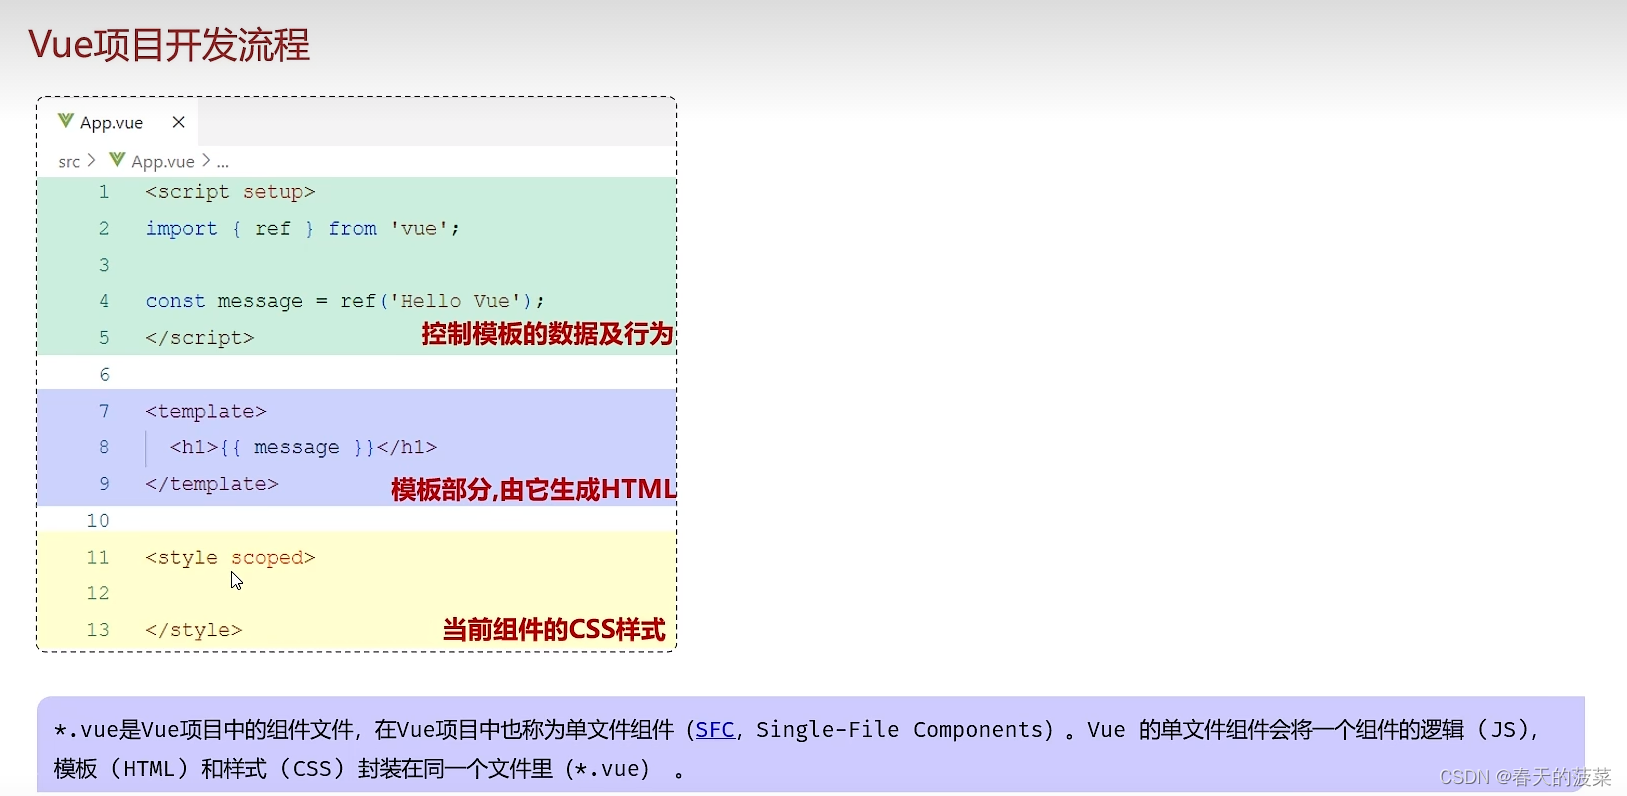
3、vue项目开发流程
4、API风格
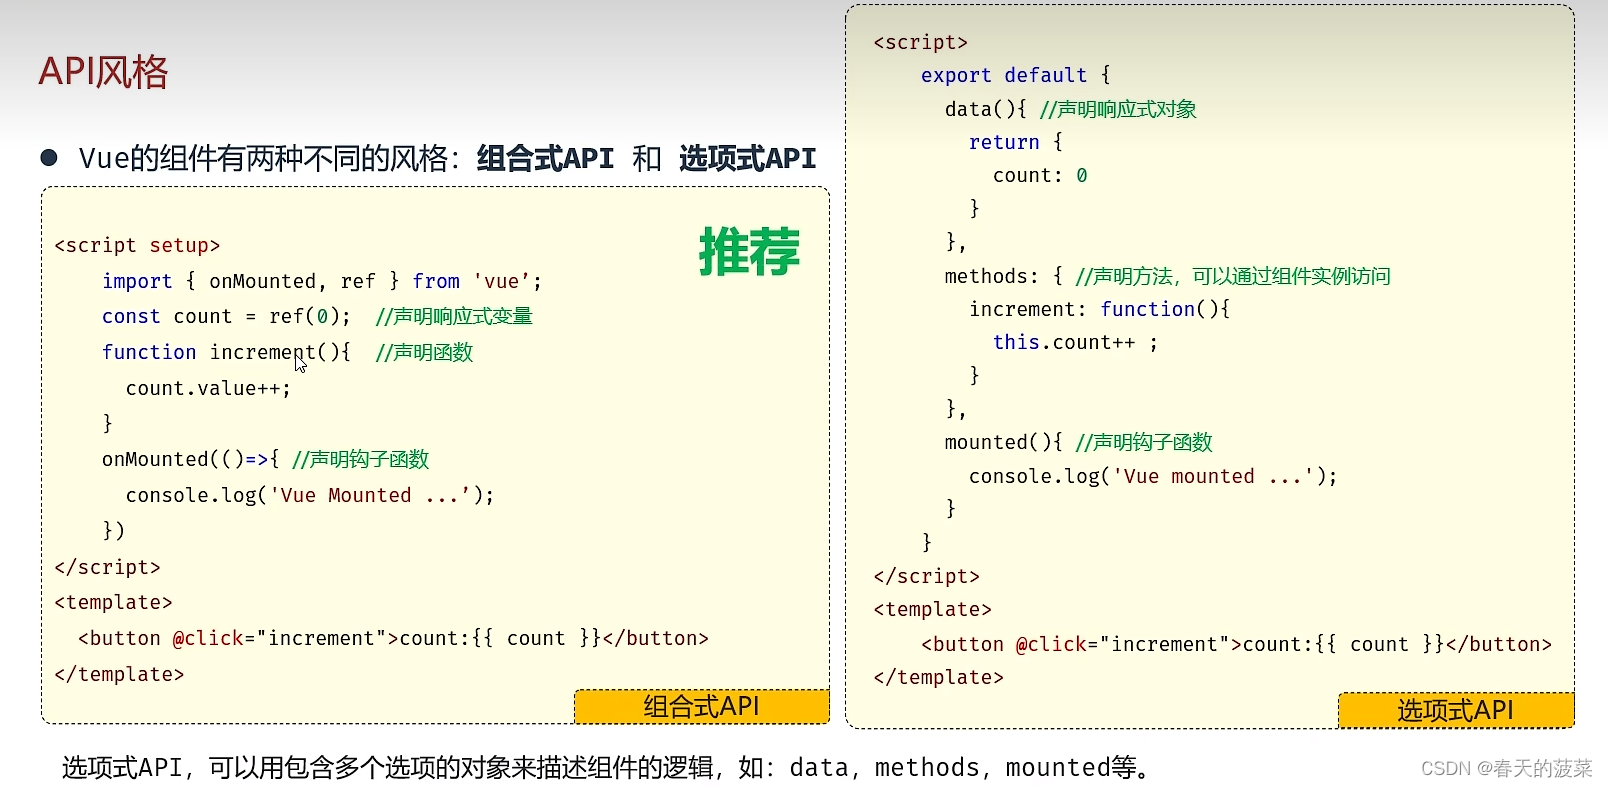
4.1 组合式API

App.vue
<!-- <script>
//写数据
export default{data(){return{msg: '上海'}}
}
</script> --><script setup>import {ref} from 'vue';//调用ref函数,定义响应式数据const msg = ref('西安');//导入Api.vue文件 vs 开发工具显示下面一句有问题 是开发工具问题import ApiVue from './Api.vue'
</script> <template><!-- html-->  <h1>{{ msg }}</h1>  <ApiVue/></template><style scoped>
/* 样式 */
h1{color: red;
}</style>
Api.vue
<script setup>import {onMounted, ref} from 'vue';//声明响应式数据 ref  响应式对象有一个内部的属性valueconst count = ref(0);// 声明函数increment
function increment(){count.value++;
}//声明钩子函数onMountedonMounted(()=>{console.log('vue已经挂载完毕!')});</script><template><button @click="increment">点击+1 count:{{ count }}</button></template>
5、案例
5.1 启动后台程序
后台程序与局部的那个案例相同
5.2 安装axios
项目目录下执行
npm install axios5.3 App.vue代码
<!-- <script>
//写数据
export default{data(){return{msg: '上海'}}
}
</script> --><script setup>import {ref} from 'vue';//调用ref函数,定义响应式数据const msg = ref('西安');//导入Api.vue文件 vs 开发工具显示下面一句有问题 是开发工具问题import ApiVue from './Api.vue'//Article.vue文件 vs 开发工具显示下面一句有问题 是开发工具问题import Article from './Article.vue'
</script> <template><!-- html-->  <!-- <h1>{{ msg }}</h1>   <br><ApiVue/> --><Article/></template><style scoped>
/* 样式 */
h1{color: red;
}</style>
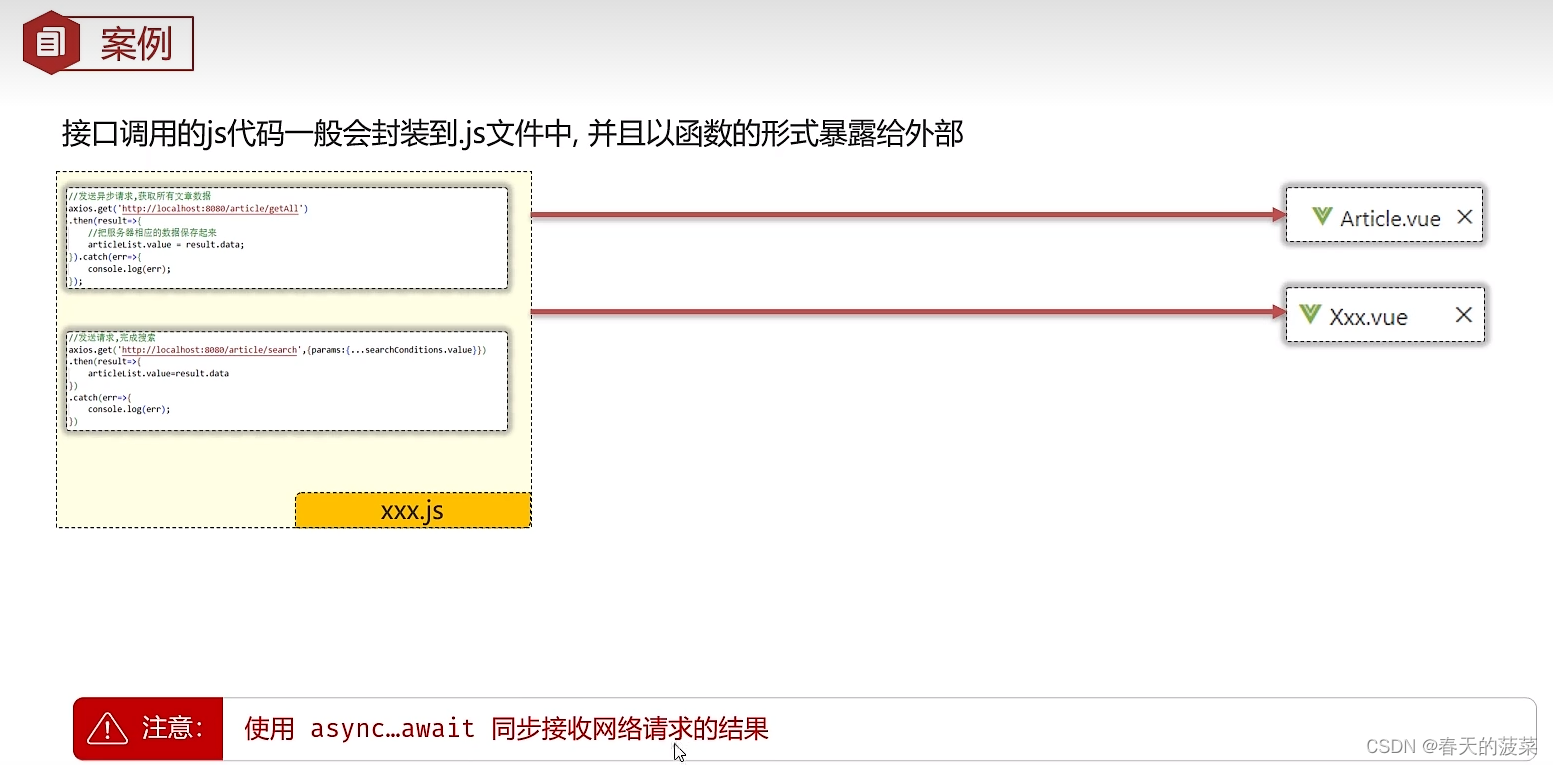
5.4 Article.vue代码
<script setup>//导入axiosimport axios from 'axios'; import {ref} from 'vue';//定义响应式数据 refconst articleList = ref([])//发送异步请求,获取所有文章数据axios.get('http://localhost:8080/article/getAll').then(result=>{//把服务器相应的数据保存起来articleList.value = result.data;}).catch(err=>{console.log(err)});//定义响应式数据searchConditionsconst searchConditions = ref({category:'',state:''});//声明search函数const search=function(){//发送请求完成搜索axios.get('http://localhost:8080/article/search',{params:{...searchConditions.value}}).then(result=>{articleList.value = result.data;}).catch(err=>{console.log(err)});}</script><template><!--  html元素--><div>文章分类: <input type="text" v-model="searchConditions.category">发布状态: <input type="text" v-model="searchConditions.state"><button v-on:click="search">搜索</button><br />
<br />
<table border="1 solid" colspa="0" cellspacing="0"><tr><th>文章标题</th><th>分类</th><th>发表时间</th><th>状态</th><th>操作</th></tr><tr v-for="(article,index) in articleList"><td>{{article.title}}</td><td>{{article.category}}</td><td>{{article.time}}</td><td>{{article.state}}</td><td><button>编辑</button><button>删除</button></td></tr><!-- <tr><td>标题2</td><td>分类2</td><td>2000-01-01</td><td>已发布</td><td><button>编辑</button><button>删除</button></td></tr><tr><td>标题3</td><td>分类3</td><td>2000-01-01</td><td>已发布</td><td><button>编辑</button><button>删除</button></td></tr> -->
</table>
</div></template>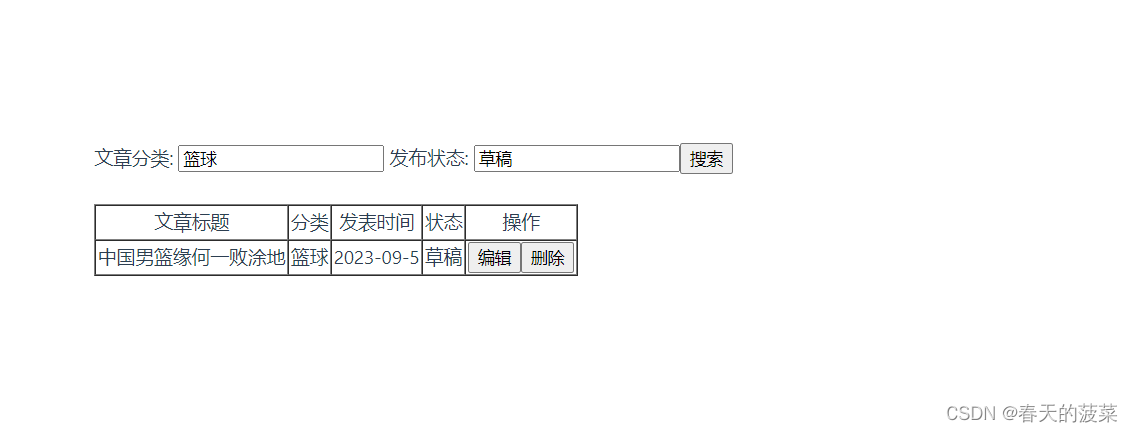
5.5 代码优化1
问题:
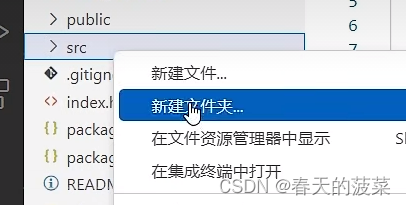
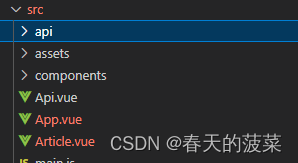
5.5.1 新增api文件夹
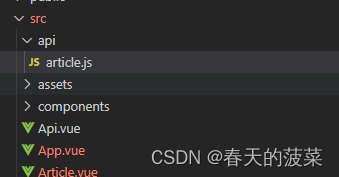
5.5.2 新增article.js文件
//导入axios
import axios from 'axios'; //定义一个变量,记录公共的前缀baseURL
const baseURL = 'http://localhost:8080'
const instance = axios.create({baseURL})//获取所有文件的数据函数
export async function articleGetAllService(){//发送异步请求,获取所有文章数据//同步等待服务器相应的结果,并返回async,await//  return await axios.get('/article/getAll')return await instance.get('/article/getAll').then(result=>{//把服务器相应的数据保存起来//  articleList.value = result.data;return result.data;}).catch(err=>{console.log(err)});}//根据文章分类和发包状态搜索的函数
export async function articleGetSearchService(conditions){//发送请求完成搜索// return await axios.get('/article/search',{params : conditions})return await instance.get('/article/search',{params : conditions}).then(result=>{// articleList.value = result.data;return result.data;}).catch(err=>{console.log(err)});}
5.5.3 修改Article.vue代码
<script setup>import {articleGetAllService,articleGetSearchService} from '@/api/article.js'import {ref} from 'vue';//定义响应式数据 refconst articleList = ref([])//获取所有文章数据//同步获取articleGetAllService的返回结果 async awaitconst getAllArticle = async function(){let data = await articleGetAllService()articleList.value = data;}getAllArticle();//定义响应式数据searchConditionsconst searchConditions = ref({category:'',state:''});//声明search函数const search= async function(){//文章搜索let data = await articleGetSearchService({...searchConditions.value});articleList.value = data;}</script><template><!-- html元素--><div>文章分类: <input type="text" v-model="searchConditions.category">发布状态: <input type="text" v-model="searchConditions.state"><button v-on:click="search">搜索</button><br />
<br />
<table border="1 solid" colspa="0" cellspacing="0"><tr><th>文章标题</th><th>分类</th><th>发表时间</th><th>状态</th><th>操作</th></tr><tr v-for="(article,index) in articleList"><td>{{article.title}}</td><td>{{article.category}}</td><td>{{article.time}}</td><td>{{article.state}}</td><td><button>编辑</button><button>删除</button></td></tr><!-- <tr><td>标题2</td><td>分类2</td><td>2000-01-01</td><td>已发布</td><td><button>编辑</button><button>删除</button></td></tr><tr><td>标题3</td><td>分类3</td><td>2000-01-01</td><td>已发布</td><td><button>编辑</button><button>删除</button></td></tr> -->
</table>
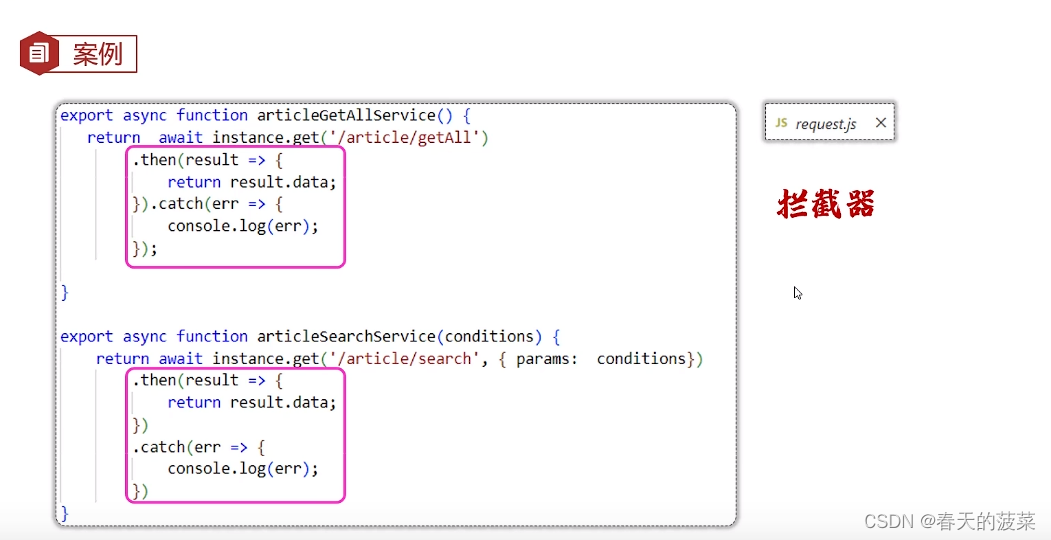
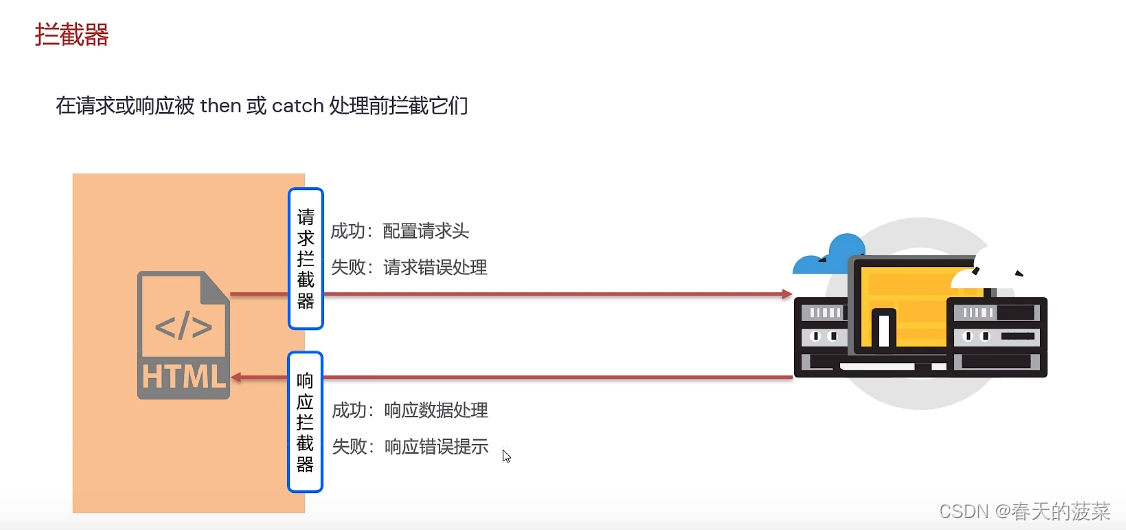
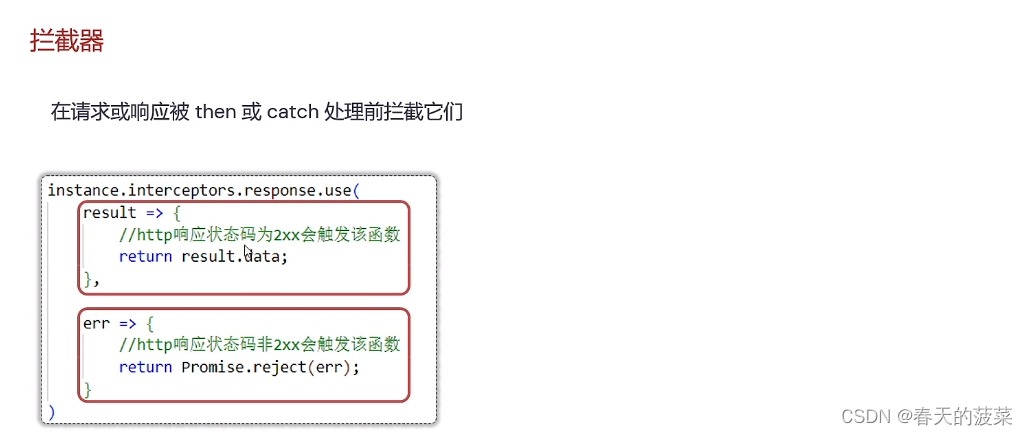
</div></template>5.6 代码优化2(拦截器使用)
问题
5.6.1 新建文件夹util
5.6.2 新建request.js文件
// 定制请求实例//导入axios
import axios from 'axios'; //定义一个变量,记录公共的前缀baseURL
const baseURL = 'http://localhost:8080'
const instance = axios.create({baseURL})// 添加响应拦截器
instance.interceptors.response.use(result=>{return result.data;},err=>{alert('服务异常')return Promise.reject(err);//异步的状态转化成失败的状态}
)export default instance;
5.6.3 优化article.js
/*
//导入axios
import axios from 'axios'; //定义一个变量,记录公共的前缀baseURL
const baseURL = 'http://localhost:8080'
const instance = axios.create({baseURL}) */
import request from '@/util/request.js'//获取所有文件的数据函数
export async function articleGetAllService(){//发送异步请求,获取所有文章数据//同步等待服务器相应的结果,并返回async,await//  return await axios.get('/article/getAll')return request.get('/article/getAll');}//根据文章分类和发包状态搜索的函数
export async function articleGetSearchService(conditions){//发送请求完成搜索// return await axios.get('/article/search',{params : conditions})return  request.get('/article/search',{params : conditions});}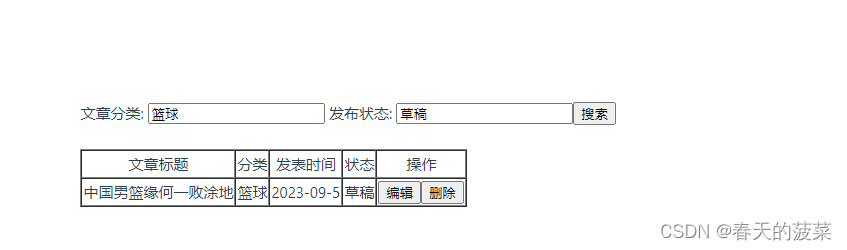
六、Element-plus
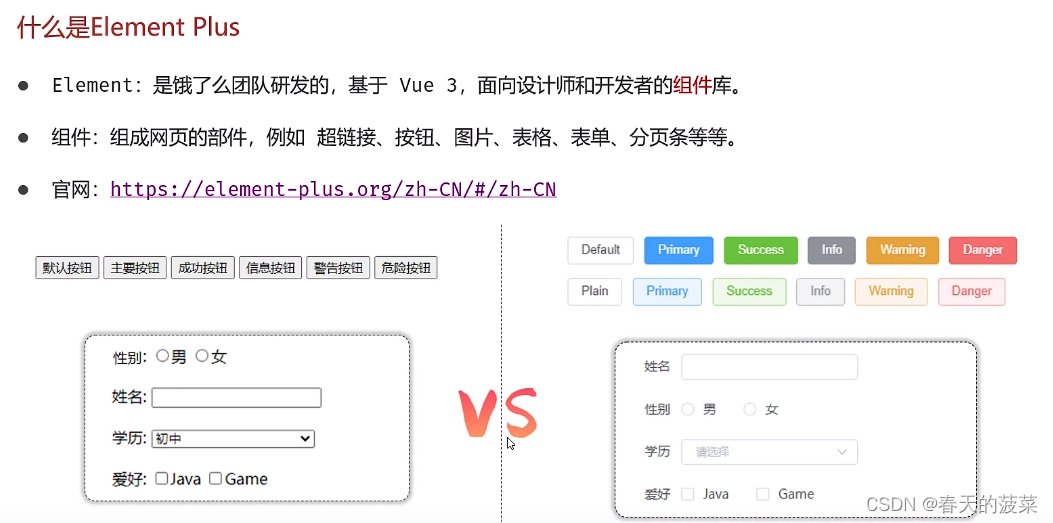
1、快速入门
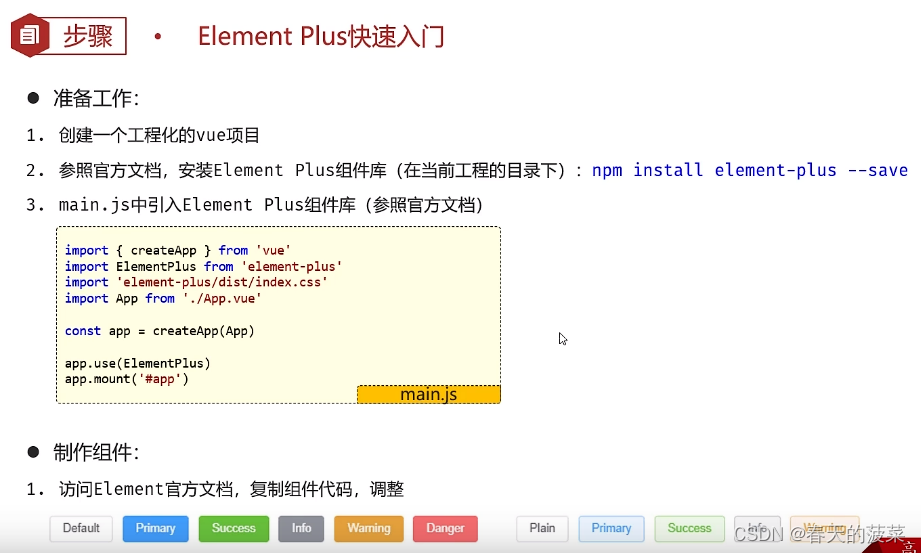
1.1 步骤
1.2 实操
1.2.1 创建vue3项目
npm init vue@latest 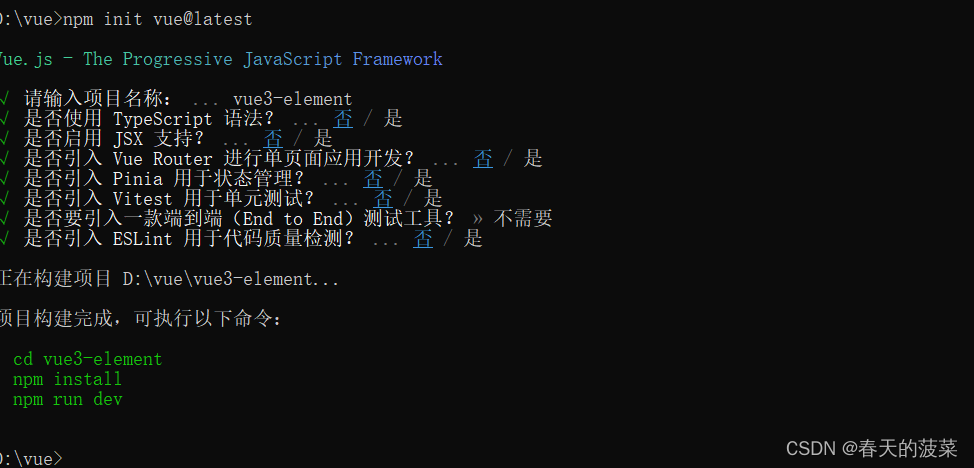
1.2.2 进入项目目录安装vue依赖
cd 项目目录
npm install

1.2.3 使用vs studio打开项目
code .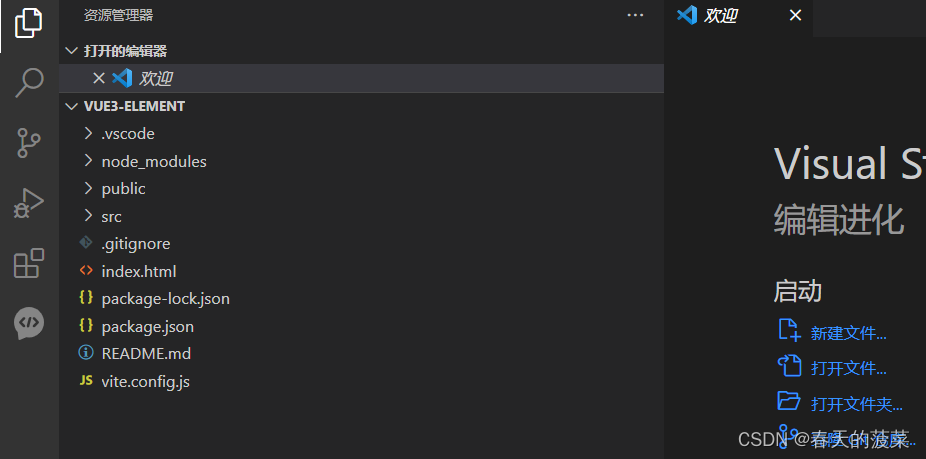
1.2.4 安装Element Plus
npm install element-plus --save
1.2.5 项目引用Element Plus
复制替换main.js文件内容
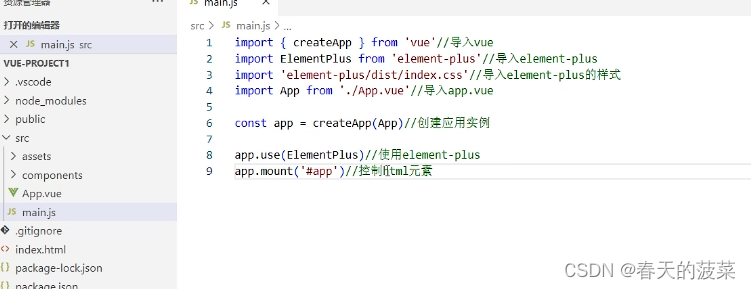
// main.ts
import { createApp } from 'vue'  //导入vue
import ElementPlus from 'element-plus'  //导入element-plus
import 'element-plus/dist/index.css'  //导入element-plus的样式
import App from './App.vue'  //导入app.vueconst app = createApp(App)  //创建应用实例app.use(ElementPlus) //使用element-plus
app.mount('#app')  //控制html元素
1.2.6 src下新建Button.vue文件
<script lang="ts" setup>import {Check,Delete,Edit,Message,Search,Star,} from '@element-plus/icons-vue'</script><template><el-row class="mb-4"><el-button>Default</el-button><el-button type="primary">Primary</el-button><el-button type="success">Success</el-button><el-button type="info">Info</el-button><el-button type="warning">Warning</el-button><el-button type="danger">Danger</el-button></el-row><el-row class="mb-4"><el-button plain>Plain</el-button><el-button type="primary" plain>Primary</el-button><el-button type="success" plain>Success</el-button><el-button type="info" plain>Info</el-button><el-button type="warning" plain>Warning</el-button><el-button type="danger" plain>Danger</el-button></el-row><el-row class="mb-4"><el-button round>Round</el-button><el-button type="primary" round>Primary</el-button><el-button type="success" round>Success</el-button><el-button type="info" round>Info</el-button><el-button type="warning" round>Warning</el-button><el-button type="danger" round>Danger</el-button></el-row><el-row><el-button :icon="Search" circle /><el-button type="primary" :icon="Edit" circle /><el-button type="success" :icon="Check" circle /><el-button type="info" :icon="Message" circle /><el-button type="warning" :icon="Star" circle /><el-button type="danger" :icon="Delete" circle /></el-row></template>1.2.7 修改 App.vue
<script setup>
import ButtonVue from './Button.vue';</script><template><ButtonVue/>
</template>
# 启动项目
npm run dev 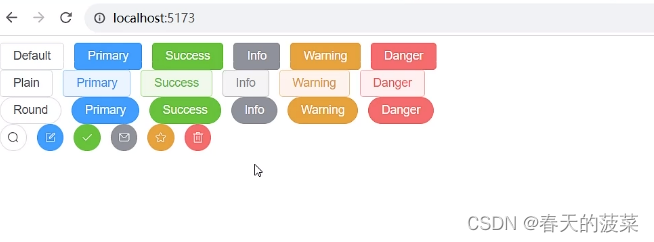
优化代码
<script lang="ts" setup>
import {Check,Delete,Edit,Message,Search,Star,
} from '@element-plus/icons-vue'
</script><template><el-row class="mb-4"><el-button>Default</el-button><el-button type="primary" disabled = "true">编辑</el-button>   <!--disabled = "true" 禁用--><el-button type="success" loading = "true">查看</el-button>     <!--loading = "true" 加载中--></el-row><el-row class="mb-4">  <el-button type="info" plain>Info</el-button><el-button type="warning" plain>Warning</el-button><el-button type="danger" plain>Danger</el-button></el-row><!--  初始化的<el-row class="mb-4"><el-button>Default</el-button><el-button type="primary">Primary</el-button><el-button type="success">Success</el-button><el-button type="info">Info</el-button><el-button type="warning">Warning</el-button><el-button type="danger">Danger</el-button></el-row><el-row class="mb-4"><el-button plain>Plain</el-button><el-button type="primary" plain>Primary</el-button><el-button type="success" plain>Success</el-button><el-button type="info" plain>Info</el-button><el-button type="warning" plain>Warning</el-button><el-button type="danger" plain>Danger</el-button></el-row><el-row class="mb-4"><el-button round>Round</el-button><el-button type="primary" round>Primary</el-button><el-button type="success" round>Success</el-button><el-button type="info" round>Info</el-button><el-button type="warning" round>Warning</el-button><el-button type="danger" round>Danger</el-button></el-row><el-row><el-button :icon="Search" circle /><el-button type="primary" :icon="Edit" circle /><el-button type="success" :icon="Check" circle /><el-button type="info" :icon="Message" circle /><el-button type="warning" :icon="Star" circle /><el-button type="danger" :icon="Delete" circle /></el-row> --></template>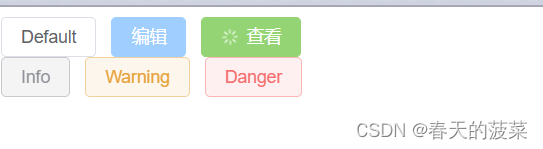
2、常用组件
2.1 表格组件
2.1.1 src新增Article.vue文件
<script lang="ts" setup>
import { Delete,Edit,
} from '@element-plus/icons-vue'
const tableData = [{title: '标题1',category: '时事',time: '2023-01-02',state: '已发布',},{title: '标题1',category: '时事',time: '2023-01-02',state: '已发布',},{title: '标题1',category: '时事',time: '2023-01-02',state: '已发布',},{title: '标题1',category: '时事',time: '2023-01-02',state: '已发布',}]
</script>
<template><el-table :data="tableData" style="width: 100%"><el-table-column prop="title" label="文章标题"/><el-table-column prop="category" label="分类"/><el-table-column prop="time" label="发表时间" /><el-table-column prop="state" label="状态" /><el-table-column  label="操作"  width="180" ><el-row><el-button type="primary" :icon="Edit" circle />    <el-button type="danger" :icon="Delete" circle /></el-row></el-table-column></el-table></template>
2.1.2 修改App.vue
<script setup>
import ButtonVue from './Button.vue';
import ArticleVue from './Article.vue';</script><template><!-- <ButtonVue/> --><ArticleVue/>
</template>

2.2 分页组件
2.2.1 main.js修改
支持分页控件中文显示
// main.ts
import { createApp } from 'vue'  //导入vue
import ElementPlus from 'element-plus'  //导入element-plus
import 'element-plus/dist/index.css'  //导入element-plus的样式
import App from './App.vue'  //导入app.vue
import locale from 'element-plus/dist/locale/zh-cn.js'  //调整分页控件中文显示const app = createApp(App)  //创建应用实例app.use(ElementPlus,{locale}) //使用element-plus
app.mount('#app')  //控制html元素
2.2.2 Article.vue文件导入分页组件
<script lang="ts" setup>
// 按钮icon
import { Delete,Edit,
} from '@element-plus/icons-vue'// 分页
import { ref } from 'vue'const currentPage4 = ref(4)
const pageSize4 = ref(5)
const small = ref(false)
const background = ref(false)
const disabled = ref(false)
const total = ref(20)const handleSizeChange = (val: number) => {console.log(`${val} items per page`)
}
const handleCurrentChange = (val: number) => {console.log(`current page: ${val}`)
}const tableData = [{title: '标题1',category: '时事',time: '2023-01-02',state: '已发布',},{title: '标题1',category: '时事',time: '2023-01-02',state: '已发布',},{title: '标题1',category: '时事',time: '2023-01-02',state: '已发布',},{title: '标题1',category: '时事',time: '2023-01-02',state: '已发布',}]
</script>
<template><!-- 表格组件 --><el-table :data="tableData" style="width: 100%"><el-table-column prop="title" label="文章标题"/><el-table-column prop="category" label="分类"/><el-table-column prop="time" label="发表时间" /><el-table-column prop="state" label="状态" /><el-table-column  label="操作"  width="180" ><el-row><el-button type="primary" :icon="Edit" circle />    <el-button type="danger" :icon="Delete" circle /></el-row></el-table-column></el-table><!-- 分页组件 --><el-paginationclass="el-p"v-model:current-page="currentPage4"v-model:page-size="pageSize4":page-sizes="[5, 10, 15, 40200]":small="small":disabled="disabled":background="background"layout="jumper, total, sizes, prev, pager, next":total="total"@size-change="handleSizeChange"@current-change="handleCurrentChange"/></template><style scoped>.el-p{margin-top: 20px;display: flex;justify-content: flex-end;}</style>
2.3 表单组件
这里使用的是行内表单
2.3.1 Article.vue文件导入表单组件
<script lang="ts" setup>
// 按钮icon
import { Delete,Edit,
} from '@element-plus/icons-vue'// 分页组件导入
import { ref } from 'vue'// 表单组件 行内表单
import { reactive } from 'vue'
const formInline = reactive({user: '',region: '',date: '',
})const onSubmit = () => {console.log('submit!')
}// 分页 组件
const currentPage4 = ref(4)
const pageSize4 = ref(5)
const small = ref(false)
const background = ref(false)
const disabled = ref(false)
const total = ref(20)const handleSizeChange = (val: number) => {console.log(`${val} items per page`)
}
const handleCurrentChange = (val: number) => {console.log(`current page: ${val}`)
}const tableData = [{title: '标题1',category: '时事',time: '2023-01-02',state: '已发布',},{title: '标题1',category: '时事',time: '2023-01-02',state: '已发布',},{title: '标题1',category: '时事',time: '2023-01-02',state: '已发布',},{title: '标题1',category: '时事',time: '2023-01-02',state: '已发布',}]
</script>
<template><!-- 表单组件  行内表单 --><el-form :inline="true" :model="formInline" class="demo-form-inline"><!-- 查询条件1 --><el-form-item label="文章分类:"><el-selectv-model="formInline.region"placeholder="请选择"clearable><el-option label="时事" value="时事" /><el-option label="篮球" value="篮球" /></el-select></el-form-item><!-- 查询条件2 --><el-form-item label="发布状态:"><el-selectv-model="formInline.region"placeholder="请选择"clearable><el-option label="已发布" value="已发布" /><el-option label="草稿" value="草稿" /></el-select></el-form-item><!-- 查询按钮--><el-form-item><el-button type="primary" @click="onSubmit">查询</el-button>  </el-form-item><!-- 重置按钮 --><el-form-item>      <el-button type="default" @click="onSubmit">重置</el-button></el-form-item></el-form><!-- 表格组件 --><el-table :data="tableData" style="width: 100%"><el-table-column prop="title" label="文章标题"/><el-table-column prop="category" label="分类"/><el-table-column prop="time" label="发表时间" /><el-table-column prop="state" label="状态" /><el-table-column  label="操作"  width="180" ><el-row><el-button type="primary" :icon="Edit" circle />    <el-button type="danger" :icon="Delete" circle /></el-row></el-table-column></el-table><!-- 分页组件 --><el-paginationclass="el-p"v-model:current-page="currentPage4"v-model:page-size="pageSize4":page-sizes="[5, 10, 15, 40200]":small="small":disabled="disabled":background="background"layout="jumper, total, sizes, prev, pager, next":total="total"@size-change="handleSizeChange"@current-change="handleCurrentChange"/></template><style scoped>.el-p{margin-top: 20px;display: flex;justify-content: flex-end;}</style>
2.4 卡片组件
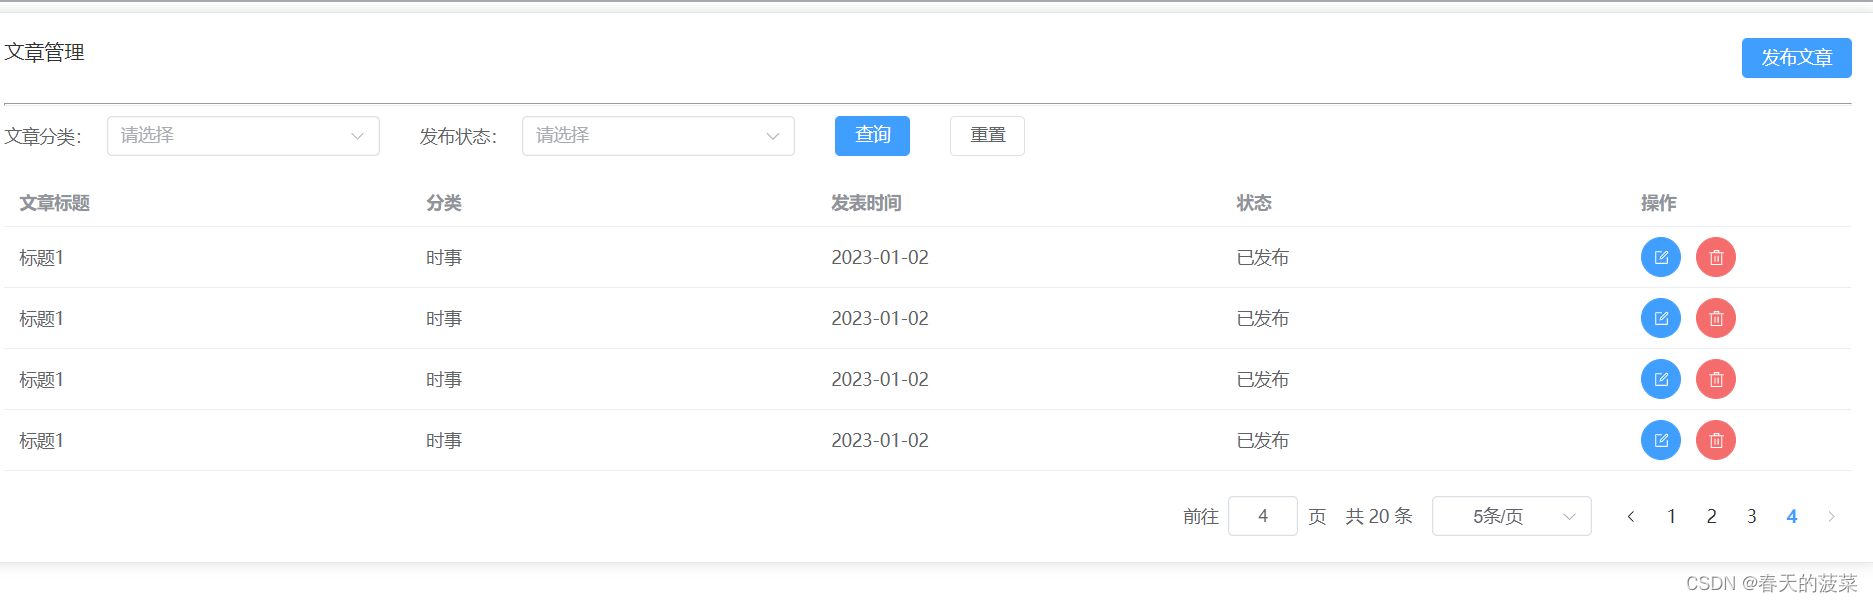
2.4.1 Article.vue文件导入卡片组件
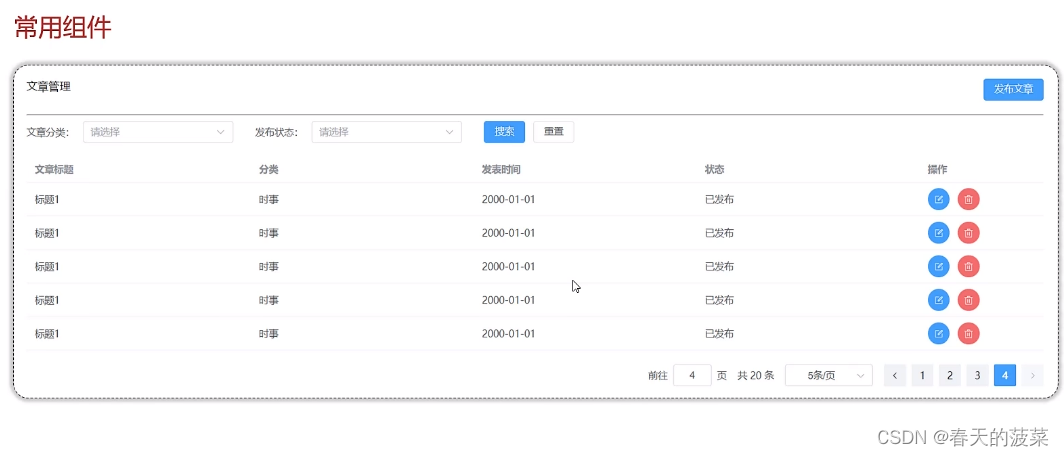
导入卡片组件,将之前的组件放放在卡片组件内
<script lang="ts" setup>
// 按钮icon
import { Delete,Edit,
} from '@element-plus/icons-vue'// 分页组件导入
import { ref } from 'vue'// 表单组件 行内表单
import { reactive } from 'vue'
const formInline = reactive({user: '',region: '',date: '',
})const onSubmit = () => {console.log('submit!')
}// 分页 组件
const currentPage4 = ref(4)
const pageSize4 = ref(5)
const small = ref(false)
const background = ref(false)
const disabled = ref(false)
const total = ref(20)const handleSizeChange = (val: number) => {console.log(`${val} items per page`)
}
const handleCurrentChange = (val: number) => {console.log(`current page: ${val}`)
}const tableData = [{title: '标题1',category: '时事',time: '2023-01-02',state: '已发布',},{title: '标题1',category: '时事',time: '2023-01-02',state: '已发布',},{title: '标题1',category: '时事',time: '2023-01-02',state: '已发布',},{title: '标题1',category: '时事',time: '2023-01-02',state: '已发布',}]
</script>
<template><!-- 卡片组件 --><el-card class="box-card">   <div class="card-header"><span>文章管理</span><el-button type="primary">发布文章</el-button>      </div> <div style="margin-top: 20px;"><hr></div><!-- 表单组件  行内表单 --><el-form :inline="true" :model="formInline" class="demo-form-inline"><!-- 查询条件1 --><el-form-item label="文章分类:"><el-selectv-model="formInline.region"placeholder="请选择"clearable><el-option label="时事" value="时事" /><el-option label="篮球" value="篮球" /></el-select></el-form-item><!-- 查询条件2 --><el-form-item label="发布状态:"><el-selectv-model="formInline.region"placeholder="请选择"clearable><el-option label="已发布" value="已发布" /><el-option label="草稿" value="草稿" /></el-select></el-form-item><!-- 查询按钮--><el-form-item><el-button type="primary" @click="onSubmit">查询</el-button>  </el-form-item><!-- 重置按钮 --><el-form-item>      <el-button type="default" @click="onSubmit">重置</el-button></el-form-item></el-form><!-- 表格组件 --><el-table :data="tableData" style="width: 100%"><el-table-column prop="title" label="文章标题"/><el-table-column prop="category" label="分类"/><el-table-column prop="time" label="发表时间" /><el-table-column prop="state" label="状态" /><el-table-column  label="操作"  width="180" ><el-row><el-button type="primary" :icon="Edit" circle />    <el-button type="danger" :icon="Delete" circle /></el-row></el-table-column></el-table><!-- 分页组件 --><el-paginationclass="el-p"v-model:current-page="currentPage4"v-model:page-size="pageSize4":page-sizes="[5, 10, 15, 40200]":small="small":disabled="disabled":background="background"layout="jumper, total, sizes, prev, pager, next":total="total"@size-change="handleSizeChange"@current-change="handleCurrentChange"/></el-card>    </template><style scoped>.el-p{margin-top: 20px;display: flex;justify-content: flex-end;}.card-header{display: flex;justify-content: space-between;}</style>