(动手学习深度学习)第13章 计算机视觉---微调
文章目录
- 微调
- 总结
- 微调代码实现
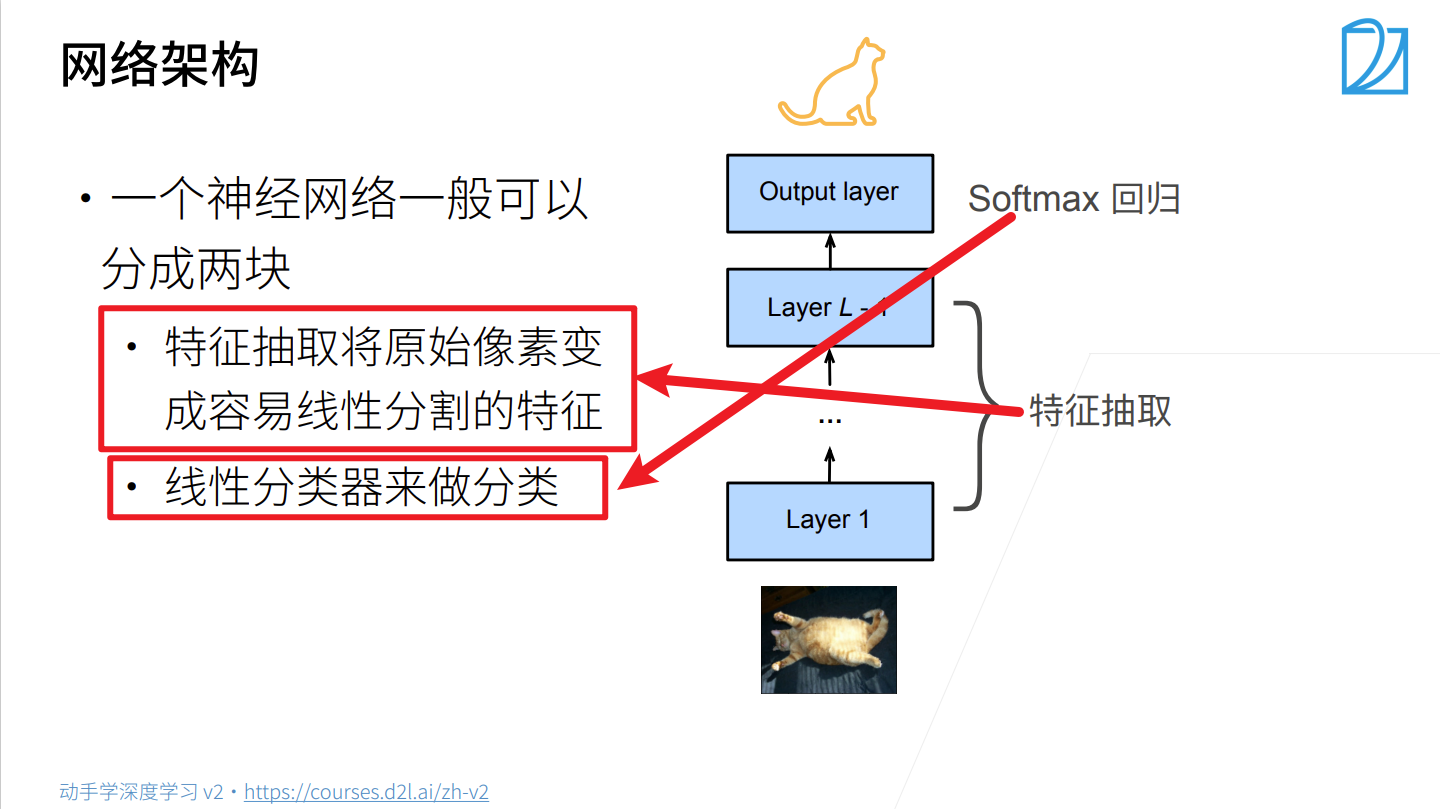
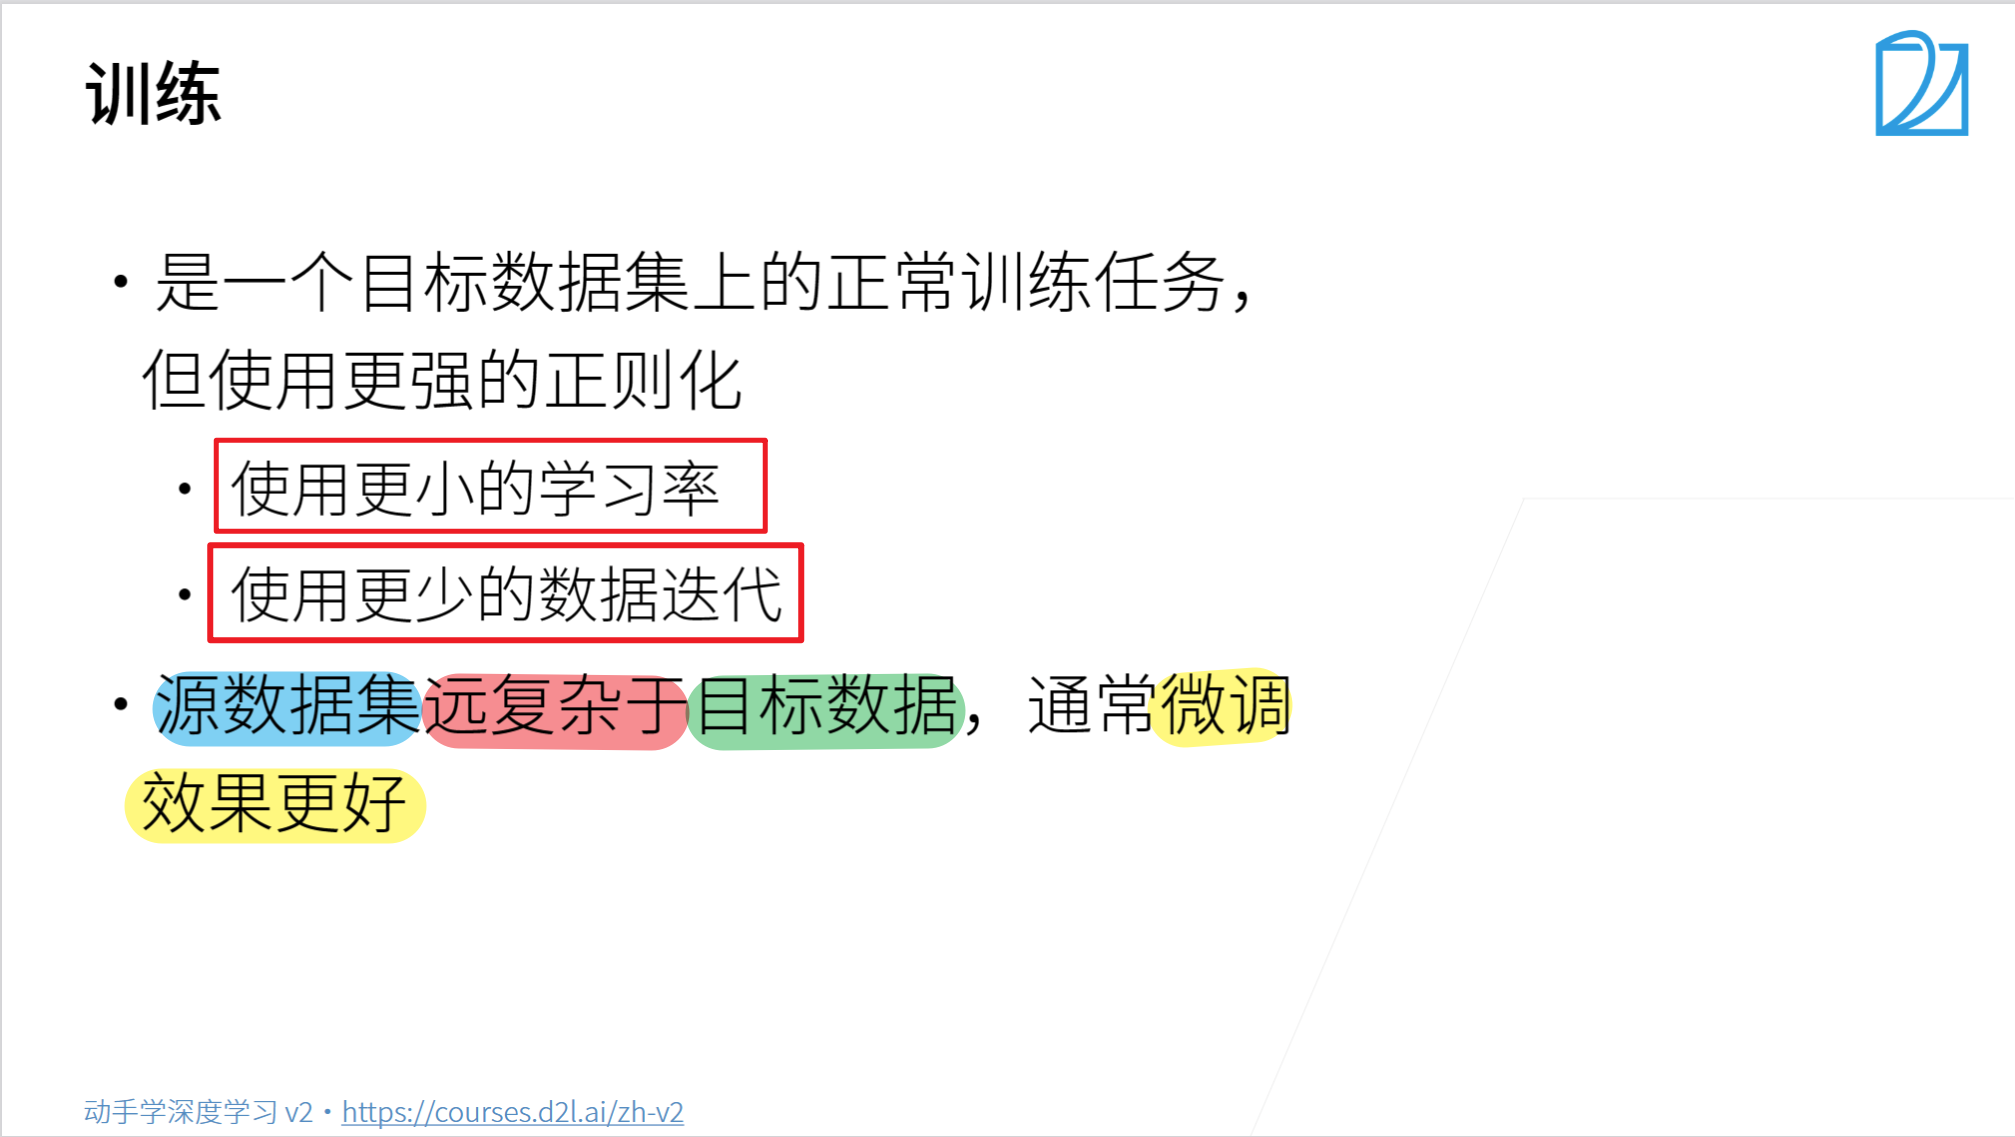
微调

总结
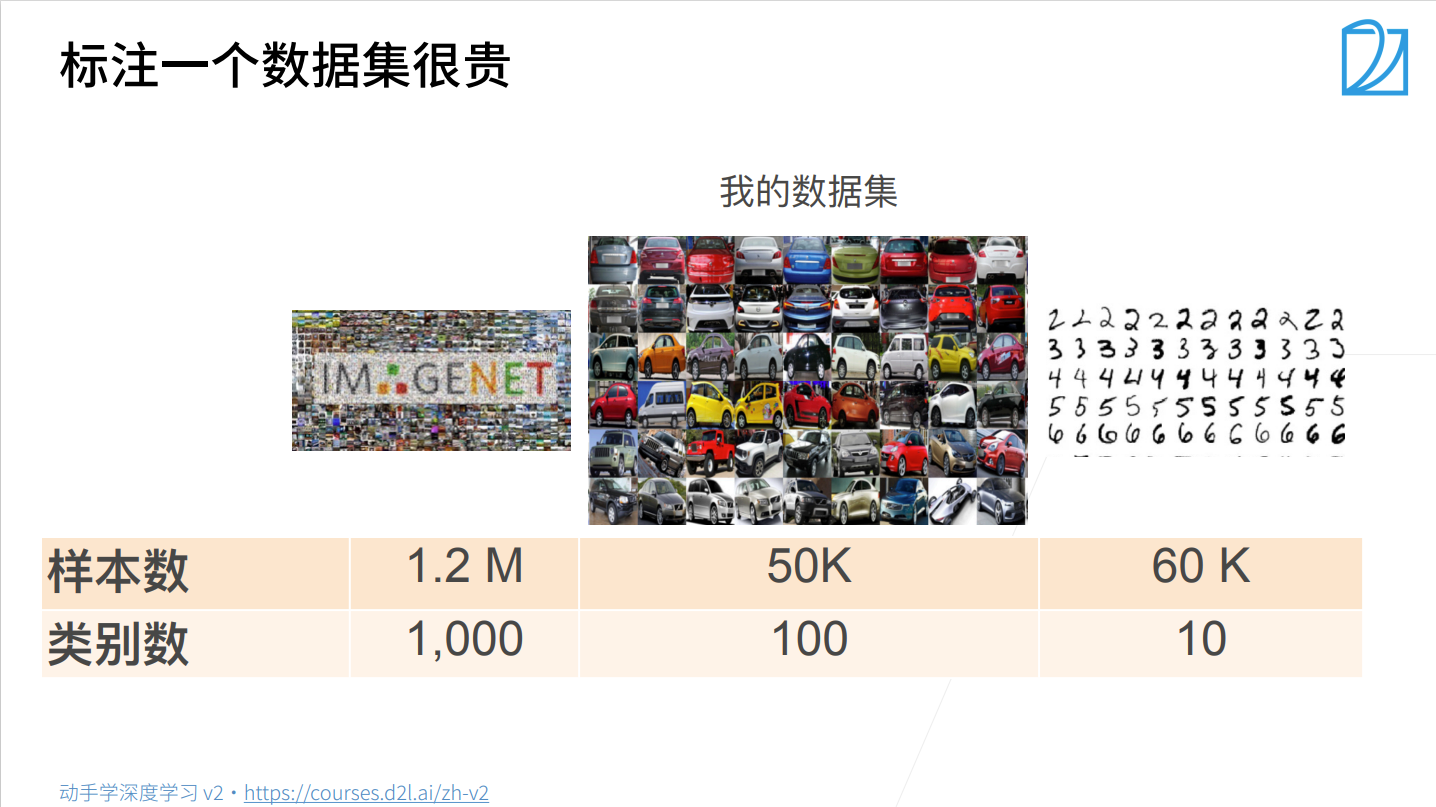
- 微调通过使用在大数据上的恶道的预训练好的模型来初始化模型权重来完成提升精度。
- 预训练模型质量很重要
- 微调通常速度更快、精确度更高
微调代码实现
- 导入相关库
%matplotlib inline
import os
import torch
import torchvision
from torch import nn
from d2l import torch as d2l
import matplotlib as plt
- 获取数据集
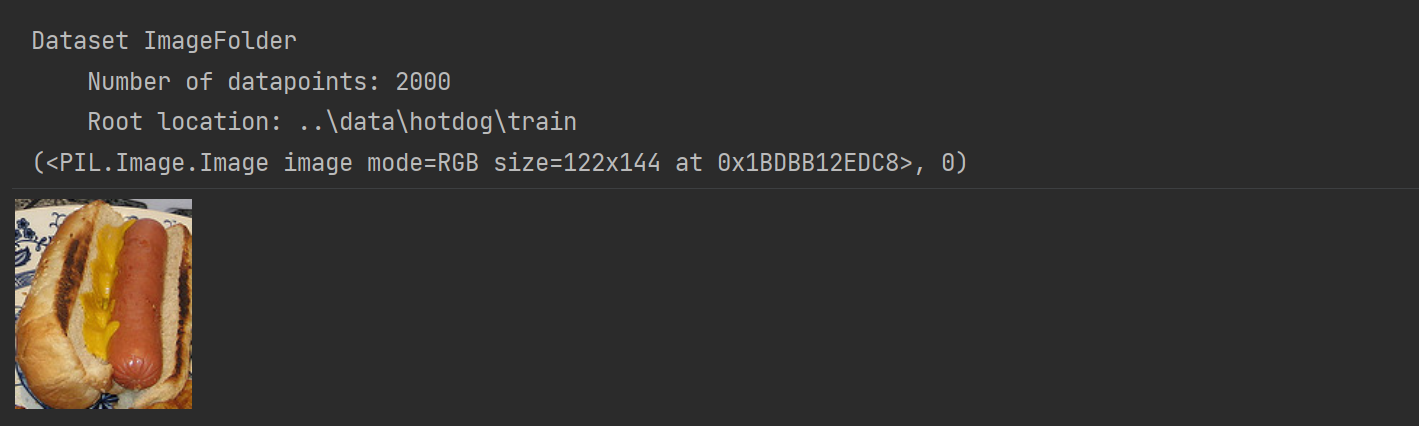
d2l.DATA_HUB['hotdog'] = (d2l.DATA_URL + 'hotdog.zip','fba480ffa8aa7e0febbb511d181409f899b9baa5')data_dir = d2l.download_extract('hotdog')
train_imgs = torchvision.datasets.ImageFolder(os.path.join(data_dir,'train'))
test_imgs = torchvision.datasets.ImageFolder(os.path.join(data_dir,'test'))
print(train_imgs)
print(train_imgs[0])
train_imgs[0][0]
查看数据集中图像的形状
hotdogs = [train_imgs[i][0] for i in range(8)]
not_hotdogs= [train_imgs[-i-1][0] for i in range(8)]
d2l.show_images(hotdogs + not_hotdogs, 2 ,8, scale=1.4)

- 数据增强
# 图像增广
normalize = torchvision.transforms.Normalize([0.485, 0.456, 0.406], [0.229, 0.224,0.225]
)
train_augs = torchvision.transforms.Compose(  # 训练集数据增强[torchvision.transforms.RandomResizedCrop(224),torchvision.transforms.RandomHorizontalFlip(),torchvision.transforms.ToTensor(),normalize]
)
test_augs = torchvision.transforms.Compose(  # 验证集不做数据增强[torchvision.transforms.Resize(256),torchvision.transforms.CenterCrop(224),torchvision.transforms.ToTensor(),normalize]
)
- 定义和初始化模型
# 下载resnet18,
# 老:pretrain=True: 也下载预训练的模型参数
# 新:weights=torchvision.models.ResNet18_Weights.IMAGENET1K_V1
pretrained_net = torchvision.models.resnet18(weights=torchvision.models.ResNet18_Weights.IMAGENET1K_V1)
print(pretrained_net.fc)

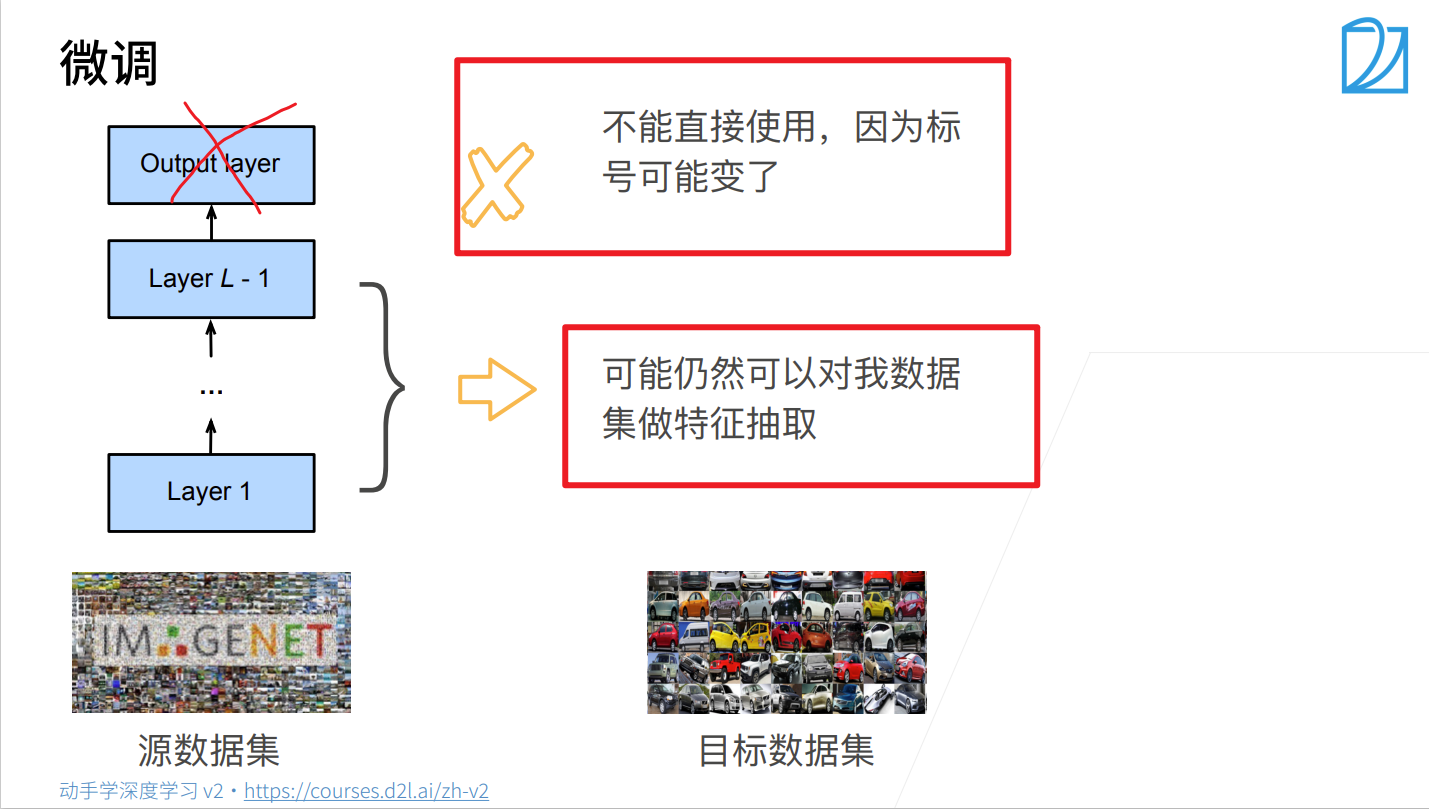
- 微调模型
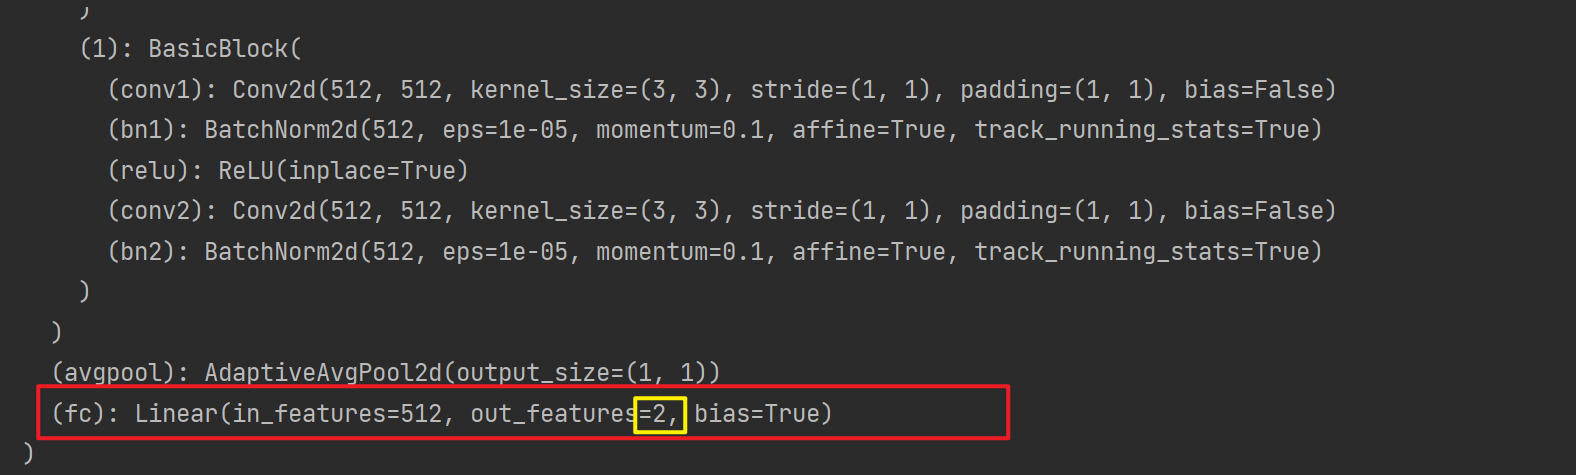
- (1)直接修改网络层(如最后全连接层:512—>1000,改成512—>2)
- (2)在增加一层分类层(如:512—>1000, 改成512—>1000, 1000—>2)
本次选择(1):将resnet18最后全连接层的输出,改成自己训练集的类别,并初始化最后全连接层的权重参数
finetune_net = pretrained_net
finetune_net.fc = nn.Linear(finetune_net.fc.in_features, 2)
nn.init.xavier_uniform_(finetune_net.fc.weight)

print(finetune_net)
- 训练模型
- 特征提取层(预训练层):使用较小的学习率
- 输出全连接层(微调层):使用较大的学习率
def train_fine_tuning(net, learning_rate, batch_size=128, num_epochs=10, param_group=True):train_iter = torch.utils.data.DataLoader(torchvision.datasets.ImageFolder(os.path.join(data_dir,'train'), transform=train_augs),batch_size=batch_size,shuffle=True)test_iter = torch.utils.data.DataLoader(torchvision.datasets.ImageFolder(os.path.join(data_dir, 'test'), transform=test_augs),batch_size=batch_size)device = d2l.try_all_gpus()loss = nn.CrossEntropyLoss(reduction='none')if param_group:params_1x = [param for name, param in net.named_parameters()if name not in ['fc.weight', 'fc.bias']]trainer = torch.optim.SGD([{'params': params_1x}, {'params': net.fc.parameters(), 'lr': learning_rate * 10}],lr=learning_rate, weight_decay=0.001)else:trainer = torch.optim.SGD(net.parameters(),lr=learning_rate,weight_decay=0.001)d2l.train_ch13(net, train_iter, test_iter, loss,trainer, num_epochs, device)
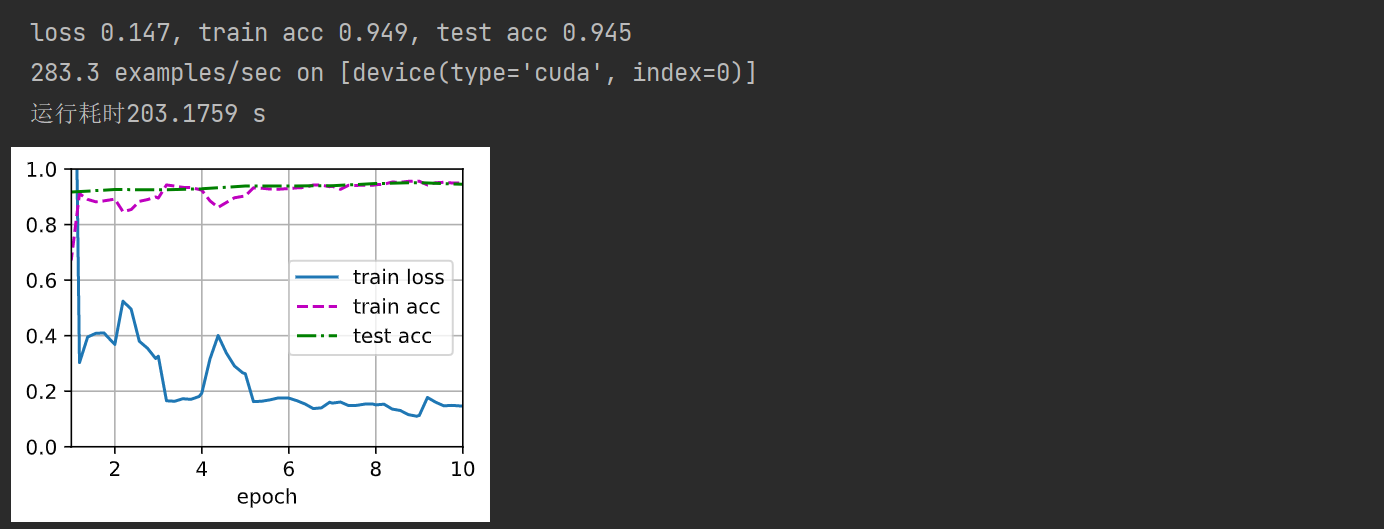
训练模型
import time# 在开头设置开始时间
start = time.perf_counter()  # start = time.clock() python3.8之前可以train_fine_tuning(finetune_net, 5e-5, 128, 10)# 在程序运行结束的位置添加结束时间
end = time.perf_counter()  # end = time.clock()  python3.8之前可以# 再将其进行打印,即可显示出程序完成的运行耗时
print(f'运行耗时{(end-start):.4f} s')
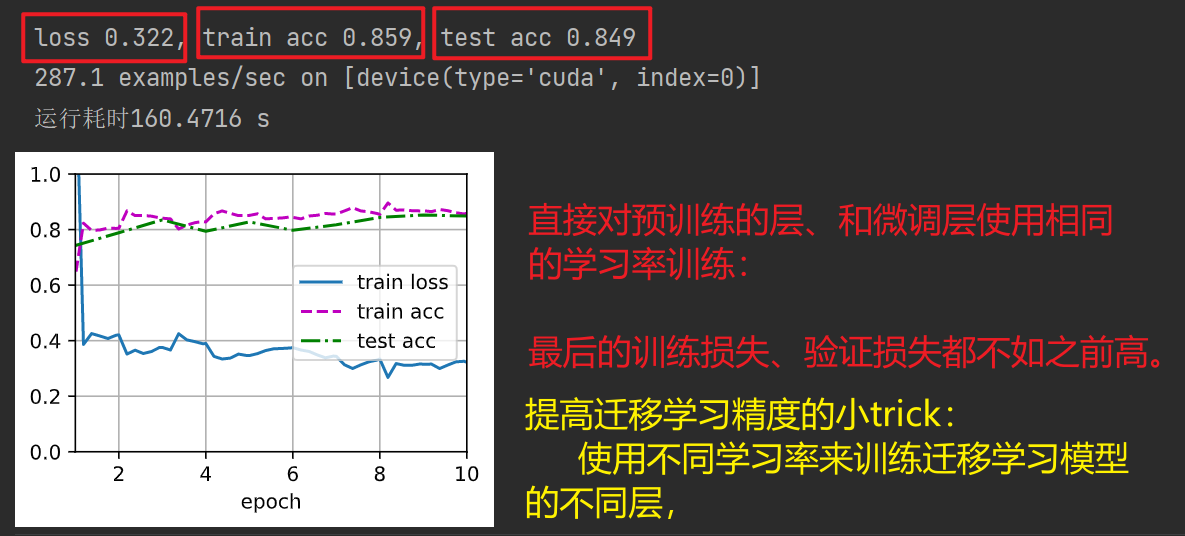
直接训练:整个模型都使用相同的学习率,重新训练
scracth_net = torchvision.models.resnet18()
scracth_net.fc = nn.Linear(scracth_net.fc.in_features, 2)import time# 在开头设置开始时间
start = time.perf_counter()  # start = time.clock() python3.8之前可以train_fine_tuning(scracth_net, 5e-4, param_group=False)# 在程序运行结束的位置添加结束时间
end = time.perf_counter()  # end = time.clock()  python3.8之前可以# 再将其进行打印,即可显示出程序完成的运行耗时
print(f'运行耗时{(end-start):.4f} s')