python实战之PyQt5桌面软件
一. 演示效果

二. 准备工作
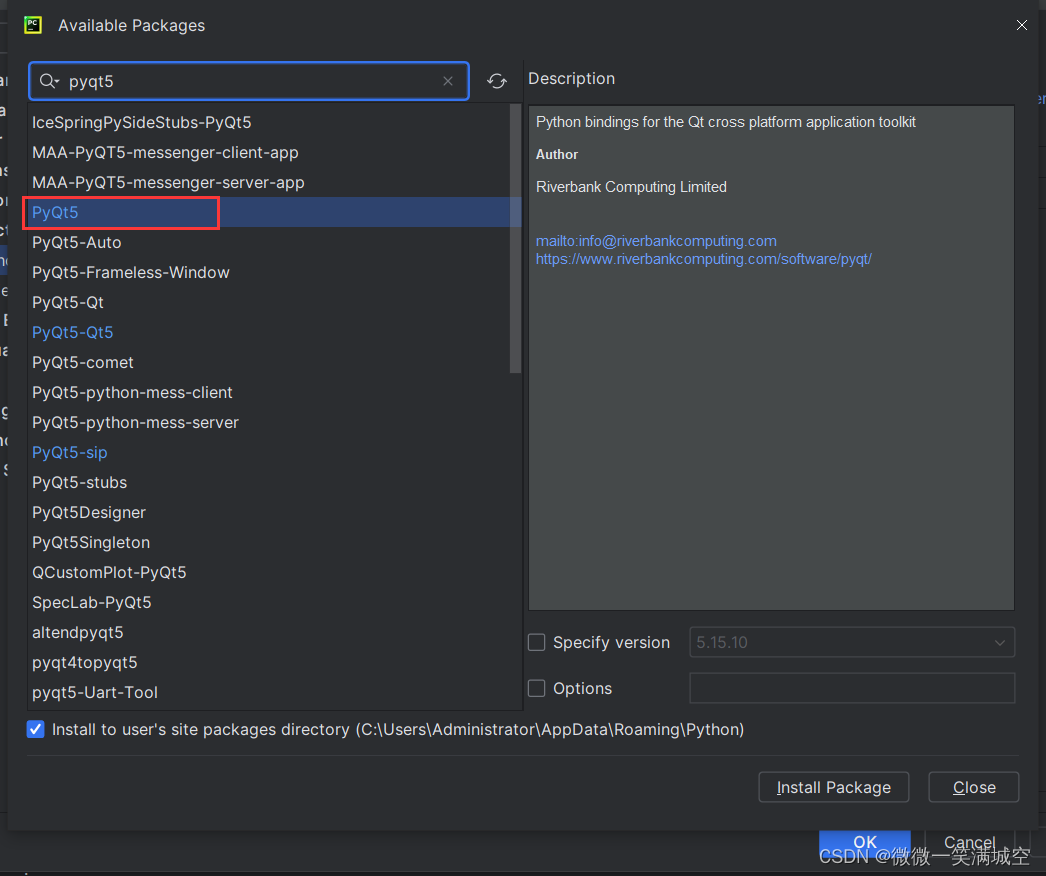
1. 使用pip 下载所需包 pyqt5
2. 下载可视化UI工具 QT Designer
链接:https://pan.baidu.com/s/1ic4S3ocEF90Y4L1GqYHPPA?pwd=ywct
提取码:ywct
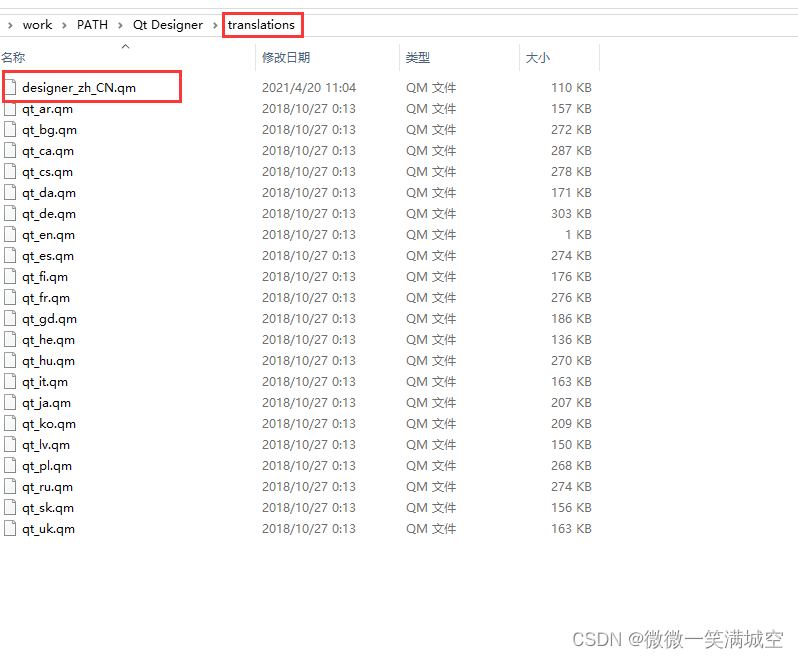
3. 可视化UI工具汉化
把上面的链接打开, 里面有安装和汉化包, 前面的路径还要看你安装在哪里, 然后把汉化包直接放到这个文件夹中就可以了
4. pycharm配置QT Designer

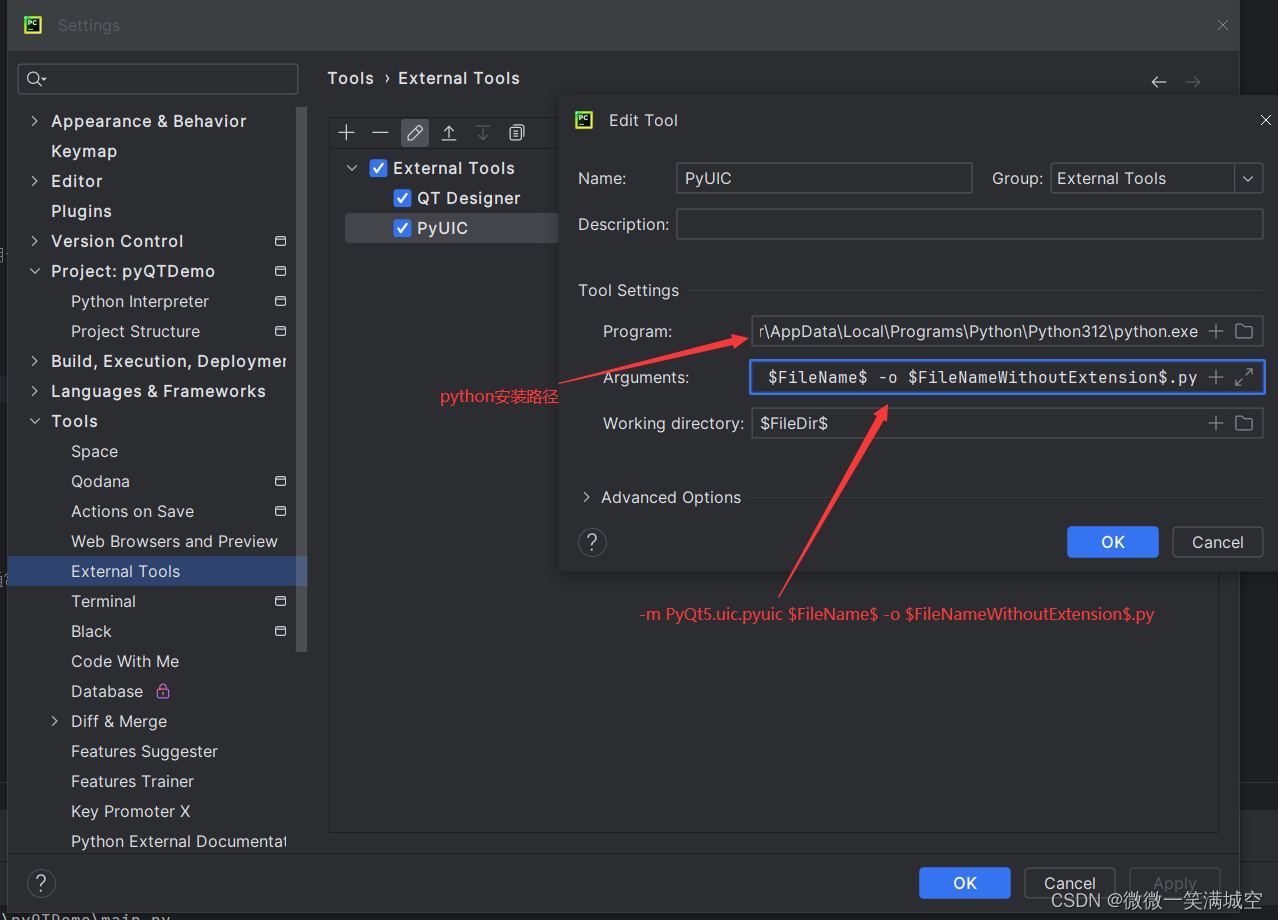
Arguments: -m PyQt5.uic.pyuic $FileName$ -o $FileNameWithoutExtension$.py
QT Designer作用: 快速打开QT Designer布局工具
PyUIC作用: .ui布局文件转成.py布局文件, 也就是test.ui -> test.py

三. 代码
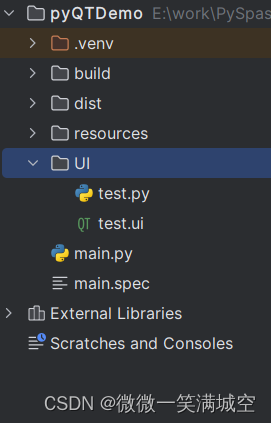
1. 文件结构
2. 代码
test.ui
<?xml version="1.0" encoding="UTF-8"?>
<ui version="4.0"><class>MainWindow</class><widget class="QMainWindow" name="MainWindow"><property name="geometry"><rect><x>0</x><y>0</y><width>800</width><height>600</height></rect></property><property name="windowTitle"><string>MainWindow</string></property><property name="toolButtonStyle"><enum>Qt::ToolButtonIconOnly</enum></property><widget class="QWidget" name="centralwidget"><widget class="QLabel" name="label"><property name="geometry"><rect><x>250</x><y>90</y><width>91</width><height>41</height></rect></property><property name="font"><font><pointsize>16</pointsize><weight>50</weight><bold>false</bold></font></property><property name="text"><string>欢迎使用</string></property></widget><widget class="QLabel" name="label_2"><property name="geometry"><rect><x>370</x><y>90</y><width>181</width><height>41</height></rect></property><property name="font"><font><pointsize>16</pointsize><weight>75</weight><bold>true</bold></font></property><property name="text"><string>计时器</string></property></widget><widget class="QLabel" name="label_3"><property name="enabled"><bool>true</bool></property><property name="geometry"><rect><x>220</x><y>100</y><width>21</width><height>21</height></rect></property><property name="text"><string/></property><property name="pixmap"><pixmap>../resources/icon/icon.ico</pixmap></property><property name="scaledContents"><bool>true</bool></property></widget><widget class="QSlider" name="horizontalSlider"><property name="geometry"><rect><x>110</x><y>190</y><width>571</width><height>16</height></rect></property><property name="mouseTracking"><bool>false</bool></property><property name="orientation"><enum>Qt::Horizontal</enum></property></widget><widget class="QPushButton" name="pushButton"><property name="geometry"><rect><x>230</x><y>260</y><width>75</width><height>23</height></rect></property><property name="text"><string>开始计时</string></property></widget><widget class="QPushButton" name="pushButton_2"><property name="geometry"><rect><x>430</x><y>260</y><width>75</width><height>23</height></rect></property><property name="text"><string>重置计时</string></property></widget><widget class="QLabel" name="label_4"><property name="geometry"><rect><x>700</x><y>190</y><width>31</width><height>16</height></rect></property><property name="text"><string>0</string></property></widget></widget><widget class="QStatusBar" name="statusbar"/></widget><resources><include location="../resources/icon/qrcResources.qrc"/></resources><connections><connection><sender>horizontalSlider</sender><signal>sliderMoved(int)</signal><receiver>label_4</receiver><slot>setNum(int)</slot><hints><hint type="sourcelabel"><x>395</x><y>197</y></hint><hint type="destinationlabel"><x>715</x><y>197</y></hint></hints></connection><connection><sender>label_4</sender><signal>windowIconTextChanged(QString)</signal><receiver>horizontalSlider</receiver><slot>setFocus()</slot><hints><hint type="sourcelabel"><x>715</x><y>197</y></hint><hint type="destinationlabel"><x>395</x><y>197</y></hint></hints></connection><connection><sender>pushButton</sender><signal>clicked()</signal><receiver>label_4</receiver><slot>update()</slot><hints><hint type="sourcelabel"><x>267</x><y>271</y></hint><hint type="destinationlabel"><x>715</x><y>197</y></hint></hints></connection></connections>
</ui>
test.py
# -*- coding: utf-8 -*-# Form implementation generated from reading ui file 'test.ui'
#
# Created by: PyQt5 UI code generator 5.15.10
#
# WARNING: Any manual changes made to this file will be lost when pyuic5 is
# run again.  Do not edit this file unless you know what you are doing.from PyQt5 import QtCore, QtGui, QtWidgets
from PyQt5.QtWidgets import QApplicationclass Ui_MainWindow(object):def setupUi(self, MainWindow):MainWindow.setObjectName("MainWindow")MainWindow.resize(800, 600)MainWindow.setToolButtonStyle(QtCore.Qt.ToolButtonIconOnly)self.centralwidget = QtWidgets.QWidget(MainWindow)self.centralwidget.setObjectName("centralwidget")self.label = QtWidgets.QLabel(self.centralwidget)self.label.setGeometry(QtCore.QRect(250, 90, 91, 41))font = QtGui.QFont()font.setPointSize(16)font.setBold(False)font.setWeight(50)self.label.setFont(font)self.label.setObjectName("label")self.label_2 = QtWidgets.QLabel(self.centralwidget)self.label_2.setGeometry(QtCore.QRect(370, 90, 181, 41))font = QtGui.QFont()font.setPointSize(16)font.setBold(True)font.setWeight(75)self.label_2.setFont(font)self.label_2.setObjectName("label_2")self.label_3 = QtWidgets.QLabel(self.centralwidget)self.label_3.setEnabled(True)self.label_3.setGeometry(QtCore.QRect(220, 100, 21, 21))self.label_3.setText("")self.label_3.setPixmap(QtGui.QPixmap("../resources/icon/icon.ico"))self.label_3.setScaledContents(True)self.label_3.setObjectName("label_3")self.horizontalSlider = QtWidgets.QSlider(self.centralwidget)self.horizontalSlider.setGeometry(QtCore.QRect(110, 190, 571, 16))self.horizontalSlider.setMouseTracking(False)self.horizontalSlider.setOrientation(QtCore.Qt.Horizontal)self.horizontalSlider.setObjectName("horizontalSlider")self.pushButton = QtWidgets.QPushButton(self.centralwidget)self.pushButton.setGeometry(QtCore.QRect(230, 260, 75, 23))self.pushButton.setObjectName("pushButton")self.pushButton_2 = QtWidgets.QPushButton(self.centralwidget)self.pushButton_2.setGeometry(QtCore.QRect(430, 260, 75, 23))self.pushButton_2.setObjectName("pushButton_2")self.label_4 = QtWidgets.QLabel(self.centralwidget)self.label_4.setGeometry(QtCore.QRect(700, 190, 31, 16))self.label_4.setObjectName("label_4")MainWindow.setCentralWidget(self.centralwidget)self.statusbar = QtWidgets.QStatusBar(MainWindow)self.statusbar.setObjectName("statusbar")MainWindow.setStatusBar(self.statusbar)self.retranslateUi(MainWindow)self.horizontalSlider.sliderMoved['int'].connect(self.label_4.setNum) # type: ignoreself.label_4.windowIconTextChanged['QString'].connect(self.horizontalSlider.setFocus) # type: ignoreself.pushButton.clicked.connect(self.zidongflush) # type: ignoreQtCore.QMetaObject.connectSlotsByName(MainWindow)def zidongflush(self):# 按钮设置不可点击self.pushButton.setText("进行中...")self.pushButton.setEnabled(False)# 假设 label_4 已经设置了数字文本,尝试转换成整数try:numb = int(self.label_4.text())except ValueError:numb = 10  # 如果不能转换,则默认为0for _ in range(numb, -1, -1):  # 从 numb 开始递减至 0self.label_4.setText(str(_))  # 设置新的文本self.label_4.update()  # 触发重绘self.horizontalSlider.setValue(_)# 等待一段时间,模拟计时QtCore.QThread.msleep(1000)QApplication.processEvents()  # 让事件循环有机会处理其他事件,防止界面卡死self.pushButton.setText("开始计时")self.pushButton.setEnabled(True)def retranslateUi(self, MainWindow):_translate = QtCore.QCoreApplication.translateMainWindow.setWindowTitle(_translate("MainWindow", "MainWindow"))self.label.setText(_translate("MainWindow", "欢迎使用"))self.label_2.setText(_translate("MainWindow", "计时器工具"))self.pushButton.setText(_translate("MainWindow", "开始计时"))self.pushButton_2.setText(_translate("MainWindow", "重置计时"))self.label_4.setText(_translate("MainWindow", "0"))
main.py
import sysfrom PyQt5.QtWidgets import QApplication, QMainWindowfrom UI.test import Ui_MainWindowif __name__ == '__main__':# 创建QApplication实例,传入系统命令行参数app = QApplication(sys.argv)# 创建主窗口,一个应用程序通常只有一个主窗口MainWindow = QMainWindow()# 加载主窗口的用户界面,Ui_MainWindow是自动生成的类,用于控制界面布局和元素ui = Ui_MainWindow()# 使用ui类中的方法设置主窗口的界面,完成界面初始化ui.setupUi(MainWindow)# 设置主窗口的标题MainWindow.setWindowTitle('HG')# 显示主窗口,使得用户可以与之交互MainWindow.show()# 运行应用程序,直到应用程序结束。这里退出应用程序的条件通常是用户关闭了主窗口sys.exit(app.exec_())四. 打包- pyinstaller
说明: 桌面软件开发完毕之后, 需要打包成.exe文件, 这样才能分发给其他人使用
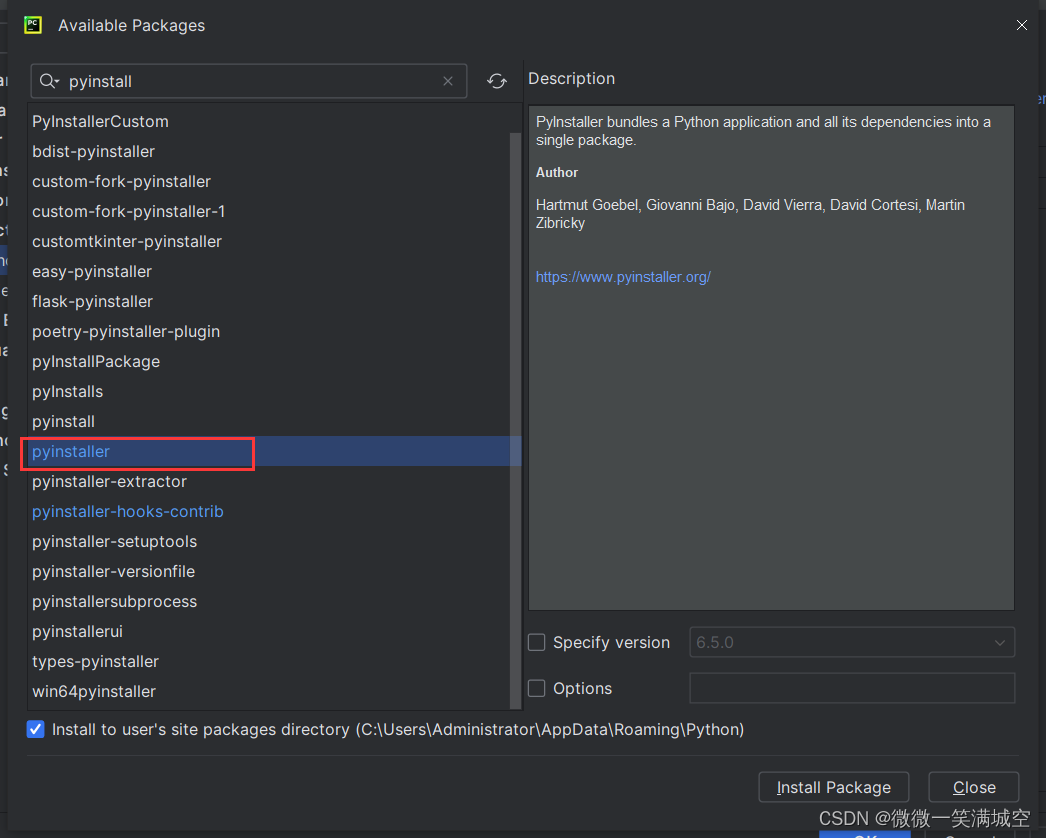
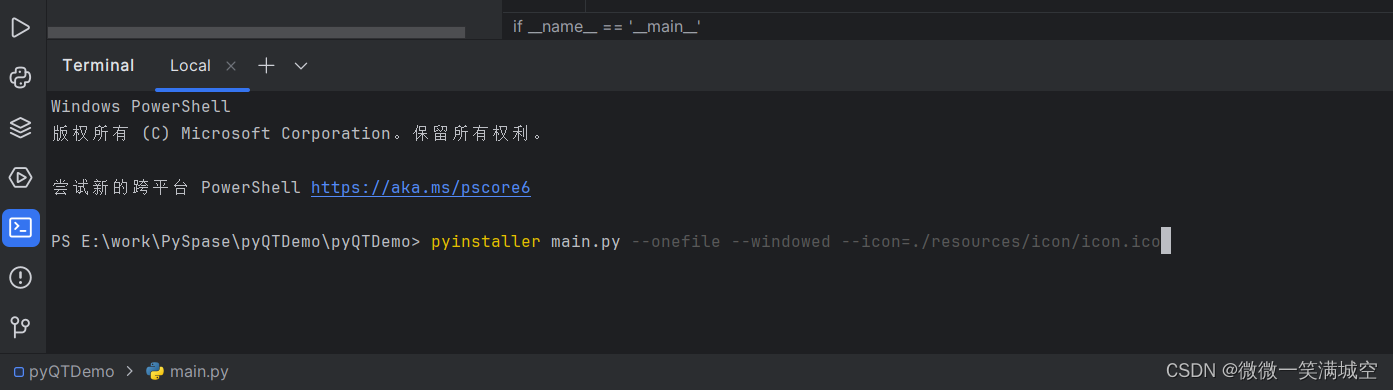
下载好之后, 把pyinstaller配置到电脑的PATH中, 这样就可以使用cmd执行了
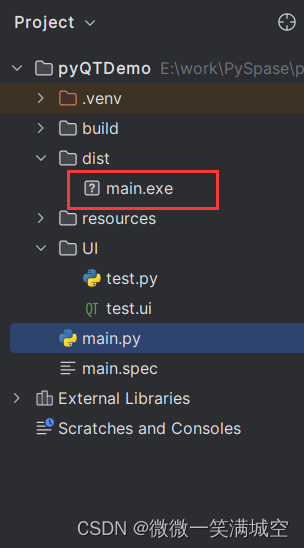
打包后的样子
完毕!!! 希望可以让刚开始学的小伙伴增加点思路~