【C++】模拟实现list
在上篇中我们已经了解过的list各种接口的功能使用,接下来我们就试着模拟实现一下吧!
注意:我们在此实现的和C++标准库中实现的有所不同,其目的主要是帮助大家大概理解底层原理。list的底层结构是带头双向循环链表,是链表就需要有结点,可以单独用一个结构类来存放一个结点的信息,它的大致框架是:
//写成模板的原因是使其适应结点中数据的各种类型
template<class T>
struct list_node  //结点的结构,在C++中struct也是类,与class的区别是,它的成员默认是公有
{T _data;list_node<T>* _prev;list_node<T>* _next;//构造函数list_node(const T& data = T()):_data(data),_prev(nullptr),_next(nullptr)     {}};template<class T>
class list
{typedef list_node<T> Node;public://...private:Node* _head;  //指向头节点(哨兵位)size_t _size;  //记录容器中结点个数
};
我们本篇以实现为主,不再细讲各个函数功能介绍。
如果大家对各个成员函数还不太了解其功能时,可以去先看一下这篇文章 -> list容器的基本使用
一、构造函数
//构造函数
list()
{//new一个哨兵位头结点_head = new Node;_head->_prev = _head;_head->_next = _head;_size = 0;
}
对链表进行初始化,即生成一个哨兵位头结点。
二、成员函数
1、size()
//返回当前容器内结点个数
size_t size() const
{return _size;
}
2、empty()
//判断当前容器中结点个数是否为空,若为空返回true,否则返回false
bool empty() const
{//这两种写法都可以//return _size == 0;return _head->_next = _head;
}
3、clear()
//清空容器内所有结点
void clear()
{auto it = begin();while (it != end()){it = erase(it);}
}
4、push_back()
//在尾部插入一个新结点,它的值为x
void push_back(const T& x)
{Node* newnode = new Node(x); //生成一个新结点Node* tail = _head->_prev;   //记录插入前最后一个结点的位置//插入新结点的过程tail->_next = newnode;newnode->_next = _head;newnode->_prev = tail;_head->_prev = newnode;//更新_size++_size;
}
5、insert()
注意:看以下几个成员函数建议先看一下本篇中的三、迭代器。
//在it位置之前插入一个新结点,它的值为x
void insert(iterator it, const T& x)
{Node* newnode = new Node(x);Node* cur = it._node;  //当前位置Node* prev = cur->_prev; //前一位置//插入过程prev->_next = newnode;newnode->_next = cur;newnode->_prev = prev;cur->_prev = newnode;//更新_size++_size;
}
6、push_front()
//头插
void push_front(const T& x)
{insert(begin(), x); //复用insert
}
我们也可以对push_back进行修改,让它也复用insert:
//尾插
void push_back(const T& x)
{insert(end(), x);
}
7、erase()
//删除pos位置的结点
void erase(iterator pos)
{assert(pos != end());Node* cur = pos._node;Node* prev = cur->_prev;Node* next = cur->_next;//删除过程prev->_next = next;next->_prev = prev;//释放删除结点的空间delete cur;//更新_size--_size;
}
8、pop_back()
//尾删
void pop_back()
{erase(--end()); //复用erase,end位置上是头结点(哨兵位结点),所以要--
}
9、pop_front()
//头删
void pop_front()
{erase(begin()); //复用erase
}
三、迭代器(重点)
1、普通迭代器
我们在之前学到的string类和vector容器中,由于它们的底层是数组,申请的空间是连续的,所以它们的迭代器支持++和解引用,而list的底层是链表,如果直接++或者解引用是达不到我们想要的结果的,所以我们需要单独写一个类来封装结点的指针。
template<class T>
struct list_iterator  //在C++中struct也是类,与class的区别是,它的成员默认是公有
{typedef list_node<T> Node;typedef list_iterator<T> Self;//构造函数list_iterator(Node* node):_node(node)  //浅拷贝,不需要深拷贝,不用单独写拷贝构造{}//重载解引用操作符,返回当前结点的数据//引用返回的目的是:可以修改当前结点的值T& operator*(){return _node->_data;}//重载前置++,返回值依旧是迭代器Self& operator++(){_node = _node->_next;return *this;}//重载!=用于判断两个结点是否相等bool operator!=(const Self& s) const{return _node != s._node;}
public:Node* _node;
};
迭代器本质上就是指针,由于单纯的指针进行++或解引用达不到我们的意图,所以我们用类将它封装起来,在类中重载运算符,使运算符的效果达到我们的意图,大家不要被这种结构所吓倒,只要理解了,它也没那么难。
在list这个类中可以添加与迭代器相关的接口:
public:typedef list_iterator<T> iterator; //typedef的类型也受访问限定符的限制iterator begin(){//有名对象//iterator it(_head->_next);//return it;//匿名对象//return iterator(_head->_next);return _head->_next; //隐式类型转换//以上3种写法均可}iterator end(){return _head;}我们来写一段简单的代码,验证一下功能:
在主函数中调用test_list1:
void test_list1()
{list<int> lt;lt.push_back(1);lt.push_back(2);lt.push_back(3);lt.push_back(4);lt.push_back(5);list<int>::iterator it = lt.begin();while (it != lt.end())   //这里!=已经是重载后的结果{cout << *it << " ";  //这里的解引用也是重载后的结果++it;  //这里的++还是重载后的结果}cout << endl;
}
运行结果:

从结果上看,我们写的代码是没问题的。
我们发现每个容器的迭代器遍历方式几乎一模一样,但是底层是大相径庭的。这就体现了封装的好处,不管是什么容器,都可以用这种方式进行遍历。
用Node*定义的对象是4个字节,用iterator定义的对象也是4个字节,用Node*定义的对象解引用和++不符合我们的要求,用iterator定义的对象解引用和++可以满足我们的要求,这就体现出封装的魅力。
了解上述过程后,我们再来补充一些运算符重载:
//前置--
Self& operator--()
{_node = _node->_prev;return *this;
}
//后置++
Self operator++(int)
{Self tmp(*this); //用系统提供的拷贝构造,完成浅拷贝,因为是迭代器的指针,它的作用就是便于访问,所以不需要写深拷贝_node = _node->_next;return tmp;
}
//后置--
Self operator--(int)
{Self tmp(*this);_node = _node->_next;return tmp;
}
//相等
bool operator==(const Self& s) const
{return _node == s._node;
}
迭代器通常模拟指针的功能,自定义类型的指针支持"->"这个操作符,所以我们也可以重载"->"让迭代器也可以使用。
举个例子:
struct AA
{int _a1;
};void test_list2()
{list<AA> lta;lta.push_back(AA());lta.push_back(AA());lta.push_back(AA());list<AA>::iterator ita = lta.begin();while (ita != lta.end()){cout << *ita << " ";++ita;}cout << endl;
}
这段代码是运行不起来的,因为lta中的元素是AA这种自定义类型,*ita解引用后会得到AA类型的对象,自定义类型是不支持流插入和流提取的,所以运行不起来。
解决方法1:在AA中重载流插入和流提取
解决方法2:换一种形式打印。
list<AA>::iterator ita = lta.begin();
while (ita != lta.end())
{cout << (*ita)._a1 << " ";++ita;
}
cout << endl;
解决方法3:在迭代器中重载"->",然后用 ita->_a1 的方式访问。
//在list_iterator中重载"->"
T* operator->()
{return &(_node->_data);
}
调用时:
list<AA>::iterator ita = lta.begin();
while (ita != lta.end())
{cout << ita->_a1 << " "; //按理说应该是ita->->_a1,但两个"->"显得不美观,降低了可读性,所以省略了一个"->"//cout << ita.operator->()->_a1 << " "; //也可以用这行代码进行理解++ita;
}
cout << endl;
运行结果:

2、通用容器打印方法
在模拟实现vector这篇文章中时,我们用到了通用的容器打印方法print_container(),既然是通用的,那么在list容器中也可以同样的调用。
template<class Container>
void print_container(const Container& con)
{//方式1//typename Container::const_iterator it = con.begin();//因为con被const修饰,所以这里的it必须是const_iterator//while (it != con.end())//{//cout << *it << " ";//++it;//}//cout << endl;//方式2for (auto e : con) // 因为con被const修饰,这里的范围for底层调用的必须是const迭代器{cout << e << " ";}cout << endl;
}
3、const迭代器
既然有了通用的打印方法,我们可以写一段代码来验证一下:
在主函数中调用test_list3():
void test_list3()
{list<int> lt;lt.push_back(1);lt.push_back(2);lt.push_back(3);lt.push_back(4);lt.push_back(5);print_container(lt);
}
运行结果:

运行报错。 这是因为我们调用print_container()时传的时普通的容器,而print_container()接收的是const类型的容器,所以在用范围for进行数据打印时,必须传const类型的迭代器。我们当前是普通类型的迭代器,所以报错了。
这里需要区分:const iterator 和 const_iterator 前者是迭代器本身不能修改(这就不能打印了,因为打印时需要++it),后者是迭代器指向的内容不能修改。我们所说的const类型的迭代器是后者(const_iterator)。
在普通迭代器中能修改指向内容的地方只有两个,一是重载解引用(*),二是重载"->"。我们如果想要由普通迭代器改写为const迭代器,就必须单独对着两处进行限制:
template<class T>
struct list_const_iterator
{typedef list_node<T> Node;typedef list_const_iterator<T> Self;//构造函数list_const_iterator(Node* node):_node(node)  //浅拷贝,不需要深拷贝,不用单独写拷贝构造{}//重载解引用操作符,返回当前结点的数据//引用返回的目的是:可以修改当前结点的值const T& operator*(){return _node->_data;}const T* operator->(){return &(_node->_data);}//重载前置++,返回值依旧是迭代器Self& operator++(){_node = _node->_next;return *this;}//前置--Self& operator--(){_node = _node->_prev;return *this;}//后置++Self operator++(int){Self tmp(*this); //用系统提供的拷贝构造,完成浅拷贝,因为是迭代器的指针,它的作用就是便于访问,所以不需要写深拷贝_node = _node->_next;return tmp;}//后置--Self operator--(int){Self tmp(*this);_node = _node->_next;return tmp;}//不等bool operator!=(const Self& s) const{return _node != s._node;}//相等bool operator==(const Self& s) const{return _node == s._node;}
public:Node* _node;
};
操作非常简单,我么只需拷贝一份普通迭代器,对普通迭代器换一下名字,然后单独对重载解引用(*) 和 "->" 的地方做出限制(返回值用const修饰)即可。
然后在list类中添加begin和end方法:
typedef list_const_iterator<T> const_iterator;const_iterator begin() const
{return _head->_next; //隐式类型转换
}
const_iterator end() const
{return _head;//隐式类型转换
}
接下来,我们再次调用test_list3(),看看运行结果:

这样,程序就可以正常运行了。
4、简化
不难发现,我们上面写的list_const_iterator和list_iterator除了operator*和operator->的返回值不一样,其他地方一模一样,那是不是有点冗余了?
由于它们只有两个地方有差异,所以我们可以考虑让它们共用一个模板,只不过模板参数由原先的一个换成三个,具体如下:
template<class T,class Ref,class Ptr>
struct list_iterator
{typedef list_node<T> Node;typedef list_iterator<T,Ref,Ptr> Self;//构造函数list_iterator(Node* node):_node(node)  //浅拷贝,不需要深拷贝,不用单独写拷贝构造{}//重载解引用操作符,返回当前结点的数据//引用返回的目的是:可以修改当前结点的值Ref operator*(){return _node->_data;}Ptr operator->(){return &(_node->_data);}//重载前置++,返回值依旧是迭代器Self& operator++(){_node = _node->_next;return *this;}//前置--Self& operator--(){_node = _node->_prev;return *this;}//后置++Self operator++(int){Self tmp(*this); //用系统提供的拷贝构造,完成浅拷贝,因为是迭代器的指针,它的作用就是便于访问,所以不需要写深拷贝_node = _node->_next;return tmp;}//后置--Self operator--(int){Self tmp(*this);_node = _node->_next;return tmp;}//不等bool operator!=(const Self& s) const{return _node != s._node;}//相等bool operator==(const Self& s) const{return _node == s._node;}
public:Node* _node;
};
在list类中,修改typedef中的内容即可:
//修改前:
//typedef list_iterator<T> iterator;
//typedef list_const_iterator<T> const_iterator;//修改后:
typedef list_iterator<T,T&,T*> iterator;
typedef list_iterator<T,const T&,const T*> const_iterator;
这样就可以达到合二为一的效果。
四、迭代器失效
1、insert()
这里,insert后就不会出现迭代器失效的问题,我们来看一段代码:
在主函数中调用test_list4():
void test_list4()
{list<int> lt;lt.push_back(1);lt.push_back(2);lt.push_back(3);lt.push_back(4);print_container(lt);list<int>::iterator it = lt.begin();lt.insert(it, 10);*it += 100;print_container(lt);
}
运行结果:

插入数据后,it的指向并没有发生改变所以它没有迭代器失效的问题。
2、erase()
删除时就会发生迭代器失效的问题,我们来看一段代码:
void test_list5()
{list<int> lt;lt.push_back(1);lt.push_back(2);lt.push_back(3);lt.push_back(4);cout << "删除前:";print_container(lt);//删除链表中数据是偶数的结点auto it = lt.begin();while (it != lt.end()){if (*it % 2 == 0){lt.erase(it);}++it;}cout << "删除后:";print_container(lt);
}
运行结果:
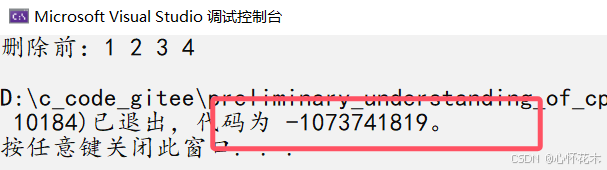
显而易见,程序崩溃了。
我们将it位置删除后,it位置对应的结点被释放了,此时it就是野指针,紧接着++it,这肯定是不合规的, 这也就是迭代器失效导致的。
我们要想解决该问题,就需要将erase的返回值由void改为iterator:
//删除pos位置上的结点
iterator erase(iterator pos)
{assert(pos != end());Node* cur = pos._node;Node* prev = cur->_prev;Node* next = cur->_next;//删除过程prev->_next = next;next->_prev = prev;//释放删除结点的空间delete cur;//更新_size--_size;return next; //返回下一位置的迭代器,隐式类型转换
}
我们测试代码也需要改一下:
void test_list5()
{list<int> lt;lt.push_back(1);lt.push_back(2);lt.push_back(3);lt.push_back(4);cout << "删除前:";print_container(lt);//删除链表中数据是偶数的结点auto it = lt.begin();while (it != lt.end()){if (*it % 2 == 0){it = lt.erase(it);}else //这里加else是为了防止两个重复数据挨在一起导致删不干净的情况{++it;}}cout << "删除后:";print_container(lt);
}
再次运行结果为:

这就解决了迭代器失效的问题。
总结来说:insert后迭代器不失效,erase后迭代器失效。
规范一点的话,我们也应让insert的返回值是iterator:
//在it位置之前插入
iterator insert(iterator it, const T& x)
{Node* newnode = new Node(x);Node* cur = it._node;  //当前位置Node* prev = cur->_prev; //前一位置//插入过程prev->_next = newnode;newnode->_next = cur;newnode->_prev = prev;cur->_prev = newnode;//更新_size++_size;return newnode; //返回插入结点的指针,隐式类型转换
}
五、析构函数
//析构函数
~list()
{clear();  //清空结点delete _head; //单独释放头结点_head = nullptr;
}
六、拷贝构造
list(const list<T>& lt)
{for (auto& e : lt) //加引用是为了防止T是自定义类型{push_back(e);}
}
这段代码是有问题的,假设lt1已经存在,现在调用拷贝构造用lt1构造lt2,"list<int> lt2(lt1)",我们在调用拷贝构造时,lt2就不会调用默认构造了,那么lt2就没有头结点,它的_head就是nullptr,直接调用push_back就会出现问题。 链表为空时调用push_back的前提条件是有头结点,并且头结点的_prev和_next都指向自己。所以我们在进行范围for前要初始化一下lt2。
这里写一个函数来初始化:
void empty_init()
{//new一个哨兵位头结点_head = new Node;_head->_prev = _head;_head->_next = _head;_size = 0;
}
拷贝构造:
//拷贝构造
list(const list<T>& lt)
{empty_init();for (auto& e : lt) //加引用是为了防止T是自定义类型{push_back(e);}
}
在主函数中调用test_list6:
void test_list6()
{list<int> lt1;lt1.push_back(1);lt1.push_back(2);lt1.push_back(3);lt1.push_back(4);cout << "lt1:";print_container(lt1);list<int> lt2(lt1); //拷贝构造cout << "lt2:";print_container(lt2);
}
运行结果:

有了empty_init这个函数,我们在写构造函数时可以直接调用即可:
//构造函数
list()
{//new一个哨兵位头结点//_head = new Node;//_head->_prev = _head;//_head->_next = _head;// _size = 0;empty_init();
}
七、赋值重载
void swap(list<T>& lt)
{std::swap(_head, lt._head);std::swap(_size, lt._size);
}
//赋值重载
list<T>& operator=(list<T> lt)
{swap(lt);return *this;
}
在主函数调用test_list7():
void test_list7()
{list<int> lt1;lt1.push_back(1);lt1.push_back(2);lt1.push_back(3);lt1.push_back(4);cout << "lt1(赋值前):";print_container(lt1);list<int> lt2;lt2.push_back(10);lt2.push_back(20);lt2.push_back(30);lt2.push_back(40);lt1 = lt2; //赋值重载cout << "lt1(赋值后):";print_container(lt1);
}
运行结果:

八、源码
1、list.h
#pragma once
#include <iostream>
#include <assert.h>
using namespace std;namespace blue
{template<class T>struct list_node  //结点的结构,在C++中struct也是类,与class的区别是,它的成员默认是公有{T _data;list_node<T>* _prev;list_node<T>* _next;//构造函数list_node(const T& data = T()):_data(data),_prev(nullptr),_next(nullptr){}};/*template<class T>struct list_iterator  //在C++中struct也是类,与class的区别是,它的成员默认是公有{typedef list_node<T> Node;typedef list_iterator<T> Self;//构造函数list_iterator(Node* node):_node(node)  //浅拷贝,不需要深拷贝,不用单独写拷贝构造{}//重载解引用操作符,返回当前结点的数据//引用返回的目的是:可以修改当前结点的值T& operator*(){return _node->_data;}//重载前置++,返回值依旧是迭代器Self& operator++(){_node = _node->_next;return *this;}//前置--Self& operator--(){_node = _node->_prev;return *this;}//后置++Self operator++(int){Self tmp(*this); //用系统提供的拷贝构造,完成浅拷贝,因为是迭代器的指针,它的作用就是便于访问,所以不需要写深拷贝_node = _node->_next;return tmp;}//后置--Self operator--(int){Self tmp(*this);_node = _node->_next;return tmp;}//不等bool operator!=(const Self& s) const{return _node != s._node;}//相等bool operator==(const Self& s) const{return _node == s._node;}T* operator->(){return &(_node->_data);}public:Node* _node;};*//*template<class T>struct list_const_iterator{typedef list_node<T> Node;typedef list_const_iterator<T> Self;//构造函数list_const_iterator(Node* node):_node(node)  //浅拷贝,不需要深拷贝,不用单独写拷贝构造{}//重载解引用操作符,返回当前结点的数据//引用返回的目的是:可以修改当前结点的值const T& operator*(){return _node->_data;}const T* operator->(){return &(_node->_data);}//重载前置++,返回值依旧是迭代器Self& operator++(){_node = _node->_next;return *this;}//前置--Self& operator--(){_node = _node->_prev;return *this;}//后置++Self operator++(int){Self tmp(*this); //用系统提供的拷贝构造,完成浅拷贝,因为是迭代器的指针,它的作用就是便于访问,所以不需要写深拷贝_node = _node->_next;return tmp;}//后置--Self operator--(int){Self tmp(*this);_node = _node->_next;return tmp;}//不等bool operator!=(const Self& s) const{return _node != s._node;}//相等bool operator==(const Self& s) const{return _node == s._node;}public:Node* _node;};*/template<class T,class Ref,class Ptr>struct list_iterator{typedef list_node<T> Node;typedef list_iterator<T,Ref,Ptr> Self;//构造函数list_iterator(Node* node):_node(node)  //浅拷贝,不需要深拷贝,不用单独写拷贝构造{}//重载解引用操作符,返回当前结点的数据//引用返回的目的是:可以修改当前结点的值Ref operator*(){return _node->_data;}Ptr operator->(){return &(_node->_data);}//重载前置++,返回值依旧是迭代器Self& operator++(){_node = _node->_next;return *this;}//前置--Self& operator--(){_node = _node->_prev;return *this;}//后置++Self operator++(int){Self tmp(*this); //用系统提供的拷贝构造,完成浅拷贝,因为是迭代器的指针,它的作用就是便于访问,所以不需要写深拷贝_node = _node->_next;return tmp;}//后置--Self operator--(int){Self tmp(*this);_node = _node->_next;return tmp;}//不等bool operator!=(const Self& s) const{return _node != s._node;}//相等bool operator==(const Self& s) const{return _node == s._node;}public:Node* _node;};template<class T>class list{typedef list_node<T> Node;public://typedef list_iterator<T> iterator; //typedef的类型也受访问限定符的限制//typedef list_const_iterator<T> const_iterator;typedef list_iterator<T,T&,T*> iterator; //typedef的类型也受访问限定符的限制typedef list_iterator<T,const T&,const T*> const_iterator;iterator begin(){//有名对象//iterator it(_head->_next);//return it;//匿名对象//return iterator(_head->_next);return _head->_next; //隐式类型转换//以上3种写法均可}iterator end(){return _head;}const_iterator begin() const{return _head->_next; //隐式类型转换}const_iterator end() const{return _head;//隐式类型转换}void empty_init(){//new一个哨兵位头结点_head = new Node;_head->_prev = _head;_head->_next = _head;_size = 0;}//构造函数list(){empty_init();}//拷贝构造list(const list<T>& lt){empty_init();for (auto& e : lt) //加引用是为了防止T是自定义类型{push_back(e);}}void swap(list<T>& lt){std::swap(_head, lt._head);std::swap(_size, lt._size);}//赋值重载list<T>& operator=(list<T> lt){swap(lt);return *this;}//析构函数~list(){clear();delete _head;_head = nullptr;}size_t size() const{return _size;}bool empty() const{//这两种写法都可以//return _size == 0;return _head->_next = _head;}//清空容器内所有结点void clear(){auto it = begin();while (it != end()){it = erase(it);}}//尾插void push_back(const T& x){/*Node* newnode = new Node(x);Node* tail = _head->_prev;tail->_next = newnode;newnode->_next = _head;newnode->_prev = tail;_head->_prev = newnode;++_size;*/insert(end(), x);}在it位置之前插入//void insert(iterator it, const T& x)//{//	Node* newnode = new Node(x);//	Node* cur = it._node;  //当前位置//	Node* prev = cur->_prev; //前一位置//	//插入过程//	prev->_next = newnode;//	newnode->_next = cur;//	newnode->_prev = prev;//	cur->_prev = newnode;//	//更新_size//	++_size;//}//在it位置之前插入iterator insert(iterator it, const T& x){Node* newnode = new Node(x);Node* cur = it._node;  //当前位置Node* prev = cur->_prev; //前一位置//插入过程prev->_next = newnode;newnode->_next = cur;newnode->_prev = prev;cur->_prev = newnode;//更新_size++_size;return newnode; //返回插入结点的指针,隐式类型转换}//头插void push_front(const T& x){insert(begin(), x);}//void erase(iterator pos)//{//	assert(pos != end());//	Node* cur = pos._node;//	Node* prev = cur->_prev;//	Node* next = cur->_next;//	//删除过程//	prev->_next = next;//	next->_prev = prev;//	//释放删除结点的空间//	delete cur;//	//更新_size//	--_size;//}iterator erase(iterator pos){assert(pos != end());Node* cur = pos._node;Node* prev = cur->_prev;Node* next = cur->_next;//删除过程prev->_next = next;next->_prev = prev;//释放删除结点的空间delete cur;//更新_size--_size;return next; //返回下一位置的迭代器}//尾删void pop_back(){erase(--end()); //end位置上是头结点(哨兵位结点),所以要--}//头删void pop_front(){erase(begin());}private:Node* _head;  //指向头节点(哨兵位)size_t _size;};template<class Container>void print_container(const Container& con){//typename Container::const_iterator it = con.begin();//因为con被const修饰,所以这里的it必须是const_iterator//while (it != con.end())//{//	cout << *it << " ";//	++it;//}//cout << endl;for (auto e : con) // 因为con被const修饰,这里的范围for底层调用的必须是const迭代器{cout << e << " ";}cout << endl;}void test_list1(){list<int> lt;lt.push_back(1);lt.push_back(2);lt.push_back(3);lt.push_back(4);lt.push_back(5);list<int>::iterator it = lt.begin();while (it != lt.end()){cout << *it << " ";++it;}cout << endl;}struct AA{int _a1;};void test_list2(){list<AA> lta;lta.push_back(AA());lta.push_back(AA());lta.push_back(AA());list<AA>::iterator ita = lta.begin();while (ita != lta.end()){cout << ita->_a1 << " ";cout << ita.operator->()->_a1 << " ";++ita;}cout << endl;}void test_list3(){list<int> lt;lt.push_back(1);lt.push_back(2);lt.push_back(3);lt.push_back(4);lt.push_back(5);print_container(lt);}void test_list4(){list<int> lt;lt.push_back(1);lt.push_back(2);lt.push_back(3);lt.push_back(4);print_container(lt);list<int>::iterator it = lt.begin();lt.insert(it, 10);*it += 100;print_container(lt);}void test_list5(){list<int> lt;lt.push_back(1);lt.push_back(2);lt.push_back(3);lt.push_back(4);cout<<"删除前:";print_container(lt);//删除链表中数据是偶数的结点auto it = lt.begin();while (it != lt.end()){if (*it % 2 == 0){it = lt.erase(it);}else //这里加else是为了防止两个重复数据挨在一起导致删不干净的情况{++it;}}cout << "删除后:";print_container(lt);}void test_list6(){list<int> lt1;lt1.push_back(1);lt1.push_back(2);lt1.push_back(3);lt1.push_back(4);cout << "lt1:";print_container(lt1);list<int> lt2(lt1); //拷贝构造cout << "lt2:";print_container(lt2);}void test_list7(){list<int> lt1;lt1.push_back(1);lt1.push_back(2);lt1.push_back(3);lt1.push_back(4);cout << "lt1(赋值前):";print_container(lt1);list<int> lt2;lt2.push_back(10);lt2.push_back(20);lt2.push_back(30);lt2.push_back(40);lt1 = lt2; //赋值重载cout << "lt1(赋值后):";print_container(lt1);}
}
2、Test.cpp
#include "list.h"
int main()
{//blue::test_list1();//blue::test_list2();//blue::test_list3();//blue::test_list4();//blue::test_list5();//blue::test_list6();//blue::test_list7();return 0;
}
九、补充
标准库中list对象还可以支持这样初始化:
#include <iostream>
#include <list>
using namespace std;
int main()
{std::list<int> lt = { 1,2,3,4,5 };for (auto e : lt)cout << e << " ";cout << endl;return 0;
}
运行结果:

这是C++11中的用法,用{}将一些值包在其中,这种写法的类型是:initializer_list

它是一个类模板。它的底层就是在栈上开辟一个数组将{}中的值存储起来,有两个指针,一个指向起始位置,另外一个指向最后一个有效元素的下一个位置,所以initializer_list类型的对象大小在32位平台下是8字节(两个指针)。
而list对象之所以能这样初始化是因为它的底层有个像这样的构造函数:
list(initializer_list<T> il)
{empty_init();for (auto& e : il){push_back(e);}
}
调用时是这样的:
#include <iostream>
#include <list>
using namespace std;
int main()
{//实际上是这样调用std::list<int> lt1({ 1,2,3,4,5 }); //直接构造for (auto e : lt1)cout << e << " ";cout << endl;//但我们平时喜欢这样写std::list<int> lt2 = { 10,20,30,40,50 }; //这里是隐式类型转换,单参数构造函数支持隐式类型转换for (auto e : lt2)cout << e << " ";cout << endl;const std::list<int>& lt3 = { 3,3,3,3,3 }; //将隐式类型转换过程中的临时对象给lt3了,临时对象具有常性,所以必须加constreturn 0;
}
运行结果:

十、结语
本篇内容到这里就结束了,主要模拟实现了list容器的常用接口,希望对大家有些许帮助,祝大家天天开心!