众所周知,socket是编写网络通信应用的基本技术,网络数据交换大多直接或间接通过socket进行。对于直接使用socket的client与服务端,一旦连接被建立则均可主动向对方传送数据,而对于使用更上层的HTTP/HTTPS协议的应用,因为它们是非连接协议,所以通常仅仅能由client主动向服务端发送请求才干获得服务端的响应并取得相关的数据。而当前越来越多的应用希望可以及时获取服务端提供的数据,甚至希望可以达到接近实时的数据交换(比如非常多站点提供的在线客户系统)。为达到此目的,通常採用的技术主要有轮询、长轮询、流等,而伴随着HTML5的出现,相对更优异的WebSocket方案也应运而生。
一、 非WebSocket方案简单介绍
1. 轮询
轮询是由client定时向服务端发起查询数据的请求的一种实现方式。早期的轮询是通过不断自己主动刷新页面而实现的(在那个基本是IE统治浏览器的时代,那不断刷新页面产生的噪声就难以让人忍受),后来随着技术的发展,特别是Ajax技术的出现,实现了无刷新更新数据。但本质上这些方式均是client定时轮询服务端,这样的方式的最显著的缺点是假设client数量庞大而且定时轮询间隔较短服务端将承受响应这些client海量请求的巨大的压力。
2. 长轮询
在数据更新不够频繁的情况下,使用轮询方法获取数据时client常常会得到没有数据的响应,显然这样的轮询是一个浪费网络资源的无效的轮询。长轮询则是针对普通轮询的这样的缺陷的一种改进方案,其详细实现方式是假设当前请求没有数据能够返回,则继续保持当前请求的网络连接状态,直到服务端有数据能够返回或者连接超时。长轮询通过这样的方式降低了client与服务端交互的次数,避免了一些无谓的网络连接。可是假设数据变更较为频繁,则长轮询方式与普通轮询在性能上并无显著差异。同一时候,添加连接的等待时间,往往意味着并发性能的下降。
3. 流
所谓流是指client在页面之下向服务端发起一个长连接请求,服务端收到这个请求后响应它并不断更新连接状态,以确保这个连接在client与服务端之间一直有效。服务端能够通过这个连接将数据主动推送到client。显然,这样的方案实现起来相对照较麻烦,并且可能被防火墙阻断。
二、 WebSocket简单介绍
1. WebSocket协议简单介绍
WebSocket是为解决client与服务端实时通信而产生的技术。其本质是先通过HTTP/HTTPS协议进行握手后创建一个用于交换数据的TCP连接,此后服务端与client通过此TCP连接进行实时通信。
WebSocket规范当前还没有正式版本号,草案变化也较为迅速。Tomcat7(本文中的例程来自7.0.42)当前支持RFC 6455(http://tools.ietf.org/html/rfc6455)定义的WebSocket,而RFC 6455眼下还未冻结,将来可能会修复一些Bug,甚至协议本身也可能会产生一些变化。
RFC6455定义的WebSocket协议由握手和传输数据两个部分组成。
来自client的握手信息类似例如以下:
GET /chat HTTP/1.1
Host: server.example.com
Upgrade: websocket
Connection: Upgrade
Sec-WebSocket-Key: dGhlIHNhbXBsZSBub25jZQ==
Origin: http://example.com
Sec-WebSocket-Protocol: chat, superchat
Sec-WebSocket-Version: 13
服务端的握手信息类似例如以下:
HTTP/1.1 101 Switching Protocols
Upgrade: websocket
Connection: Upgrade
Sec-WebSocket-Accept: s3pPLMBiTxaQ9kYGzzhZRbK+xOo=
Sec-WebSocket-Protocol: chat
一旦client和服务端都发送了握手信息而且成功握手,则传输数据部分将開始。传输数据对client和服务端而言都是一个双工通信通道,client和服务端来回传递的数据称之为“消息”。
client通过WebSocket URI发起WebSocket连接,WebSocket URIs模式定义例如以下:
ws-URI = "ws:" "//" host [ ":" port ] path [ "?" query ]
wss-URI = "wss:" "//" host [ ":" port ] path [ "?" query ]
ws是普通的WebSocket通信协议,而wss是安全的WebSocket通信协议(就像HTTP与HTTPS之间的差异一样)。在缺省情况下,ws的port是80而wss的port是443。
关于WebSocke协议规范的完整详尽说明,请參考RFC 6455。
2. Tomcat7提供的WebSocket包简单介绍
Tomcat7提供的与WebSocket相关的类均位于包org.apache.catalina.websocket之中(包org.apache.catalina.websocket的实现包括于文件catalina.jar之中),它包括有类Constants、MessageInbound、StreamInbound、WebSocketServlet、WsFrame、WsHttpServletRequestWrapper、WsInputStream、WsOutbound。这些类的关系如图 1所看到的。
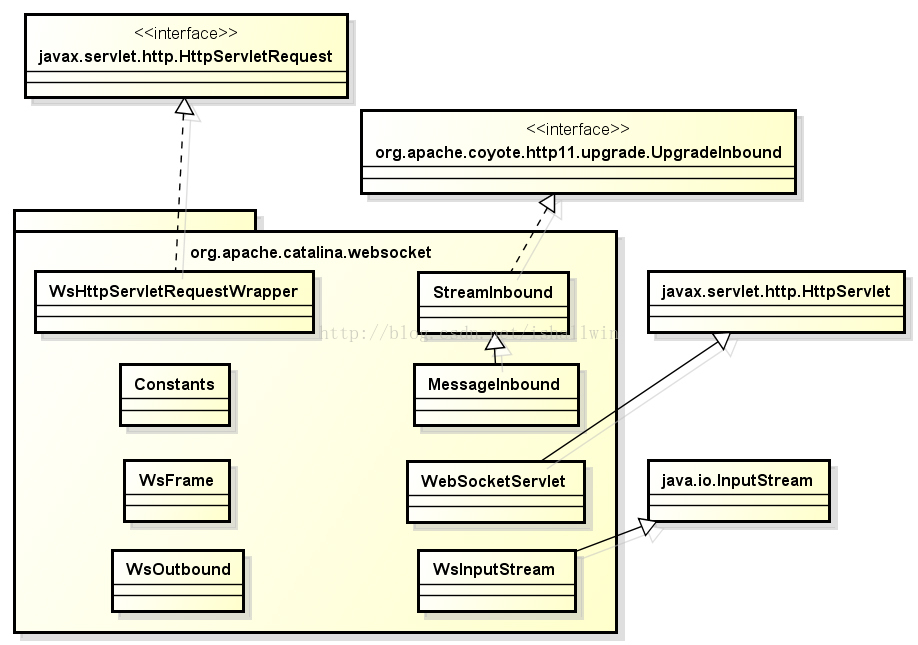
图1
包org.apache.catalina.websocket中的这些类为WebSocket开发服务端提供了支持,这些类的主要功能简述例如以下:
Constants:包org.apache.catalina.websocket中用到的常数定义在这个类中,它仅仅包括静态常数定义,无不论什么逻辑实现。
MessageInbound:基于消息的WebSocket实现类(带内消息),应用程序应当扩展这个类并实现其抽象方法onBinaryMessage和onTextMessage。
StreamInbound:基于流的WebSocket实现类(带内流),应用程序应当扩展这个类并实现其抽象方法onBinaryData和onTextData。
WebSocketServlet:提供遵循RFC6455的WebSocket连接的Servlet基本实现。client使用WebSocket连接服务端时,须要将WebSocketServlet的子类作为连接入口。同一时候,该子类应当实现WebSocketServlet的抽象方法createWebSocketInbound,以便创建一个inbound实例(MessageInbound或StreamInbound)。
WsFrame:代表完整的WebSocket框架。
WsHttpServletRequestWrapper:包装过的HttpServletRequest对象。
WsInputStream:基于WebSocket框架底层的socket的输入流。
WsOutbound:提供发送消息到client的功能。它提供的全部向client的写方法都是同步的,能够防止多线程同一时候向client写入数据。
三、 基于Tomcat7的WebSocket例程
利用当前HTML5和Tomcat7为WebSocket提供的支持,基本仅仅须要编写简单的代码对不同的事件做对应的逻辑处理就能够实现利用WebSocket进行实时通信了。
Tomcat7为WebSocket提供了3个例程(echo、chat及snake),下面就当中的echo和chat分别做一简要解析。
1. echo例程
echo例程主要演示下面功能:client连接服务端、client向服务端发送消息、服务端收到client发送的消息后将其原样返回给client、client收到消息后将其显示在网页之上。
在client页面选择streams或messages作为“Connectusing”,然后点击“Connect”button,能够在右側窗体看到WebSocket连接打开的消息。随后点击“Echo message”button,client将向服务端发送一条消息,在右側窗体,能够看到,消息发出的后的瞬间,client已经收到了服务端原样返回的消息。
client页面及执行效果截图如图 2所看到的。

图2
client实现上述功能的核心脚本例如以下,其关键点通过凝视的形式加以说明:
<script type="text/javascript">
        var ws = null;
        // 界面元素可用性控制
        function setConnected(connected) {
            document.getElementById('connect').disabled = connected;
            document.getElementById('disconnect').disabled = !connected;
            document.getElementById('echo').disabled = !connected;
        }

        function connect() {
            // 取得WebSocket连接入口(WebSocket URI)
            var target = document.getElementById('target').value;
            if (target == '') {
                alert('Please select server side connection implementation.');
                return;
            }
            // 创建WebSocket
            if ('WebSocket' in window) {
                ws = new WebSocket(target);
            } else if ('MozWebSocket' in window) {
                ws = new MozWebSocket(target);
            } else {
                alert('WebSocket is not supported by this browser.');
                return;
            }
            // 定义Open事件处理函数
            ws.onopen = function () {
                setConnected(true);
                log('Info: WebSocket connection opened.');
            };
            // 定义Message事件处理函数(收取服务端消息并处理)
            ws.onmessage = function (event) {
                log('Received: ' + event.data);
            };
            // 定义Close事件处理函数
            ws.onclose = function () {
                setConnected(false);
                log('Info: WebSocket connection closed.');
            };
        }
        // 关闭WebSocket连接
        function disconnect() {
            if (ws != null) {
                ws.close();
                ws = null;
            }
            setConnected(false);
        }

        function echo() {
            if (ws != null) {
                var message = document.getElementById('message').value;
                log('Sent: ' + message);
                // 向服务端发送消息
                ws.send(message);
            } else {
                alert('WebSocket connection not established, please connect.');
            }
        }
	    // 生成WebSocket URI
        function updateTarget(target) {
            if (window.location.protocol == 'http:') {
                document.getElementById('target').value =
'ws://' + window.location.host + target;
            } else {
                document.getElementById('target').value =
'wss://' + window.location.host + target;
            }
        }
        // 在界面显示log及消息
        function log(message) {
            var console = document.getElementById('console');
            var p = document.createElement('p');
            p.style.wordWrap = 'break-word';
            p.appendChild(document.createTextNode(message));
            console.appendChild(p);
            while (console.childNodes.length > 25) {
                console.removeChild(console.firstChild);
            }
            console.scrollTop = console.scrollHeight;
        }
    </script>
注:完整代码參见apache-tomcat-7.0.42\webapps\examples\websocket\echo.html
以上client能够依据“Connectusing”的不同选择连接不同的服务端WebSocket。比如messages选项相应的服务端代码例如以下,其核心逻辑是在收到client发来的消息后马上将其发回client。
public class EchoMessage extends WebSocketServlet {
    private static final long serialVersionUID = 1L;
    private volatile int byteBufSize;
    private volatile int charBufSize;

    @Override
    public void init() throws ServletException {
        super.init();
        byteBufSize = getInitParameterIntValue("byteBufferMaxSize", 2097152);
        charBufSize = getInitParameterIntValue("charBufferMaxSize", 2097152);
    }

    public int getInitParameterIntValue(String name, int defaultValue) {
        String val = this.getInitParameter(name);
        int result;
        if(null != val) {
            try {
                result = Integer.parseInt(val);
            }catch (Exception x) {
                result = defaultValue;
            }
        } else {
            result = defaultValue;
        }

        return result;
    }

    // 创建Inbound实例,WebSocketServlet子类必须实现的方法
    @Override
    protected StreamInbound createWebSocketInbound(String subProtocol,
            HttpServletRequest request) {
        return new EchoMessageInbound(byteBufSize,charBufSize);
    }
    // MessageInbound子类,完毕收到WebSocket消息后的逻辑处理
    private static final class EchoMessageInbound extends MessageInbound {
        public EchoMessageInbound(int byteBufferMaxSize, int charBufferMaxSize) {
            super();
            setByteBufferMaxSize(byteBufferMaxSize);
            setCharBufferMaxSize(charBufferMaxSize);
        }
        //  二进制消息响应
        @Override
        protected void onBinaryMessage(ByteBuffer message) throws IOException {
            getWsOutbound().writeBinaryMessage(message);
        }
        // 文本消息响应
        @Override
        protected void onTextMessage(CharBuffer message) throws IOException {
            // 将收到的消息发回client
            getWsOutbound().writeTextMessage(message);
        }
    }
}
注:完整代码參见apache-tomcat-7.0.42\webapps\examples\WEB-INF\classes\websocket\echo\EchoMessage.java。
2. chat例程
chat例程实现了通过网页进行群聊的功能。每一个打开的聊天网页都能够收到全部在线者发出的消息,同一时候,每一个在线者也都能够(也仅仅能够)向其他全部人发送消息。也就是说,chat实例演示了怎样通过WebSocket实现对全部在线client的广播。
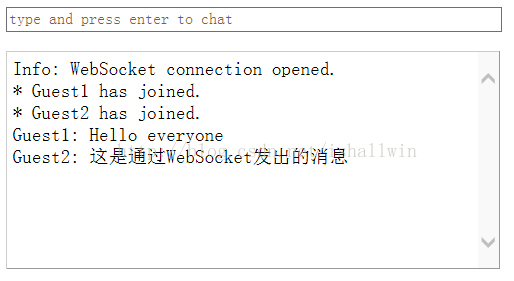
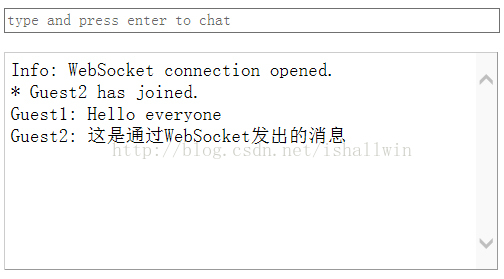
图3
chat例程client核心代码例如以下,能够看到事实上现方式与echo例程形式上稍有变化,本质依然是对WebSocket事件进行响应与处理。
<script type="text/javascript">
        var Chat = {};

        Chat.socket = null;

        Chat.connect = (function(host) {
            // 创建WebSocket
            if ('WebSocket' in window) {
                Chat.socket = new WebSocket(host);
            } else if ('MozWebSocket' in window) {
                Chat.socket = new MozWebSocket(host);
            } else {
                Console.log('Error: WebSocket is not supported by this browser.');
                return;
            }
            // 定义Open事件处理函数
            Chat.socket.onopen = function () {
                Console.log('Info: WebSocket connection opened.');
                document.getElementById('chat').onkeydown = function(event) {
                    if (event.keyCode == 13) {
                        Chat.sendMessage();
                    }
                };
            };
            // 定义Close事件处理函数
            Chat.socket.onclose = function () {
                document.getElementById('chat').onkeydown = null;
                Console.log('Info: WebSocket closed.');
            };
            // 定义Message事件处理函数
            Chat.socket.onmessage = function (message) {
                Console.log(message.data);
            };
        });

        Chat.initialize = function() {
            if (window.location.protocol == 'http:') {
                Chat.connect('ws://' +
window.location.host + '/examples/websocket/chat');
            } else {
                Chat.connect('wss://' +
window.location.host + '/examples/websocket/chat');
            }
        };
		// 发送消息至服务端
        Chat.sendMessage = (function() {
            var message = document.getElementById('chat').value;
            if (message != '') {
                Chat.socket.send(message);
                document.getElementById('chat').value = '';
            }
        });

        var Console = {};

        Console.log = (function(message) {
            var console = document.getElementById('console');
            var p = document.createElement('p');
            p.style.wordWrap = 'break-word';
            p.innerHTML = message;
            console.appendChild(p);
            while (console.childNodes.length > 25) {
                console.removeChild(console.firstChild);
            }
            console.scrollTop = console.scrollHeight;
        });

        Chat.initialize();

    </script>
注:完整代码參见apache-tomcat-7.0.42\webapps\examples\websocket\chat.html
public class ChatWebSocketServlet extends WebSocketServlet {

    private static final long serialVersionUID = 1L;

    private static final String GUEST_PREFIX = "Guest";

    private final AtomicInteger connectionIds = new AtomicInteger(0);
    private final Set<ChatMessageInbound> connections =
            new CopyOnWriteArraySet<ChatMessageInbound>();
    // 创建Inbound实例,WebSocketServlet子类必须实现的方法
    @Override
    protected StreamInbound createWebSocketInbound(String subProtocol,
            HttpServletRequest request) {
        return new ChatMessageInbound(connectionIds.incrementAndGet());
    }
    // MessageInbound子类,完毕收到WebSocket消息后的逻辑处理
    private final class ChatMessageInbound extends MessageInbound {

        private final String nickname;

        private ChatMessageInbound(int id) {
            this.nickname = GUEST_PREFIX + id;
        }
        // Open事件
        @Override
        protected void onOpen(WsOutbound outbound) {
            connections.add(this);
            String message = String.format("* %s %s",
                    nickname, "has joined.");
            broadcast(message);
        }
        // Close事件
        @Override
        protected void onClose(int status) {
            connections.remove(this);
            String message = String.format("* %s %s",
                    nickname, "has disconnected.");
            broadcast(message);
        }
		// 二进制消息事件
        @Override
        protected void onBinaryMessage(ByteBuffer message) throws IOException {
            throw new UnsupportedOperationException(
                    "Binary message not supported.");
        }
		// 文本消息事件
        @Override
        protected void onTextMessage(CharBuffer message) throws IOException {
            // Never trust the client
            String filteredMessage = String.format("%s: %s",
                    nickname, HTMLFilter.filter(message.toString()));
            broadcast(filteredMessage);
        }
		// 向全部已连接的客户端发送文本消息(广播)
        private void broadcast(String message) {
            for (ChatMessageInbound connection : connections) {
                try {
                    CharBuffer buffer = CharBuffer.wrap(message);
                    connection.getWsOutbound().writeTextMessage(buffer);
                } catch (IOException ignore) {
                    // Ignore
                }
            }
        }
    }
注:完整代码參见apache-tomcat-7.0.42\webapps\examples\WEB-INF\classes\websocket\echo\ChatWebSocketServlet.java。
通过上述例程能够看到WebSocket广播实际上是通过遍历全部连接并通过每一个连接向对应的client发送消息实现的。
四、 WebSocket实战
实时向在线用户推送通知是一个WebSocket应用的简单场景,后台提交通知信息以后,所在在线用户均应非常快收到这个通知。通过上述例程了解WebSocket后,能够尝试编写一个实现这个需求的WebSocket应用。
首先编写一个用户的Sample页面,该页面没有实质的内容,可是在收到后台发出的通知时要在右下角通过弹窗显示通知的内容。其代码例如以下:<!DOCTYPE html>
<html>
<head>
<title>Receive Message</title>
<style type="text/css">
#winpop { width:200px; height:0px;
position:absolute;
right:0; bottom:0;
border:1px solid #999999;
margin:0;
padding:1px;
overflow:hidden;
display:none;
background:#FFFFFF}
#winpop .con { width:100%; height:80px;
line-height:80px;
font-weight:bold;
font-size:12px;
color:#FF0000;
text-align:center}
</style>
<script type="text/javascript">
// 弹窗相关
function tips_pop(){
var MsgPop=document.getElementById("winpop");
var popH=parseInt(MsgPop.style.height);
if(isNaN(popH)) {
popH = 0;
}
if (popH==0){
MsgPop.style.display="block";
show=setInterval("changeH('up')",100);
}
else {
hide=setInterval("changeH('down')",100);
}
}
function changeH(str) {
var MsgPop=document.getElementById("winpop");
var popH=parseInt(MsgPop.style.height);
if(isNaN(popH)) {
popH = 0;
}
if(str=="up"){
if (popH<=100){
MsgPop.style.height=(popH+4).toString()+"px";
}
else{
clearInterval(show);
setTimeout("tips_pop()", 5000);
}
}
if(str=="down"){
if (popH>=4){
MsgPop.style.height=(popH-4).toString()+"px";
}
else{
clearInterval(hide);
MsgPop.style.display="none";
}
}
}
// WebSocket相关
var ws = null;
function connect() {
var target = 'ws://' + window.location.host
+ "/test/NotifyWebSocketServlet";
if ('WebSocket' in window) {
ws = new WebSocket(target);
} else if ('MozWebSocket' in window) {
ws = new MozWebSocket(target);
} else {
alert('WebSocket is not supported by this browser.');
return;
}
ws.onopen = function () {
document.getElementById('msg').innerHTML =
"WebSocket has opened, Waiting message.......";
};
ws.onmessage = function (event) {
document.getElementById('infomsg').innerHTML = event.data;
tips_pop();
};
ws.onclose = function () {
document.getElementById('msg').innerHTML = "WebSocket has closed";
};
}
function disconnect() {
if (ws != null) {
ws.close();
ws = null;
}
}
connect();
</script>
</head>
<body>
<h1 align="center" id="msg">Try to connect websocket.</h1>
<div id="winpop">
<div class="con" id="infomsg"></div>
</div>
</body>
</html>
当用户界面打开时,它会尝试通过/test/NotifyWebSocketServlet建立与server的WebSocket连接,而NotifyWebSocketServlet的实现代码则例如以下:
package net.yanzhijun.example;

import javax.servlet.ServletContext;
import javax.servlet.http.HttpServletRequest;

import org.apache.catalina.websocket.StreamInbound;
import org.apache.catalina.websocket.WebSocketServlet;

public class NotifyWebSocketServlet extends WebSocketServlet {

    private static final long serialVersionUID = 1L;

    @Override
    protected StreamInbound createWebSocketInbound(String subProtocol,
            HttpServletRequest request) {
        ServletContext application = this.getServletContext();
        return new NofityMessageInbound(application);
    }
}
与Tomcat给出的演示样例代码不同的是,在NotifyWebSocketServlet中并未将继承于MessageInbound的NofityMessageInbound作为一个内嵌类。前述演示样例代码中发送消息和接收消息都是在同一组client页面和服务端响应Servlet间进行的,而当前须要实现是在一个页面中提交通知,而在其他用户的页面上显示通知信息,因此须要将全部client与服务端的连接存储一个全局域中,故而NofityMessageInbound将不仅仅在当前Servlet中被使用,所以有必要将其独立出来。
NofityMessageInbound的完整代码例如以下:package net.yanzhijun.example;
import java.nio.CharBuffer;
import java.nio.ByteBuffer;
import java.io.IOException;
import java.util.Set;
import java.util.concurrent.CopyOnWriteArraySet;
import javax.servlet.ServletContext;
import org.apache.catalina.websocket.WsOutbound;
import org.apache.catalina.websocket.MessageInbound;
public class NofityMessageInbound extends MessageInbound {
private ServletContext application;
private Set<NofityMessageInbound> connections = null;
public NofityMessageInbound(ServletContext application) {
this.application = application;
connections =
(Set<NofityMessageInbound>)application.getAttribute("connections");
if(connections == null) {
connections =
new CopyOnWriteArraySet<NofityMessageInbound>();
}
}
@Override
protected void onOpen(WsOutbound outbound) {
connections.add(this);
application.setAttribute("connections", connections);
}
@Override
protected void onClose(int status) {
connections.remove(this);
application.setAttribute("connections", connections);
}
@Override
protected void onBinaryMessage(ByteBuffer message) throws IOException {
throw new UnsupportedOperationException(
"message not supported.");
}
@Override
protected void onTextMessage(CharBuffer message) throws IOException {
throw new UnsupportedOperationException(
"message not supported.");
}
}
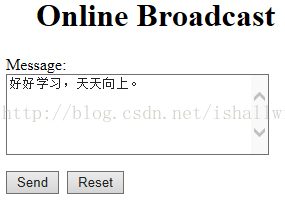
后台发送通知的页面实现的相当简单,仅仅是一个表单提交一条通知信息。
<%@ page contentType="text/html;charset=UTF-8" language="java" %>
<html>
    <head>
        <title>PushMessage</title>
    </head>
    <body>
        <h1 align="Center">Online Broadcast</h1>
        <form method="post" action="PushMessageServlet">
            <p>Message:<br/>
                <textarea name="message" rows="5" cols="30"></textarea>
            </p>
            <p><input type="submit" value="Send">
                <input type="reset" value="Reset">
            </p>
        </form>
    </body>
</html>
接收提交通知的Servlet是PushMessageServlet,它在收到后台提交的通知后,就通过全部用户的WebSocket连接将通知发送出去。
package net.yanzhijun.example;

import java.io.PrintWriter;
import java.nio.CharBuffer;
import java.util.Set;
import java.util.concurrent.CopyOnWriteArraySet;
import java.io.IOException;

import javax.servlet.ServletContext;
import javax.servlet.ServletException;
import javax.servlet.http.HttpServlet;
import javax.servlet.http.HttpServletRequest;
import javax.servlet.http.HttpServletResponse;

public class PushMessageServlet extends HttpServlet {
     private static final long serialVersionUID = 1L;

    @Override
    public void doGet(HttpServletRequest request,
                      HttpServletResponse response)
        throws IOException, ServletException {
            doPost(request, response);
        }

    @Override
    public void doPost(HttpServletRequest request,
                      HttpServletResponse response)
        throws IOException, ServletException {

        request.setCharacterEncoding("UTF-8");
        response.setContentType("text/html;charset=UTF-8");

        PrintWriter out = response.getWriter();

        String message = request.getParameter("message");
        if(message == null || message.length() == 0) {
            out.println("The message is empty!");
            return;
        }

        // 广播消息
        broadcast(message);

        out.println("Send success!");
    }

    // 将參数中的消息发送至全部在线client
    private void broadcast(String message) {
        ServletContext application=this.getServletContext();
        Set<NofityMessageInbound> connections =
(Set<NofityMessageInbound>)application.getAttribute("connections");
        if(connections == null){
            return;
        }

        for (NofityMessageInbound connection : connections) {
            try {
                CharBuffer buffer = CharBuffer.wrap(message);
                connection.getWsOutbound().writeTextMessage(buffer);
            } catch (IOException ignore) {
                // Ignore
            }
        }
    }
}
编译相关文件并完毕部署,尝试在后台发送消息,能够看到用户界面右下角出现的弹窗中显示了后台所提交的内容。
五、 WebSocket总结
通过以上例程和实例能够看出,从开发角度使用WebSocket相当easy,基本仅仅须要创建WebSocket实例并对关心的事件进行处理就能够了;从应用角度WebSocket提供了优异的性能,图 5是来自websocket.org的性能測试图表( http://www.websocket.org/quantum.html ),能够看到当并发和负载添加时轮询与WebSocket的差异。