ASP.NET MVC 开源建站系统 ZKEACMS 推荐,从此网站“拼”起来
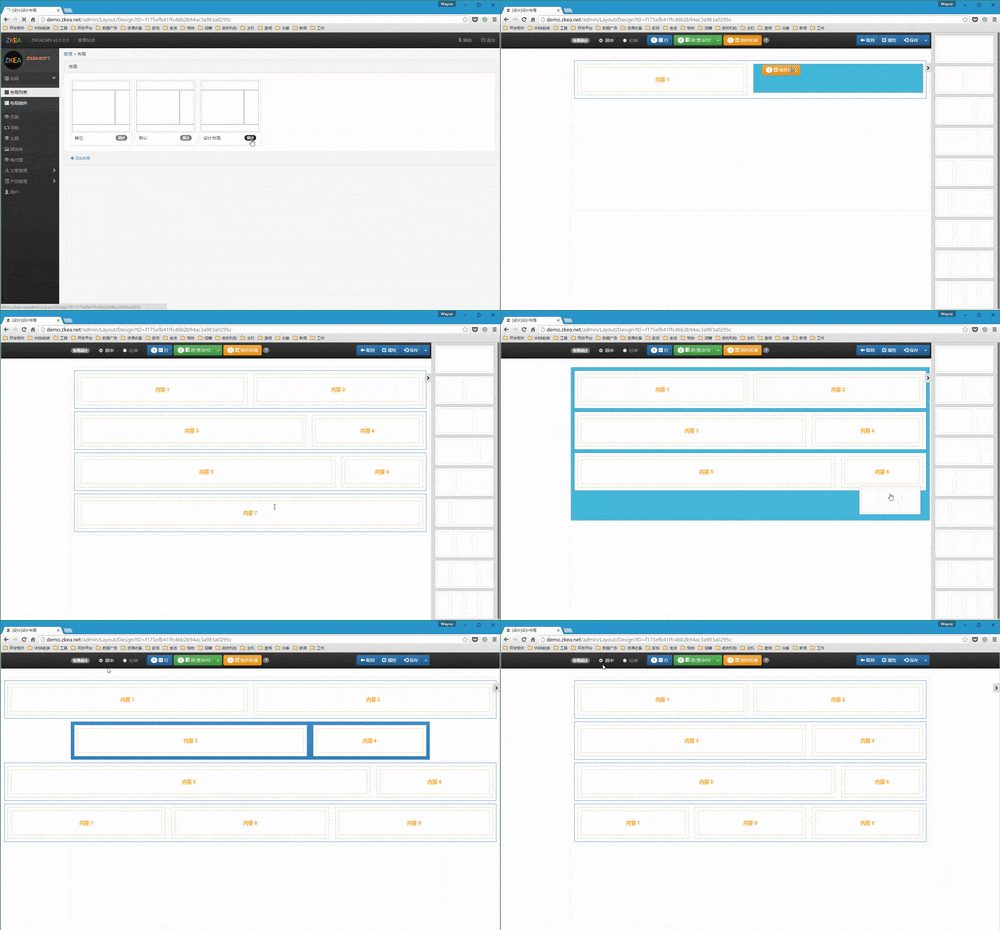
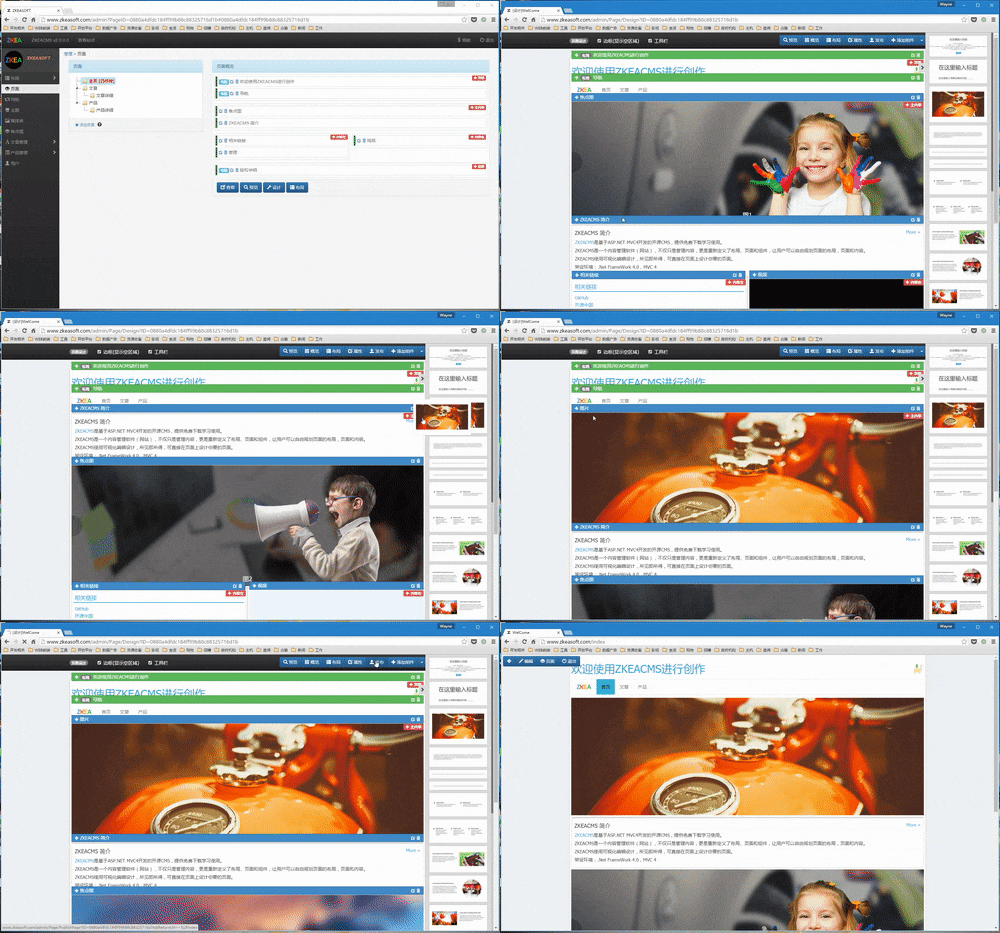
一个挺有意思的项目,跟拼图一样的创建网站,先来几张GIF感受一下:


官方地址:http://www.zkea.net/zkeacms
下载地址:https://github.com/SeriaWei/ASP.NET-MVC-CMS/releases
GitHub:https://github.com/SeriaWei/ASP.NET-MVC-CMS
Git@OCS:http://git.oschina.net/seriawei/ASP.NET-MVC-CMS
演示地址:http://demo.zkea.net/
后台:http://demo.zkea.net/admin
用户名,密码:admin
ZKEACMS是基于EasyFrameWork,使用ASP.NET MVC4开发的开源CMS。
ZKEACMS一个内容管理软件(网站)。ZKEACMS不仅只是管理内容,更是重新定义了布局、页面和组件,让用户可以自由规划页面的布局,页面和内容。
ZKEACMS使用可视化编辑设计,真正做到所见即所得,可直接在预览页面上设计页面。
ZKEACMS采用插件式设计,支持扩展新插件。
架设环境:
Windows server 2003,IIS 6 或以上
MsSql 2005 或以上
.Net FrameWork 4.0,MVC 4
开发环境
Microsoft VisualStudio 2013
Microsoft Sql Server 2005 以上
关于项目的特性大家到官网去看看就好了,这里主要讲讲Code:
资源管理与应用(JS/CSS):
资源定义
script("jQuery").Include("~/Scripts/jquery-1.11.2.min.js", "~/Scripts/jquery-1.11.2.min.js").RequiredAtHead();
script("bootStrap").Include("~/Content/bootstrap/js/bootstrap.js", "~/Content/bootstrap/js/bootstrap.min.js").RequiredAtFoot();
script("jQueryUi").Include("~/Scripts/jquery-ui/jquery-ui.js", "~/Scripts/jquery-ui/jquery-ui.min.js");
style("bootStrap").Include("~/Content/bootstrap/css/bootstrap.css", "~/Content/bootstrap/css/bootstrap.min.css").RequiredAtHead();
style("bootStrapTheme").Include("~/Content/bootstrap/css/bootstrap-theme.css", "~/Content/bootstrap/css/bootstrap-theme.min.css").RequiredAtHead();
style("Site").Include("~/Content/Site.css", "~/Content/Site.min.css").RequiredAtFoot();
这里是对脚本和样式文件的定义,显示调用RequiredAtHead()/RequiredAtFoot(),则无需主动加到页面中,默认都会使用该资源文件,加到页面的开头或者结尾。
资源的使用(.cshtml):
Style.Reqiured("Site").AtHead();
Script.Reqiured("jQueryUi").AtFoot();
@using (Script.AtFoot())
{
    <script type="text/javascript">
        function Create(xxx) {

        }
    </script>
}

为什么需要这样管理资源?因为ZKEACMS的页面是由不同的组件构成的,完全由用户选择在页面中显示什么组件,而不同的组件会需要不同的JS或CSS,因此需要动态加载这些资源文件。
简单的数据和视图配置(元数据注册):
    [DataConfigure(typeof(CarouselEntityMetaData))]
    public class CarouselEntity : EditorEntity
    {
    public long? ID { get; set; }
    public int? Height { get; set; }
    public List<CarouselItemEntity> CarouselItems { get; set; }

    }
    class CarouselEntityMetaData : DataViewMetaData<CarouselEntity>
    {
        protected override void DataConfigure()
        {
            DataTable("Carousel");
            DataConfig(m => m.ID).AsIncreasePrimaryKey();
            DataConfig(m => m.CarouselItems).Ignore();
        }        protected override void ViewConfigure()
        {
            ViewConfig(m => m.ID).AsHidden();
            ViewConfig(m => m.CarouselItems).AsListEditor();
            ViewConfig(m => m.Height).AsHidden();
        }
    }
编辑页面直接使用EditorForModel:
在视图配置完以后(.AsTextBox(),.AsDropDownList()...) 直接调用EditorForModel即可自动生成表单:
@Html.EditorForModel()
列表页面:
@(
 Html.Grid<ArticleEntity>().SetColumnTemplate(col => {
     col.Add(m => m.Title, "<a href='"+Url.Action("Edit")+"?ID={ID}'>{Title}</a>");
 }).SetAsToolBar("#toolBar").ShowCheckbox(m=>m.ID).OrderBy(m=>m.PublishDate, OrderType.Descending)
)
FilterConfig:
以前我们这样写:
[ViewDataArticleType]public override ActionResult Edit(ArticleEntity entity)
现在我们这样写:
Registry.Register<ArticleController, ViewDataArticleTypeAttribute>(m => m.Edit(null));
灵活的Service
Service.Add(entity);
Service.Count(m=>m.Id=1);
Service.Delete(primaryKey);
Service.Delete(m=>m.Id=1);
Service.Get(primaryKey);
Service.Get(m=>m.Id=1);
...
实现却如此简单:
public class CarouselService : ServiceBase<CarouselEntity>{
}
。。。。。。
写得很简单,可是还有很多,有兴趣的就下下来玩玩吧。
转载于:https://blog.51cto.com/zkeasoft/1770222
