依赖jar
<dependency>
    <groupId>org.springframework.cloud</groupId>
    <artifactId>spring-cloud-starter-oauth2</artifactId>
    <version>2.0.0.RELEASE</version>
</dependency>
示例如下:
1. 新建Maven项目 security
2. pom.xml
<project xmlns="http://maven.apache.org/POM/4.0.0"
    xmlns:xsi="http://www.w3.org/2001/XMLSchema-instance"
    xsi:schemaLocation="http://maven.apache.org/POM/4.0.0
        http://maven.apache.org/xsd/maven-4.0.0.xsd">


    <modelVersion>4.0.0</modelVersion>
    <groupId>com.java</groupId>
    <artifactId>security</artifactId>
    <version>1.0.0</version>

    <parent>
        <groupId>org.springframework.boot</groupId>
        <artifactId>spring-boot-starter-parent</artifactId>
        <version>2.0.5.RELEASE</version>
    </parent>


    <dependencies>

        <!-- Spring Boot -->
        <dependency>
            <groupId>org.springframework.boot</groupId>
            <artifactId>spring-boot-starter-web</artifactId>
        </dependency>
        <dependency>
            <groupId>org.springframework.cloud</groupId>
            <artifactId>spring-cloud-starter-oauth2</artifactId>
            <version>2.0.0.RELEASE</version>
        </dependency>


        <!-- 热部署 -->
        <dependency>
            <groupId>org.springframework</groupId>
            <artifactId>springloaded</artifactId>
            <version>1.2.8.RELEASE</version>
            <scope>provided</scope>
        </dependency>
        <dependency>
            <groupId>org.springframework.boot</groupId>
            <artifactId>spring-boot-devtools</artifactId>
            <scope>provided</scope>
        </dependency>

    </dependencies>

    <build>
        <finalName>${project.artifactId}</finalName>
        <plugins>
            <plugin>
                <groupId>org.apache.maven.plugins</groupId>
                <artifactId>maven-compiler-plugin</artifactId>
                <configuration>
                    <source>1.8</source>
                    <target>1.8</target>
                    <encoding>UTF-8</encoding>
                </configuration>
            </plugin>

            <plugin>
                <groupId>org.springframework.boot</groupId>
                <artifactId>spring-boot-maven-plugin</artifactId>
                <executions>
                    <execution>
                        <goals>
                            <goal>repackage</goal>
                        </goals>
                    </execution>
                </executions>
            </plugin>
        </plugins>
    </build>
</project>
3. SecurityStarter.java
package com.java;

import org.springframework.boot.SpringApplication;
import org.springframework.boot.autoconfigure.SpringBootApplication;

/**
 * <blockquote><pre>
 *
 * 主启动类
 *
 * </pre></blockquote>
 *
 *
 */
@SpringBootApplication
public class SecurityStarter {

    public static void main(String[] args) {
        SpringApplication.run(SecurityStarter.class, args);
    }

}
4. HostController.java
package com.java.controller;

import java.net.InetAddress;
import java.net.UnknownHostException;
import java.util.HashMap;
import java.util.Map;

import org.springframework.web.bind.annotation.GetMapping;
import org.springframework.web.bind.annotation.RestController;

@RestController
public class HostController {

    @GetMapping("/getHostMessage")
    public Map<String, Object> getHostMessage() {
        Map<String, Object> map = new HashMap<>();
        try {
            InetAddress serverHost = InetAddress.getLocalHost();
            map.put("hostname", serverHost.getHostName());
            map.put("hostAddress", serverHost.getHostAddress());
        } catch (UnknownHostException e) {
            e.printStackTrace();
            map.put("msg", e.getMessage());
        }

        return map;

    }

}
5. ApplicationContextConfig.java
package com.java.config;

import org.springframework.context.annotation.Bean;
import org.springframework.context.annotation.Configuration;
import org.springframework.security.crypto.bcrypt.BCryptPasswordEncoder;
import org.springframework.security.crypto.password.PasswordEncoder;

/**
 * 配置文件类
 *
 */
@Configuration
public class ApplicationContextConfig {

    /**
     * <blockquote><pre>
     *
     * 配置密码编码器,Spring Security 5.X必须配置,否则登录时报空指针异常
     *
     * </pre></blockquote>
     *
     * @return
     */
    @Bean
    public PasswordEncoder passwordEncoder() {
        return new BCryptPasswordEncoder();
    }

}
6. SecurityUserDetailsService.java
package com.java.service;

import org.springframework.beans.factory.annotation.Autowired;
import org.springframework.security.core.authority.AuthorityUtils;
import org.springframework.security.core.userdetails.User;
import org.springframework.security.core.userdetails.UserDetails;
import org.springframework.security.core.userdetails.UserDetailsService;
import org.springframework.security.core.userdetails.UsernameNotFoundException;
import org.springframework.security.crypto.password.PasswordEncoder;
import org.springframework.stereotype.Component;

@Component
public class SecurityUserDetailsService implements UserDetailsService {

    @Autowired
    private PasswordEncoder passwordEncoder;

    @Override
    public UserDetails loadUserByUsername(String username) throws UsernameNotFoundException {

        // 数据库存储密码为加密后的密文(明文为123456)
        String password = passwordEncoder.encode("123456");

        System.out.println("username: " + username);
        System.out.println("password: " + password);

        // 模拟查询数据库,获取属于Admin和Normal角色的用户
        User user = new User(username, password, AuthorityUtils.commaSeparatedStringToAuthorityList("Admin,Normal"));

        return user;
    }

}
7. 运行 SecurityStarter.java ,启动项目
浏览器输入 http://localhost:8080/getHostMessage
自动跳转到登录界面,截图如下:
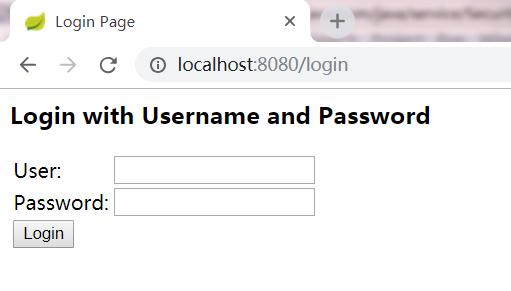
输入如下信息:
User:Logen
Password:123456
点击【Login】按钮,自动跳转回刚才访问页面http://localhost:8080/getHostMessage
返回信息如下:
{"hostname":"Logen","hostAddress":"192.168.1.102"}
输入其它密码,将提示<坏的凭证>
搭建完成!
.