Cobbler自动化安装(linux)服务器
1、Cobbler简介
Cobbler是一个免费开源系统安装部署软件,用于自动化网络安装操作系统。Cobbler 集成了 DNS, DHCP, 软件包更新,带外管理以及配置管理,方便操作系统安装自动化。Cobbler 可以支持PXE启动, 操作系统重新安装,以及虚拟化客户机创建,包括Xen, KVM or VMware. Cobbler透过koan程序以支持虚拟化客户机安 装。Cobbler可以支持管理复杂网路环境,如建立在链路聚合以太网的桥接环境。Cobbler可以用来快速建立 Linux 网络安装环境,它已将 Linux 网络安装的技术门槛,从大专以上文化水平,成功降低到初中以下,连补鞋匠都能学会。在生产环境中,经常批量部署几十甚至上百台服务器时,实现自动化安装操作系统尤为重要,按照传统的光盘引导安装工作量是不可预估的;此前我们通过pxe+kickstart简单实现了自动化安装,但只能实现单一版本安装,当需要部署不同版本或不同引导模式(BIOS、EFI)时,此种方式就不够灵活。而Cobbler正是为了解决此问题而设计的。
2、Cobbler的组织架构: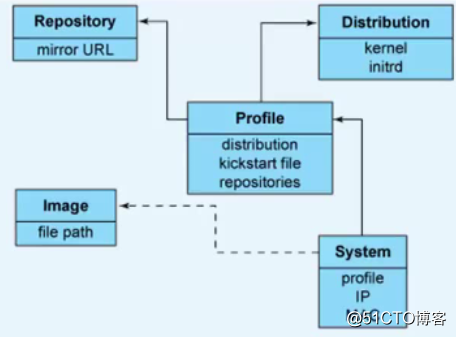
3、Cobbler安装及配置
3.1、基本配置
[root@Cobbler ~]# cat /etc/redhat-release
CentOS Linux release 7.4.1708 (Core)
[root@Cobbler ~]# uname -r
3.10.0-693.el7.x86_64
[root@Cobbler ~]# getenforce
Disabled
[root@Cobbler ~]# systemctl status firewalld.service
● firewalld.service - firewalld - dynamic firewall daemon
Loaded: loaded (/usr/lib/systemd/system/firewalld.service; disabled; vendor
preset: enabled)
[root@Cobbler ~]# hostname -I
10.0.0.10
3.2、yum源以及eple源
curl -o /etc/yum.repos.d/CentOS-Base.repo http://mirrors.aliyun.com/repo/Centos-7.repo
curl -o /etc/yum.repos.d/epel.repo http://mirrors.aliyun.com/repo/epel-7.repo
3.3、安装Cobbler
yum -y install cobbler cobbler-web dhcp tftp-server pykickstart httpd
systemctl start httpd.service
systemctl start cobbled.service
cobbler check
check之后会出现以下问题,逐步解决就可以:
The following are potential configuration items that you may want to fix:
1 : The 'server' field in /etc/cobbler/settings must be set to something other than localhost, or kickstarting features will not work. This should be a resolvable hostname or IP for the boot server as reachable by all machines that will use it.
2 : For PXE to be functional, the 'next_server' field in /etc/cobbler/settings must be set to something other than 127.0.0.1, and should match the IP of the boot server on the PXE network.
3 : change 'disable' to 'no' in /etc/xinetd.d/tftp
4 : Some network boot-loaders are missing from /var/lib/cobbler/loaders, you may run 'cobbler get-loaders' to download them, or, if you only want to handle x86/x86_64 netbooting, you may ensure that you have installed a recent version of the syslinux package installed and can ignore this message entirely. Files in this directory, should you want to support all architectures, should include pxelinux.0, menu.c32, elilo.efi, and yaboot. The 'cobbler get-loaders' command is the easiest way to resolve these requirements.
5 : enable and start rsyncd.service with systemctl
6 : debmirror package is not installed, it will be required to manage debian deployments and repositories
7 : The default password used by the sample templates for newly installed machines (default_password_crypted in /etc/cobbler/settings) is still set to 'cobbler' and should be changed, try: "openssl passwd -1 -salt 'random-phrase-here' 'your-password-here'" to generate new one
8 : fencing tools were not found, and are required to use the (optional) power management features. install cman or fence-agents to use them
Restart cobblerd and then run 'cobbler sync' to apply changes.
3.4解决以上问题:
1、2问题的解决:
cp /etc/cobbler/settings{,.ori}
sed -i 's/server: 127.0.0.1/server: 10.0.0.10/' /etc/cobbler/settings
sed -i 's/next_server: 127.0.0.1/next_server: 10.0.0.10/' /etc/cobbler/settings
3问题的解决:
sed -i 's#yes#no#g' /etc/xinetd.d/tftp
4问题的解决:
cobbler get-loaders
5问题的解决
systemctl start rsyncd.service
systemctl enable rsyncd.service
7问题的解决
openssl passwd -1 -salt 'random-phrase-here' 'your-password-here'
random-phrase-here 随机字符串
your-password-here 密码
openssl passwd -1 -salt 'zbjt' '123456'
$1$zbjt$LpJk4x1cplibx3q/O4O/K/
vim /etc/cobbler/settings
default_password_crypted: "$1$zbjt$LpJk4x1cplibx3q/O4O/K/"
6、8两个暂时不用处理
后面要批量安装服务器,所以还要对以下几处内容进行修改:
管理dhcp
sed -i 's/manage_dhcp: 0/manage_dhcp: 1/' /etc/cobbler/settings
防止重装
sed -i 's/pxe_just_once: 0/pxe_just_once: 1/' /etc/cobbler/settings
修改dhcp模板(以下展示的是修改后的内容,注意比对)
vim /etc/cobbler/settings
subnet 10.0.0.0 netmask 255.255.255.0 {
option routers 10.0.0.2;
option domain-name-servers 223.5.5.5;
option subnet-mask 255.255.255.0;
range dynamic-bootp 10.0.0.100 10.0.0.200;
注意:修改完成之后要用cobbler sync进行同步!
cobbler check
The following are potential configuration items that you may want to fix
1 : debmirror package is not installed, it will be required to manage debian deployments and repositories
2 : fencing tools were not found, and are required to use the (optional) power management features. install cman or fence-agents to use them
Restart cobblerd and then run 'cobbler sync' to apply changes.
将所有的服务重启(启动)
systemctl restart httpd.service
systemctl restart cobblerd.service
systemctl start dhcpd.service
systemctl restart rsyncd.service
systemctl start tftp.socket
注意:CentOS7使用https进行登录
浏览器中输入:https://10.0.0.10/cobbler_web登录进入图形化操作界面:用户名密码都是cobbler.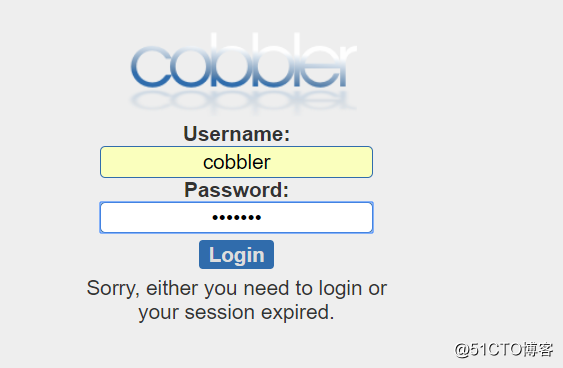
4、挂载操作系统,进行批量安装(主要采用图形化操作)
4.1、挂载操作系统
      mount /dev/cdrom /mnt/
      df -h|grep mnt
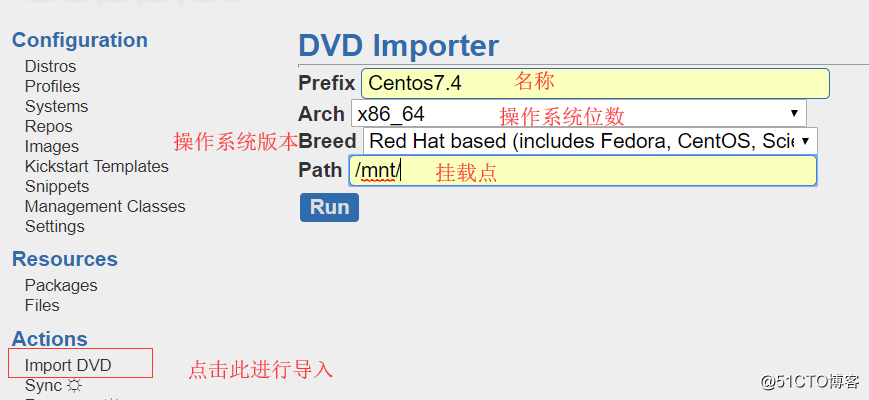
导入成功的标志:
ls /var/www/cobbler/ks_mirror
CentOS-7.4-x86_64 config
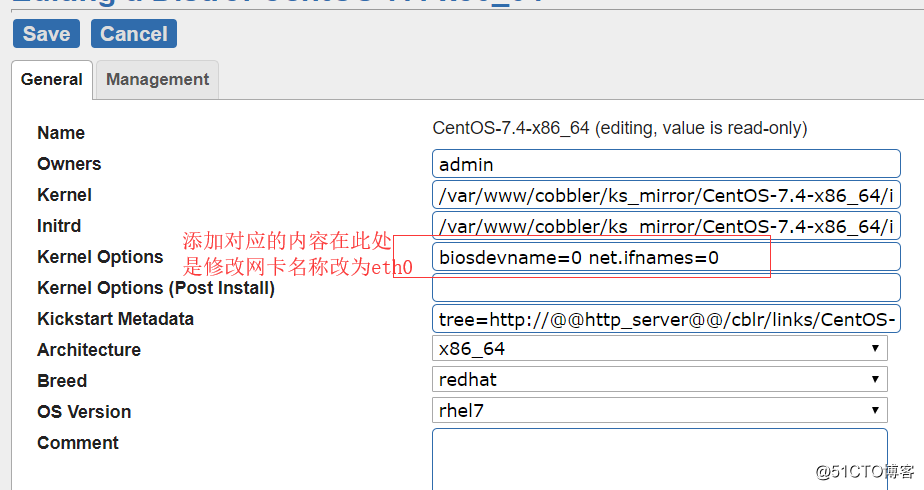
由于CentOS7的网卡名称不是默认的eth0,所以修改网卡名称,操作过程如下:

4.2编辑kickstart Templates模板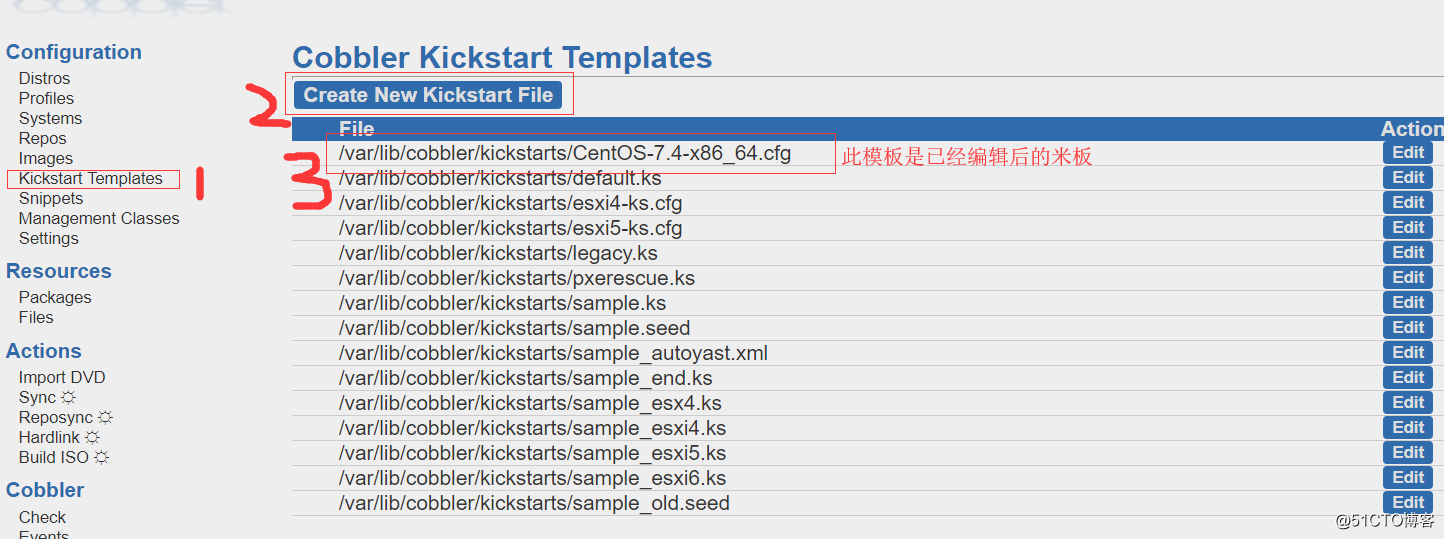
具体内容为:
cd /var/lib/cobbler/kickstarts/
vim CentOS-7.4-x86_64.cfgCobbler for Kickstart Configurator for CentOS 7.4 by wyyue
install
url --url=$tree
text
lang en_US.UTF-8
keyboard us
zerombr
bootloader --location=mbr --driveorder=sda --append="crashkernel=auto rhgb quiet"
$SNIPPET('network_config')
timezone --utc Asia/Shanghai
authconfig --enableshadow --passalgo=sha512
rootpw --iscrypted $default_password_crypted
clearpart --all --initlabel
part /boot --fstype xfs --size 1024 --ondisk sda
part swap --size 1024 --ondisk sda
part / --fstype xfs --size 1 --grow --ondisk sda
firstboot --disable
selinux --disabled
firewall --disabled
logging --level=info
reboot%pre
$SNIPPET('log_ks_pre')
$SNIPPET('kickstart_start')
$SNIPPET('pre_install_network_config')
$SNIPPET('pre_anamon')
%end%packagesbr/>@base
@compat-librariesbr/>@debugging
@development
tree
nmap
sysstat
lrzsz
dos2unix
telnet
iptraf
ncurses-devel
openssl-devel
zlib-devel
OpenIPMI-tools
screen
%end%post
systemctl disable postfix.service
%end
注意:上述配置文件中不能有中文,不能有中文,不能有中文,注释也不行!
4.3、自定义操作系统:
a、==============================
b、==============================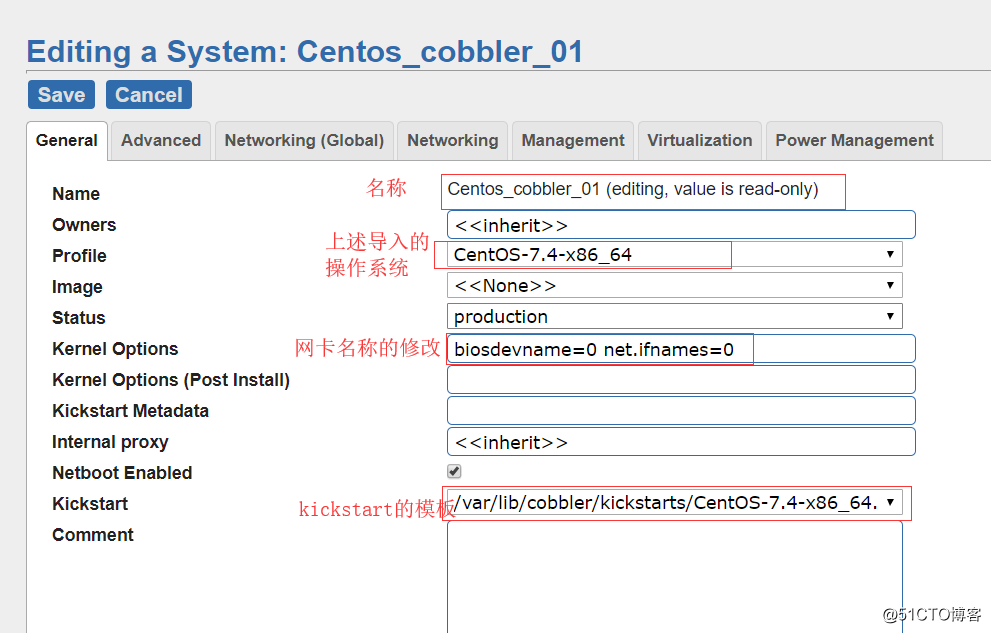
c、==============================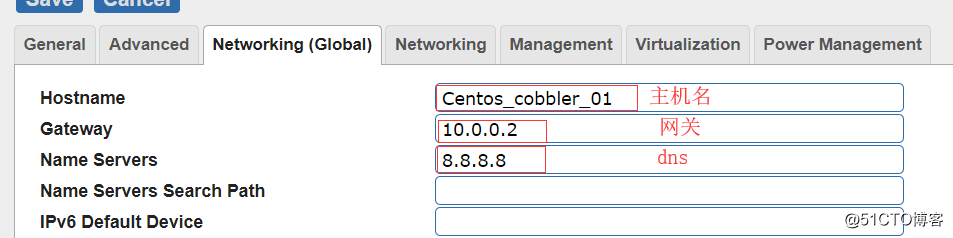
d、==============================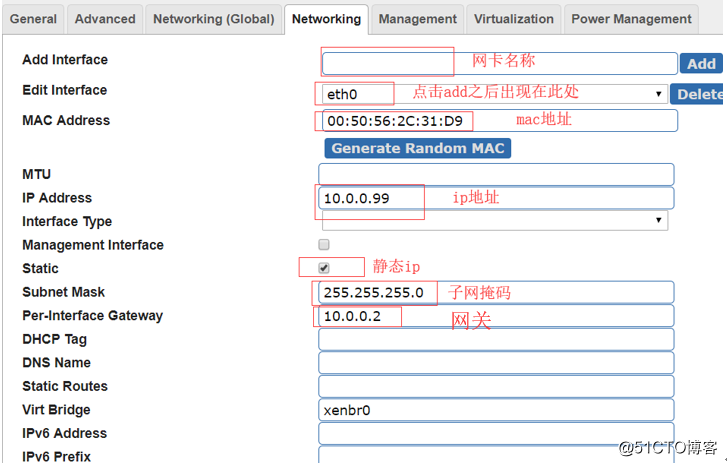
上述d、的图中mac地址是创建空白虚拟机生成的: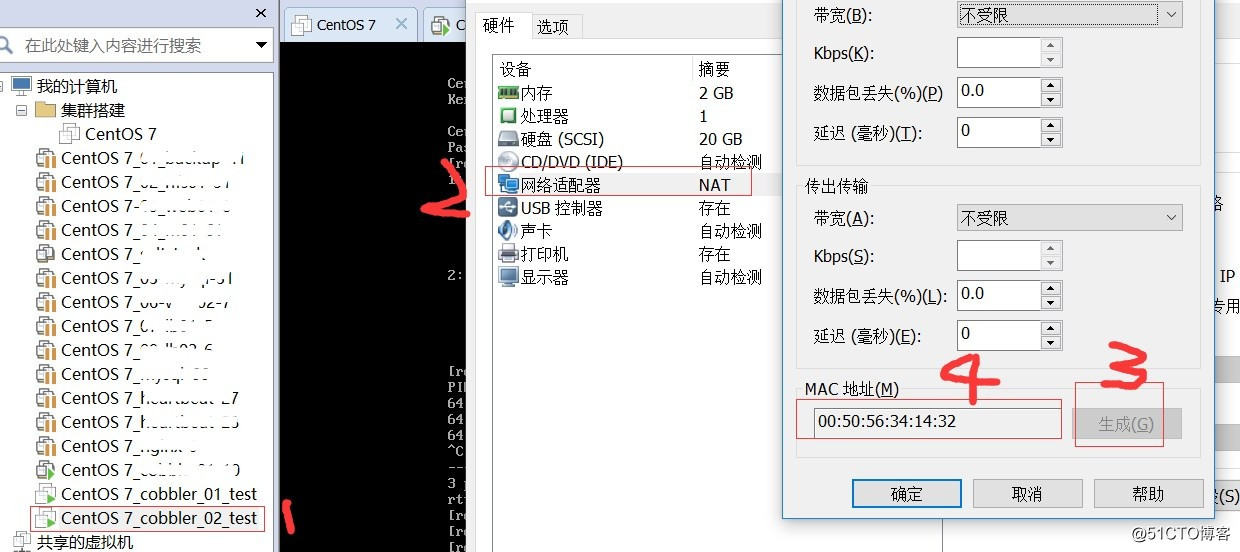
上述配置完成之后,要创建空白虚拟机,只要对应mac地址的虚拟机启动就会自动安装了。
创建空白虚拟机时要注意:红框对应的√要去掉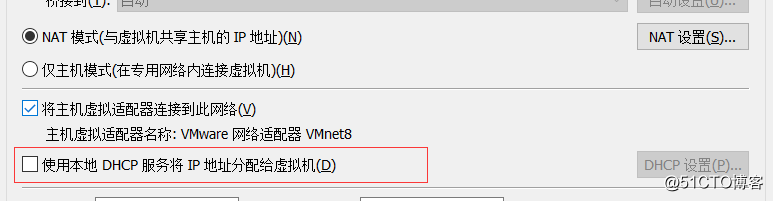
=================================================================
安装画面: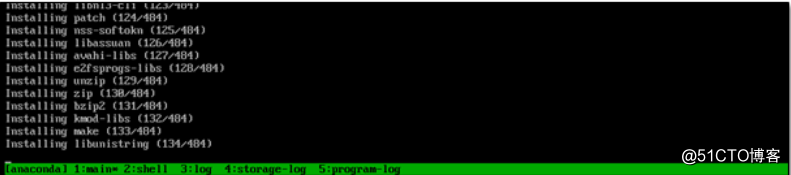
=================================================================
以上都是基于图形化的安装,手动安装如下:
mount /dev/cdrom /mnt/
df -h|grep mnt
cobbler import --path=/mnt/ --name=CentOS-7.4-x86_64 --arch=x86_64
cobbler distro list
CentOS-7.4-x86_64
kickstart的配置文件是一样的
cobbler profile edit --name=CentOS-7.4-x86_64 --kickstart=/var/lib/cobbler/kickstarts/CentOS-7.4-x86_64.cfg
cobbler profile edit --name=CentOS-7.4-x86_64 --kopts='net.ifnames=0 biosdevname=0'
cobbler profile reportcobbler sync
vim /etc/cobbler/pxe/pxedefault.template
MENU TITLE Cobbler|Welcome to Cobbleer(安装界面,可自行选择更改与否)
cobbler sync
cobbler system add --name=zbjt3 --mac=00:50:56:29:12:9A --profile=CentOS-7.4-x86_64 --interface=eth0 --static=1 --hostname=zbjt3.com --name-servers="8.8.8.8"
对应的mac地址虚拟机启动就可以安装了。
转载于:https://blog.51cto.com/13754781/2316929