OpenCV中的新函数connectedComponentsWithStats使用
主要内容:对比新旧函数,用于过滤原始图像中轮廓分析后较小的区域,留下较大区域。

目前方向:图像拼接融合、图像识别 联系方式:jsxyhelu@foxmail.com
关键字 :connectedComponentsWithStats
在以前,常用的方法是
”
是先调用
cv::findContours()
函数(传入
cv::RETR_CCOMP
标志),随后在得到的连通区域上循环调用
cv::drawContours()
“
比如,我在GOCVHelper中这样进行了实现
//寻找最大的轮廓
VP FindBigestContour(Mat src){
int imax = 0; //代表最大轮廓的序号
int imaxcontour = -1; //代表最大轮廓的大小
std::vector<std::vector<Point>>contours;
findContours(src,contours,CV_RETR_LIST,CV_CHAIN_APPROX_SIMPLE);
for (int i=0;i<contours.size();i++){
int itmp = contourArea(contours[i]);//这里采用的是轮廓大小
if (imaxcontour < itmp ){
imax = i;
imaxcontour = itmp;
}
}
return contours[imax];
}
//寻找并绘制出彩色联通区域
vector<VP> connection2(Mat src,Mat& draw){
draw = Mat::zeros(src.rows,src.cols,CV_8UC3);
vector<VP>contours;
findContours(src.clone(),contours,CV_RETR_LIST,CV_CHAIN_APPROX_SIMPLE);
//由于给大的区域着色会覆盖小的区域,所以首先进行排序操作
//冒泡排序,由小到大排序
VP vptmp;
for(int i=1;i<contours.size();i++){
for(int j=contours.size()-1;j>=i;j--){
if (contourArea(contours[j]) < contourArea(contours[j-1]))
{
vptmp = contours[j-1];
contours[j-1] = contours[j];
contours[j] = vptmp;
}
}
}
在OpenCV3中有了新的专门的函数
cv::connectedComponents()
和函数
cv::connectedComponentsWithStats()
定义:
int cv::connectedComponents (
cv::InputArrayn image, // input 8-bit single-channel (binary)
cv::OutputArray labels, // output label map
int connectivity = 8, // 4- or 8-connected components
int ltype = CV_32S // Output label type (CV_32S or CV_16U)
);
int cv::connectedComponentsWithStats (
cv::InputArrayn image, // input 8-bit single-channel (binary)
cv::OutputArray labels, // output label map
cv::OutputArray stats, // Nx5 matrix (CV_32S) of statistics:
// [x0, y0, width0, height0, area0;
// ... ; x(N-1), y(N-1), width(N-1),
// height(N-1), area(N-1)]
cv::OutputArray centroids, // Nx2 CV_64F matrix of centroids:
// [ cx0, cy0; ... ; cx(N-1), cy(N-1)]
int connectivity = 8, // 4- or 8-connected components
int ltype = CV_32S // Output label type (CV_32S or CV_16U)
);
其中,新出现的参数
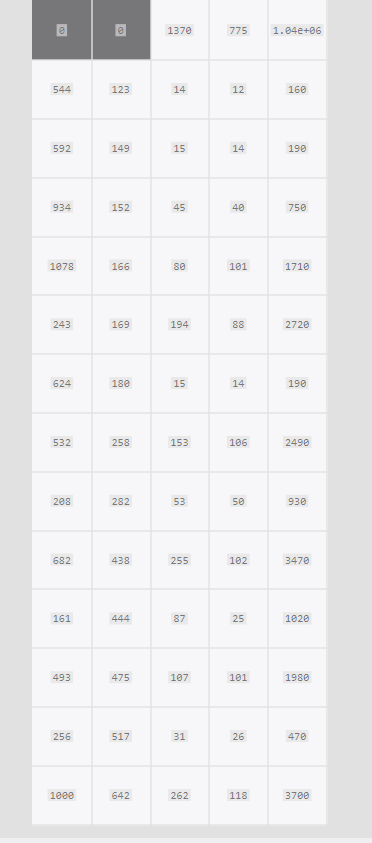
stats:长这样
分别对应各个轮廓的x,y,width,height和面积。注意0的区域标识的是background
而
centroids则对应的是中心点
而label则对应于表示是当前像素是第几个轮廓
例子:
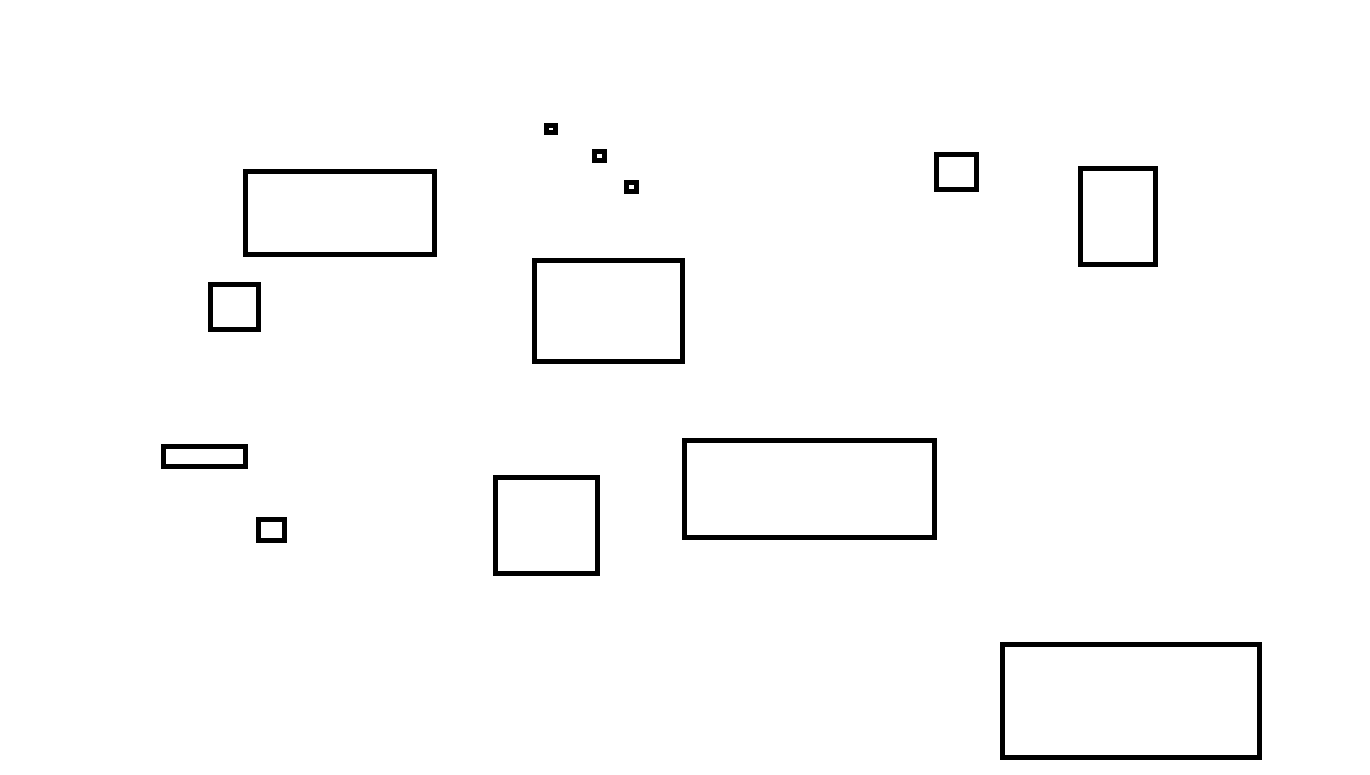
对于图像
Mat img = cv::imread( "e:/sandbox/rect.png",0);
cv::Mat img_edge, labels, img_color, stats,centroids;
cv::threshold(img, img_edge, 128, 255, cv::THRESH_BINARY);
bitwise_not(img_edge,img_edge);
cv::imshow("Image after threshold", img_edge);
int i, nccomps = cv::connectedComponentsWithStats (
img_edge, labels,
stats, centroids
);
cout << "Total Connected Components Detected: " << nccomps << endl;
vector<cv::Vec3b> colors(nccomps+1);
colors[0] = Vec3b(0,0,0); // background pixels remain black.
for( i = 1; i < nccomps; i++ ) {
colors[i] = Vec3b(rand()%256, rand()%256, rand()%256);
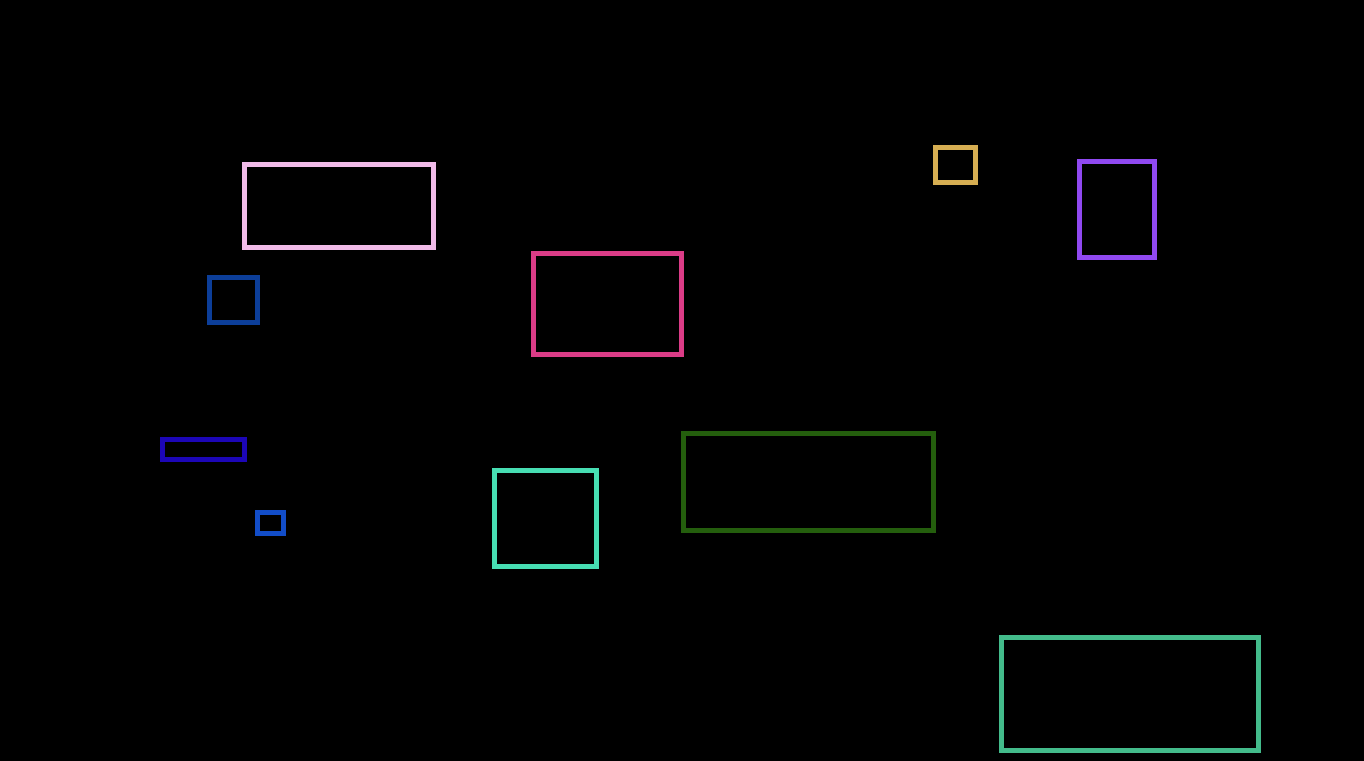
if( stats.at<int>(i, cv::CC_STAT_AREA) < 200 )
colors[i] = Vec3b(0,0,0); // small regions are painted with black too.
}
img_color = Mat::zeros(img.size(), CV_8UC3);
for( int y = 0; y < img_color.rows; y++ )
for( int x = 0; x < img_color.cols; x++ )
{
int label = labels.at<int>(y, x);
CV_Assert(0 <= label && label <= nccomps);
img_color.at<cv::Vec3b>(y, x) = colors[label];
}
cv::imshow("Labeled map", img_color);
cv::waitKey();
注意:
1、对于OpenCV来说,白色代表有数据,黑色代表没有数据,所以图像输入之前要转换成”黑底白图“
2、看
labels
和
stats,其中第1 2 6 个的面积小于200
而labels中
完全对的上号,结果为
来自为知笔记(Wiz)
目前方向:图像拼接融合、图像识别 联系方式:jsxyhelu@foxmail.com