Iceberg源码学习:flink读iceberg流程一
实例
StreamExecutionEnvironment env = StreamExecutionEnvironment.getExecutionEnvironment();
StreamExecutionEnvironment.createLocalEnvironment();
TableLoader tableLoader = TableLoader.fromHadoopTable("XXX");

DataStream<RowData> stream = FlinkSource.forRowData()
        .env(env)
        .tableLoader(tableLoader)
        .streaming(true)
        .build();

stream.print();
env.execute("IcebergRead");
流程详解
首先看build()方法:
public DataStream<RowData> build() {
    Preconditions.checkNotNull(this.env, "StreamExecutionEnvironment should not be null");
    FlinkInputFormat format = this.buildFormat();
    ScanContext context = this.contextBuilder.build();
    TypeInformation<RowData> typeInfo = FlinkCompatibilityUtil.toTypeInfo(FlinkSchemaUtil.convert(context.project()));
    if (!context.isStreaming()) {
        int parallelism = this.inferParallelism(format, context);
        if (this.env.getMaxParallelism() > 0) {
            parallelism = Math.min(parallelism, this.env.getMaxParallelism());
        }

        return this.env.createInput(format, typeInfo).setParallelism(parallelism);
    } else {
        StreamingMonitorFunction function = new StreamingMonitorFunction(this.tableLoader, context);
        String monitorFunctionName = String.format("Iceberg table (%s) monitor", this.table);
        String readerOperatorName = String.format("Iceberg table (%s) reader", this.table);
        return this.env.addSource(function, monitorFunctionName).transform(readerOperatorName, typeInfo, StreamingReaderOperator.factory(format));
    }
}
该方法主要做了两件事情:
-
利用tableLoader加载对应的table,然后通过这个table获取到对应的FileIO、Schema、EncryptionManager、ScanContext对象,然后分两种情况,批读取和流读取
-
在流式读取情况下,将DataSourceStreamingMonitorFunction和StreamingReaderOperator蒜子注册到env上
StreamingMonitorFunction:不停的扫描iceberg表看是否有新的snapshot生成,如果有则生成CombinedScanTask发向下游。
StreamingReaderOperator:一旦收到source发来的split,会将其放到一个队列中,然后通过一个MailboxExecutor线程处理,这种结构可以将读取数据和处理checkpoint barriers功能分离,避免潜在的背压。
StreamingMonitorFunction
继承关系:
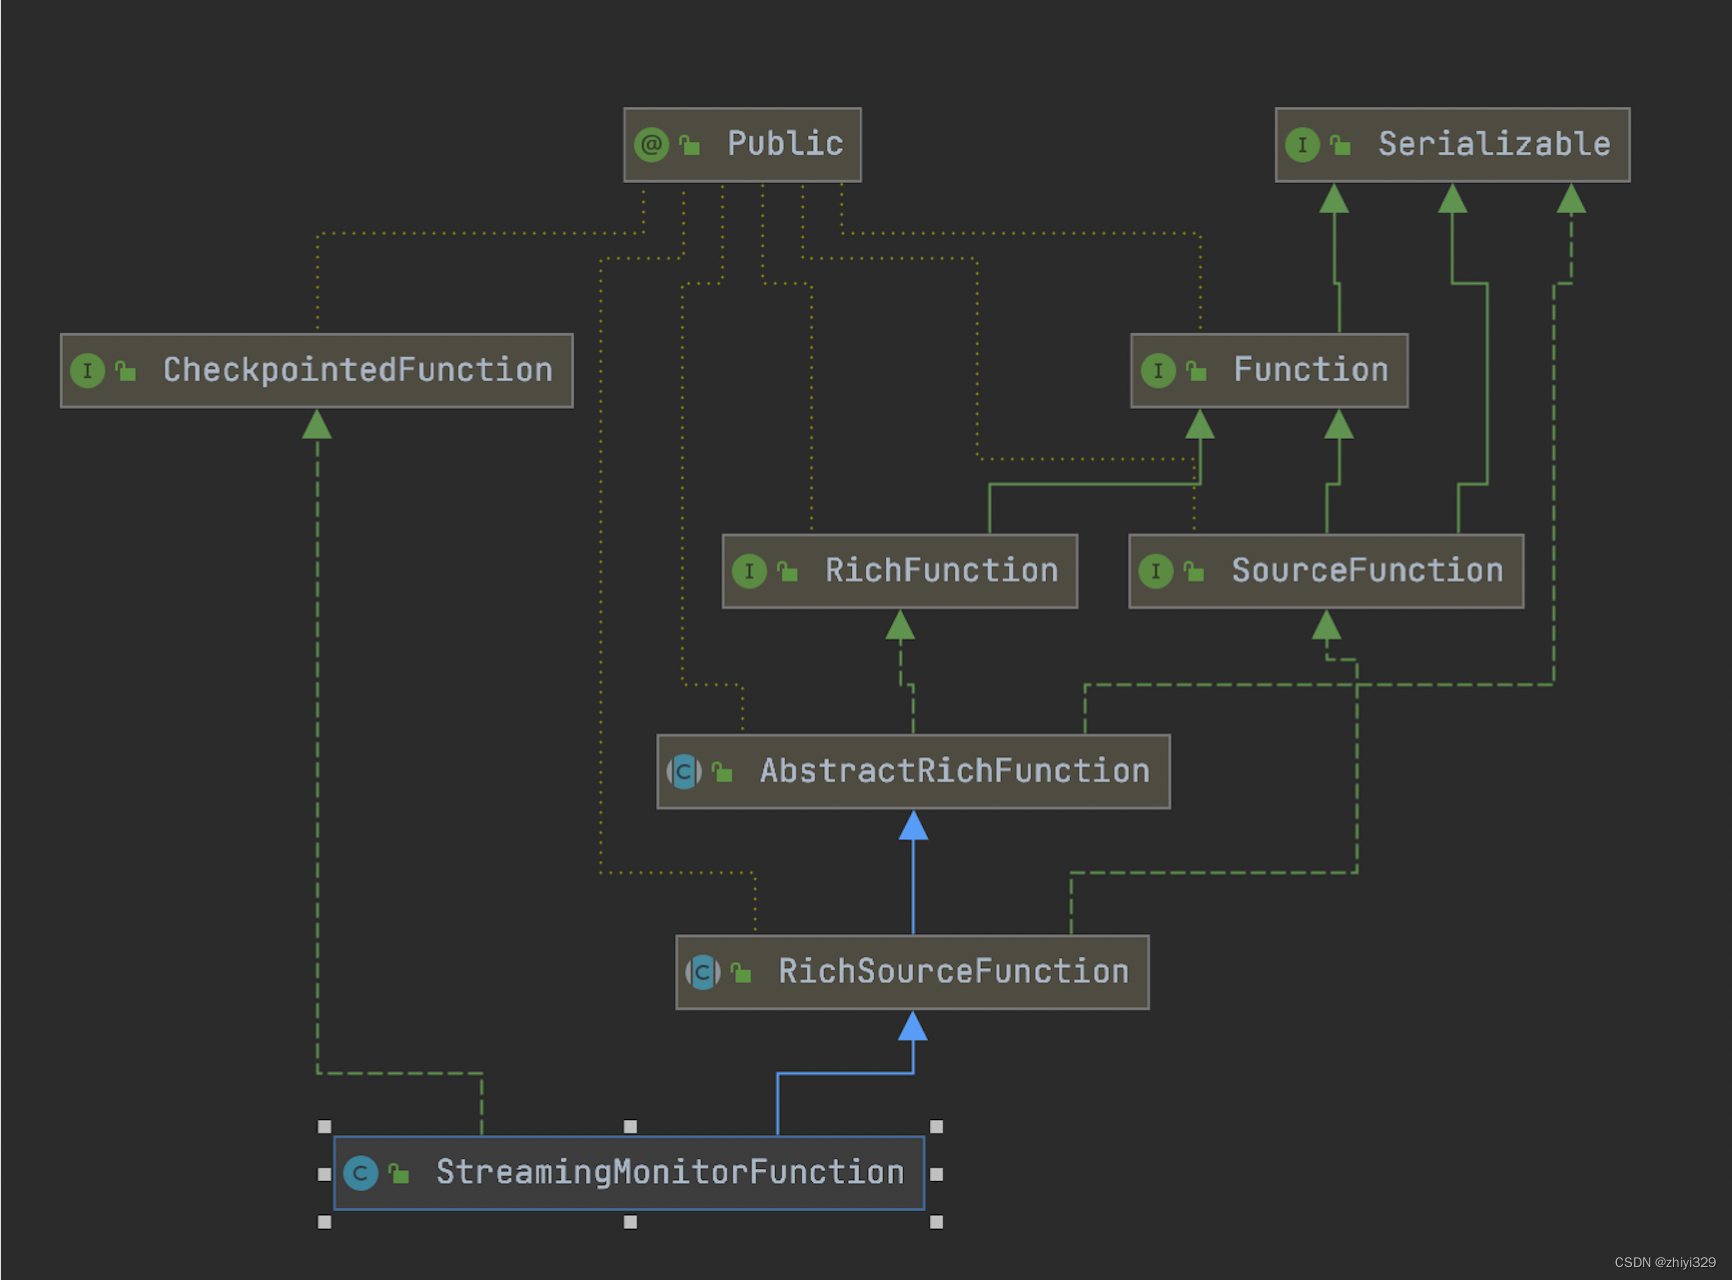
它实现了CheckpointedFunction接口,所以能够保证在source端的一致性;
另外,因为它并没有实现ParallelSourceFunction接口,所以它注定只能有一个并行度。这里的目的是确保在只有一个线程去监控Iceberg表和分发任务,多线程只会发生数据错乱。
run()方法流程:
public void run(SourceFunction.SourceContext<FlinkInputSplit> ctx) throws Exception {
    this.sourceContext = ctx;

    while(this.isRunning) {
        this.monitorAndForwardSplits();
        Thread.sleep(this.scanContext.monitorInterval().toMillis());
    }

}
monitorAndForwardSplits()方法,获取表当前最新的快照snapshotId,如果记录了lastSnapshotId,那就生成lastSnapshotId到snapshotId之间的增量文件的FlinkInputSplit对象:
void monitorAndForwardSplits() {
    this.table.refresh();
    Snapshot snapshot = this.table.currentSnapshot();
    if (snapshot != null && snapshot.snapshotId() != this.lastSnapshotId) {
        long snapshotId = snapshot.snapshotId();
        ScanContext newScanContext;
        if (this.lastSnapshotId == -1L) {
            newScanContext = this.scanContext.copyWithSnapshotId(snapshotId);
        } else {
            snapshotId = this.toSnapshotIdInclusive(this.lastSnapshotId, snapshotId, this.scanContext.maxPlanningSnapshotCount());
            newScanContext = this.scanContext.copyWithAppendsBetween(this.lastSnapshotId, snapshotId);
        }

        LOG.debug("Start discovering splits from {} (exclusive) to {} (inclusive)", this.lastSnapshotId, snapshotId);
        long start = System.currentTimeMillis();
        FlinkInputSplit[] splits = FlinkSplitPlanner.planInputSplits(this.table, newScanContext, this.workerPool);
        LOG.debug("Discovered {} splits, time elapsed {}ms", splits.length, System.currentTimeMillis() - start);
        start = System.currentTimeMillis();
        synchronized(this.sourceContext.getCheckpointLock()) {
            FlinkInputSplit[] var9 = splits;
            int var10 = splits.length;
            int var11 = 0;

            while(true) {
                if (var11 >= var10) {
                    this.lastSnapshotId = snapshotId;
                    break;
                }

                FlinkInputSplit split = var9[var11];
                this.sourceContext.collect(split);
                ++var11;
            }
        }

        LOG.debug("Forwarded {} splits, time elapsed {}ms", splits.length, System.currentTimeMillis() - start);
    }

}
此处核心:
- 构造出从startSnapshotId到snapshotId之间的增量FlinkInputSplit(FlinkSplitPlanner.planInputSplits为核心内容,流程二详细讲解)
- 将FlinkInputSplit分配给下游进一步的处理
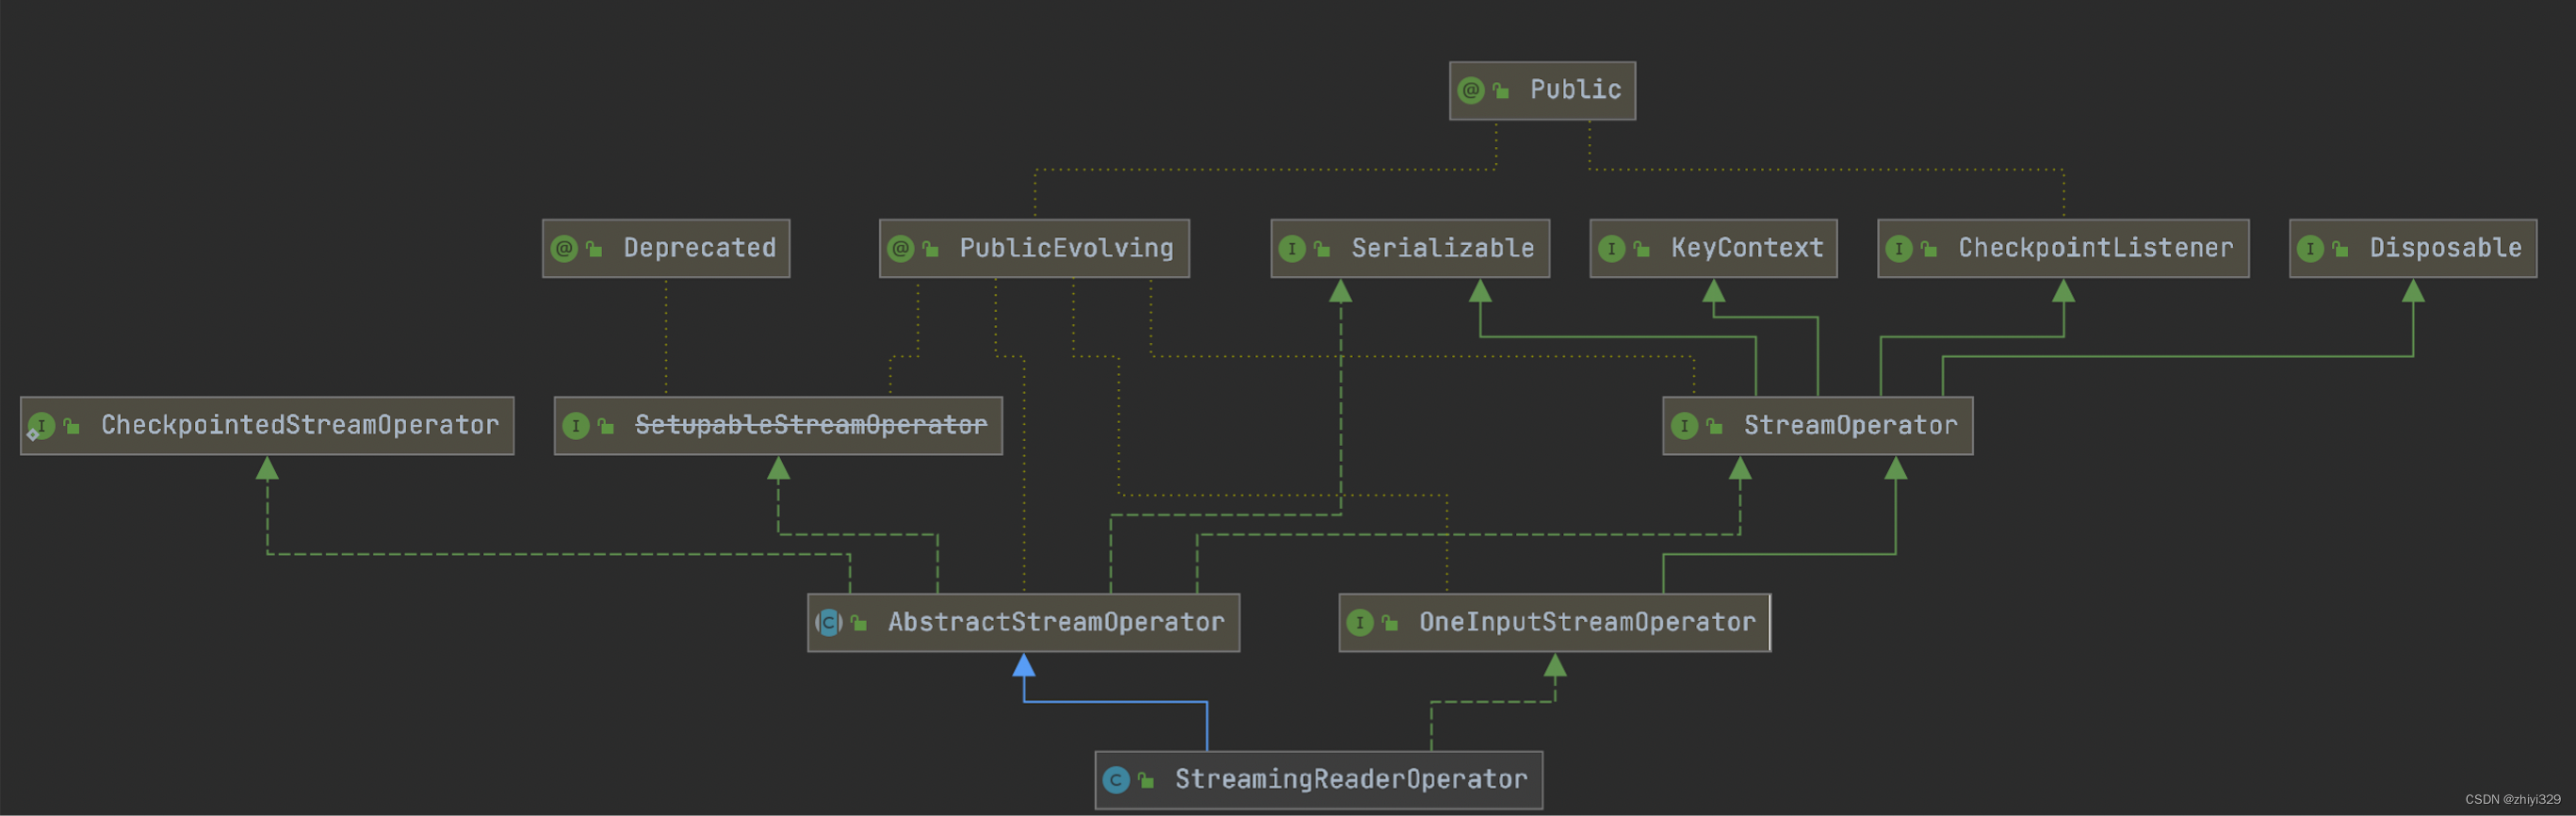
StreamingReaderOperator
继承关系:
一些参数:
private final MailboxExecutor executor;
private FlinkInputFormat format;
private transient SourceFunction.SourceContext<RowData> sourceContext;
private transient ListState<FlinkInputSplit> inputSplitsState;
private transient Queue<FlinkInputSplit> splits;
private transient SplitState currentSplitState;
其中:
- executor是暴露出来的一个执行器,这个线程同时处理用户操作和checkpoint动作,我们一次只预定一个InputSplit去读取,因此当新的checkpoint到达是能被触发而不是被InputSplit读取操作阻塞。
- inputSplitsState为存储FlinkInputSplit的状态变量,即需要被读取的FlinkInputSplit,会在checkpoint持久化。
- splits为当前周期需要读取的FlinkInputSplit,会在initializeState从inputSplitsState读出来。
- currentSplitState表示当前的读取状态。
处理数据流程:
public void processElement(StreamRecord<FlinkInputSplit> element) {
    this.splits.add((FlinkInputSplit)element.getValue());
    this.enqueueProcessSplits();
}
将接收到的数据加入splits然后调用enqueueProcessSplits方法
private void enqueueProcessSplits() {
    if (this.currentSplitState == StreamingReaderOperator.SplitState.IDLE && !this.splits.isEmpty()) {
        this.currentSplitState = StreamingReaderOperator.SplitState.RUNNING;
        this.executor.execute(this::processSplits, this.getClass().getSimpleName());
    }

}
在executor中异步的执行了如下操作:
- 从列表头中取出一个FlinkInputSplit对象,调用FlinkInputFormat.open()
- 轮询调用FlinkInputFormat.nextRecord()获取RowData数据对象,并交给了flink的SourceContext,至此数据真正的进入了流
一直循环1-2这个过程,直到队列为空。
private void processSplits() throws IOException {
  FlinkInputSplit split = (FlinkInputSplit)this.splits.poll();
  if (split == null) {
      this.currentSplitState = StreamingReaderOperator.SplitState.IDLE;
  } else {
      this.format.open(split);

      try {
          RowData nextElement = null;

          while(!this.format.reachedEnd()) {
              nextElement = this.format.nextRecord(nextElement);
              this.sourceContext.collect(nextElement);
          }
      } finally {
          this.currentSplitState = StreamingReaderOperator.SplitState.IDLE;
          this.format.close();
      }

      this.enqueueProcessSplits();
  }
}
StreamingReaderOperator中有一个成员变量为FlinkInputFormat format,FlinkInputFormat继承自flink中的RichInputFormat,RichInputFormat继承自InputFormat,InputFormat为读取数据时候的一个抽象类,一些数据的读取数据的相关类都基于它实现。
format的open()方法会去构建一个RowDataIterator对象,RowDataIterator对应一个CombinedScanTask的数据读取的迭代器:
public void open(FlinkInputSplit split) {
    this.iterator = new DataIterator(this.rowDataReader, split.getTask(), this.io, this.encryption);
}
nextRecord()方法获取下一个元素:
public RowData nextRecord(RowData reuse) {
    ++this.currentReadCount;
    return (RowData)this.iterator.next();
}
进入DataIterator.next():
public T next() {
    this.updateCurrentIterator();
    ++this.recordOffset;
    return this.currentIterator.next();
}

private void updateCurrentIterator() {
    try {
        while(!this.currentIterator.hasNext() && this.tasks.hasNext()) {
            this.currentIterator.close();
            this.currentIterator = this.openTaskIterator((FileScanTask)this.tasks.next());
            ++this.fileOffset;
            this.recordOffset = 0L;
        }

    } catch (IOException var2) {
        throw new UncheckedIOException(var2);
    }
}


private CloseableIterator<T> openTaskIterator(FileScanTask scanTask) {
    return this.fileScanTaskReader.open(scanTask, this.inputFilesDecryptor);
}
updateCurrentIterator()函数轮询了CombinedScanTask中的Collection files(),针对每个FileScanTask执行了FileScanTaskReader的fileScanTaskReader.open(scanTask, inputFilesDecryptor),通过FileScanTask任务读取了RowData对象,读取底层文件,包括PARQUET、AVRO、ORC三种文件格式的读取。