摄像头测试软件汇总
推荐一个零声学院免费教程,个人觉得老师讲得不错,
分享给大家:[Linux,Nginx,ZeroMQ,MySQL,Redis,
fastdfs,MongoDB,ZK,流媒体,CDN,P2P,K8S,Docker,
TCP/IP,协程,DPDK等技术内容,点击立即学习:
https://ke.qq.com/course/4032547?flowToken=1042705
前言
本来是想用xawtv来测试摄像头,结果不是很喜欢,然后,就想找一个喜欢的,然后就变成摄像头软件汇总了。
一 在ubuntu虚拟机中查看
拢共分三步
1.先 ls /dev/video*
ls /dev/video*2. 插入外置摄像头
3.再 ls /dev/video*
多出来的那个videoXXX设备就是摄像头了。
我使用的是一个外置的USB摄像头,将USB摄像头连接到虚拟机后,使用dmesg命令,会看到usb摄像头被加载过程的信息。
[92462.307190] usb 3-2: new high-speed USB device number 5 using xhci_hcd
[92462.726303] usb 3-2: New USB device found, idVendor=1e45, idProduct=3035
[92462.726306] usb 3-2: New USB device strings: Mfr=3, Product=1, SerialNumber=2
[92462.726356] usb 3-2: Product: USB Camera
[92462.726357] usb 3-2: Manufacturer: Generic
[92462.726358] usb 3-2: SerialNumber: 0001
[92462.857710] media: Linux media interface: v0.10
[92462.994536] Linux video capture interface: v2.00
[92463.096302] usbcore: registered new interface driver snd-usb-audio
[92463.177813] uvcvideo: Found UVC 1.00 device USB Camera (1e45:3035)
[92463.185183] input: USB Camera: USB Camera as /devices/pci0000:00/0000:00:15.0/0000:03:00.0/usb3/3-2/3-2:1.0/input/input6
[92463.185506] usbcore: registered new interface driver uvcvideo
[92463.185507] USB Video Class driver (1.1.1)
[92469.683588] usb 3-2: USB disconnect, device number 5
[92470.406837] usb 3-2: new high-speed USB device number 6 using xhci_hcd
[92470.810353] usb 3-2: New USB device found, idVendor=1e45, idProduct=3035
[92470.810356] usb 3-2: New USB device strings: Mfr=3, Product=1, SerialNumber=2
[92470.810357] usb 3-2: Product: USB Camera
[92470.810358] usb 3-2: Manufacturer: Generic
[92470.810359] usb 3-2: SerialNumber: 0001
[92470.823773] uvcvideo: Found UVC 1.00 device USB Camera (1e45:3035)
[92470.833211] input: USB Camera: USB Camera as /devices/pci0000:00/0000:00:15.0/0000:03:00.0/usb3/3-2/3-2:1.0/input/input7
[92478.499868] usb 3-2: USB disconnect, device number 6
[92479.215252] usb 3-2: new high-speed USB device number 7 using xhci_hcd
[92479.614817] usb 3-2: New USB device found, idVendor=1e45, idProduct=3035
[92479.614819] usb 3-2: New USB device strings: Mfr=3, Product=1, SerialNumber=2
[92479.614820] usb 3-2: Product: USB Camera
[92479.614821] usb 3-2: Manufacturer: Generic
[92479.614821] usb 3-2: SerialNumber: 0001
[92479.623908] uvcvideo: Found UVC 1.00 device USB Camera (1e45:3035)
[92479.629663] input: USB Camera: USB Camera as /devices/pci0000:00/0000:00:15.0/0000:03:00.0/usb3/3-2/3-2:1.0/input/input8
[92483.057036] usb 3-2: USB disconnect, device number 7
[92483.770509] usb 3-2: new high-speed USB device number 8 using xhci_hcd
[92484.172011] usb 3-2: New USB device found, idVendor=1e45, idProduct=3035
[92484.172013] usb 3-2: New USB device strings: Mfr=3, Product=1, SerialNumber=2
[92484.172015] usb 3-2: Product: USB Camera
[92484.172016] usb 3-2: Manufacturer: Generic
[92484.172017] usb 3-2: SerialNumber: 0001
[92484.181008] uvcvideo: Found UVC 1.00 device USB Camera (1e45:3035)
[92484.189816] input: USB Camera: USB Camera as /devices/pci0000:00/0000:00:15.0/0000:03:00.0/usb3/3-2/3-2:1.0/input/input9
[92484.551272] usb 3-2: USB disconnect, device number 8
[92485.262678] usb 3-2: new high-speed USB device number 9 using xhci_hcd
[92485.660855] usb 3-2: New USB device found, idVendor=1e45, idProduct=3035
[92485.660857] usb 3-2: New USB device strings: Mfr=3, Product=1, SerialNumber=2
[92485.660858] usb 3-2: Product: USB Camera
[92485.660859] usb 3-2: Manufacturer: Generic
[92485.660859] usb 3-2: SerialNumber: 0001
[92485.670919] uvcvideo: Found UVC 1.00 device USB Camera (1e45:3035)
[92485.678017] input: USB Camera: USB Camera as /devices/pci0000:00/0000:00:15.0/0000:03:00.0/usb3/3-2/3-2:1.0/input/input10
查看设备名:
$ ls /dev/video* -ls
0 crw-rw----+ 1 root video 81, 0 9月  16 11:55 /dev/video0
当前/dev目录中多出了一个video0设备,主设备号是81,次设备号是0
二 xawtv测试

点击OK,邮件点击视频窗口,看到Options窗口。

(⊙o⊙)…好像我的需求中不需要窗口
看看帮助信息:
xawtv -hlkmao@ubuntu:~$ xawtv -h
This is xawtv-3.103, running on Linux/x86_64 (4.15.0-142-generic)
usage: xawtv [ options ] [ station ]
options:
-h -help print this text
-v -debug n debug level n, n = [0..2]
-remote assume remote display
-n -noconf don't read the config file
-m -nomouse startup with mouse pointer disabled
-f -fullscreen startup in fullscreen mode
-(no)dga enable/disable DGA extension
-(no)vm enable/disable VidMode extension
-(no)randr enable/disable Xrandr extension
-(no)xv enable/disable Xvideo extension altogether
-(no)xv-video enable/disable Xvideo extension (for video only,
i.e. XvPutVideo() calls)
-(no)xv-image enable/disable Xvideo extension (for image scaling
only, i.e. XvPutImage() calls)
-(no)gl enable/disable OpenGL
-(no)alsa enable/disable alsa streaming. Default: enabled
-(no)alsa-cap manually specify an alsa capture interface
-(no)alsa-pb manually specify an alsa playback interface
-alsa-latency manually specify an alsa latency in ms. Default: 30
-b -bpp n color depth of the display is n (n=24,32)
-o -outfile file filename base for snapshots
-c -device file use <file> as video4linux device
-D -driver name use <name> as video4linux driver
-C -dspdev file use <file> as audio (oss) device
-vbidev file use <file> as vbi device
-joydev file use <file> as joystick device
-shift x shift display by x bytes
-fb let fb (not X) set up v4l device
-parallel n use n compression threads
-bufcount n use n video buffers
-hwscan print a list of available devices.
station:
this is one of the stations listed in $HOME/.xawtv
Check the manual page for a more detailed description.
--
Gerd Knorr <kraxel@bytesex.org>
lkmao@ubuntu:~$ 使用xawtv扫描系统中的视频设备
xawtv -hwscanlkmao@ubuntu:~$ xawtv -hwscan
This is xawtv-3.103, running on Linux/x86_64 (4.15.0-142-generic)
looking for available devices
Xlib: extension "XVideo" missing on display "localhost:10.0".
/dev/video0: OK [ -device /dev/video0 ]
type : libv4l
name : USB Camera: USB Camera
flags: capture
lkmao@ubuntu:~$
三cheese软件
cheese正常的翻译是干酪、乳酪、芝士,拍照的时候翻译成茄子或者七喜。这个好像默认是安装的。没有安装的话,也很简单。
sudo apt-get install cheesecheese
看一下帮助信息:
lkmao@ubuntu:~$ cheese -h
用法:
  cheese [选项...]

帮助选项:
  -h, --help                 显示帮助选项
  --help-all                 显示全部帮助选项
  --help-gapplication        显示 GApplication 选项
  --help-gtk                 显示 GTK+ 选项

应用程序选项:
  -w, --wide                 以宽屏模式启动
  -d, --device=设备          用作摄像头的设备
  -v, --version              输出版本信息并退出
  -f, --fullscreen           以全屏模式启动
  --display=显示             要使用的 X 显示

lkmao@ubuntu:~$
看一下就好了,再换一个
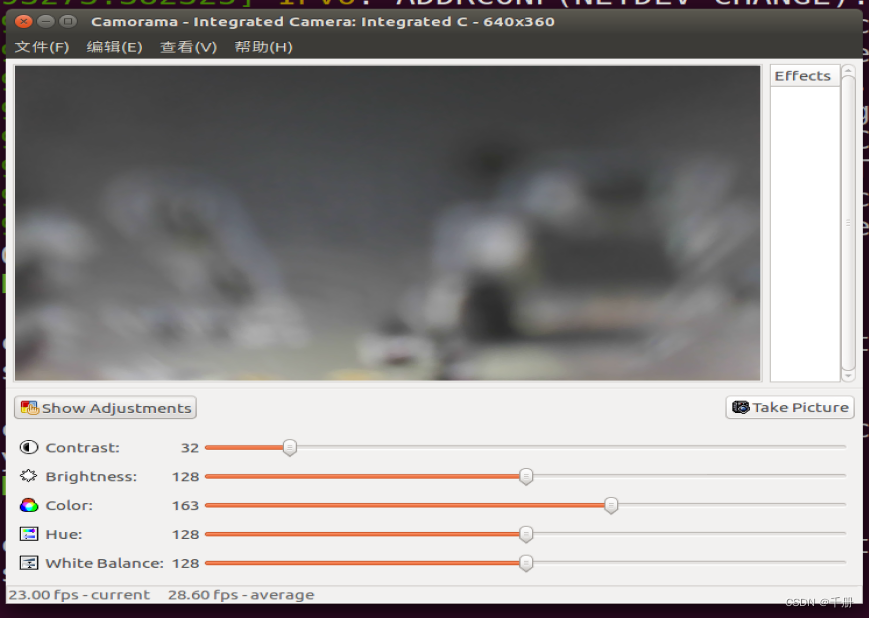
四 camorama测试
这个没用过,得先安装
sudo apt install camorama
这个东西好像支持FTP远程访问
下面的尝试不一定成功啊,试一下,将摄像头连接到另一个虚拟机中,取名虚拟机2号,小名虚2。并保证该虚拟机安装了ftp服务器。(⊙o⊙)…,没安装。那就安装吧,过程在本文下面。
在虚1中运行camorama,然后配置FTP,这个时候虚1中已经没有摄像头了,因为连接到虚2上了,打开会报错,如下所示,所以要看看帮助信息

先在虚1中连接笔记本电脑的摄像头。保证camorama能打开
配置如下所示:

点击take picture,报错。
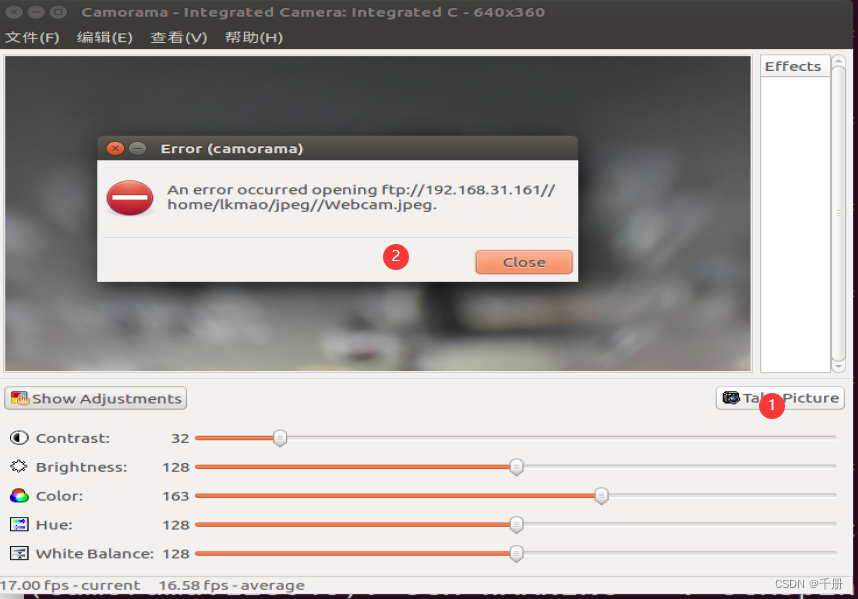
不知道怎么弄了,暂时先换一个软件。
ubuntu中使用guvcview
sudo apt install guvcview直接运行guvcview即可

mplayer
sudo apt install mencodersudo apt install mplayer运行
$ mplayer
mplayer: error while loading shared libraries: libfaad.so.2: cannot open shared object file: No such file or directory
$
这个没安装成功
$ sudo apt install mencoder
Reading package lists... Done
Building dependency tree... Done
Reading state information... Done
You might want to run 'apt --fix-broken install' to correct these.
The following packages have unmet dependencies:
 mencoder : Depends: libfaad2 (>= 2.7) but it is not going to be installed
 mplayer : Depends: libfaad2 (>= 2.7) but it is not going to be installed
E: Unmet dependencies. Try 'apt --fix-broken install' with no packages (or specify a solution).
$
五 在ubuntu中测试luvcview
安装依赖包
sudo apt-get install debhelper
sudo apt-get install libsdl1.2-dev
sudo apt-get install libv4l-dev
sudo apt-get install pkg-config
下载的0.2.6版本的源码,make会报错,将其中的会报错文件中的
#include <linux/videodev.h>
替换成#include <linux/videodev2.h>
只需要修改三个文件就行了,编译好的源码,在我的下载资源中有。地址:
https://download.csdn.net/download/yueni_zhao/86544123?spm=1001.2014.3001.5501
编译完毕后生成luvcview可执行文件
./luvcview 如果找不到摄像头会出书如下内容:
$ ./luvcview
luvcview 0.2.6

SDL information:
  Video driver: x11
  A window manager is available
Device information:
  Device path:  /dev/video0
ERROR opening V4L interface: No such file or directory
如果有摄像头,输出如下内容:
$ ./luvcview
luvcview 0.2.6

SDL information:
  Video driver: x11
  A window manager is available
Device information:
  Device path:  /dev/video0
Stream settings:
  Frame format: MJPG
  Frame size:   640x480
  Frame rate:   30 fps
在虚拟机中安装FTP服务器
sudo apt-get install vsftpdlkmao@ubuntu:~$ sudo apt-get install vsftpd
[sudo] password for lkmao:
E: Could not get lock /var/lib/dpkg/lock-frontend - open (11: Resource temporarily unavailable)
E: Unable to acquire the dpkg frontend lock (/var/lib/dpkg/lock-frontend), is another process using it?
lkmao@ubuntu:~$
安装器被锁住了,这都是自动更新的锅。将自动更新设置为never。然后重启

重启后,开始安装,等待软件安装完成,完成以后使用 VI 命令打开/etc/vsftpd.conf,命令如下:
sudo vi /etc/vsftpd.conf打开 vsftpd.conf 文件以后找到如下两行:
local_enable=YES
write_enable=YES
sudo /etc/init.d/vsftpd restart总结