FastAPI简介与快速体验
文章目录
- 一、FastAPI简介
- 二、FastAPI的特点
- 三、安装
- 3.1 安装 fastapi
- 3.2 安装 ASGI 服务器
- 四、FastAPI快速体验
- 4.1 编写main.py文件
- 4.2 运行服务
- 4.3 观察服务运行结果
一、FastAPI简介
FastAPI是一个用于构建API的快速、高性能的WEB框架,使用Python3.6+并基于标准的Python类型提示。
二、FastAPI的特点
- 快速:可与NodeJS和GO比肩的极高性能,是执行速度最快的Python的web框架之一
- 高效编码:代码开发效率可提高至200%至300%
- 更少的Bug:可减少大约40%的开发者人为导致的Bug
- 智能:编辑器中自动补全和提示支持的非常好,可以大幅减少调试时间
- 简单:学习和使用起来非常的简单
- 健壮:代码具有很好的健壮性,而且还能自动生成帮助文档
- 标准化:完全兼容API的相关标准,自动支持Swagger接口文档
三、安装
3.1 安装 fastapi
pip install fastapi
3.2 安装 ASGI 服务器
pip install "uvicorn[standard]"
四、FastAPI快速体验
4.1 编写main.py文件
编写如下代码,即实例化了一个app的对象,然后编写了两个接口,其中helloworld接口无需填写参数,直接返回一个字典,而get_info接口需要在url中填写一个参数,同样也是返回一个字典
from fastapi import FastAPI

app=FastAPI()

@app.get("/")
def helloworld():
    return {"Hello":"World"}

@app.get("/user/{name}")
def get_info(name: str):
    return {"name":name}
4.2 运行服务
可以直接使用如下命令执行
PS G:\redrose2100.com\fast_api_demo> uvicorn main:app --reload
INFO:     Will watch for changes in these directories: ['G:\\redrose2100.com\\fast_api_demo']
ERROR:    [WinError 10013] 以一种访问权限不允许的方式做了一个访问套接字的尝试。
PS G:\redrose2100.com\fast_api_demo>
显然这里报错了,报这个错误的原因是FastAPI默认的是使用8000端口,而当前本机已经占用8000端口了,因此可以通过–port参数修改端口,即再执行如下命令,即将端口修改为8080端口,可以看出此时已经运行起来了。
PS G:\redrose2100.com\fast_api_demo> uvicorn main:app --reload --port 8080
INFO:     Will watch for changes in these directories: ['G:\\redrose2100.com\\fast_api_demo']
INFO:     Uvicorn running on http://127.0.0.1:8080 (Press CTRL+C to quit)
INFO:     Started reloader process [14840] using WatchFiles
INFO:     Started server process [3664]
INFO:     Waiting for application startup.
INFO:     Application startup complete.
WARNING:  WatchFiles detected changes in 'main.py'. Reloading...
INFO:     Started server process [18188]
INFO:     Waiting for application startup.
INFO:     Application startup complete.
4.3 观察服务运行结果
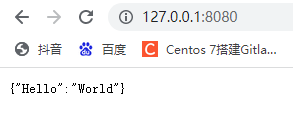
直接使用浏览器打开 127.0.0.1:8080,则此时相当于调用了helloworld接口了,即直接返回一个字典了,如下:
打开 127.0.0.1:8080/docs 则可以打开FastAPI自带的swagger接口文档了,如下

可以将第一个接口展开,点击执行,如下,可以看到已经得到了返回值

把第二个接口展开,可以看到此时这里有一个必填参数,然后点击执行,即也得到了结果

至此就快速体验了一下FastAPI最简单的应用,使用起来非常的简单便捷