从零开始实现自己的串口调试助手(3) - 显示底部收发,优化串口打开/关闭
注意:
1. 我们要实现自发自收,要将tx,rx连起来
2.发送的 不能是中文符号,因为这可能导致,读取到的是英文符号 --> 导致接收到的size 和发送的size 大小不一致
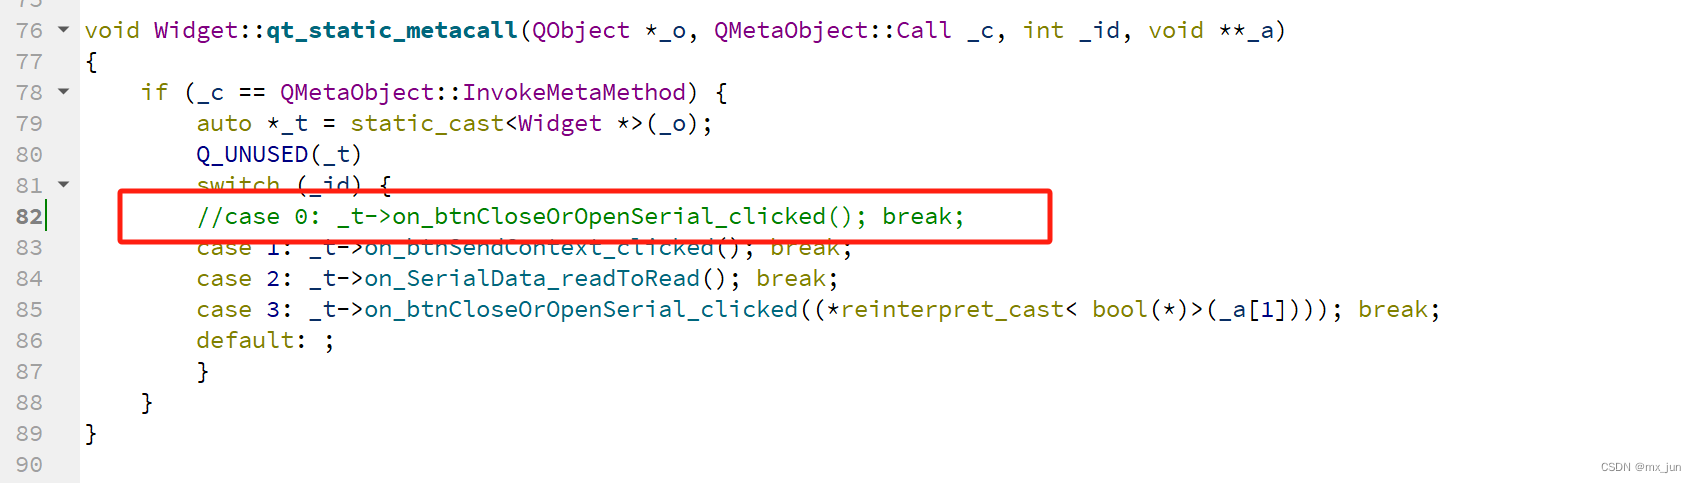
3.注意同时定义两个槽函数的时候两个槽函数都会被调用,我们应该注释掉不需要的那个,爆率剩下的那个避免产生干扰
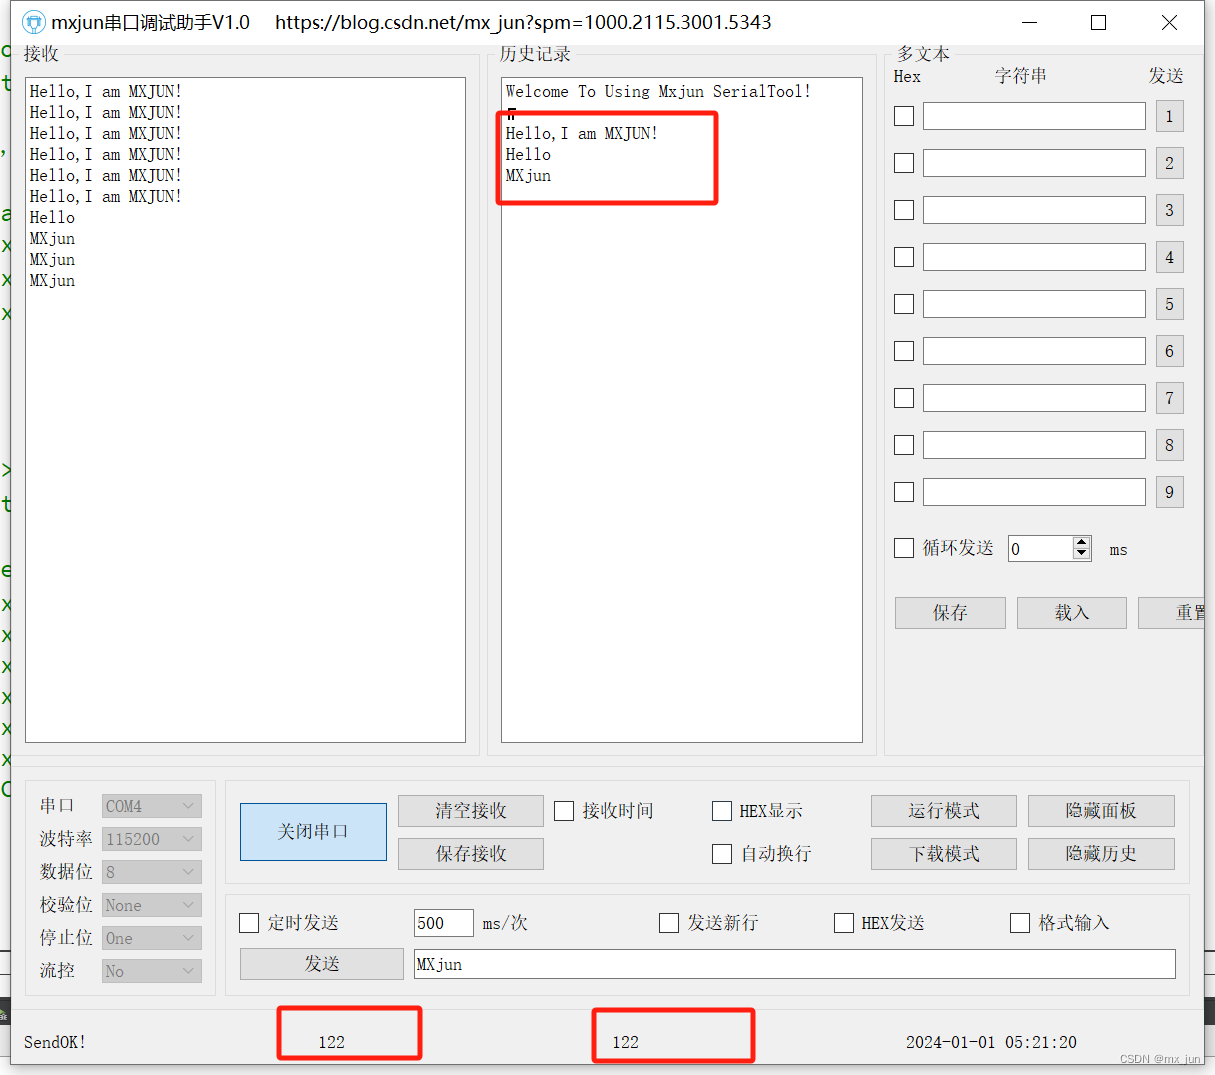
实现收发消息数的显示:
//并且做了一个历史判断 -->避免重复记录
修改代码:
void Widget::on_btnSendContext_clicked()
{const char * sendData = ui->lineEdit_SendContext->text().toStdString().c_str();//QString->String(C++)->char*int writeCnt = 0;writeCnt = serialPort->write(sendData);if(writeCnt == - 1){ui->label_SendStatus->setText("SendError!");}else {writeCntTotal += writeCnt;qDebug()<<"Send:"<<sendData;qDebug()<<"writeCnt"<<writeCnt;ui->label_SendStatus->setText("SendOK!");ui->label_SendCnt->setNum(writeCntTotal);if(strcmp(sendData,sendBak.toStdString().c_str())!=0){ //只有当数据与上一次不相等的时候我们才会追加到我们的历史发生中ui->textEditRecord->append(sendData);sendBak = QString(sendData);}}
}void Widget::on_SerialData_readToRead()
{QString recvMessage = serialPort->readAll();if(recvMessage != NULL){qDebug()<<"get Message: "<<recvMessage;ui->textEditRev->append(recvMessage);readCntTotal += recvMessage.size();qDebug()<<"readCnt"<<recvMessage.size();ui->label_RecvCnt->setNum(readCntTotal);}}
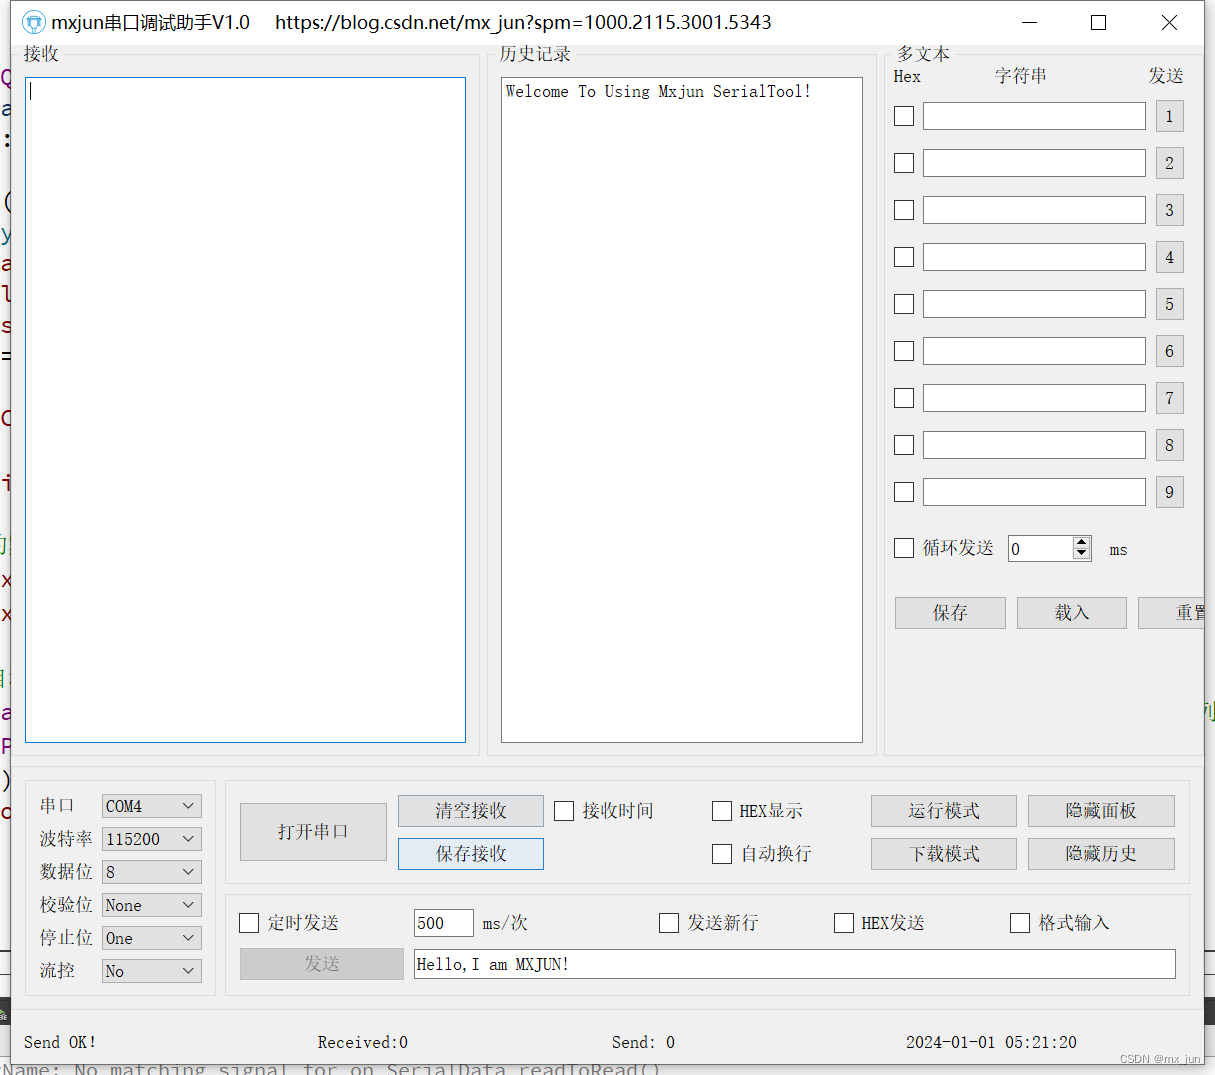
输出效果
================================================================
添加关闭/打开按钮功能
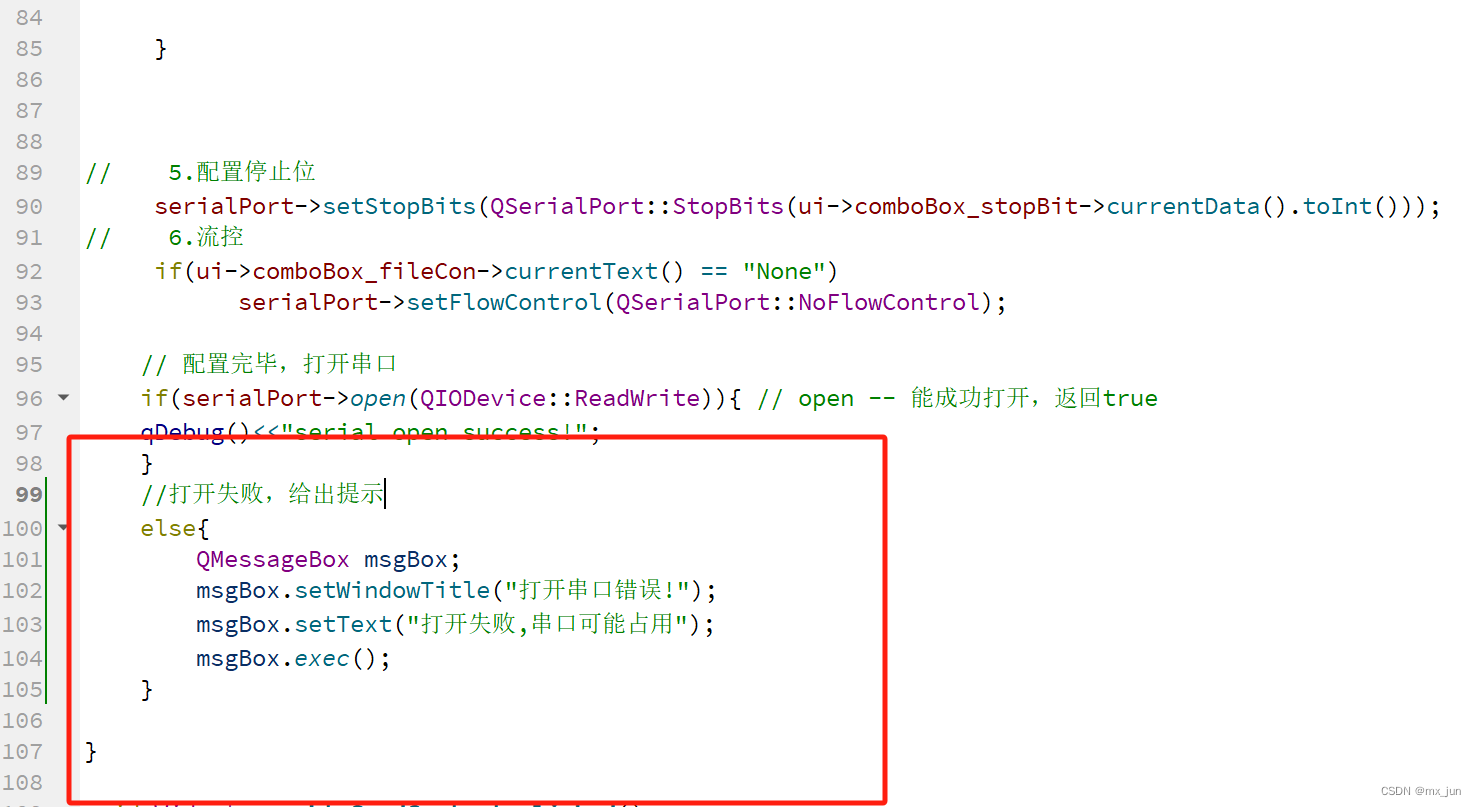
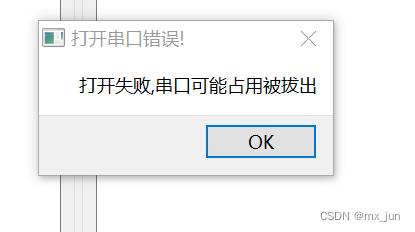
添加打开失败的判断:QMessageBox
添加代码
效果图
方式一: 自己定义一个flag,比如serialStatus 判断串口是否被打开
void Widget::on_btnCloseOrOpenSerial_clicked()
{if(!serialStatus){ //串口没有被打开 --> 配置参数,打开串口// 1.选择端口号serialPort->setPortName(ui->comboBox_serialNum->currentText());
// 2.配置波特率 注意把String ->intserialPort->setBaudRate(ui->comboBox_Baudrate->currentText().toInt());
// 3.配置数据位serialPort->setDataBits(QSerialPort::DataBits(ui->comboBox_dataBit->currentText().toInt()));
// 4.配置校验位switch (ui->comboBox_checkBit->currentIndex()) // 根据下标来匹配{case 0:serialPort->setParity(QSerialPort::NoParity);break;case 1:serialPort->setParity(QSerialPort::EvenParity);break;case 2:serialPort->setParity(QSerialPort::MarkParity);break;case 3:serialPort->setParity(QSerialPort::OddParity);break;case 4:serialPort->setParity(QSerialPort::SpaceParity);break;default:serialPort->setParity(QSerialPort::UnknownParity);break;}// 5.配置停止位serialPort->setStopBits(QSerialPort::StopBits(ui->comboBox_stopBit->currentData().toInt()));
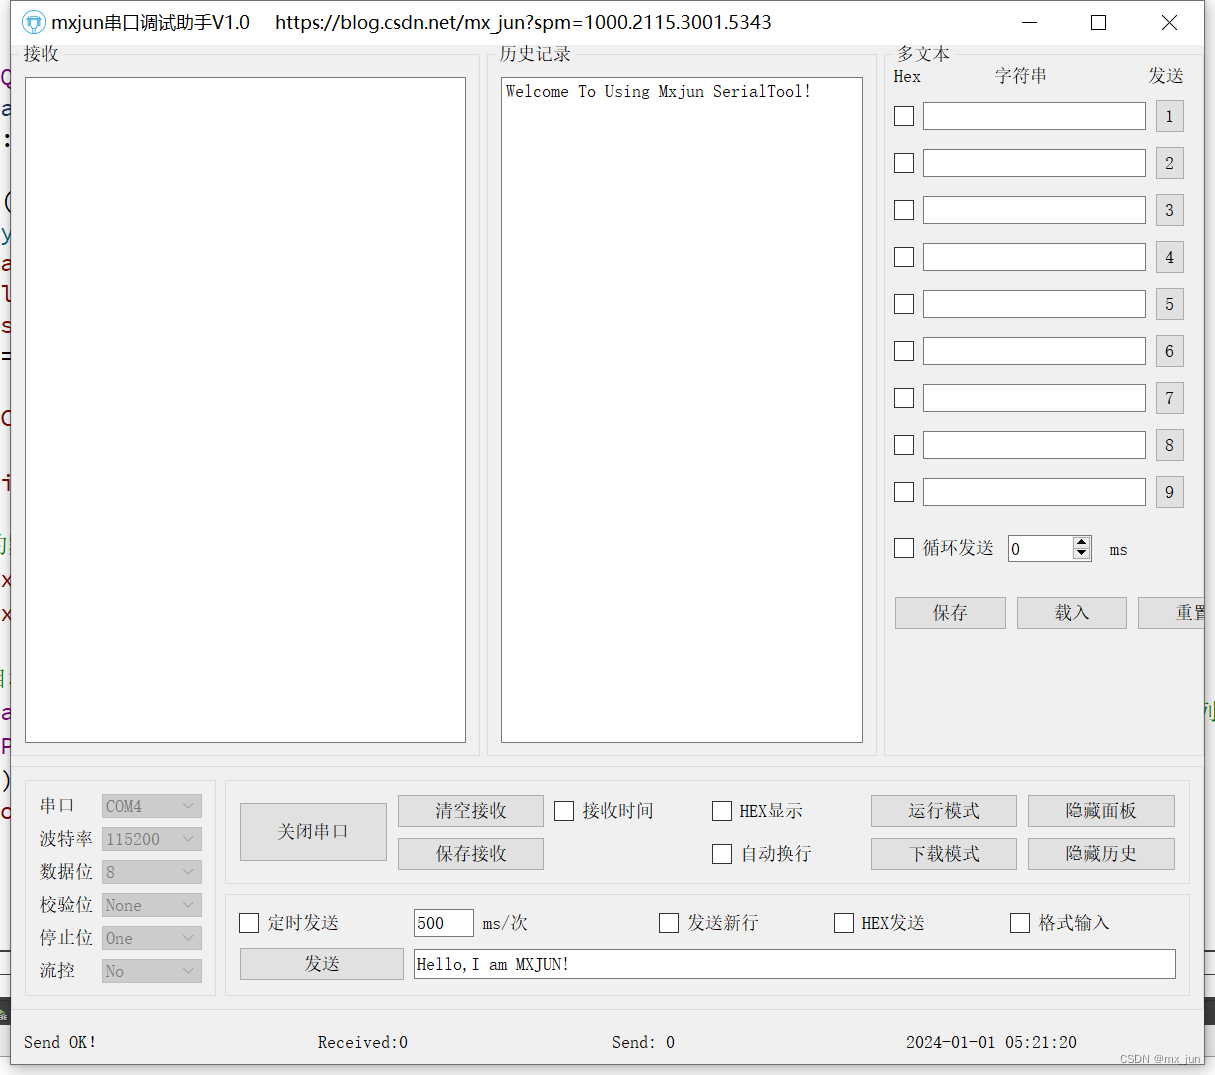
// 6.流控if(ui->comboBox_fileCon->currentText() == "None")serialPort->setFlowControl(QSerialPort::NoFlowControl);// 配置完毕,打开串口if(serialPort->open(QIODevice::ReadWrite)){ // open -- 能成功打开,返回trueqDebug()<<"serial open success!";//打开串口后这些串口参数就不可以设置了ui->comboBox_dataBit->setEnabled(false);ui->comboBox_fileCon->setEnabled(false);ui->comboBox_stopBit->setEnabled(false);ui->comboBox_Baudrate->setEnabled(false);ui->comboBox_checkBit->setEnabled(false);ui->comboBox_serialNum->setEnabled(false);ui->btnSendContext->setEnabled(true); //串口打开成功,允许发送ui->btnCloseOrOpenSerial->setText("关闭串口");serialStatus = true; // 打开成功,设置状态}//打开失败,给出提示else{QMessageBox msgBox;msgBox.setWindowTitle("打开串口错误!");msgBox.setText("打开失败,串口可能占用被拔出");msgBox.exec();}}else{ // if 串口已经打开我们就关闭串口,并且让 参数可选serialPort->close(); // 关闭串口serialStatus = false; // 关闭成功,设置状态ui->btnCloseOrOpenSerial->setText("打开串口");ui->comboBox_dataBit->setEnabled(true);ui->comboBox_fileCon->setEnabled(true);ui->comboBox_stopBit->setEnabled(true);ui->comboBox_Baudrate->setEnabled(true);ui->comboBox_checkBit->setEnabled(true);ui->comboBox_serialNum->setEnabled(true);ui->btnSendContext->setEnabled(false); //串口关闭,无法向串口发送}}效果展示
setEnable -- 设置comboBox 是否可变
观察下面的左下角串口配置信息 和 发送按钮的 深色(不可操作) / 白色(可操作)
方式二: checkable --> 利用槽函数判断串口是否被打开
先 √ checkbool

在重新生成 checkbool 类型的 槽函数
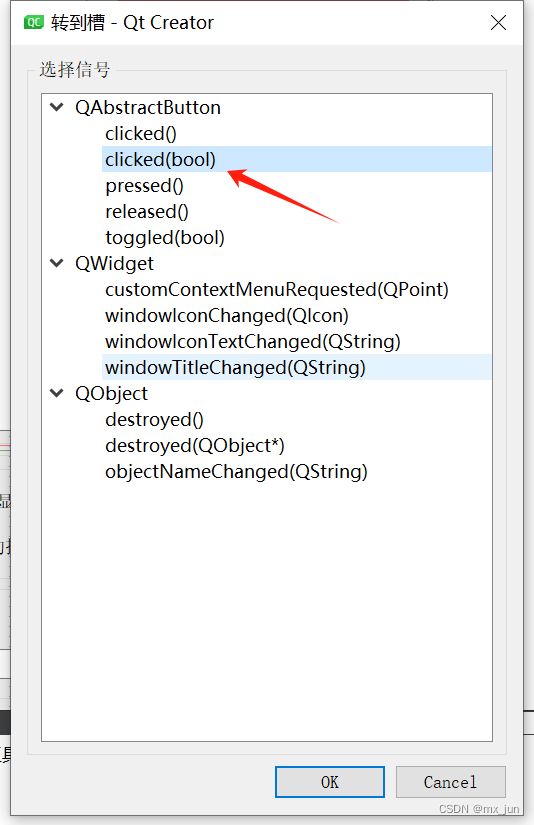
void Widget::on_btnCloseOrOpenSerial_clicked(bool checked)
{if(!checked){ //串口没有被打开  --> 配置参数,打开串口//    1.选择端口号serialPort->setPortName(ui->comboBox_serialNum->currentText());
//    2.配置波特率   注意把String ->intserialPort->setBaudRate(ui->comboBox_Baudrate->currentText().toInt());
//    3.配置数据位serialPort->setDataBits(QSerialPort::DataBits(ui->comboBox_dataBit->currentText().toInt()));
//    4.配置校验位switch (ui->comboBox_checkBit->currentIndex()) // 根据下标来匹配{case 0:serialPort->setParity(QSerialPort::NoParity);break;case 1:serialPort->setParity(QSerialPort::EvenParity);break;case 2:serialPort->setParity(QSerialPort::MarkParity);break;case 3:serialPort->setParity(QSerialPort::OddParity);break;case 4:serialPort->setParity(QSerialPort::SpaceParity);break;default:serialPort->setParity(QSerialPort::UnknownParity);break;}//    5.配置停止位serialPort->setStopBits(QSerialPort::StopBits(ui->comboBox_stopBit->currentData().toInt()));
//    6.流控if(ui->comboBox_fileCon->currentText() == "None")serialPort->setFlowControl(QSerialPort::NoFlowControl);// 配置完毕,打开串口if(serialPort->open(QIODevice::ReadWrite)){ // open -- 能成功打开,返回trueqDebug()<<"serial open success!";//打开串口后这些串口参数就不可以设置了ui->comboBox_dataBit->setEnabled(false);ui->comboBox_fileCon->setEnabled(false);ui->comboBox_stopBit->setEnabled(false);ui->comboBox_Baudrate->setEnabled(false);ui->comboBox_checkBit->setEnabled(false);ui->comboBox_serialNum->setEnabled(false);ui->btnSendContext->setEnabled(true); //串口打开成功,允许发送ui->btnCloseOrOpenSerial->setText("关闭串口");// serialStatus  = true; // 打开成功,设置状态}//打开失败,给出提示else{QMessageBox msgBox;msgBox.setWindowTitle("打开串口错误!");msgBox.setText("打开失败,串口可能占用被拔出");msgBox.exec();}}else{ // if 串口已经打开我们就关闭串口,并且让 参数可选serialPort->close(); // 关闭串口// serialStatus = false; // 关闭成功,设置状态ui->btnCloseOrOpenSerial->setText("打开串口");ui->comboBox_dataBit->setEnabled(true);ui->comboBox_fileCon->setEnabled(true);ui->comboBox_stopBit->setEnabled(true);ui->comboBox_Baudrate->setEnabled(true);ui->comboBox_checkBit->setEnabled(true);ui->comboBox_serialNum->setEnabled(true);ui->btnSendContext->setEnabled(false); //串口关闭,无法向串口发送}
}