用PlayCanvas打造一个3D模型
本文由ScriptEcho平台提供技术支持
项目地址:传送门
基于 PlayCanvas 的 3D 物理场景开发
应用场景介绍
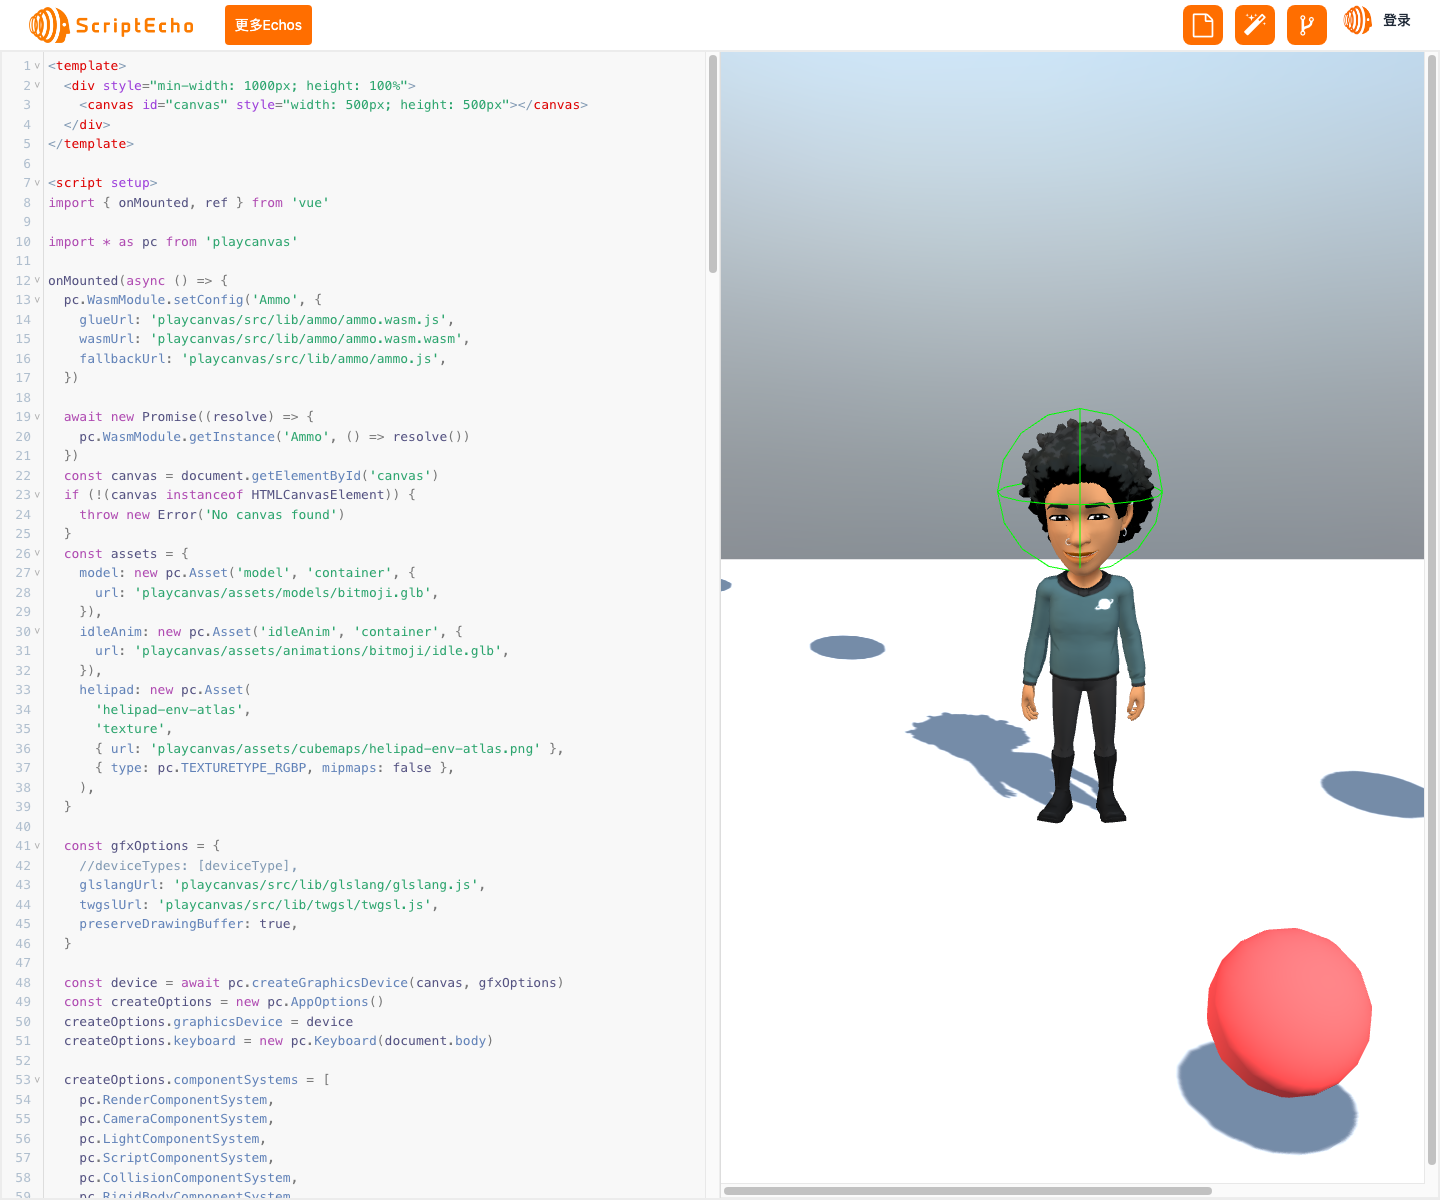
PlayCanvas 是一款功能强大的 3D 引擎,可用于创建各种类型的 3D 体验,包括游戏、模拟和交互式可视化。本技术博客将介绍如何使用 PlayCanvas 创建一个具有物理交互功能的 3D 场景。
代码基本功能介绍
本代码演示了如何使用 PlayCanvas 创建一个具有以下功能的 3D 场景:
- 物理碰撞和刚体运动
- 使用 3D 模型和动画
- 相机控制和场景交互
- 动态创建和销毁对象
功能实现步骤及关键代码分析说明
1. 初始化 PlayCanvas 和加载资产
首先,我们初始化 PlayCanvas 并加载所需的资产,包括 3D 模型、动画和纹理。
import * as pc from 'playcanvas'const canvas = document.getElementById('canvas')
if (!(canvas instanceof HTMLCanvasElement)) {throw new Error('No canvas found')
}
const assets = {model: new pc.Asset('model', 'container', {url: 'playcanvas/assets/models/bitmoji.glb',}),idleAnim: new pc.Asset('idleAnim', 'container', {url: 'playcanvas/assets/animations/bitmoji/idle.glb',}),helipad: new pc.Asset('helipad-env-atlas','texture',{ url: 'playcanvas/assets/cubemaps/helipad-env-atlas.png' },{ type: pc.TEXTURETYPE_RGBP, mipmaps: false },),
}
2. 创建物理场景
接下来,我们创建物理场景并设置重力。
// Set the gravity for our rigid bodies
app.systems.rigidbody.gravity.set(0, -9.81, 0)
3. 创建地面
我们创建了一个平面作为地面,并添加了刚体和碰撞组件,以使其具有物理特性。
const floor = new pc.Entity()
floor.addComponent('render', {type: 'box',material: gray,
})// Scale it and move it so that the top is at 0 on the y axis
floor.setLocalScale(10, 1, 10)
floor.translateLocal(0, -0.5, 0)// Add a rigidbody component so that other objects collide with it
floor.addComponent('rigidbody', {type: 'static',restitution: 0.5,
})// Add a collision component
floor.addComponent('collision', {type: 'box',halfExtents: new pc.Vec3(5, 0.5, 5),
})// Add the floor to the hierarchy
app.root.addChild(floor)
4. 创建 3D 模型
我们从加载的资产中实例化 3D 模型,并添加了动画、刚体和碰撞组件。
const modelEntity = assets.model.resource.instantiateRenderEntity({castShadows: true,
})// Add an anim component to the entity
modelEntity.addComponent('anim', {activate: true,
})// Add a rigid body and collision for the head with offset as the model's origin is
// at the feet on the floor
modelEntity.addComponent('rigidbody', {type: 'static',restitution: 0.5,
})modelEntity.addComponent('collision', {type: 'sphere',radius: 0.3,linearOffset: [0, 1.25, 0],
})
5. 创建相机
我们创建了一个相机实体,并设置了它的位置和视角。
const cameraEntity = new pc.Entity()
cameraEntity.addComponent('camera')
cameraEntity.translate(0, 2, 5)
const lookAtPosition = modelEntity.getPosition()
cameraEntity.lookAt(lookAtPosition.x,lookAtPosition.y + 0.75,lookAtPosition.z,
)app.root.addChild(cameraEntity)
6. 动态创建对象
我们在更新循环中创建了一个球体模板,并根据需要动态创建和销毁球体。
const ball = new pc.Entity()
ball.tags.add('shape')
ball.setLocalScale(0.4, 0.4, 0.4)
ball.translate(0, -1, 0)
ball.addComponent('render', {type: 'sphere',
})ball.addComponent('rigidbody', {type: 'dynamic',mass: 50,restitution: 0.5,
})ball.addComponent('collision', {type: 'sphere',radius: 0.2,
})ball.enabled = false
// create a falling box every 0.2 seconds
if (count > 0) {timer -= dtif (timer <= 0) {count--timer = 0.5// Create a new ball to dropconst clone = ball.clone()clone.rigidbody.teleport(pc.math.random(-0.25, 0.25),5,pc.math.random(-0.25, 0.25),)app.root.addChild(clone)clone.enabled = true}
}
总结与展望
通过本代码,我们成功创建了一个具有物理交互功能的 3D 场景。我们了解了如何使用 PlayCanvas 创建 3D 模型、设置物理特性、动态创建对象以及实现场景交互。
未来,我们可以对该场景进行拓展和优化,例如:
-
添加更多交互元素,如按钮或杠杆
-
实现更复杂的物理交互,如绳索或弹簧
-
优化场景性能,提高帧率
更多组件:


获取更多Echos
本文由ScriptEcho平台提供技术支持
项目地址:传送门
扫码加入AI生成前端微信讨论群: