ShardingSphere-Jdbc + Spring Security + Redis 实现简单JWT认证
1. 项目结构

2. 数据库相关操作
create database user_profiles;
use user_profiles;
CREATE TABLE `user`
(`id`       INT AUTO_INCREMENT PRIMARY KEY,`username` VARCHAR(255) NOT NULL UNIQUE,`password` VARCHAR(255) NOT NULL,`email`    VARCHAR(255) UNIQUE,`role`     VARCHAR(255) DEFAULT 'USER',`enabled`  BOOLEAN      DEFAULT TRUE
);
src
main
java
org.example
config
LettuceConfig.java
package org.example.config;import io.lettuce.core.RedisClient;
import io.lettuce.core.RedisURI;
import io.lettuce.core.api.StatefulRedisConnection;
import io.lettuce.core.api.sync.RedisCommands;
import org.springframework.beans.factory.annotation.Value;
import org.springframework.context.annotation.Bean;
import org.springframework.context.annotation.Configuration;
import org.springframework.data.redis.connection.RedisConnectionFactory;
import org.springframework.data.redis.connection.lettuce.LettuceConnectionFactory;
import org.springframework.data.redis.core.RedisTemplate;
import org.springframework.data.redis.serializer.GenericJackson2JsonRedisSerializer;
import org.springframework.data.redis.serializer.StringRedisSerializer;@Configuration  // 标注这是一个配置类
public class LettuceConfig {@Bean  // 定义一个 RedisTemplate Bean,用于与 Redis 进行交互public RedisTemplate<String, Object> redisTemplate(RedisConnectionFactory connectionFactory) {RedisTemplate<String, Object> template = new RedisTemplate<>();template.setConnectionFactory(connectionFactory);template.setKeySerializer(new StringRedisSerializer());  // 设置键的序列化方式template.setValueSerializer(new GenericJackson2JsonRedisSerializer());  // 设置值的序列化方式template.setHashKeySerializer(new StringRedisSerializer());  // 设置哈希键的序列化方式template.setHashValueSerializer(new GenericJackson2JsonRedisSerializer());  // 设置哈希值的序列化方式return template;}@Value("${redis.host}")  // 从配置文件中注入 Redis 主机地址private String redisHost;@Value("${redis.port}")  // 从配置文件中注入 Redis 端口号private int redisPort;@Bean  // 定义一个 RedisClient Bean,用于创建 Redis 客户端public RedisClient redisClient() {RedisURI redisURI = RedisURI.builder().withHost(redisHost).withPort(redisPort).build();return RedisClient.create(redisURI);}@Bean  // 定义一个 StatefulRedisConnection Bean,用于管理 Redis 连接public StatefulRedisConnection<String, String> connection(RedisClient redisClient) {return redisClient.connect();}@Bean  // 定义一个 RedisCommands Bean,用于同步执行 Redis 命令public RedisCommands<String, String> redisCommands(StatefulRedisConnection<String, String> connection) {return connection.sync();}@Bean  // 定义一个 RedisConnectionFactory Bean,用于创建 Redis 连接工厂public RedisConnectionFactory redisConnectionFactory() {return new LettuceConnectionFactory(redisHost, redisPort);}
}
解释:该配置类 LettuceConfig 用于配置与 Redis 相关的各种 Bean,包括 Redis 客户端、连接工厂、连接管理和 Redis 命令执行等 。
SecurityConfig.java
package org.example.config;import com.fasterxml.jackson.databind.ObjectMapper;
import org.example.filter.JwtAuthenticationFilter;
import org.springframework.beans.factory.annotation.Autowired;
import org.springframework.context.annotation.Bean;
import org.springframework.context.annotation.Configuration;
import org.springframework.security.config.annotation.web.builders.HttpSecurity;
import org.springframework.security.config.annotation.web.configuration.EnableWebSecurity;
import org.springframework.security.config.annotation.web.configurers.AbstractHttpConfigurer;
import org.springframework.security.config.http.SessionCreationPolicy;
import org.springframework.security.web.AuthenticationEntryPoint;
import org.springframework.security.web.SecurityFilterChain;
import org.springframework.security.web.access.AccessDeniedHandler;
import org.springframework.security.web.authentication.UsernamePasswordAuthenticationFilter;import jakarta.servlet.http.HttpServletRequest;
import jakarta.servlet.http.HttpServletResponse;
import org.springframework.security.access.AccessDeniedException;
import org.springframework.security.core.AuthenticationException;import java.io.IOException;
import java.util.HashMap;
import java.util.Map;@Configuration  // 标注这是一个配置类
@EnableWebSecurity  // 启用 Spring Security 的 Web 安全支持
public class SecurityConfig {@Autowired private JwtAuthenticationFilter jwtAuthenticationFilter;@Bean  // 定义一个 SecurityFilterChain Bean,用于配置 Spring Securitypublic SecurityFilterChain securityFilterChain(HttpSecurity http) throws Exception {http.csrf(AbstractHttpConfigurer::disable) // 禁用 CSRF 保护.authorizeHttpRequests(authorize -> authorize.requestMatchers("/auth/**").permitAll() // 允许公开访问 /auth/** 端点.requestMatchers("/admin/**").hasRole("ADMIN") // 限制 admin 路径只有 ADMIN 角色能访问.requestMatchers("/user/**").hasRole("USER") // 限制 user 路径只有 USER 角色能访问.anyRequest().authenticated()) // 其他请求需要认证.sessionManagement(session -> session.sessionCreationPolicy(SessionCreationPolicy.STATELESS)) // 使用无状态会话.exceptionHandling(exception -> exception.accessDeniedHandler(new AccessDeniedHandler() { // 自定义处理访问被拒绝情况@Overridepublic void handle(HttpServletRequest request, HttpServletResponse response, AccessDeniedException accessDeniedException) throws IOException {sendErrorResponse(response, HttpServletResponse.SC_FORBIDDEN, "无权访问该资源");}}).authenticationEntryPoint(new AuthenticationEntryPoint() { // 自定义处理未认证情况@Overridepublic void commence(HttpServletRequest request, HttpServletResponse response, AuthenticationException authException) throws IOException {sendErrorResponse(response, HttpServletResponse.SC_UNAUTHORIZED, "未认证,请先登录");}})) // 使用匿名类处理未认证和越权访问.addFilterBefore(jwtAuthenticationFilter, UsernamePasswordAuthenticationFilter.class); // 添加 JWT 过滤器return http.build();}// 定义发送错误响应的方法private void sendErrorResponse(HttpServletResponse response, int status, String message) throws IOException {response.setStatus(status);response.setContentType("application/json");response.setCharacterEncoding("UTF-8");Map<String, String> errorResponse = new HashMap<>();errorResponse.put("error", message);response.getWriter().write(new ObjectMapper().writeValueAsString(errorResponse));}
}
解释:通过以上配置,SecurityConfig 类确保了应用程序的安全性,支持基于 JWT 的无状态认证,并提供了灵活的请求授权和自定义异常处理机制。
ShardingSphereConfig.java
package org.example.config;import org.apache.shardingsphere.driver.api.yaml.YamlShardingSphereDataSourceFactory;
import org.springframework.beans.factory.annotation.Value;
import org.springframework.context.annotation.Bean;
import org.springframework.context.annotation.Configuration;
import org.springframework.core.io.Resource;
import org.springframework.core.io.ResourceLoader;import javax.sql.DataSource;
import java.io.IOException;
import java.sql.SQLException;@Configuration  // 标注这是一个配置类
public class ShardingSphereConfig {@Value("classpath:shardingsphere.yml")  // 从类路径中加载 ShardingSphere 配置文件private Resource configResource;@Bean  // 定义一个 DataSource Bean,用于配置数据源public DataSource dataSource(ResourceLoader resourceLoader) throws SQLException, IOException {return YamlShardingSphereDataSourceFactory.createDataSource(configResource.getInputStream().readAllBytes());  // 创建并返回 ShardingSphere 数据源}
}
解释:通过以上配置,ShardingSphereConfig 类确保了应用程序可以正确加载 ShardingSphere 配置文件并创建数据源,从而支持分库分表和读写分离等高级数据库操作。
controller
AdminController.java
package org.example.controller;import org.example.util.RedisJwtUtil;
import org.springframework.beans.factory.annotation.Autowired;
import org.springframework.http.HttpStatus;
import org.springframework.http.ResponseEntity;
import org.springframework.web.bind.annotation.*;@RestController
@RequestMapping("/admin")  // 映射请求到 "/admin" 路径
public class AdminController {@GetMapping("/hi")  // 处理 GET 请求 "/admin/hi"public String index() {return "HI ADMIN!";  }@Autowired  private RedisJwtUtil redisJwtUtil;@PostMapping("/blacklist")  // 处理 POST 请求 "/admin/blacklist"public ResponseEntity<String> addToBlacklist(@RequestParam String ipAddress) {redisJwtUtil.addToBlacklist(ipAddress);  // 调用工具类方法将 IP 地址加入黑名单return ResponseEntity.status(HttpStatus.OK).body("IP地址已加入黑名单");  // 返回成功消息}@DeleteMapping("/blacklist")  // 处理 DELETE 请求 "/admin/blacklist"public ResponseEntity<String> removeFromBlacklist(@RequestParam String ipAddress) {redisJwtUtil.removeFromBlacklist(ipAddress);  // 调用工具类方法将 IP 地址从黑名单中移除return ResponseEntity.status(HttpStatus.OK).body("IP地址已从黑名单中移除");  // 返回成功消息}
}
说明:通过以上配置,AdminController 类提供了管理员的基本操作接口,包括欢迎信息的显示和 IP 地址黑名单的管理。
AuthController.java
package org.example.controller;import org.example.entity.User;
import org.example.entity.UserVo;
import org.example.service.UserService;
import org.example.util.RedisJwtUtil;
import org.springframework.beans.factory.annotation.Autowired;
import org.springframework.http.HttpStatus;
import org.springframework.http.ResponseEntity;
import org.springframework.security.authentication.AuthenticationManager;
import org.springframework.security.authentication.BadCredentialsException;
import org.springframework.security.authentication.UsernamePasswordAuthenticationToken;
import org.springframework.security.core.Authentication;
import org.springframework.security.core.context.SecurityContextHolder;
import org.springframework.security.crypto.password.PasswordEncoder;
import org.springframework.web.bind.annotation.*;import java.util.HashMap;
import java.util.Map;@RestController
@RequestMapping("/auth")  // 映射请求到 "/auth" 路径
public class AuthController {@Autowired  private AuthenticationManager authenticationManager;@Autowired  private PasswordEncoder passwordEncoder;@Autowired private UserService userService;@Autowired  private RedisJwtUtil redisJwtUtil;@PostMapping("/register")  // 处理 POST 请求 "/auth/register"public ResponseEntity<UserVo<?>> register(@RequestBody User user) {user.setPassword(passwordEncoder.encode(user.getPassword()));  // 加密用户密码try {userService.register(user);  // 注册用户String token = redisJwtUtil.generateToken(user.getUsername());  // 生成 JWTredisJwtUtil.saveToken(user.getUsername(), token);  // 保存 JWTMap<String, String> tokenData = new HashMap<>();tokenData.put("token", "Bearer " + token);  // 将 JWT 放入响应中return ResponseEntity.ok(new UserVo<>(HttpStatus.OK.value(), "Register Success", tokenData));  // 返回成功响应} catch (Exception e) {return ResponseEntity.status(HttpStatus.CONFLICT).body(new UserVo<>(HttpStatus.CONFLICT.value(), "Register failed: Username already exists!", null));  // 返回失败响应}}@PostMapping("/login")  // 处理 POST 请求 "/auth/login"public ResponseEntity<UserVo<?>> login(@RequestBody User user) {try {Authentication authentication = authenticationManager.authenticate(new UsernamePasswordAuthenticationToken(user.getUsername(), user.getPassword()));  // 进行身份验证SecurityContextHolder.getContext().setAuthentication(authentication);  // 设置安全上下文String token = redisJwtUtil.generateToken(user.getUsername());  // 生成 JWTredisJwtUtil.saveToken(user.getUsername(), token);  // 保存 JWTMap<String, String> tokenData = new HashMap<>();tokenData.put("token", "Bearer " + token);  // 将 JWT 放入响应中return ResponseEntity.ok(new UserVo<>(HttpStatus.OK.value(), "Login Success", tokenData));  // 返回成功响应} catch (BadCredentialsException e) {return ResponseEntity.status(HttpStatus.UNAUTHORIZED).body(new UserVo<>(HttpStatus.UNAUTHORIZED.value(), "Login failed: Invalid username or password", null));  // 返回失败响应}}@PostMapping("/logout")  // 处理 POST 请求 "/auth/logout"public ResponseEntity<UserVo<String>> logout(@RequestHeader("Authorization") String header) {if (header != null && header.startsWith("Bearer ")) {String token = header.substring(7);  // 提取 JWTString username = redisJwtUtil.extractUsername(token);  // 提取用户名if (username != null) {redisJwtUtil.deleteToken(username);  // 删除 JWTuserService.evictUserCache(username);  // 清除用户缓存SecurityContextHolder.clearContext();  // 清除安全上下文return ResponseEntity.ok(new UserVo<>(HttpStatus.OK.value(), "Logout Success", null));  // 返回成功响应}}return ResponseEntity.status(HttpStatus.BAD_REQUEST).body(new UserVo<>(HttpStatus.BAD_REQUEST.value(), "Invalid request", null));  // 返回失败响应}
}
解释:通过以上配置,AuthController 类提供了用户注册、登录和注销的接口,支持基于 JWT 的无状态认证,并管理用户的认证状态和缓存。
UserController.java
package org.example.controller;import org.springframework.web.bind.annotation.GetMapping;
import org.springframework.web.bind.annotation.RequestMapping;
import org.springframework.web.bind.annotation.RestController;@RestController
@RequestMapping("/user")
public class UserController {@GetMapping("/hi")  public String hi() {return "HI USER!";  }
}
解释:通过以上配置,UserController 类提供了一个简单的用户接口,响应特定路径的 GET 请求并返回一条欢迎信息。
entity
User.java
package org.example.entity;import lombok.Data;@Data
public class User {private Integer id;private String username;private String password;private String email;private String role;private Boolean enabled;
}
UserVo.java
package org.example.entity;import lombok.AllArgsConstructor;
import lombok.Data;@Data
@AllArgsConstructor
public class UserVo<T> {private int status;private String message;private T data;
}
filter
JwtAuthenticationFilter.java
package org.example.filter;import com.fasterxml.jackson.databind.ObjectMapper;
import jakarta.servlet.FilterChain;
import jakarta.servlet.http.HttpServletRequest;
import jakarta.servlet.http.HttpServletResponse;
import org.example.util.RedisJwtUtil;
import org.springframework.beans.factory.annotation.Autowired;
import org.springframework.security.authentication.UsernamePasswordAuthenticationToken;
import org.springframework.security.core.context.SecurityContextHolder;
import org.springframework.security.core.userdetails.UserDetails;
import org.springframework.security.core.userdetails.UserDetailsService;
import org.springframework.security.web.authentication.WebAuthenticationDetailsSource;
import org.springframework.stereotype.Component;
import org.springframework.web.filter.OncePerRequestFilter;import java.io.IOException;
import java.util.HashMap;
import java.util.Map;@Component
public class JwtAuthenticationFilter extends OncePerRequestFilter {@Autowiredprivate UserDetailsService userDetailsService;@Autowiredprivate RedisJwtUtil redisJwtUtil;private final ObjectMapper objectMapper = new ObjectMapper();private void sendErrorResponse(HttpServletResponse response, int status, String message) throws IOException {response.setStatus(status);response.setContentType("application/json");response.setCharacterEncoding("UTF-8");Map<String, String> errorResponse = new HashMap<>();errorResponse.put("error", message);response.getWriter().write(objectMapper.writeValueAsString(errorResponse));}@Overrideprotected void doFilterInternal(HttpServletRequest request, HttpServletResponse response, FilterChain filterChain)throws IOException {// 获取客户端IP地址String clientIP = request.getRemoteAddr();String path = request.getRequestURI();try {// 检查IP是否在黑名单中if (redisJwtUtil.isBlacklisted(clientIP)) {sendErrorResponse(response, HttpServletResponse.SC_FORBIDDEN, "该IP地址已被禁止访问");return;}// 检查IP频率限制if (redisJwtUtil.isRateLimited(clientIP, path)) {sendErrorResponse(response, 429, "请求过多,请稍后再试");return;}// 从请求头中获取 Authorization 字段String header = request.getHeader("Authorization");String token = null;String username = null;// JWT Token的形式为"Bearer token",移除 Bearer 单词,只获取 Token 部分if (header != null && header.startsWith("Bearer ")) {token = header.substring(7);try {// 从 Token 中提取用户名username = redisJwtUtil.extractUsername(token);} catch (Exception e) {// 无效的 JWT Token 或无法解析sendErrorResponse(response, HttpServletResponse.SC_UNAUTHORIZED, "未认证,请先登录!");return;}}// 获取到Token后,进行验证if (username != null && SecurityContextHolder.getContext().getAuthentication() == null) {// 验证 Token 是否在 Redis 中存在且有效if (redisJwtUtil.redisValidate(token)) {// 根据用户名加载用户详情UserDetails userDetails = userDetailsService.loadUserByUsername(username);if (userDetails != null) {// 如果 Token 有效,配置 Spring Security 手动设置认证UsernamePasswordAuthenticationToken authenticationToken = new UsernamePasswordAuthenticationToken(userDetails, null, userDetails.getAuthorities());authenticationToken.setDetails(new WebAuthenticationDetailsSource().buildDetails(request));// 在设置 Authentication 之后,指定当前用户已认证SecurityContextHolder.getContext().setAuthentication(authenticationToken);} else {sendErrorResponse(response, HttpServletResponse.SC_UNAUTHORIZED, "未认证,请先登录!");return;}} else {sendErrorResponse(response, HttpServletResponse.SC_UNAUTHORIZED, "未认证,请先登录!");return;}}// 如果没有token或token无效,将请求传递到过滤器链的下一个过滤器filterChain.doFilter(request, response);} catch (Exception e) {// 捕获所有异常,并发送错误响应sendErrorResponse(response, HttpServletResponse.SC_INTERNAL_SERVER_ERROR, "服务器内部错误");}}
}
解释:JwtAuthenticationFilter 类是一个自定义的 Spring Security 过滤器,用于对每个请求进行 JWT 验证和处理。该过滤器继承了 OncePerRequestFilter,保证在每个请求过程中只调用一IP。
1. 黑名单检查:确保在黑名单中的 IP 无法访问。
2. IP 请求频率限制:防止单个 IP 频繁请求导致服务器过载。
3. JWT 验证:从请求头中提取 JWT,验证其有效性,确保用户已认证。
4. 错误处理:捕获并处理所有异常,返回适当的错误响应。
该过滤器确保每个请求都经过严格的 IP 检查和 JWT 验证,提升了应用的安全性和稳定性。
mapper
UserMapper.java
package org.example.mapper;import org.apache.ibatis.annotations.Insert;
import org.apache.ibatis.annotations.Mapper;
import org.apache.ibatis.annotations.Options;
import org.apache.ibatis.annotations.Select;
import org.example.entity.User;@Mapper
public interface UserMapper {@Insert("INSERT INTO user(username, password, email, role, enabled) VALUES(#{username}, #{password}, #{email}, #{role}, #{enabled})")@Options(useGeneratedKeys = true, keyProperty = "id")void register(User user);@Select("SELECT * FROM user WHERE username = #{username} ")User findByUsername(String username);
}
service
UserService.java
package org.example.service;import org.example.entity.User;
import org.example.mapper.UserMapper;
import org.example.util.AESUtil;
import org.springframework.beans.factory.annotation.Autowired;
import org.springframework.beans.factory.annotation.Value;
import org.springframework.data.redis.core.RedisTemplate;
import org.springframework.security.core.authority.SimpleGrantedAuthority;
import org.springframework.security.core.userdetails.UserDetails;
import org.springframework.security.core.userdetails.UserDetailsService;
import org.springframework.security.core.userdetails.UsernameNotFoundException;
import org.springframework.stereotype.Service;import java.time.Duration;
import java.util.Collections;@Service
public class UserService implements UserDetailsService {@Autowiredprivate UserMapper userMapper;@Autowiredprivate RedisTemplate<String, Object> redisTemplate;@Value("${aes.key}")  // 从配置文件中读取AES密钥private String aesKey;private  final Duration CACHE_EXPIRATION = Duration.ofMinutes(3);  // 设置缓存过期时间3分钟private static final String USER_CACHE_KEY = "userCache:";@Overridepublic UserDetails loadUserByUsername(String username) throws UsernameNotFoundException {User user = null;try {user = findByUsername(username);} catch (Exception e) {throw new RuntimeException(e);}if (user == null) {throw new UsernameNotFoundException("User not found with username: " + username);}SimpleGrantedAuthority authority = new SimpleGrantedAuthority("ROLE_" + user.getRole());return org.springframework.security.core.userdetails.User.withUsername(user.getUsername()).password(user.getPassword()).authorities(Collections.singletonList(authority)).build();}public void register(User user) throws Exception {if (userMapper.findByUsername(user.getUsername()) != null) {throw new Exception("User already exists!");}userMapper.register(user);encryptUser(user);  // 加密用户数据cacheUser(user);  // 缓存加密后的用户数据decryptUser(user); //解密}public User findByUsername(String username) throws Exception {String encryptedUsername = AESUtil.encrypt(username, aesKey);User user = (User) redisTemplate.opsForValue().get(USER_CACHE_KEY + encryptedUsername);if (user != null) {decryptUser(user);  // 解密用户数据return user;}user = userMapper.findByUsername(username);if (user != null) {encryptUser(user);cacheUser(user);  // 缓存加密后的用户数据decryptUser(user);  // 解密用户数据}return user;}public void evictUserCache(String username) {try {String encryptedUsername = AESUtil.encrypt(username, aesKey);redisTemplate.delete(USER_CACHE_KEY + encryptedUsername);} catch (Exception e) {throw new RuntimeException(e);}}private void encryptUser(User user) throws Exception {user.setUsername(AESUtil.encrypt(user.getUsername(), aesKey));user.setEmail(AESUtil.encrypt(user.getEmail(), aesKey));user.setPassword(AESUtil.encrypt(user.getPassword(), aesKey));user.setRole(AESUtil.encrypt(user.getRole(), aesKey));}private void decryptUser(User user) throws Exception {user.setUsername(AESUtil.decrypt(user.getUsername(), aesKey));user.setEmail(AESUtil.decrypt(user.getEmail(), aesKey));user.setPassword(AESUtil.decrypt(user.getPassword(), aesKey));user.setRole(AESUtil.decrypt(user.getRole(), aesKey));}private void cacheUser(User user) {try {redisTemplate.opsForValue().set(USER_CACHE_KEY + user.getUsername(), user, CACHE_EXPIRATION);} catch (Exception e) {throw new RuntimeException(e);}}
}
解释: UserService 类是一个服务类,实现了 UserDetailsService 接口,负责用户相关的业务逻辑,包括用户注册、查找和缓存管理。
util
AESUtil.java
package org.example.util;import javax.crypto.Cipher;
import javax.crypto.KeyGenerator;
import javax.crypto.SecretKey;
import javax.crypto.spec.SecretKeySpec;
import java.util.Base64;public class AESUtil {private static final String ALGORITHM = "AES";/*** 生成一个新的AES密钥* @return Base64编码的密钥字符串* @throws Exception*/public static String generateKey() throws Exception {// 使用AES算法生成密钥KeyGenerator keyGen = KeyGenerator.getInstance(ALGORITHM);keyGen.init(256); // 使用256位密钥SecretKey secretKey = keyGen.generateKey();return Base64.getEncoder().encodeToString(secretKey.getEncoded());}/*** 使用给定的密钥加密字符串** @param data 要加密的数据* @param key  Base64编码的密钥字符串* @return 加密后的Base64编码字符串* @throws Exception*/public static String encrypt(String data, String key) throws Exception {SecretKeySpec secretKey = new SecretKeySpec(Base64.getDecoder().decode(key), ALGORITHM);Cipher cipher = Cipher.getInstance(ALGORITHM);cipher.init(Cipher.ENCRYPT_MODE, secretKey);byte[] encryptedData = cipher.doFinal(data.getBytes());return Base64.getEncoder().encodeToString(encryptedData);}/*** 使用给定的密钥解密字符串** @param encryptedData 加密后的Base64编码字符串* @param key           Base64编码的密钥字符串* @return 解密后的原始字符串* @throws Exception*/public static String decrypt(String encryptedData, String key) throws Exception {SecretKeySpec secretKey = new SecretKeySpec(Base64.getDecoder().decode(key), ALGORITHM);Cipher cipher = Cipher.getInstance(ALGORITHM);cipher.init(Cipher.DECRYPT_MODE, secretKey);byte[] decryptedData = cipher.doFinal(Base64.getDecoder().decode(encryptedData));return new String(decryptedData);}public static void main(String[] args) {try {// 生成一个256位的AES密钥String aesKey = generateKey();System.out.println("生成的256位AES密钥: " + aesKey);} catch (Exception e) {e.printStackTrace();}}
}
解释:AESUtil 类是一个实用工具类,用于生成 AES 密钥以及使用 AES 算法加密和解密字符串。
RedisJwtUtil.java
package org.example.util;import com.auth0.jwt.JWT;
import com.auth0.jwt.algorithms.Algorithm;
import com.auth0.jwt.exceptions.JWTVerificationException;
import com.auth0.jwt.interfaces.DecodedJWT;
import com.auth0.jwt.interfaces.JWTVerifier;
import io.lettuce.core.api.sync.RedisCommands;
import org.springframework.beans.factory.annotation.Value;
import org.springframework.stereotype.Component;
import org.slf4j.Logger;
import org.slf4j.LoggerFactory;import java.util.Date;@Component  // 标注这是一个 Spring 组件
public class RedisJwtUtil {private static final Logger logger = LoggerFactory.getLogger(RedisJwtUtil.class);private final String secretKey;private final long expirationTime;private final RedisCommands<String, String> redisCommands;private final int maxRequests;private final long timeWindow;private static final String BLACKLIST_KEY_PREFIX = "blacklist_"; // 黑名单标识前缀public RedisJwtUtil(@Value("${jwt.secret_key}") String secretKey,@Value("${jwt.expire_time}") long expirationTime,@Value("${jwt.max_requests}") int maxRequests,@Value("${jwt.time_window}") int timeWindow,RedisCommands<String, String> redisCommands) {this.secretKey = secretKey;this.expirationTime = expirationTime;this.maxRequests = maxRequests;this.timeWindow = timeWindow;this.redisCommands = redisCommands;}/*** 生成 JWT** @param username 用户名* @return 生成的 JWT*/public String generateToken(String username) {Date issuedAt = new Date();Date expiresAt = new Date(issuedAt.getTime() + expirationTime); // 设置过期时间return JWT.create().withSubject(username).withIssuedAt(issuedAt).withExpiresAt(expiresAt).sign(Algorithm.HMAC256(secretKey));}/*** 验证 JWT** @param token JWT 字符串* @return 如果有效则返回 true,否则返回 false*/public boolean validateToken(String token) {try {String username = extractUsername(token);if (username == null) {return false;}Algorithm algorithm = Algorithm.HMAC256(secretKey);JWTVerifier verifier = JWT.require(algorithm).withSubject(username).build();DecodedJWT jwt = verifier.verify(token);return !isTokenExpired(jwt);} catch (JWTVerificationException exception) {logger.error("JWT Verification failed", exception);return false;}}/*** 从 JWT 中提取用户名** @param token JWT 字符串* @return 提取的用户名*/public String extractUsername(String token) {try {DecodedJWT jwt = JWT.decode(token);return jwt.getSubject();} catch (JWTVerificationException exception) {logger.error("Error decoding JWT", exception);return null;}}/*** 检查 JWT 是否已过期** @param jwt 解码后的 JWT 对象* @return 如果过期则返回 true,否则返回 false*/private boolean isTokenExpired(DecodedJWT jwt) {return jwt.getExpiresAt().before(new Date());}/*** 将 JWT 保存到 Redis** @param username 用户名* @param token JWT 字符串*/public void saveToken(String username, String token) {try {redisCommands.setex(username, expirationTime / 1000, token); // 使用 setex 方法设置过期时间,单位为秒logger.info("Token saved for user: {}", username);} catch (Exception e) {logger.error("Error saving token to Redis", e);}}/*** 验证 Redis 中的 JWT** @param token JWT 字符串* @return 如果有效则返回 true,否则返回 false*/public boolean redisValidate(String token) {try {String username = extractUsername(token);if (username == null) {return false;}String redisToken = redisCommands.get(username);return token.equals(redisToken) && validateToken(redisToken);} catch (Exception e) {logger.error("Error validating token with Redis", e);return false;}}/*** 从 Redis 中删除 JWT** @param username 用户名*/public void deleteToken(String username) {try {redisCommands.del(username);logger.info("Token deleted for user: {}", username);} catch (Exception e) {logger.error("Error deleting token from Redis", e);}}/*** 检查 IP 地址的请求频率** @param ipAddress 客户端 IP 地址* @param path 请求路径* @return 如果频率受限则返回 true,否则返回 false*/public boolean isRateLimited(String ipAddress, String path) {try {String key = "req_count_" + ipAddress + "_" + path;Integer currentCount = redisCommands.get(key) != null ? Integer.parseInt(redisCommands.get(key)) : null;if (currentCount == null) {redisCommands.setex(key, timeWindow * 60, String.valueOf(1)); // 以秒为单位设置过期时间return false;} else if (currentCount < maxRequests) {redisCommands.incr(key);return false;} else {return true;}} catch (Exception e) {logger.error("Error checking rate limit", e);return true;}}/*** 将 IP 地址添加到黑名单** @param ipAddress IP 地址*/public void addToBlacklist(String ipAddress) {try {redisCommands.set(BLACKLIST_KEY_PREFIX + ipAddress, "true");logger.info("IP added to blacklist: {}", ipAddress);} catch (Exception e) {logger.error("Error adding IP to blacklist", e);}}/*** 将 IP 地址从黑名单中移除** @param ipAddress IP 地址*/public void removeFromBlacklist(String ipAddress) {try {redisCommands.del(BLACKLIST_KEY_PREFIX + ipAddress);logger.info("IP removed from blacklist: {}", ipAddress);} catch (Exception e) {logger.error("Error removing IP from blacklist", e);}}/*** 检查 IP 地址是否在黑名单中** @param ipAddress IP 地址* @return 如果在黑名单中则返回 true,否则返回 false*/public boolean isBlacklisted(String ipAddress) {try {return "true".equals(redisCommands.get(BLACKLIST_KEY_PREFIX + ipAddress));} catch (Exception e) {logger.error("Error checking if IP is blacklisted", e);return false;}}
}
解释:RedisJwtUtil 类是一个实用工具类,主要用于生成、验证、保存和管理 JWT,同时支持基于 Redis 的 IP 黑名单和请求频率限制。
SpringJwtApplication.java
package org.example;import org.springframework.boot.SpringApplication;
import org.springframework.boot.autoconfigure.SpringBootApplication;
import org.springframework.context.annotation.Bean;
import org.springframework.security.authentication.AuthenticationManager;
import org.springframework.security.config.annotation.authentication.configuration.AuthenticationConfiguration;
import org.springframework.security.crypto.bcrypt.BCryptPasswordEncoder;
import org.springframework.security.crypto.password.PasswordEncoder;@SpringBootApplication
public class SpringJwtApplication {public static void main(String[] args) {SpringApplication.run(SpringJwtApplication.class, args);}@Beanpublic AuthenticationManager authenticationManager(AuthenticationConfiguration authenticationConfiguration) throws Exception {return authenticationConfiguration.getAuthenticationManager();}@Beanpublic PasswordEncoder passwordEncoder() {return new BCryptPasswordEncoder();}
}
resources
shardingsphere.yml
databaseName: virtual_database
dataSources:master:dataSourceClassName: com.zaxxer.hikari.HikariDataSourceurl: jdbc:mysql://127.0.0.1:3306/user_profiles?serverTimezone=UTC&useSSL=false&allowPublicKeyRetrieval=trueusername: rootpassword: 123456connectionTimeoutMilliseconds: 30000idleTimeoutMilliseconds: 60000maxLifetimeMilliseconds: 1800000maxPoolSize: 50minPoolSize: 1
rules:- !ENCRYPTencryptors:aes_encryptor:type: AESprops:aes-key-value: 123456abctables:user:columns:password:cipher:name: passwordencryptorName: aes_encryptorusername:cipher:name: usernameencryptorName: aes_encryptor
props:sql-show: true解释:该配置文件用于设置一个虚拟数据库,配置连接池参数,并定义了对用户表中username和password列的AES加密规则,同时开启了SQL语句的显示功能。
application.yml
spring:application:name: spring_jwt  # 应用名称,设置为 spring_jwtcache:type: redis  # 缓存类型,设置为 redis,使用 Redis 作为缓存机制
redis:host: 192.168.186.77  # Redis 服务器的主机地址port: 6379  # Redis 服务器的端口号
jwt:secret_key: abc123  # JWT 的密钥,用于签名和验证 JWTexpire_time: 180000  # JWT 的过期时间,单位为毫秒,设置为 180000 毫秒(3 分钟)max_requests: 5  # 在 time_window 内允许的最大请求次数time_window: 1  # 限制请求次数的时间窗口,单位为分钟,设置为 1 分钟
aes:key: H9ylG13Otn6ZRC0LhMy+cyu5TJzU4sT2LPAFJjRJt9Q=  # AES 加密密钥,Base64 编码的密钥
logging:level:root: debug  # 日志级别,设置为 debug,记录详细的调试信息
解释:该配置文件用于配置 Spring 应用,包括应用名称、Redis 缓存、JWT 验证、AES 加密和日志级别设置。具体来说,它设置了 Redis 作为缓存机制,配置了 Redis 服务器的连接信息,定义了 JWT 的密钥和相关参数,指定了 AES 加密的密钥,并将日志级别设置为 debug 以便于调试。
pom.xml
<?xml version="1.0" encoding="UTF-8"?>
<project xmlns="http://maven.apache.org/POM/4.0.0" xmlns:xsi="http://www.w3.org/2001/XMLSchema-instance"xsi:schemaLocation="http://maven.apache.org/POM/4.0.0 https://maven.apache.org/xsd/maven-4.0.0.xsd"><modelVersion>4.0.0</modelVersion><parent><groupId>org.springframework.boot</groupId><artifactId>spring-boot-starter-parent</artifactId><version>3.3.2</version><relativePath/> <!-- lookup parent from repository --></parent><groupId>org.example</groupId><artifactId>spring_jwt</artifactId><version>0.0.1-SNAPSHOT</version><name>spring_jwt</name><properties><java.version>17</java.version></properties><dependencies><dependency><groupId>org.springframework.boot</groupId><artifactId>spring-boot-starter-security</artifactId></dependency><dependency><groupId>org.springframework.boot</groupId><artifactId>spring-boot-starter-web</artifactId></dependency><dependency><groupId>org.mybatis.spring.boot</groupId><artifactId>mybatis-spring-boot-starter</artifactId><version>3.0.3</version></dependency><!-- https://mvnrepository.com/artifact/org.mybatis/mybatis --><dependency><groupId>org.mybatis</groupId><artifactId>mybatis</artifactId><version>3.5.16</version></dependency><dependency><groupId>com.mysql</groupId><artifactId>mysql-connector-j</artifactId><version>8.3.0</version></dependency><dependency><groupId>org.projectlombok</groupId><artifactId>lombok</artifactId><optional>true</optional></dependency><!-- https://mvnrepository.com/artifact/org.apache.shardingsphere/shardingsphere-jdbc --><dependency><groupId>org.apache.shardingsphere</groupId><artifactId>shardingsphere-jdbc</artifactId><version>5.5.0</version><exclusions><exclusion><groupId>org.apache.shardingsphere</groupId><artifactId>shardingsphere-test-util</artifactId></exclusion></exclusions></dependency><dependency><groupId>org.springframework.boot</groupId><artifactId>spring-boot-starter-test</artifactId></dependency><!-- https://mvnrepository.com/artifact/com.auth0/java-jwt --><dependency><groupId>com.auth0</groupId><artifactId>java-jwt</artifactId><version>4.4.0</version></dependency><dependency><groupId>org.springframework.boot</groupId><artifactId>spring-boot-starter-data-redis</artifactId></dependency><!-- https://mvnrepository.com/artifact/io.lettuce/lettuce-core --><dependency><groupId>io.lettuce</groupId><artifactId>lettuce-core</artifactId><version>6.3.0.RELEASE</version></dependency><!-- https://mvnrepository.com/artifact/org.bouncycastle/bcprov-jdk18on --><dependency><groupId>org.bouncycastle</groupId><artifactId>bcprov-jdk18on</artifactId><version>1.78.1</version></dependency></dependencies><build><plugins><plugin><groupId>org.springframework.boot</groupId><artifactId>spring-boot-maven-plugin</artifactId><configuration><excludes><exclude><groupId>org.projectlombok</groupId><artifactId>lombok</artifactId></exclude></excludes></configuration></plugin></plugins></build></project>
3. 测试验证
3.1 请求路径
AdminController
GET /admin/hi
POST /admin/blacklist
DELETE /admin/blacklist
AuthController
POST /auth/register
POST /auth/login
POST /auth/logout
UserController
GET /user/hi
3.2 POST /auth/register(注册)
{"role":"ADMIN",  "username":"admin","password": "123456","email": "12345678@qq.com","enabled": true
}


说明:注册成功会生成token,同时存储到redis中,本例设置3分钟过期,读者可以自行修改有效时间便于测试。
3.3 POST /auth/login(登录)

3.3 GET /admin/hi (带权访问)
3.3.1 未携带token请求

3.3.2 携带token请求
 3.4 POST /admin/blacklist (加入黑名单)

再次请求,IP被禁止访问

3.5 DELETE /admin/blacklist(移出黑名单)

再次访问

3.6 POST /auth/logout (退出)

再次访问
 3.7 GET /user/hi
3.7.1 注册一个普通用户
{"role":"USER",  "username":"guest","password": "123456","email": "123456789@qq.com","enabled": true
}
3.7.2 访问user/hi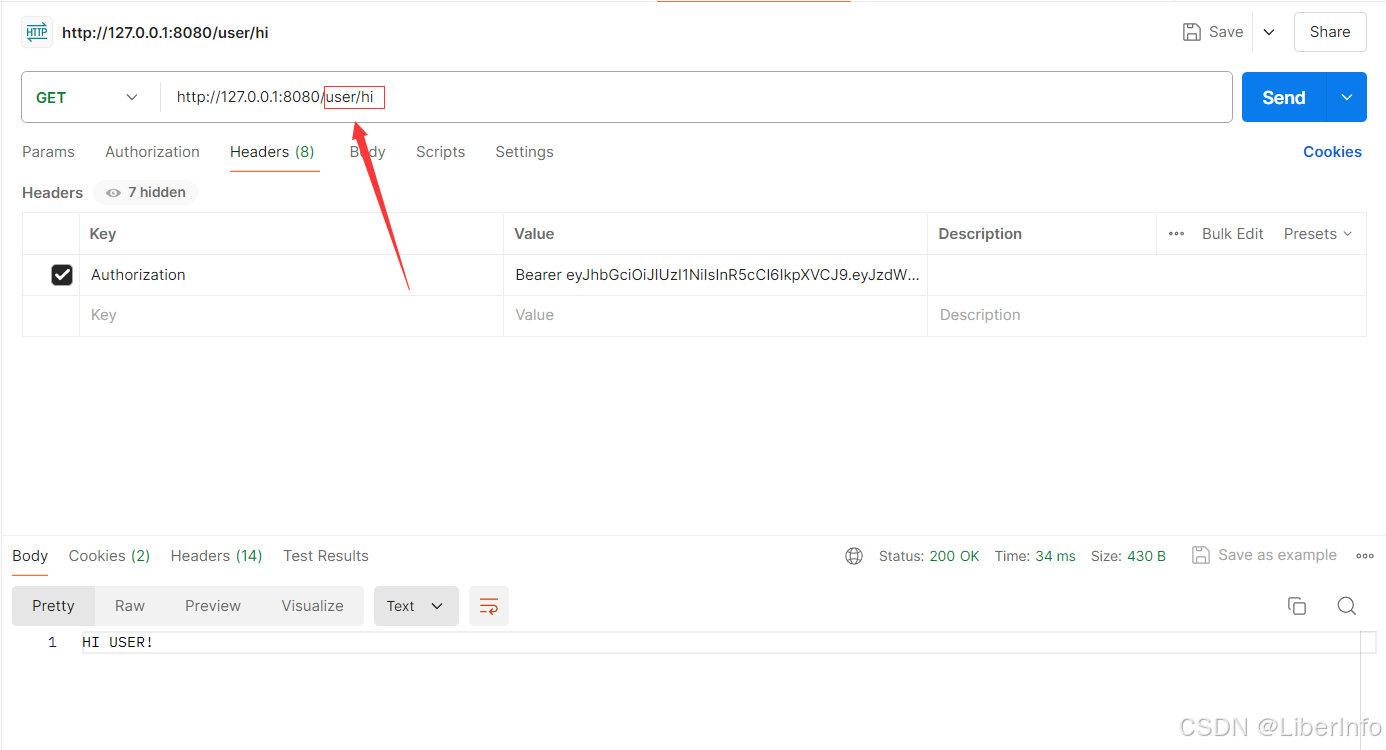
3.8 不同角色访问

说明:使用普通用户的token对admin/hi进行访问。
3.9 频繁请求校验

说明:我设置了一分钟内,一个IP的同一个路径只能请求5次超过了,就限制访问。
3.10 数据库的数据


说明:username只通过shardingsphere的加密规则加密一次;password先通过passwordEncoder加密一次,再通过shardingsphere的加密规则再加密一次总共加密2次;缓存用户信息的时候又通过AES对用户名密码邮箱进行加密和解密。
4. 总结
实现简单的jwt令牌验证,先禁用CSRF,只是简单的结合Redis进行缓存和有效期验证。如果 JWT(JSON Web Token)泄露了,任何持有该令牌的人都可以冒充令牌所有者发起请求,带来安全风险。