光线追踪(纹理映射)

最近在跟着ray trace in one week来学习光线追踪(很多概念茅塞顿开)做到一半想着记录一下(比较随心)上面是之前的效果。ray trace in one week
Texture Coordinates for Spheres(球体纹理坐标)
u, v 纹理坐标指定了2D源图像(或某些2D参数化空间)上的位置。需要一种方式在3d物体上找到u,v坐标。这种映射是完全任意的,但通常你希望覆盖整个表面,并且能够以某种有意义的方式缩放、定位和拉伸2D图像。
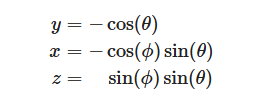
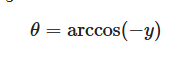
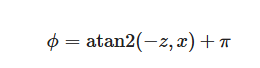
对于球体而言,纹理坐标一般是基于球体的经度和纬度。我们计算球坐标中的 (θ, ϕ),其中 θ 是从底部极点(即从 -Y 方向)向上的角度(0~180度),而 ϕ 是围绕 Y 轴的角度(从 -X 到 +Z 到 +X 到 -Z 再回到 -X)(360度)。希望将 θ 和 ϕ 映射到纹理坐标 u 和 v,每个都在 [0,1] 范围内,其中 (u=0, v=0) 映射到纹理的左下角。因此,从 (θ, ϕ) 到 (u, v) 的归一化将是:
将角度变化映射到对应的x,y,z的坐标上:
std::atan2(y, x),C++中一种double类型的反正切函数,返回值为弧度,是点(0,0)和(x,y)的连线与X轴正半轴的夹角,其值域为 [-π,π] (当y=0时,可以取到±π),且在第一二象限为正,在第三四象限为负。同理arccos是-y与单位向量1的夹角。
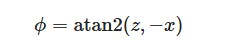
其中的范围为[-π,π] ,此时映射回u为(-1/2~1/2)与实际的u(0~1)不符合,于是将其进行处理,
因为我们有等式:(atan2 函数是 arctan 函数的一种改进,它返回的是给定的 x 和 y 坐标值的反正切值,并且会根据 x 和 y 的符号来确定返回角度的象限。这里加上pai以后回到原来的象限)
![]()
所以:
注意此时的x,y,z的击中点都是单位向量点
static void get_sphere_uv(const Point3& p,double &u , double& v){auto theta = std::acos(-p.y());auto phi = std::atan2(-p.z(),p.x())+pi;u = phi / (2 *pi);v = theta / pi;
}
bool hit(const Ray& r,interval ray_t,hit_record& rec) const override{Point3 center = is_moving? sphere_center(r.time()) : center1;vec3 oc=center-r.origin();double a=r.direction().length_squared();double h= dot(r.direction(),oc);double c= oc.length_squared() - radius*radius;double discriminant= h * h - a * c;if(discriminant<0.0) return false;double sqrtd=std::sqrt(discriminant);double root=(h-sqrtd)/a;if(!ray_t.surrounds(root)){root=(h+sqrtd)/a;if(!ray_t.surrounds(root)){return false;}}rec.t=root;rec.p=r.at(root);vec3 outwrad_normal=unit_vector(rec.p-center);rec.set_face_normal(r,outwrad_normal);rec.mat=mat;get_sphere_uv(outwrad_normal,rec.u,rec.v);return true;}从撞击点 P 开始,我们计算出表面坐标 (u, v)。然后我们使用这些坐标来索引我们的程序化实体纹理(例如大理石)。我们也可以读取一个图像,并使用二维 (u, v) 纹理坐标来索引图像。
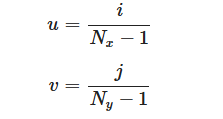
对于一个(Nx*Ny)的图像,其(i,j)像素对应的纹理坐标为
Accessing Texture Image Data
接下来需要一个方式去读取图像。这里介绍stb_image。它将图像数据读入到一个32位浮点数的数组中。这些数值是打包的 RGB 值,每个分量的值在 [0,1] 的范围内(从黑色到纯白色)。此外,图像以线性颜色空间(gamma = 1)加载——这是我们进行所有计算所使用的颜色空间。
为了帮助我们更轻松地加载图像文件,我们提供了一个辅助类来管理这一切:rtw_image。它提供了一个辅助函数 —— pixel_data(int x, int y) —— 用于获取每个像素的8位RGB字节值。
首先我们需要下载stb_image.h
然后编写封装的类rtw_image
首先我需要一个初始化的定义,让我的程序从定义的目录中去加载图片,并且若加载失败还能输出错误信息。那么首先我需要一个函数去调用stb_image.h
rtw_image(const char* image_filename){// 从指定的文件加载图像数据。如果定义了 RTW_IMAGES 环境变量,// 则只在该目录中查找图像文件。如果找不到图像,// 首先从当前目录开始搜索指定的图像文件,然后在 images/ 子目录中搜索,// 接着是 父目录 的 images/ 子目录,然后是 那个父目录的父目录,依此类推,// 向上搜索六个级别。如果图像没有成功加载,// width() 和 height() 将返回 0。std::string filename = std::string(image_filename);auto imagedir = getenv("RTW_IMAGES");if(imagedir && load(std::string(imagedir) + "/" + filename)) return;if(load(filename)) return;if(load("images/"+filename)) return;if(load("../images/"+filename)) return;if(load("../../images/"+filename)) return;if(load("../../../images/"+filename)) return;if(load("../../../../images/"+filename)) return;if(load("../../../../../images/"+filename)) return;if(load("../../../../../../images/"+filename)) return;std::cerr<<"ERROR: Could not load image file'"<<image_filename<<"'.\n";
}
bool load(const std::string& filename){// 从给定的文件名加载线性(gamma=1)图像数据。// 如果加载成功,返回 true。// 结果数据缓冲区包含第一个像素的三个 [0.0, 1.0] // 范围内的浮点值(首先是红色,然后是绿色,然后是蓝色)。// 像素是连续的,从图像的宽度方向从左到右,接着是下一行,// 直到整个图像的高度。int n = bytes_per_pixel;fdata = stbi_loadf(filename.c_str(),&image_width,&image_height,&n,bytes_per_pixel);if (fdata == nullptr) return false;return true;
}
同时由于我们需要根据给定的图像上的像素的x,y的坐标来得到对应的像素的值,其中fdata返回的就是以行为优先级的每一列为bytes_per_pixel的值。于是这里我们需要手动记录每一行的像素值为多少。
bool load(const std::string& filename){// 从给定的文件名加载线性(gamma=1)图像数据。// 如果加载成功,返回 true。// 结果数据缓冲区包含第一个像素的三个 [0.0, 1.0] // 范围内的浮点值(首先是红色,然后是绿色,然后是蓝色)。// 像素是连续的,从图像的宽度方向从左到右,接着是下一行,// 直到整个图像的高度。int n = bytes_per_pixel;fdata = stbi_loadf(filename.c_str(),&image_width,&image_height,&n,bytes_per_pixel);if (fdata == nullptr) return false;bytes_per_scanline = image_width * bytes_per_pixel;convert_to_bytes();return true;
}
并且由于值都是[0.0,1.0]的范围,于是需要根据这个值来转换为0~255的范围。
static unsigned char float_to_byte(float value){if (value <= 0.0) return 0;if (value >= 1.0) return 255;return static_cast<unsigned char>(256.0 * value);//这里希望,比如0.99可以转换为255
}
void convert_to_bytes(){// Convert the linear floating point pixel data to bytes, storing the resulting byte// data in the `bdata` member.int total_bytes = image_width * image_height * bytes_per_pixel;bdata = new unsigned char[total_bytes];unsigned char *bptr = bdata;float *fptr = fdata;for (int i=0;i<total_bytes;i++,bptr++,fptr++){*bptr = float_to_byte(*fptr);}
}
最后我们需要一个函数可以根据我们提供的图像上的像素坐标得到我们实际需要的颜色值。
const unsigned char* pixel_data(int x,int y) const{static unsigned char magenta[] = {255,0,255};if(bdata == nullptr) return magenta;x = clamp(x,0,image_width);y = clamp(y,0,image_height);return bdata + y * bytes_per_scanline + x * bytes_per_pixel;}static int clamp(int x,int low,int high){if (x<low) return low;if (x<high) return x;return high-1;}rtw_image.h的总代码
#ifndef RTW_STB_IMAGE_H
#define RTW_STB_IMAGE_H
// Disable strict warnings for this header from the Microsoft Visual C++ compiler.
#ifdef _MSC_VER#pragma warning(push,0);
#endif
#define STB_IMAGE_IMPLEMENTATION
#define STBI_FAILURE_USERMSG
#include "extern/stb_image.h"
#include <cstdlib>
#include <iostream>
class rtw_image{
public:rtw_image(){}rtw_image(const char* image_filename){// 从指定的文件加载图像数据。如果定义了 RTW_IMAGES 环境变量,// 则只在该目录中查找图像文件。如果找不到图像,// 首先从当前目录开始搜索指定的图像文件,然后在 images/ 子目录中搜索,// 接着是 父目录 的 images/ 子目录,然后是 那个父目录的父目录,依此类推,// 向上搜索六个级别。如果图像没有成功加载,// width() 和 height() 将返回 0。std::string filename = std::string(image_filename);auto imagedir = getenv("RTW_IMAGES");if(imagedir && load(std::string(imagedir) + "/" + filename)) return;if(load(filename)) return;if(load("images/"+filename)) return;if(load("../images/"+filename)) return;if(load("../../images/"+filename)) return;if(load("../../../images/"+filename)) return;if(load("../../../../images/"+filename)) return;if(load("../../../../../images/"+filename)) return;if(load("../../../../../../images/"+filename)) return;std::cerr<<"ERROR: Could not load image file'"<<image_filename<<"'.\n";}bool load(const std::string& filename){// 从给定的文件名加载线性(gamma=1)图像数据。// 如果加载成功,返回 true。// 结果数据缓冲区包含第一个像素的三个 [0.0, 1.0] // 范围内的浮点值(首先是红色,然后是绿色,然后是蓝色)。// 像素是连续的,从图像的宽度方向从左到右,接着是下一行,// 直到整个图像的高度。int n = bytes_per_pixel;fdata = stbi_loadf(filename.c_str(),&image_width,&image_height,&n,bytes_per_pixel);if (fdata == nullptr) return false;bytes_per_scanline = image_width * bytes_per_pixel;convert_to_bytes();return true;}int width() const {return (fdata == nullptr) ? 0 : image_width;}int height() const {return (fdata == nullptr) ? 0 : image_height;}const unsigned char* pixel_data(int x,int y) const{static unsigned char magenta[] = {255,0,255};if(bdata == nullptr) return magenta;x = clamp(x,0,image_width);y = clamp(y,0,image_height);return bdata + y * bytes_per_scanline + x * bytes_per_pixel;}
private:const int bytes_per_pixel = 3;float    *fdata = nullptr; // Linear floating point pixel data 每个像素的0~1的值unsigned char *bdata = nullptr;  Linear 8-bit pixel data 转换为8bit的颜色值int       image_width = 0;int       image_height = 0;int       bytes_per_scanline = 0;static int clamp(int x,int low,int high){if (x<low) return low;if (x<high) return x;return high-1;}static unsigned char float_to_byte(float value){if (value <= 0.0) return 0;if (value >= 1.0) return 255;return static_cast<unsigned char>(256.0 * value);//这里希望,比如0.99可以转换为255}void convert_to_bytes(){// Convert the linear floating point pixel data to bytes, storing the resulting byte// data in the `bdata` member.int total_bytes = image_width * image_height * bytes_per_pixel;bdata = new unsigned char[total_bytes];unsigned char *bptr = bdata;float *fptr = fdata;for (int i=0;i<total_bytes;i++,bptr++,fptr++){*bptr = float_to_byte(*fptr);}}
};
// Restore MSVC compiler warnings
#ifdef _MSC_VER#pragma warning (pop)
#endif#endif
应用
首先需要修改texture.h的代码,之前的纹理都是固定颜色的,现在的纹理使用的是图片的纹理颜色。
class image_texture : public texture{
public:image_texture(const char* image_filename) : image(image_filename){}color value(double u,double v,const Point3& p) const override{// If we have no texture data, then return solid cyan as a debugging aid.if(image.height() <= 0) return color(0,1,1);// Clamp input texture coordinates to [0,1] x [1,0]u = interval(0,1).clamp(u);v = 1.0 - interval(0,1).clamp(v);// Flip V to image coordinatesint i = int(u*image.width());int j = int(v*image.height());auto pixel = image.pixel_data(i,j);double color_scale = 1.0 / 255.0;return color(color_scale*pixel[0],color_scale*pixel[1],color_scale*pixel[2]);}
private:rtw_image image;
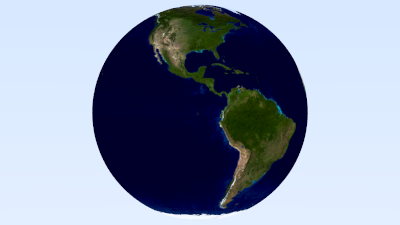
};做一个地球
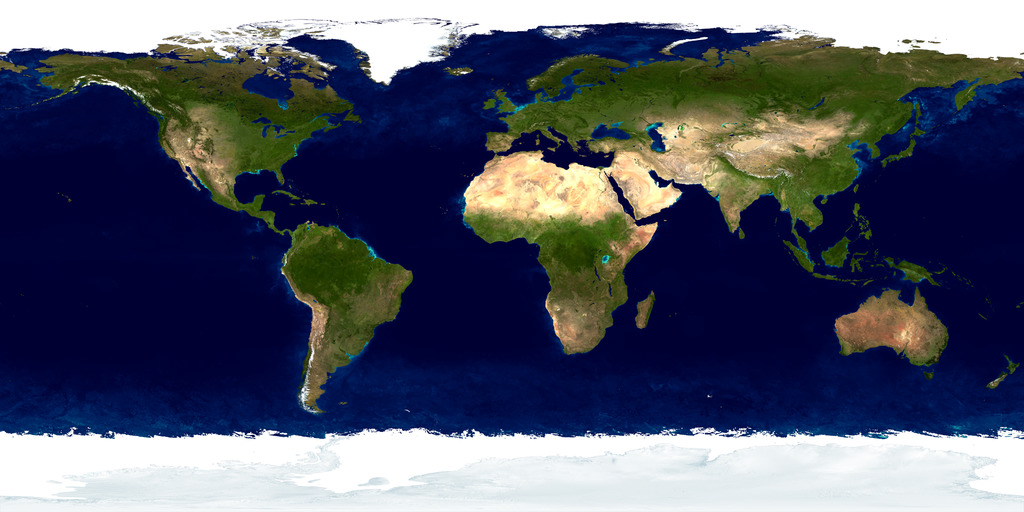
void earth(){hittable_list world;shared_ptr<image_texture> earth_texture = make_shared<image_texture>("../images/earthmap.jpg");shared_ptr<lambertian> earth_surface = make_shared<lambertian>(earth_texture);shared_ptr<sphere> globe = make_shared<sphere>(Point3(0,0,0),2,earth_surface);world.add(globe);camera cam;cam.aspect_ratio = 16.0 / 9.0;cam.image_width = 400;cam.samples_per_pixel = 100;cam.max_depth = 50;cam.vfov = 20;cam.lookfrom = Point3(0,0,12);cam.lookat = Point3(0,0,0);cam.vup = vec3(0,1,0);cam.defocus_angle = 0;cam.render(world);
}
int main(){earth();return 0;
}