Element-plus组件库基础组件使用
文章目录
- 按钮
- 图标
- 输入框
- 表格
- 表单
- 对话框
- 文件上传
- 布局容器
- ElMessage消息提示
- MessageBox 消息提示框
- Pagination分页样式
- 表单校验
记录vue3项目使用element-Plus,开发中常用的一些样式
下面这些组件是写增删改查是经常用到的,学习了这个写增删改查会好很多。
按钮
按钮是 el-button
基本的按钮 default 默认 primary基础蓝色 success info warning警告 Danger 危险
通过type属性 指定颜色     round  plain cycle指定形状
<el-button type="primary">Primary</el-button>
<el-button type="success">Success</el-button>
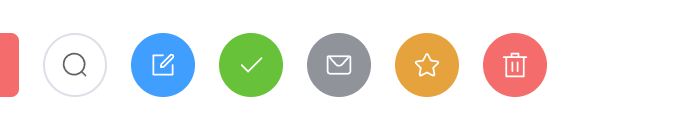
不输入文字,展示标签 :icon
通过:icon 绑定  需要导入对应的标签样式  @element-plus/icos-vue
<el-button type="warning" :icon="Star" circle />
<el-button type="danger" :icon="Delete" circle />import {Check,  //确定Delete, //删除Edit, //编辑Message, //信息Search, //搜索Star, //星
} from '@element-plus/icons-vue'
通过size属性来控制大小
想要显示图片+文字
<el-button type="danger" :icon="Delete" circle> 删除</el-button>
图标
https://element-plus.org/zh-CN/component/icon.html#%E7%BB%93%E5%90%88-el-icon-%E4%BD%BF%E7%94%A8
常用的一些图标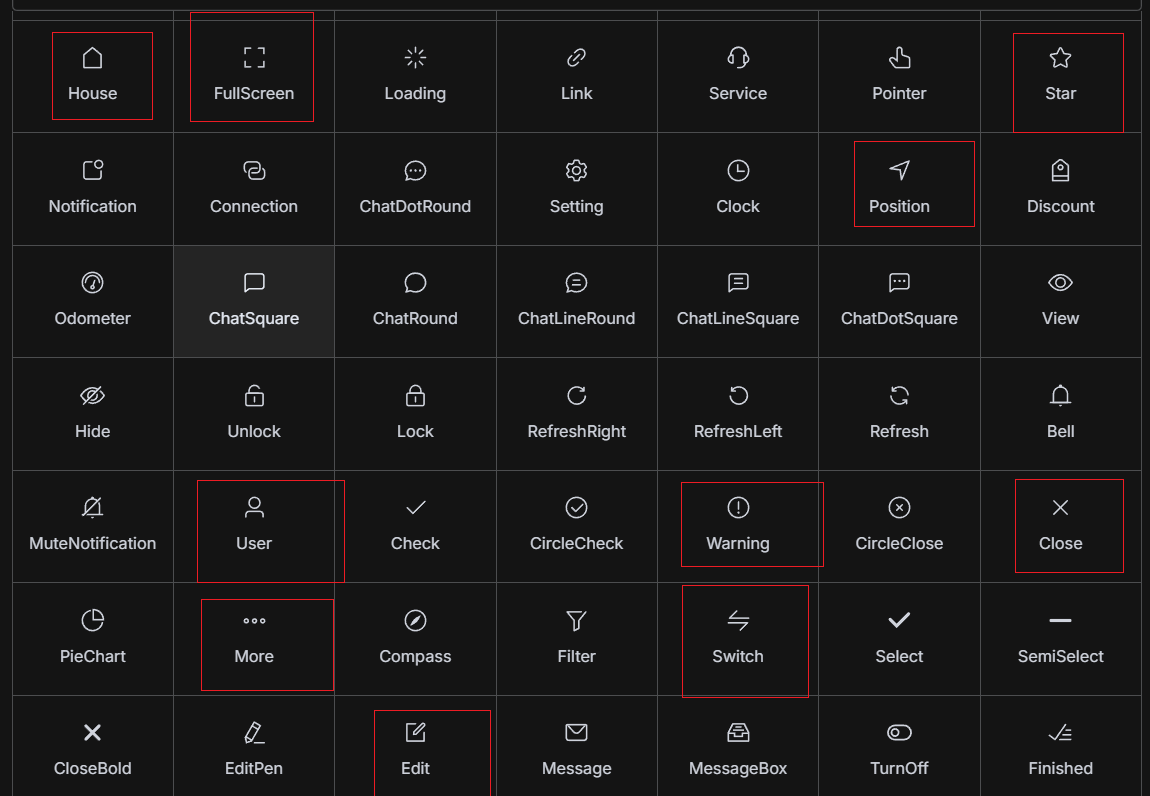
使用图标的时候需要导入图标库
import{} from @element-plus/icons-vue
输入框
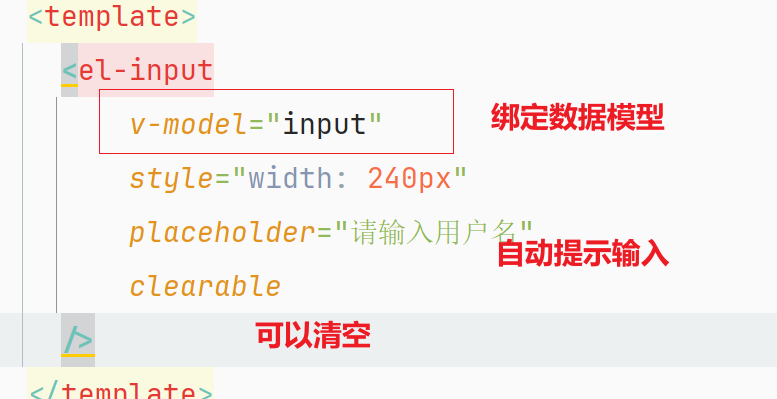
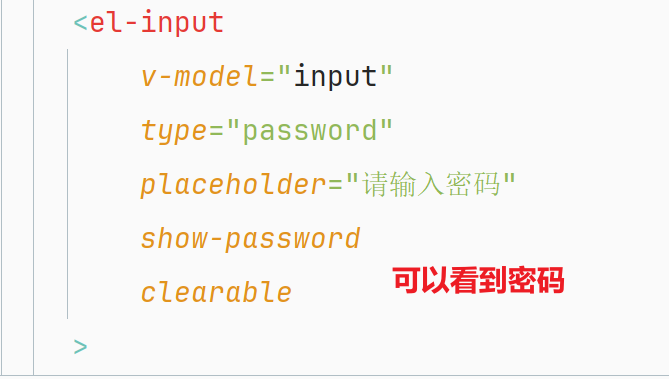
v-model 绑定数据模型 placeholder 提示输入 clearable 是否直接清除 type指定类型 showpassword是否显示密码<el-inputv-model="input"style="width: 240px"placeholder="请输入用户名"clearable/><el-inputv-model="input"type="password"placeholder="请输入密码"show-passwordclearable/>
其他属性
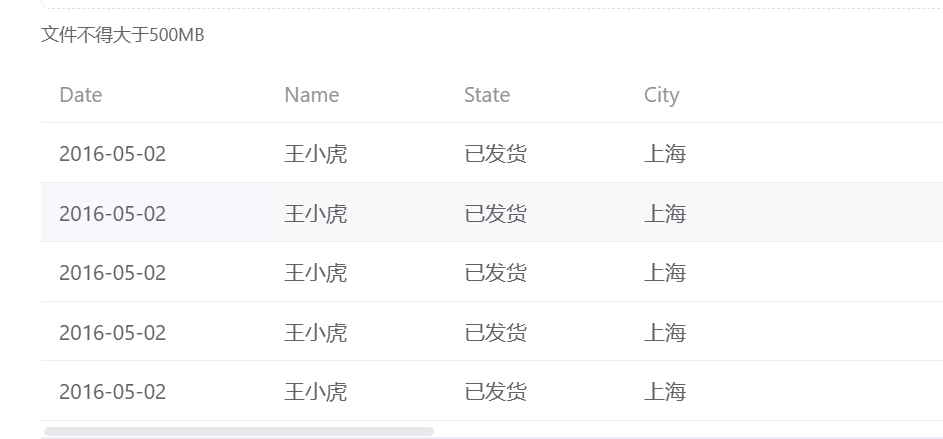
表格
:data绑定数据模型。 prop绑定模型里面具体的数据、label这一列的名称
表格是 el-table
每一列用prop绑定对象的属性。label展示的是这一列的名称。在js里面定义这个数组
const dataData=ref([])<el-table :data="tableData" style="width: 100%" height="250"><el-table-column fixed prop="date" label="Date" width="150" /><el-table-column prop="name" label="Name" width="120" /><el-table-column prop="state" label="State" width="120" /><el-table-column prop="city" label="City" width="320" /><el-table-column prop="address" label="Address" width="600" /><el-table-column prop="zip" label="Zip" /></el-table>
如果表格里面还要添加其他的数据,比如绑定按钮和开关按钮等。
代码需要写在template里面。 但是这样写如何获取数据么? element团队提供了插槽 通过**#default=“scope”**绑定了多用于,想要拿这一行数据通过 scope.row 得到。再拿到里面的具体状态。
<el-table-column label="状态">实现开关按钮<template #default="scope">   //scope.row拿到当前行的数据<el-switch v-model="scope.row.status"></el-switch></template>
</el-table-column>通过scope得到当前的行  scope.row 得到当前行的数据
表格想要添加选择框和排列序号
type selection 选择框   index 序号<el-table-column type="selection" width="150"/>  //前面的选择框
<el-table-column type="index" width="120" label="序号"/> //序号进行排序的
表单
//表单也是常用的ui。    :model 绑定模型      :inline表示当前是否在一行内  v-show 是否展示
<el-form :model="queryParams" ref="queryRef" :inline="true" v-show="showSearch" label-width="90px"><el-form-item label="合作商名称" prop="partnerName"><el-inputv-model="queryParams.partnerName"placeholder="请输入合作商名称"clearable@keyup.enter="handleQuery"/></el-form-item><el-form-item><el-button type="primary" icon="Search" @click="handleQuery">搜索</el-button><el-button icon="Refresh" @click="resetQuery">重置</el-button></el-form-item>
</el-form>
对话框
 <!-- 添加或修改点位管理对话框 -->、//标题  title     v-model true展示 false<el-dialog :title="title" v-model="open" width="500px" append-to-body>//ref    :rules绑定校验规则   :model 绑定模型
//在这个例子中,ref="nodeRef" 为 el-form 组件(即 Element Plus 的表单组件)创建了一个引用,命名为 nodeRef。<el-form ref="nodeRef" :model="form" :rules="rules" label-width="80px">//label 标题   prop校验规则<el-form-item label="点位名称" prop="nodeName"><el-input v-model="form.nodeName" placeholder="请输入点位名称"/></el-form-item><el-form-item label="详细地址" prop="address"><el-input v-model="form.address" placeholder="请输入详细地址"/></el-form-item>
/**v-for="dict in bussiness_type": 使用 v-for 指令循环遍历 bussiness_type 数组,生成多个 el-option 组件。
:key="dict.value": 使用 dict.value 作为每个 el-option 的唯一键,确保 Vue 能高效地渲染和更新选项。
:label="dict.label": 设置选项的显示文本为 dict.label。
:value="parseInt(dict.value)": 设置选项的值为 dict.value,并通过 parseInt 转换为整数。这个值将绑定到 form.businessType 中。
**/<el-form-item label="商圈类型" prop="businessType"><el-select v-model="form.businessType" placeholder="请选择商圈类型">//下拉菜单<el-optionv-for="dict in bussiness_type":key="dict.value":label="dict.label":value="parseInt(dict.value)"></el-option></el-select></el-form-item><el-form-item label="区域ID" prop="regionId"><el-input v-model="form.regionId" placeholder="请输入区域ID"/></el-form-item><el-form-item label="合作商ID" prop="partnerId"><el-input v-model="form.partnerId" placeholder="请输入合作商ID"/></el-form-item></el-form>//绑定插槽<template #footer><div class="dialog-footer"><el-button type="primary" @click="submitForm">确 定</el-button><el-button @click="cancel">取 消</el-button></div></template></el-dialog>
文件上传
<el-uploadaction="/api/upload"  //向后端请求的地址name="file" //文件名称auto-upload:true  //是否是自动上传:on-success="handleCovergeSuccess">//上传成功的回调函数<el-button type="primary">请选择上传视频封面</el-button>
</el-upload>
const handleSuccess = (result) => {
//响应的结果      //返回的是服务器上面的地址
console.log(result.data)
VideoData.value.videoUrl = result.data  //回调 后端返回文件在服务器上面的地址 前端拿到赋值给视频的地址。点击投稿后数据库中存放的是视频的URL
ElMessage.success('success')  //弹出消息成功
}
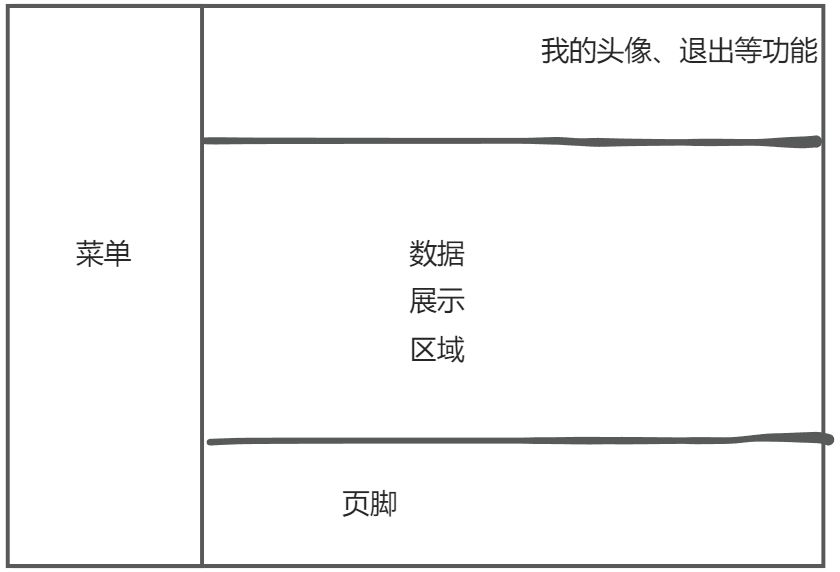
布局容器
<el-container>:外层容器。当子元素中包含 <el-header> 或 <el-footer> 时,全部子元素会垂直上下排列, 否则会水平左右排列。<el-header>:顶栏容器。<el-aside>:侧边栏容器。<el-main>:主要区域容器。<el-footer>:底栏容器。
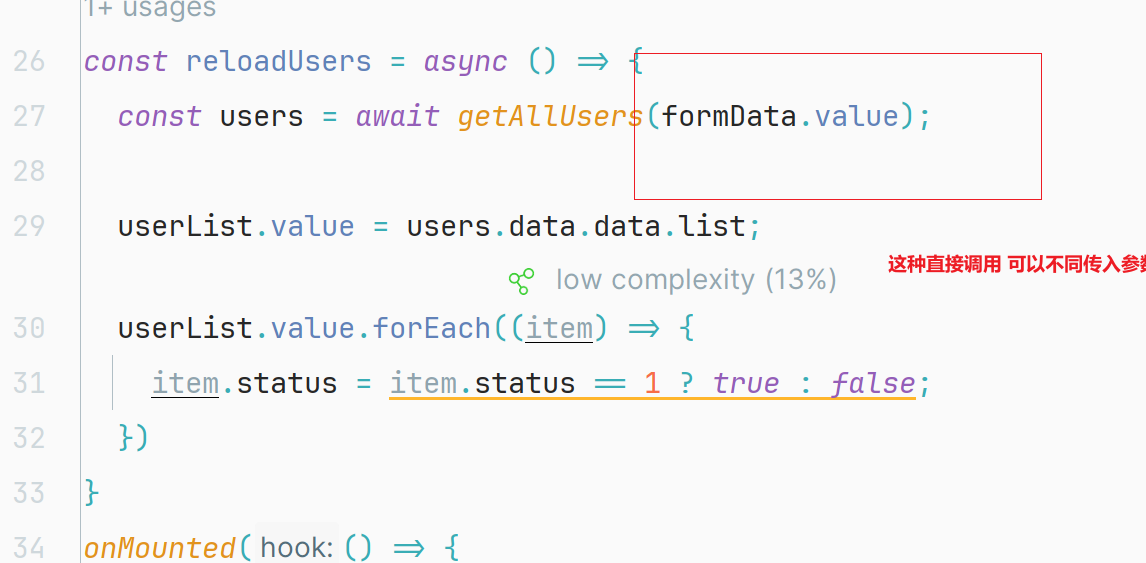
vue3中的创建属性使用的是ref,这个创建的是对象,如果想要获取属性需要通过.value拿到。
自动展开:当传递响应式对象给一个函数时,vue3会自动响应处理系统,使得可以直接传递整个对象而不用手动解包.value属
ElMessage消息提示
方法成功后需要提示消息,用的ElMessage。
import { ElMessage } from 'element-plus'ElMessage.error('服务异常');
ElMessage.success('登录成功!')
<script setup>
import {Search, Download, Upload, ArrowRight
} from '@element-plus/icons-vue'
import {ElMessage} from 'element-plus'//箭头函数
const show=()=>{// ElMessage.success('成功')ElMessage.error('失败')
}
</script><template>
<el-button type="primary" :icon="Search" @click="show()">登录按钮</el-button>
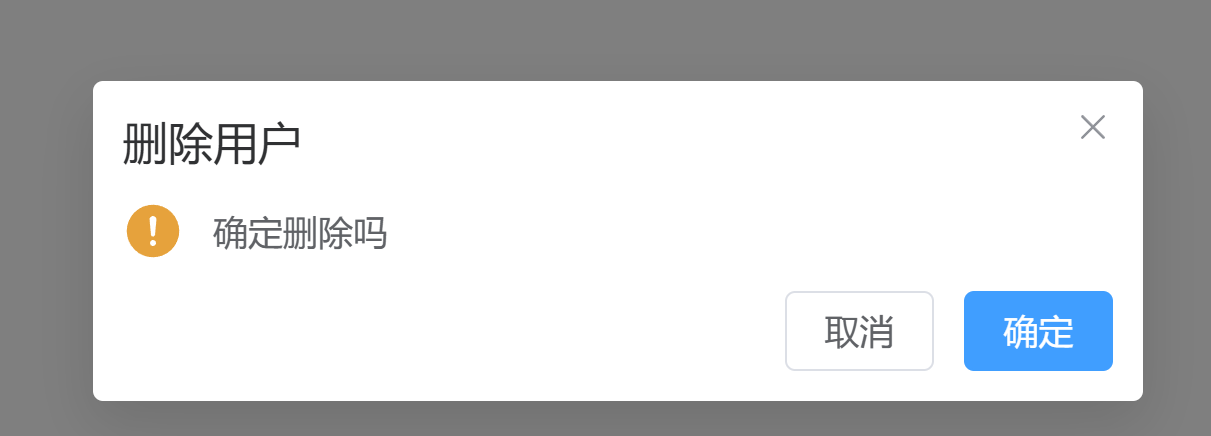
</template>MessageBox 消息提示框
//confirm确认吗 内容 标题 确定按钮 取消按钮 then成功回调函数 catch 取消的回调函数ElMessageBox.confirm('确定删除吗','删除用户',{confirmButtonText: '确定',cancelButtonText: '取消',type: 'warning'}).then(()=>{ElMessage.success('删除成功')}).catch(()=>{ElMessage.error('删除失败')})//编写退出按钮 配合路由进行跳转
User.js里面的方法:
get请求用查询字符串,传入对象的时候用{}包裹。 @RequestParam
post请求携带数据,直接传入对象即可 后端用@RequestBody 对象 携带的是表单数据
还有请求是模板字符串,后端用的是@pathvairable动态提取。
import request from '@/util/request.js'
//查询所有用户
export const getAllUsers = (formData) => {var params = new URLSearchParams();for (let key in formData) {params.append(key, formData[key])}//这边漏掉了一个大括号return request.get('/user/queryByPage',{params})
}
//添加用户 post请求携带数据 直接添加到data属性上面去
export const addUser = (formData) => {return request.post('/user/add', formData)
}
//更新用户  根据id和status
export const updateStatus = (id, status) => {return request.put(`/user/modifyStatus/${id}/${status}`);
}
//根据用户id得到用户 模板字符串
export const getUserById = (id) => {return request.get(`/user/query/${id}`)
}
//更新用户
export const UpdateUser = (formData) => {return request.put('/user/modify', formData)
}
//删除用户
export const deleteUser = (id) => {return request.delete(`/user/remove/${id}`)
}
Pagination分页样式
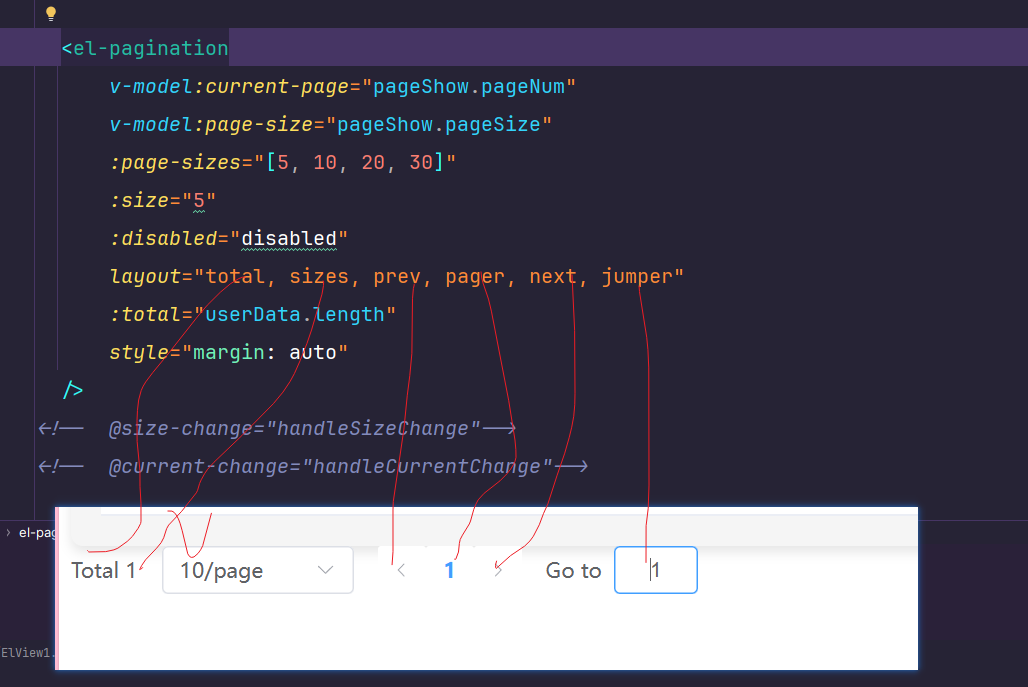
<el-pagination v-model:current-page="userList.pageNum" v-model:page-size="userList.pageSize":page-sizes="[10, 20 ,30, 50]" //有哪些选项layout="jumper, total, sizes, prev, pager, next"background :total="total"@size-change="onSizeChange" //监听size改变@current-change="onCurrentChange" //监听当前页改变 这两个都要重新请给后端style="margin-top: 20px; justify-content: flex-end"/>
这个代码片段是一个使用 Vue.js 和 Element UI 框架的分页组件。下面是对这个代码的分析:
. el-pagination 组件<el-pagination> 是 Element UI 中的分页组件,用于分页显示数据列表。分页组件提供了许多属性和事件来控制分页行为和样式。
2. 属性和绑定
-
v-model:current-page="userList.pageNum":- 双向绑定
current-page属性和userList.pageNum。current-page表示当前页码,userList.pageNum是一个变量,存储当前页码的值。
- 双向绑定
-
v-model:page-size="userList.pageSize":- 双向绑定
page-size属性和userList.pageSize。page-size表示每页显示的条目数,userList.pageSize是一个变量,存储每页显示的条目数。
- 双向绑定
-
:page-sizes="[10, 20 ,30, 50]":- 绑定
page-sizes属性,设置每页条目数的选项,这里提供了 10、20、30 和 50 条每页的选项。
- 绑定
-
layout="jumper, total, sizes, prev, pager, next":- 设置分页组件的布局,包括跳转器、总条目数、条数选择器、上一页按钮、页码按钮和下一页按钮。
-
background:- 添加背景样式。
-
:total="total":- 绑定
total属性,总条目数。total是一个变量,表示数据总条目数。
- 绑定
-
@size-change="onSizeChange":- 监听
size-change事件,当每页条目数改变时触发**onSizeChange**方法。
- 监听
-
@current-change="onCurrentChange":- 监听
current-change事件,当当前页码改变时触发**onCurrentChange**方法。
这个两个函数会自动有一个参数,我们需要传入这个参数。
3. 样式 - 监听
-
style="margin-top: 20px; justify-content: flex-end":- 设置组件的内联样式,添加顶部外边距为 20px,并将内容对齐方式设置为
flex-end,即右对齐。
- 设置组件的内联样式,添加顶部外边距为 20px,并将内容对齐方式设置为
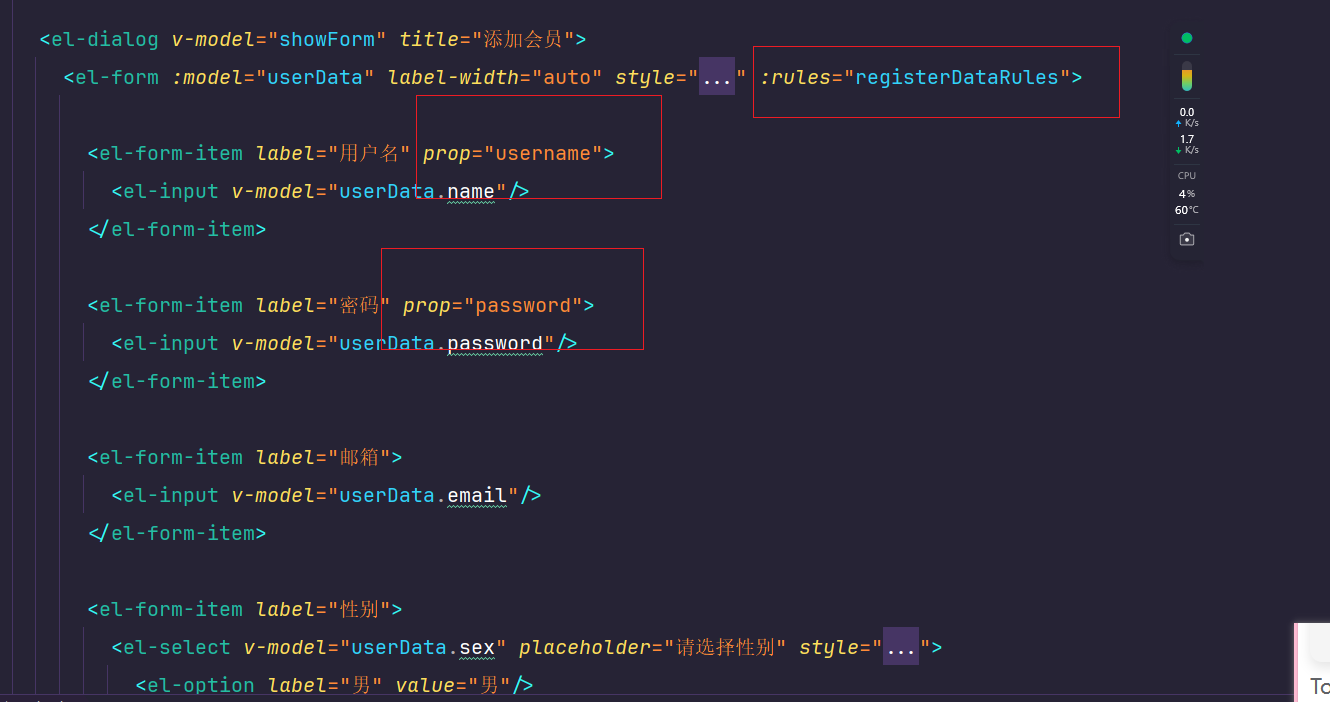
表单校验
定义表单检验的规则.required:true 表示这个字段是必须的  trigger 校验触发规则  min max 表单的最大长度
const registerDataRules = ref({username: [{required: true, message: '请输入用户名', trigger: 'blur'},{min: 5, max: 16, message: '用户名的长度必须为5~16位', trigger: 'blur'}],password: [{required: true, message: '请输入密码', trigger: 'blur'},{min: 5, max: 16, message: '密码长度必须为5~16位', trigger: 'blur'}],phone: [{required: true, message: '请输入密码', trigger: 'blur'},{min: 5, max: 16, message: '密码长度必须为5~16位', trigger: 'blur'}]
})
给需要校验的表单绑定规则 一定要是form表单
:rules="registerDataRules",绑定校验的规则。给每一个form-item 绑定prop属性,prop属性对应校验里面的对象数组名称