3. 进阶指南:自定义 Prompt 提升大模型解题能力
怎么判断 Prompt 的好坏,有什么问题有着标准答案么?
答:让大模型求解数学问题。
李宏毅老师的 HW4 正好提到了有关数学问题的 Prompt,所以我决定中间插一篇这样的文章。通过本文你将:
- 了解各种 Prompt 如何影响大型语言模型的性能。
- 设计 Prompt 提高大模型解决数学问题的正确性。
- 了解占位符的使用
- 了解如何使用 ipywidgets 创建交互模块。
如果你可以访问 Gemini,可以在 Google AI Studio 中非常快速的获取 Gemini API,从而在 Colab 上进行学习:HW4 - Colab。
因为国家政策原因,这里不会提供🪜的教程,但本文会根据 HW4 的完整内容进行组织,并将 Colab 中的 @param 使用 ipywidgets 进行替代,提供一个大陆版本的中文作业镜像。
注意,尽管我提到的是作业,但并不意味着你需要视频基础,其实你也可以直接进行学习,这没有门槛。
推荐观看视频:训练不了人工智能?你可以训练你自己
你需要确保你拥有一个支持 openai 的大模型 API,如果没有,参照之前的文章0. 阿里大模型API获取步骤进行获取。代码文件下载

文章目录
- 下载,导入和配置
- 初始化 OpenAI 模型
- 🧙 创建你的自定义 Prompt(Gradio 版本)
- 设计Prompt解决数学问题
- 🧙 创建你的自定义 Prompt(非 Gradio 版本)
- 导入
- 自定义 Prompt
- 创建下拉选项选择问题
- 评估
- 创建滑块选择评估的数量
- 打印指定的评估结果
- 保存你的 Propmt
- 参考链接
下载,导入和配置
pip install tqdm jinja2 gradio tiktoken openai
import os
import time
import re
import pickle
import json
import tracebackimport openai
import tiktoken  # 用于 prompt_token_num()
import jinja2
from tqdm import tqdm
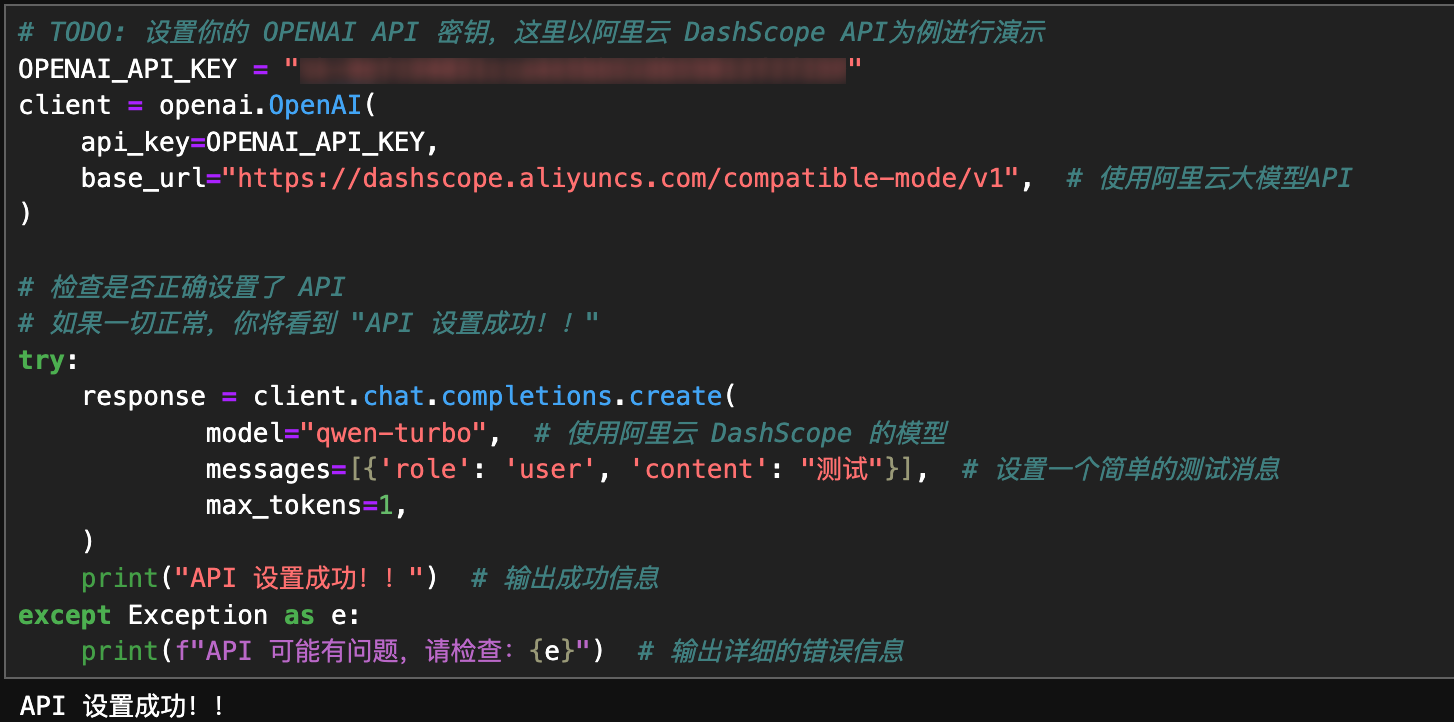
填充你的API并运行代码:
初始化 OpenAI 模型
实际上如果专注于 Prompt,可以暂时跳过这部分。
class OpenAIModel():def __init__(self, cache_file="openai_cache"):# 初始化 OpenAI 模型对象,并设置缓存文件self.cache_file = cache_fileself.cache_dict = self.load_cache()  # 加载缓存def save_cache(self):# 将当前缓存保存到文件with open(self.cache_file, "wb") as f:pickle.dump(self.cache_dict, f)def load_cache(self, allow_retry=True):# 从文件加载缓存,带有重试机制if os.path.exists(self.cache_file):while True:try:with open(self.cache_file, "rb") as f:cache = pickle.load(f)breakexcept Exception:if not allow_retry:assert Falseprint("Pickle Error: 5秒后重试...")time.sleep(5)else:# 如果文件不存在则初始化缓存cache = {}return cachedef set_cache_file(self, file_name):# 设置缓存文件名并加载缓存self.cache_file = file_nameself.cache_dict = self.load_cache()def get_completion(self, content):# 获取模型完成的文本,先检查缓存,若无则请求生成# 如果选择检查缓存,则会导致同问题不同trial的结果相同,这与实际想表达的内容不符,故注释# if content in self.cache_dict:#     return self.cache_dict[content]for _ in range(3):try:# 调用模型生成内容response = client.chat.completions.create(model="qwen-turbo",messages=[{'role': 'user', 'content': content}],temperature=1.0,)completion = response.choices[0].message.contentself.cache_dict[content] = completionreturn completionexcept Exception as e:print(e, "\n")time.sleep(1)return Nonedef is_valid_key(self):# 检查 API 密钥是否有效for _ in range(4):try:response = client.chat.completions.create(model="qwen-turbo",messages=[{'role': 'user', 'content': "hi there"}],temperature=1.0,max_tokens=1)return Trueexcept Exception as e:traceback.print_exc()time.sleep(1)return Falsedef prompt_token_num(self, prompt):# 使用 tiktoken 来计算 token 数量try:# 使用 gpt-3.5-turbo 的编码器,因为 tiktoken 库不支持自动识别 qwen-turbo 模型encoding = tiktoken.get_encoding("cl100k_base")  # 这是 GPT-3.5-turbo 所使用的编码器# 将 prompt 编码成 token,并返回 token 数量tokens = encoding.encode(prompt)return len(tokens)except Exception as e:print(f"计算 token 数量时出错: {e}")return 0def two_stage_completion(self, question, content):# 两阶段完成:首先获取推理,再获取最终答案rationale = self.get_completion(content)if not rationale:return {'prompt': content,'rationale': None,'answer': None}ans = self.get_completion(content=f"Q:{question}\nA:{rationale}\nThe answer to the original question is (a number only): ")return {'prompt': content,'rationale': rationale,'answer': ans}# 初始化模型
my_model = OpenAIModel()
🧙 创建你的自定义 Prompt(Gradio 版本)
以下完全基于你下载了代码文件或者使用了Colab进行。你需要暂时忽略代码细节,专注于 Prompt 设计。
你需要一直运行提供的代码:

直到看到一个这样的交互界面:
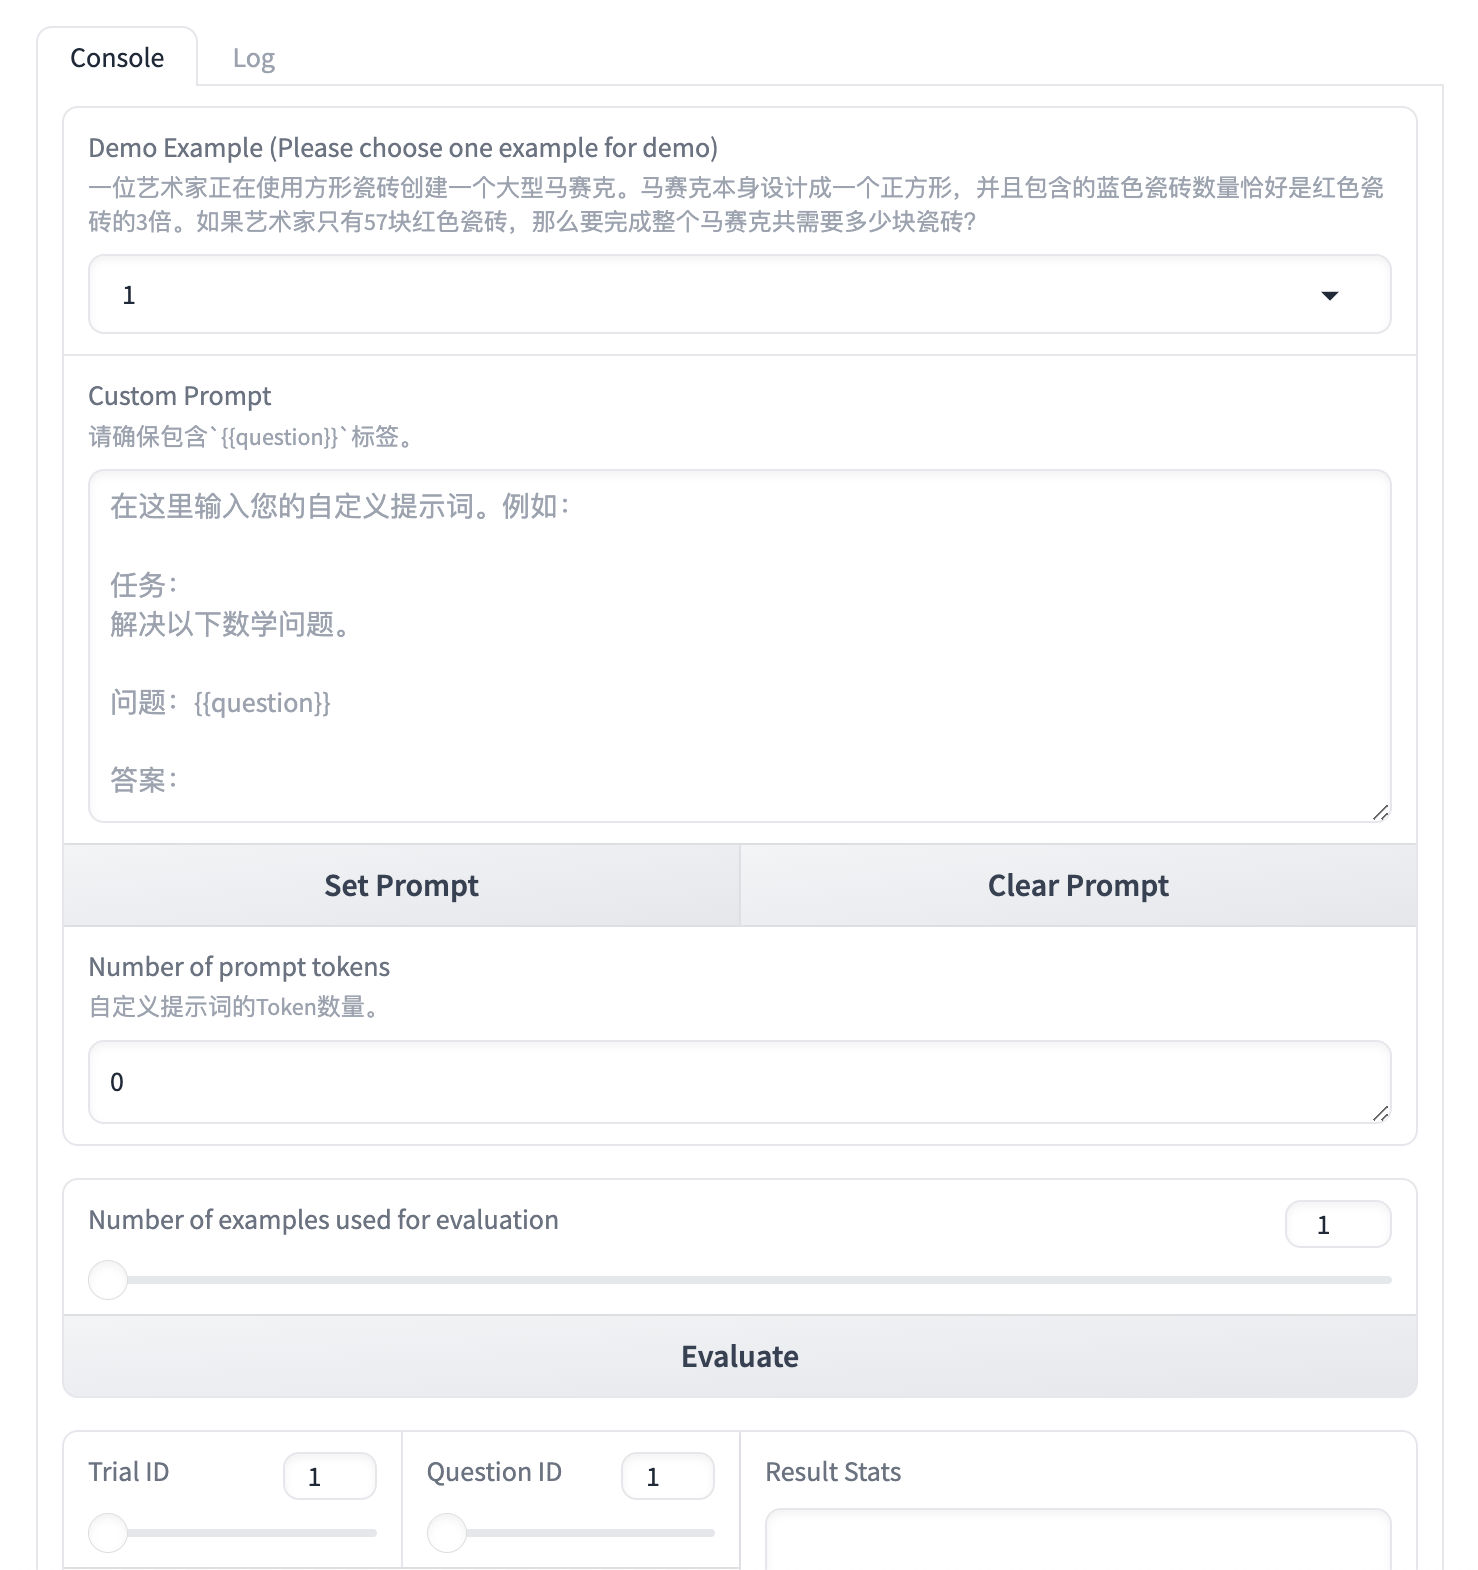
设计Prompt解决数学问题
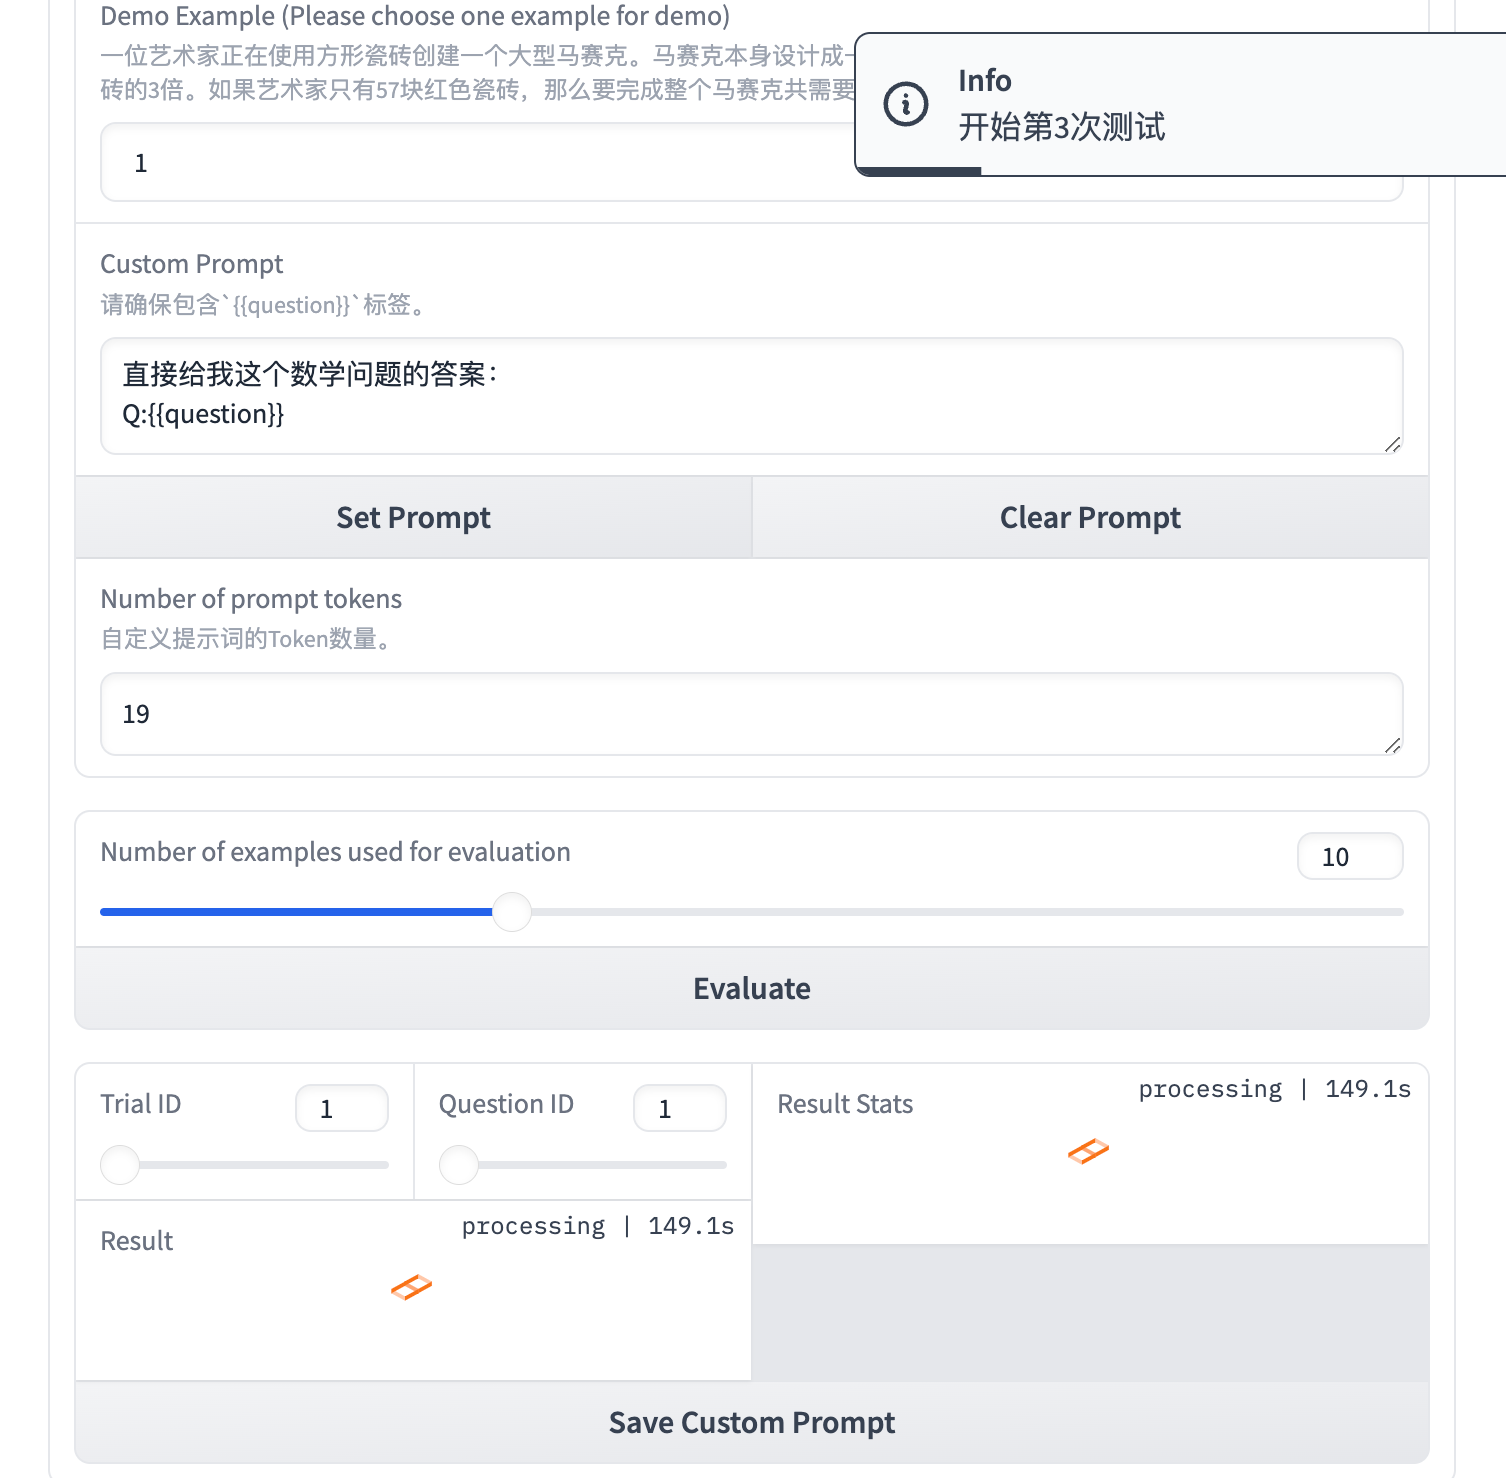
现在需要设计你自己的 Prompt,填写在 Custom Prompt 中,注意,你的 Prompt 中需要包含 {{question}},这将作为一个占位符,后续被 Demo Example 显示的问题替换。

使用 Shift+Enter 可以在文本框中换行。在设计完成之后,点击 Set Prompt设置当前 Prompt。

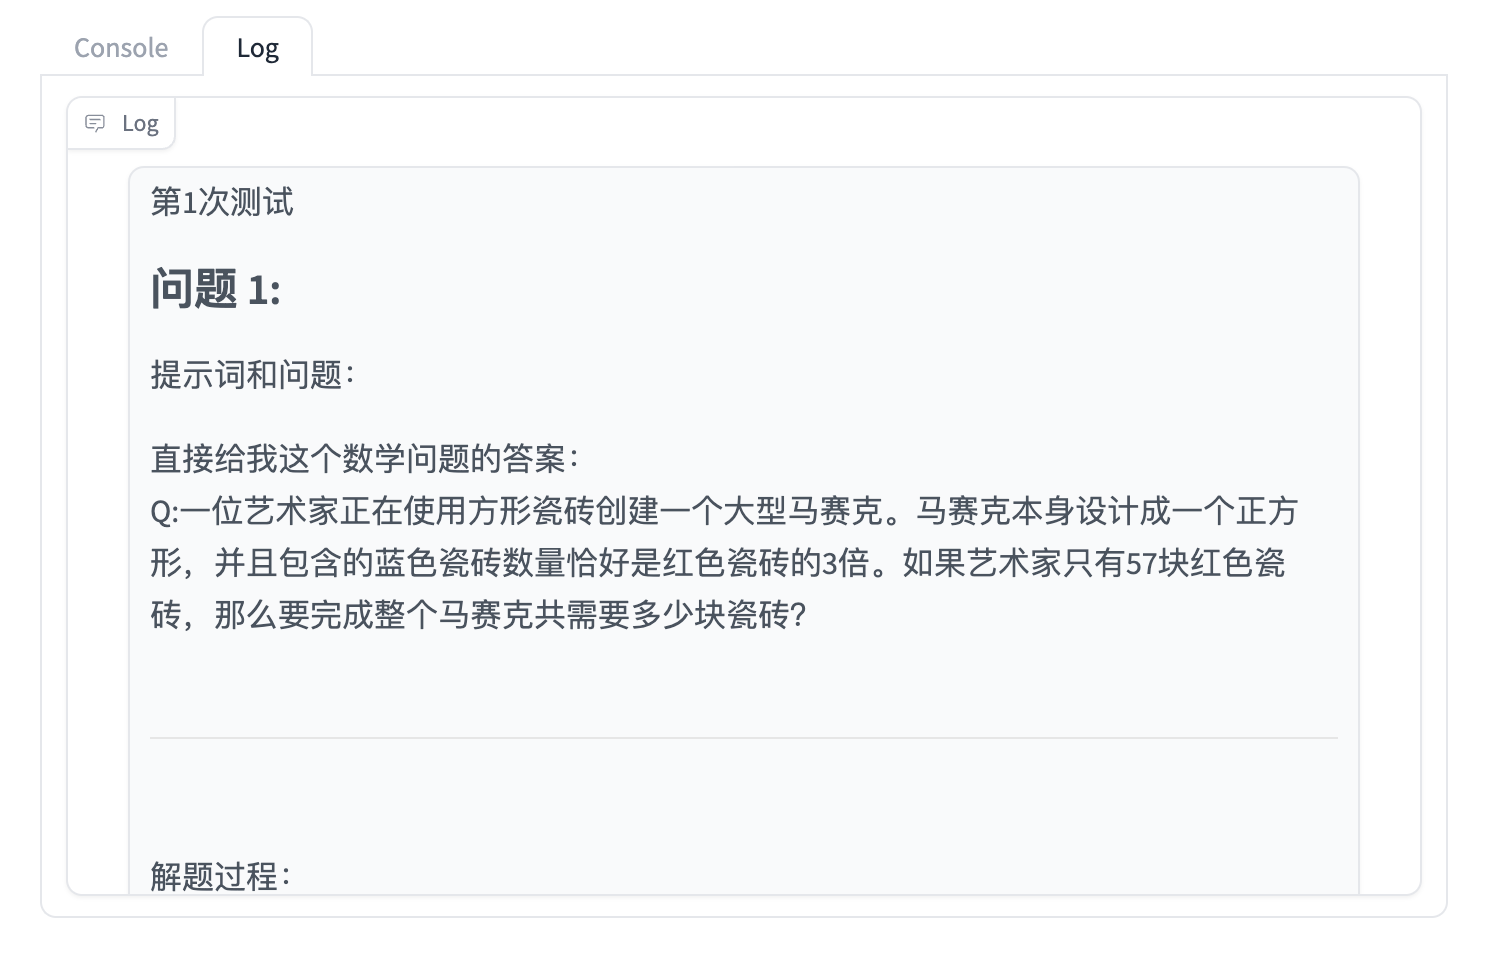
设置的结果可以点击 Log 查看:
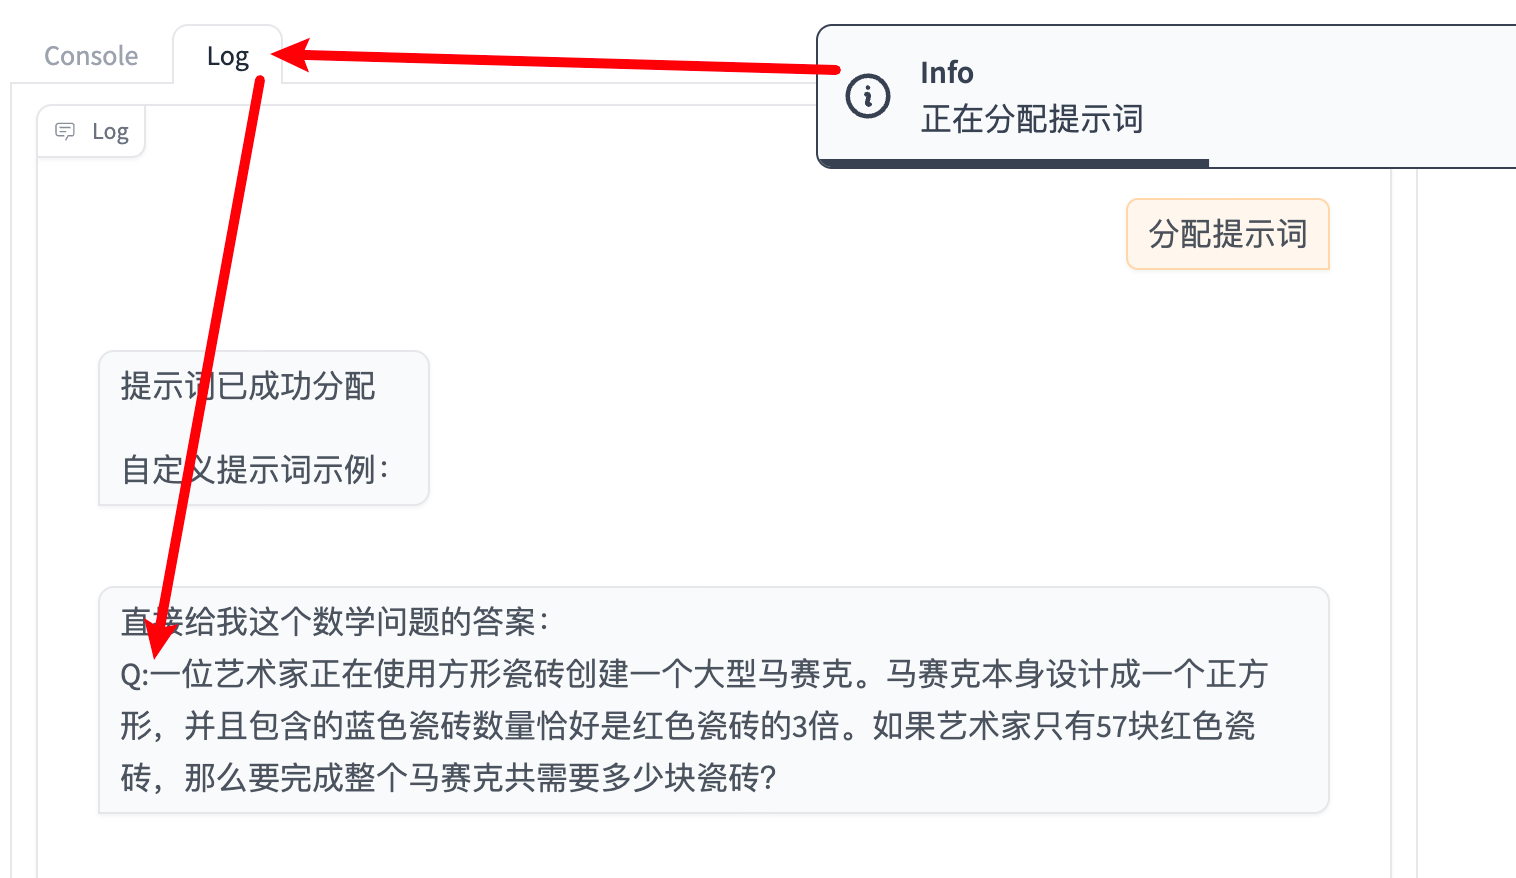
回到 Console 界面,如果想重新设置 Prompt,点击 Clear Prompt 清除已输入的任何自定义提示词:
在点击 Evalute 进行评估之前,你需要了解对应的概念:
-
Number of prompt tokens
显示当前 Prompt 的 Token 数量,作业会限制最大长度为 1024。 -
Number of examples used for evaluation
意味着我们将去评估多少个问题的答案。 -
Trail ID
对指定评估的问题,将进行三次测试。 -
Question ID受
Number of examples used for evaluation限制,为问题数量。
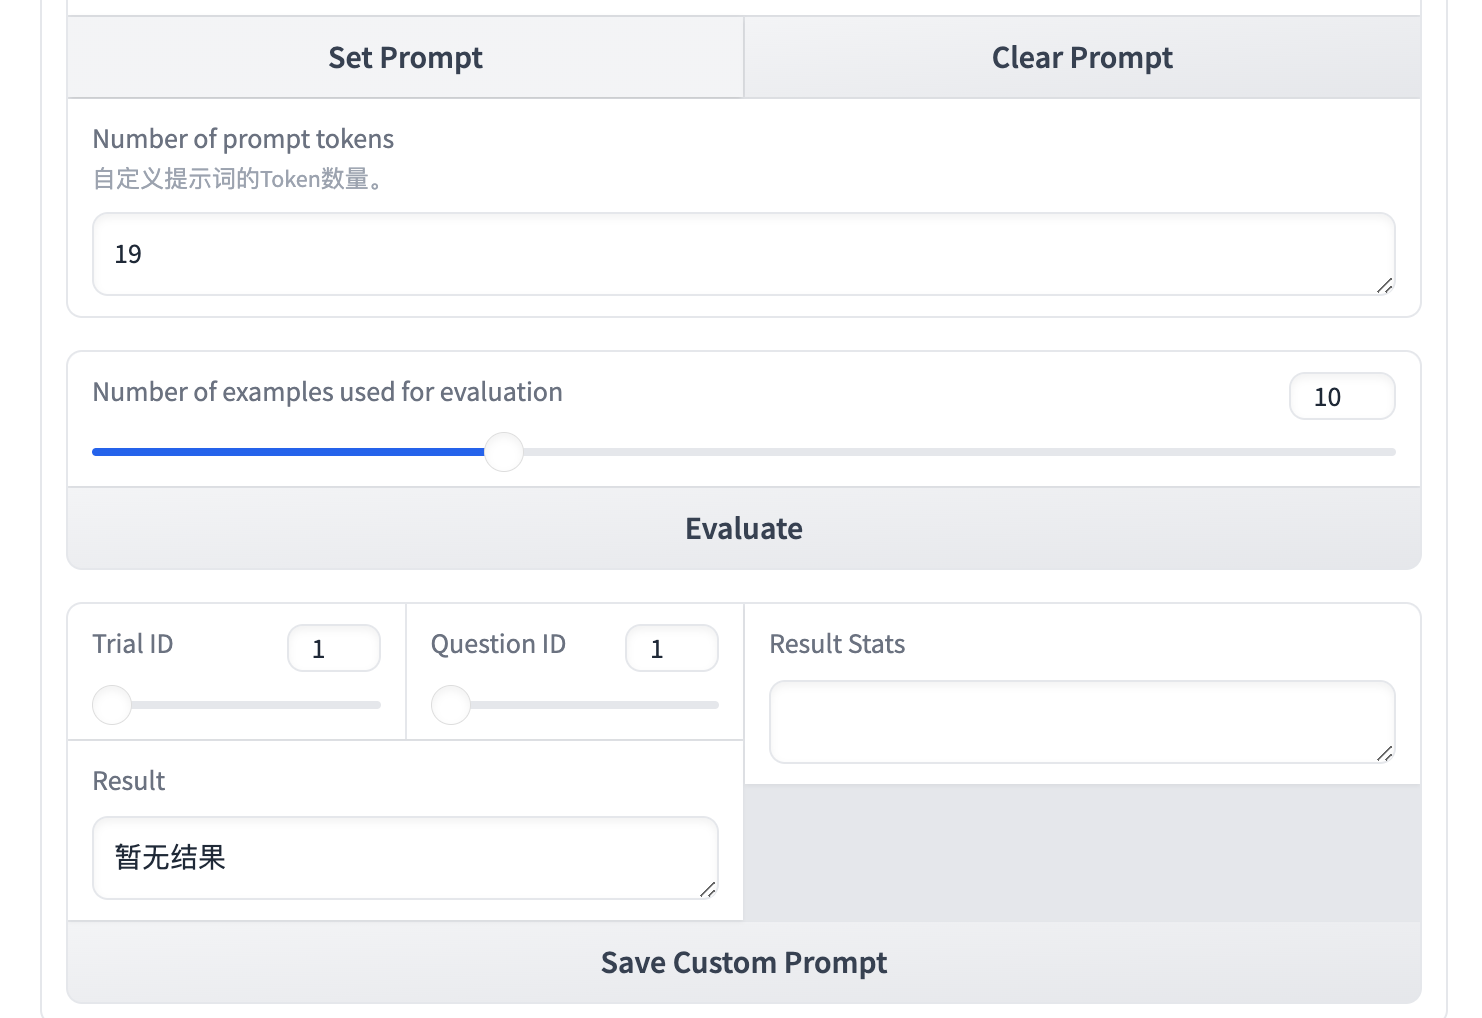
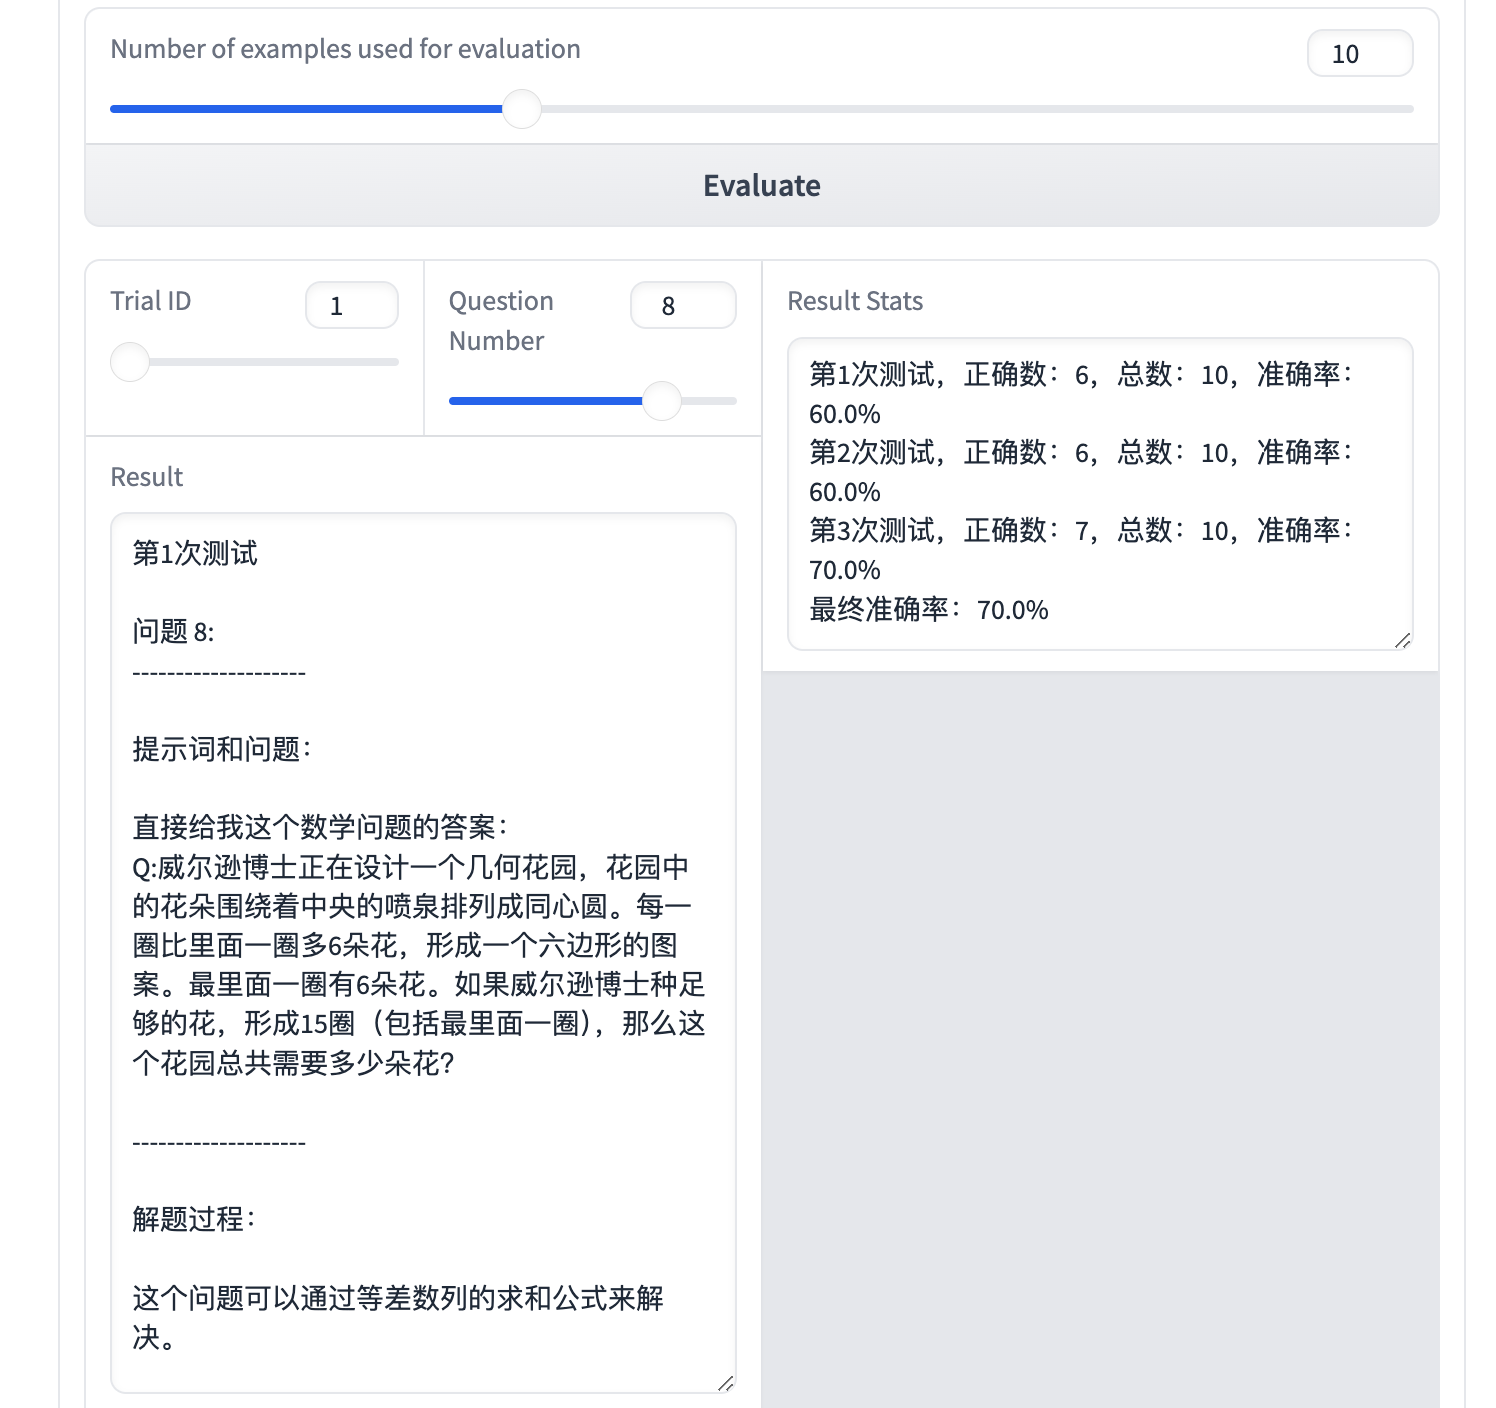
假设我们仅评估前10个问题,设置Number of examples used for evaluation 为10,点击 Evaluate。
你可以改变Trail ID和Question ID来查看某次测试下对应问题的结果,并可以得到 3 次测试下 Prompt 的准确率。
你还可以点击 Log 进一步查看细节:
🧙 创建你的自定义 Prompt(非 Gradio 版本)
这个版本将不涉及 Gradio,使用 ipywidgets 来创建交互界面。
实际上这里只是一个拓展,如果只是想练习 Prompt 的使用,查看 Gradio 版本即可。
导入
import ipywidgets as widgets
from IPython.display import display
自定义 Prompt
import ipywidgets as widgets
from IPython.display import display# 创建文本区域、按钮和输出区域
prompt_area = widgets.Textarea(placeholder="在此输入你的自定义提示词")
prompt_area_desc = widgets.HTML(value="<p><b>Custom Prompt:</b></p>")
setprompt_btn = widgets.Button(description="Set Prompt")
resetprompt_btn = widgets.Button(description="Clear Prompt")
display_output = widgets.Output()# 初始化自定义提示词变量
custom_prompt = ""# 定义“Assign Prompt”按钮点击事件
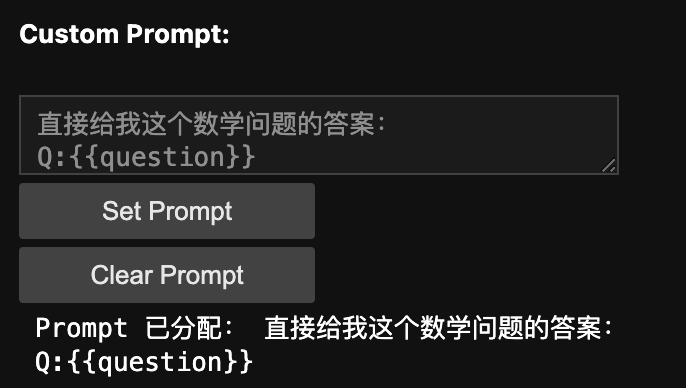
def set_prompt_clk(b):global custom_promptcustom_prompt = prompt_area.value # 获取输入框中的提示词prompt_area.disabled = True # 禁用输入框with display_output:display_output.clear_output() # 清除之前的输出print("Prompt 已分配:", custom_prompt) # 打印已分配的提示词# 定义“Clear Prompt”按钮点击事件
def reset_prompt_clk(b):prompt_area.disabled = False # 重新启用输入框prompt_area.value = "" # 清空输入框with display_output:display_output.clear_output() # 清除之前的输出print("提示词已重置") # 提示已重置# 绑定按钮点击事件
setprompt_btn.on_click(set_prompt_clk)
resetprompt_btn.on_click(reset_prompt_clk)# 显示组件
display(prompt_area_desc, prompt_area, setprompt_btn, resetprompt_btn, display_output)
在文本框中填写你的 Prompt:
创建下拉选项选择问题
这部分实现Colab中的 Demo_Example = "7" # @param [1,2,3,4,5,6,7,8,9,10,11,12,13,14,15,16,17,18,19,20,21,22,23,24,25,26,27,28,29,30] {type:"string"}
# 创建下拉菜单,允许用户选择 1 到 30 之间的数字
demo_example_dropdown = widgets.Dropdown(options=[str(i) for i in range(1, 31)],  # 选项为字符串value="7",  # 默认值description='示例编号:',
)# 创建输出区域
output_demo_example = widgets.Output()# 定义一个回调函数,当用户选择新值时触发
def on_dropdown_change(change):global Demo_Example  # 使用全局变量Demo_Example = change['new']  # 获取下拉菜单的新值with output_demo_example:output_demo_example.clear_output()  # 清除之前的输出print(f"已选择的示例编号是: {Demo_Example}")# 监听下拉菜单的变化
demo_example_dropdown.observe(on_dropdown_change, names='value')# 显示下拉菜单和输出区域
display(demo_example_dropdown, output_demo_example)
默认选择示例7:

查看占位符的作用:
# 从文本框获取用户输入的自定义提示词
custom_prompt = prompt_area.value
assert "{{question}}" in custom_prompt, "提示词中必须包含 '{{question}}' 占位符!"# 通过上面的下拉选项选择一个示例,你可以选择1到30之间的编号
demo_index = eval(Demo_Example)  # 将字符串形式的数字转为整数# 初始化 jinja2 环境并渲染模板
environment = jinja2.Environment()
template = environment.from_string(custom_prompt)# 输出生成的自定义提示词示例
print(f"自定义提示词示例:\n\n{template.render(question=questions[demo_index-1])}")
可以看到原来占位符的位置被替换为了第7个问题。

评估
创建滑块选择评估的数量
这部分用于实现Colab中的 eval_num = 5 # @param {type:"slider", min:1, max:30, step:1}
# 创建滑块,范围为 1 到 30,步长为 1,默认值为 5
eval_slider = widgets.IntSlider(value=5,min=1,max=30,step=1,description='选择评估数:', continuous_update=False  # 滑块放开后才更新
)# 创建输出区域
output = widgets.Output()# 初始化为滑块的默认值
eval_num = eval_slider.value  # 定义一个回调函数,滑块变化时会触发
def on_slider_change(change):global eval_numeval_num = change['new']  # 获取滑块的新值with output:output.clear_output()  # 清除之前的输出print(f"已选择的评估数是: {eval_num}")# 监听滑块的变化
eval_slider.observe(on_slider_change, names='value')# 显示滑块和输出区域
display(eval_slider, output)
这里的演示选择10。

开始评估前10个问题下 Prompt 的正确率:
assert 1 <= eval_num <= 30# 定义显示结果的模板
ans_template = """Prompt with Question:\n\n{{question}}\n\n--------------------\n\nProblem-solving Process:\n\n{{rationale}}\n\n--------------------\n\nFinal Answer\n\n{{answer}}"""res_list = []
test_num = eval_num # 要评估的问题数量
total_count = test_num# 将 ans_template 字符串转换为 jinja2 模板对象
environment = jinja2.Environment()
ans_template = environment.from_string(ans_template)# 初始化计数器以跟踪准确回答的次数
trial_num = 3 # 进行三次试验
trials = [[] for _ in range(trial_num)]
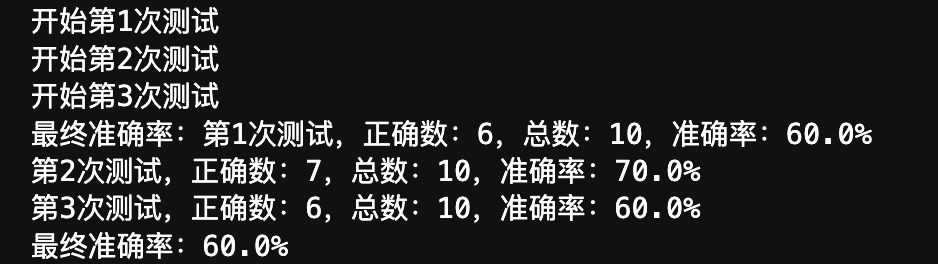
res_stats_str = ""def clean_commas(text):# 该函数用于清理数字中的逗号,并保留浮点数中的逗号def process_match(match):number = match.group(0)if '.' in number:return number # 保留浮点数else:# 去掉数字中的逗号number_list = number.split(",")new_string = number_list[0]for i in range(1, len(number_list)):if len(number_list[i]) == 3: # 这是千位分隔符new_string += number_list[i]else:new_string += f",{number_list[i]}"return new_stringpattern = r'\d+(?:,\d+)*(?:\.\d+)?'return re.sub(pattern, process_match, text)def find_and_match_floats(input_string, ground_truth):# 匹配输入字符串中的所有浮点数和整数pattern = re.compile(r"[-+]?\d*\.\d+|[-+]?\d+")found_numbers = pattern.findall(input_string)found_floats = [float(num) for num in found_numbers]return ground_truth in found_floatsfor i in range(trial_num):print(f"Start trial {i+1}")my_model.set_cache_file(f"gemini_cache_trial_{i+1}")accurate_count = 0# 遍历每个要评估的示例for idx, example in enumerate(questions[:test_num]):test_res = ""result = my_model.two_stage_completion(example, template.render(question=example))# 检查模型是否返回了有效答案if not result["answer"]:trials[i].append(0)test_res += f"Trial {i+1}\n\n Skip question {idx + 1}."test_res += "\n" + "<"*6 + "="*30 + ">"*6 + "\n\n"res_list.append(f"Trial {i+1}\n\n Skip question {idx + 1}.")continue# 清理答案中的逗号并与地面真值进行比较cleaned_result = clean_commas(result["answer"])if find_and_match_floats(cleaned_result, answers[idx]) or idx in [0, 26]:accurate_count += 1trials[i].append(1)else:trials[i].append(0)# 保存模型的缓存my_model.save_cache()test_res += f"Trial {i + 1}\n\n"test_res += f"Question {idx + 1}:\n" + '-'*20test_res += f'''\n\n{ans_template.render(question=result['prompt'], rationale=result['rationale'], answer=result['answer'])}\n'''test_res += "\n" + "<"*6 + "="*30 + ">"*6 + "\n\n"res_list.append(test_res)time.sleep(1)# 打印准确率统计res_stats_str += f"Trial {i + 1}, accurate_count: {accurate_count}, total_count: {total_count}, accuracy: {accurate_count / total_count * 100}%\n"my_model.save_cache()## 多数投票计算最终准确率
voting_acc = 0
for i in range(total_count):count = 0for j in range(trial_num):if trials[j][i] == 1:count += 1if count >= 2:voting_acc += 1res_stats_str += f"Final Accuracy: {voting_acc / total_count * 100}%"print(f"Final accuracy: {res_stats_str}")
用多数投票来计算最终准确率:
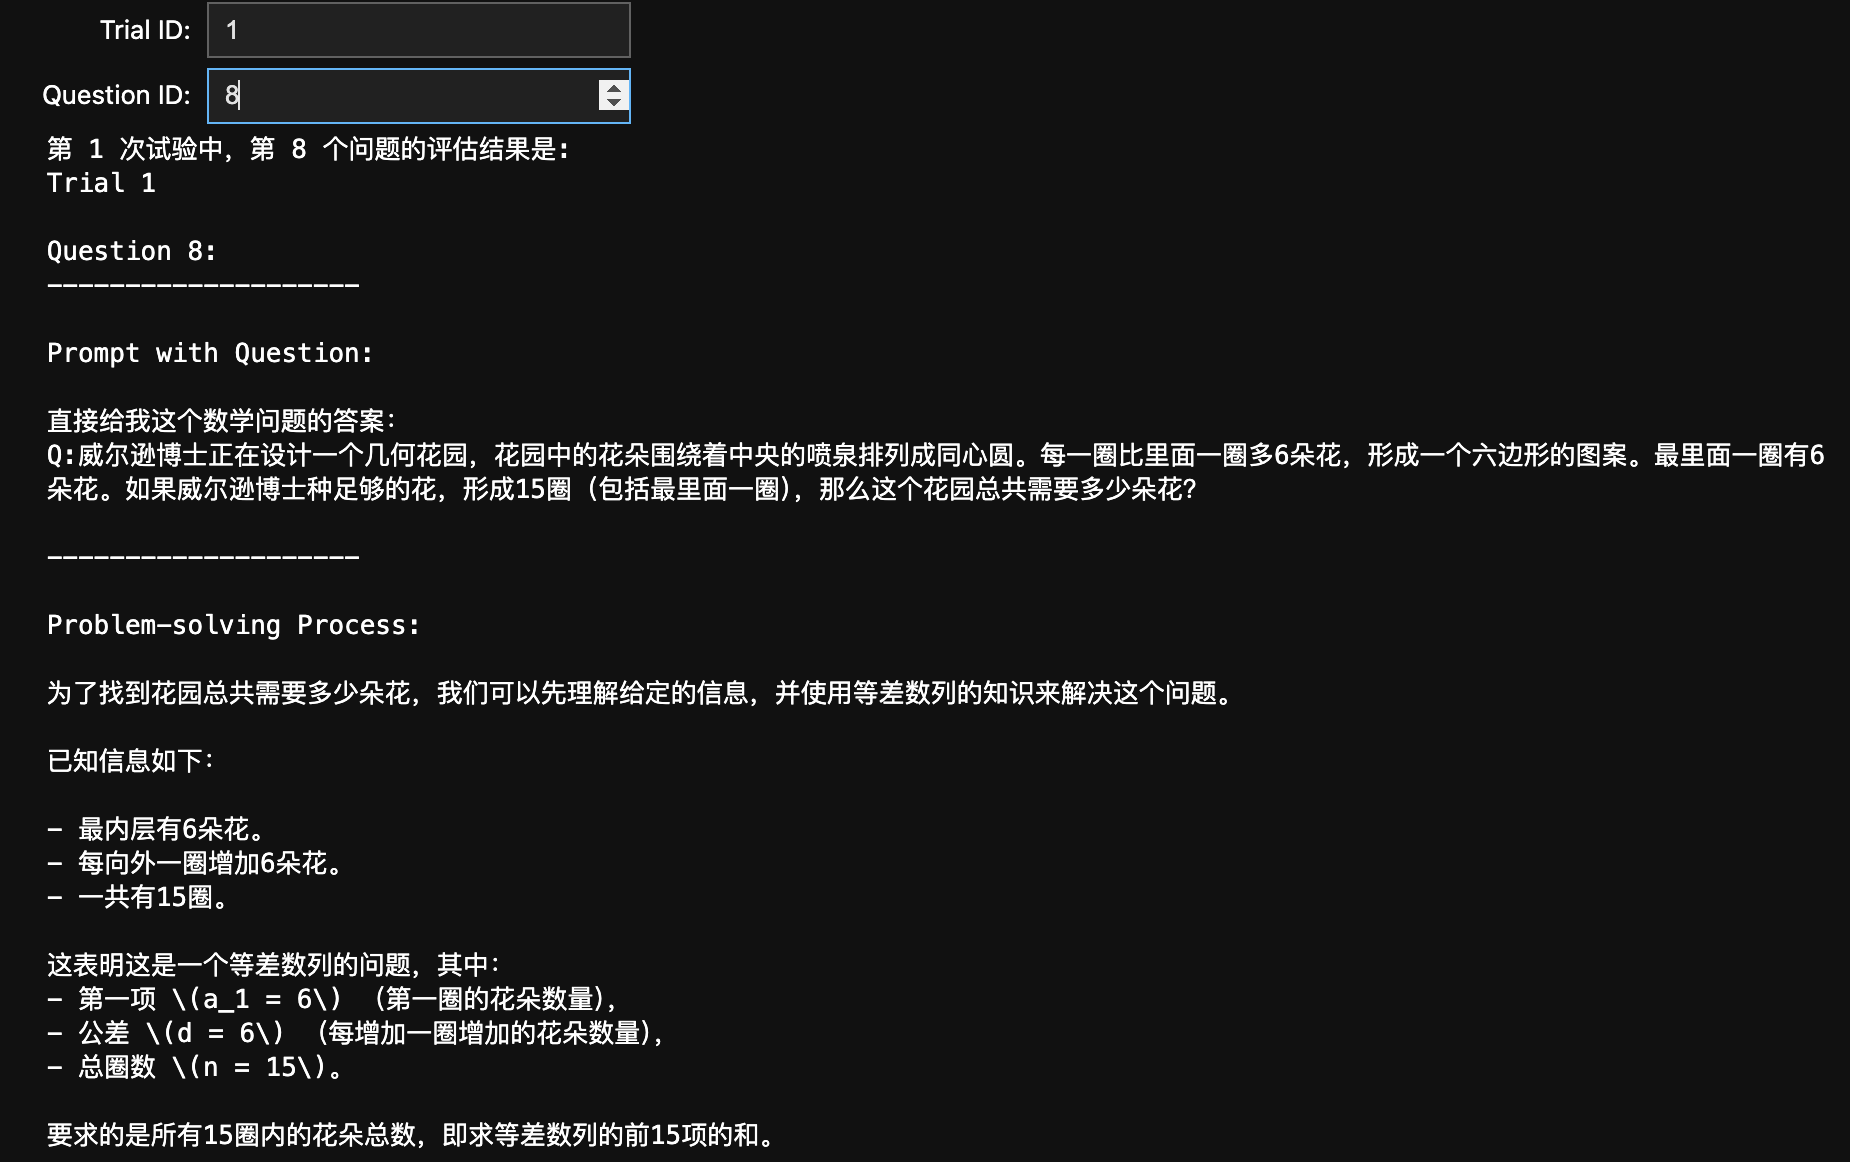
打印指定的评估结果
# 定义 trial_id 和 question_id 的输入框
trial_id_input = widgets.IntText(value=3,  # 默认值description='Trial ID:',
)question_id_input = widgets.IntText(value=1,  # 默认值description='Question ID:',
)# 如果你想定义 trial_id 和 question_id 的滑块的话使用下面的代码
"""
trial_id_input = widgets.IntSlider(value=3,  # 默认值min=1,    # 最小值max=3,    # 最大值step=1,   # 步长description='Trial ID:',continuous_update=False  # 滑块放开后才更新
)question_id_input = widgets.IntSlider(value=1,  # 默认值min=1,    # 最小值max=eval_num,   # 最大值(根据实际 eval_num 的范围调整)step=1,   # 步长description='Question ID:',continuous_update=False  # 滑块放开后才更新
)
"""# 显示输出
output_result = widgets.Output()# 定义回调函数,用于评估用户选择的值
def on_evaluate(change):with output_result:output_result.clear_output()  # 清除之前的输出trial_id = trial_id_input.valuequestion_id = question_id_input.valueif trial_id not in [1, 2, 3]:print("trial_id 只能是 1, 2 或 3。")elif question_id not in [i for i in range(1, eval_num + 1)]:print(f"question_id 只能在 1 到 {eval_num} 之间。")else:result_index = (trial_id - 1) * eval_num + question_id - 1print(f"第 {trial_id} 次试验中,第 {question_id} 个问题的评估结果是:\n{res_list[result_index]}")# 监听值变化并执行评估逻辑
trial_id_input.observe(on_evaluate, names='value')
question_id_input.observe(on_evaluate, names='value')# 显示滑块和输出
display(trial_id_input, question_id_input, output_result)
可以看到实际上 ipywidget 也可以提供一个非常直观的界面(虽然不够美观):
保存你的 Propmt
如果你需要的话。
prompt_dict = {'prompt': custom_prompt
}with open('prompt.json', 'w') as f:json.dump(prompt_dict, f)print("Prompt 已保存为 prompt.json 文件")
参考链接
HW4 视频
HW4 - Colab