实战OpenPose项目1:开篇使用文档
OpenPose 文档


对于 OpenPose,您的显卡中应该至少有 4GB 的可用内存。
如果不使用GPU,只需修改为参数0:–num_gpu 0 --num_gpu_start 0。
官网:https://github.com/CMU-Perceptual-Computing-Lab/openpose
内容
- 快速开始
1.1. 在图像、视频或网络摄像头上运行
1.2. 脸和手
1.3. 不同的输出(JSON、图像、视频、UI)
1.4. 只有没有背景图像的骨架
1.5. 不运行所有 GPU
1.6. 最大精度配置
1.6.1. 具有最大精度的附加模型
1.6.2. 具有较低误报的附加模型
1.7. 3D 重建
1.8. 追踪
1.9. Kinect 2.0 作为 Windows 10 上的网络摄像头
1.10. 主要标志 - 高级快速入门
- 错误解决
3.1. 提高内存和速度但降低准确性
3.2. Mac OSX 附加步骤
3.3. 常问问题
快速开始
在 Ubuntu、Mac 和其他 Unix 系统中,使用Terminal或Terminator. 在 Windows 中,Windows PowerShell. 如果您不熟悉这些工具,请观看任何 Youtube 视频教程。请确保你在项目的根目录下运行时,任何命令(即在OpenPose文件夹,里面没有build/也不windows/也不是bin/)。此外,examples/media/video.avi并examples/media存在,所以不需要更改任何代码行。
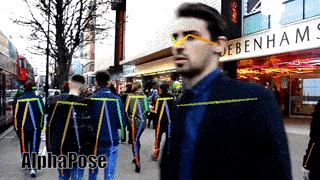
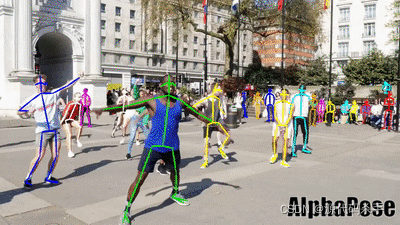
通过运行以下命令测试 OpenPose。预期的视觉结果应该类似于doc/02_output.md#ui-and-visual-output。
# Ubuntu and Mac
./build/examples/openpose/openpose.bin --video examples/media/video.avi
:: Windows - Portable Demo
bin\OpenPoseDemo.exe --video examples/media/video.avi
如果您只使用 OpenPose 演示,我们强烈建议您使用 OpenPose的最新 Windows 便携式版本。如果您仍然想在 Visual Studio 中使用演示,您可以将bin/*.dll文件复制到doc/installation/0_index.md#windows之后的最终 DLL bin 位置,或者您也可以简单地从include/flags.hpp修改默认标志值. 如果您已复制 DLL,则可以执行以下操作:
:: Windows - Library - Assuming you have copied the DLLs following doc/installation/0_index.md#windows
build\x64\Release\OpenPoseDemo.exe --video examples/media/video.avi
如果有效,请继续下一部分。否则:
- 如果这些因内存不足错误而失败,请检查并按照提高内存和速度但降低准确性部分进行操作。
- 如果您使用的是 Mac,请务必检查并遵循Mac OSX 附加步骤部分。
- 否则,请查看常见问题部分。
在图像、视频或网络摄像头上运行
- 图像目录 (
--image_dir {DIRECTORY_PATH}):
# Ubuntu and Mac
./build/examples/openpose/openpose.bin --image_dir examples/media/
:: Windows - Portable Demo
bin\OpenPoseDemo.exe --image_dir examples/media/
- 视频 (
--video {VIDEO_PATH}):
# Ubuntu and Mac
./build/examples/openpose/openpose.bin --video examples/media/video.avi
:: Windows - Portable Demo
bin\OpenPoseDemo.exe --video examples/media/video.avi
- 默认情况下应用网络摄像头(即,如果没有使用
--image_dir或--video使用标志)。或者,如果您有 1 个以上的摄像头,您可以使用它--camera {CAMERA_NUMBER}来选择正确的一个:
# Ubuntu and Mac
./build/examples/openpose/openpose.bin
./build/examples/openpose/openpose.bin --camera 0
./build/examples/openpose/openpose.bin --camera 1
:: Windows - Portable Demo
bin\OpenPoseDemo.exe
bin\OpenPoseDemo.exe --camera 0
bin\OpenPoseDemo.exe --camera 1
脸和手
只需添加--face和/或添加--hand到任何命令:
# Ubuntu and Mac
./build/examples/openpose/openpose.bin --image_dir examples/media/ --face --hand
./build/examples/openpose/openpose.bin --video examples/media/video.avi --face --hand
./build/examples/openpose/openpose.bin --face --hand
:: Windows - Portable Demo
bin\OpenPoseDemo.exe --image_dir examples/media/ --face --hand
bin\OpenPoseDemo.exe --video examples/media/video.avi --face --hand
bin\OpenPoseDemo.exe --face --hand
不同的输出(JSON、图像、视频、UI)
所有的输出选项都是互补的。例如,您是否在 UI 上显示带有骨架的图像(或不显示)与您是否将它们保存在磁盘上(或不)无关。
- 使用 将骨架保存在一组 JSON 文件中
--write_json {OUTPUT_JSON_PATH},请参阅doc/02_output.md以了解其格式。
# Ubuntu and Mac (same flags for Windows)
./build/examples/openpose/openpose.bin --image_dir examples/media/ --write_json output_jsons/
./build/examples/openpose/openpose.bin --video examples/media/video.avi --write_json output_jsons/
./build/examples/openpose/openpose.bin --write_json output_jsons/
- 将 OpenPose 的视觉输出(覆盖骨架的图像)保存在磁盘上作为输出视频 (
--write_video {OUTPUT_VIDEO_PATH}) 或图像集 (--write_images {OUTPUT_IMAGE_DIRECTORY_PATH}.:
# Ubuntu and Mac (same flags for Windows)
./build/examples/openpose/openpose.bin --video examples/media/video.avi --write_video output/result.avi
./build/examples/openpose/openpose.bin --image_dir examples/media/ --write_video output/result.avi
./build/examples/openpose/openpose.bin --video examples/media/video.avi --write_images output_images/
./build/examples/openpose/openpose.bin --video examples/media/video.avi --write_images output_images/ --write_images_format jpg
./build/examples/openpose/openpose.bin --image_dir examples/media/ --write_images output_images/
./build/examples/openpose/openpose.bin --image_dir examples/media/ --write_images output_images/ --write_images_format jpg
- 您还可以使用 禁用 UI 可视化
--display 0。但是,必须生成某种输出。即,一组一出来的--write_json,--write_video或者--write_images如果--display 0。
# Ubuntu and Mac (same flags for Windows)
./build/examples/openpose/openpose.bin --video examples/media/video.avi --write_images output_images/ --display 0
- 为了在使用 时进一步加速 OpenPose
--display 0,--render_pose 0如果您不使用--write_videoor ,还要添加--write_images(这样 OpenPose 不会用输入图像覆盖骨架)。
# Ubuntu and Mac (same flags for Windows)
./build/examples/openpose/openpose.bin --video examples/media/video.avi --write_json output_jsons/ --display 0 --render_pose 0
只有没有背景图像的骨架
您还可以在不覆盖或混合原始图像的情况下可视化/保存骨架--disable_blending:
# Ubuntu and Mac (same flags for Windows)
# Only body
./build/examples/openpose/openpose.bin --video examples/media/video.avi --disable_blending
不运行所有 GPU
默认情况下,OpenPose 将使用您机器中可用的所有 GPU。否则,--num_gpu设置 GPU 总数和--num_gpu_start要使用的第一个 GPU。例如,--num_gpu 2 --num_gpu_start 1将使用 GPU ID 1 和 2 而忽略 GPU ID 0(假设至少有 3 个 GPU):
:: Windows - Portable Demo (same flags for Ubuntu and Mac)
bin\OpenPoseDemo.exe --video examples/media/video.avi --num_gpu 2 --num_gpu_start 1
最大精度配置
此命令提供了我们能够实现的最准确的身体、手和面部关键点检测结果。
# Ubuntu and Mac: Body
./build/examples/openpose/openpose.bin --net_resolution "1312x736" --scale_number 4 --scale_gap 0.25
# Ubuntu and Mac: Body + Hand + Face
./build/examples/openpose/openpose.bin --net_resolution "1312x736" --scale_number 4 --scale_gap 0.25 --hand --hand_scale_number 6 --hand_scale_range 0.4 --face
:: Windows - Portable Demo: Body
bin\OpenPoseDemo.exe --net_resolution "1312x736" --scale_number 4 --scale_gap 0.25
:: Windows - Portable Demo: Body + Hand + Face
bin\OpenPoseDemo.exe --net_resolution "1312x736" --scale_number 4 --scale_gap 0.25 --hand --hand_scale_number 6 --hand_scale_range 0.4 --face
- 必需的:
BODY_25(默认模型)。COCO不太准确(但仍然可用),而MPI不受支持(即,MPI使用这些设置会降低准确性和速度)。- 具有至少 16 GB 内存的 Nvidia GPU。8 或 12 GB 可用于此处详述的某些子情况。
BODY_25(身体 + 脚,默认型号):Nvidia GPU,至少有大约 10.5 GB 的内存。例如,Titan X§、某些 Quadro 型号、P100、V100。BODY_25+ 脸 + 手:Nvidia GPU 至少有大约 16 GB 的内存。例如,V100。COCO身体 + 面部 + 手:Nvidia GPU,至少有大约 6.7 GB 的内存。例如,2070、2080。
- 它不适用于 CPU/OpenCL 模式,您唯一的选择是手动裁剪每个人,重新缩放,然后将其输入默认的 OpenPose
- 附加信息:
- 它在 Titan X 上以大约 2 FPS 的速度运行
BODY_25(COCO为1 FPS)。 - 增加
--net_resolution会大大降低速度,但不保证增加的准确性。因此,我们建议仅使用此处详述的确切标志和值(或者,如果使用其他值,则要求用户进行自己的准确性分析)。 - (不推荐,使用风险自负)您可以添加
--maximize_positives损害视觉/质量准确性,但它会增加 COCO 挑战的准确性值指标。它降低了接受个人候选者的阈值(即,更多的假阳性和真阳性),这会最大限度地提高平均召回率,但可能会损害平均精度。我们的经验:它在视觉上看起来更糟,但提高了挑战准确度数字。 - 如果您在 Ubuntu 上操作,您可以查看我们用来测试准确性的实验脚本(我们不正式支持它,即我们不会回答有关它的问题,并且可能会不断更改它),它们是放置在
openpose/scripts/tests/,称为pose_accuracy_coco_test_dev.sh和pose_accuracy_coco_val.sh。
- 它在 Titan X 上以大约 2 FPS 的速度运行
具有最大精度的附加模型
免责声明:它更准确但也更慢,需要更多的 GPU 内存,并且必须使用 Nvidia GPU 版本。
我们的纸张精度数字与默认型号不匹配。我们当时发布了最好的模型,但后来发现了更好的模型。
对于我们的最佳模型,您可以BODY_25B从 OpenPose 训练存储库下载预训练模型:BODY_25B 模型 - 选项 1(最大精度,较低速度)。
具有较低误报的附加模型
免责声明:它必须使用 Nvidia GPU 版本。
您是否需要误报较少但运行时性能和 GPU 要求相同的模型?您可以BODY_25B从 OpenPose 训练存储库下载预训练模型:BODY_25B 模型 - 选项 2(推荐)。
3D 重建
- 实时演示
# Ubuntu and Mac
./build/examples/openpose/openpose.bin --flir_camera --3d --number_people_max 1
# With face and hands
./build/examples/openpose/openpose.bin --flir_camera --3d --number_people_max 1 --face --hand
:: Windows - Portable Demo
bin\OpenPoseDemo.exe --flir_camera --3d --number_people_max 1
:: With face and hands
bin\OpenPoseDemo.exe --flir_camera --3d --number_people_max 1 --face --hand
- 保存 3-D 关键点和视频
# Ubuntu and Mac (same flags for Windows)
./build/examples/openpose/openpose.bin --flir_camera --3d --number_people_max 1 --write_json output_folder_path/ --write_video_3d output_folder_path/video_3d.avi
- 快速立体相机图像保存(无关键点检测)用于后期后期处理
# Ubuntu and Mac (same flags for Windows)
# Saving video
# Note: saving in PNG rather than JPG will improve image quality, but slow down FPS (depending on hard disk writing speed and camera number)
./build/examples/openpose/openpose.bin --flir_camera --num_gpu 0 --write_video output_folder_path/video.avi --write_video_fps 5
# Saving images
# Note: saving in PNG rather than JPG will improve image quality, but slow down FPS (depending on hard disk writing speed and camera number)
./build/examples/openpose/openpose.bin --flir_camera --num_gpu 0 --write_images output_folder_path/ --write_images_format jpg
- 读取和处理先前保存的立体相机图像
# Ubuntu and Mac (same flags for Windows)
# Optionally add `--face` and/or `--hand` to include face and/or hands
# Assuming 3 cameras
# Note: We highly recommend to reduce `--output_resolution`. E.g., for 3 cameras recording at 1920x1080, the resulting image is (3x1920)x1080, so we recommend e.g. 640x360 (x3 reduction).
# Video
./build/examples/openpose/openpose.bin --video output_folder_path/video.avi --3d_views 3 --3d --number_people_max 1 --output_resolution {desired_output_resolution}
# Images
./build/examples/openpose/openpose.bin --image_dir output_folder_path/ --3d_views 3 --3d --number_people_max 1 --output_resolution {desired_output_resolution}
- 重建至少在关键点是可见的
x摄像机视图出总的n相机
# Ubuntu and Mac (same flags for Windows)
# Reconstruction when a keypoint is visible in at least 2 camera views (assuming `n` >= 2)
./build/examples/openpose/openpose.bin --flir_camera --3d --number_people_max 1 --3d_min_views 2 --output_resolution {desired_output_resolution}
# Reconstruction when a keypoint is visible in at least max(2, min(4, n-1)) camera views
./build/examples/openpose/openpose.bin --flir_camera --3d --number_people_max 1 --output_resolution {desired_output_resolution}
追踪
- 运行时通过降低准确度大大加快:
:: Windows - Portable Demo (same flags for Ubuntu and Mac)
# Using OpenPose 1 frame, tracking the following e.g., 5 frames
bin\OpenPoseDemo.exe --tracking 5 --number_people_max 1
- 运行时加速,同时保持大部分准确性:
:: Windows - Portable Demo (same flags for Ubuntu and Mac)
# Using OpenPose 1 frame and tracking another frame
bin\OpenPoseDemo.exe --tracking 1 --number_people_max 1
- 视觉平滑度:
:: Windows - Portable Demo (same flags for Ubuntu and Mac)
# Running both OpenPose and tracking on each frame. Note: There is no speed up/slow down
bin\OpenPoseDemo.exe --tracking 0 --number_people_max 1
Kinect 2.0 作为 Windows 10 上的网络摄像头
从 Windows 10 周年起,Kinect 2.0 就可以当作普通的网络摄像头来读取了。您需要做的就是转到device manager,展开kinect sensor devices选项卡,右键单击并更新WDF kinectSensor Interface. 如果您已经有另一个网络摄像头,请断开连接或使用--camera 2.
主要标志
这些是最常见的标志,但请查看doc/advanced/demo_advanced.md以获取所有这些标志的完整列表和说明。
--face:启用人脸关键点检测。--hand:启用手部关键点检测。--video input.mp4: 看视频input.mp4。--camera 3:读取网络摄像头编号 3。--image_dir path_with_images/: 在path_with_images/带有图像的目录上运行。--ip_camera http://iris.not.iac.es/axis-cgi/mjpg/video.cgi?resolution=320x240?x.mjpeg:在流式网络摄像机上运行。在此处查看公共 IP 摄像机示例。--write_video path.avi:将处理后的图像保存为视频。--write_images folder_path:将处理后的图像保存在文件夹中。--write_keypoint path/:输出 JSON、XML 或 YML 文件以及文件夹上的人物姿势数据。--process_real_time: 对于视频,可能会跳帧实时显示。--disable_blending:如果启用,它将在黑色背景上渲染结果(关键点骨架或热图),而不显示原始图像。相关:part_to_show,alpha_pose, 和alpha_pose。--part_to_show:要可视化的预测通道。--display 0: 显示窗口未打开。对服务器和/或稍微加速 OpenPose 很有用。--num_gpu 2 --num_gpu_start 1:从所需的设备 ID 开始,在此数量的 GPU 上并行化。默认情况下,它使用所有可用的 GPU。--model_pose MPI:要使用的模型,影响数字关键点、速度和准确性。--logging_level 3:记录消息阈值,范围 [0,255]:0 将输出任何消息,255 将不输出任何消息。当前消息在 [1-4] 范围内,1 表示低优先级消息,4 表示重要消息。
高级快速入门
要了解更多标志,请查看doc/advanced/demo_advanced.md。
错误解决
提高内存和速度但降低准确性
如果您的 Nvidia GPU 在运行时不会耗尽内存,则应跳过此步骤!
使用net_resolution风险自负:如果您的 GPU 内存不足或您没有 Nvidia GPU,您可以减少--net_resolution以提高速度并降低内存要求,但它也会大大降低准确性!分辨率越低,精度越低,但速度/内存越好。
# Ubuntu and Mac
./build/examples/openpose/openpose.bin --video examples/media/video.avi --net_resolution -1x320
./build/examples/openpose/openpose.bin --video examples/media/video.avi --net_resolution -1x256
./build/examples/openpose/openpose.bin --video examples/media/video.avi --net_resolution -1x196
./build/examples/openpose/openpose.bin --video examples/media/video.avi --net_resolution -1x128
:: Windows - Portable Demo
bin\OpenPoseDemo.exe --video examples/media/video.avi --net_resolution -1x320
bin\OpenPoseDemo.exe --video examples/media/video.avi --net_resolution -1x256
bin\OpenPoseDemo.exe --video examples/media/video.avi --net_resolution -1x196
bin\OpenPoseDemo.exe --video examples/media/video.avi --net_resolution -1x128
补充笔记:
- 默认分辨率为
-1x368,任何较小的分辨率都会提高速度。 - 这
-1意味着将调整分辨率以保持输入源的纵横比。例如,-1x368、656x-1和656x368将导致 720p 和 1080p 输入图像的精确分辨率相同。 - 对于视频,
-1建议使用让 OpenPose 找到理想的分辨率。对于不同大小的图像文件夹,不添加-1和使用具有完全不同纵横比的图像可能会导致内存不足问题。例如,如果一个文件夹包含 2 张分辨率100x11040和10000x368. 然后,使用默认值-1x368将导致网络输出分辨率为3x368和10000x368,从而导致10000x368图像明显内存不足。
Mac OSX 附加步骤
如果您使用的不是 Mac,或者您使用的是带有 的 Mac CPU_only,则可以跳过此部分。
如果您使用的是 Mac 并选择了OPENCL支持,并且它具有 AMD 显卡,则意味着该机器具有 2 个彼此不兼容的 GPU(AMD 和 Intel)。然后,您将不得不手动选择其中之一(AMD 应该更强大)。为此,首先检查您的显卡是在哪个设备下设置的。很可能,您的 AMD 设备将是设备 2。
信息
对于您运行的任何 OpenPose 命令,添加以下 2 个标志以使用您的 AMD 卡进行加速(此处num_gpu_start应该是上面给出的 ID 号)。
./build/examples/openpose/openpose.bin --num_gpu 1 --num_gpu_start 2
如果您只有集成的 Intel 显卡,那么它很可能是设备 1。然后,始终添加以下 2 个标志以使用您的 AMD 卡进行加速。
./build/examples/openpose/openpose.bin --num_gpu 1 --num_gpu_start 1
常问问题
检查doc/05_faq.md以查看您是否可以找到您的错误、问题或疑虑。

参考:
https://cmu-perceptual-computing-lab.github.io/openpose/web/html/doc/md_doc_01_demo.html
https://cmu-perceptual-computing-lab.github.io/openpose/web/html/doc/index.html
