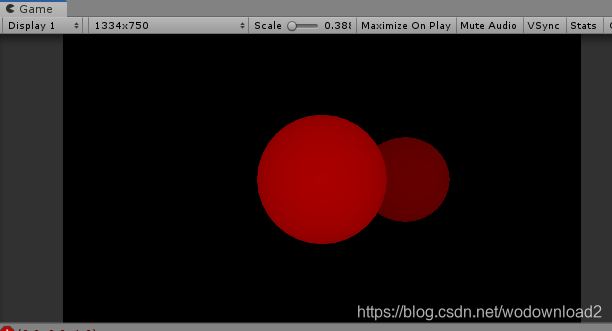
unity深度图
https://gameinstitute.qq.com/community/detail/124214
https://catlikecoding.com/unity/tutorials/scriptable-render-pipeline/spotlight-shadows/
https://docs.unity3d.com/ScriptReference/RenderTextureFormat.Shadowmap.html
渲染到深度rt:
using UnityEngine;

public class DrawDepthTexture : MonoBehaviour
{
    public RenderTexture colorRT;
    public RenderTexture depthRT;
    public Material depthMat;
    void Start()
    {
        bool flag = SystemInfo.SupportsRenderTextureFormat(RenderTextureFormat.Shadowmap);
        Debug.LogError(flag);

        colorRT = new RenderTexture(Camera.main.pixelWidth, Camera.main.pixelHeight, 0);
        depthRT = new RenderTexture(Camera.main.pixelWidth, Camera.main.pixelHeight, 16, RenderTextureFormat.Depth);
        Camera.main.SetTargetBuffers(depthRT.colorBuffer, depthRT.depthBuffer);
        depthMat.SetTexture("_MainTex", depthRT);
        Matrix4x4 proj = Camera.main.projectionMatrix;
        proj = GL.GetGPUProjectionMatrix(proj, true);
        Matrix4x4 view = Camera.main.worldToCameraMatrix;
        Matrix4x4 vp = proj * view;
        Debug.LogError(vp);

        Debug.LogError(vp.MultiplyPoint3x4(new Vector3(0, 0, 2)));
    }

    private void OnRenderImage(RenderTexture source, RenderTexture destination)
    {
        Graphics.Blit(source, destination, depthMat);
    }
}
渲染物体的shader,用任何的都可以,下面是采样深度图,blit到屏幕:
Shader "Unlit/DrawDepthTexture"
{
    SubShader
    {
        Tags { "RenderType"="Opaque" }
        LOD 100

        Pass
        {
            CGPROGRAM
            #pragma vertex vert
            #pragma fragment frag

            #include "UnityCG.cginc"

            struct appdata
            {
                float4 vertex : POSITION;
                float2 uv : TEXCOORD0;
            };

            struct v2f
            {
                float2 uv : TEXCOORD0;
                float4 vertex : SV_POSITION;
            };

            v2f vert (appdata v)
            {
                v2f o;
                o.vertex = UnityObjectToClipPos(v.vertex);
				o.uv = v.uv;
                return o;
            }

			sampler2D _MainTex;
            fixed4 frag (v2f i) : SV_Target
            {
				float depth = tex2D(_MainTex, i.uv).r;
				return fixed4(depth, 0, 0, 1);
            }
            ENDCG
        }
    }
}
直接使用tex2D,采样即可。

如果是使用原生的ShadowMap格式:
depthRT = new RenderTexture(Camera.main.pixelWidth, Camera.main.pixelHeight, 16, RenderTextureFormat.Shadowmap);
则采样原生的Shadowmap图的时候,使用:
Shader "Unlit/DrawDepthTexture"
{
    SubShader
    {
        Tags { "RenderType"="Opaque" }
        LOD 100

        Pass
        {
            CGPROGRAM
            #pragma vertex vert
            #pragma fragment frag

            #include "UnityCG.cginc"

            struct appdata
            {
                float4 vertex : POSITION;
                float2 uv : TEXCOORD0;
            };

            struct v2f
            {
                float2 uv : TEXCOORD0;
                float4 vertex : SV_POSITION;
            };

            v2f vert (appdata v)
            {
                v2f o;
                o.vertex = UnityObjectToClipPos(v.vertex);
				o.uv = v.uv;
                return o;
            }

			uniform Texture2D _MainTex;
			uniform SamplerState sampler_MainTex;
			Texture2D fakePoint;
			SamplerState samplerfakePoint;

            fixed4 frag (v2f i) : SV_Target
            {
				float depth = fakePoint.Sample(samplerfakePoint,float2(0,0)).a; //建立采样器/
				for (int j = 0; j < 5; j++)
				{
					depth += _MainTex.Sample(samplerfakePoint, i.uv).r;			//对该点进行反复采样/
				}
				depth -= fakePoint.Sample(samplerfakePoint, float2(0, 0)).a;    //去除多余量/
				depth = depth / 5.f;                                            //对采样总和取平均值/
				fixed4 col = fixed4(depth, 0, 0, 1.f);
				return col;
            }
            ENDCG
        }
    }
}
不知道作者是从哪里找到这样的方法,有知道的告诉我unity原生的shadowmap是如何编码的。
