unity3D调用外接摄像头,保存图片、不使用截屏方式
首先感谢前辈使用截屏的方式调用外接摄像头并保存图片:http://blog.csdn.net/a112634313/article/details/8472786
Texture2D处理http://www.narkii.com/club/thread-291958-1.html
不多说,直接上我的代码
using UnityEngine;
using System.Collections;
using System.IO;
public class CameraTest : MonoBehaviour
{
public GameObject obj;
WebCamTexture cameraTexture;
string cameraName="";
private bool isPlay = false;
// Use this for initialization
void Start()
{
StartCoroutine(Test());
}
// Update is called once per frame
void Update()
{
obj.renderer.material.mainTexture=cameraTexture;
}
IEnumerator Test()
{
yield return Application.RequestUserAuthorization(UserAuthorization.WebCam);
if (Application.HasUserAuthorization(UserAuthorization.WebCam))
{
WebCamDevice[] devices = WebCamTexture.devices;
cameraName = devices[0].name;
cameraTexture = new WebCamTexture(cameraName, 400, 300, 15);
cameraTexture.Play();
isPlay = true;
}
}
void OnGUI()
{
if (isPlay)
{
GUI.DrawTexture(new Rect(0, 0, 400, 300), cameraTexture, ScaleMode.ScaleToFit);
}
if(GUI.Button(new Rect(400,0,450,50),"保存")){
StartCoroutine(getTexture2d());
}
if(GUI.Button(new Rect(400,50,450,50),"AR")){
Application.LoadLevel("HelloWorld");
cameraTexture.Stop();
}
}
IEnumerator getTexture2d()
{
yield return new WaitForEndOfFrame();
//Texture2D savedTexture ;//要保存图片的大小
//截取的区域
Texture2D savedTexture=obj.renderer.material.mainTexture as Texture2D;
//截图方式
/*
Texture2D t = new Texture2D(200, 200);//要保存图片的大小
//截取的区域
t.ReadPixels(new Rect(0,cameraTexture.height, 400, 300), 0, 0, false);
t.Apply();
//把图片数据转换为byte数组
byte[] byt = t.EncodeToPNG();
//然后保存为图片
File.WriteAllBytes(Application.dataPath + "/StreamingAssets/TutorialHelloWorld/"+"target1.png", byt);
}*/
Texture2D texture = new Texture2D(cameraTexture.width, cameraTexture.height);
int y = 0;
while (y < texture.height)
{
int x = 0;
while (x < texture.width)
{
Color color = cameraTexture.GetPixel(x, y);
texture.SetPixel(x, y, color);
++x;
}
++y;
}
texture.Apply();
byte[] pngData = texture.EncodeToPNG();
File.WriteAllBytes(Application.dataPath + "/StreamingAssets/TutorialHelloWorld/"+"target1.png", pngData);
}
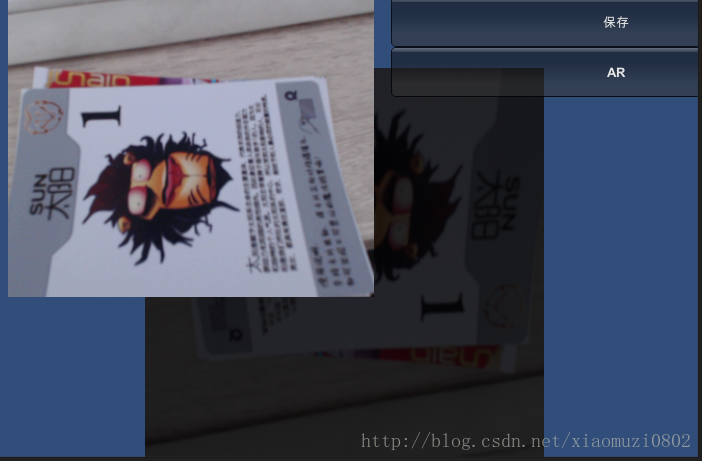
} 说明一下,在场景中添加一个plane,我的目的就是将camera作为贴图放到panel上面来实时显示,因为我发现 WebCamTexture 不能直接作为Texture2D直接使用
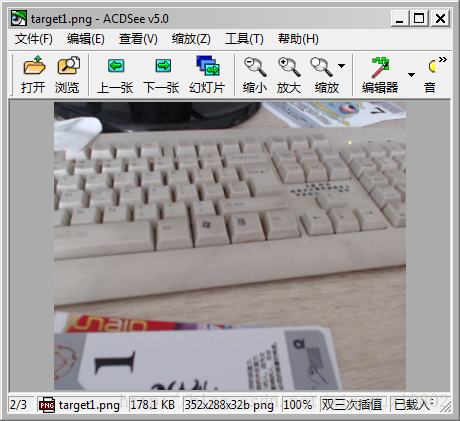
之后点击保存按钮,将图片保存到指定路径:注意路径可以修改,不过没有的话它不会自己创建、会报错。看看结果
这样做和截屏相比有什么好处呢,我觉得:
1、截屏坐标需要你自己调节,unity3d默认坐标原点和截屏时候坐标原点是不一致的,一个在左上角一个在左下角,调节很麻烦
2、截屏方法一旦屏幕分辨率变化那么你的程序也要相应变化,不然会出问题
3、这种方式可以直接放到plane上或者任何Texture2D上,有很大的自由性,同时不需要担心图片是不是完整、有没有其他杂质什么的,摄像头获取的是什么,那么保存的图片就是什么。
最近又看到一种方法,就是截取相机的视野看到的内容,
Texture2D CaptureCamera(Camera camera, Rect rect)
{
// 创建一个RenderTexture对象
RenderTexture rt = new RenderTexture((int)rect.width, (int)rect.height, 0);
// 临时设置相关相机的targetTexture为rt, 并手动渲染相关相机
camera.targetTexture = rt;
camera.Render();
//ps: --- 如果这样加上第二个相机,可以实现只截图某几个指定的相机一起看到的图像。
//ps: camera2.targetTexture = rt;
//ps: camera2.Render();
//ps: -------------------------------------------------------------------
// 激活这个rt, 并从中中读取像素。
RenderTexture.active = rt;
Texture2D screenShot = new Texture2D((int)rect.width, (int)rect.height, TextureFormat.RGB24,false);
screenShot.ReadPixels(rect, 0, 0);// 注:这个时候,它是从RenderTexture.active中读取像素
screenShot.Apply();
// 重置相关参数,以使用camera继续在屏幕上显示
camera.targetTexture = null;
//ps: camera2.targetTexture = null;
RenderTexture.active = null; // JC: added to avoid errors
GameObject.Destroy(rt);
// 最后将这些纹理数据,成一个png图片文件
byte[] bytes = screenShot.EncodeToPNG();
string filename = Application.dataPath + "/Screenshot.png";
System.IO.File.WriteAllBytes(filename, bytes);
Debug.Log(string.Format("截屏了一张照片: {0}", filename));
return screenShot;
}
注释很详细