Spring Boot整合Shiro入门教程
Shiro 简介
Apache Shiro 是一个开源的轻量级的 Java 安全框架,它提供身份验证、授权、密码管理以及会话管理等功能。 相对于Spring Security, Shiro框架更加直观、易用,同时也能提供健壮的安全性。在传统的 SSM 框架中,手动整合 Shiro 的配置步骤还是比较多的,针对 Spring Boot, Shiro 官方提供了 shiro-spring-boot-web-starter 用来简化Shiro在 Spring Boot 中的配置。下面向读者介绍shiro-spring-boot-web-starter的使用步骤。
整合 Shiro
1. 创建项目
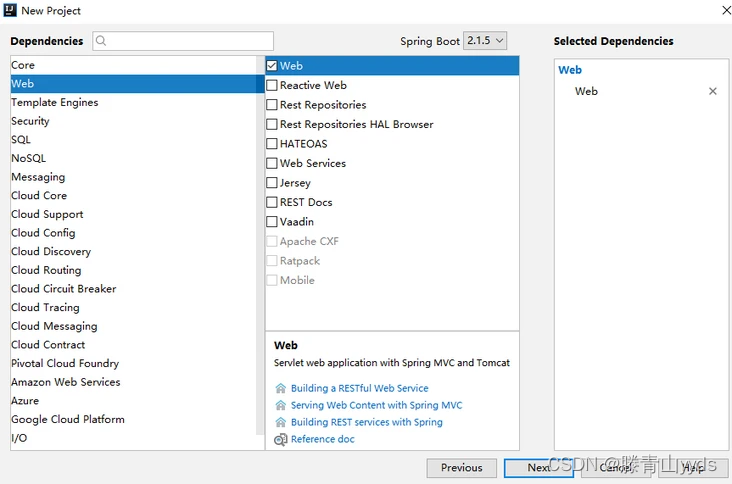
首先创建一个普通的 Spring Boot Web 项目
添加 Shiro 依赖以及页面模板依赖,代码如下:
        <dependency>
            <groupId>org.apache.shiro</groupId>
            <artifactId>shiro-spring-boot-web-starter</artifactId>
            <version>1.4.0</version>
        </dependency>
        <dependency>
            <groupId>org.springframework.boot</groupId>
            <artifactId>spring-boot-starter-thyrneleaf</artifactId>
        </dependency>
        <dependency>
            <groupId>com.github.theborakompanioni</groupId>
            <artifactId>thymeleaf-extras-shiro</artifactId>
            <version>2.0.0</version>
        </dependency>
注意这里不需要添加spring-boot-starter-web依赖,shiro-spring-boot-web-starter中已经依赖了spring-boot-starter-web。
同时,本案例使用Thymeleaf模版,因此添加Thymeleaf依赖,另外,为了在Thymeleaf中使用shiro标签,因此引入了thymeleaf-extras-shiro依赖。
2. Shiro 基本配置
2.1 application.properties
首先在 application.properties 中配置 Shiro 的基本信息,代码如下:
shiro.enabled=true
shiro.web.enabled=true
shiro.loginUrl=/login
shiro.successUrl=/index
shiro.unauthorizedUrl=/unauthorized
shiro.sessionManager.sessionidUrlRewritngEnabled=true
shiro.sessionManager.sessionidCookieEnabled=true
代码解释:
• 第1行配置表示开启 Shiro 配置,默认为 true
• 第2行配置表示开启 Shiro Web 配置 ,默认为 true
• 第3行配置表示登录地址,默认为"login.jsp"
• 第4行配置表示登录成功地址,默认为"/"。
• 第5行配置表示未获授权默认跳转地址。
• 第6行配置表示是否允许通过 URL 参数实现会话跟踪, 如果网站支持 Cookie ,可以关闭此选项,默认为 true
• 第7行配置表示是否允许通过Cookie实现会话跟踪,默认为true
2.2 ShiroConfig.class
基本信息配置完成后,接下来在 Java 代码中配置Shiro ,提供两个最基本的 Bean 即可,代码如下:
ShiroConfig.class
package org.sang.shiro;

import at.pollux.thymeleaf.shiro.dialect.ShiroDialect;
import org.apache.shiro.realm.Realm;
import org.apache.shiro.realm.text.TextConfigurationRealm;
import org.apache.shiro.spring.web.config.DefaultShiroFilterChainDefinition;
import org.apache.shiro.spring.web.config.ShiroFilterChainDefinition;
import org.springframework.context.annotation.Bean;
import org.springframework.context.annotation.Configuration;

@Configuration
public class ShiroConfig {
    @Bean
    public Realm realm() {
        TextConfigurationRealm realm = new TextConfigurationRealm();
        realm.setUserDefinitions("sang=123,user\n admin=123,admin");
        realm.setRoleDefinitions("admin=read,write\n user=read");
        return realm;
    }
    @Bean
    public ShiroFilterChainDefinition shiroFilterChainDefinition() {
        DefaultShiroFilterChainDefinition chainDefinition =
                new DefaultShiroFilterChainDefinition();
        chainDefinition.addPathDefinition("/login", "anon");
        chainDefinition.addPathDefinition("/doLogin", "anon");
        chainDefinition.addPathDefinition("/logout", "logout");
        chainDefinition.addPathDefinition("/**", "authc");
        return chainDefinition;
    }
    @Bean
    public ShiroDialect shiroDialect() {
        return new ShiroDialect();
    }
}
代码解释:
这里提供两个关键Bean ,一个是Realm ,另一个是ShiroFilterChainDefinition. 至于 ShiroDialect, 则是为了支持在 Thymeleaf 中使用 Shiro 标签,如果不在 Thymeleaf 中使用 Shiro 标签,那么可以不提供 ShiroDialect。
Realm 可以是自定义 Realm ,也可以是 Shiro 提供的 Realm。简单起见,本案例没有配置数据库连接,这里直接配直了两个用户: sang/123和admin/123 ,分别对应角色 user和admin, user 具有 read 权限, admin 则具有 read write 权限。
ShiroFilterChainDefinition Bean 中配置了基本的过滤规则,"/login"和"/doLogin"可以匿名访问,"logout"是一个注销登录请求,其余请求则都需要认证后才能访问。
2.3 UserController.class
接下来配置登录接口以及页面访问接口,代码如下:
UserController.class
package org.sang.shiro;

import org.apache.shiro.SecurityUtils;
import org.apache.shiro.authc.AuthenticationException;
import org.apache.shiro.authc.UsernamePasswordToken;
import org.apache.shiro.authz.annotation.Logical;
import org.apache.shiro.authz.annotation.RequiresRoles;
import org.apache.shiro.subject.Subject;
import org.springframework.stereotype.Controller;
import org.springframework.ui.Model;
import org.springframework.web.bind.annotation.GetMapping;
import org.springframework.web.bind.annotation.PostMapping;

@Controller
public class UserController {
    @PostMapping("/doLogin")
    public String doLogin(String username, String password, Model model) {
        UsernamePasswordToken token =
                new UsernamePasswordToken(username, password);
        Subject subject = SecurityUtils.getSubject();
        try {
            subject.login(token);
        } catch (AuthenticationException e) {
            model.addAttribute("error", "用户名或密码输入错误!");
            return "login";
        }
        return "redirect:/index";
    }
    @RequiresRoles("admin")
    @GetMapping("/admin")
    public String admin() {
        return "admin";
    }
    @RequiresRoles(value = {"admin","user"},logical = Logical.OR)
    @GetMapping("/user")
    public String user() {
        return "user";
    }
}
代码解释:
在doLogin方法中,首先构造一个UsernamePasswordToken实例,然后获取一个Subject对象并调用该对象中的login方法执行登录操作,在登录操作执行过程中,当有异常抛出时,说明登录失败,携带错误信息返回登录视图;当登录成功时,则重定向到“/index”。
接下来暴露两个接口“/admin”和“/user”,对于“/admin”接口,需要具有admin角色才可以访问;对于“/user”接口,具备admin角色和user角色其中任意一个即可访问。
2.4 WebMvcConfig.class
对于其他不需要角色就能访问的接口,直接在WebMvc中配置即可,代码如下:
WebMvcConfig.class
package org.sang.shiro;

import org.springframework.context.annotation.Configuration;
import org.springframework.web.servlet.config.annotation.ViewControllerRegistry;
import org.springframework.web.servlet.config.annotation.WebMvcConfigurer;

@Configuration
public class WebMvcConfig implements WebMvcConfigurer{
    @Override
    public void addViewControllers(ViewControllerRegistry registry) {
        registry.addViewController("/login").setViewName("login");
        registry.addViewController("/index").setViewName("index");
        registry.addViewController("/unauthorized").setViewName("unauthorized");
    }
}
2.5 ExceptionController.class
接下来创建全局异常处理器进行全局异常处理,本案例主要是处理授权异常,代码如下:
package org.sang.shiro;

import org.apache.shiro.authz.AuthorizationException;
import org.springframework.web.bind.annotation.ControllerAdvice;
import org.springframework.web.bind.annotation.ExceptionHandler;
import org.springframework.web.servlet.ModelAndView;

@ControllerAdvice
public class ExceptionController {
    @ExceptionHandler(AuthorizationException.class)
    public ModelAndView error(AuthorizationException e) {
        ModelAndView mv = new ModelAndView("unauthorized");
        mv.addObject("error", e.getMessage());
        return mv;
    }
}
当用户访问未授权的资源时,跳转到unauthorized视图中,并携带出错信息。
2.6 创建HTML页面
配置完成后,最后在resources/templates目录下创建5个HTML页面进行测试。
(1) index.html, 代码如下:
<!DOCTYPE html>
<html lang="en" xmlns:shiro="http://www.pollix.at/thymeleaf/shiro">
<head>
    <meta charset="UTF-8">
    <title>Title</title>
</head>
<body>
<h3>Hello, <shiro:principal/></h3>
<h3><a href="/logout">注销登录</a></h3>
<h3><a shiro:hasRole="admin" href="/admin">管理员页面</a></h3>
<h3><a shiro:hasAnyRoles="admin,user" href="/user">普通用户页面</a></h3>
</body>
</html>
index.html是登录成功后的首页,首先展示当前登录用户的用户名,然后展示一个“注销登录”链接,若当前登录用户具备“admin"角色,则展示一个“管理员页面”的超链接;
若用户具备“admin”或者“user” 角色,则展示一个“普通用户页面”的超链接。
注意这里导入的名称空间是xmlns:shiro=http://www.pollix.at/thymeleaf/shiro,和JSP中导入的Shiro名称空间不一致。
(2) login.html, 代码如下:
<!DOCTYPE html>
<html lang="en" xmlns:th="http://www.thymeleaf.org">
<head>
    <meta charset="UTF-8">
    <title>Title</title>
</head>
<body>
<div>
    <form action="/doLogin" method="post">
        <input type="text" name="username"><br>
        <input type="password" name="password"><br>
        <div th:text="${error}"></div>
        <input type="submit" value="登录">
    </form>
</div>
</body>
</html>
login.html是一个普通的登录页面,在登录失败时通过一个div显示登录失败信息。
(3) user.html, 代码如下:
<!DOCTYPE html>
<html lang="en">
<head>
    <meta charset="UTF-8">
    <title>Title</title>
</head>
<body>
<h1>普通用户页面</h1>
</body>
</html>
user.html是一个普通的用户信息展示页面。
(4) admin.html,代码如下:
<!DOCTYPE html>
<html lang="en">
<head>
    <meta charset="UTF-8">
    <title>Title</title>
</head>
<body>
<h1>管理员页面</h1>
</body>
</html>
admin.html是一个普通的管理员信息展示页面。
(5) unauthorized.html, 代码如下:
<!DOCTYPE html>
<html lang="en" xmlns:th="http://www.thymeleaf.org">
<head>
    <meta charset="UTF-8">
    <title>Title</title>
</head>
<body>
<div>
    <h3>未获授权,非法访问</h3>
    <h3 th:text="${error}"></h3>
</div>
</body>
</html>
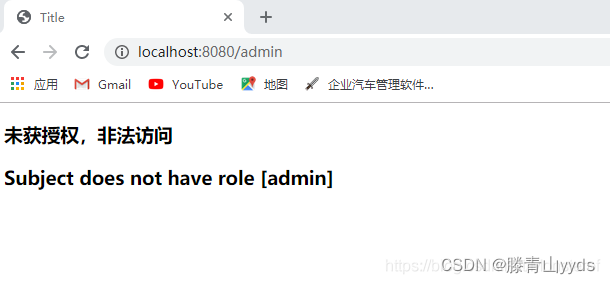
unauithorized.html是–个授权失败的展示页面,该页面还会展示授权出错的信息。
3. 测试
配置完成后,启动 Spring Boot 项目,访问登录页面,分别使用 sang/123 admin/123 登录,结果如图 所示。注意,因为 sang 用户不具备 admin 角色,因此登录成功后的页面上没有前往管理员页面的超链接。

登录成功后,无论是sang还是admin用户,单击“注销登录”都会注销成功,然后回到登录页面,sang用户因为不具备admin角色,因此没有“管理员页面”的超链接,无法进入管理员页面中,此时,若用户使用sang用户登录,然后手动在地址栏输入http://localhost:8080/admin,则会跳转到未授权页面:
以上通过一个简单的案例向读者展示了如何在SpringBoot中整合Shiro以及如何在Thymeleaf中使用Shiro标签,一旦整合成功,接下来Shiro的用法就和原来的一模一样。本小节主要介绍SpringBoot整合Shiro,对于Shiro的其他用法,读者可以参考Shiro官方文档,这里不再赘述。