11---OpenCV:图像进阶操作之①轮廓②凸包操作
一、图像轮廓操作
图像轮廓
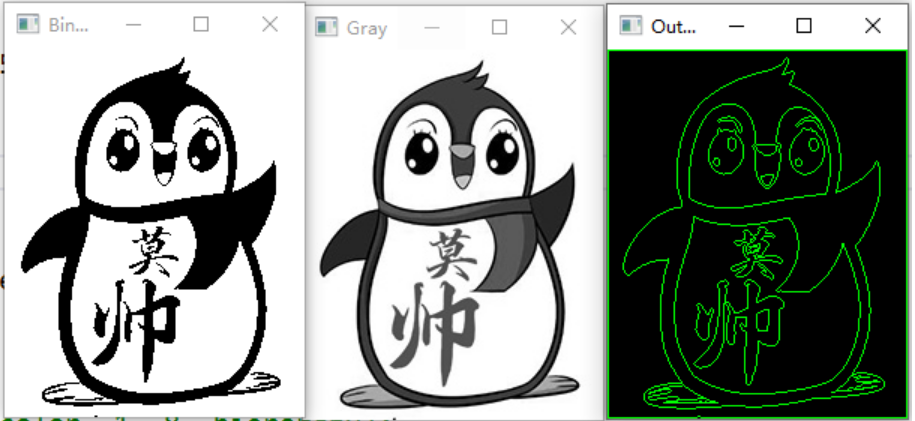
图像轮廓是一系列相连的点组成的曲线,代表了物体的基本外形,相对于边缘,轮廓是连续的,边缘并不全部连续。一般地,获取图像轮廓要经过下面几个步骤:
读取图片
灰度处理-->imread("testMin.jpg", IMREAD_GRAYSCALE)
二值化处理,查找轮廓
二值化---> threshold(result["Gray"], result["Binary"], 125, 255, THRESH_BINARY);
显示轮廓边缘
查找轮廓
void findContours( InputArray image, OutputArrayOfArrays contours,int mode, int method, Point offset = Point());
/*******************************************************************
*           image:          单通道灰度图
*           contours:       检测到的轮廓,存储的是点坐标
*           mode:           轮廓检索模式
*           method:         轮廓逼近方法
*           offset:         按照偏移量移动所有的轮廓 一般不使用
*********************************************************************/
void findContours( InputArray image, OutputArrayOfArrays contours, OutputArray hierarchy, int mode,int method, Point offset = Point()); /******************************************************************* * image: 输入单通道灰度图 * contours: 检测到的轮廓,存储的是点坐标 * hierarchy: 轮廓的拓扑信息 * contours[i]包含4个hierarchy[i]元素, * hierarchy[i][0]:后一个轮廓 * hierarchy[i][1]:前一个轮廓 * hierarchy[i][2]:父轮廓 * hierarchy[i][3]:内嵌轮廓 * mode: 轮廓检索模式 * method: 轮廓逼近方法 * offset: 按照偏移量移动所有的轮廓 一般不使用 *********************************************************************///mode取值: enum RetrievalModes { RETR_EXTERNAL = 0,//只检索最外面的轮廓 RETR_LIST = 1,//检索所有轮廓,并保存到一条链表中 RETR_CCOMP = 2,//检索所有轮廓,组织为顶层(外部边界)和次层(内部边界) RETR_TREE = 3,//检索所有的轮廓,并重构嵌套轮廓的整个层次 RETR_FLOODFILL = 4 //支持CV_32SC1图像,不等于仅支持CV_8UC1图像 }; //method取值: enum ContourApproximationModes { CHAIN_APPROX_NONE = 1, //保存所有轮廓点 CHAIN_APPROX_SIMPLE = 2, //压缩水垂直对角线,只保留线的两端点 CHAIN_APPROX_TC89_L1 = 3, //使用teh-Chinl chain 近似算法 CHAIN_APPROX_TC89_KCOS = 4 //使用teh-Chinl chain 近似算法 };
绘制轮廓
void drawContours( InputOutputArray image, InputArrayOfArrays contours,int contourIdx, const Scalar& color,
int thickness = 1, int lineType = LINE_8,InputArray hierarchy = noArray(),int maxLevel = INT_MAX, Point offset = Point());
/*******************************************************************
*           image:                  输出单通道灰度图
*           contours:               所有的输入轮廓
*           contourIdx:             指定轮廓列表的索引 ID(将被绘制)
*                                       若为负数,则所有的轮廓将会被绘制
*           color:                  绘制轮廓的颜色
*           thickness:              绘制轮廓线条的宽度
*           lineType:               线条的类型,8连通型或4连通型
*           hierarchy:              层次结构信息
*           maxLevel:               绘制轮廓的最高级别
*                                        0:绘制指定轮廓
*                                        1:绘制该轮廓和所有嵌套轮廓
*                                        2:绘制该轮廓、嵌套轮廓子轮廓等
*           offset:                 按照偏移量移动所有的轮廓
*********************************************************************/
综合代码
#include <iostream>
#include <vector>
#include <map>
#include <string>
#include <opencv2/opencv.hpp>
using namespace cv;
using namespace std;
class OutLine
{
public:
OutLine() :img(imread("testMin.jpg", IMREAD_GRAYSCALE))
{
result["Gray"] = img;
}
void Show()
{
for (auto& v : result)
{
imshow(v.first, v.second);
}
waitKey(0);
}
//查找轮廓
void FindOutLine()
{
threshold(result["Gray"], result["Binary"], 125, 255, THRESH_BINARY);
findContours(result["Binary"], contours, hierarchy, RETR_CCOMP, CHAIN_APPROX_SIMPLE);
}
//着色
void DrawOutLine()
{
result["OutLine"] = Mat::zeros(result["Binary"].size(), CV_8UC3);
for (int i = 0; i < contours.size(); i++)
{
Scalar color = Scalar(0, 255, 0);
//drawContours(result["OutLine"], contours, i, color, 1, 8, hierarchy);
drawContours(result["OutLine"], contours, i, color);
}
}
private:
Mat img;
map<string, Mat> result;
vector<vector<Point>> contours;
vector<Vec4i> hierarchy;
};
int main()
{
OutLine* p = new OutLine;
p->FindOutLine();
p->DrawOutLine();
p->Show();
return 0;
}
二、图像凸包操作
凸包
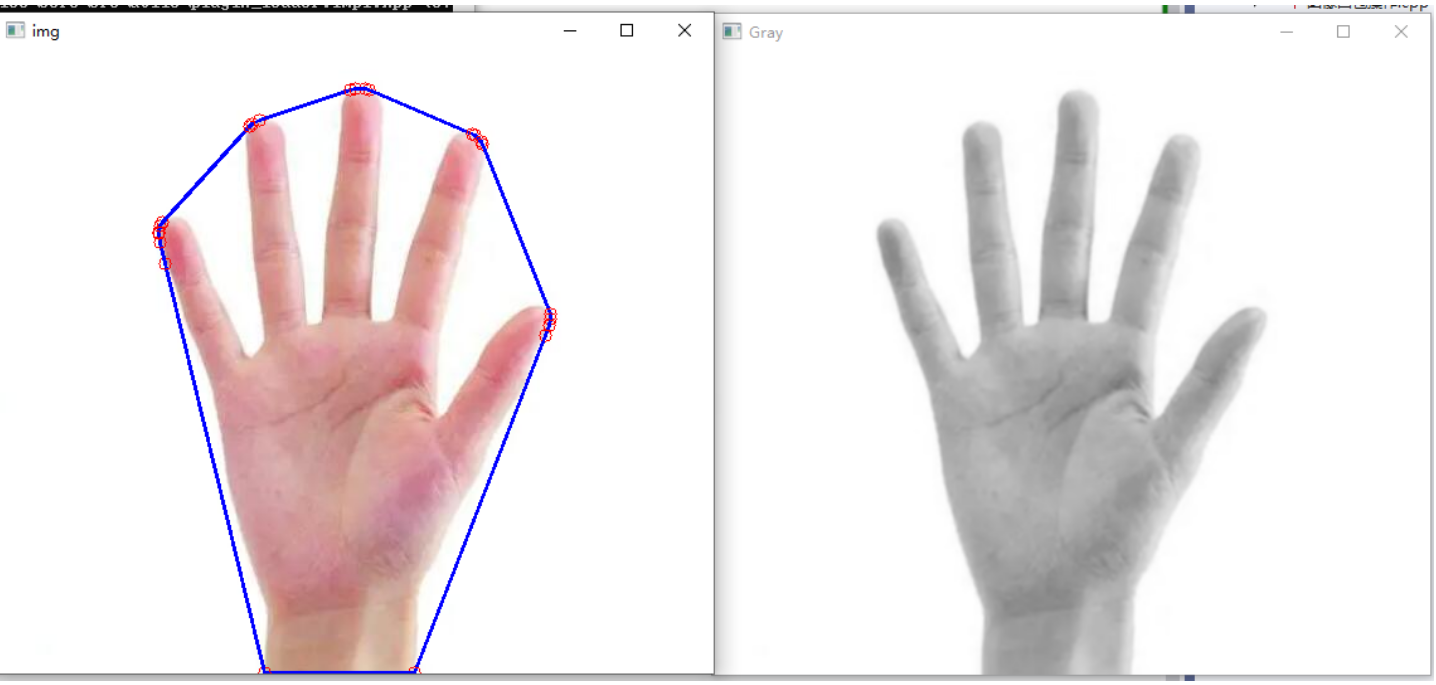
凸包指如果在集合A内连接任意两个点的直线段都在A的内部,则称集合A是凸形的。
简单点理解,就是一个多边型,没有凹的地方。凸包(凸壳)能包含点集中所有的点,凸包检测常应用在物体识别、手势识别及边界检测等领域。一个轮廓可以有无数个包围它的外壳,而其中表面积最小的一个外壳,就是凸包。
凸包绘制步骤
图像灰度处理
灰度图二值化处理
轮廓检测得到候选点
凸包API调用,筛选可用点
绘制显示
API介绍
void convexHull( InputArray points, OutputArray hull,bool clockwise = false, bool returnPoints = true );
/*******************************************************************
*           points:             轮廓点集
*           hull:               凸包点集输出
*           clockwise:          凸包方向的标志位
*                                   true:顺时针方向
*                                   false:逆时针
*           returnPoints:       返回点个数
*********************************************************************/
综合代码
注意:
①在做二值化处理之前,建议先用blur函数进行模糊处理(为了降噪)-->再去二值化处理效果会更好
②在画关键点和凸包处是一个重点。
hull[(j+1)%count]随着j不断循环,最后一个点以及j+1取余之后会回到第一个点,实现闭环,完成凸包的绘制。
③ 绘制凸包前,需要得到外部轮廓的关键点,需要使用findContour函数去找并进行相应的存储
#include <iostream>
#include <string>
#include <map>
#include <vector>
#include <opencv2/opencv.hpp>
using namespace std;
using namespace cv;
class ConvexHull
{
public:
ConvexHull() :img(imread("hand.jpg"))
{
result["img"] = img;
}
void TestConvexHull()
{
//图像灰度处理
cvtColor(result["img"], result["Gray"], COLOR_BGR2GRAY);
//灰度图二值化处理
blur(result["Gray"], result["Gray"], Size(3, 3));
threshold(result["Gray"], result["Binary"], 240, 255, THRESH_BINARY_INV);
//轮廓检测得到候选点
vector<vector<Point>> contours;
vector<Vec4i> hierarchy;
findContours(result["Binary"], contours, hierarchy, RETR_EXTERNAL,CHAIN_APPROX_SIMPLE);
//凸包API调用,筛选可用点
//绘制显示
for (int i = 0; i < contours.size(); i++)
{
vector<Point> hull;
convexHull(contours[i], hull);
//bool isOk = isContourConvex(contours[i]); //判断当前点是否为有效点
int count = hull.size();
for (int j = 0; j < count; j++)
{
circle(img, hull[j], 5, Scalar(0, 0, 255));
line(img, hull[j % count], hull[(j + 1) % count], Scalar(255, 0, 0), 2);
}
}
}
void Show()
{
for (auto& v : result)
{
imshow(v.first, v.second);
}
waitKey(0);
}
private:
Mat img;
map<string, Mat> result;
};
int main()
{
ConvexHull* p = new ConvexHull;
p->TestConvexHull();
p->Show();
return 0;
}