Android集成IJKFFMPEG总结
Android集成IJKFFMPEG总结
目的:
Android端实现视频小窗预览功能。
方案对比
- 硬解方案:
mediaExtrator + mediaCodec,速度快,但是不支持分片视频,且高profile H264 编码不支持。 - 软解方案:
1、FFmpeg重写取帧逻辑,过程繁复需要手动读写文件,解封装等,效率低,并且没有扩展性
2、复用FFmpeg命令行功能,打通调用路径,可以自由使用FFmpeg现有的能力。
实现方式:
Android端整理一套FFmpeg命令,传递给ffmpeg.c main 函数并执行。
实现基本步骤:
1、编写Android端FFmpeg命令
_**例如:**_

/**
     * screenshot from video, you could assign the specific time
     *
     * @param inputPath  input file
     * @param offset     which time you want to shot
     * @param outputPath output file
     * @return screenshot success or not
     */
    public static String[] shotFrame(String inputPath, float offset, String outputPath) {
        // ffmpeg -ss %f -i %s -f image2 -vframes 1 -an %s
        String screenShotCmd = "ffmpeg -ss %f -i -f image2 -vframes 1 -s 148*83 -an";
        screenShotCmd = String.format(Locale.getDefault(), screenShotCmd, offset);
        return insert(screenShotCmd.split(" "), 4, inputPath, outputPath);
    }

    /**
     * cut video, you could assign the startTime and duration which you want to
     *
     * @param inputPath  input file
     * @param startTime  startTime in the video(unit is second)
     * @param duration   duration
     * @param outputPath output file
     * @return cut video success or not
     */
    public static String[] cutVideo(String inputPath, float startTime, float duration, String outputPath) {
        // -map 0 -codec copy (copy all tracks)
        // -map 0:v -vcodec copy (copy track of video)
        // -map 0:a -acodec copy (copy all tracks of audio)
        // -map 0:s -scodec copy (copy all tracks of subtitle)
        // ffmpeg -ss %f -accurate_seek -t %f -i %s -map 0 -codec copy -avoid_negative_ts 1 %s
        String cutVideoCmd = "ffmpeg -ss %f -accurate_seek -t %f -i -map 0 -codec copy -avoid_negative_ts 1";
        cutVideoCmd = String.format(Locale.getDefault(), cutVideoCmd, startTime, duration);
        return insert(cutVideoCmd.split(" "), 7, inputPath, outputPath);
    }

    /**
     * add watermark with image to video, you could assign the location and bitRate
     *
     * @param inputPath  input file
     * @param imgPath    the path of the image
     * @param location   the location in the video(1:top left 2:top right 3:bottom left 4:bottom right)
     * @param bitRate    bitRate
     * @param offsetXY   the offset of x and y in the video
     * @param outputPath output file
     * @return add watermark success or not
     */
    public static String[] addWaterMarkImg(String inputPath, String imgPath, int location, int bitRate,
                                           int offsetXY, String outputPath) {
        String mBitRate = bitRate + "k";
        String overlay = obtainOverlay(offsetXY, offsetXY, location);
        String waterMarkCmd = "ffmpeg -i -i -b:v %s -filter_complex %s -preset:v superfast";
        waterMarkCmd = String.format(waterMarkCmd, mBitRate, overlay);
        return insert(waterMarkCmd.split(" "), 2, inputPath, 4, imgPath, outputPath);
    }
2、JNI方法调用
** Java端:**
    public static int execute(final String[] commands) {
        //call JNI interface to execute FFmpeg cmd
        return executeCmd(commands);
    }

    private native static int executeCmd(String[] commands);


 **Native端:函数的主要作用就是将 Java 端传递过来的 jobjectArray 类型的 FFmpeg 命令,
 转换为 main 函数所需要的参数 argc 和 argv ,然后调用执行。**

    JNIEXPORT jobject JNICALL
Java_com_v_video_ffmpegUtils_FFmpegCmd_executeCmd(JNIEnv *env, jobject thiz, jobjectArray commands)  {
    int argc = (*env)->GetArrayLength(env, commands);
    char **argv = (char **) malloc(argc * sizeof(char *));
    for (int i = 0; i < argc; i++) {
        jstring jstr = (jstring) (*env)->GetObjectArrayElement(env, commands, i);
        char *temp = (char *) (*env)->GetStringUTFChars(env, jstr, 0);
        argv[i] = malloc(INPUT_SIZE);
        strcpy(argv[i], temp);
        (*env)->ReleaseStringUTFChars(env, jstr, temp);
    }

    //execute ffmpeg cmd
    int result = main(argc, argv);

    //release memory
    for (int i = 0; i < argc; i++) {
        free(argv[i]);
    }
    free(argv);

    return result;
}
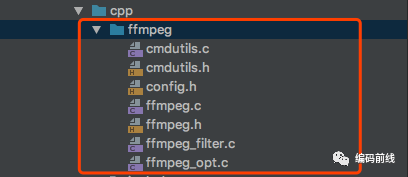
这里的main方法,调用至ffmpeg.c的命令行执行入口。这里需要添加ffmpeg.c 、ffmpeg.h 文件编译,除此以外,还需要增加ffmpeg.c调用所需的文件编译。需要从源码中拷贝 ffmpeg.h、ffmpeg.c、ffmpeg_opt.c、ffmpeg_filter.c、cmdutils.c、cmdutils.h 以及 cmdutils_common_opts.h 共 7 个文件到自己目录下。
并且添加至cMakeList中,编译出相应的so,在Java的Native入口类中加载即可实现调用。
add_library( # Sets the name of the library.
        mediahandle

        # Sets the library as a shared library.
        SHARED

        # Provides a relative path to your source file(s).
        ffmpeg/cmdutils.c
        ffmpeg/ffmpeg.c
        ffmpeg_cmd.c
        ffmpeg/ffmpeg_filter.c
        ffmpeg/ffmpeg_opt.c
        ffmpeg/cmdutils_common_opts.h
        )

        target_link_libraries( # Specifies the target library.
        mediahandle
        libijkffmpeg
        # Links the target library to the log library
        # included in the NDK.
        ${log-lib})
整体思路大致如上,过程中会遇到各种编译、各种native崩溃、包体大小等问题,逐个解决即可。
具体操作及问题处理
android编译mediahandle.so
-
模块的 build.gradle中添加配置:
android { compileSdkVersion project.compileSdkVersion buildToolsVersion project.buildToolsVersion defaultConfig { minSdkVersion project.minSdkVersion targetSdkVersion project.targetSdkVersion versionCode project.versionCode versionName project.versionName // 配置cmake构建参数 externalNativeBuild { cmake { abiFilters "arm64-v8a" } } } // 配置cmake构建脚本的路径 externalNativeBuild { cmake { path "src/main/cpp/CMakeLists.txt" version "3.10.2" } } -
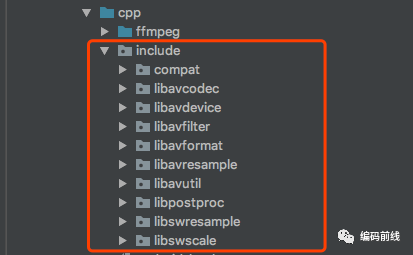
导入文件、编写CMakeLists.txt文件
编译所需头文件
编译所需源码文件
编写CmakeLists.txt
 cmake_minimum_required(VERSION 3.4.1)
 # libijkffmpeg.so
 add_library(libijkffmpeg SHARED IMPORTED)
  set_target_properties(libijkffmpeg PROPERTIES IMPORTED_LOCATION ${PROJECT_SOURCE_DIR}/../jniLibs/${ANDROID_ABI}/libijkffmpeg.so)

 include_directories(./include)

add_library( # Sets the name of the library.
      mediahandle

      # Sets the library as a shared library.
      SHARED

      # Provides a relative path to your source file(s).
      ffmpeg/cmdutils.c
      ffmpeg/ffmpeg.c
      ffmpeg_cmd.c
      ffmpeg/ffmpeg_filter.c
      ffmpeg/ffmpeg_opt.c
      ffmpeg/cmdutils_common_opts.h
      )

  find_library( # Sets the name of the path variable.
      log-lib

      # Specifies the name of the NDK library that
      # you want CMake to locate.
      log)

 target_link_libraries( # Specifies the target library.
      mediahandle
      libijkffmpeg
      # Links the target library to the log library
      # included in the NDK.
      ${log-lib})
FFmpeg命令运行分析-main函数
了解FFmpeg命令行源码,后续做定制修改
int main(int argc, char **argv)
{
    int i, ret;
    BenchmarkTimeStamps ti;	# 用于基准测试

    init_dynload();	# 初始化动态库加载路径,只在win32环境下调用SetDllDirectory(""),设定DLL加载路径为当前工作目录

    register_exit(ffmpeg_cleanup); 	# 注册清理函数,这时还没有调用ffmpeg_cleanup,在程序退出时才调用。
    								# 主要用于资源回收,比如释放过滤器、关闭输出/输入文件等。

    setvbuf(stderr,NULL,_IONBF,0); /* win32 runtime needs this */# 设置标准出错没有缓冲输出

    av_log_set_flags(AV_LOG_SKIP_REPEATED);	# 日志打印设置:跳过重复信息
    parse_loglevel(argc, argv, options);	# 从命令行参数及环境参数中获取打印级别,并设置

	# 如果ffmpeg命令后面紧跟着-d,将按照后台守护程序运行。
    if(argc>1 && !strcmp(argv[1], "-d")){
        run_as_daemon=1;
        av_log_set_callback(log_callback_null);
        argc--;
        argv++;
    }

#if CONFIG_AVDEVICE
    avdevice_register_all(); # 注册所有输入、输出设备
#endif
    avformat_network_init(); # 初始化网络

    show_banner(argc, argv, options);# 打印ffmpeg一些详细信息

	# 解析命令行参数,并打开所有输入、输出文件
    /* parse options and open all input/output files */
    ret = ffmpeg_parse_options(argc, argv);
    if (ret < 0)
        exit_program(1);# 如果打开失败,执行之前注册的ffmpeg_cleanup函数,最后调用exit函数退出

	# 如果没有输出、输入文件,打印提示信息,然后退出
    if (nb_output_files <= 0 && nb_input_files == 0) {
        show_usage();
        av_log(NULL, AV_LOG_WARNING, "Use -h to get full help or, even better, run 'man %s'\n", program_name);
        exit_program(1);
    }

	# 至少要有一个输出文件
    /* file converter / grab */
    if (nb_output_files <= 0) {
        av_log(NULL, AV_LOG_FATAL, "At least one output file must be specified\n");
        exit_program(1);
    }

	# 如果输出文件中有rtp,默认不输出sdp(为什么呢???)
	for (i = 0; i < nb_output_files; i++) {
        if (strcmp(output_files[i]->ctx->oformat->name, "rtp"))
            want_sdp = 0;
    }

	# 执行转换任务前,记录时间戳
    current_time = ti = get_benchmark_time_stamps();

	# 转换任务主函数
    if (transcode() < 0)
        exit_program(1);	# 转换错误,执行清理函数ffmpeg_cleanup,最后调用exit函数退出

	# 如果在命令行参数中有“benchmark”,执行基准测试,打印执行的时间信息
    if (do_benchmark) {
        int64_t utime, stime, rtime;
        current_time = get_benchmark_time_stamps();
        utime = current_time.user_usec - ti.user_usec;
        stime = current_time.sys_usec  - ti.sys_usec;
        rtime = current_time.real_usec - ti.real_usec;
        av_log(NULL, AV_LOG_INFO,
               "bench: utime=%0.3fs stime=%0.3fs rtime=%0.3fs\n",
               utime / 1000000.0, stime / 1000000.0, rtime / 1000000.0);
    }
    av_log(NULL, AV_LOG_DEBUG, "%"PRIu64" frames successfully decoded, %"PRIu64" decoding errors\n",
           decode_error_stat[0], decode_error_stat[1]);

	# 计算解码成功的比例,如果小于设置的最大错误率(默认是2.0/3)时,报错退出
    if ((decode_error_stat[0] + decode_error_stat[1]) * max_error_rate < decode_error_stat[1])
        exit_program(69);

	#文件转换成功,执行清理函数ffmpeg_cleanup,最后调用exit函数退出
    exit_program(received_nb_signals ? 255 : main_return_code);
    return main_return_code;
}
定制修改
//在 ffmpeg_cleanup函数执行结束前重新初始化:
static void ffmpeg_cleanup(int ret) {

  // 省略其他代码...

  nb_filtergraphs = 0;
  nb_output_files = 0;
  nb_output_streams = 0;
  nb_input_files = 0;
  nb_input_streams = 0;
}

// cmdutils.c 修改 exit_program函数:
void exit_program(int ret) {
  if (program_exit)
      program_exit(ret);
      exit(ret);
}

//改成:防止命令运行完,退出进程,导致应用崩溃
int exit_program(int ret)
{
 return ret;
}

// 修改ffmpeg_opt.c,注释掉设备相关代码,以及文件重复检查机制
static int opt_init_hw_device(void *optctx, const char *opt, const char *arg)
{
  if (!strcmp(arg, "list")) {
      enum AVHWDeviceType type = AV_HWDEVICE_TYPE_NONE;
      printf("Supported hardware device types:\n");
      while ((type = av_hwdevice_iterate_types(type)) !=
             AV_HWDEVICE_TYPE_NONE)
          printf("%s\n", av_hwdevice_get_type_name(type));
      printf("\n");
      exit_program(0);
  } else {
      // 1
      return 1;//hw_device_init_from_string(arg, NULL);
  }
}

static int opt_filter_hw_device(void *optctx, const char *opt, const char *arg)
{
  if (filter_hw_device) {
      av_log(NULL, AV_LOG_ERROR, "Only one filter device can be used.\n");
      return AVERROR(EINVAL);
  }
  // 2
  filter_hw_device = NULL;//hw_device_get_by_name(arg);
  if (!filter_hw_device) {
      av_log(NULL, AV_LOG_ERROR, "Invalid filter device %s.\n", arg);
      return AVERROR(EINVAL);
  }
  return 0;
}
// 文件重复检查机制修改
static void assert_file_overwrite(const char *filename)
{
  if (file_overwrite && no_file_overwrite) {
      fprintf(stderr, "Error, both -y and -n supplied. Exiting.\n");
      exit_program(1);
  }

  if (!file_overwrite) {
      const char *proto_name = avio_find_protocol_name(filename);
      if (proto_name && !strcmp(proto_name, "file") && avio_check(filename, 0) == 0) {
          if (stdin_interaction && !no_file_overwrite) {
              fprintf(stderr,"File '%s' already exists. Overwrite ? [y/N] ", filename);
              fflush(stderr);
              term_exit();
              signal(SIGINT, SIG_DFL);
              //  prevent exit due to not overwriting
              //if (!read_yesno()) {
              //    av_log(NULL, AV_LOG_FATAL, "Not overwriting - exiting\n");
              //    exit_program(1);
              //}

              term_init();
          }
          else {
              av_log(NULL, AV_LOG_FATAL, "File '%s' already exists. Exiting.\n", filename);
              // prevent exit
              //exit_program(1);
          }
      }
  }
}
取帧速度优化
ffmpeg -i /home/下载/下载.mp4 -f image2 -ss 1000 -vframes 1 -s 148*83 -an /home/nj/2222/14.jpg
=> 改成 先seek再打开文件 取帧时间从10s级缩短至120ms
ffmpeg -ss 1000 -i /home/下载/下载.mp4 -f image2 -vframes 1 -s 148*83 -an /home/nj/2222/31.jpg
包体大小裁剪
方式:有限打开编解码器 文件config/module-lite.sh
   export COMMON_FF_CFG_FLAGS="$COMMON_FF_CFG_FLAGS --disable-encoders"
   export COMMON_FF_CFG_FLAGS="$COMMON_FF_CFG_FLAGS --enable-encoder=mjpeg"
   export COMMON_FF_CFG_FLAGS="$COMMON_FF_CFG_FLAGS --enable-muxer=image2"
   export COMMON_FF_CFG_FLAGS="$COMMON_FF_CFG_FLAGS --disable-filters"
   export COMMON_FF_CFG_FLAGS="$COMMON_FF_CFG_FLAGS --enable-filter=trim"
   export COMMON_FF_CFG_FLAGS="$COMMON_FF_CFG_FLAGS --enable-filter=scale"
   export COMMON_FF_CFG_FLAGS="$COMMON_FF_CFG_FLAGS --enable-filter=format"
  export COMMON_FF_CFG_FLAGS="$COMMON_FF_CFG_FLAGS --enable-filter=null"
根据编译报错打开相应开关,并且找到filter获取的源码,添加日志,打印出当前任务所需的所有编码器,解码器,滤镜等,打开开关即可
如:找到ffmpeg_filter.c avfilter_get_by_name方法,在while循环中打印出即可。
const AVFilter *avfilter_get_by_name(const char *name)
{
  const AVFilter *f = NULL;
  void *opaque = 0;

  if (!name)
      return NULL;

  while ((f = av_filter_iterate(&opaque)))
      if (!strcmp(f->name, name))
          return (AVFilter *)f;

  return NULL;
}
其他参照上述操作执行即可
视频末尾取帧失败问题
问题描述:视频取帧存在一些视频末尾帧无法取出问题。
问题视频链接:
https://apd-7e140ef9b89c86a1c10127e889334fee.v.smtcdns.com/omts.tc.qq.com/AbEUJiVdZBPsIB7TwsRaWJgru6vs07l30hJy7qxBDQD4/uwMROfz2r57BIaQXGdGnC2deOm7WRbkbfdWCxMUsemsF2Gfz/svp_50001/fkTItM-64nAykdNRmEZ5CWH2zdFnyKUPeMBcFATJR0X2fyUglOenoeHDY-WPB6E8MF8fLgol4nsTEEjHo3WYrywAqEGj-Oui04252-0xVh7XqNonCXej3S8kCc2vyI2ZCxe_xQ3C8zAkhrvTaGrYV9X3WRsphA_tL0Mt177xeLLLkRnriSYurg/szg_9332_50001_0bc3juacoaaauiaglhapifrvctode5gqaj2a.f304110.ts.m3u8?ver=4
问题分析:
通过本地使用FFmpeg命令行,报错:Output file is empty, nothing was encoded (check -ss / -t / -frames parameters if used)
查看文档:
Output file is empty, nothing was encoded (check -ss / -t / -frames parameters if used) The -ss option allows you to skip to a certain point. This message is often seen when the -ss option value is greater than the duration of the input. For example, if -ss 30 is used for a 15 second input you may see this message.
根据文档,怀疑是视频的时长传入超过了实际的视频时间导致
 ```c{.line-numbers}
   #EXTINF:9.560,
   /storage/emulated/0/下载/.video_cache_3/fb86c6a2ca616c834cf55bbccb3fd475/segments/ts_50.ts
   #EXTINF:8.800,
   /storage/emulated/0/下载/.video_cache_3/fb86c6a2ca616c834cf55bbccb3fd475/segments/ts_51.ts
   #EXTINF:9.560,
  /storage/emulated/0/下载/.video_cache_3/fb86c6a2ca616c834cf55bbccb3fd475/segments/ts_52.ts
  #EXTINF:13.877,
  /storage/emulated/0/下载/.video_cache_3/fb86c6a2ca616c834cf55bbccb3fd475/segments/ts_53.ts
  #EXT-X-ENDLIST
 ```
分析该链接m3u8,发现该视频正常的ts片段9s左右,而最后一片ts标注的时间是13.877s。明显超出正常片段数值5秒左右。因此取值传入至最后一秒时间,帧报该错误。
验证:
将该视频格式转换成mp4,视频最后一帧可以正常取出。
对比转换后的mp4视频最后一帧,与m3u8视频的倒数3秒的视频帧一致。
因此可以得出结论:m3u8标注的时长超过视频视频帧实际长度,导致ffmpeg传入的取帧时间超过视频时长,从而报错Output file is empty, nothing was encoded (check -ss / -t / -frames parameters if used),无法正常取帧。
参考文章:
https://blog.lxfpoe.work/jekyll/update/2020/05/18/ffmpeg-android.html
https://yhaolpz.github.io/ddeb5551/
https://github.com/jdpxiaoming/FFmpegTools