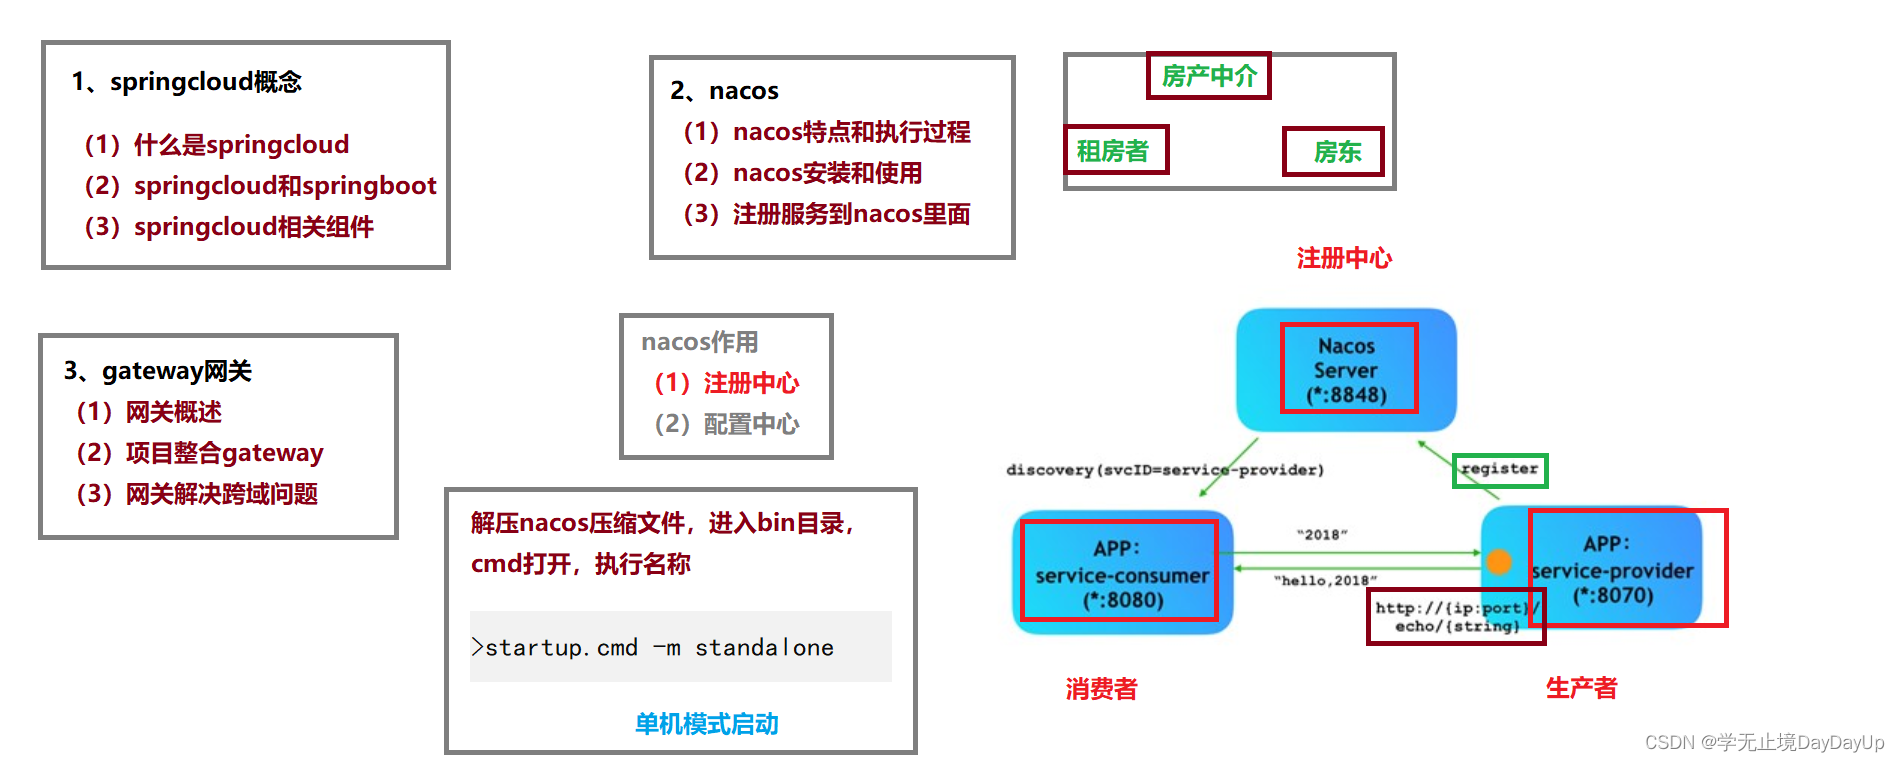
Java项目硅谷课堂学习笔记-P9-整合网关与实现订单和营销管理模块
P9-整合网关与实现订单和营销管理模块
- 0.概述
- 1.SpringCloud
- 1.1什么是Spring Cloud
- 1.2Spring Cloud和Spring Boot关系
- 1.3Spring Cloud相关基础服务组件
- 2.Nacos
- 2.0Nacos作用
- 2.1基本概念
- 2.2常见的注册中心
- 2.3Nacos结构图
- 2.4Nacos启动
- 2.5服务注册
- 2.5.1引入依赖
- 2.5.2配置自己的服务service_vod
- 2.5.3添加Nacos客户端注解
- 2.6Nacos使用注意点
- 3.gateway网关
- 3.1Gateway概述
- 3.2Gateway核心概念
- 3.2.1 **路由**
- 3.2.2 **断言**
- 3.2.3.**过滤器**
- 3.3实现网关转发功能
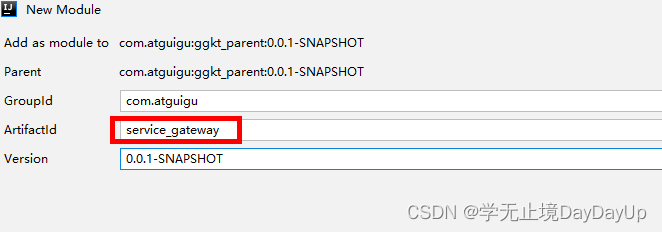
- 3.3.1创建网关模块
- 3.3.2引入网关依赖
- 3.3.3创建启动类
- 3.3.4创建配置文件
- 3.4网关解决跨域问题
- 3.4.1跨域概述
- 3.4.2创建配置类
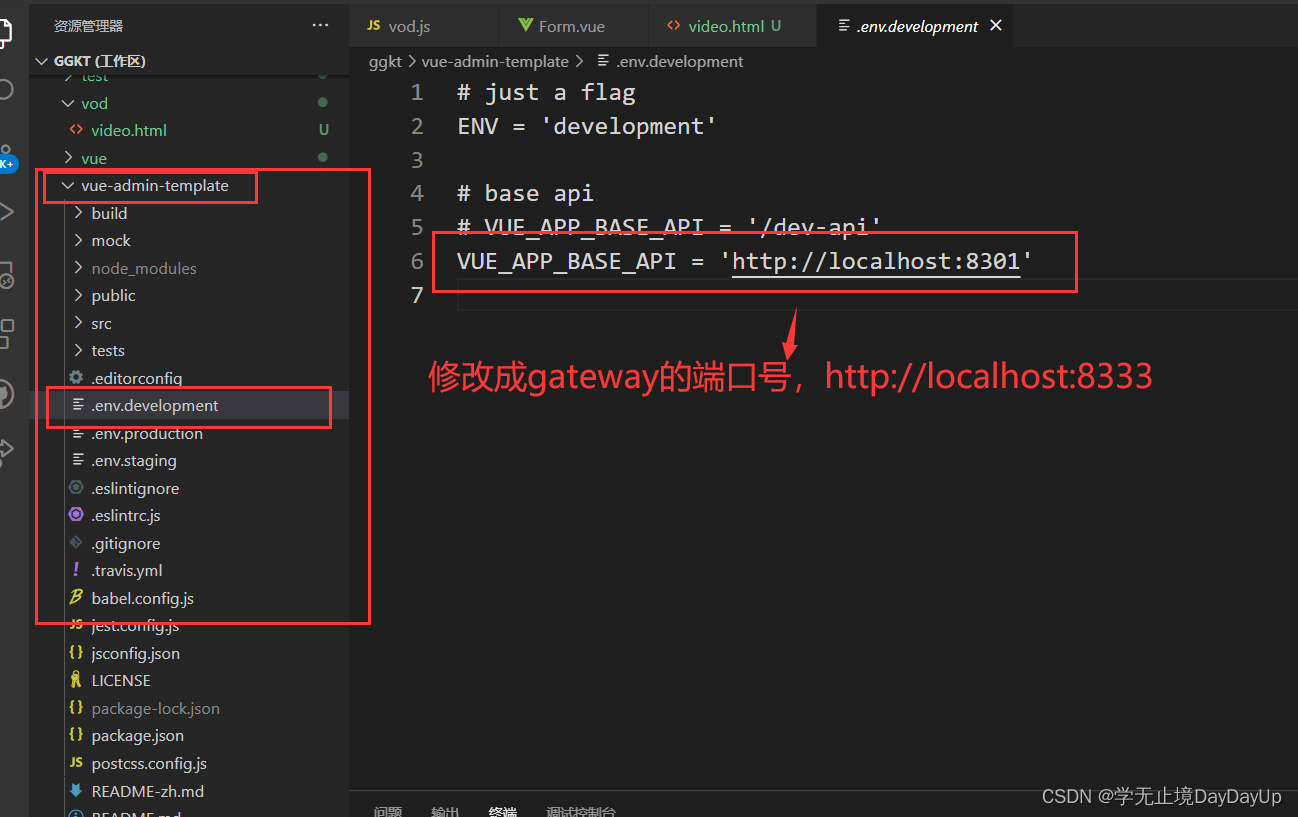
- 3.3.5修改前端
- 4. 后台管理系统-订单管理模块
- 4.1环境准备
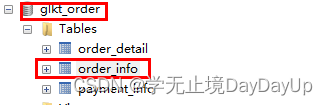
- 4.1.1创建数据库表
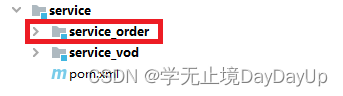
- 4.1.2创建订单模块
- 4.1.3生成订单相关实体类
- 4.1.4创建启动类
- 4.1.5创建配置文件
- 4.1.6创建配置类
- 4.2订单列表接口
- 4.2.1后端-条件分页查询接口controller
- 4.2.2后端-serviceImpl层
- 4.2.3后端-service_gateway配置文件
- 4.2.4前端-接口定义
- 4.2.5前端-创建路由
- 4.2.6前端-页面
- 4.2.7最终实现效果
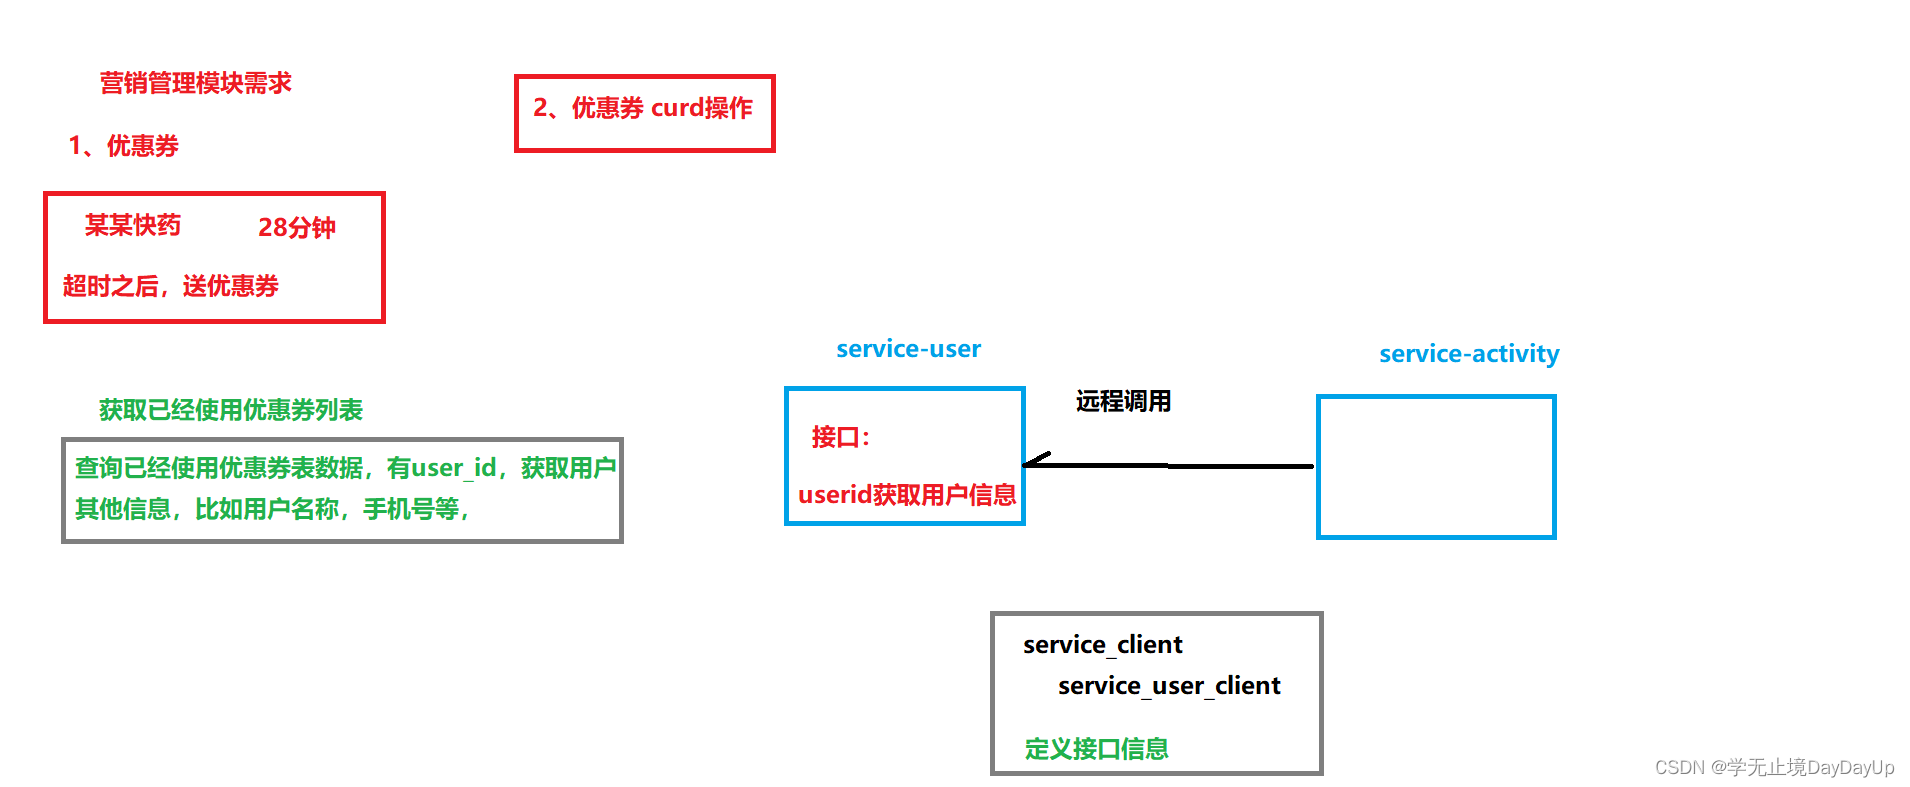
- 5. 后台管理系统-营销管理模块
- 5.1环境准备
- 5.1.1创建数据库表
- 5.1.2创建营销模块
- 5.1.3生成订单相关实体类
- 5.1.4创建启动类
- 5.1.5创建配置文件
- 5.1.6创建配置类
- 5.2开发优惠券相关接口
- 5.2.1编写CouponInfoController
- 5.2.2编写Service
- 5.2.3ServiceImpl
- 6 .优惠券列表接口
- 6.1编写获取用户信息接口
- 6.1.1创建service_user模块
- 6.1.2生成相关代码
- 6.1.3创建启动类
- 6.1.4创建配置文件
- 6.1.5编写UserInfocontroller
- 6.1.6配置网关
- 6.2创建模块定义远程接口.
- 6.2.1创建模块
- 6.2.2service_client引入依赖
- 6.2.3定义远程调用的接口
- 6.3编写Service实现方法
- 6.3.1service_activity引入依赖
- 6.3.2service_activity添加注解
- 6.3.3CouponInfoServiceImpl实现方法
- 6.4配置网关
- 6.5整合优惠券前端
- 6.5.1定义接口
- 6.5.创建路由
- 6.5.3创建vue页面
0.概述
1.SpringCloud
1.1什么是Spring Cloud
Spring Cloud是一系列框架的集合。它利用Spring Boot的开发便利性简化了分布式系统基础设施的开发,如
- 服务发现
- 服务注册
- 配置中心
- 消息总线
- 负载均衡
- 熔断器
- 数据监控等
都可以用Spring Boot的开发风格做到一键启动和部署。Spring并没有重复制造轮子,它只是将目前各家公司开发的比较成熟、经得起实际考验的服务框架组合起来,通过SpringBoot风格进行再封装屏蔽掉了复杂的配置和实现原理,最终给开发者留出了一套简单易懂、易部署和易维护的分布式系统开发工具包
1.2Spring Cloud和Spring Boot关系
Spring Boot 是 Spring 的一套快速配置脚手架,可以基于Spring Boot 快速开发单个微服务,Spring Cloud是一个基于Spring Boot实现的开发工具;
Spring Boot专注于快速、方便集成的单个微服务个体,Spring Cloud关注全局的服务治理框架;
Spring Boot使用了默认大于配置的理念,很多集成方案已经帮你选择好了,能不配置就不配置,Spring Cloud很大的一部分是基于Spring Boot来实现,必须基于Spring Boot开发。可以单独使用Spring Boot开发项目,但是Spring Cloud离不开 Spring Boot
1.3Spring Cloud相关基础服务组件
- 服务发现——Netflix Eureka (Nacos)
- 服务调用——Netflix Feign
- 熔断器——Netflix Hystrix
- 服务网关——Spring Cloud GateWay
- 分布式配置——Spring Cloud Config (Nacos)
- 消息总线 —— Spring Cloud Bus (Nacos)
2.Nacos
2.0Nacos作用
- 注册中心
- 配置中心
2.1基本概念
Nacos 是阿里巴巴推出来的一个新开源项目,是一个更易于构建云原生应用的动态服务发现、配置管理和服务管理平台。Nacos 致力于帮助您发现、配置和管理微服务。Nacos 提供了一组简单易用的特性集,帮助您快速实现动态服务发现、服务配置、服务元数据及流量管理。Nacos 帮助您更敏捷和容易地构建、交付和管理微服务平台。 Nacos 是构建以“服务”为中心的现代应用架构 (例如微服务范式、云原生范式) 的服务基础设施。
2.2常见的注册中心
-
Eureka(原生,2.0遇到性能瓶颈,停止维护)
-
Zookeeper(支持,专业的独立产品。例如:dubbo)
-
Consul(原生,GO语言开发)
-
Nacos
相对于 Spring Cloud Eureka 来说,Nacos 更强大。
Nacos = Spring Cloud Eureka + Spring Cloud Config
Nacos 可以与 Spring, Spring Boot, Spring Cloud 集成,并能代替 Spring Cloud Eureka, Spring Cloud Config
通过 Nacos Server 和 spring-cloud-starter-alibaba-nacos-discovery 实现服务的注册与发现。
2.3Nacos结构图

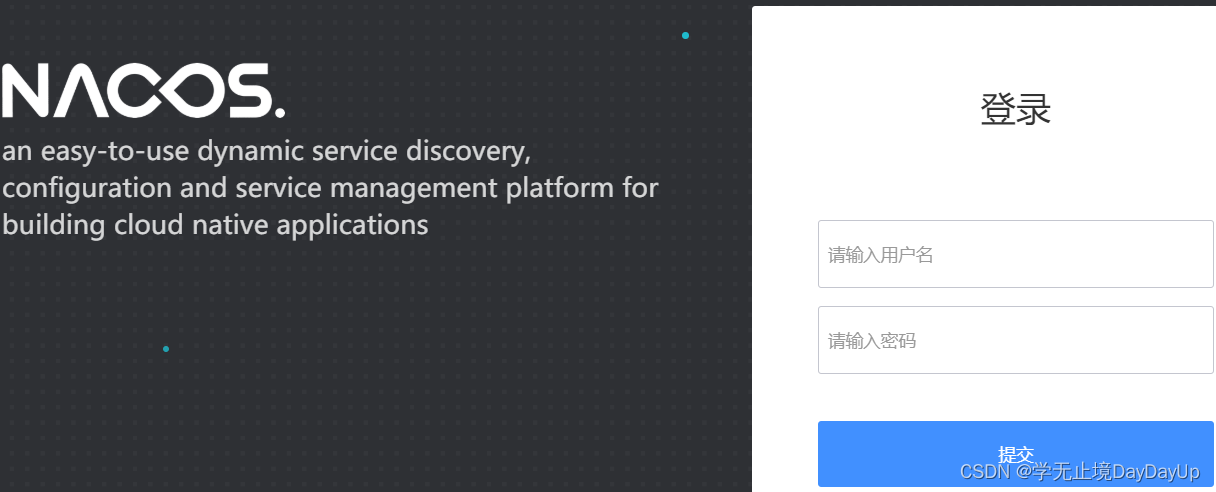
2.4Nacos启动
Nacos下载地址
Windows
启动方式,cmd打开,执行命令:
startup.cmd -m standalone
访问:http://localhost:8848/nacos
用户名密码:nacos/nacos
如果Nacos启动不了发现网页打不开,
- 看一看当前文件夹所在路径是否包含中文,更换到全英文路径的文件下
- 其次删除解压的文件,重新解压,再次启动即可

2.5服务注册
2.5.1引入依赖
<!-- 服务注册 -->
<dependency>
   <groupId>com.alibaba.cloud</groupId>
   <artifactId>spring-cloud-starter-alibaba-nacos-discovery</artifactId>
</dependency>

<!-- 服务调用feign -->
<dependency>
   <groupId>org.springframework.cloud</groupId>
   <artifactId>spring-cloud-starter-openfeign</artifactId>
</dependency>
2.5.2配置自己的服务service_vod
配置application.properties,在客户端微服务中添加注册Nacos服务的配置信息
# nacos服务地址
spring.cloud.nacos.discovery.server-addr=127.0.0.1:8848
2.5.3添加Nacos客户端注解
在service_vod微服务启动类中添加注解
package com.jq.vod;


import org.springframework.boot.SpringApplication;
import org.springframework.boot.autoconfigure.SpringBootApplication;
import org.springframework.cloud.client.discovery.EnableDiscoveryClient;
import org.springframework.context.annotation.ComponentScan;
@EnableDiscoveryClient
@SpringBootApplication
@ComponentScan(basePackages = "com.jq")
public class ServiceVodApplication {
    public static void main(String[] args) {
        SpringApplication.run(ServiceVodApplication.class);
    }
}


2.6Nacos使用注意点
后期每个功能写完的时候,首先启动Nacos,然后再启动Java程序,否则报错
3.gateway网关
3.1Gateway概述
Spring cloud gateway是spring官方基于Spring 5.0、Spring Boot2.0和Project Reactor等技术开发的网关,Spring Cloud Gateway旨在为微服务架构提供简单、有效和统一的API路由管理方式,Spring Cloud Gateway作为Spring Cloud生态系统中的网关,目标是替代Netflix Zuul,其不仅提供统一的路由方式,并且还基于Filter链的方式提供了网关基本的功能,例如:安全、监控/埋点、限流等。
3.2Gateway核心概念
网关提供API全托管服务,丰富的API管理功能,辅助企业管理大规模的API,以降低管理成本和安全风险,包括
- 协议适配
- 协议转发
- 安全策略
- 防刷
- 流量
- 监控日志等
一般来说网关对外暴露的URL或者接口信息,我们统称为路由信息。如果研发过网关中间件或者使用过Zuul的人,会知道网关的核心是Filter以及Filter Chain(Filter责任链)。Sprig Cloud Gateway也具有路由和Filter的概念。下面介绍一下Spring Cloud Gateway中几个重要的概念。
3.2.1 路由
路由是网关最基础的部分,路由信息有
- 一个ID
- 一个目的URL
- 一组断言
- 一组Filter组成
如果断言路由为真,则说明请求的URL和配置匹配
3.2.2 断言
Java8中的断言函数。Spring Cloud Gateway中的断言函数输入类型是Spring5.0框架中的ServerWebExchange。Spring Cloud Gateway中的断言函数允许开发者去定义匹配来自于http request中的任何信息,比如请求头和参数等。
3.2.3.过滤器
一个标准的Spring webFilter。Spring cloud gateway中的filter分为两种类型的Filter,分别是Gateway Filter和Global Filter。过滤器Filter将会对请求和响应进行修改处理

3.3实现网关转发功能
3.3.1创建网关模块
在ggkt_parent下创建service_gateway
3.3.2引入网关依赖
<dependencies>
    <dependency>
        <groupId>com.atguigu</groupId>
        <artifactId>service_util</artifactId>
        <version>0.0.1-SNAPSHOT</version>
    </dependency>

    <!-- 网关 -->
    <dependency>
        <groupId>org.springframework.cloud</groupId>
        <artifactId>spring-cloud-starter-gateway</artifactId>
    </dependency>

    <!-- 服务注册 -->
    <dependency>
        <groupId>com.alibaba.cloud</groupId>
        <artifactId>spring-cloud-starter-alibaba-nacos-discovery</artifactId>
    </dependency>
</dependencies>
3.3.3创建启动类
@SpringBootApplication
public class ApiGatewayApplication {
    public static void main(String[] args) {
        SpringApplication.run(ApiGatewayApplication.class, args);
    }
}
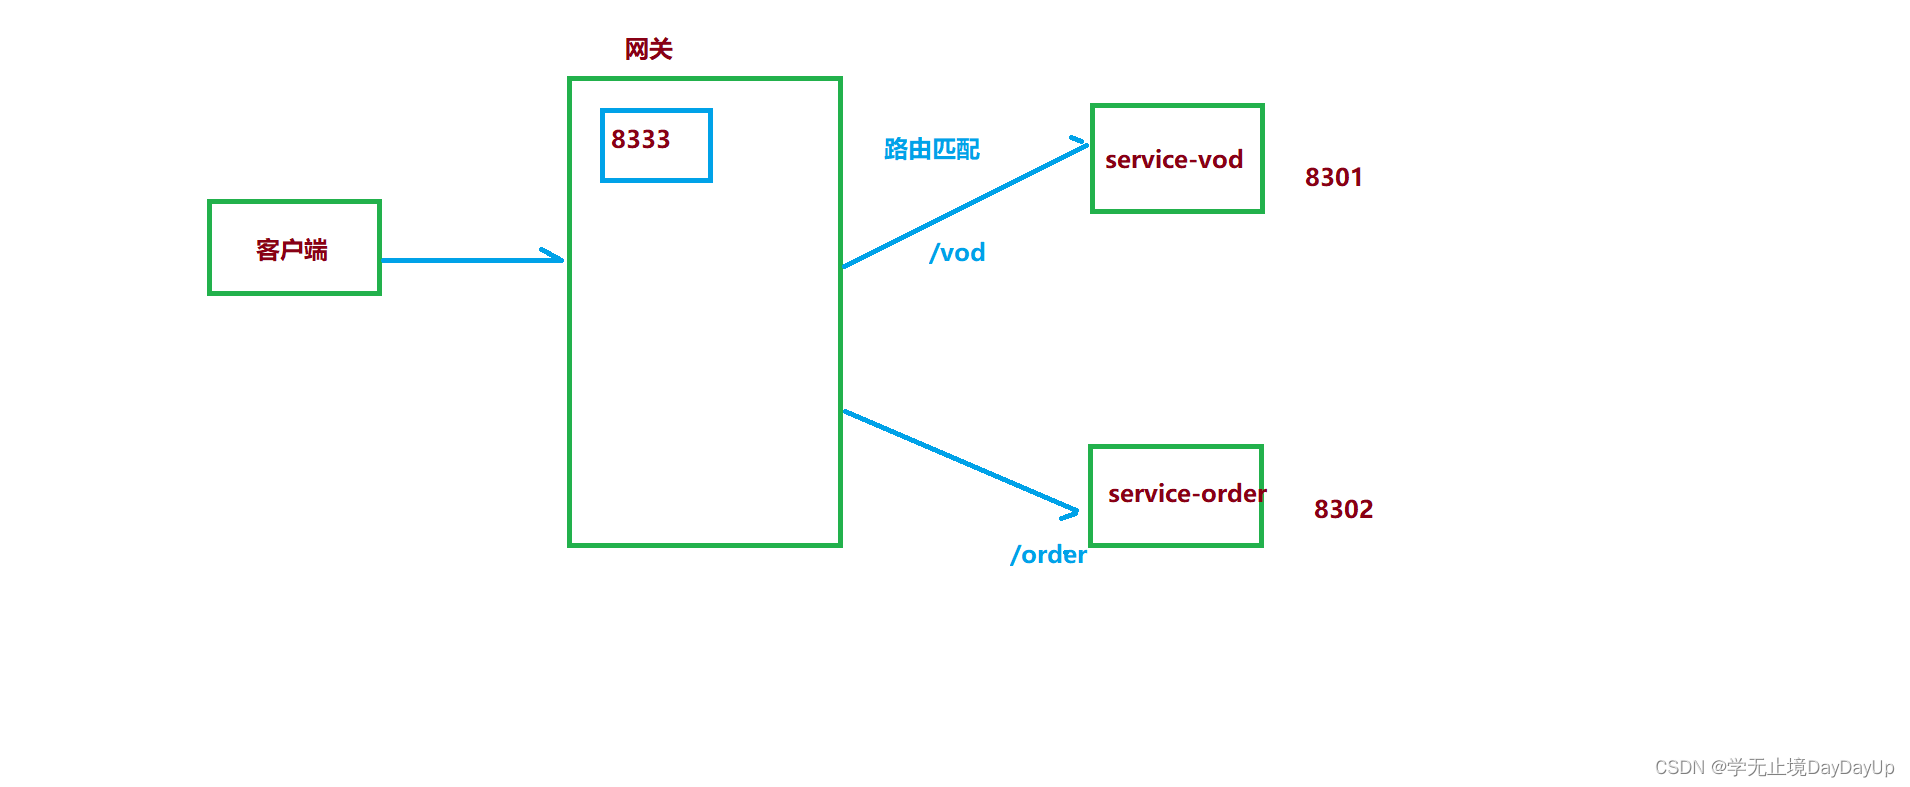
3.3.4创建配置文件
编写application.properties
# 服务端口
server.port=8333

# 服务名
spring.application.name=service-gateway

# nacos服务地址
spring.cloud.nacos.discovery.server-addr=127.0.0.1:8848


#使用服务发现路由
spring.cloud.gateway.discovery.locator.enabled=true

#service-vod模块配置
#设置路由id 即Nacos中服务注册的名称
spring.cloud.gateway.routes[0].id=service-vod
#设置路由的uri  lb :loadbalance
spring.cloud.gateway.routes[0].uri=lb://service-vod
#设置路由断言,代理servicerId为auth-service的/auth/路径  /admin/vod/chapter
spring.cloud.gateway.routes[0].predicates= Path=/*/vod/**
3.4网关解决跨域问题
3.4.1跨域概述
跨域本质是浏览器对于ajax请求的一种安全限制:一个页面发起的ajax请求,只能是与当前页域名相同的路径,这能有效的阻止跨站攻击。因此:跨域问题 是针对ajax的一种限制。但是这却给我们的开发带来了不便,而且在实际生产环境中,肯定会有很多台服务器之间交互,地址和端口都可能不同。
之前我们通过服务器添加注解实现,现在我们跨域通过网关来解决跨域问题。
3.4.2创建配置类
过滤器实现
package com.jq.gateway.config;

import org.springframework.context.annotation.Bean;
import org.springframework.context.annotation.Configuration;
import org.springframework.web.cors.CorsConfiguration;
import org.springframework.web.cors.reactive.CorsWebFilter;
import org.springframework.web.cors.reactive.UrlBasedCorsConfigurationSource;
import org.springframework.web.util.pattern.PathPatternParser;

@Configuration
public class CorsConfig {
    //处理跨域
    @Bean
    public CorsWebFilter corsFilter() {
        CorsConfiguration config = new CorsConfiguration();
        config.addAllowedMethod("*");
        config.addAllowedOrigin("*");
        config.addAllowedHeader("*");
        UrlBasedCorsConfigurationSource source = new UrlBasedCorsConfigurationSource(new PathPatternParser());
        source.registerCorsConfiguration("/**", config);
        return new CorsWebFilter(source);
    }
}
3.3.5修改前端
4. 后台管理系统-订单管理模块

4.1环境准备
4.1.1创建数据库表
4.1.2创建订单模块
4.1.3生成订单相关实体类

4.1.4创建启动类
@SpringBootApplication
public class ServiceOrderApplication {
	public static void main(String[] args) {
		SpringApplication.run(ServiceOrderApplication.class, args);
	}
}
4.1.5创建配置文件
# 服务端口
server.port=8302

# 服务名
spring.application.name=service-order

# 环境设置:dev、test、prod
spring.profiles.active=dev

# mysql数据库连接
spring.datasource.driver-class-name=com.mysql.jdbc.Driver
spring.datasource.url=jdbc:mysql://localhost:3306/glkt_order?characterEncoding=utf-8&useSSL=false
spring.datasource.username=root
spring.datasource.password=123456

#返回json的全局时间格式
spring.jackson.date-format=yyyy-MM-dd HH:mm:ss
spring.jackson.time-zone=GMT+8

#mybatis日志
mybatis-plus.configuration.log-impl=org.apache.ibatis.logging.stdout.StdOutImpl

mybatis-plus.mapper-locations=classpath:com/jq/order/mapper/xml/*.xml

# nacos服务地址
spring.cloud.nacos.discovery.server-addr=127.0.0.1:8848
4.1.6创建配置类
package com.jq.order.config;

import com.baomidou.mybatisplus.extension.plugins.PaginationInterceptor;
import org.mybatis.spring.annotation.MapperScan;
import org.springframework.context.annotation.Bean;
import org.springframework.context.annotation.Configuration;

@Configuration
@MapperScan("com.jq.order.mapper")
public class OrderConfig {
    /**
     * 分页插件
     */
    @Bean
    public PaginationInterceptor paginationInterceptor() {
        return new PaginationInterceptor();
    }
}
4.2订单列表接口
4.2.1后端-条件分页查询接口controller
package com.jq.order.controller;


import com.baomidou.mybatisplus.extension.plugins.pagination.Page;
import com.fasterxml.jackson.databind.ObjectReader;
import com.jq.model.order.OrderInfo;
import com.jq.order.service.OrderInfoService;
import com.jq.result.Result;
import com.jq.vo.order.OrderInfoQueryVo;
import io.swagger.annotations.Api;
import org.springframework.beans.factory.annotation.Autowired;
import org.springframework.web.bind.annotation.GetMapping;
import org.springframework.web.bind.annotation.PathVariable;
import org.springframework.web.bind.annotation.RequestMapping;

import org.springframework.web.bind.annotation.RestController;

import java.util.Map;

/**
 * <p>
 * 订单表 订单表 前端控制器
 * </p>
 *
 * @author CJQ
 * @since 2022-08-31
 */

@Api(tags = "订单管理")
@RestController
@RequestMapping(value="/admin/order/orderInfo")
public class OrderInfoController {
    @Autowired
    private OrderInfoService orderInfoService;

    //订单列表
    @GetMapping("{page}/{limit}")
    public Result listOrder(@PathVariable Long page,
                            @PathVariable Long limit,
                            OrderInfoQueryVo orderInfoQueryVo){
        //创建page对象
        Page<OrderInfo>pageParam =new Page<>(page,limit);
        Map<String,Object> map=orderInfoService.selectOrderInfoPage(pageParam,orderInfoQueryVo);
        return Result.ok(map);
    }
}
4.2.2后端-serviceImpl层
package com.jq.order.service.impl;


import com.baomidou.mybatisplus.core.conditions.query.QueryWrapper;
import com.baomidou.mybatisplus.extension.plugins.pagination.Page;
import com.jq.model.order.OrderDetail;
import com.jq.model.order.OrderInfo;
import com.jq.order.mapper.OrderInfoMapper;
import com.jq.order.service.OrderDetailService;
import com.jq.order.service.OrderInfoService;
import com.baomidou.mybatisplus.extension.service.impl.ServiceImpl;
import com.jq.vo.order.OrderInfoQueryVo;
import org.springframework.beans.factory.annotation.Autowired;
import org.springframework.stereotype.Service;
import org.springframework.util.StringUtils;

import java.util.HashMap;
import java.util.List;
import java.util.Map;

/**
 * <p>
 * 订单表 订单表 服务实现类
 * </p>
 *
 * @author CJQ
 * @since 2022-08-31
 */
@Service
public class OrderInfoServiceImpl extends ServiceImpl<OrderInfoMapper, OrderInfo> implements OrderInfoService {

    @Autowired
    private OrderDetailService orderDetailService;

    @Override
    public Map<String, Object> selectOrderInfoPage(Page<OrderInfo> pageParam, OrderInfoQueryVo orderInfoQueryVo) {
        //orderInfoQueryVo获得查询条件
        Long userId = orderInfoQueryVo.getUserId();
        String outTradeNo = orderInfoQueryVo.getOutTradeNo();
        String phone = orderInfoQueryVo.getPhone();
        String createTimeEnd = orderInfoQueryVo.getCreateTimeEnd();
        String createTimeBegin = orderInfoQueryVo.getCreateTimeBegin();
        Integer orderStatus = orderInfoQueryVo.getOrderStatus();

        //判断条件值是否为空,如果不为空进行条件封装
        QueryWrapper<OrderInfo>wrapper=new QueryWrapper<>();
        if(!StringUtils.isEmpty(orderStatus)) {
            wrapper.eq("order_status",orderStatus);
        }
        if(!StringUtils.isEmpty(userId)) {
            wrapper.eq("user_id",userId);
        }
        if(!StringUtils.isEmpty(outTradeNo)) {
            wrapper.eq("out_trade_no",outTradeNo);
        }
        if(!StringUtils.isEmpty(phone)) {
            wrapper.eq("phone",phone);
        }
        if(!StringUtils.isEmpty(createTimeBegin)) {
            wrapper.ge("create_time",createTimeBegin);
        }
        if(!StringUtils.isEmpty(createTimeEnd)) {
            wrapper.le("create_time",createTimeEnd);
        }

        //调用mapper中的方法实现分页查询
        Page<OrderInfo> pages = baseMapper.selectPage(pageParam, wrapper);
        long totalCount = pages.getTotal();
        long pageCount = pages.getPages();
        List<OrderInfo> records = pages.getRecords();
        //订单里面包含详情内容,封装详情数据,根据订单id查询详情
        records.stream().forEach(item->{
            this.geoOrderDetail(item);

        });
        //所有需要的数据封装到map集合,最终返回
        Map<String,Object> map=new HashMap<>();
        map.put("total",totalCount);
        map.put("pageCount",pageCount);
        map.put("records",records);
        return map;
    }
    //查询订单详情数据
    private OrderInfo geoOrderDetail(OrderInfo orderInfo) {
        //先得到订单id
        Long id = orderInfo.getId();
        //查询订单详情
        OrderDetail orderDetail = orderDetailService.getById(id);
        if(orderDetail!=null){
            String courseName = orderDetail.getCourseName();
            orderInfo.getParam().put("courseName",courseName)
        }
        return orderInfo;

    }
}
4.2.3后端-service_gateway配置文件
#service-order模块配置
#设置路由id 即Nacos中服务注册的名称
spring.cloud.gateway.routes[1].id=service-order
#设置路由的uri  lb :loadbalance
spring.cloud.gateway.routes[1].uri=lb://service-order
#设置路由断言,代理servicerId为auth-service的/auth/路径  /admin/order/orderInfo
spring.cloud.gateway.routes[1].predicates= Path=/*/order/**
4.2.4前端-接口定义

import request from '@/utils/request'

const api_name = '/admin/order/orderInfo'

export default {

  getPageList(page, limit, searchObj) {
    return request({
      url: `${api_name}/${page}/${limit}`,
      method: 'get',
      params: searchObj
    })
  }
}
4.2.5前端-创建路由
  {
    path: '/order',
    component: Layout,
    redirect: '/order/orderInfo/list',
    name: 'Order',
    meta: { title: '订单管理', icon: 'el-icon-truck' },
    alwaysShow: true,
    children: [
      {
        path: 'orderInfo/list',
        name: 'OrderInfo',
        component: () => import('@/views/order/orderInfo/list'),
        meta: { title: '订单列表' }
      }
    ]
  },
4.2.6前端-页面
<template>
  <div class="app-container">
    <el-card class="operate-container" shadow="never">
      <el-form :inline="true" class="demo-form-inline">
        <el-form-item>
          <el-input v-model="searchObj.outTradeNo" placeholder="订单号"/>
        </el-form-item>
        <el-form-item>
          <el-input v-model="searchObj.phone" placeholder="手机"/>
        </el-form-item>
        <el-form-item>
          <el-date-picker
            v-model="searchObj.createTimeBegin"
            type="date"
            placeholder="选择下单开始日期"
            value-format="yyyy-MM-dd" />
        </el-form-item>
        <el-form-item>
          <el-date-picker
            v-model="searchObj.createTimeEnd"
            type="date"
            placeholder="选择截止日期"
            value-format="yyyy-MM-dd" />
        </el-form-item>
        <el-form-item>
          <el-select v-model="searchObj.orderStatus" placeholder="订单状态" class="v-select patient-select">
            <el-option
              v-for="item in statusList"
              :key="item.status"
              :label="item.name"
              :value="item.status">
            </el-option>
          </el-select>
        </el-form-item>
        <el-button type="primary" icon="el-icon-search" @click="fetchData()">查询</el-button>
        <el-button type="default" @click="resetData()">清空</el-button>
      </el-form>
    </el-card>
    <!-- 列表 -->
    <el-table
      v-loading="listLoading"
      :data="list"
      border
      fit
      highlight-current-row>
      <el-table-column
        label="序号"
        width="60"
        align="center">
        <template slot-scope="scope">
          {{ (page - 1) * limit + scope.$index + 1 }}
        </template>
      </el-table-column>
      <el-table-column prop="outTradeNo" label="订单号" width="160"/>
      <el-table-column prop="courseName" label="课程名称" width="160">
        <template slot-scope="scope">
          {{ scope.row.param.courseName }}
        </template>
      </el-table-column>
      <el-table-column prop="finalAmount" label="订单金额" width="90"/>
      <el-table-column prop="nickName" label="下单用户" />
      <el-table-column prop="phone" label="用户手机" />
      <el-table-column prop="payTime" label="支付时间" width="156"/>
      <el-table-column prop="orderStatus" label="订单状态">
        <template slot-scope="scope">
          {{ scope.row.orderStatus == 0 ? '未支付' : '已支付' }}
        </template>
      </el-table-column>
      <el-table-column prop="createTime" label="下单时间" width="156"/>
    </el-table>
    <!-- 分页组件 -->
    <el-pagination
      :current-page="page"
      :total="total"
      :page-size="limit"
      :page-sizes="[5, 10, 20, 30, 40, 50, 100]"
      style="padding: 30px 0; text-align: center;"
      layout="sizes, prev, pager, next, jumper, ->, total, slot"
      @current-change="fetchData"
      @size-change="changeSize"
    />
  </div>
</template>
<script>
import orderInfoApi from '@/api/order/orderInfo'

export default {
  data() {
    return {
      listLoading: true, // 数据是否正在加载
      list: null, // banner列表
      total: 0, // 数据库中的总记录数
      page: 1, // 默认页码
      limit: 10, // 每页记录数
      searchObj: {}, // 查询表单对象
      statusList: [
        {
          'status': 0,
          'name': '未支付'
        },
        {
          'status': 1,
          'name': '已支付'
        }
      ]
    }
  },
  // 生命周期函数:内存准备完毕,页面尚未渲染
  created() {
    this.fetchData()
  },
  // 生命周期函数:内存准备完毕,页面渲染成功
  mounted() {
    console.log('list mounted......')
  },
  methods: {
    // 当页码发生改变的时候
    changeSize(size) {
      this.limit = size
      this.fetchData(1)
    },
    // 加载banner列表数据
    fetchData(page = 1) {
      // 异步获取远程数据(ajax)
      this.page = page
      orderInfoApi.getPageList(this.page, this.limit, this.searchObj).then(
        response => {
          this.list = response.data.records
          this.total = response.data.total
          // 数据加载并绑定成功
          this.listLoading = false
        }
      )
    },
    // 重置查询表单
    resetData() {
      console.log('重置查询表单')
      this.searchObj = {}
      this.fetchData()
    }
  }
}
</script>
4.2.7最终实现效果

5. 后台管理系统-营销管理模块
5.1环境准备
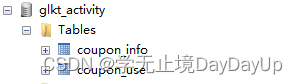
5.1.1创建数据库表
5.1.2创建营销模块
5.1.3生成订单相关实体类
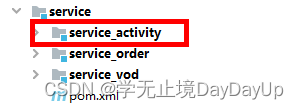
service模块下创建service_activity模块
5.1.4创建启动类
@SpringBootApplication
@EnableDiscoveryClient
public class ServiceActivityApplication {

    public static void main(String[] args) {
        SpringApplication.run(ServiceActivityApplication.class, args);
    }
}
5.1.5创建配置文件
# 服务端口
server.port=8303

# 服务名
spring.application.name=service-activity

# 环境设置:dev、test、prod
spring.profiles.active=dev

# mysql数据库连接
spring.datasource.driver-class-name=com.mysql.jdbc.Driver
spring.datasource.url=jdbc:mysql://localhost:3306/glkt_activity?characterEncoding=utf-8&useSSL=false
spring.datasource.username=root
spring.datasource.password=123456

#返回json的全局时间格式
spring.jackson.date-format=yyyy-MM-dd HH:mm:ss
spring.jackson.time-zone=GMT+8

#mybatis日志
mybatis-plus.configuration.log-impl=org.apache.ibatis.logging.stdout.StdOutImpl

mybatis-plus.mapper-locations=classpath:com/jq/activity/mapper/xml/*.xml

# nacos服务地址
spring.cloud.nacos.discovery.server-addr=127.0.0.1:8848
5.1.6创建配置类
@Configuration
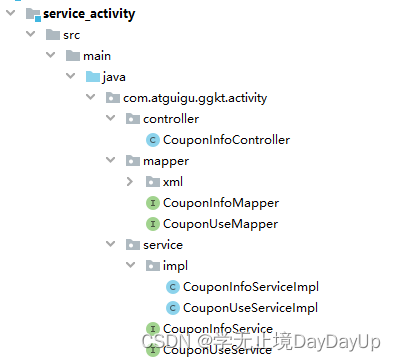
@MapperScan("com.atguigu.ggkt.activity.mapper")
public class ActivityConfig {
/**
* 分页插件
*/
@Bean
public PaginationInterceptor paginationInterceptor() {
return new PaginationInterceptor();
}
}
5.2开发优惠券相关接口
5.2.1编写CouponInfoController
@RestController
@RequestMapping("/admin/activity/couponInfo")
public class CouponInfoController {

    @Autowired
    private CouponInfoService couponInfoService;

    @ApiOperation(value = "获取分页列表")
    @GetMapping("{page}/{limit}")
    public Result index(
            @ApiParam(name = "page", value = "当前页码", required = true)
            @PathVariable Long page,
            @ApiParam(name = "limit", value = "每页记录数", required = true)
            @PathVariable Long limit) {
        Page<CouponInfo> pageParam = new Page<>(page, limit);
        IPage<CouponInfo> pageModel = couponInfoService.page(pageParam);
        return Result.ok(pageModel);
    }

    @ApiOperation(value = "获取优惠券")
    @GetMapping("get/{id}")
    public Result get(@PathVariable String id) {
        CouponInfo couponInfo = couponInfoService.getById(id);
        return Result.ok(couponInfo);
    }

    @ApiOperation(value = "新增优惠券")
    @PostMapping("save")
    public Result save(@RequestBody CouponInfo couponInfo) {
        couponInfoService.save(couponInfo);
        return Result.ok();
    }

    @ApiOperation(value = "修改优惠券")
    @PutMapping("update")
    public Result updateById(@RequestBody CouponInfo couponInfo) {
        couponInfoService.updateById(couponInfo);
        return Result.ok();
    }

    @ApiOperation(value = "删除优惠券")
    @DeleteMapping("remove/{id}")
    public Result remove(@PathVariable String id) {
        couponInfoService.removeById(id);
        return Result.ok();
    }

    @ApiOperation(value="根据id列表删除优惠券")
    @DeleteMapping("batchRemove")
    public Result batchRemove(@RequestBody List<String> idList){
        couponInfoService.removeByIds(idList);
        return Result.ok();
    }

    @ApiOperation(value = "获取分页列表")
    @GetMapping("couponUse/{page}/{limit}")
    public Result index(
            @ApiParam(name = "page", value = "当前页码", required = true)
            @PathVariable Long page,

            @ApiParam(name = "limit", value = "每页记录数", required = true)
            @PathVariable Long limit,
            @ApiParam(name = "couponUseVo", value = "查询对象", required = false)
                    CouponUseQueryVo couponUseQueryVo) {
        Page<CouponUse> pageParam = new Page<>(page, limit);
        IPage<CouponUse> pageModel = couponInfoService.selectCouponUsePage(pageParam, couponUseQueryVo);
        return Result.ok(pageModel);
    }
}
5.2.2编写Service
public interface CouponInfoService extends IService<CouponInfo> {
    //获取已使用优惠券列表
    IPage<CouponUse> selectCouponUsePage(Page<CouponUse> pageParam, CouponUseQueryVo couponUseQueryVo);
}
5.2.3ServiceImpl
6 .优惠券列表接口
6.1编写获取用户信息接口
6.1.1创建service_user模块

6.1.2生成相关代码
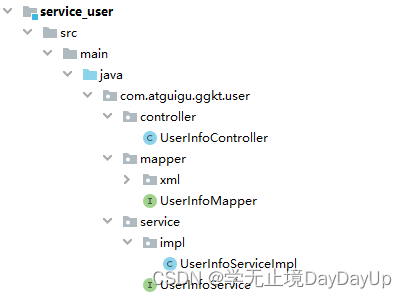
6.1.3创建启动类
@SpringBootApplication
@EnableDiscoveryClient
@MapperScan("com.atguigu.ggkt.user.mapper")
public class ServiceUserApplication {

    public static void main(String[] args) {
        SpringApplication.run(ServiceUserApplication.class, args);
    }

}
6.1.4创建配置文件
# 服务端口
server.port=8304
# 服务名
spring.application.name=service-user

# 环境设置:dev、test、prod
spring.profiles.active=dev

# mysql数据库连接
spring.datasource.driver-class-name=com.mysql.jdbc.Driver
spring.datasource.url=jdbc:mysql://localhost:3306/glkt_user?characterEncoding=utf-8&useSSL=false
spring.datasource.username=root
spring.datasource.password=root

#返回json的全局时间格式
spring.jackson.date-format=yyyy-MM-dd HH:mm:ss
spring.jackson.time-zone=GMT+8

#mybatis日志
mybatis-plus.configuration.log-impl=org.apache.ibatis.logging.stdout.StdOutImpl

# nacos服务地址
spring.cloud.nacos.discovery.server-addr=127.0.0.1:8848
6.1.5编写UserInfocontroller
实现根据用户id获取用户信息接口
@RestController
@RequestMapping("/admin/user/userInfo")
public class UserInfoController {

    @Autowired
    private UserInfoService userService;

    @ApiOperation(value = "获取")
    @GetMapping("inner/getById/{id}")
    public UserInfo getById(@PathVariable Long id) {
        return userService.getById(id);
    }
}
6.1.6配置网关
在网关配置文件配置路径
#service-user模块配置
#设置路由id
spring.cloud.gateway.routes[3].id=service-user
#设置路由的uri
spring.cloud.gateway.routes[3].uri=lb://service-user
#设置路由断言,代理servicerId为auth-service的/auth/路径
spring.cloud.gateway.routes[3].predicates= Path=/*/user/**
6.2创建模块定义远程接口.
6.2.1创建模块
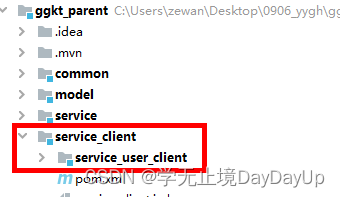
在ggkt_parent -> service_client -> service_user_client
6.2.2service_client引入依赖
<dependencies>
    <dependency>
        <groupId>com.atguigu</groupId>
        <artifactId>service_util</artifactId>
        <version>0.0.1-SNAPSHOT</version>
        <scope>provided </scope>
    </dependency>

    <dependency>
        <groupId>com.atguigu</groupId>
        <artifactId>model</artifactId>
        <version>0.0.1-SNAPSHOT</version>
        <scope>provided </scope>
    </dependency>

    <dependency>
        <groupId>org.springframework.boot</groupId>
        <artifactId>spring-boot-starter-web</artifactId>
        <scope>provided </scope>
    </dependency>

    <!-- 服务调用feign -->
    <dependency>
        <groupId>org.springframework.cloud</groupId>
        <artifactId>spring-cloud-starter-openfeign</artifactId>
        <scope>provided </scope>
    </dependency>
</dependencies>
6.2.3定义远程调用的接口
@FeignClient(value = "service-user")
public interface UserInfoFeignClient {

    @GetMapping("/admin/user/userInfo/inner/getById/{id}")
    UserInfo getById(@PathVariable Long id);

}
6.3编写Service实现方法
6.3.1service_activity引入依赖
<dependencies>
    <dependency>
        <groupId>com.atguigu</groupId>
        <artifactId>service_user_client</artifactId>
        <version>0.0.1-SNAPSHOT</version>
    </dependency>
</dependencies>
6.3.2service_activity添加注解
package com.jq.activity;

import org.springframework.boot.SpringApplication;
import org.springframework.boot.autoconfigure.SpringBootApplication;
import org.springframework.cloud.client.discovery.EnableDiscoveryClient;
import org.springframework.cloud.openfeign.EnableFeignClients;
import org.springframework.cloud.openfeign.FeignClient;

@SpringBootApplication
@EnableDiscoveryClient
@EnableFeignClients(basePackages = "com.jq")
public class ServiceActivityApplication {
    public static void main(String[] args) {
        SpringApplication.run(ServiceActivityApplication.class, args);
    }
}
6.3.3CouponInfoServiceImpl实现方法
远程调用,根据用户id获取用户信息
package com.jq.activity.service.impl;


import com.baomidou.mybatisplus.core.conditions.query.QueryWrapper;
import com.baomidou.mybatisplus.core.metadata.IPage;
import com.baomidou.mybatisplus.extension.plugins.pagination.Page;
import com.jq.activity.mapper.CouponInfoMapper;
import com.jq.activity.service.CouponInfoService;
import com.baomidou.mybatisplus.extension.service.impl.ServiceImpl;
import com.jq.activity.service.CouponUseService;
import com.jq.client.user.UserInfoFeignClient;
import com.jq.model.activity.CouponInfo;
import com.jq.model.activity.CouponUse;
import com.jq.model.user.UserInfo;
import com.jq.vo.activity.CouponUseQueryVo;
import org.springframework.beans.factory.annotation.Autowired;
import org.springframework.stereotype.Service;
import org.springframework.util.StringUtils;

import java.util.List;

/**
 * <p>
 * 优惠券信息 服务实现类
 * </p>
 *
 * @author CJQ
 * @since 2022-09-01
 */
@Service
public class CouponInfoServiceImpl extends ServiceImpl<CouponInfoMapper, CouponInfo> implements CouponInfoService {
    //获取已经使用的优惠券列表(条件查询分页)

    @Autowired
    private CouponUseService couponUseService;
    @Autowired
    private UserInfoFeignClient userInfoFeignClient;
    @Override
    public IPage<CouponUse> selectCouponUsePage(Page<CouponUse> pageParam, CouponUseQueryVo couponUseQueryVo) {
        // 获取条件值
        Long couponId = couponUseQueryVo.getCouponId();
        String couponStatus = couponUseQueryVo.getCouponStatus();
        String getTimeBegin = couponUseQueryVo.getGetTimeBegin();
        String getTimeEnd = couponUseQueryVo.getGetTimeEnd();

        // 封装条件
        QueryWrapper<CouponUse> wrapper = new QueryWrapper<>();
        if(!StringUtils.isEmpty(couponId)) {
            wrapper.eq("coupon_id",couponId);
        }
        if(!StringUtils.isEmpty(couponStatus)) {
            wrapper.eq("coupon_status",couponStatus);
        }
        if(!StringUtils.isEmpty(getTimeBegin)) {
            wrapper.ge("get_time",getTimeBegin);
        }
        if(!StringUtils.isEmpty(getTimeEnd)) {
            wrapper.le("get_time",getTimeEnd);
        }
        //调用方法查询
        Page<CouponUse> pageModel = couponUseService.page(pageParam, wrapper);
        //封装用户昵称和手机号
        List<CouponUse> couponUseList = pageModel.getRecords();
        //遍历
        couponUseList.stream().forEach(item->{
            this.getUserInfoById(item);
        });
        return pageModel;
    }
    //根据用户id,通过远程调用得到用户信息
    private CouponUse getUserInfoById(CouponUse couponUse) {
        //获取用户id
        Long userId = couponUse.getUserId();
        if (!StringUtils.isEmpty(userId)){
            //远程调用
            UserInfo userInfo = userInfoFeignClient.getById(userId);
            if (userInfo!=null){
                couponUse.getParam().put("NickName",userInfo.getNickName());
                couponUse.getParam().put("phone",userInfo.getPhone());
            }
        }
        return couponUse;
    }
}
6.4配置网关
service_gateway配置文件
#service-activity模块配置
#设置路由id
spring.cloud.gateway.routes[2].id=service-activity
#设置路由的uri
spring.cloud.gateway.routes[2].uri=lb://service-activity
#设置路由断言,代理servicerId为auth-service的/auth/路径
spring.cloud.gateway.routes[2].predicates= Path=/*/activity/**
6.5整合优惠券前端
6.5.1定义接口
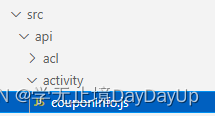
创建api -> activity -> couponInfo.js
import request from '@/utils/request'

const api_name = '/admin/activity/couponInfo'

export default {

  getPageList(page, limit) {
    return request({
      url: `${api_name}/${page}/${limit}`,
      method: 'get'
    })
  },
  getById(id) {
    return request({
      url: `${api_name}/get/${id}`,
      method: 'get'
    })
  },

  save(role) {
    return request({
      url: `${api_name}/save`,
      method: 'post',
      data: role
    })
  },

  updateById(role) {
    return request({
      url: `${api_name}/update`,
      method: 'put',
      data: role
    })
  },
  removeById(id) {
    return request({
      url: `${api_name}/remove/${id}`,
      method: 'delete'
    })
  },
  removeRows(idList) {
    return request({
      url: `${api_name}/batchRemove`,
      method: 'delete',
      data: idList
    })
  },

  getPageCouponUseList(page, limit, searchObj) {
    return request({
      url: `${api_name}/couponUse/${page}/${limit}`,
      method: 'get',
      params: searchObj
    })
  }
}
6.5.创建路由
router -> index.js定义路由
{
  path: '/activity',
  component: Layout,
  redirect: '/couponInfo/list',
  name: 'Activity',
  meta: { title: '营销活动管理', icon: 'el-icon-football' },
  alwaysShow: true,
  children: [
    {
      path: 'couponInfo/list',
      name: 'CouponInfo',
      component: () => import('@/views/activity/couponInfo/list'),
      meta: { title: '优惠券列表' }
    },
    {
      path: 'couponInfo/add',
      name: 'CouponInfoAdd',
      component: () => import('@/views/activity/couponInfo/form'),
      meta: { title: '添加' },
      hidden: true
    },
    {
      path: 'couponInfo/edit/:id',
      name: 'CouponInfoEdit',
      component: () => import('@/views/activity/couponInfo/form'),
      meta: { title: '编辑', noCache: true },
      hidden: true
    },
    {
      path: 'couponInfo/show/:id',
      name: 'CouponInfoShow',
      component: () => import('@/views/activity/couponInfo/show'),
      meta: { title: '详情', noCache: true },
      hidden: true
    }
  ]
},
6.5.3创建vue页面
创建views -> activity-> couponInfo-> 页面
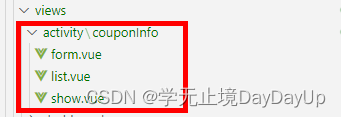
list.vue
<template>
  <div class="app-container">

    <!-- 工具条 -->
    <el-card class="operate-container" shadow="never">
      <i class="el-icon-tickets" style="margin-top: 5px"></i>
      <span style="margin-top: 5px">数据列表</span>
      <el-button class="btn-add" size="mini" @click="add()">添加</el-button>
    </el-card>

    <!-- banner列表 -->
    <el-table
      v-loading="listLoading"
      :data="list"
      element-loading-text="数据正在加载......"
      border
      fit
      highlight-current-row>

      <el-table-column
        label="序号"
        width="70"
        align="center">
        <template slot-scope="scope">
          {{ (page - 1) * limit + scope.$index + 1 }}
        </template>
      </el-table-column>

      <el-table-column prop="couponName" label="购物券名称" />
      <el-table-column prop="couponType" label="购物券类型">
        <template slot-scope="scope">
          {{ scope.row.couponType == 'REGISTER' ? '注册卷' : '推荐赠送卷' }}
        </template>
      </el-table-column>
      <el-table-column label="规则">
        <template slot-scope="scope">
          {{ '现金卷:' + scope.row.amount + '元' }}
        </template>
      </el-table-column>
      <el-table-column label="使用范围 ">
          所有商品
      </el-table-column>
      <el-table-column prop="publishCount" label="发行数量" />
      <el-table-column prop="expireTime" label="过期时间" />
      <el-table-column prop="createTime" label="创建时间" />
      <el-table-column label="操作" width="150" align="center">
        <template slot-scope="scope">
          <router-link :to="'/activity/couponInfo/edit/'+scope.row.id">
            <el-button size="mini" type="text" >修改</el-button>
          </router-link>
          <el-button size="mini" type="text" @click="removeDataById(scope.row.id)">删除</el-button>
          <router-link :to="'/activity/couponInfo/show/'+scope.row.id">
            <el-button size="mini" type="text" >详情</el-button>
          </router-link>
        </template>
      </el-table-column>
    </el-table>

    <!-- 分页组件 -->
    <el-pagination
      :current-page="page"
      :total="total"
      :page-size="limit"
      :page-sizes="[5, 10, 20, 30, 40, 50, 100]"
      style="padding: 30px 0; text-align: center;"
      layout="sizes, prev, pager, next, jumper, ->, total, slot"
      @current-change="fetchData"
      @size-change="changeSize"
    />
  </div>
</template>

<script>
import api from '@/api/activity/couponInfo'

export default {
  data() {
    return {
      listLoading: true, // 数据是否正在加载
      list: null, // banner列表
      total: 0, // 数据库中的总记录数
      page: 1, // 默认页码
      limit: 10, // 每页记录数
      searchObj: {}, // 查询表单对象
      multipleSelection: [] // 批量选择中选择的记录列表
    }
  },

  // 生命周期函数:内存准备完毕,页面尚未渲染
  created() {
    console.log('list created......')
    this.fetchData()
  },

  // 生命周期函数:内存准备完毕,页面渲染成功
  mounted() {
    console.log('list mounted......')
  },

  methods: {

    // 当页码发生改变的时候
    changeSize(size) {
      console.log(size)
      this.limit = size
      this.fetchData(1)
    },

    add(){
      this.$router.push({ path: '/activity/couponInfo/add' })
    },

    // 加载banner列表数据
    fetchData(page = 1) {
      console.log('翻页。。。' + page)
      // 异步获取远程数据(ajax)
      this.page = page

      api.getPageList(this.page, this.limit, this.searchObj).then(
        response => {
          this.list = response.data.records
          this.total = response.data.total

          // 数据加载并绑定成功
          this.listLoading = false
        }
      )
    },

    // 重置查询表单
    resetData() {
      console.log('重置查询表单')
      this.searchObj = {}
      this.fetchData()
    },

    // 根据id删除数据
    removeDataById(id) {
      // debugger
      this.$confirm('此操作将永久删除该记录, 是否继续?', '提示', {
        confirmButtonText: '确定',
        cancelButtonText: '取消',
        type: 'warning'
      }).then(() => { // promise
        // 点击确定,远程调用ajax
        return api.removeById(id)
      }).then((response) => {
        this.fetchData(this.page)
        if (response.code) {
          this.$message({
            type: 'success',
            message: '删除成功!'
          })
        }
      }).catch(() => {
        this.$message({
          type: 'info',
          message: '已取消删除'
        })
      })
    }
  }
}
</script>
form.vue
<template>
  <div class="app-container">
    <el-form label-width="120px">

      <el-form-item label="优惠券名称">
        <el-input v-model="couponInfo.couponName"/>
      </el-form-item>
      <el-form-item label="优惠券类型">
        <el-radio-group v-model="couponInfo.couponType">
          <el-radio label="1">注册卷</el-radio>
          <el-radio label="2">推荐购买卷</el-radio>
        </el-radio-group>
      </el-form-item>

      <el-form-item label="发行数量">
        <el-input v-model="couponInfo.publishCount"/>
      </el-form-item>
      <el-form-item label="领取时间">
        <el-date-picker
          v-model="couponInfo.startTime"
          type="date"
          placeholder="选择开始日期"
          value-format="yyyy-MM-dd" />
        至
        <el-date-picker
          v-model="couponInfo.endTime"
          type="date"
          placeholder="选择开始日期"
          value-format="yyyy-MM-dd" />
      </el-form-item>
      <el-form-item label="过期时间">
        <el-date-picker
          v-model="couponInfo.expireTime"
          type="datetime"
          placeholder="选择开始日期"
          value-format="yyyy-MM-dd HH:mm:ss" />
      </el-form-item>
      <el-form-item label="直播详情">
        <el-input v-model="couponInfo.ruleDesc" type="textarea" rows="5"/>
      </el-form-item>
      <el-form-item>
        <el-button type="primary" @click="saveOrUpdate">保存</el-button>
        <el-button @click="back">返回</el-button>
      </el-form-item>
    </el-form>
  </div>
</template>

<script>

import api from '@/api/activity/couponInfo'

const defaultForm = {
  id: '',
  couponType: '1',
  couponName: '',
  amount: '0',
  conditionAmount: '0',
  startTime: '',
  endTime: '',
  rangeType: '1',
  ruleDesc: '',
  publishCount: '',
  perLimit: '1',
  useCount: '0',
  receiveCount: '',
  expireTime: '',
  publishStatus: ''
}

export default {
  data() {
    return {
      couponInfo: defaultForm,
      saveBtnDisabled: false,

      keyword: '',
      skuInfoList: []
    }
  },

  // 监听器
  watch: {
    $route(to, from) {
      console.log('路由变化......')
      console.log(to)
      console.log(from)
      this.init()
    }
  },

  // 生命周期方法(在路由切换,组件不变的情况下不会被调用)
  created() {
    console.log('form created ......')
    this.init()
  },

  methods: {

    // 表单初始化
    init() {
      // debugger
      if (this.$route.params && this.$route.params.id) {
        const id = this.$route.params.id
        this.fetchDataById(id)
      } else {
        // 对象拓展运算符:拷贝对象,而不是赋值对象的引用
        this.couponInfo = { ...defaultForm }
      }
    },

    saveOrUpdate() {
      this.saveBtnDisabled = true // 防止表单重复提交
      if (!this.couponInfo.id) {
        this.saveData()
      } else {
        this.updateData()
      }
    },

    // 新增
    saveData() {
      api.save(this.couponInfo).then(response => {
        // debugger
        if (response.code) {
          this.$message({
            type: 'success',
            message: response.message
          })
          this.$router.push({ path: '/activity/couponInfo/list' })
        }
      })
    },

    // 根据id更新记录
    updateData() {
      api.updateById(this.couponInfo).then(response => {
        debugger
        if (response.code) {
          this.$message({
            type: 'success',
            message: response.message
          })
          this.$router.push({ path: '/activity/couponInfo/list' })
        }
      })
    },

    back() {
      this.$router.push({ path: '/activity/couponInfo/list' })
    },

    // 根据id查询记录
    fetchDataById(id) {
      api.getById(id).then(response => {
        // debugger
        this.couponInfo = response.data
      })
    }
  }
}
</script>
show.vue
<template>
<div class="app-container">
<h4>优惠券信息</h4>
<table class="table table-striped table-condenseda table-bordered" width="100%">
<tbody>
<tr>
<th width="15%">优惠券名称</th>
<td width="35%"><b style="font-size: 14px">{{ couponInfo.couponName }}</b></td>
<th width="15%">优惠券类型</th>
<td width="35%">
{{ couponInfo.couponType == 'REGISTER' ? '注册卷' : '推荐赠送卷' }}
</td>
</tr>
<tr>
<th>发行数量</th>
<td>{{ couponInfo.publishCount }}</td>
<th>每人限领次数</th>
<td>{{ couponInfo.perLimit }}</td>
</tr>
<tr>
<th>领取数量</th>
<td>{{ couponInfo.receiveCount }}</td>
<th>使用数量</th>
<td>{{ couponInfo.useCount }}</td>
</tr>
<tr>
<th>领取时间</th>
<td>{{ couponInfo.startTime }}至{{ couponInfo.endTime }}</td>
<th>过期时间</th>
<td>{{ couponInfo.expireTime }}</td>
</tr>
<tr>
<th>规则描述</th>
<td colspan="3">{{ couponInfo.ruleDesc }}</td>
</tr>
</tbody>
</table>
<h4>
优惠券发放列表
</h4>
<el-table
v-loading="listLoading"
:data="list"
stripe
border
style="width: 100%;margin-top: 10px;">
<el-table-column
label="序号"
width="70"
align="center">
<template slot-scope="scope">
{{ (page - 1) * limit + scope.$index + 1 }}
</template>
</el-table-column>
<el-table-column prop="param.nickName" label="用户昵称" />
<el-table-column prop="param.phone" label="手机号" />
<el-table-column label="使用状态">
<template slot-scope="scope">
{{ scope.row.couponStatus == 'NOT_USED' ? '未使用' : '已使用' }}
</template>
</el-table-column>
<el-table-column prop="getTime" label="获取时间" />
<el-table-column prop="usingTime" label="使用时间" />
<el-table-column prop="usedTime" label="支付时间" />
<el-table-column prop="expireTime" label="过期时间" />
</el-table>
<!-- 分页组件 -->
<el-pagination
:current-page="page"
:total="total"
:page-size="limit"
:page-sizes="[5, 10, 20, 30, 40, 50, 100]"
style="padding: 30px 0; text-align: center;"
layout="sizes, prev, pager, next, jumper, ->, total, slot"
@current-change="fetchData"
@size-change="changeSize"
/>
<div style="margin-top: 15px;">
<el-form label-width="0px">
<el-form-item>
<el-button @click="back">返回</el-button>
</el-form-item>
</el-form>
</div>
</div>
</template>
<script>
import api from '@/api/activity/couponInfo'
export default {
data() {
return {
listLoading: false, // 数据是否正在加载
couponId: null,
couponInfo: {},
list: null, // banner列表
total: 0, // 数据库中的总记录数
page: 1, // 默认页码
limit: 10, // 每页记录数
searchObj: {} // 查询表单对象
}
},
// 监听器
watch: {
$route(to, from) {
console.log('路由变化......')
console.log(to)
console.log(from)
this.init()
}
},
// 生命周期方法(在路由切换,组件不变的情况下不会被调用)
created() {
console.log('form created ......')
this.couponId = this.$route.params.id
// 获取优惠券信息
this.fetchDataById()
this.fetchData()
},
methods: {
// 根据id查询记录
fetchDataById() {
api.getById(this.couponId).then(response => {
//
this.couponInfo = response.data
})
},
// 当页码发生改变的时候
changeSize(size) {
console.log(size)
this.limit = size
this.fetchData(1)
},
// 加载banner列表数据
fetchData(page = 1) {
console.log('翻页。。。' + page)
// 异步获取远程数据(ajax)
this.page = page
this.searchObj.couponId = this.couponId
api.getPageCouponUseList(this.page, this.limit, this.searchObj).then(
response => {
this.list = response.data.records
this.total = response.data.total
// 数据加载并绑定成功
this.listLoading = false
}
)
},
back() {
this.$router.push({ path: '/activity/couponInfo/list' })
}
}
}
</script>
<style>
.app-container h4 {
color: #606266;
}
</style>