“舔狗机器人”
1、效果展示
通过网络请求方式实现的低级舔狗机器人
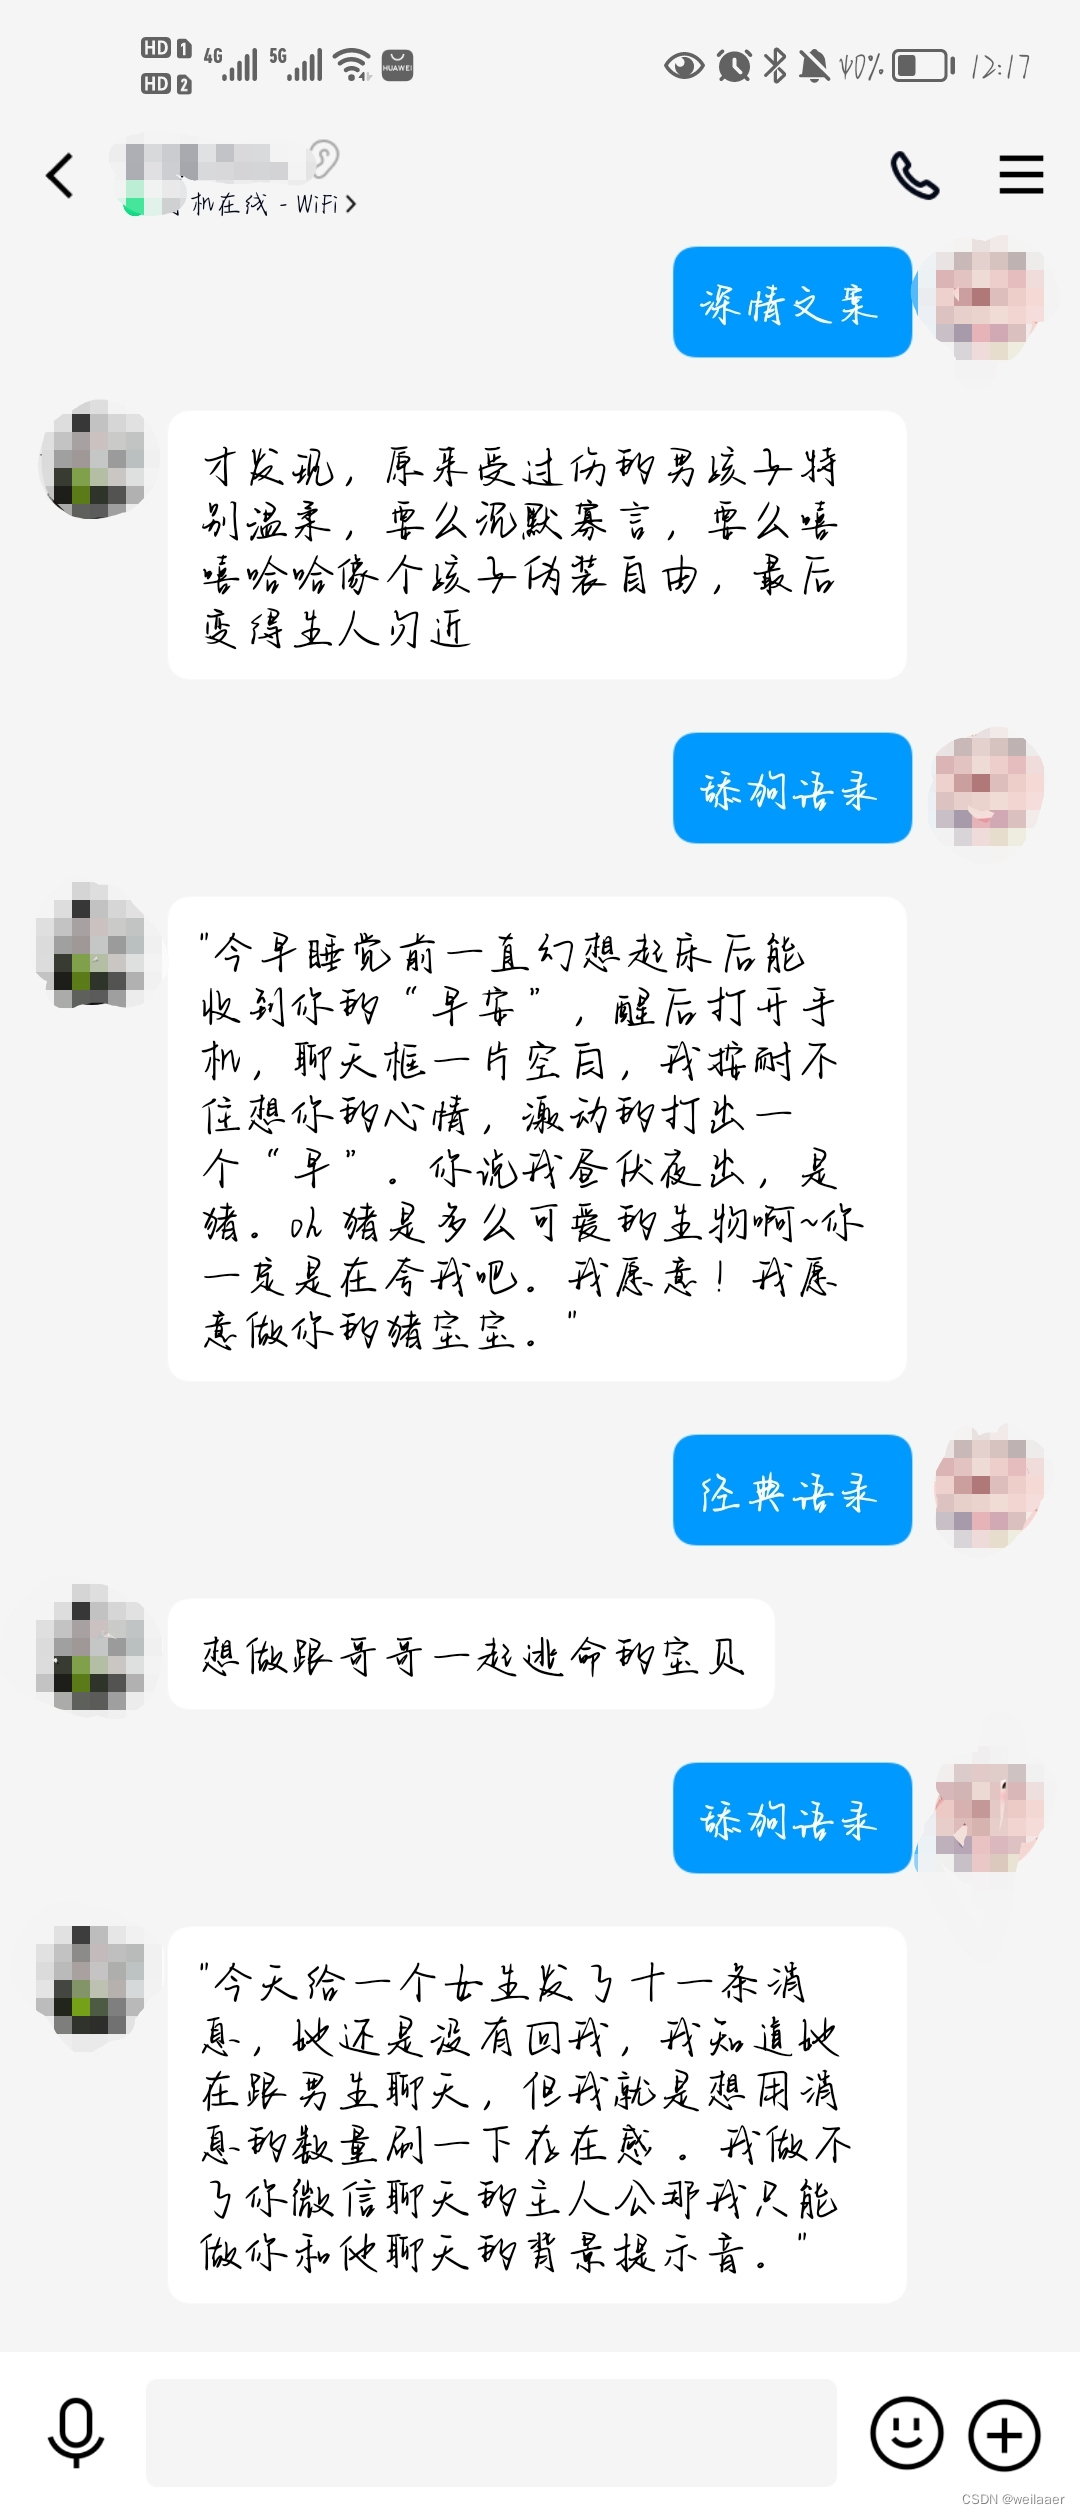
我这里采用自己编写后端代码和直接调用开放地址实现。
2、封装HTTP类用于发送http请求
package org.example.mirai.plugin;


import java.io.BufferedReader;
import java.io.IOException;
import java.io.InputStreamReader;
import java.io.OutputStream;
import java.net.HttpURLConnection;
import java.net.MalformedURLException;
import java.net.URL;
import java.util.HashMap;
import java.util.List;
import java.util.Map;

public class HTTP{
    public URL u;
    public HttpURLConnection h;
    public Exception e;
    public HashMap<String,String> header;
    HTTP (String url) {
        try {
            this.u=new URL(url);
            try {
                h= (HttpURLConnection) u.openConnection();
                h.setInstanceFollowRedirects(false);
            } catch (IOException ex) {
                this.e=e;
            }

        } catch (MalformedURLException ex) {
            this.e=e;
        }

    }
    public String get() {
        String res="";
        try {
            h.setRequestMethod("GET");
            BufferedReader in=new BufferedReader(new InputStreamReader(h.getInputStream(),"UTF-8"));
            String line;
            while((line=in.readLine())!=null){
                res+=line;
            }
            in.close();
            return res;
        } catch (Exception e) {
            this.e=e;
            return "";
        }
    }
    public boolean setHeader(HashMap<String,String> header){
        if (header!=null ){
            for (String k : header.keySet()) {
                h.setRequestProperty(k, header.get(k));
            }
            return true;
        }
        return false;
    }

    public String post(String data){
        String res="";
        try {
            h.setRequestMethod("POST");
            h.setDoInput(true);
            h.setDoOutput(true);
            OutputStream ou= h.getOutputStream();
            ou.write(data.getBytes());
            BufferedReader in=new BufferedReader(new InputStreamReader(h.getInputStream(),"UTF-8"));
            String line;
            while((line=in.readLine())!=null){
                res+=line;
            }
            in.close();
            return res;
        } catch (Exception e) {
            this.e=e;
            return "";
        }

    }
    public Map<String, List<String>> getResponseHeader(){
        return h.getHeaderFields();
    }

    public String getCookie(){
        return h.getHeaderField("Set-Cookie");
    }
    public int getCode(){
        try {
            return this.h.getResponseCode();
        } catch (IOException ex) {
            this.e=ex;
            return -1;
        }
    }

}
3、调用开放地址
https://api.xygeng.cn/one
通过浏览器直接访问以上地址会直接返回一个JSON格式的数据

我们即可对该数据进行处理通过机器人发送,详情请见之前的文章
如何搭建自己的qq机器人(mirai)- 项目搭建
如何搭建自己的qq机器人(mirai)- 事件监听
public static void friendMsg(FriendMessageEvent f) {
	String msg=f.getMessage().serializeToMiraiCode();
	if(msg.equals("经典语录")) {
            HTTP http = new HTTP("https://api.xygeng.cn/one");
            String content = JSON.parseObject(http.get()).getJSONObject("data").getString("content");
            f.getSender().sendMessage(content);
    }
}
该网址返回的为JSON字符串格式,后端操控JSON数据需要先引入相关JSON包,我这里使用的为阿里的fastjson
4、自己编写后端
(1)准备好数据库
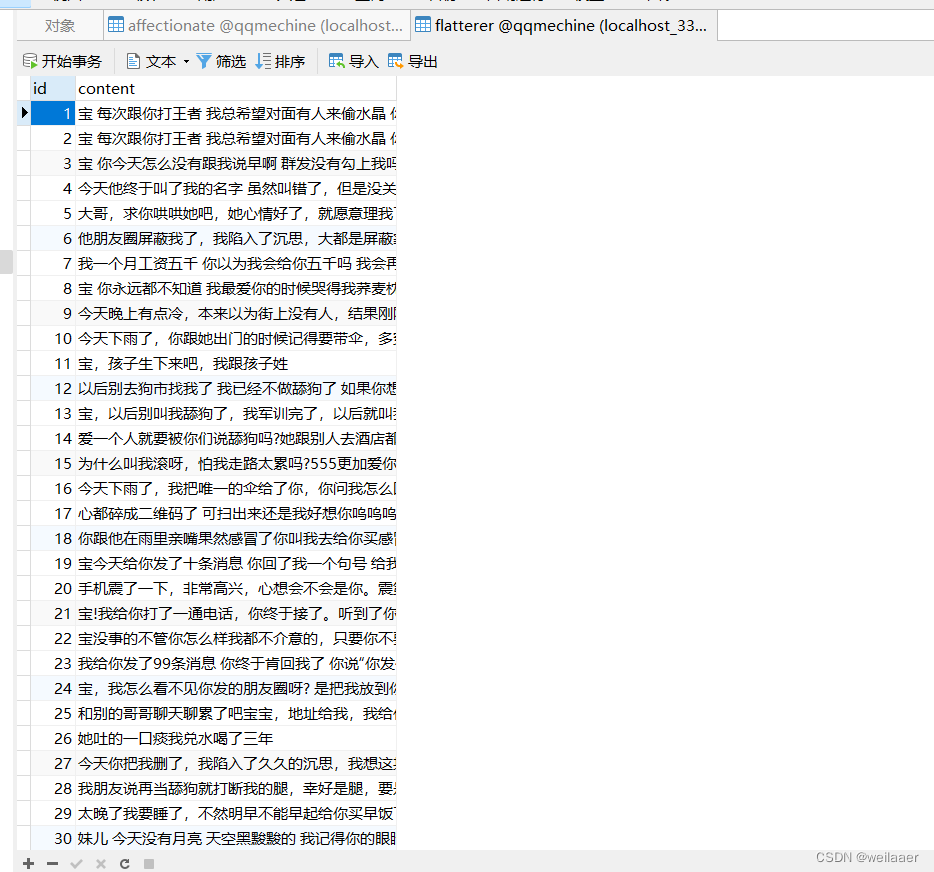
”舔狗语录的“数据量为983条,”深情文案“的为104条,如有需要麻烦点个关注私信我呀。
(2)后端代码编写
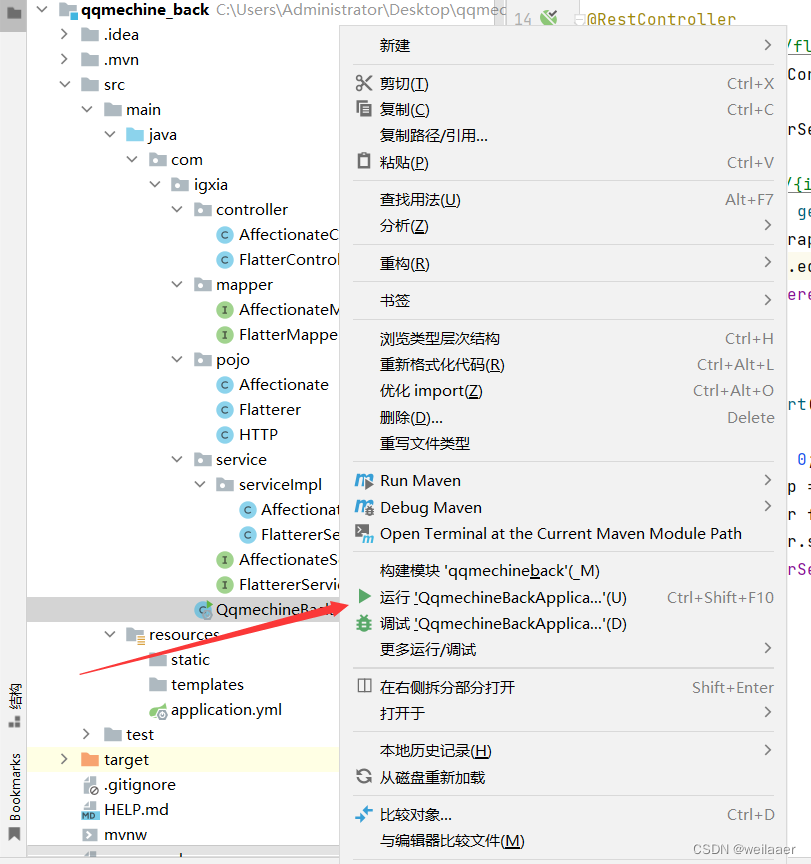
我这里采用的为springboot + mybatisplus编写的,项目结构如下
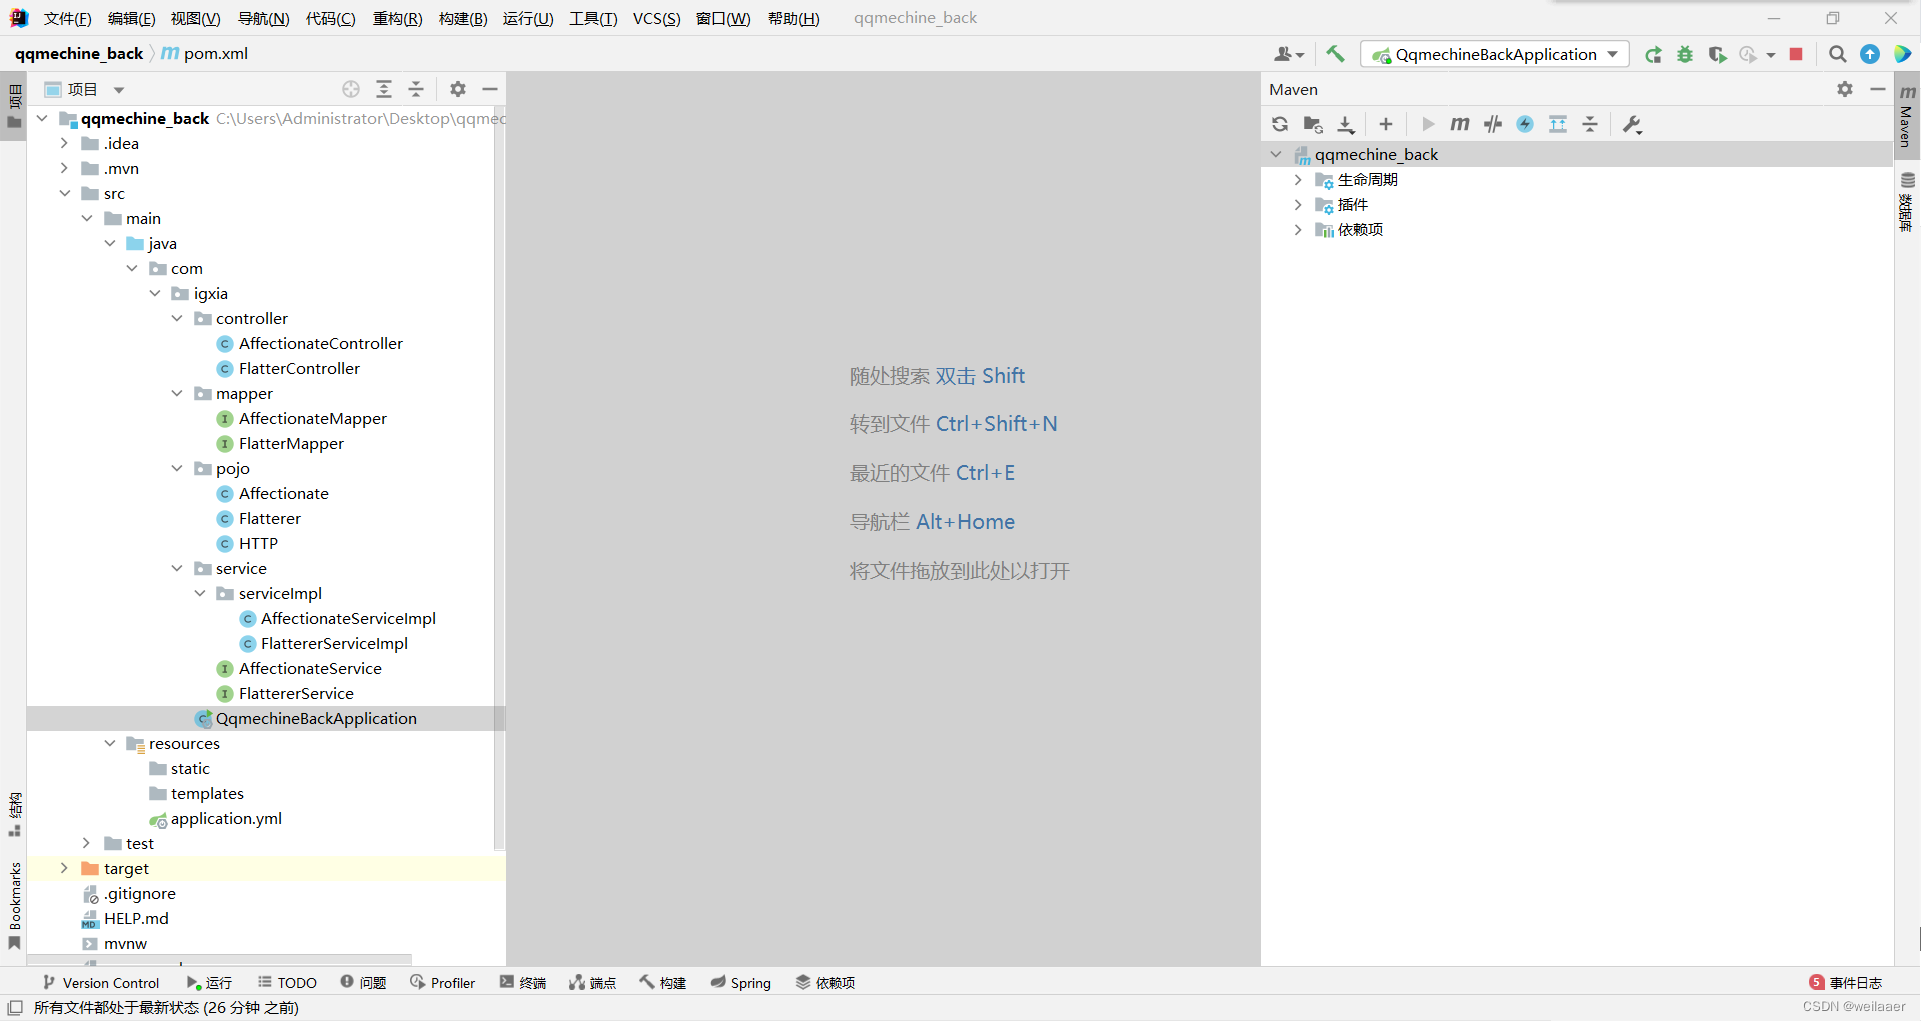
因为机器人运行是不占用端口的,这里后端就可以不用担心端口被占用了。
(3)机器人调用后端接口
因为我数据库里面id值只是采用了递增。所有就可以直接用范围随机数自动生成id来实现随机发送。
好友消息监听
public static void Qrun(FriendMessageEvent f){

        String msg=f.getMessage().serializeToMiraiCode();
        Random random = new Random();

        if(msg.equals("舔狗语录")) {
            int id = random.nextInt(983) + 1;
            System.out.println(id);
            HTTP http = new HTTP("http://localhost:8080/flatterer/" + id);
            String content = JSON.parseObject(http.get(), Flatterer.class).getContent();

            f.getSender().sendMessage(content);
//            f.getSender().sendMessage("1111");
        } else if(msg.equals("经典语录")) {
            HTTP http = new HTTP("https://api.xygeng.cn/one");
            String content = JSON.parseObject(http.get()).getJSONObject("data").getString("content");
            f.getSender().sendMessage(content);
        } else if(msg.equals("深情文案")) {
            int id = random.nextInt(103) + 1;
            HTTP http = new HTTP("http://localhost:8080/affectionate/" + id);
            String content = JSON.parseObject(http.get(), Affectionate.class).getContent();
            f.getSender().sendMessage(content);
        }
    }
群消息监听同理
public static void Grun(GroupMessageEvent g){
        String msg=g.getMessage().serializeToMiraiCode();
        if(msg.equals("舔狗语录")) {
            Random random = new Random();
            int id = random.nextInt(983) + 1;
            System.out.println(id);
            HTTP http = new HTTP("http://localhost:8080/flatterer/" + id);
            String content = JSON.parseObject(http.get(), Flatterer.class).getContent();

            g.getGroup().sendMessage(content);
        } else if(msg.equals("经典语录")) {
            HTTP http = new HTTP("https://api.xygeng.cn/one");
            String content = JSON.parseObject(http.get()).getJSONObject("data").getString("content");
            g.getGroup().sendMessage(content);
        } else if(msg.equals("深情文案")) {
            Random random = new Random();
            int id = random.nextInt(103) + 1;
            HTTP http = new HTTP("http://localhost:8080/affectionate/" + id);
            String content = JSON.parseObject(http.get(), Affectionate.class).getContent();
            g.getGroup().sendMessage(content);
        }
    }
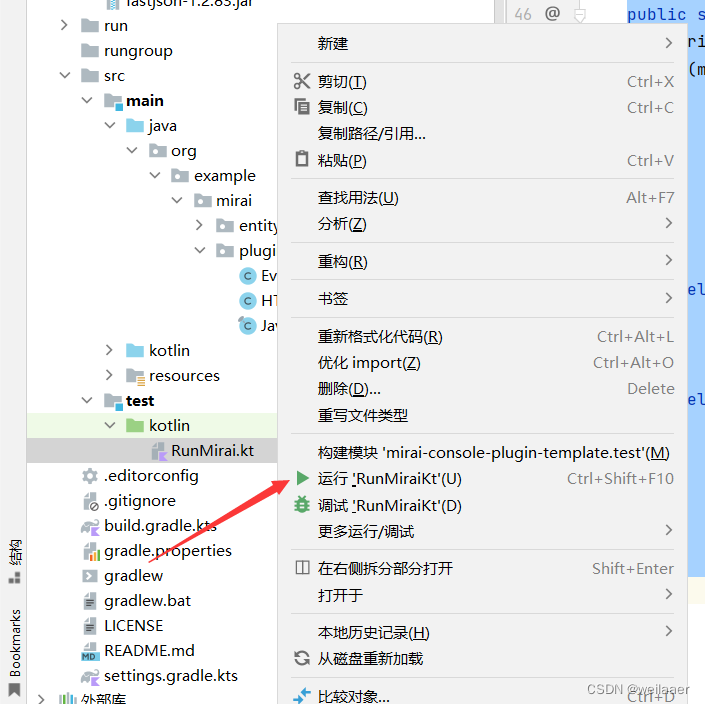
(4)运行
同时运行机器人和后端即可
如需要代码资料,麻烦点个小小的赞和关注然后私信我呀❤。