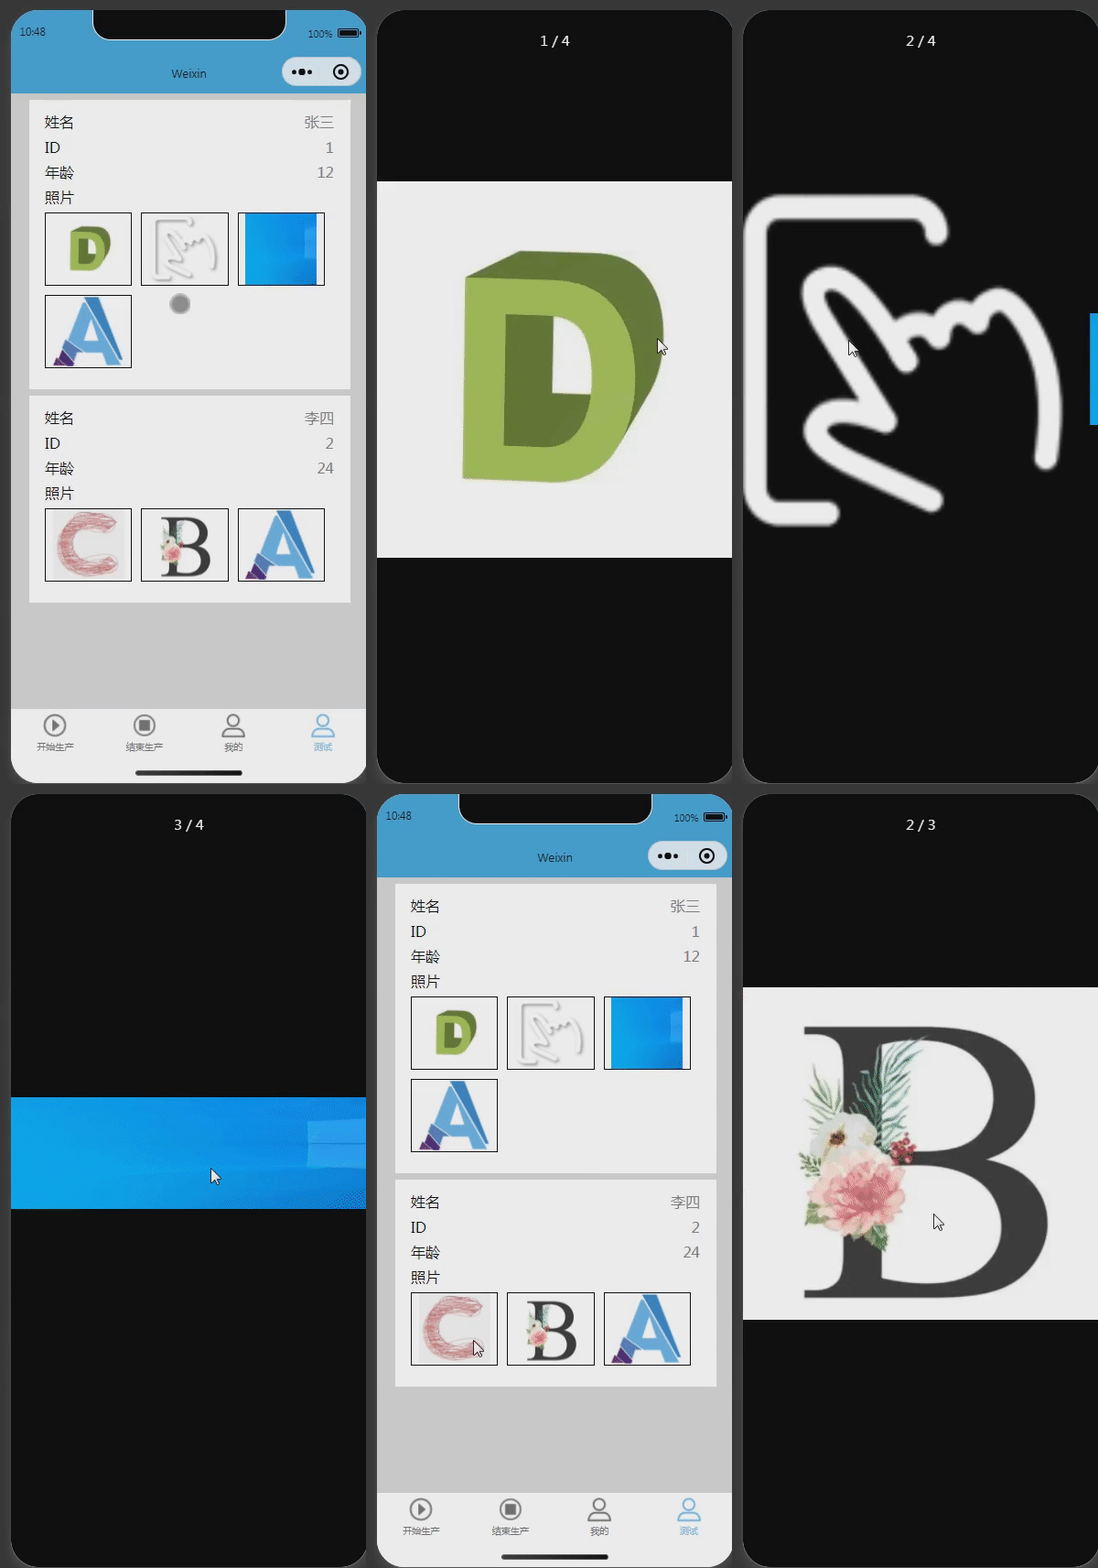
微信小程序:两层循环的练习,两层循环显示循环图片大图(大图显示、多层循环)
效果

代码分析
外层循环
外层循环的框架
<view wx:for="{{info}}" wx:key="index"></view>
wx:for="{{info}}":这里wx:for指令用于指定要遍历的数据源,即info数组。当遍历开始时,会依次将数组中的每个元素赋值给子项进行展示。
wx:key="index":在循环过程中,需要为每个子项指定一个唯一的标识,以便更高效地更新和渲染。这里,我们使用了index作为索引来标识子项。
子项引用
<view class="right">
{{item.name}}
</view>
引用子项通过item来进行,在没通过wx:for-item自定义子项名称时,子项默认为item
扩展:自定义子项名称wx:for-item,自定义索引名称wx:for-index(详见内层循环)
<view wx:for="{{info}}" wx:for-item="customItem" wx:key="index" wx:for-index="customIndex" class="item">
<text>{{customItem}}</text> <!-- 使用自定义子项名称 -->
<text>{{customIndex}}</text> <!-- 引用索引 -->
</view>
内层循环
外层循环的框架
内层循环中,循环的数据是外层循环的子项{{item.photo}},这里就需要设置子项名称和索引了,就不能使用默认的item和index了
<view wx:for="{{item.photo}}" wx:key="photoIndex" wx:for-item="photo" wx:for-index="photoIndex"></view>
wx:for="{{item.photo}}":这里使用了wx:for指令来遍历名为item.photo的数组。每次循环时,将数组中的一个元素赋值给名为photo的自定义子项。wx:key="photoIndex":使用wx:key指令来指定循环中每个子项的唯一标识符为photoIndex,通常会使用一个具有唯一性的属性值作为标识符。wx:for-item="photo":使用wx:for-item指令来指定自定义子项的名称为photo,这样在循环内部就可以通过{{photo}}来引用每个子项的值。wx:for-index="photoIndex":使用wx:for-index指令来指定循环中的索引变量名称为photoIndex,这样在循环内部就可以通过{{photoIndex}}来引用当前子项的索引值。
内层循环的子项引用
<image src="{{photo}}" data-card-index="{{index}}" data-index="{{photoIndex}}" bindtap="bindClickImg"></image>
<image>标签:在循环内部,使用<image>标签来显示图片。src="{{photo}}"绑定了photo变量作为图片的路径。data-card-index="{{index}}"为图片元素设置了外层循环的索引index。data-index="{{photoIndex}}"为图片元素设置了内层循环的索引photoIndex。bindtap="bindClickImg"表示点击图片时触发名为bindClickImg的事件处理函数。
显示大图
点击实现方法框架
bindClickImg(event) { },
- 通过点击事件,获取wxml中传入的参数 data-card-index="{{index}}" data-index="{{photoIndex}}"(内外层的索引)
注:前面的
data-前缀定义自定义数据属性时,属性名会被转换为驼峰命名法,即将连字符后的第一个字母大写。所以在事件处理函数中,data-card-index被转换为了cardIndex。
获取点击时间携带的参数
const cardIndex = event.currentTarget.dataset.cardIndex;//外层循环的索引
const photoIndex = event.currentTarget.dataset.index;//内层循环的索引
根据外层循环与外层循环的索引找到点开图片的路径
const photo = this.data.info[cardIndex].photo[photoIndex]; // 获取点击的图片路径
根据外层循环找到该外层的全部图片数组,便于大图的翻页功能(显示一组图片)
const photos = this.data.info[cardIndex].photo; // 获取当前卡片中的所有图片链接
使用wx.previewImage方法实现显示大图的功能
wx.previewImage({
current: photo, // 当前显示图片的链接
urls: photos // 需要预览的图片链接列表
});
完整代码
wxml
<view class="allstyle"><view class="center"><view wx:for="{{info}}" wx:key="index" class="item"><view class="line"><view class="left">姓名</view><view class="right">{{item.name}}</view></view><view class="line"><view class="left">ID</view><view class="right">{{item.id}}</view></view><view class="line"><view class="left">年龄</view><view class="right">{{item.age}}</view></view><view class="line"><view class="width_set"><view class="photo_title">照片</view><view class="photo"><view wx:for="{{item.photo}}"  wx:key="photoIndex"  wx:for-item="photo" wx:for-index="photoIndex" class="image_wrapper"><image src="{{photo}}" data-card-index="{{index}}" data-index="{{photoIndex}}" bindtap="bindClickImg"></image></view> </view></view></view></view></view>
</view>
wxss
page{background-color:rgb(214, 214, 214);
}
/* 整体样式,让item居中显示*/
.allstyle{width:100%;display: flex;align-items: center;justify-content: center;
}
/* 设置宽度 */
.center{width:90%;
}
/* 设置每个item样式 */
.item{padding:2% 5%;margin:2% 0;background-color:#fff;
}
/* 设置行信息 */
.line{display:flex;  margin:2% 0;
}
.left{width:50%;
}
.right{color:#808080;width:50%;text-align:right;
}
.width_set{width:100%;
}
/* 图片样式 */
.photo{display: flex;flex-wrap: wrap; width:100%;margin-top:2%;
}
.image_wrapper{width: calc(33.33% - 12px);margin:0 10px 10px 0;border:1px solid black;display: flex;align-items: center;justify-content: center;
}
image{width:150rpx;height:150rpx;
}
js
Page({data: {info: [{id: 1,name: '张三',age: 12,photo: ["这里写自己的图片路径1","这里写自己的图片路径2","这里写自己的图片路径3","这里写自己的图片路径4"]},{ id: 2,name: '李四',age: 24,photo: ["这里写自己的图片路径1","这里写自己的图片路径2","这里写自己的图片路径3"]},]},// 点击图片显示大图bindClickImg(event) {const cardIndex = event.currentTarget.dataset.cardIndex;const photoIndex = event.currentTarget.dataset.index;console.log(cardIndex)console.log(photoIndex)const photo = this.data.info[cardIndex].photo[photoIndex]; // 获取点击的图片路径const photos = this.data.info[cardIndex].photo; // 获取当前卡片中的所有图片链接// 在这里实现展示大图的逻辑,比如使用 wx.previewImage 方法wx.previewImage({current: photo, // 当前显示图片的链接urls: photos // 需要预览的图片链接列表});},
})