常见React Hooks 钩子函数用法
一、useState
useState()用于为函数组件引入状态(state)。纯函数不能有状态,所以把状态放在钩子里面。
import React, { useState } from 'react'
import './Button.css'export function UseStateWithoutFunc() {const [name, setName] = useState('何遇')const [age, setAge] = useState()function onChange() {setName('张三') // 修改namesetAge(23) // 修改age}return (<><div className={'nameButton'}>姓名: {name}</div><div className={'ageButton'}>年龄: {age === undefined ? '未知' : age}</div><button onClick={onChange}>click</button></>)
}
上面代码中,UseStateWithoutFunc 组件是一个函数,内部使用useState()钩子引入状态。
useState()这个函数接受状态的初始值,作为参数,上例的初始值为显示的姓名文字。该函数返回一个数组,数组的第一个成员是一个变量(上例是name),指向状态的当前值。第二个成员是一个函数,用来更新状态,约定是set前缀加上状态的变量名(上例是setName)。
当没有赋予初始值的时候,这个变量则是undefined,没有定义的。当再次执行set函数的时候,则会被赋值。如上述年龄字段age,一开始是undefined的,所以显示出来的效果就是“未知”。

当点击button的时候,触发onChange函数,同时给年龄和姓名赋新值。因此点击按钮之后显示效果如下:

二、useEffect
seEffect()用来引入具有副作用的操作,最常见的就是向服务器请求数据。以前,放在componentDidMount里面的代码,现在可以放在useEffect()。
useEffect()的用法如下:
useEffect(() => {// Async Action
}, [dependencies]);
上面用法中,useEffect()接受两个参数。
- 第一个参数是一个函数,异步操作的代码放在里面。
- 第二个参数是一个数组,用于给出 Effect 的依赖项,只要这个数组发生变化,useEffect()就会执行。第二个参数可以省略,这时每次组件渲染时,就会执行useEffect()。
下面是Person.js和Person.css代码
import {useEffect, useState} from "react";
import "./Person.css";const Person = ({personId}) => {const[loading, setLoading] = useState(true);const[person, setPerson] = useState({});useEffect(() => {setLoading(true);fetch(`https://swapi.dev/api/people/${personId}`).then(response => response.json()).then(data => {setLoading(false)setPerson(data)});}, [personId]);if (loading) {return <p>Loading...</p>}return <div><p>You're viewing: {person.name}</p><p>Height: {person.height}</p><p>Mass: {person.mass}</p></div>
}export default function PersonComponent() {const [show, setShow] = useState("1");return (<div className="App"><Person personId={show}></Person><div>Show:<button onClick={() => setShow("3")}>R2-D2</button><button onClick={() => setShow("2")}>C-3PO</button></div></div>)
}
* {margin: 0;padding: 0;
}
body {padding: 10px;background-color: #f5f5fa;color: #222;
}
h2 {margin-bottom: 20px;font-family: 'Helvetica';font-weight: 400;
}
.App {font-family: 'Helvetica';font-weight: 200;text-align: left;width: 400px;
}
input {border: 1px solid #ddd;background-color: #fff;padding: 5px 10px;margin: 10px 0;border-radius: 5px;width: 300px;
}
button {padding: 5px 20px;background: #0066cc;border: 1px solid #fff;border-radius: 15px;color: #fff;margin-top: 10px;margin-bottom: 10px;
}
button:hover {cursor: pointer;box-shadow: 0px 2px 4px #0044aa40;
}
button:active {background: #0044aa;
}
button:focus {outline:0;}
ul {margin-left: 20px;
}.navbar {display: flex;flex-direction: row;justify-content: space-between;padding-bottom: 10px;margin-bottom: 20px;border-bottom: 1px solid #ccc;
}
.messages h1 {margin-bottom: 20px;
}
.messages p {margin-bottom: 10px;
}
.message {background-color: #fff;border: 1px solid #ddd;padding: 10px;border-radius: 4px;
}
在请求https://swapi.dev/api/people/{personId}/ 这个接口,每次传入不同的personId值,就可以请求到不同人的数据。
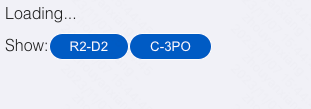
每次personId发生改变之后,Person组件里的useEffect里的方法就会执行一次也就是会去请求一次后端数据,请求到了之后再刷新界面。没有请求到的时候由于loading默认设为true,因此就会执行return <p>Loading...</p>这段代码,就会展示Loading的文字。等请求到之后,会执行这行 setLoading(false),将loading字段设为false,因此此时就不会展示Loading的文字,而是展示姓名、身高等字样。
点击R2-D2数据还没请求到的时候,会显示Loading
请求到对应的数据之后,就会展示对应的个人信息

三、useReducer
React 本身不提供状态管理功能,通常需要使用外部库。这方面最常用的库是 Redux。
Redux 的核心概念是,组件发出 action 与状态管理器通信。状态管理器收到 action 以后,使用 Reducer 函数算出新的状态,Reducer 函数的形式是(state, action) => newState。
useReducers()钩子用来引入 Reducer 功能。
const [state, dispatch] = useReducer(reducer, initialState);上面是useReducer()的基本用法,它接受 Reducer 函数和状态的初始值作为参数,返回一个数组。数组的第一个成员是状态的当前值,第二个成员是发送 action 的dispatch函数。
下面是一个计数器的例子。用于计算状态的 Reducer 函数如下。
const myReducer = (state, action) => {switch(action.type)  {case('countUp'):return  {...state,count: state.count + 1}default:return  state;}
}
组件代码如下。
export default function UseReducerComponent() {const[state, dispatch] = useReducer(myReducer, {count: 0})return (<div className="App"><button onClick={() => dispatch({type: 'countUp'})}>+1</button><p>Count: {state.count}</p></div>)
}
import {useReducer} from "react";
import "./styles.css";const myReducer = (state, action) => {switch (action.type) {case ('countUp'):return {...state,count: state.count + 1}default:return state}
}export default function UseReducerComponent() {const[state, dispatch] = useReducer(myReducer, {count: 0})return (<div className="App"><button onClick={() => dispatch({type: 'countUp'})}>+1</button><p>Count: {state.count}</p></div>)
}styles.css样式如下:
* {margin: 0;padding: 0;
}
body {padding: 10px;background-color: #f5f5fa;color: #222;
}
h2 {margin-bottom: 20px;font-family: 'Helvetica';font-weight: 400;
}
.App {font-family: 'Helvetica';font-weight: 200;text-align: left;width: 400px;
}
input {border: 1px solid #ddd;background-color: #fff;padding: 5px 10px;margin: 10px 0;border-radius: 5px;width: 300px;
}
button {padding: 5px 20px;background: #0066cc;border: 1px solid #fff;border-radius: 15px;color: #fff;margin-top: 10px;margin-bottom: 10px;
}
button:hover {cursor: pointer;box-shadow: 0px 2px 4px #0044aa40;
}
button:active {background: #0044aa;
}
button:focus {outline:0;}
ul {margin-left: 20px;
}.navbar {display: flex;flex-direction: row;justify-content: space-between;padding-bottom: 10px;margin-bottom: 20px;border-bottom: 1px solid #ccc;
}
.messages h1 {margin-bottom: 20px;
}
.messages p {margin-bottom: 10px;
}
.message {background-color: #fff;border: 1px solid #ddd;padding: 10px;border-radius: 4px;
}
四、useContext
如果需要在组件之间共享状态,可以使用useContext()。
现在有两个组件 Navbar 和 Messages,我们希望它们之间共享状态。
<div className="App"><Navbar/><Messages/>
</div>
第一步就是使用 React Context API,在组件外部建立一个 Context。
const AppContext = React.createContext({});组件封装代码如下。
<AppContext.Provider value={{username: 'superawesome'
}}><div className="App"><Navbar/><Messages/></div>
</AppContext.Provider>
上面代码中,AppContext.Provider提供了一个 Context 对象,这个对象可以被子组件共享。
Navbar 组件的代码如下。下面代码中,useContext()钩子函数用来引入 Context 对象,从中获取username属性
const Navbar = () => {const { username } = useContext(AppContext);return (<div className="navbar"><p>AwesomeSite</p><p>{username}</p></div>);
}
Message 组件的代码如下。下面代码中,useContext()钩子函数用来引入 Context 对象,从中获取username属性
const Messages = () => {const { username } = useContext(AppContext)return (<div className="messages"><h1>Messages</h1><p>1 message for {username}</p><p className="message">useContext is awesome!</p></div>)
}
UseContextComponent.js代码如下所示:
import React, { useContext } from "react";
import "./style.css";const AppContext = React.createContext({});const Navbar = () => {const { username } = useContext(AppContext)return (<div className="navbar"><p>AwesomeSite</p><p>{username}</p></div>)
}const Messages = () => {const { username } = useContext(AppContext)return (<div className="messages"><h1>Messages</h1><p>1 message for {username}</p><p className="message">useContext is awesome!</p></div>)
}export default function UseContextComponent() {return (<AppContext.Provider value={{username: 'superawesome'}}><div className="App"><Navbar /><Messages /></div></AppContext.Provider>);
}
style.css文件如下:
* {margin: 0;padding: 0;
}
body {padding: 10px;background-color: #f5f5fa;color: #222;
}
h2 {margin-bottom: 20px;font-family: 'Helvetica';font-weight: 400;
}
.App {font-family: 'Helvetica';font-weight: 200;text-align: left;width: 400px;
}
input {border: 1px solid #ddd;background-color: #fff;padding: 5px 10px;margin: 10px 0;border-radius: 5px;width: 300px;
}
button {padding: 5px 20px;background: #0066cc;border: 1px solid #fff;border-radius: 15px;color: #fff;margin-top: 10px;margin-bottom: 10px;
}
button:hover {cursor: pointer;box-shadow: 0px 2px 4px #0044aa40;
}
button:active {background: #0044aa;
}
button:focus {outline:0;}
ul {margin-left: 20px;
}.navbar {display: flex;flex-direction: row;justify-content: space-between;padding-bottom: 10px;margin-bottom: 20px;border-bottom: 1px solid #ccc;
}
.messages h1 {margin-bottom: 20px;
}
.messages p {margin-bottom: 10px;
}
.message {background-color: #fff;border: 1px solid #ddd;padding: 10px;border-radius: 4px;
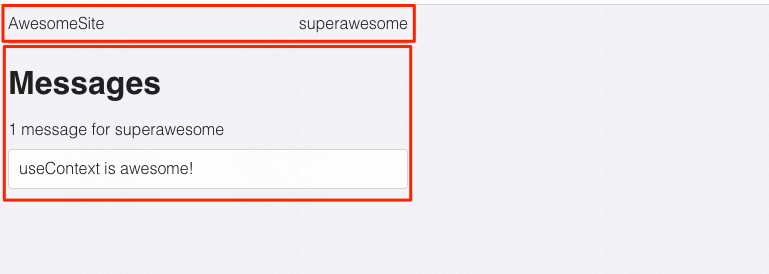
}可以理解为一种共享上下文状态。类似于Android里context的一样,获取上下文信息的。
第一块是组件Navbar展示的
第二块是组件Message展示的
引用文献:
【1】轻松学会 React 钩子:以 useEffect() 为例 - 阮一峰的网络日志