vue+springboot前后端视频文件等的上传与展示(基于七牛云)
前言:在初步说明完成功能之前,我会把重要的部分说明下。后续我会细化。
vue视频文件上传
其实这里和图片这些文件就是一样的。因为上传只是把我们想在云端展示的文件按等传输到云端的bucket。然后方便网站去请求引用。
有人问我我就说明下。这种东西无非就是照猫画虎,当然你是需要一些逻辑和一些基础的。
先看一下效果
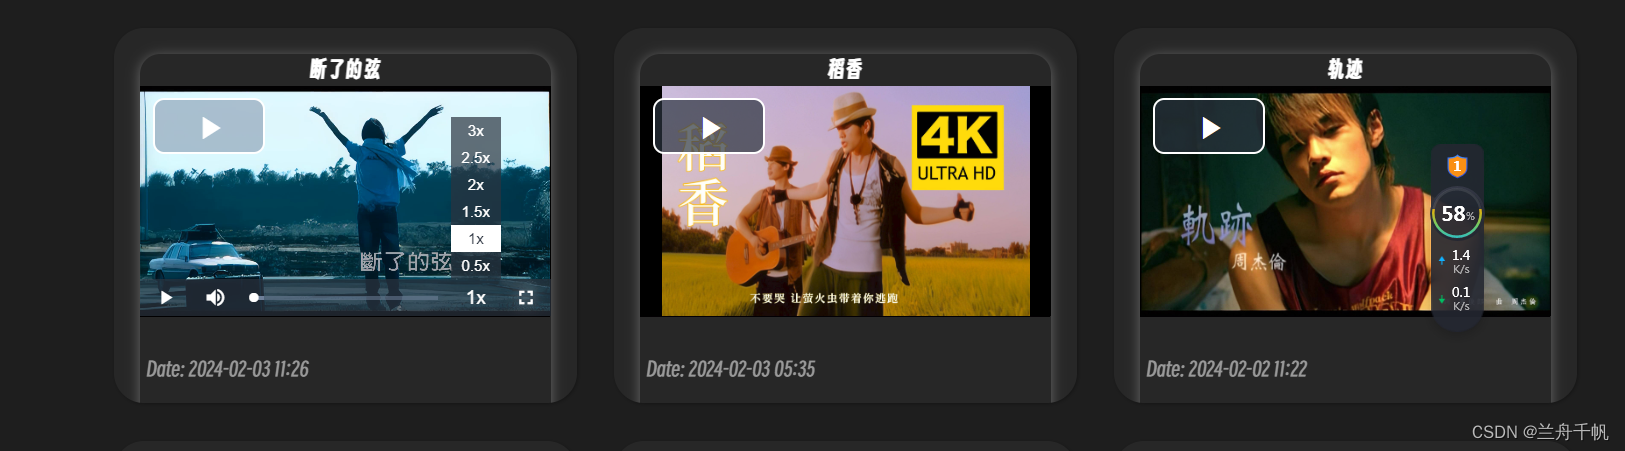
这是我网站展示的效果。
网站地址兰舟千帆的个人博客
在这里呢可以浏览效果。
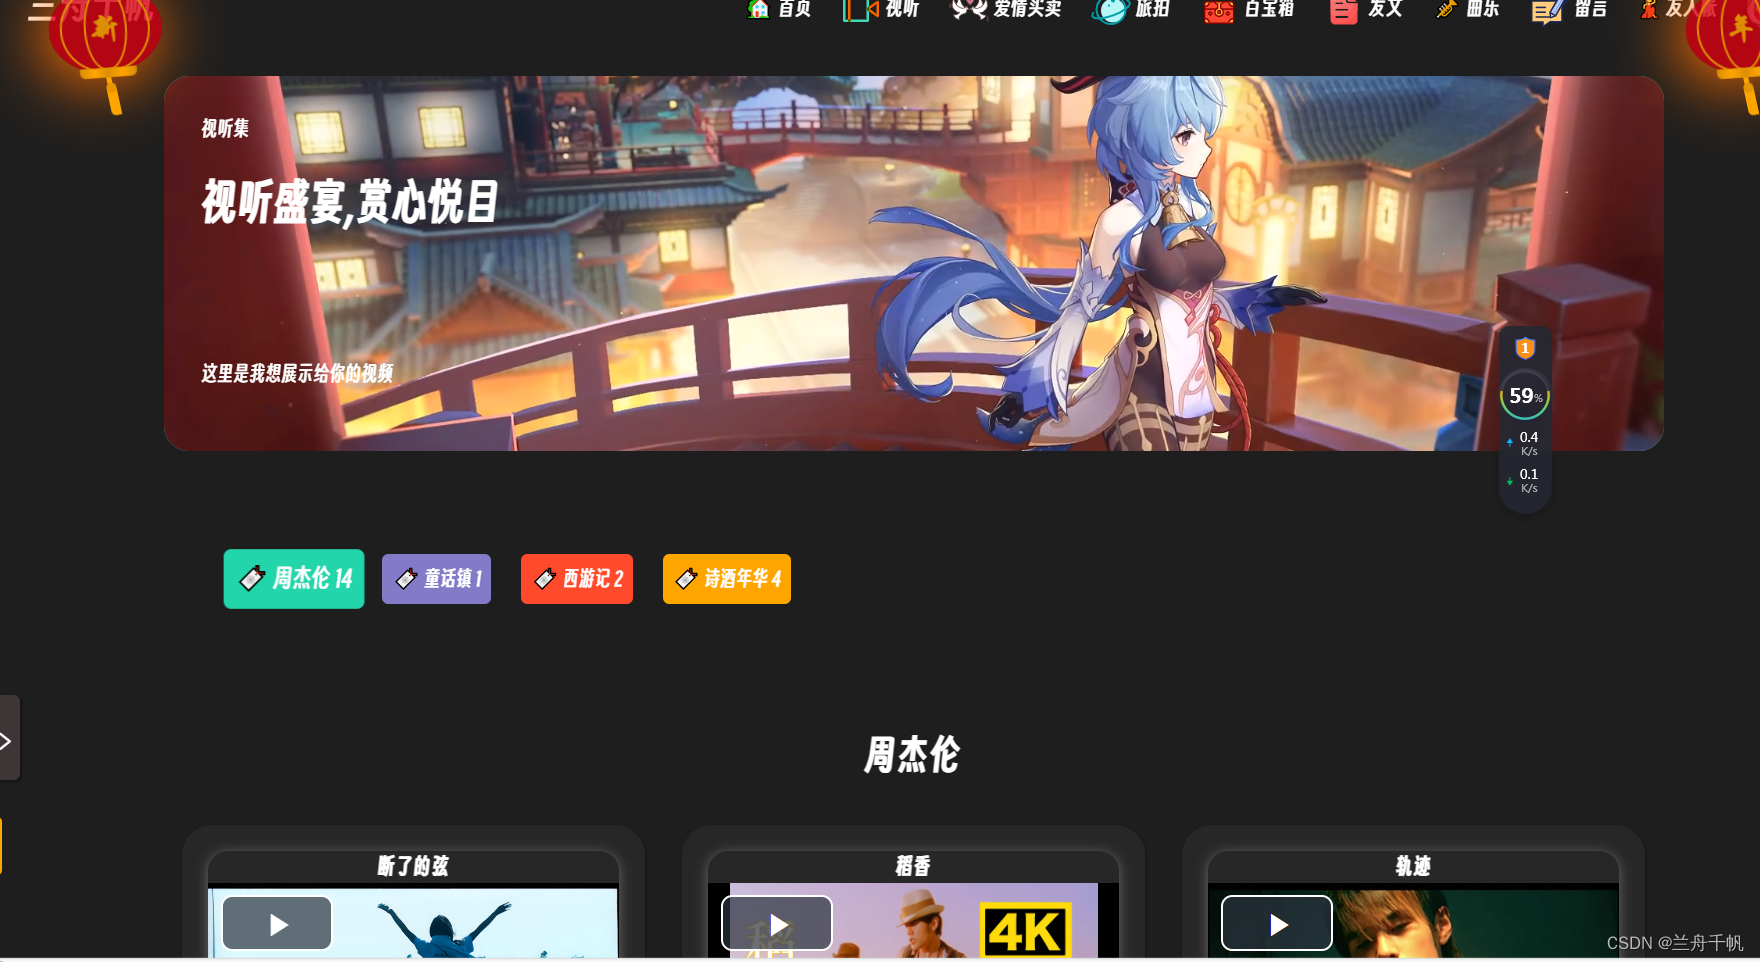
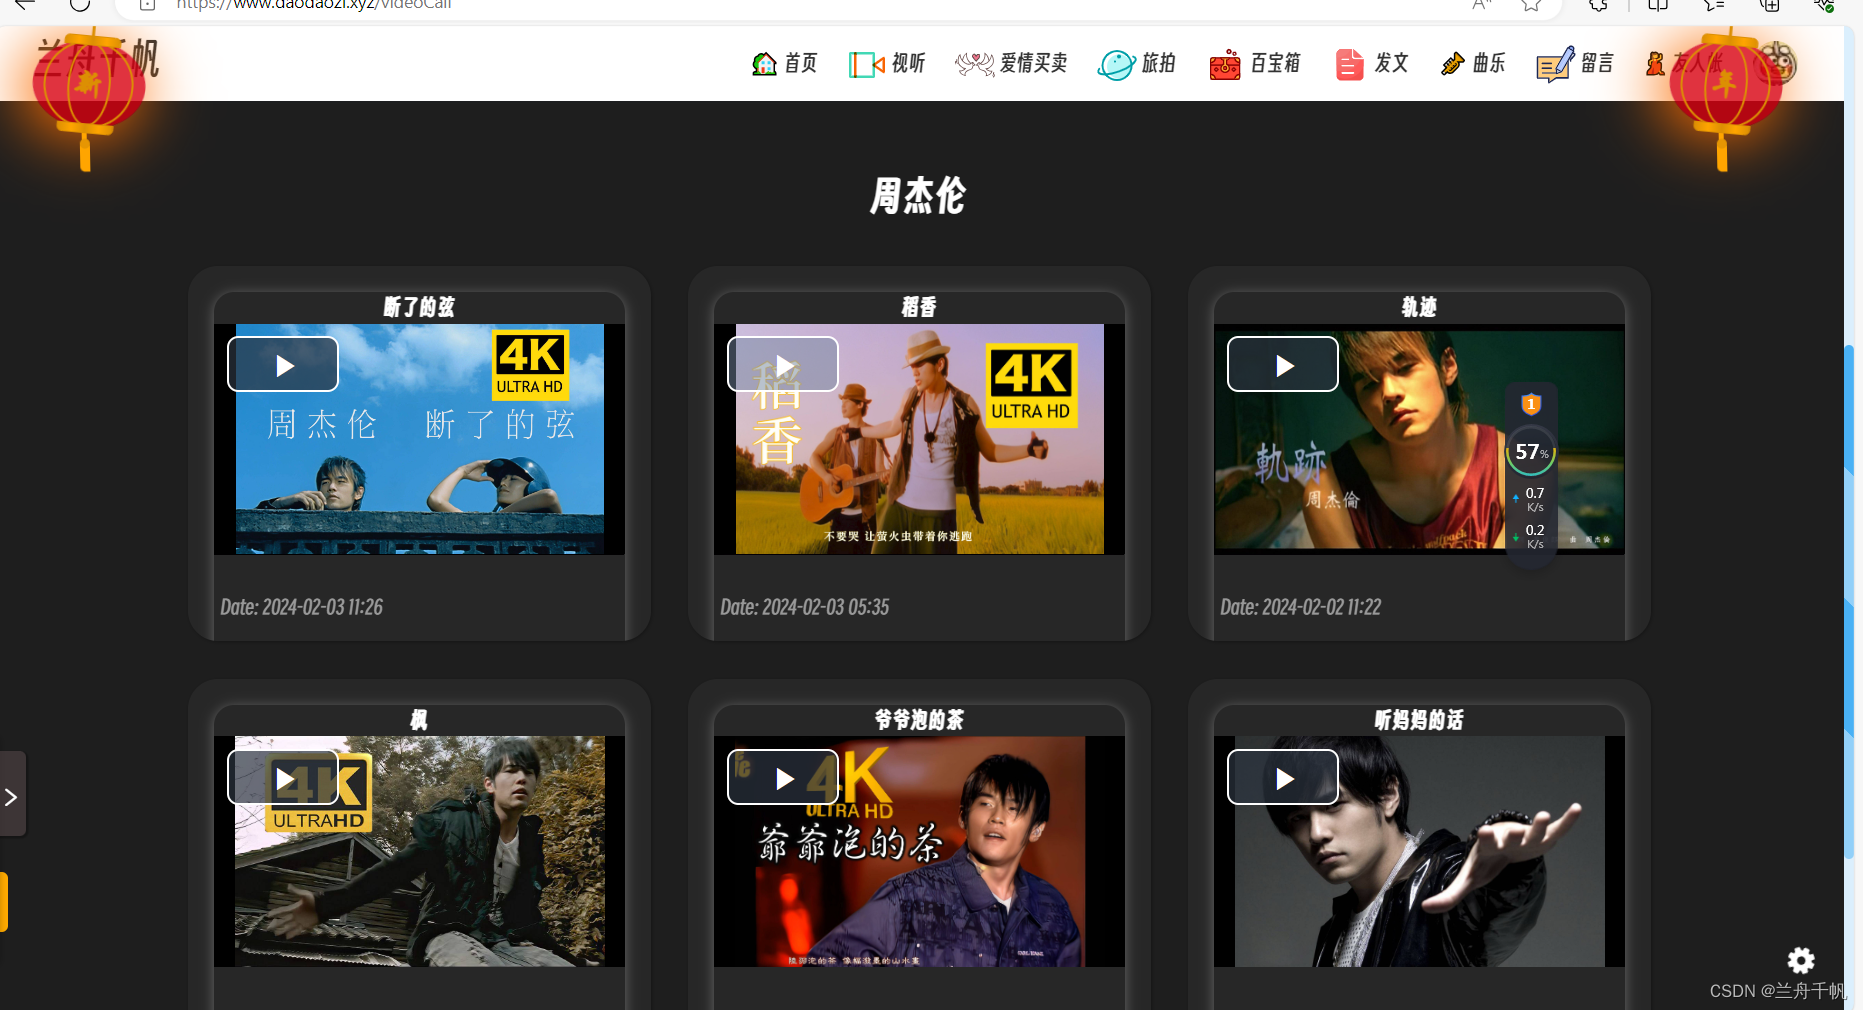
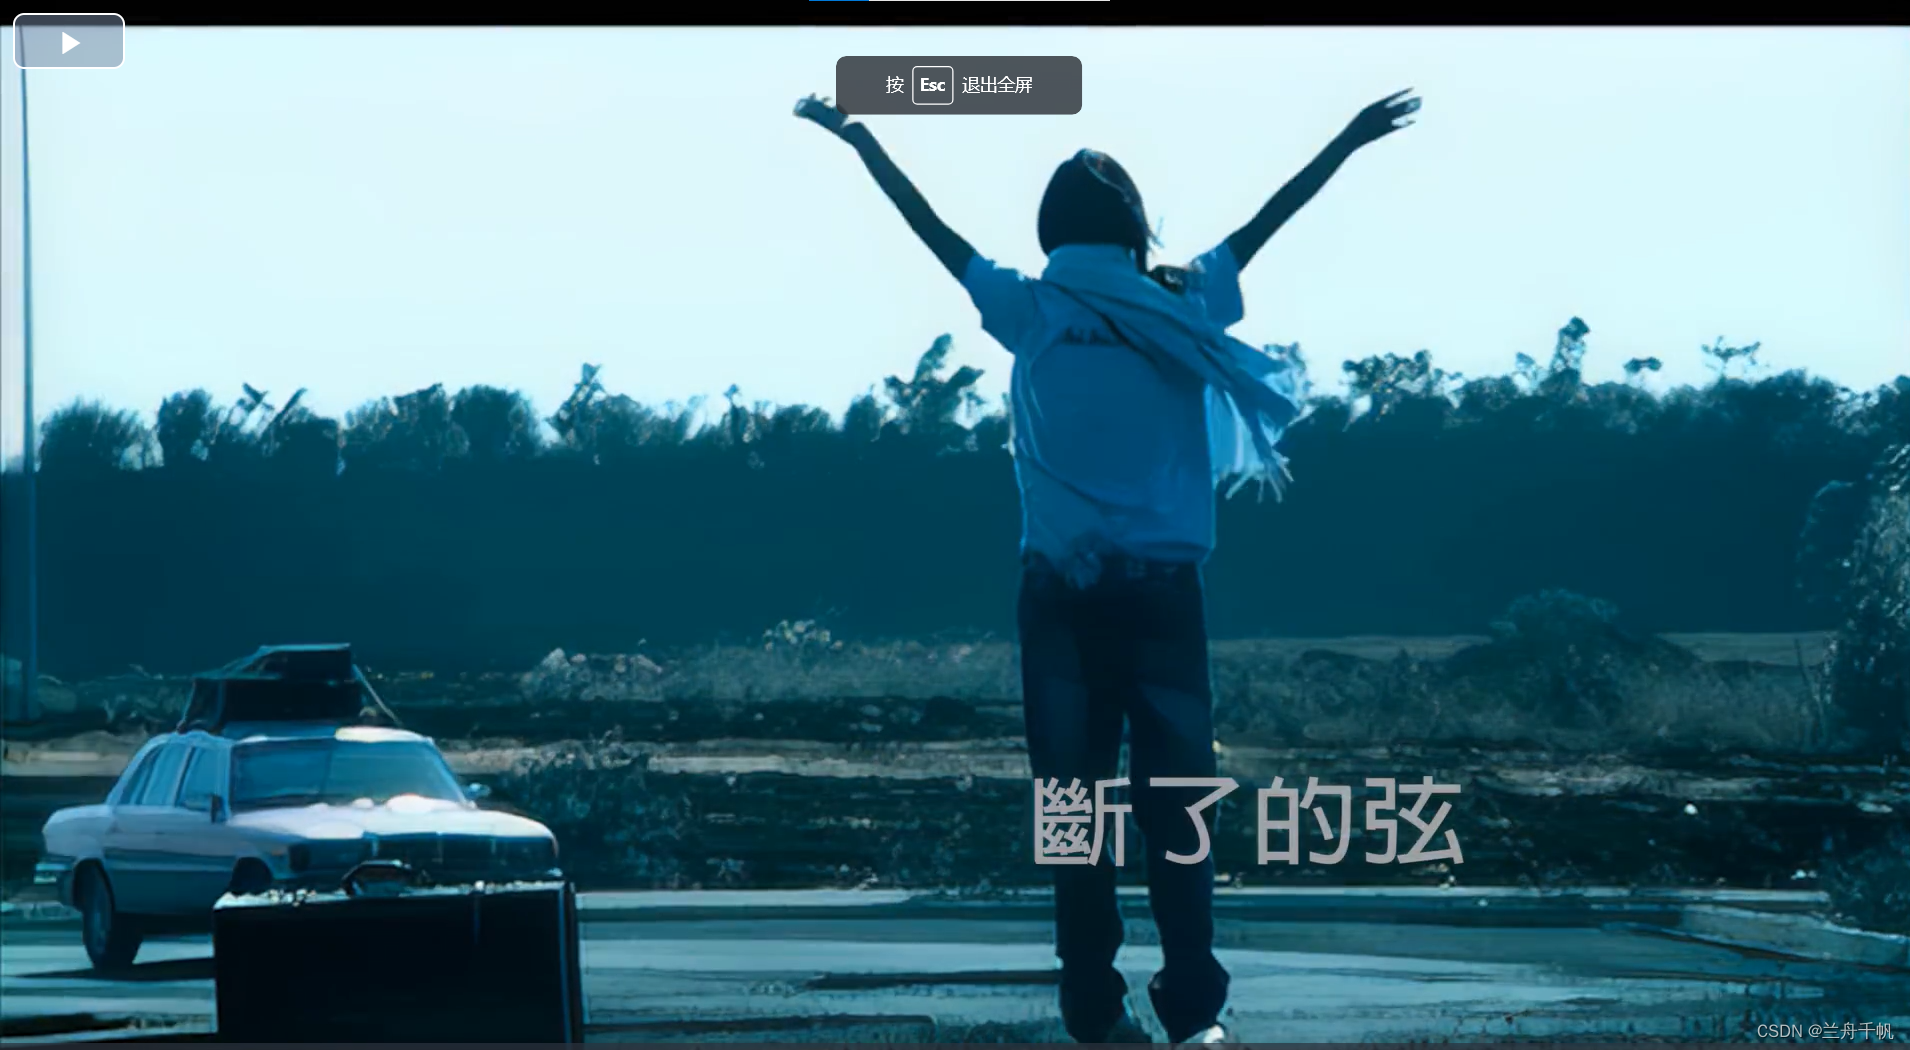
并且呢,单个视频可以独立放大全屏,可以控制倍数,音量进度。
做这个三大关键点,第一完成上传与下载的请求封装
第二:会看懂七牛云sdk
第三:会学习到vueplayer
后台上传显示为
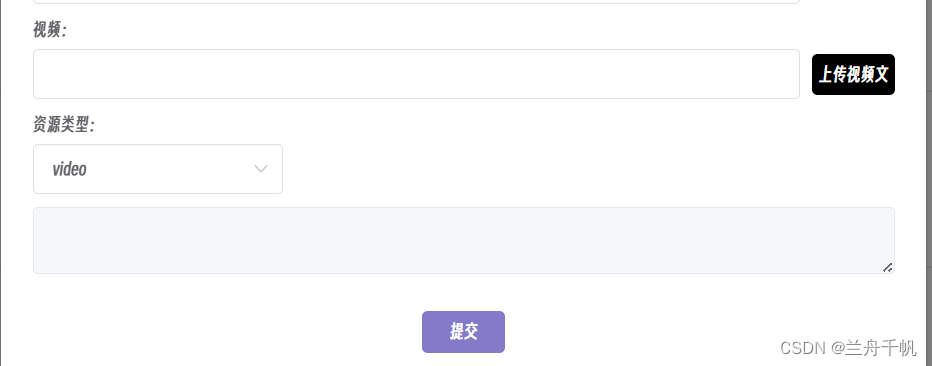
里面这些限制性数据都可以进行修改
独立功能拆分前后端为
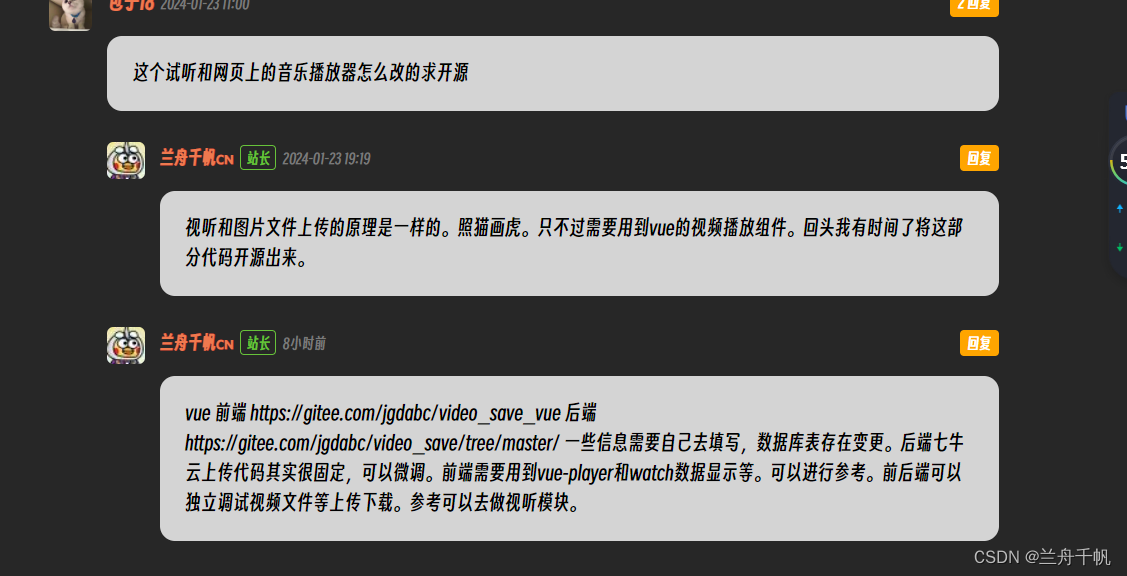
vue 前端
后端
一些信息需要自己去填写,数据库表存在变更。后端七牛云上传代码其实很固定,可以微调。前端需要用到vue-player和watch数据显示等。可以进行参考。前后端可以独立调试视频文件等上传下载。参考可以去做视听模块。
首先从前端
代码很多我把关键点和思路写一下。(具体可以查看链接地代码)
首先是上传按钮。
proButton是封装的组件,就是button。
<proButton :info="'上传视频文件'" @click.native="addVideoResource()":before="$constant.before_color_1":after="$constant.after_color_1"></proButton>
点击将触发一个方法
addVideoResource(){if (this.addResourcePathDialog === false) {return;}if (this.$common.isEmpty(this.resourcePath.type)) {this.$message({message: "请选择有效资源类型!",type: "error"});return;}this.resourceVideoDialog = true;},this.resourceVideoDialog = true;
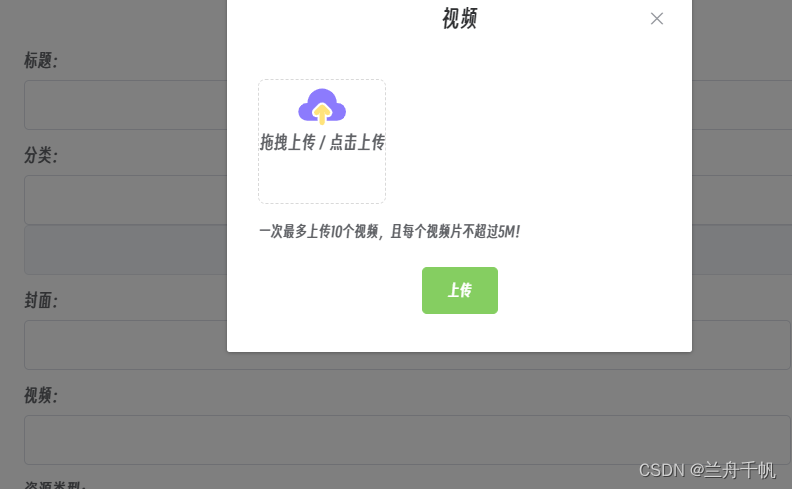
将会让上传的视频的dialog显示出来
<el-dialog title="视频":visible.sync="resourceVideoDialog"width="35%":append-to-body="true"destroy-on-closecenter><div><uploadVideo :isAdmin="true" :prefix="resourcePath.type+'LoveVideo'" @addVideo="addVideo" :maxSize="5":maxNumber="10"></uploadVideo></div></el-dialog>uploadVideo 是封装的组件,其实主要就是el-upload的东西。
eg
<el-uploadclass="upload-demo"ref="upload"multipledrag:action="$constant.qiniuUrl" :on-change="handleChange":before-upload="beforeUpload" :on-success="handleSuccess":on-error="handleError":on-remove="handleRemove" :http-request="customUpload":list-type="listType":accept="accept":limit="maxNumber":auto-upload="false"><div class="el-upload__text"><svg viewBox="0 0 1024 1024" width="40" height="40"><pathd="M666.2656 629.4528l-113.7664-112.4864c-20.7872-20.5824-54.3232-20.5312-75.1104 0.1024l-113.3056 112.4864c-20.8896 20.736-21.0432 54.528-0.256 75.4688 20.736 20.8896 54.528 21.0432 75.4688 0.256l22.6304-22.4256v189.5936c0 29.44 23.9104 53.3504 53.3504 53.3504s53.3504-23.9104 53.3504-53.3504v-189.5424l22.6816 22.4256a53.1456 53.1456 0 0 0 37.5296 15.4112c13.7728 0 27.4944-5.2736 37.9392-15.8208 20.6336-20.9408 20.4288-54.7328-0.512-75.4688z"fill="#FFE37B"></path><pathd="M820.992 469.504h-5.376c-3.072-163.328-136.3456-294.8096-300.4416-294.8096S217.856 306.1248 214.784 469.504H209.408c-100.7104 0-182.3744 81.664-182.3744 182.3744s81.664 182.3744 182.3744 182.3744h209.7664V761.856c-30.208 5.5808-62.464-3.3792-85.6576-26.7264-37.3248-37.5808-37.0688-98.5088 0.512-135.7824l113.3056-112.4864c37.2224-36.9664 97.8432-37.0176 135.168-0.1536l113.7664 112.4864c18.2272 18.0224 28.3648 42.0864 28.5184 67.7376 0.1536 25.6512-9.728 49.8176-27.7504 68.0448a95.40096 95.40096 0 0 1-68.3008 28.5184c-5.9392 0-11.776-0.512-17.5104-1.5872v72.3456h209.7664c100.7104 0 182.3744-81.664 182.3744-182.3744S921.7024 469.504 820.992 469.504z"fill="#8C7BFD"></path></svg><div>拖拽上传 / 点击上传</div></div><template v-if="listType === 'video'"><div slot="tip" class="el-upload__tip">一次最多上传{{maxNumber}}个视频,且每个视频片不超过{{maxSize}}M!</div></template><template v-else><div slot="tip" class="el-upload__tip">一次最多上传{{maxNumber}}个文件,且每个文件不超过{{maxSize}}M!</div></template></el-upload><div style="text-align: center;margin-top: 20px"><el-button type="success" style="font-size: 12px" @click="submitUpload">上传</el-button></div>
当然el绑定的这些方法我们都会写出来,里面有一些说明
  submitUpload() {this.$refs.upload.submit();//调用el组件的上传},// 点击提交,会将el-upload的内容提交,会转到自定义的customUploadcustomUpload(options) {options// options 是文件对象// 进行文件名分割处理let suffix = "";if (options.file.name.lastIndexOf('.') !== -1) {suffix = options.file.name.substring(options.file.name.lastIndexOf('.'));}// 给上传的文件起名字(prefix是前缀,最终在存储空间形成文件夹的名字)let key = this.prefix + "/" + "daodaozi" + new Date().getTime() + Math.floor(Math.random() * 1000) + suffix;const xhr = new XMLHttpRequest();// 启动一个请求(还没发送)xhr.open('get', this.$constant.baseURL + "/qiniu/getUpToken?key=" + key, false);// 这是请求到后端要携带的token,这里就不携带了。加入到博客项目或者其他需要视频文件上传的网站中就加上做一些权限校验等// if (this.isAdmin) {//   xhr.setRequestHeader("Authorization", localStorage.getItem("adminToken"));// } else {//   xhr.setRequestHeader("Authorization", localStorage.getItem("userToken"));// }try {xhr.send();//发送请求,上传需要获取后端凭证,这个时候上面那个准备的请求就将真正的发送const res = JSON.parse(xhr.responseText);if (res !== null && res.hasOwnProperty.call("code") && res.code === 200) {options.data = {token: res.data,key: key};return upload(options);} else if (res !== null && res.hasOwnProperty.call("code") && res.code !== 200) {if(res.code===3000){// 3000代表token过期了//  那就清理掉localStorage.removeItem("userToken");localStorage.removeItem("adminToken");localStorage.removeItem("currentUser");localStorage.removeItem("currentAdmin")//将页面刷新下window.location.reload()window.location.href  =  "/"// debugger}return Promise.reject(res.message);} else {return Promise.reject("服务异常!");}} catch (e) {return Promise.reject(e.message);}},// 文件上传成功时的钩子handleSuccess(response, file, fileList) {// 返回上传后的urllet url = this.$constant.qiniuDownload + response.key;// 调用common中的方法向后端请求,将文件(图片信息保存)this.$common.saveVideoResource(this, this.prefix, url, file.size, file.raw.type, this.isAdmin);// 子组件向父组件传值(引用该组件的组件会获取到此处传递的值)this.$emit("addVideo", url);},handleError(err, file, fileList) {this.$message({message: err,type: "error"});},// 上传文件之前的钩子,参数为上传的文件,若返回 false 或者返回 Promise 且被 reject,则停止上传beforeUpload(file) {},// 文件列表移除文件时的钩子handleRemove(file, fileList) {},// 添加文件、上传成功和上传失败时都会被调用handleChange(file, fileList) {let flag = false;// if (file.size > this.maxSize * 1024 * 1024) {//   this.$message({//     message: "视频最大为" + this.maxSize + "M!",//     type: "warning"//   });//   flag = true;// }if (flag) {fileList.splice(fileList.size - 1, 1);}}}}
``
upload也是封装的,封装进行上传功能的代码
作用就是类似于底层的组件一个表单上传
function getError(action, option, xhr) {let msg;if (xhr.response) {msg = `${xhr.response.error || xhr.response}`;} else if (xhr.responseText) {msg = `${xhr.responseText}`;} else {msg = `fail to ${action} ${xhr.status}`;}return new Error(msg);
}function getBody(xhr) {const text = xhr.responseText || xhr.response;if (!text) {return text;}try {return JSON.parse(text);} catch (e) {return text;}
}export default function upload(option) {const xhr = new XMLHttpRequest();const action = option.action;if (xhr.upload) {xhr.upload.onprogress = function progress(e) {if (e.total > 0) {e.percent = e.loaded / e.total * 100;}option.onProgress(e);};}
// 组建上传表单const formData = new FormData();if (option.data) {Object.keys(option.data).forEach(key => {formData.append(key, option.data[key]);});}formData.append(option.filename, option.file, option.file.name);xhr.onerror = function error(e) {option.onError(e);};xhr.onload = function onload() {if (xhr.status < 200 || xhr.status >= 300) {return option.onError(getError(action, option, xhr));}option.onSuccess(getBody(xhr));};xhr.open('post', action, true);if (option.withCredentials && 'withCredentials' in xhr) {xhr.withCredentials = true;}const headers = option.headers || {};for (let item in headers) {if (headers.prototype.hasOwnProperty.call(item) && headers[item] !== null) {xhr.setRequestHeader(item, headers[item]);}}xhr.send(formData);return xhr;
}
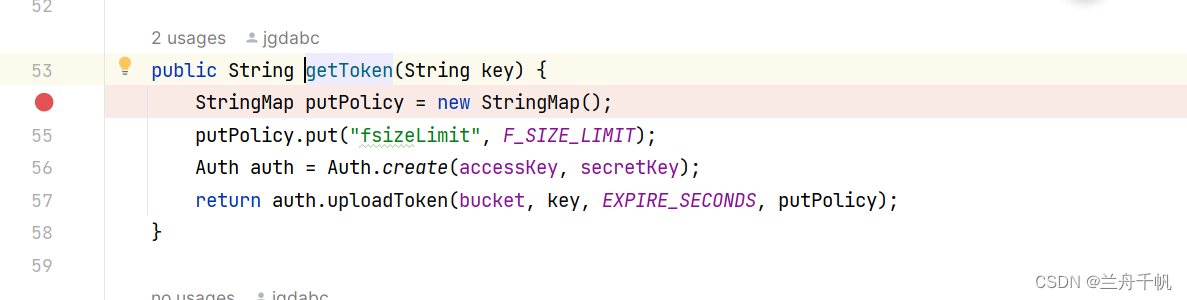
前端上传的主要就是这些。逻辑就是你首先上传呢,需要先去后端请求到一个七牛云的上传认证token,然后后端给到这个token,然后你带着这个东西去上传。
下面这里是后端的部分代码展示,其实还是有很多的封装。这些代码不需要去记忆,可以运用起来就可以。上传这里呢,主要就是获取到后端的上传token。


然后就是展示呢。我们的vue主要是这样用了一个组件 vue
-player去做播放器了
<template><div class="card-container" v-if="!$common.isEmpty(videoList)"><div  v-for="(resourcePath, index) in videoList":key="index"class="card-item wow shadow-box-mini"><div class="card-image"><!-- <video  autoplay="autoplay" muted loop="loop":src="resourcePath.url"></video> --><!-- <el-image class="my-el-image"v-oncelazy:preview-src-list="[resourcePath.url]":src="resourcePath.cover"fit="cover"><div slot="error" class="image-slot"></div></el-image> --><el-tooltip placement="top" effect="light"><div slot="content">{{resourcePath.title}}</div><div class="card-desc">{{resourcePath.title}}</div></el-tooltip><div class="player"><video-Playerref="videoPlayer"class="player-video":playsinline="true":options="playerOptions[index]"@ready="onPlayerReady"@play="onPlayerPlay($event,index)"@pause="onPlayerPause($event)"@ended="onPlayerEnd($event)"@waiting="onPlayerWaiting($event)"@playing="onPlayerPlaying($event)"@loadeddata="onPlayerLoadeddata($event)"@timeupdate="onPlayerTimeupdate($event)"@statechanged="playerStateChanged($event)"></video-Player></div></div><div class="card-body"><div class="card-time">Date: {{$common.getDateDiff(resourcePath.createTime)}}</div></div></div></div>
</template><script>
import constant from '../../utils/constant';import { videoPlayer } from 'vue-video-player';
require("video.js/dist/video-js.css");
require("vue-video-player/src/custom-theme.css");export default {components:{videoPlayer},props: {type: String,resourcePathList: {type: Array},lastTime: {  // 传入的上次播放位置type: Number,default: 0,},},data() {return {srcVideo:"",videoList:[],playedTime: this.lastTime,currentTime: 0,maxTime: 0,playsinline: true,playerOptions: [],options: "",playOptions: {height: "200px",width: "100%",//   playbackRates: [1,0.5,2,2.5], // 可选的播放速度//   autoplay: true, // 如果为true,浏览器准备好时开始回放//   muted: false, // 默认情况下静音播放//   loop: false, // 是否视频一结束就重新开始//   preload: "auto", // 建议浏览器在<video>加载元素后是否应该开始下载视频数据,auto浏览器选择最佳行为,立即开始加载视频(如果浏览器支持)//   language: "zh-CN",//   aspectRatio: "16:9", // 将播放器置于流畅模式,并在计算播放器的动态大小时使用该值,值应该代表一个比例 - 用冒号分隔的两个数字(例如"16:9"或"4:3")//   fluid: true, // 当true时,Video.js player将拥有流体大小,换句话说,它将按比例缩放以适应其容器//   sources: [//     {//       type: "video/mp4", // 类型//       src: this.resourcePathList[0].url//       // src: require('../common/5.mp4')// url地址,在使用本地的资源时,需要用require()引入,否则控制台会报错//     },//   ],//   poster: "", // 设置封面地址//   notSupportedMessage: "此视频暂无法播放,请稍后再试", // 允许覆盖Video.js无法播放媒体源时显示的默认信息//   controlBar: {//     currentTimeDisplay: true,//     progressControl: true,  // 是否显示进度条//     playbackRateMenuButton: true, // 是否显示调整播放倍速按钮//     timeDivider: true, // 当前时间和持续时间的分隔符//     durationDisplay: true, // 显示持续时间//     remainingTimeDisplay: true, // 是否显示剩余时间功能//     fullscreenToggle: true, // 是否显示全屏按钮//   },// },}}// }},computed: {},watch: {resourcePathList(newnew,oldold){this.videoList = newnewthis.getMovieList()},immediate: true,deep:true,},created() {// 方法区},mounted() {},methods: {getMovieList() {// 这里正常来说应该是从后台获取的数据,以下操作都是在成功的回调函数里for (var i = 0; i < this.videoList.length; i++) {let arrs = {playbackRates: [0.5,1.0,1.5, 2.0,2.5 ,3.0], //播放速度autoplay: false, //如果true,浏览器准备好时开始回放。muted: false, // 默认情况下将会消除任何音频。loop: false, // 导致视频一结束就重新开始。preload: "auto", // 建议浏览器在<video>加载元素后是否应该开始下载视频数据。auto浏览器选择最佳行为,立即开始加载视频(如果浏览器支持)language: "zh-CN",aspectRatio: "16:9", // 将播放器置于流畅模式,并在计算播放器的动态大小时使用该值。值应该代表一个比例 - 用冒号分隔的两个数字(例如"16:9"或"4:3")fluid: true, // 当true时,Video.js player将拥有流体大小。换句话说,它将按比例缩放以适应其容器。sources: [{type: "video/mp4",// type: "video/ogg",src: this.videoList[i].url //url地址}],poster: this.videoList[i].cover,notSupportedMessage: "此视频暂无法播放,请稍后再试", //允许覆盖Video.js无法播放媒体源时显示的默认信息。controlBar: {timeDivider: true,durationDisplay: true,remainingTimeDisplay: false,fullscreenToggle: true //全屏按钮}};this.playerOptions.push(arrs);}},onPlayerPlay(player, index) {var that = this.$refs.videoPlayer;for (let i = 0; i < that.length; i++) {if(i != index)that[i].player.pause()}},onPlayerPause(player) {},clickDemo(){this.items  =  this.resourcePathListalert(this.items[0].url)},// 准备好了onPlayerReady() {console.log("准备好了");},// 视频播放// onPlayerPlay(player) {//   console.log('播放了');//   console.log(player);//   let playTime = 0;//     if (//       Number(Math.floor(this.playedTime)) ===//       Number(Math.floor(player.duration()))//     ) {//       this.playedTime = 0;//       playTime = 0;//     } else if (//       Number(Math.floor(player.currentTime())) !==//       Number(Math.floor(this.playedTime))//     ) {//       playTime = this.playedTime;//       player.currentTime(playTime)//     }// },// // 视频暂停的// onPlayerPause(player) {//   console.log('暂停中');//   console.log(player);//   this.playedTime = player.currentTime();// },// 视频播放完onPlayerEnd(player) {console.log('播放结束了');console.log(player);},// DOM元素上的readyState更改导致播放停止onPlayerWaiting(player) {console.log("播放停止中");console.log(player);},// 视频已开始播放onPlayerPlaying(player) {console.log("开始播放了");console.log(player);},// 当播放器在当前播放位置下载数据时触发onPlayerLoadeddata(player) {console.log("开始下载数据");console.log(player);},// 当前播放位置发生变化时触发onPlayerTimeupdate(player) {console.log("播放位置变化了");console.log(player);let timeDisplay = player.currentTime();if (timeDisplay - this.currentTime > 1) {player.currentTime(this.currentTime > this.maxTime ? this.currentTime : this.maxTime);}this.currentTime = player.currentTime();this.maxTime = this.currentTime > this.maxTime ? this.currentTime : this.maxTime;},//播放状态改变playerStateChanged(playerCurrentState) {console.log("播放状态变化了");console.log(playerCurrentState);},// 手动暂停视频的播放pause() {// 视频播放器的方法调用,要使用this.$refs.videoPlayer.player这个对象去调用this.$refs.videoPlayer.player.pause()}},}</script><style scoped>.card-container {display: flex;flex-wrap: wrap;}.card-item {position: relative;overflow: hidden;margin: 15px;height: 300px;flex-shrink: 0;width: calc(100% / 3 - 30px);cursor: pointer;animation: zoomIn 0.8s ease-in-out;padding: 1.3rem 1.3rem 1.5rem;background: var(--background);border-radius: 1.5rem;transition: all 0.2s;}.card-image {width: 100%;height: 400px;border-radius: 1rem;overflow: hidden;box-shadow: 0 2px 10px rgba(147, 147, 147, 0.61);margin-bottom: 1rem;}.card-image >>> .el-image__inner {transition: all 1s;}.card-image >>> .el-image__inner:hover {transform: scale(1.2);}.card-body {padding: 10px 5px;}.card-desc {font-weight: 600;text-align: center;font-size: 1.05rem;color: var(--fontColor);letter-spacing: 1px;line-height: 1.5;overflow: hidden;text-overflow: ellipsis;display: -webkit-box;-webkit-line-clamp: 2;-webkit-box-orient: vertical;}.card-time {position: absolute;bottom: 15px;color: #999999;font-weight: 500;}@media screen and (max-width: 1300px) {.card-item {width: calc(100% / 2 - 30px);}}@media screen and (max-width: 1000px) {.card-item {height: 450px;}.card-image {height: 300px;}}@media screen and (max-width: 750px) {.card-item {width: 100%;margin: 15px 0;}}@media screen and (max-width: 450px) {.card-item {height: 400px;}.card-image {height: 250px;}}</style>
怎么说呢,去看我给出的源码地址吧,那里面是比较完整的功能拆分。