回头看了看自己写的博客,猫猫决定以后更改风格
本意是想大家看效果直接拷贝代码能用,注释齐全也方便学习,但是发现这样对新手学习特别困难,以后素材源码不会上传了,有想要的可以去群里找。
以后风格基本是–>看标题–>看目录–>看图片–>看代码–>自己尝试。
当然,如果有好的给力Demo猫猫还是会原来那样放上来的。
猫猫分享,必须精品
原创文章,欢迎转载。转载请注明:翟乃玉的博客
地址:http://blog.csdn.net/u013357243?viewmode=contents
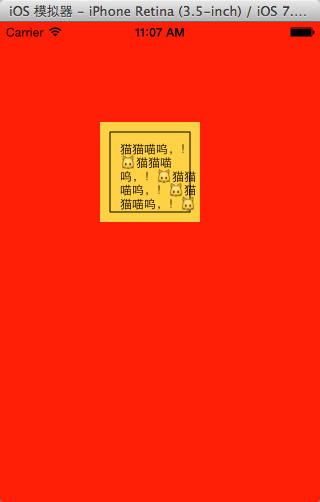
画文字
效果:
代码:
//
//  NYTextView.m
//  画图片画文字
//
//  Created by apple on 15-5-5.
//  Copyright (c) 2015年 znycat. All rights reserved.
//

#import "NYTextView.h"

@implementation NYTextView

- (id)initWithFrame:(CGRect)frame
{
    self = [super initWithFrame:frame];
    if (self) {
        // Initialization code
    }
    return self;
}

- (void)drawRect:(CGRect)rect
{

    // 画文字
    NSString *str = @"猫猫喵呜,!��猫猫喵呜,!��猫猫喵呜,!��猫猫喵呜,!��";

    // 1.获取上下文
    //    CGContextRef ctx = UIGraphicsGetCurrentContext();
    // 2.绘图
    // 不推荐使用C语言的方法绘制文字, 因为quraz2d中的坐标系和UIkit中的坐标系不一致, 绘制出来的文字是颠倒的, 而且通过C语言的方法绘制文字相当麻烦
    //    CGContextSelectFont(<#CGContextRef c#>, <#const char *name#>, <#CGFloat size#>, <#CGTextEncoding textEncoding#>)
    //    CGContextShowText(ctx, <#const char *string#>, <#size_t length#>)

    // 绘制矩形
    // 1.获取上下文
    CGContextRef ctx = UIGraphicsGetCurrentContext();
    // 2.绘图
    CGContextAddRect(ctx, CGRectMake(10, 10, 80, 80));
    // 3.渲染
    CGContextStrokePath(ctx);


    //    NSMutableDictionary *md = [NSMutableDictionary dictionary];
    //    // 设置文字颜色
    //    md[NSForegroundColorAttributeName] =[UIColor redColor];
    //    // 设置文字背景颜色
    //    md[NSBackgroundColorAttributeName] = [UIColor greenColor];
    //    // 设置文字大小
    //    md[NSFontAttributeName] = [UIFont systemFontOfSize:20];

    //    将文字绘制到指点的位置
    //    [str drawAtPoint:CGPointMake(10, 10) withAttributes:md];

    //    将文字绘制到指定的范围内, 如果一行装不下会自动换行, 当文字超出范围后就不显示
    [str drawInRect:CGRectMake(20, 20, 80, 80) withAttributes:nil];
}


@end
画图片
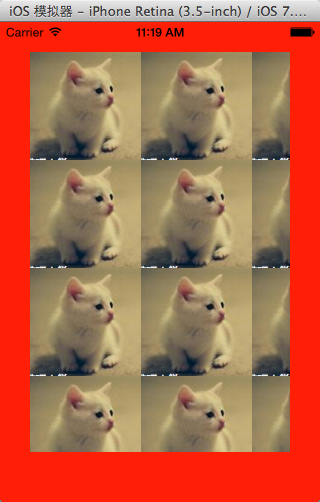
平铺图片
//
//  NYImageView.m
//  画图片画文字
//
//  Created by apple on 15-5-5.
//  Copyright (c) 2015年 znycat. All rights reserved.
//

#import "NYImageView.h"

@implementation NYImageView

- (id)initWithFrame:(CGRect)frame
{
    self = [super initWithFrame:frame];
    if (self) {
        // Initialization code
    }
    return self;
}


- (void)drawRect:(CGRect)rect
{

    //    1.加载图片到内存中
    UIImage *image = [UIImage imageNamed:@"cat"];


    // 利用drawAsPatternInRec方法绘制图片到layer, 是通过平铺原有图片
    [image drawAsPatternInRect:CGRectMake(0, 0, 320, 480)];
}


@end
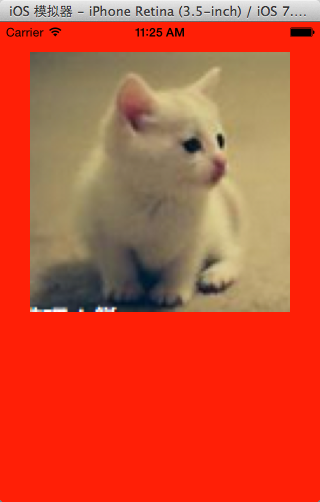
拉伸图片
效果:
代码:
//
//  NYImageView.m
//  画图片画文字
//
//  Created by apple on 15-5-5.
//  Copyright (c) 2015年 znycat. All rights reserved.
//

#import "NYImageView.h"

@implementation NYImageView

- (id)initWithFrame:(CGRect)frame
{
    self = [super initWithFrame:frame];
    if (self) {
        // Initialization code
    }
    return self;
}


- (void)drawRect:(CGRect)rect
{

    //    1.加载图片到内存中
    UIImage *image = [UIImage imageNamed:@"cat"];


    // 利用OC方法将图片绘制到layer上

    // 利用drawInRect方法绘制图片到layer, 是通过拉伸原有图片
    [image drawInRect:CGRectMake(0, 0, 260, 260)];


}


@end
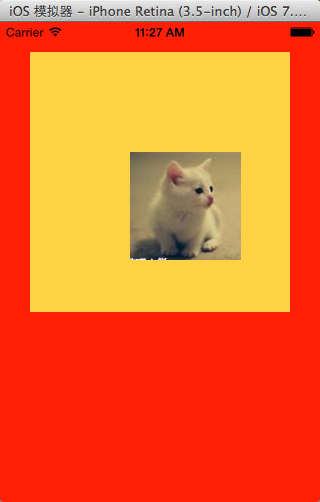
图片固定位置
效果:
代码:
//
//  NYImageView.m
//  画图片画文字
//
//  Created by apple on 15-5-5.
//  Copyright (c) 2015年 znycat. All rights reserved.
//

#import "NYImageView.h"

@implementation NYImageView

- (id)initWithFrame:(CGRect)frame
{
    self = [super initWithFrame:frame];
    if (self) {
        // Initialization code
    }
    return self;
}


- (void)drawRect:(CGRect)rect
{

    //    1.加载图片到内存中
    UIImage *image = [UIImage imageNamed:@"cat"];


    // 利用OC方法将图片绘制到layer上

    // 将图片绘制到指定的位置
    [image drawAtPoint:CGPointMake(100, 100)];
}

@end


