Windows下安装TensorFlow教程(cpu版本)
Windows下安装TensorFlow教程(cpu版本)
目录
1、查看在Windows环境下,TensorFlow对Python的版本要求。
2、配置环境
3、下载并安装Python3.5.2
4、下载并安装Anaconda
5、安装包tensorflow
6、参考链接:
1、查看在Windows环境下,TensorFlow对Python的版本要求。
查看链接:https://pypi.org/project/tensorflow/1.1.0rc2/#files
https://mirrors.tuna.tsinghua.edu.cn/tensorflow/windows/cpu/


发现tensorflow目前(2018.11.13)
在Windows环境下,只支持64位的操作系统,不支持32位的操作系统,且支持Python3.5、python3.6;
在Linux和Mac环境下,支持64位和32位的操作系统,支持多个Python版本有Python3.6、Python3.5等等;
目前较稳定的版本是python3.5
2、配置环境
Windows10 64位操作系统
python-3.5.2-amd64.exe https://www.python.org/downloads/windows/
Anaconda3-4.2.0-Windows-x86_64.exe https://mirrors.tuna.tsinghua.edu.cn/anaconda/archive/
(我使用的是 Python 3.5.2 版本,这里使用Anaconda3-4.2.0-Windows-x86_64.exe版本,因为它默认使用的是 Python 3.5)
tensorflow-1.1.0-cp35-cp35m-win_amd64.whl
3、下载并安装Python3.5.2
安装教程:https://blog.csdn.net/sinat_23619409/article/details/84065401
4、下载并安装Anaconda
Anaconda3-4.2.0-Windows-x86_64.exe
安装教程:https://blog.csdn.net/sinat_23619409/article/details/84066880
5、安装包tensorflow
安装Tensorflow时,需要从Anaconda仓库中下载.
一般默认链接的都是国外镜像地址,下载肯定很慢啊(跨国),这里我是用国内清华镜像,需要改一下链接镜像的地址。
5-1、这里,我们打开刚刚安装好的Anaconda中的 Anaconda Prompt,然后输入:
conda config --add channels https://mirrors.tuna.tsinghua.edu.cn/anaconda/pkgs/free/
conda config --set show_channel_urls yes
这两行代码用来改成连接清华镜像的
5-2、接下来安装Tensorflow,在Anaconda Prompt中输入:
conda create -n tensorflow python=3.5.2


tensorflow安装成功!
5-3、激活tensorflow
接着输入:“activate tensorflow”
![]()
5-4、安装CPU版本的tensorflow
我们要安装的是CPU版本,那么在命令下紧接着输入:
pip install --ignore-installed --upgrade tensorflow


5-5、测试:

5-6、多种安装tensorflow的方式
方法一:
安装CPU版本输入
pip install --ignore-installed --upgrade tensorflow
安装GPU版本输入
pip install --ignore-installed --upgrade tensorflow-gpu
方法二:
pip install tensorflow
方法三:
pip install -i https://pypi.tuna.tsinghua.edu.cn/simple/ https://mirrors.tuna.tsinghua.edu.cn/tensorflow/windows/cpu/tensorflow-1.1.0-cp35-cp35m-win_amd64.whl
注意:https前面有一个空格!!!
5-7、安装tensorflow时遇到的问题
1、pip版本太低,需要升级

pip版本太低,需要升级,升级pip命令:
python -m pip install --upgrade pip
2、安装命令输入错误
pip install -i https://pypi.tuna.tsinghua.edu.cn/simple/ https://mirrors.tuna.tsinghua.edu.cn/tensorflow/windows/cpu/tensorflow-1.1.0-cp35-cp35m-win_amd64.whl

错误原因是:https前面的空格忘记了!!!

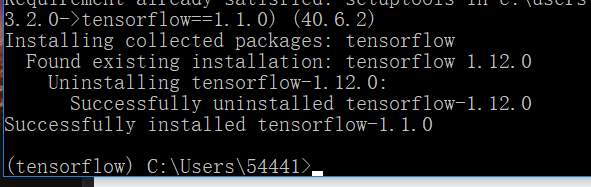
卸载了tensoflow-1.12.0
重新安装了tensorflow-1.1.0
3、也可安装自己选的Tensorflow版本。
可以在清华镜像中查看,请看:
https://mirrors.tuna.tsinghua.edu.cn/tensorflow/windows/cpu/
https://pypi.org/project/tensorflow/1.1.0rc2/#files
5-8、相关命令总结

conda config --add channels https://mirrors.tuna.tsinghua.edu.cn/anaconda/pkgs/free/

conda config --set show_channel_urls yes

conda create -n tensorflow python=3.5.2

方法一:
pip install --ignore-installed --upgrade tensorflow

安装CPU版本输入
pip install --ignore-installed --upgrade tensorflow
安装GPU版本输入
pip install --ignore-installed --upgrade tensorflow-gpu

方法二:
pip install tensorflow

方法三:
pip install -i https://pypi.tuna.tsinghua.edu.cn/simple/ https://mirrors.tuna.tsinghua.edu.cn/tensorflow/windows/cpu/tensorflow-1.1.0-cp35-cp35m-win_amd64.whl

conda --version

conda info --envs

conda search --full-name python

python --version

activate tensorflow

测试例子
import tensorflow as tf
hello = tf.constant('Hello, TensorFlow!')
sess = tf.Session()
print(sess.run(hello))

6、参考链接:
https://blog.csdn.net/u012318074/article/details/77075209/
https://www.cnblogs.com/lvsling/p/8672404.html
https://blog.csdn.net/Eppley/article/details/79297503