使用Service Bus Topic 实现简单的聊天室
创建Service Bus可以参照:
https://azure.microsoft.com/en-gb/documentation/articles/service-bus-dotnet-how-to-use-topics-subscriptions/
Azure Service Bus做广播和消息通知功能很合适,并且可以订阅不同的Topic(不同的消息类型或不同的聊天室)。
1. 首先需要安装Azure Service Bus的nuget package:

2. 建议安装Azure Service Explorer来查看Service bus中创建的Q或者Topic(本文主要介绍Topic)
https://code.msdn.microsoft.com/windowsazure/Service-Bus-Explorer-f2abca5a
很好用,并且开源,可以学习。
3. 实现过程
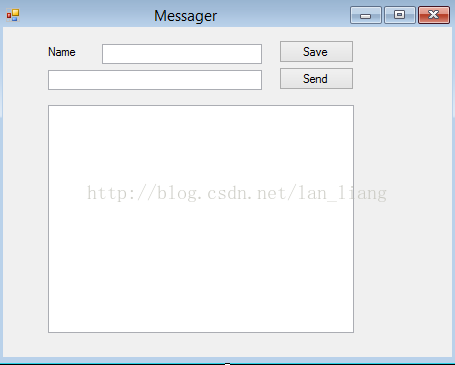
3.1 首先创建1个Winform程序,拖两个button和两个Textbox,界面如下:
3.2 创建1个类,叫ChatClient:
public class ChatClient
    {
        private string ConnStr
        {
            get
            {
                return CloudConfigurationManager.GetSetting("Microsoft.ServiceBus.ConnectionString");
            }
        }


        private const string topicName = "TestTopic";
        public OnMsgRecieved OnMsgRecieved;


        public void Subscribe(string subscriber)
        {
            var td = new TopicDescription(topicName)
            {
                MaxSizeInMegabytes = 5120,
                DefaultMessageTimeToLive = new TimeSpan(0, 1, 0)
            };


            // Create a new Topic with custom settings
            string connectionString =
                CloudConfigurationManager.GetSetting("Microsoft.ServiceBus.ConnectionString");


            var namespaceManager =
                NamespaceManager.CreateFromConnectionString(connectionString);


            if (!namespaceManager.TopicExists(topicName))
            {
                namespaceManager.CreateTopic(td);
            }


            if (!namespaceManager.SubscriptionExists(topicName, subscriber))
            {
                namespaceManager.CreateSubscription(topicName, subscriber);
            }


            SubscriptionClient Client = SubscriptionClient.CreateFromConnectionString
            (ConnStr, topicName, subscriber, ReceiveMode.PeekLock);


            // Configure the callback options
            OnMessageOptions options = new OnMessageOptions();
            options.AutoComplete = false;
            options.AutoRenewTimeout = TimeSpan.FromMinutes(1);


            Task.Run(() =>
            {
                Client.OnMessage((message) =>
                {
                    try
                    {
                        // Process message from subscription
                        OnMsgRecieved(string.Format("{0}:{1}",
                            message.Properties["name"], message.GetBody<string>()));
                    }
                    catch (Exception)
                    {
                        // Indicates a problem, unlock message in subscription
                        message.Abandon();
                    }
                }, options);
            });


        }


        private TopicClient _topicClient;


        public TopicClient TopicClient
        {
            get
            {
                if (_topicClient == null)
                {
                    _topicClient = TopicClient.CreateFromConnectionString(ConnStr, topicName);
                }


                return _topicClient;
            }
        }


        public void SendMsg(string name, string msg)
        {
            var message = new BrokeredMessage(msg);
            message.Properties["name"] = name;
            TopicClient.Send(message);
        }


    }
1. 代码包含了Subscribe和SendMsg两个方法,注意name用于标识客户端的,如果两个客户端给一样的名字,只有客户端1个客户端能收到消息。
2. 我Hard Code了Topic名称,如果需要实现多种消息广播,给不同的名字就可以了
SubscriptionClient Client = SubscriptionClient.CreateFromConnectionString
            (ConnStr, topicName, subscriber, ReceiveMode.PeekLock);
中的ReceiveMode包含两种:PeekLock和ReceiveAndDelete ,前者加锁拿消息放回,后者拿消息并删除。
4. TopicClient不必每次都创建,是支持多线程环境的。
var td = new TopicDescription(topicName)
            {
                MaxSizeInMegabytes = 5120,
                DefaultMessageTimeToLive = new TimeSpan(0, 1, 0)
            };
这里设置了消息的最大长度和默认生命周期,可根据场景进行配置。
Winform的UI逻辑代码相对简单:
 public partial class Form1 : Form
    {
        ChatClient cc = new ChatClient();


        public Form1()
        {
            InitializeComponent();
            cc.OnMsgRecieved = (msg) =>
            {
                SetText(msg);
            };
        }


        private void btnSend_Click(object sender, EventArgs e)
        {
            cc.SendMsg(txtName.Text, txtMsg.Text);
        }


        delegate void SetTextCallback(string text);


        private void SetText(string text)
        {
            if (txtResult.InvokeRequired)
            {
                var d = new SetTextCallback(SetText);
                Invoke(d, new object[] { text });
            }
            else
            {
                txtResult.Text += "\r\n" + text;
            }
        }


        private void btnSaveName_Click(object sender, EventArgs e)
        {
            cc.Subscribe(txtName.Text);
        }
    }
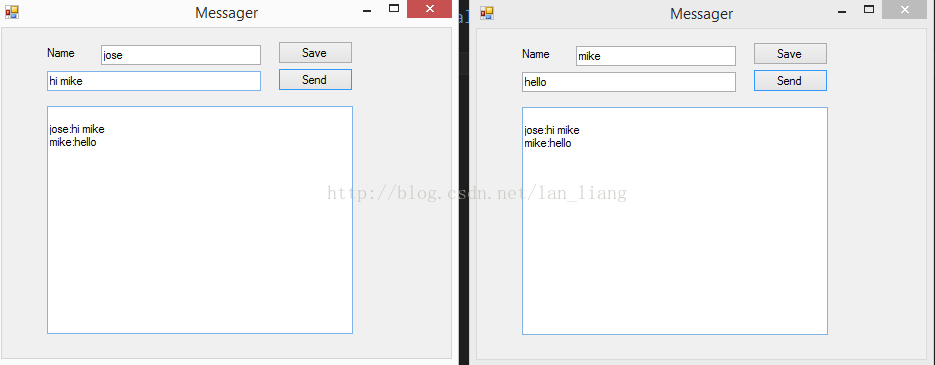
逻辑很简单,点击SaveName,重新订阅。点Send按钮,发送消息。
需要注意的就是跨线程访问UI控件,这里你需要一个delegate。
实现截图: