前端Vue小兔鲜儿电商项目实战Day03
一、Home - 整体结构搭建和分类实现
1. 页面结构
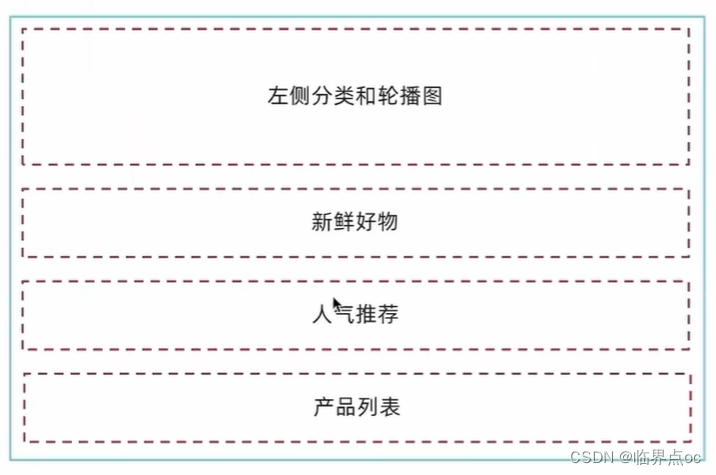
①按照结构新增5个组件,准备最简单的模板,分别在Home模块的入口组件中引入
src/views/Home/components/
-
HomeCategory.vue
-
HomeBanner.vue
-
HomeNew.vue
-
HomeHot.vue
-
HomeProduct.vue
<script setup>
</script><template><div> HomeCategory </div>
</template>
②在Home模块入口组件index.vue中引入并渲染
<script setup>
import HomeCategory from './components/HomeCategory.vue'
import HomeBanner from './components/HomeBanner.vue'
import HomeNew from './components/HomeNew.vue'
import HomeHot from './components/HomeHot.vue'
import homeProduct from './components/HomeProduct.vue'
</script><template><div class="container"><HomeCategory /><HomeBanner /></div><HomeNew /><HomeHot /><homeProduct />
</template>
2. 分类实现
①静态结构搭建 - src/views/Home.components/HomeCategory.vue
<script setup></script><template><div class="home-category"><ul class="menu"><li v-for="item in 9" :key="item"><RouterLink to="/">居家</RouterLink><RouterLink v-for="i in 2" :key="i" to="/">南北干货</RouterLink><!-- 弹层layer位置 --><div class="layer"><h4>分类推荐 <small>根据您的购买或浏览记录推荐</small></h4><ul><li v-for="i in 5" :key="i"><RouterLink to="/"><img alt="" /><div class="info"><p class="name ellipsis-2">男士外套</p><p class="desc ellipsis">男士外套,冬季必选</p><p class="price"><i>¥</i>200.00</p></div></RouterLink></li></ul></div></li></ul></div>
</template><style scoped lang='scss'>
.home-category {width: 250px;height: 500px;background: rgba(0, 0, 0, 0.8);position: relative;z-index: 99;.menu {li {padding-left: 40px;height: 55px;line-height: 55px;&:hover {background: $xtxColor;}a {margin-right: 4px;color: #fff;&:first-child {font-size: 16px;}}.layer {width: 990px;height: 500px;background: rgba(255, 255, 255, 0.8);position: absolute;left: 250px;top: 0;display: none;padding: 0 15px;h4 {font-size: 20px;font-weight: normal;line-height: 80px;small {font-size: 16px;color: #666;}}ul {display: flex;flex-wrap: wrap;li {width: 310px;height: 120px;margin-right: 15px;margin-bottom: 15px;border: 1px solid #eee;border-radius: 4px;background: #fff;&:nth-child(3n) {margin-right: 0;}a {display: flex;width: 100%;height: 100%;align-items: center;padding: 10px;&:hover {background: #e3f9f4;}img {width: 95px;height: 95px;}.info {padding-left: 10px;line-height: 24px;overflow: hidden;.name {font-size: 16px;color: #666;}.desc {color: #999;}.price {font-size: 22px;color: $priceColor;i {font-size: 16px;}}}}}}}// 关键样式  hover状态下的layer盒子变成block&:hover {.layer {display: block;}}}}
}
</style>
②数据渲染
<script setup>
import { useCategoryStore } from '@/stores/category.js'
const categoryStore = useCategoryStore()
</script><template><div class="home-category"><ul class="menu"><li v-for="item in categoryStore.categoryList" :key="item.id"><RouterLink to="/">{{ item.name }}</RouterLink><RouterLink v-for="i in item.children.slice(0, 2)" :key="i" to="/">{{i.name}}</RouterLink><!-- 弹层layer位置 --><div class="layer"><h4>分类推荐 <small>根据您的购买或浏览记录推荐</small></h4><ul><li v-for="i in item.goods" :key="i.id"><RouterLink to="/"><img :src="i.picture" alt="" /><div class="info"><p class="name ellipsis-2">{{ i.name }}</p><p class="desc ellipsis">{{ i.desc }}</p><p class="price"><i>¥</i>{{ i.price }}</p></div></RouterLink></li></ul></div></li></ul></div>
</template>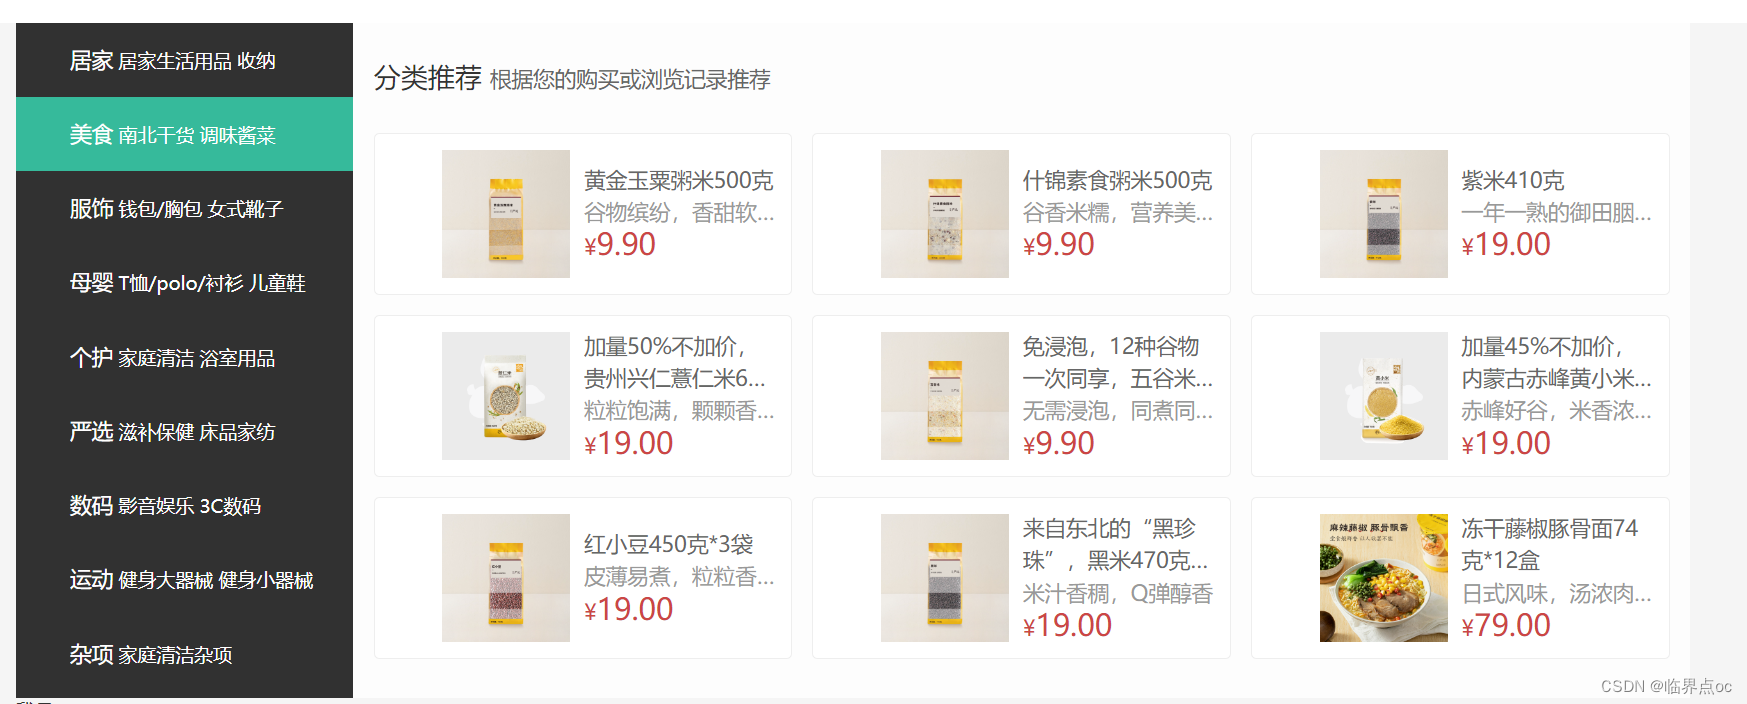
二、Home - banner轮播图功能实现

Carousel 走马灯 | Element Plus
1. 组件静态结构搭建
src/views/Home/components/HomeBanner.vue
<script setup></script><template><div class="home-banner"><el-carousel height="500px"><el-carousel-item v-for="item in 4" :key="item"><imgsrc="http://yjy-xiaotuxian-dev.oss-cn-beijing.aliyuncs.com/picture/2021-04-15/6d202d8e-bb47-4f92-9523-f32ab65754f4.jpg"alt=""/></el-carousel-item></el-carousel></div>
</template><style scoped lang="scss">
.home-banner {width: 1240px;height: 500px;position: absolute;left: 0;top: 0;z-index: 98;img {width: 100%;height: 500px;}
}
</style>
2. 获取数据渲染组件
①封装接口 - src/apis/home.js
import instance from '@/utils/http.js'
export function getBannerAPI() {return instance({url: 'home/banner'})
}
②获取数据渲染模板 - HomeBanner.vue
<script setup>
import { getBannerAPI } from '@/apis/home'
import { ref } from 'vue'const bannerList = ref([])
const getBanner = async () => {const res = await getBannerAPI()// console.log(res)bannerList.value = res.result
}getBanner()
</script><template><div class="home-banner"><el-carousel height="500px"><el-carousel-item v-for="item in bannerList" :key="item.id"><img :src="item.imgUrl" alt="" /></el-carousel-item></el-carousel></div>
</template>
三、Home - 面板组件封装
1. 场景说明
组件封装解决了什么问题?
答:①复用问题;②业务维护问题
新鲜好物和人气推荐模块,在结构上非常相似,只是内容不同,通过组件封装可以实现复用结构的效果。

2. 组件封装
核心思路:把可复用的结构只写一次,把可能发生变化的部分抽象成组件参数(props / 插槽)
实现步骤:
①不做任何抽象,准备静态模板
②抽象可变的部分
- 主标题和副标题是纯文本,可以抽象成props传入
- 主体内容是复杂的模板,抽象成插槽传入
src/views/Home/components/HomePanel.vue
<script setup>
defineProps({title: {type: String,default: ''},subTitle: {type: String,default: ''}
})
</script><template><div class="home-panel"><div class="container"><div class="head"><!-- 主标题和副标题 --><h3>{{ title }}<small>{{ subTitle }}</small></h3></div><!-- 主体内容区域 --><slot></slot></div></div>
</template><style scoped lang="scss">
.home-panel {background-color: #fff;.head {padding: 40px 0;display: flex;align-items: flex-end;h3 {flex: 1;font-size: 32px;font-weight: normal;margin-left: 6px;height: 35px;line-height: 35px;small {font-size: 16px;color: #999;margin-left: 20px;}}}
}
</style>
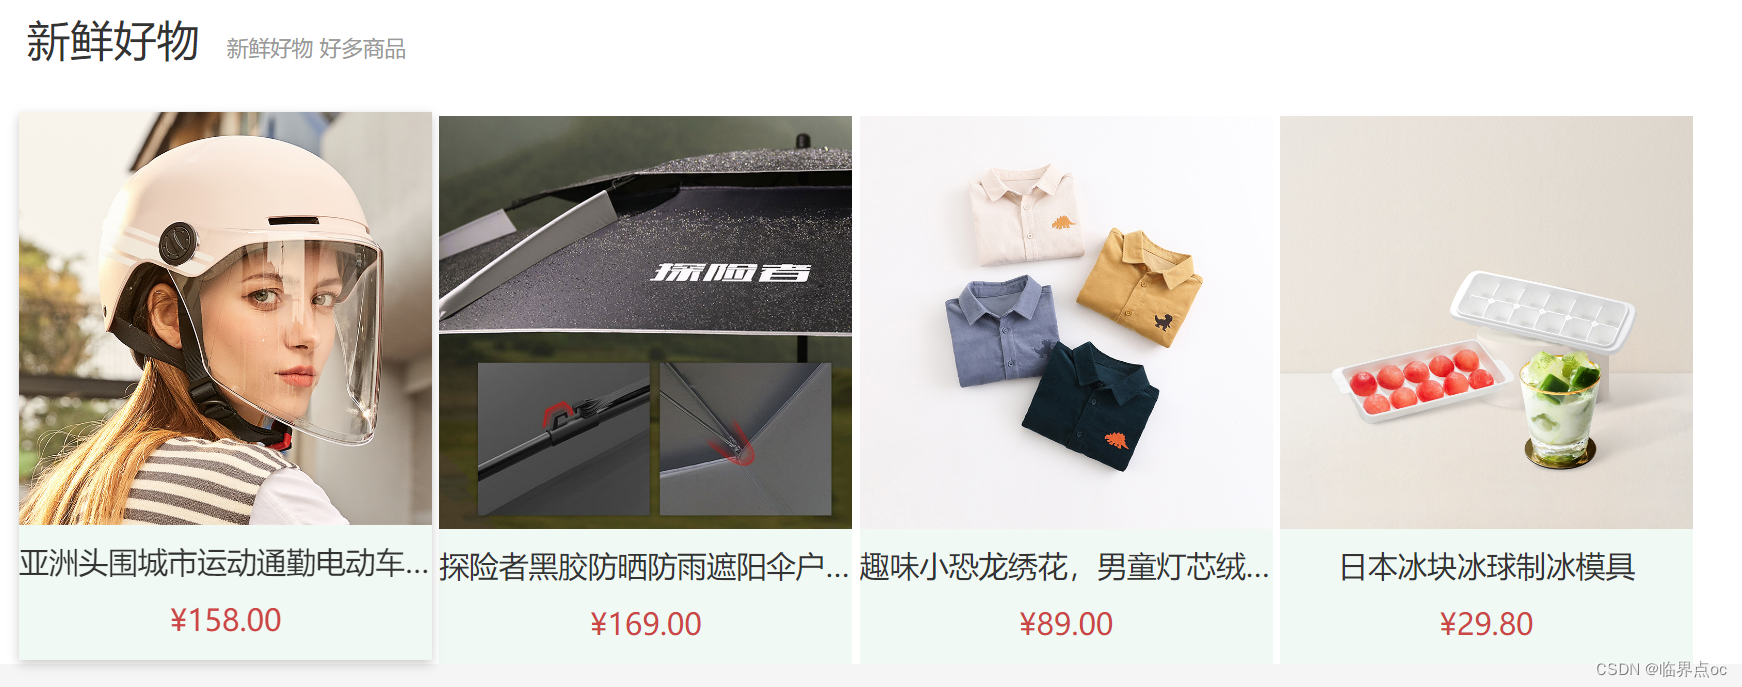
四、Home - 新鲜好物和人气推荐实现

1. 新鲜好物
1. 准备模板
<script setup>
import HomePanel from './HomePanel.vue'
</script><template><home-panel title="新鲜好物" subTitle="新鲜好物 好多商品"> </home-panel><!-- 下面是插槽主体内容模版<ul class="goods-list"><li v-for="item in newList" :key="item.id"><RouterLink to="/"><img :src="item.picture" alt="" /><p class="name">{{ item.name }}</p><p class="price">¥{{ item.price }}</p></RouterLink></li></ul>-->
</template><style scoped lang="scss">
.goods-list {display: flex;justify-content: space-between;height: 406px;li {width: 306px;height: 406px;background: #f0f9f4;transition: all 0.5s;&:hover {transform: translate3d(0, -3px, 0);box-shadow: 0 3px 8px rgb(0 0 0 / 20%);}img {width: 306px;height: 306px;}p {font-size: 22px;padding-top: 12px;text-align: center;text-overflow: ellipsis;overflow: hidden;white-space: nowrap;}.price {color: $priceColor;}}
}
</style>
2. 准备接口 - src/apis/home.js
// 获取新鲜好物
export const getNewAPI = () => {return instance({url: '/home/new'})
}
3. 获取数据渲染模板 - HomeNew.vue
<script setup>
import HomePanel from './HomePanel.vue'
import { getNewAPI } from '@/apis/home'
import { ref } from 'vue'const newList = ref([])
const getNewList = async () => {const res = await getNewAPI()newList.value = res.result
}getNewList()
</script><template><home-panel title="新鲜好物" subTitle="新鲜好物 好多商品"><!-- 具名插槽 --><template #main><!-- 下面是插槽主体内容模版 --><ul class="goods-list"><li v-for="item in newList" :key="item.id"><RouterLink to="/"><img :src="item.picture" alt="" /><p class="name">{{ item.name }}</p><p class="price">¥{{ item.price }}</p></RouterLink></li></ul></template></home-panel>
</template>把HomePanel.vue里的插槽改成 具名插槽
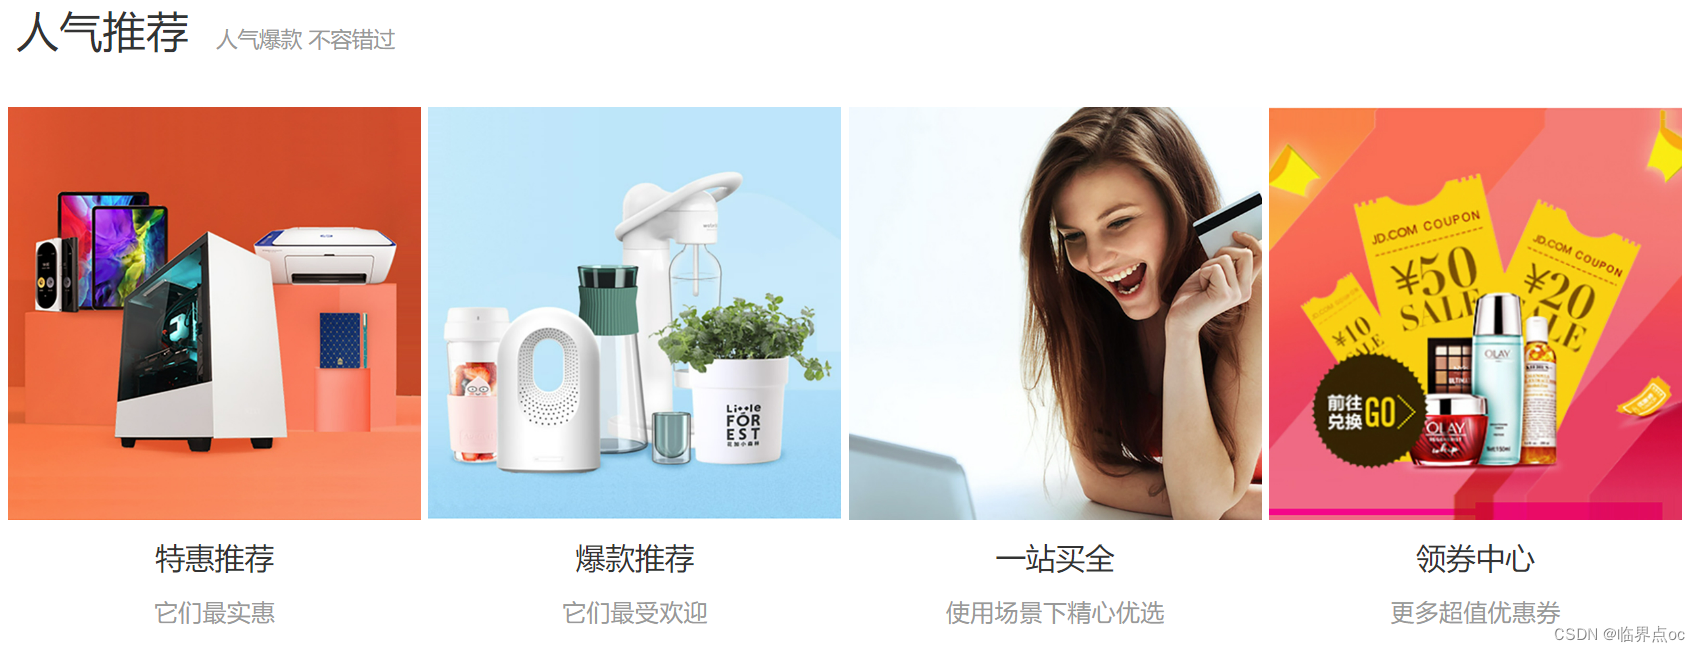
2. 人气推荐
1. 封装接口 - src/apis/home.js
// 获取人气推荐
export const getHotAPI = () => {return instance.get('home/hot')
}
2. 获取数据渲染模板 - src/views/Home/components/HomeHot.vue
<script setup>
import HomePanel from './HomePanel.vue'
import { getHotAPI } from '@/apis/home'
import { ref } from 'vue'const hotList = ref([])
const getHotList = async () => {const res = await getHotAPI()hotList.value = res.result
}
getHotList()
</script><template><HomePanel title="人气推荐" sub-title="人气爆款 不容错过"><!-- 具名插槽 --><template #main><ul class="goods-list"><li v-for="item in hotList" :key="item.id"><RouterLink to="/"><img :src="item.picture" alt="" /><p class="name">{{ item.title }}</p><p class="desc">{{ item.alt }}</p></RouterLink></li></ul></template></HomePanel>
</template><style scoped lang="scss">
.goods-list {display: flex;justify-content: space-between;height: 426px;li {width: 306px;height: 406px;transition: all 0.5s;&:hover {transform: translate3d(0, -3px, 0);box-shadow: 0 3px 8px rgb(0 0 0 / 20%);}img {width: 306px;height: 306px;}p {font-size: 22px;padding-top: 12px;text-align: center;}.desc {color: #999;font-size: 18px;}}
}
</style>
五、Home - 图片懒加载指令实现
1. 场景和指令用法
场景:电商网站的首页通常会很长,用户不一定会访问到页面靠下面的图片,这类图片通过懒加载优化手段可以做到只有进入视口区域才发送图片请求
指令用法:
<img v-img-lazy="item.picture" />在图片img身上绑定指令,该图片只有在正式进入到视口区域时才会发送图片网络请求
2. 实现思路和步骤
核心原理:图片进入视口才发送资源请求
自定义指令:自定义指令 | Vue.js
useIntersectionObserver:useIntersectionObserver | VueUse

①定义全局指令 - main.js
import { createApp } from 'vue'
import { createPinia } from 'pinia'import App from './App.vue'
import router from './router'
// 引入初始化样式文件
import '@/styles/common.scss'
import { useIntersectionObserver } from '@vueuse/core'const app = createApp(App)app.use(createPinia())
app.use(router)app.mount('#app')// 定义全局指令
app.directive('img-lazy', {mounted(el, binding) {// el: 指定绑定的元素 img// binding: binding.value 指令等于号后面绑定的表达式的值 图片urlconsole.log(el, binding.value)useIntersectionObserver(el, ([{ isIntersecting }]) => {//   console.log(isIntersecting)if (isIntersecting) {// 进入视口区域el.src = binding.valuestop()}})}
})
②组件中使用指令 - HomeHot.vue
<img v-img-lazy="item.picture" :src="item.picture" alt="" />六、Home - 懒加载指令优化
问题1:逻辑书写位置不合理
问:懒加载指令的逻辑直接写到入口文件中,合理吗?
答:不合理,入口文件通常只做一些初始化的事情,不应该包含太多的逻辑代码,可以通过插件的方法把懒加载指令封装为插件,main.js入口文件只需要负责注册插件即可
①src/direactives/index.js
import { useIntersectionObserver } from '@vueuse/core'// 定义懒加载插件
export const lazyPlugin = {install(app) {// 懒加载指令逻辑// 定义全局指令app.directive('img-lazy', {mounted(el, binding) {// el: 指定绑定的元素 img// binding: binding.value 指令等于号后面绑定的表达式的值 图片urlconsole.log(el, binding.value)useIntersectionObserver(el, ([{ isIntersecting }]) => {//   console.log(isIntersecting)if (isIntersecting) {// 进入视口区域el.src = binding.valuestop()}})}})}
}
②mian.js
import { createApp } from 'vue'
import { createPinia } from 'pinia'import App from './App.vue'
import router from './router'
// 引入初始化样式文件
import '@/styles/common.scss'
// 引入懒加载指令插件并注册
import { lazyPlugin } from '@/direactives'const app = createApp(App)app.use(createPinia())
app.use(router)
app.use(lazyPlugin)app.mount('#app')
问题2:重复监听问题
useIntersectionObserver对于元素的监听是一直存在的,除非手动停止监听,存在内存浪费
解决思路:在监听的图片第一次完成加载之后就停止监听
const { stop } = useIntersectionObserver(el,([{ isIntersecting }]) => {if( isIntersecting) {el.src = binding.valuestop()}}
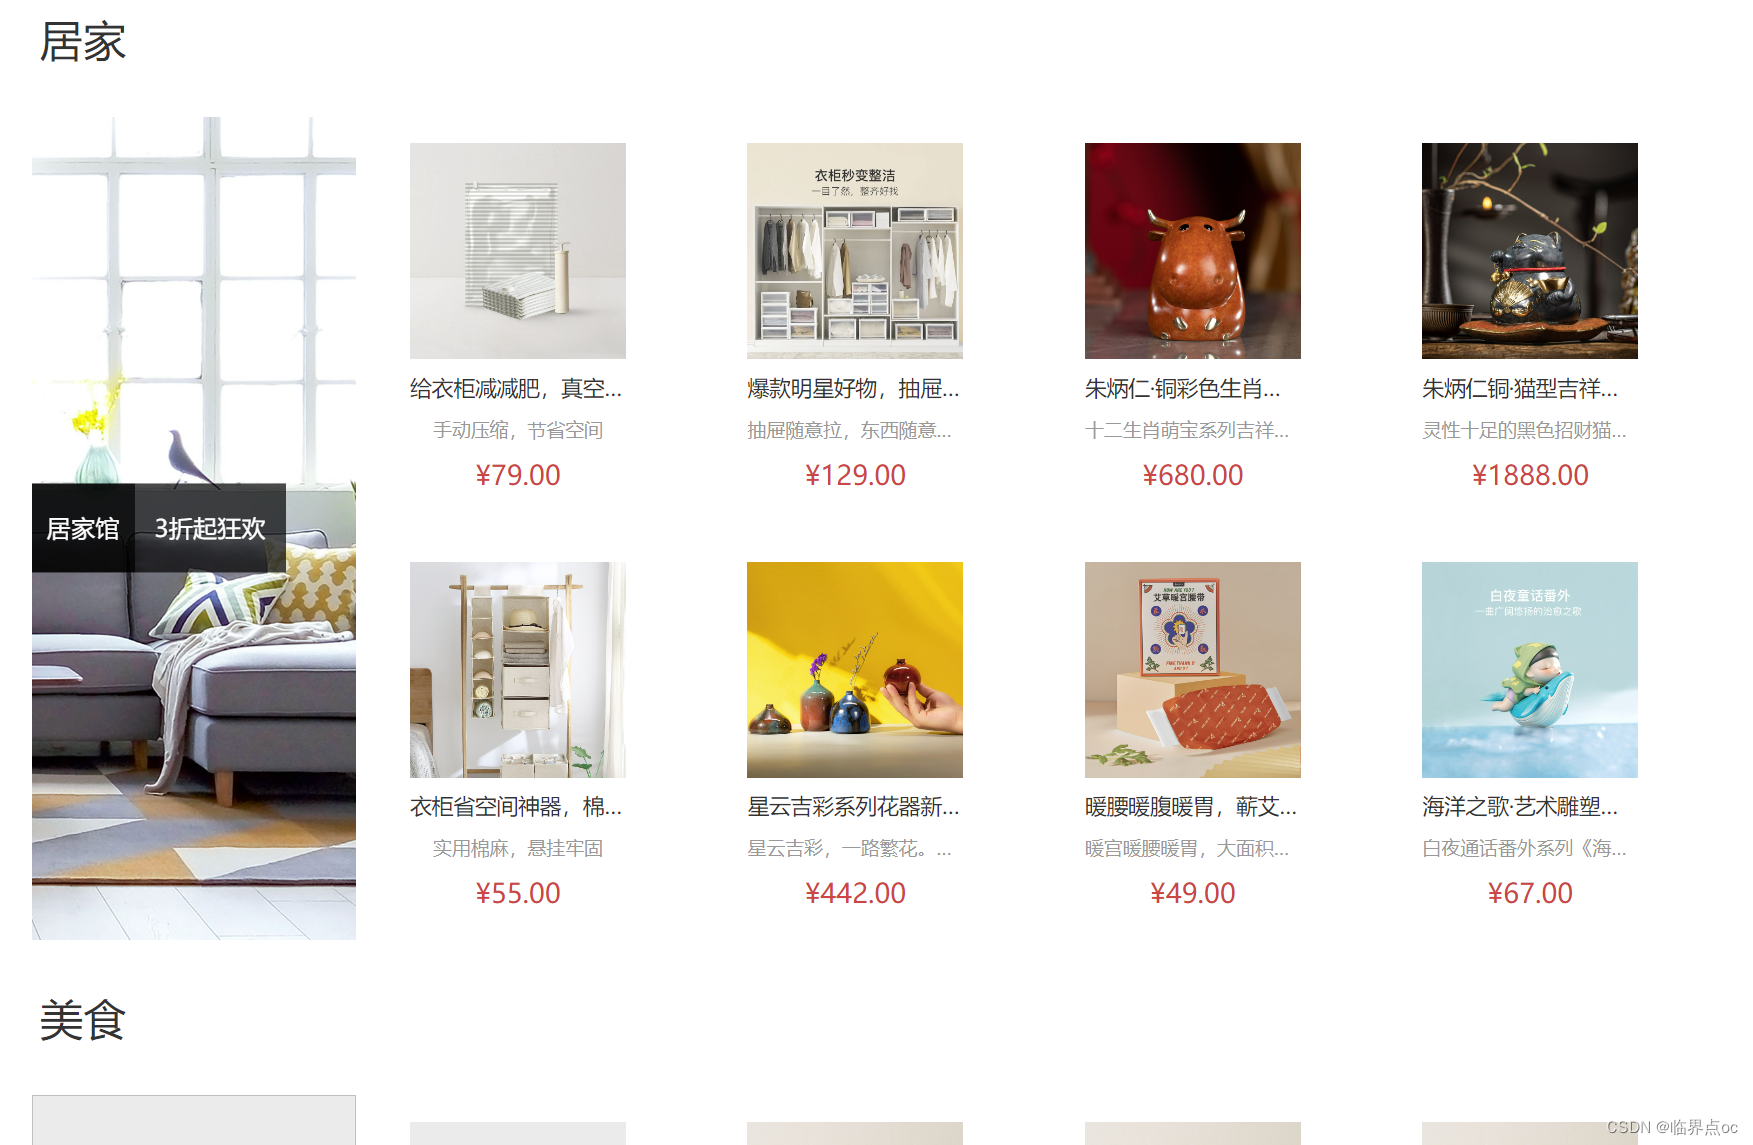
}七、Home - Product产品列表实现
1. Product产品列表
Product产品列表是一个常规的列表渲染,实现步骤如下:

①封装接口 - src/apis/home.js
// 获取所有商品模块
export const getGoodsAPI = () => {return instance({url: '/home/goods'})
}
②获取数据并渲染 - src/views/Home/components/HomeProduct.vue
<script setup>
import HomePanel from './HomePanel.vue'
import { getGoodsAPI } from '@/apis/home'
import { ref } from 'vue'const goodsProduct = ref([])
const getGoods = async () => {const res = await getGoodsAPI()console.log(res)goodsProduct.value = res.result
}
getGoods()
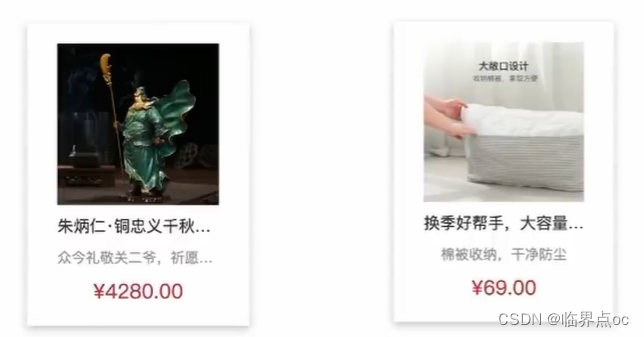
</script><template><div class="home-product"><HomePanel v-for="cate in goodsProduct" :key="cate.id" :title="cate.name"><template #main><div class="box"><RouterLink class="cover" to="/"><!-- <img :src="cate.picture" /> --><img v-img-lazy="cate.picture" /><strong class="label"><span>{{ cate.name }}馆</span><span>{{ cate.saleInfo }}</span></strong></RouterLink><ul class="goods-list"><li v-for="good in cate.goods" :key="good.id"><RouterLink to="/" class="goods-item"><!-- <img :src="good.picture" alt="" /> --><img v-img-lazy="good.picture" alt="" /><p class="name ellipsis">{{ good.name }}</p><p class="desc ellipsis">{{ good.desc }}</p><p class="price">¥{{ good.price }}</p></RouterLink></li></ul></div></template></HomePanel></div>
</template><style scoped lang="scss">
.home-product {background: #fff;margin-top: 20px;.sub {margin-bottom: 2px;a {padding: 2px 12px;font-size: 16px;border-radius: 4px;&:hover {background: $xtxColor;color: #fff;}&:last-child {margin-right: 80px;}}}.box {display: flex;.cover {width: 240px;height: 610px;margin-right: 10px;position: relative;img {width: 100%;height: 100%;}.label {width: 188px;height: 66px;display: flex;font-size: 18px;color: #fff;line-height: 66px;font-weight: normal;position: absolute;left: 0;top: 50%;transform: translate3d(0, -50%, 0);span {text-align: center;&:first-child {width: 76px;background: rgba(0, 0, 0, 0.9);}&:last-child {flex: 1;background: rgba(0, 0, 0, 0.7);}}}}.goods-list {width: 990px;display: flex;flex-wrap: wrap;li {width: 240px;height: 300px;margin-right: 10px;margin-bottom: 10px;&:nth-last-child(-n + 4) {margin-bottom: 0;}&:nth-child(4n) {margin-right: 0;}}}.goods-item {display: block;width: 220px;padding: 20px 30px;text-align: center;transition: all 0.5s;&:hover {transform: translate3d(0, -3px, 0);box-shadow: 0 3px 8px rgb(0 0 0 / 20%);}img {width: 160px;height: 160px;}p {padding-top: 10px;}.name {font-size: 16px;}.desc {color: #999;height: 29px;}.price {color: $priceColor;font-size: 20px;}}}
}
</style>
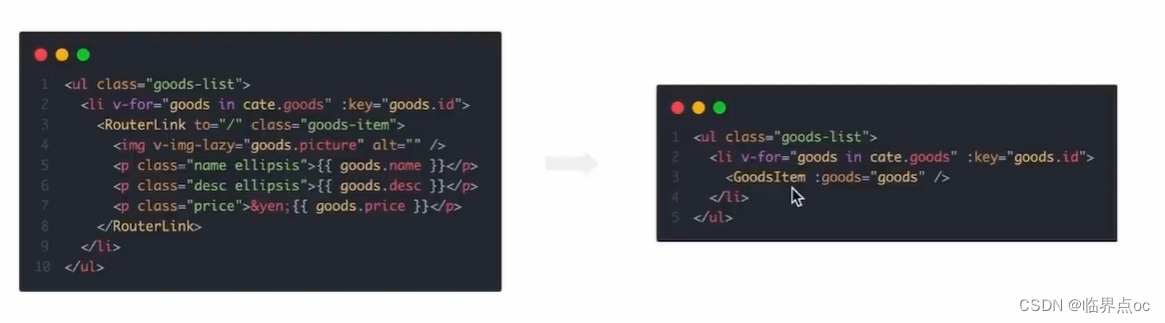
八、Home - GoodsItem组件封装
1. 为什么要封装GoodsItem组件
在小兔鲜项目的很多个业务模块中都需要用到同样的商品展示模块,没必要重复定义,封装起来,方便复用。
2. 如何封装
核心思想:把要显示的数据对象设计为props参数,传入什么数据对象就显示什么数据
①封装组件 - src/views/Home/components/GoodsItem.vue
<script setup>
defineProps({good: {type: Object,default: () => {}}
})
</script><template><RouterLink to="/" class="goods-item"><img v-img-lazy="good.picture" alt="" /><p class="name ellipsis">{{ good.name }}</p><p class="desc ellipsis">{{ good.desc }}</p><p class="price">¥{{ good.price }}</p></RouterLink>
</template><style lang="scss" scoped>
.goods-item {display: block;width: 220px;padding: 20px 30px;text-align: center;transition: all 0.5s;&:hover {transform: translate3d(0, -3px, 0);box-shadow: 0 3px 8px rgb(0 0 0 / 20%);}img {width: 160px;height: 160px;}p {padding-top: 10px;}.name {font-size: 16px;}.desc {color: #999;height: 29px;}.price {color: $priceColor;font-size: 20px;}
}
</style>
②导入使用组件 - src/views/Home/components/HomeProduct.vue
<script setup>
import HomePanel from './HomePanel.vue'
import { getGoodsAPI } from '@/apis/home'
import { ref } from 'vue'
import GoodsItem from './GoodsItem.vue'const goodsProduct = ref([])
const getGoods = async () => {const res = await getGoodsAPI()console.log(res)goodsProduct.value = res.result
}
getGoods()
</script><template><div class="home-product"><HomePanel v-for="cate in goodsProduct" :key="cate.id" :title="cate.name"><template #main><div class="box"><RouterLink class="cover" to="/"><!-- <img :src="cate.picture" /> --><img v-img-lazy="cate.picture" /><strong class="label"><span>{{ cate.name }}馆</span><span>{{ cate.saleInfo }}</span></strong></RouterLink><ul class="goods-list"><li v-for="good in cate.goods" :key="good.id"><goods-item :good="good"></goods-item></li></ul></div></template></HomePanel></div>
</template><style scoped lang="scss">
.home-product {background: #fff;margin-top: 20px;.sub {margin-bottom: 2px;a {padding: 2px 12px;font-size: 16px;border-radius: 4px;&:hover {background: $xtxColor;color: #fff;}&:last-child {margin-right: 80px;}}}.box {display: flex;.cover {width: 240px;height: 610px;margin-right: 10px;position: relative;img {width: 100%;height: 100%;}.label {width: 188px;height: 66px;display: flex;font-size: 18px;color: #fff;line-height: 66px;font-weight: normal;position: absolute;left: 0;top: 50%;transform: translate3d(0, -50%, 0);span {text-align: center;&:first-child {width: 76px;background: rgba(0, 0, 0, 0.9);}&:last-child {flex: 1;background: rgba(0, 0, 0, 0.7);}}}}.goods-list {width: 990px;display: flex;flex-wrap: wrap;li {width: 240px;height: 300px;margin-right: 10px;margin-bottom: 10px;&:nth-last-child(-n + 4) {margin-bottom: 0;}&:nth-child(4n) {margin-right: 0;}}}}
}
</style>
九、一级分类 - 整体认识和路由配置
1. 准备分类组件
src/views/Category/index.vue
<template><div>我是分类页</div>
</template>
2. 配置路由
src/router/index.js
import { createRouter, createWebHistory } from 'vue-router'
import Login from '@/views/Login/index.vue'
import Layout from '@/views/Layout/index.vue'
import Home from '@/views/Home/index.vue'
import Category from '@/views/Category/index.vue'const router = createRouter({history: createWebHistory(import.meta.env.BASE_URL),routes: [{path: '/',component: Layout,children: [{path: '',component: Home},{path: 'category/:id',component: Category}]},{path: '/login',component: Login}]
})export default router
3. 配置导航区域链接
src/views/Layout/components/LayoutHeader.vue 以及 LayoutFixed.vue
<!-- 导航区域 --><ul class="app-header-nav"><liclass="home"v-for="item in categoryStore.categoryList":key="item.id"><RouterLink :to="`/category/${item.id}`">{{ item.name }}</RouterLink></li></ul>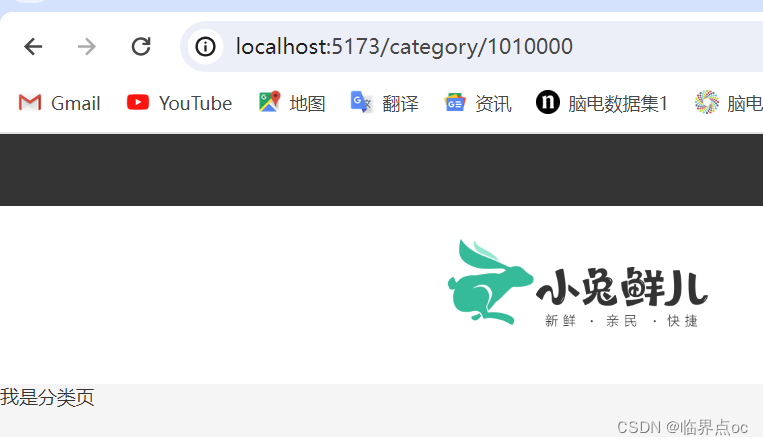
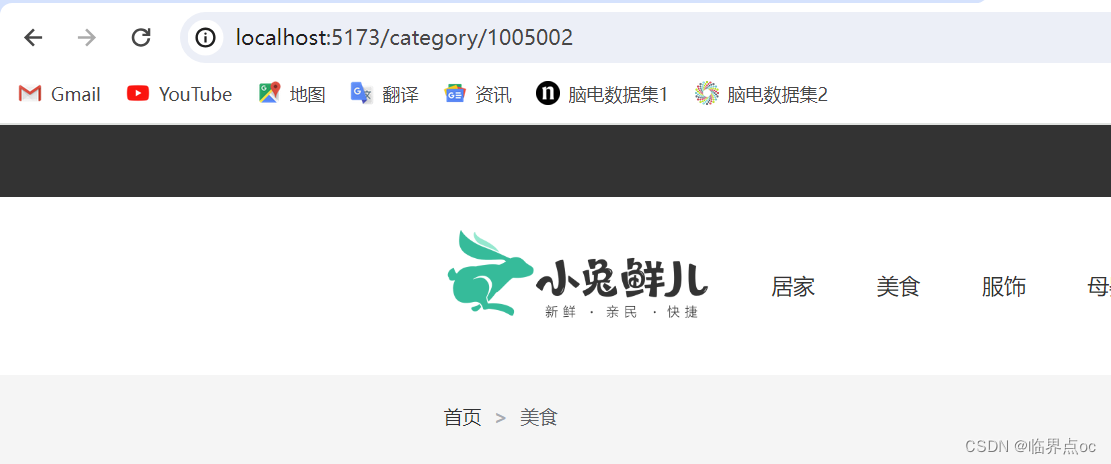
十、一级分类 - 面包屑导航渲染
Breadcrumb 面包屑 | Element Plus

1. 封装接口 - src/apis/category.js
import instance from '@/utils/http.js'// 获取分类数据
export const getTopCategoryAPI = (id) => {return instance({url: 'category',params: { id }})
}
2. 渲染面包屑导航 - src/views/Category/index.vue
<script setup>
import { getTopCategoryAPI } from '@/apis/category.js'
import { ref, watch } from 'vue'
import { useRoute } from 'vue-router'const categoryData = ref({})
const route = useRoute()const getCategory = async () => {const res = await getTopCategoryAPI(route.params.id)categoryData.value = res.result
}
getCategory()// 监听路由的变化
watch(route, () => {// 路由变化时,重新发请求getCategory()
})
</script><template><div class="top-category"><div class="container m-top-20"><!-- 面包屑 --><div class="bread-container"><el-breadcrumb separator=">"><el-breadcrumb-item :to="{ path: '/' }">首页</el-breadcrumb-item><el-breadcrumb-item>{{ categoryData.name }}</el-breadcrumb-item></el-breadcrumb></div></div></div>
</template><style scoped lang="scss">
.top-category {h3 {font-size: 28px;color: #666;font-weight: normal;text-align: center;line-height: 100px;}.sub-list {margin-top: 20px;background-color: #fff;ul {display: flex;padding: 0 32px;flex-wrap: wrap;li {width: 168px;height: 160px;a {text-align: center;display: block;font-size: 16px;img {width: 100px;height: 100px;}p {line-height: 40px;}&:hover {color: $xtxColor;}}}}}.ref-goods {background-color: #fff;margin-top: 20px;position: relative;.head {.xtx-more {position: absolute;top: 20px;right: 20px;}.tag {text-align: center;color: #999;font-size: 20px;position: relative;top: -20px;}}.body {display: flex;justify-content: space-around;padding: 0 40px 30px;}}.bread-container {padding: 25px 0;}
}
</style>
十一、一级分类 - banner轮播图实现
1. 分类轮播图实现
分类轮播图和首页轮播图的区别只有一个,接口参数不同,其余逻辑完全一致


①接口适配 - src/apis/home.js
// 获取banner
export function getBannerAPI(params = {}) {// 默认为1 商品为2const { distributionSite = '1' } = paramsreturn instance({url: 'home/banner',params: {distributionSite}})
}
②迁移首页Banner逻辑 - src/views/Category/index.vue
<script setup>
import { getTopCategoryAPI } from '@/apis/category.js'
import { getBannerAPI } from '@/apis/home.js'
import { ref, watch } from 'vue'
import { useRoute } from 'vue-router'const categoryData = ref({})
const route = useRoute()const getCategory = async () => {const res = await getTopCategoryAPI(route.params.id)categoryData.value = res.result
}
getCategory()// 监听路由的变化
watch(route, () => {// 路由变化时,重新发请求getCategory()
})// 获取banner
const bannerList = ref([])
const getBanner = async () => {const res = await getBannerAPI({distributionSite: '2'})console.log(res)bannerList.value = res.result
}getBanner()
</script><template><div class="top-category"><div class="container m-top-20"><!-- 面包屑 --><div class="bread-container"><el-breadcrumb separator=">"><el-breadcrumb-item :to="{ path: '/' }">首页</el-breadcrumb-item><el-breadcrumb-item>{{ categoryData.name }}</el-breadcrumb-item></el-breadcrumb></div><!-- 轮播图 --><div class="home-banner"><el-carousel height="500px"><el-carousel-item v-for="item in bannerList" :key="item.id"><img :src="item.imgUrl" alt="" /></el-carousel-item></el-carousel></div></div></div>
</template><style scoped lang="scss">
.top-category {h3 {font-size: 28px;color: #666;font-weight: normal;text-align: center;line-height: 100px;}.sub-list {margin-top: 20px;background-color: #fff;ul {display: flex;padding: 0 32px;flex-wrap: wrap;li {width: 168px;height: 160px;a {text-align: center;display: block;font-size: 16px;img {width: 100px;height: 100px;}p {line-height: 40px;}&:hover {color: $xtxColor;}}}}}.ref-goods {background-color: #fff;margin-top: 20px;position: relative;.head {.xtx-more {position: absolute;top: 20px;right: 20px;}.tag {text-align: center;color: #999;font-size: 20px;position: relative;top: -20px;}}.body {display: flex;justify-content: space-around;padding: 0 40px 30px;}}.bread-container {padding: 25px 0;}
}
.home-banner {width: 1240px;height: 500px;margin: 0 auto;img {width: 100%;height: 500px;}
}
</style>

十二、一级分类 - 激活状态显示和分类列表渲染
1. 激活状态显示
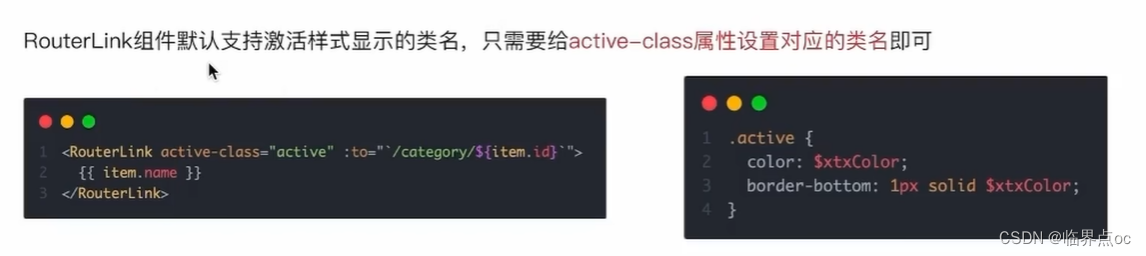
①src/views/Layout/components/LayoutHeader.vue以及LayoutFixed.vue
<RouterLink active-class="active" :to="`/category/${item.id}`">{{ item.name }}</RouterLink>2. 分类列表渲染
分类的数据已经在面包屑导航实现的时候获取到了,只需要通过v-for遍历出来即可

src/views/Category/index.vue
<script setup>
import { getTopCategoryAPI } from '@/apis/category.js'
import { getBannerAPI } from '@/apis/home.js'
import { ref, watch } from 'vue'
import { useRoute } from 'vue-router'
import GoodsItem from '../Home/components/GoodsItem.vue'const categoryData = ref({})
const route = useRoute()const getCategory = async () => {const res = await getTopCategoryAPI(route.params.id)categoryData.value = res.result
}
getCategory()// 监听路由的变化
watch(route, () => {// 路由变化时,重新发请求getCategory()
})// 获取banner
const bannerList = ref([])
const getBanner = async () => {const res = await getBannerAPI({distributionSite: '2'})// console.log(res)bannerList.value = res.result
}getBanner()
</script><template><div class="top-category"><div class="container m-top-20"><!-- 面包屑 --><div class="bread-container"><el-breadcrumb separator=">"><el-breadcrumb-item :to="{ path: '/' }">首页</el-breadcrumb-item><el-breadcrumb-item>{{ categoryData.name }}</el-breadcrumb-item></el-breadcrumb></div><!-- 轮播图 --><div class="home-banner"><el-carousel height="500px"><el-carousel-item v-for="item in bannerList" :key="item.id"><img :src="item.imgUrl" alt="" /></el-carousel-item></el-carousel></div><!-- 分类列表渲染 --><div class="sub-list"><h3>全部分类</h3><ul><li v-for="i in categoryData.children" :key="i.id"><RouterLink to="/"><img :src="i.picture" /><p>{{ i.name }}</p></RouterLink></li></ul></div><divclass="ref-goods"v-for="item in categoryData.children":key="item.id"><div class="head"><h3>- {{ item.name }}-</h3></div><div class="body"><!-- 这里注意查看GoodsItem里的prop是什么,要对应 --><GoodsItem v-for="good in item.goods" :good="good" :key="good.id" /></div></div></div></div>
</template>
十三、一级分类 - 解决路由缓存问题
1. 什么是路由缓存问题
使用带有参数的路由时需要注意的是,当用户从/users/johnny导航到/users/jolyne时,相同的组件实例将被重复使用。因为两个路由都渲染同个组件,比起销毁再创建,复用则显得更加高效。不过,这也意味着组件的生命周期钩子不会被调用。
问题:一级分类的切换正好满足上面的条件,组件实例复用,导致分类数据无法更新
解决问题的思路:1. 让组件实例不复用,强制销毁重建;2. 监听路有变化,变化之后执行数据更新操作。
2. 解决方案
方案一:给router-view添加key
以当前路由完整路径为key的值,给router-view组件绑定,破坏缓存
src/views/Layout/index.vue
<script setup>
import LayoutNav from './components/LayoutNav.vue'
import LayoutHeader from './components/LayoutHeader.vue'
import LayoutFooter from './components/LayoutFooter.vue'
import LayoutFixed from './components/LayoutFixed.vue'
import { useCategoryStore } from '@/stores/category.js'// 触发获取导航列表的action
const categoryStore = useCategoryStore()
// 一进页面就调用
categoryStore.getCategory()
</script><template><LayoutFixed /><LayoutNav /><LayoutHeader /><!-- 给二级路由出口添加key,破坏复用机制,强制销毁重建 --><RouterView :key="$route.fullPath" /><LayoutFooter />
</template>
方案二:使用onBeforeRouteUpdate钩子函数,做精确更新
API 文档 | Vue Router
onBeforeRouteUpdate钩子函数可以再每次路由更新之前执行,在回调中执行需要数据更新的业务逻辑即可,或者使用onBeforeRouteUpdate导航守卫,它也可以取消导航
src/views/Category/index.vue
<script setup>
import { getTopCategoryAPI } from '@/apis/category.js'
import { getBannerAPI } from '@/apis/home.js'
import { ref } from 'vue'
import { useRoute } from 'vue-router'
import GoodsItem from '../Home/components/GoodsItem.vue'
import { onBeforeRouteUpdate } from 'vue-router'const categoryData = ref({})
const route = useRoute()const getCategory = async (id = route.params.id) => {const res = await getTopCategoryAPI(id)categoryData.value = res.result
}
getCategory()// 目标:路由参数变化时,把分类数据接口重新发送
onBeforeRouteUpdate((to) => {// console.log('路由变化了')// 使用最新的路由参数请求最新的分类数据getCategory(to.params.id)
})// 获取banner
const bannerList = ref([])
const getBanner = async () => {const res = await getBannerAPI({distributionSite: '2'})// console.log(res)bannerList.value = res.result
}getBanner()
</script>
方案三:使用watch侦听器,监视路由的变化
<script setup>
import { getTopCategoryAPI } from '@/apis/category.js'
import { getBannerAPI } from '@/apis/home.js'
import { ref, watch } from 'vue'
import { useRoute } from 'vue-router'
import GoodsItem from '../Home/components/GoodsItem.vue'const categoryData = ref({})
const route = useRoute()const getCategory = async () => {const res = await getTopCategoryAPI(route.params.id)categoryData.value = res.result
}
getCategory()// 监听路由的变化
watch(route, () => {// 路由变化时,重新发请求getCategory()
})// 获取banner
const bannerList = ref([])
const getBanner = async () => {const res = await getBannerAPI({distributionSite: '2'})// console.log(res)bannerList.value = res.result
}getBanner()
</script>
3. 总结
①路由缓存问题产生的原因时什么?
答:路由只有参数变化时,会复用组件实例
②三种方案都可以解决路由缓存问题,如何选择呢?
答:如果在意性能问题,选择onBeforeUpdate,精细化控制;如果不在意性能问题,选择key,简单粗暴。
watch监听是即时触发的,可以在参数变化时立即获取最新数据,有利于实时更新页面展示;onBeforeUpdate在路由参数发生变化之后才会触发,因此可能存在一些延迟,不如watch及时。
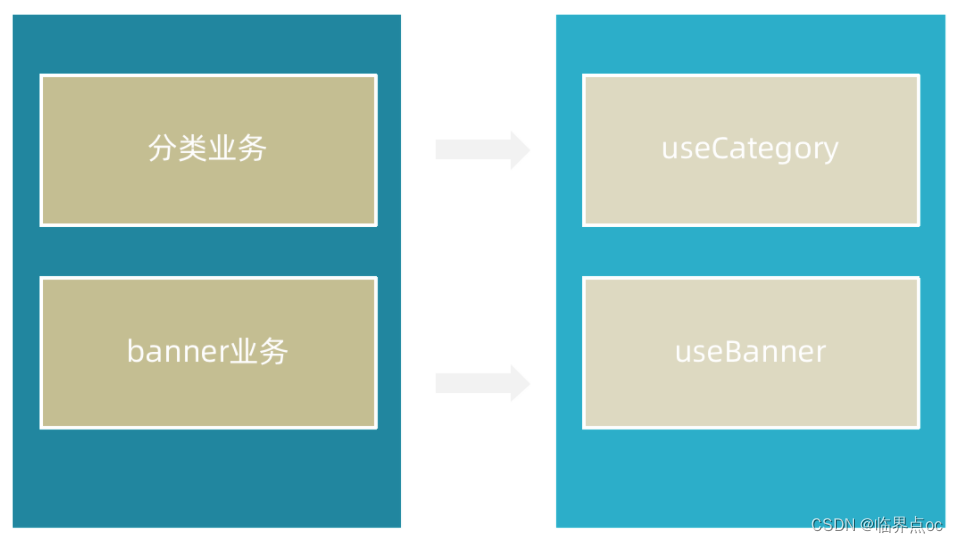
十四、一级分类 - 使用逻辑函数拆分业务
概念理解:基于逻辑函数拆分业务是指把同一个组件中独立的业务代码通过函数做封装处理,提升代码的可维护性。
实现步骤:
①按照业务声明以`use`开头的逻辑函数
②把独立的业务逻辑封装到各个函数内部
③函数内部组件中需要用到的数据或者方法return出去
④在组件中调用函数把数据或者方法组合回来使用
src/views/Category/composables/useBanner.js
// 封装banner轮播图相关的业务代码
import { ref, onMounted } from 'vue'
import { getBannerAPI } from '@/apis/home'export function useBanner() {const bannerList = ref([])const getBanner = async () => {const res = await getBannerAPI({distributionSite: '2'})// console.log(res)bannerList.value = res.result}onMounted(() => getBanner())return {bannerList}
}
src/views/Category/composables/useCategory.js
// 封装分类数据业务相关代码
import { onMounted, ref } from 'vue'
import { getTopCategoryAPI } from '@/apis/category.js'
import { useRoute } from 'vue-router'
import { onBeforeRouteUpdate } from 'vue-router'export function useCategory() {// 获取分类数据const categoryData = ref({})const route = useRoute()const getCategory = async (id = route.params.id) => {const res = await getTopCategoryAPI(id)categoryData.value = res.result}onMounted(() => getCategory())// 目标:路由参数变化的时候 可以把分类数据接口重新发送onBeforeRouteUpdate((to) => {// 存在问题:使用最新的路由参数请求最新的分类数据getCategory(to.params.id)})return {categoryData}
}
src/views/Category/index.vue
<script setup>
import GoodsItem from '../Home/components/GoodsItem.vue'
import { useBanner } from './composables/useBanner'
import { useCategory } from './composables/useCategory'
const { bannerList } = useBanner()
const { categoryData } = useCategory()
</script>